Hosted Exchange Public Folder to Office 365 Migration
Migrating Hosted Exchange public folders to Office 365 enhances accessibility, allowing users to access shared content from any device and integrate with Microsoft 365 tools like Teams and SharePoint. This shift transfers maintenance and security responsibilities to Microsoft while offering scalable storage to support future growth. With centralized management, advanced search features, and built-in data protection, businesses can streamline administrative tasks, ensure data reliability, and modernize their collaboration environment to boost overall productivity.
EdbMails Exchange migration software offers a powerful and efficient solution for migrating public folders from Hosted Exchange to Office 365. After connecting to the source and target servers, EdbMails automatically displays the complete public folder hierarchy, including subfolders and item counts for easy navigation. It supports concurrent migration of up to 20 mailboxes, significantly improving performance by handling multiple migrations simultaneously. With features like automatic throttling management, zero downtime, and delta migration that moves only new or changed items, EdbMails ensures a fast, reliable, and disruption-free migration experience.
Hosted Exchange Public folder to Office 365 migration: pre-requisites
Step 1: Assess current environment
- Create a detailed list of all public folders, including sizes and item counts, to understand the scope of the migration.
- Grant admin permissions to all the public folders you want to migrate.
Steps to assign admin permissions to the Exchange public folders.
Step 2: Prepare your Office 365 environment
- Ensure you have the appropriate Office 365 subscription that supports public folders.
- Ensure to create the public folders and assign admin permissions on your target Office 365 server
Steps to create the public folders and assign admin permissions on Office 365
Step 3: Network and connectivity
Evaluate your network bandwidth to handle the migration workload without impacting daily operations.
Step 4: Migration tool preparation
- Install and configure the migration tool, ensuring it’s set up to connect to both the source and target environments.
- Set up service accounts with the necessary permissions to access public folders for migration.
Step 5: Plan for Delta migration
Prepare to execute delta migrations post-initial transfer to capture any changes made during the migration process.
Step 6: User communication
Inform users about the migration timeline and any changes in accessing public folders post-migration to minimize disruptions.
Steps to migrate Hosted Exchange public folders to Office 365
Step 1: Download and install EdbMails software
- Download and install the EdbMails application on your computer.
System requirements for Hosted Exchange to Office 365 migration
- Launch the EdbMails application and 'Login' with your email address and password or choose 'Start Your Free Trial' to continue.
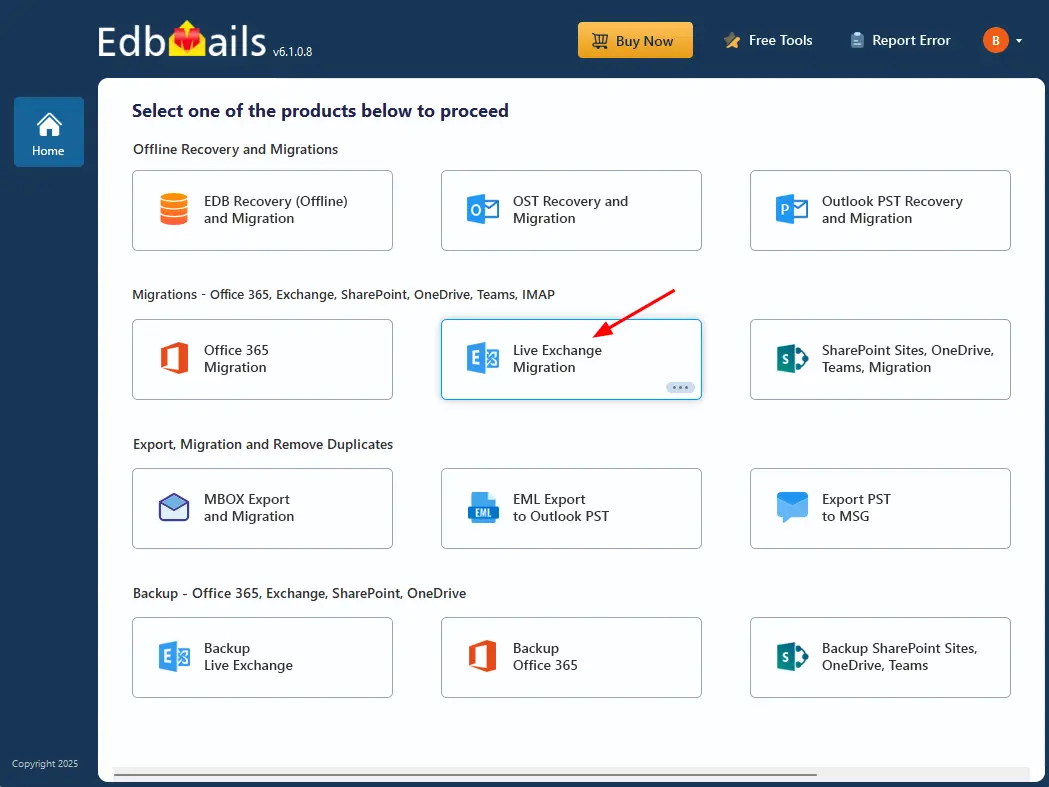
- Select 'Live Exchange migration' option.
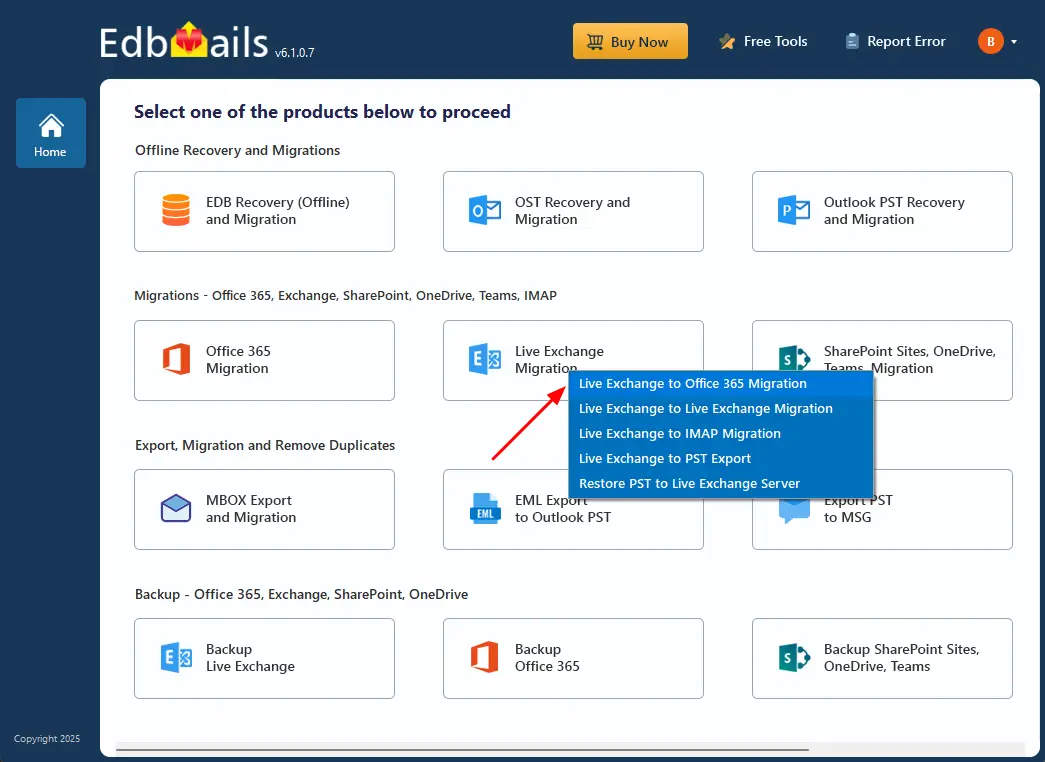
- Select 'Live Exchange to Office 365 Migration' option.
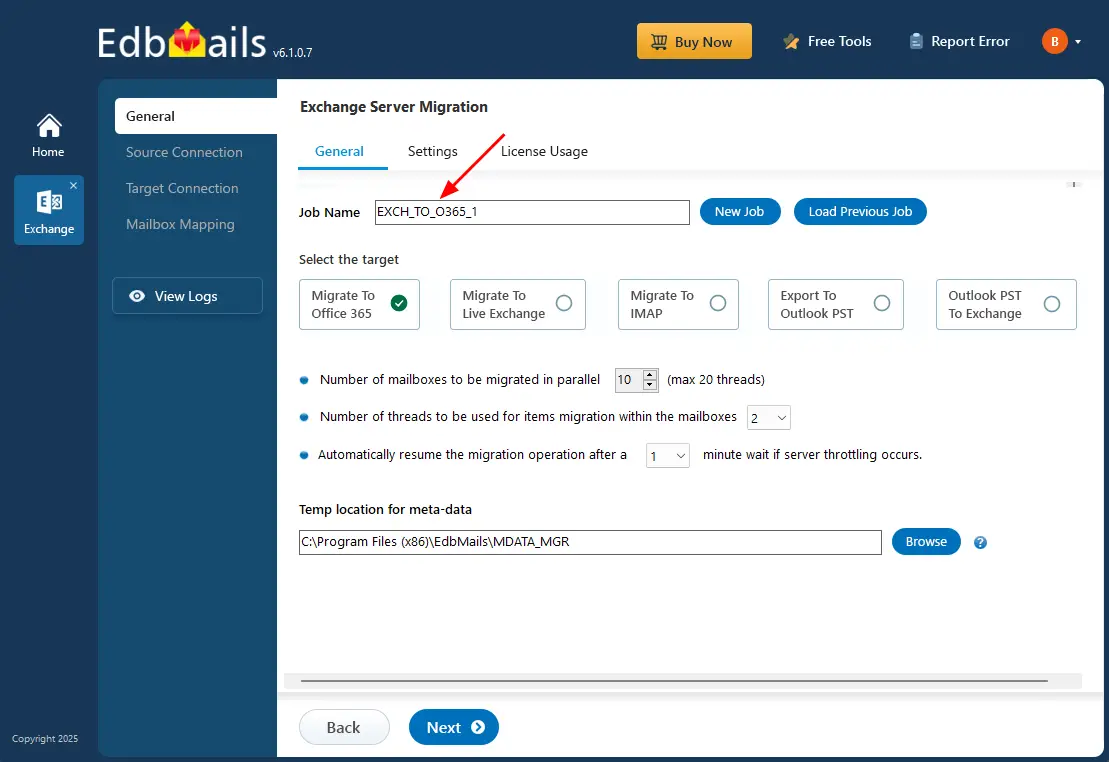
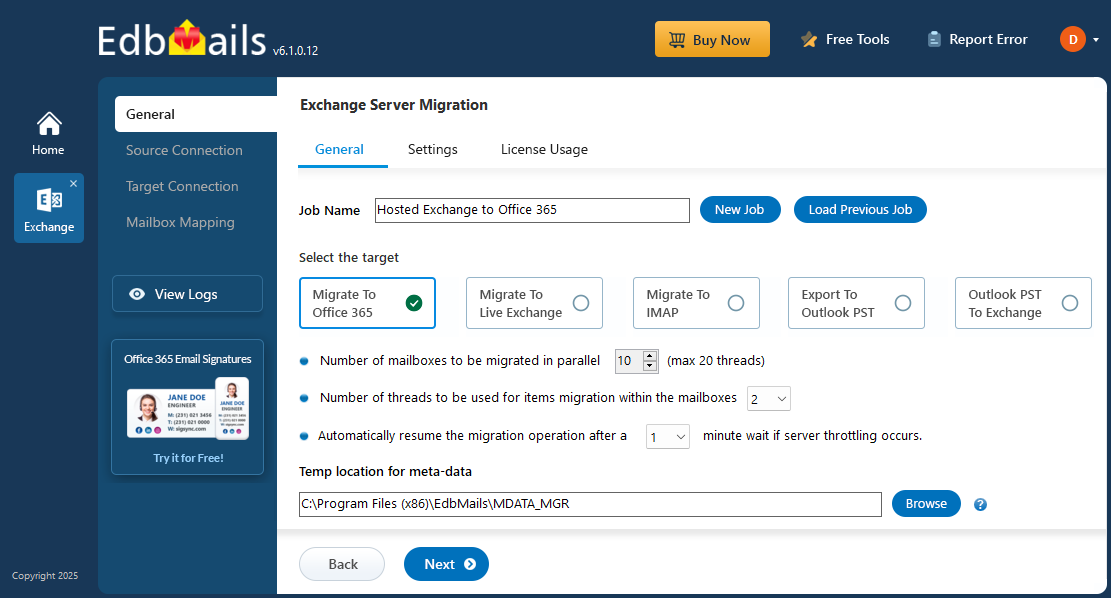
- Either proceed with the default job name or choose 'New Job' to modify it.
- Download and install the EdbMails application on your computer.
Step 2: Connect to the source Hosted Exchange server
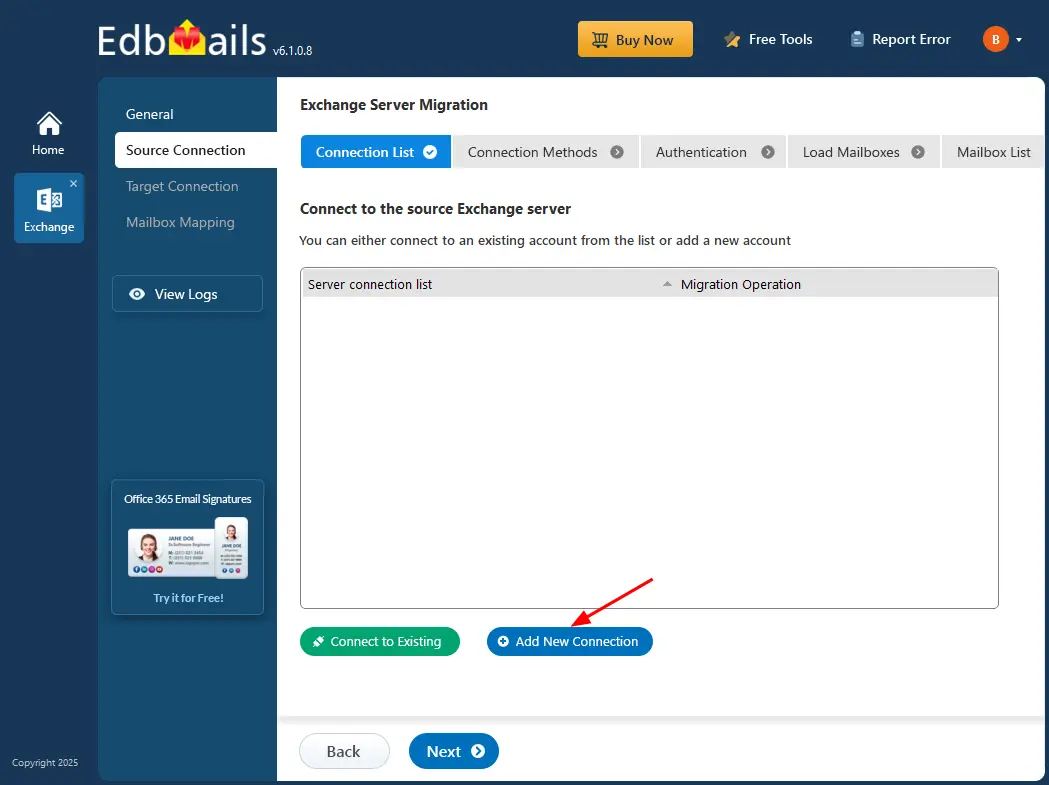
- To connect to the source Exchange server, either create a new connection using ‘Add New Connection’ or pick an existing one and click ‘Connect to Existing’.
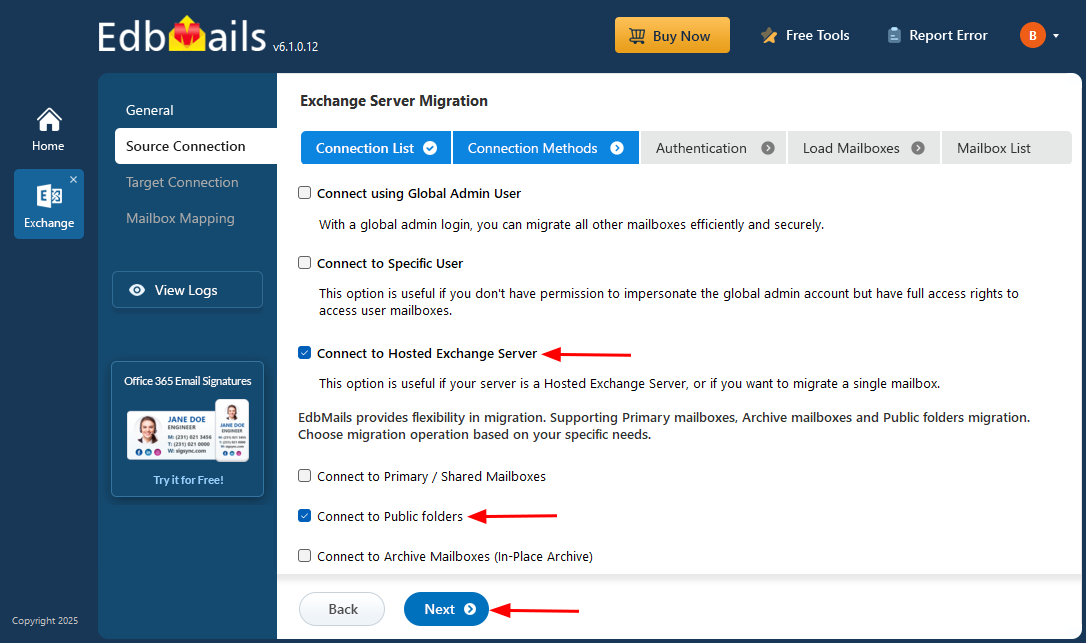
- Select ‘Connect to Hosted Exchange Server’ and the required migration option.
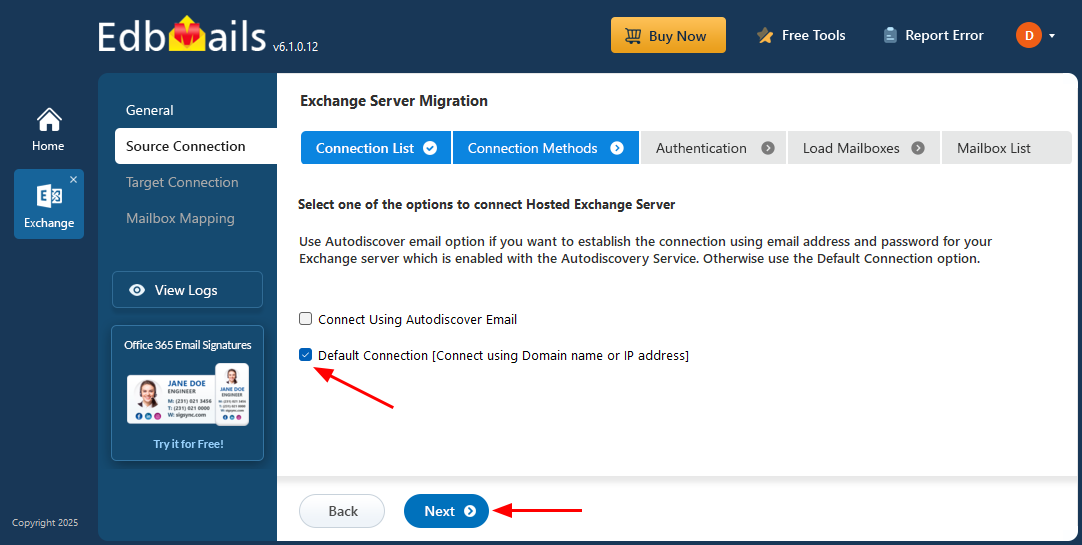
- Choose ‘Connect Using Autodiscover Email’ and enter your email and password if your Hosted Exchange supports Autodiscover, or use ‘Default Connection’ by entering the domain name or IP address.
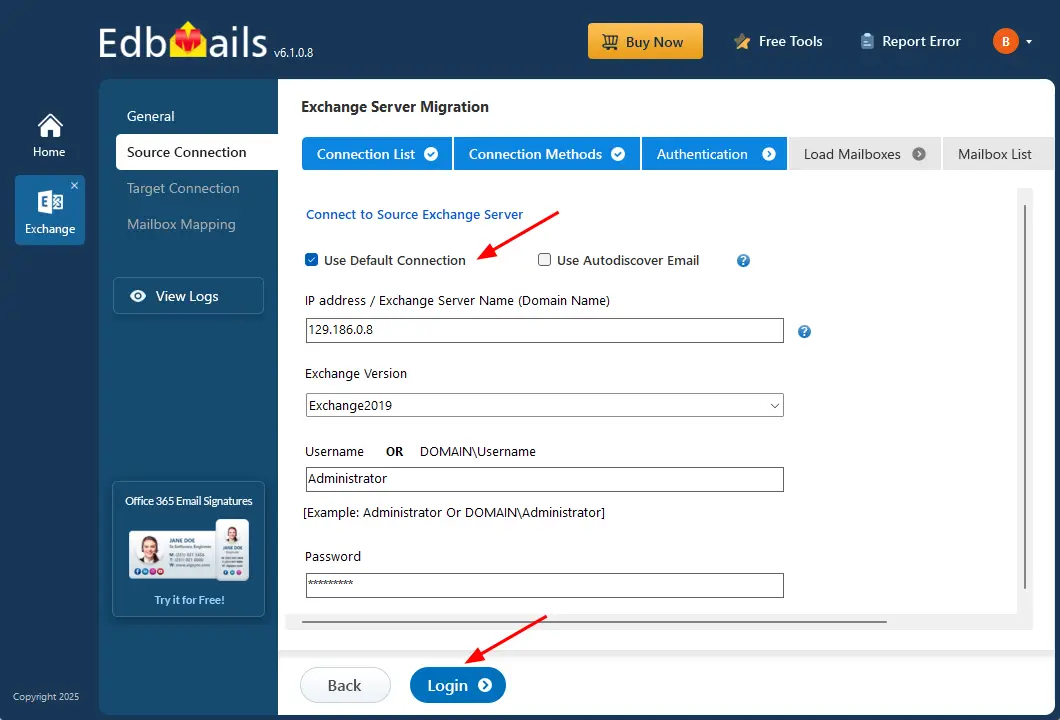
- Enter the required details and click the ‘Login’ button.
- Select one of the methods to load the Hosted Exchange public folders.
Step 3: Select Hosted Exchange public folders
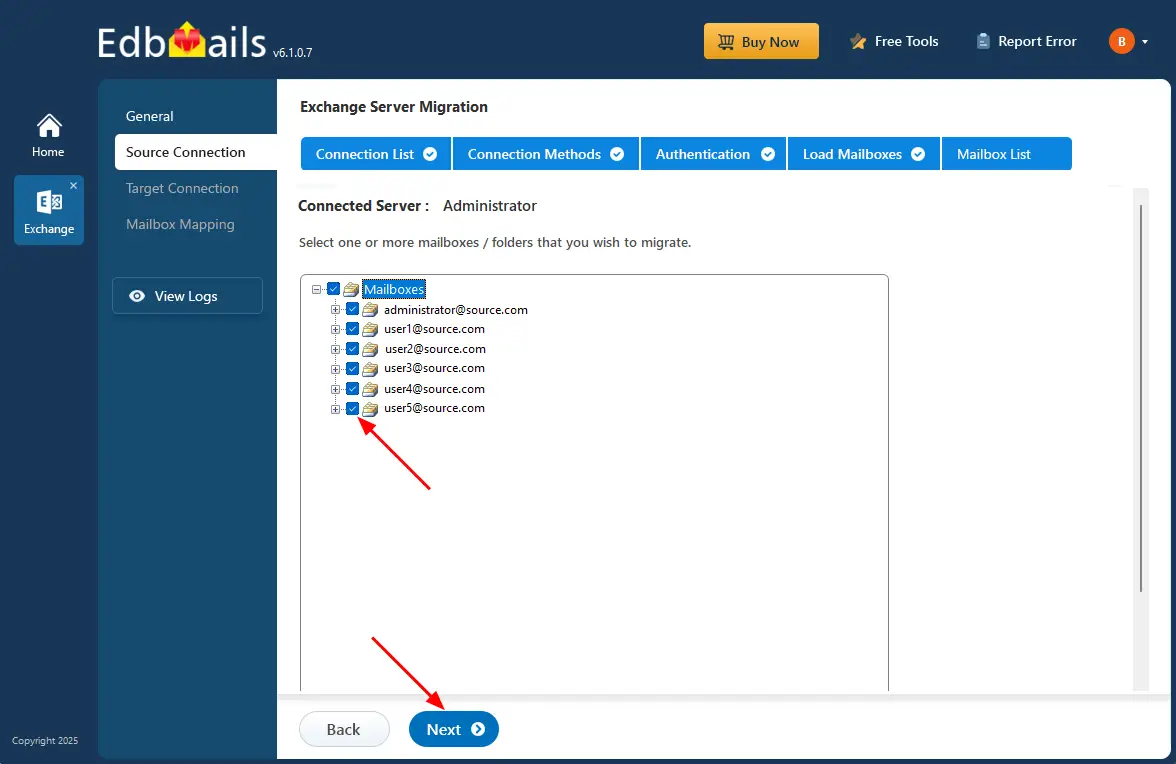
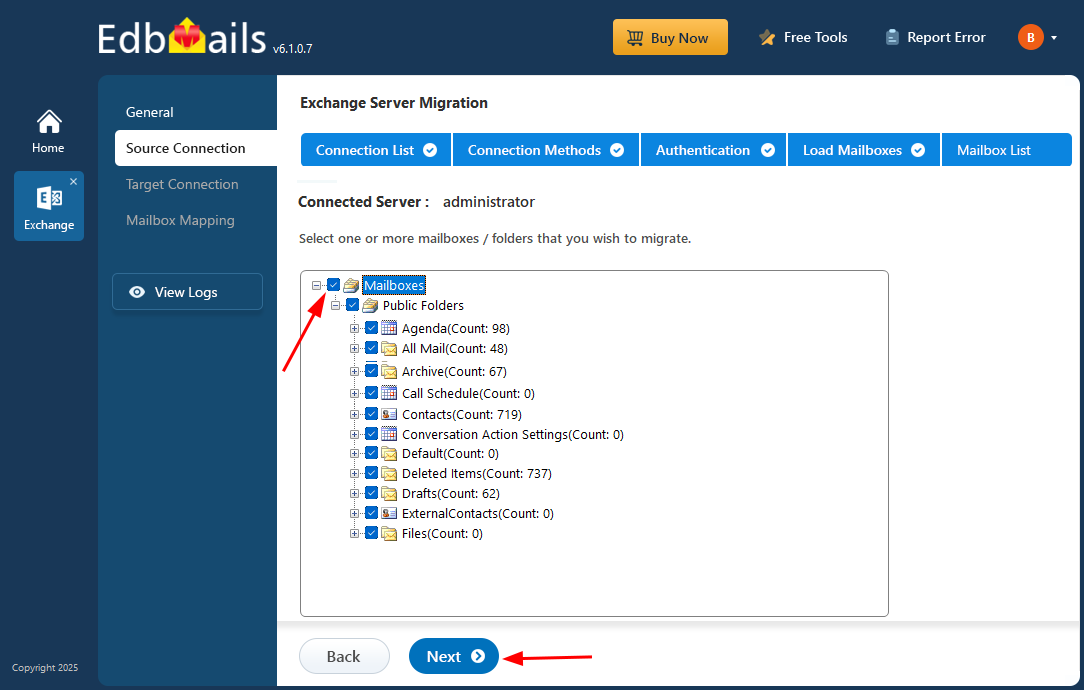
- Select the public folders from your Hosted Exchange server that you want to migrate to Office 365.
- Click ‘Next’ to initiate the connection to the target server.
Step 4: Connect to target Office 365 server
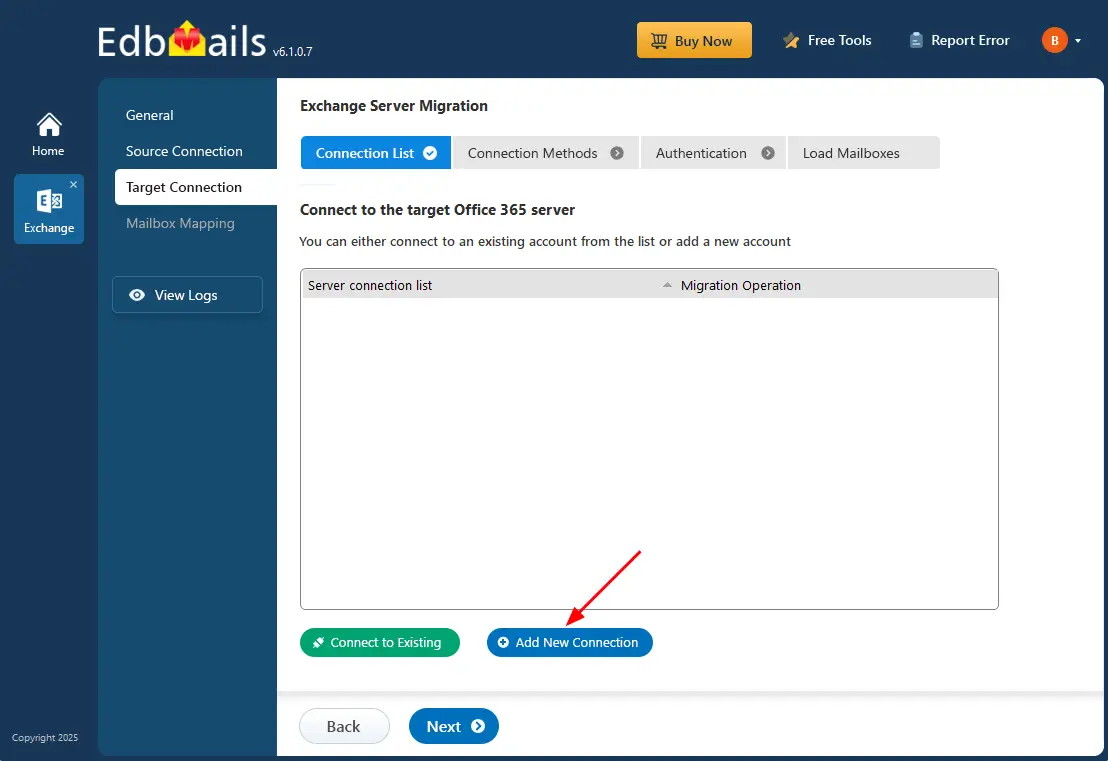
- To connect to your target Office 365, choose ‘Add New Connection’ for a new connection or select a previously saved connection and click ‘Connect to Existing’.
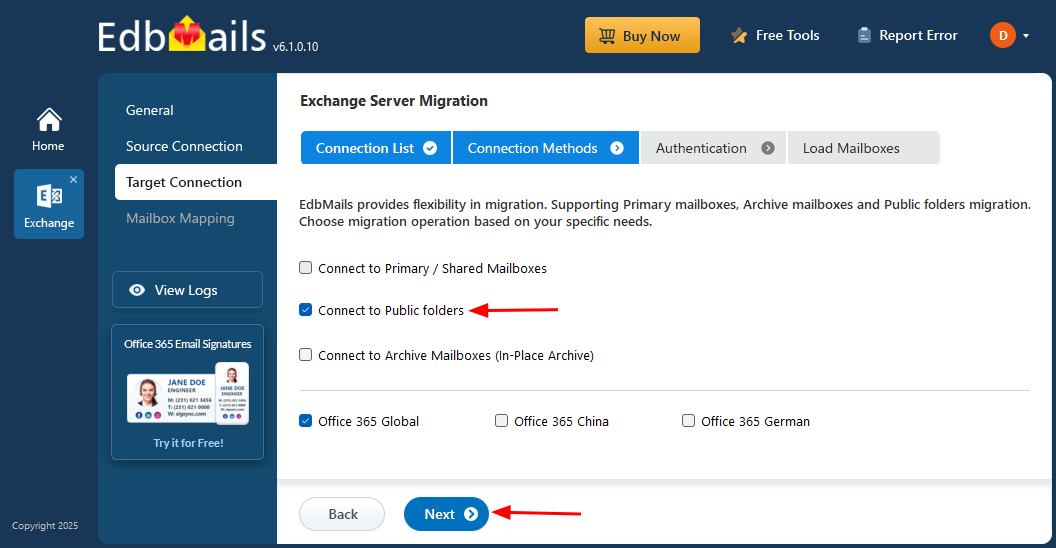
- Choose the ‘Connect to Public folders’ option and click the ‘Next’ button.
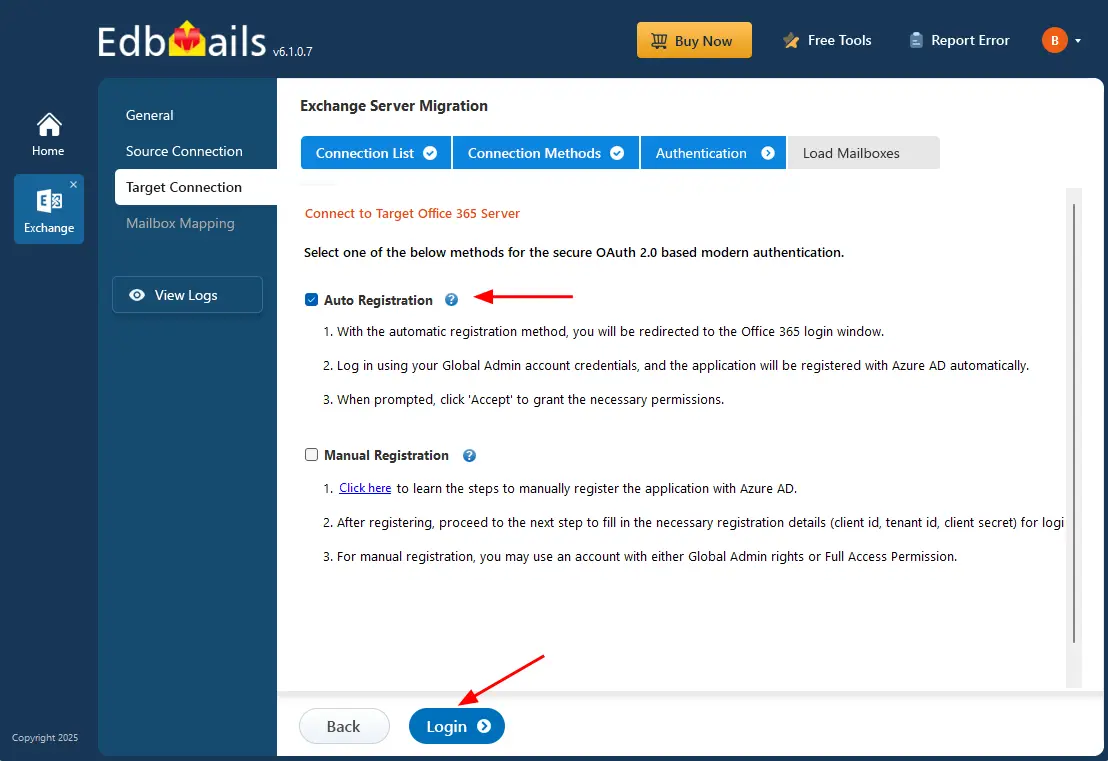
- Choose one of the authentication methods and click the ‘Login’ button.
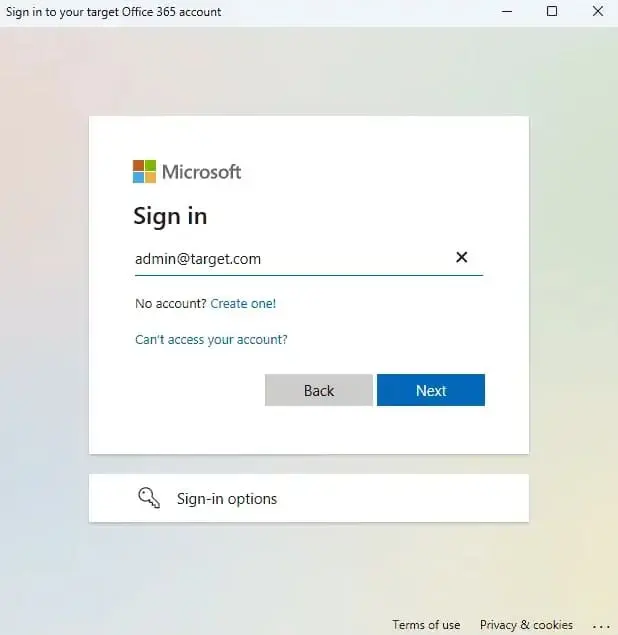
- Authenticate on Microsoft sign-in page.
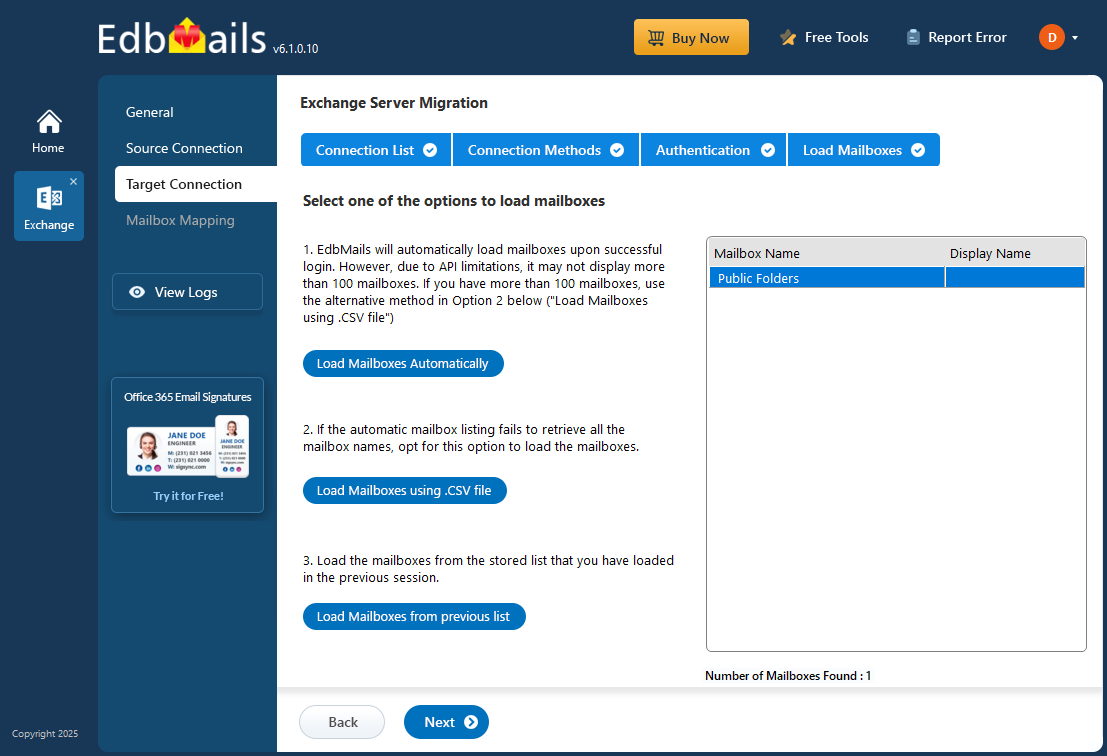
- Select one of the methods to load the public folders.
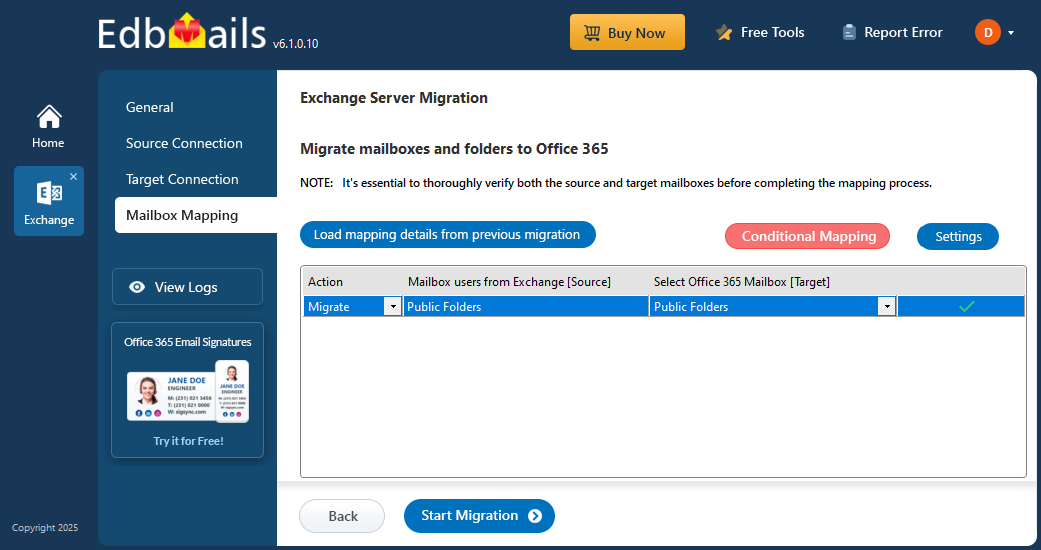
Step 5: Hosted Exchange to Office 365 public folder mapping
- EdbMails automatically maps public folders between the Hosted Exchange server and Office 365.
Step 6: Start Hosted Exchange Public folder to Office 365 migration
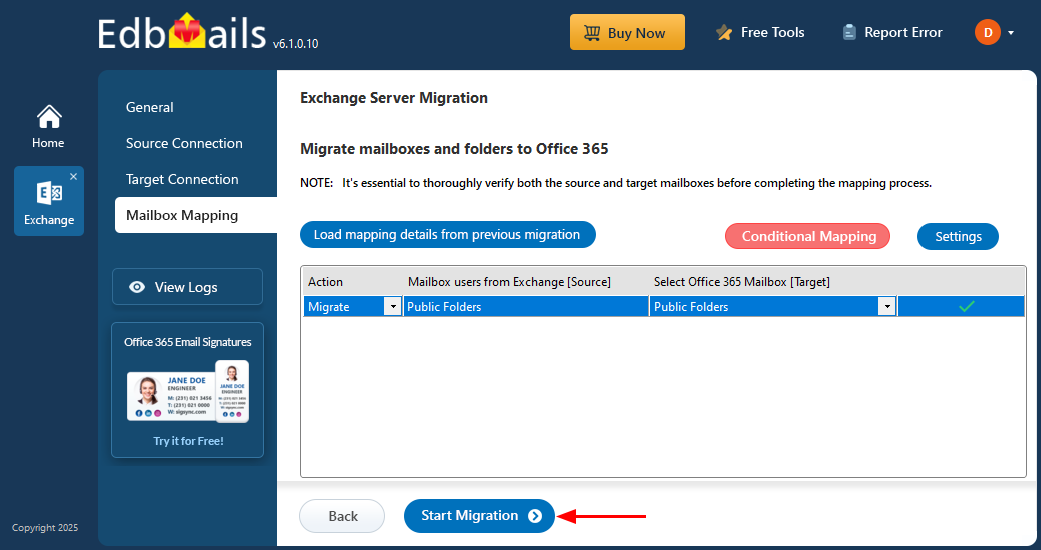
- Click the 'Start Migration’ button to initiate the migration process.
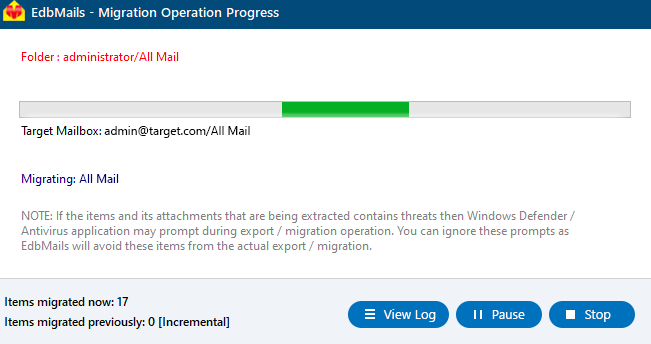
- Monitor the migration progress using the progress bar. Once the migration is complete, EdbMails will prompt you to review the status. Click the ‘View Logs’ button to access the migration report.
Hosted Exchange Public folder to Office 365: post-migration tasks
- Verify migration : Confirm that all emails, contacts, calendars, and tasks have been successfully migrated.
- Test mail flow : Send and receive test emails to verify proper mail flow functionality.
- User account configuration : Ensure all user accounts are properly configured in the new environment.
- Update MX records : Change MX records to route emails to the new server.
- Email client setup : Assist users in setting up their email clients with the new server configurations.
- Mobile device testing : Test connectivity for mobile devices utilizing ActiveSync.
- Collect user feedback : Gather feedback from users about their post-migration experience.
- Create Outlook profile : If Outlook encounters connectivity hiccups with Office 365, create fresh Outlook profiles for each user in your domain. This action will help troubleshoot and establish proper connections.
- Decommission Hosted Exchange servers : Shut down the Exchange servers after confirming a successful migration and user satisfaction.
Hosted Exchange public folder to Office 365 migration troubleshooting
For assistance with resolving migration errors, refer to the Exchange migration troubleshooting guide. For more details about EdbMails Exchange migration, visit the Frequently Asked Questions section.
Hosted Exchange public folder to Office 365 migration: pros
- Direct migration : EdbMails enables direct migration between Hosted Exchange and Office 365 without the need for intermediary steps, allowing for quick and efficient data transfer.
- Advanced filter settings : With advanced filter settings, users can customize their migration by applying specific criteria such as date ranges, item types, or folder exclusions. This precision ensures that only relevant data is migrated, optimizing both storage usage and performance.
- Incremental migration : EdbMails supports incremental migration, allowing organizations to transfer only new or modified items after the initial migration. This feature is particularly beneficial for minimizing bandwidth usage and ensuring that no critical updates are missed during the Hosted Exchange public folder to Office 365 migration process.
- Automatic mailbox mapping : The tool automatically maps mailboxes/public folders between the source and destination environments, significantly reducing the manual effort required during migration.
- User-friendly interface : EdbMails boasts a user-friendly interface that simplifies the migration process for both technical and non-technical users.
- Migration reports : Comprehensive migration reports provide detailed insights into the migration process, including counts of migrated items, any errors encountered, and summaries of completed tasks.
- Zero downtime : EdbMails ensures a zero-downtime migration experience, allowing users to continue accessing their emails and data without interruption during the transition.
Frequently Asked Questions (FAQ)
Can I migrate large public folders from Hosted Exchange to Office 365?
Does EdbMails preserve permissions during migration?
Is there downtime during the migration?
Can I perform staged or delta migrations?
Additional resources:
- EdbMails Exchange migration software
- Exchange to Exchange migration
- Exchange to Office 365 migration
- Export Exchange mailbox to PST
- Exchange to IMAP migration
- Hosted Exchange migration
- Hosted Exchange to Office 365 migration
- Exchange public folder migration to Office 365
- Exchange 2013 public folder to Office 365 migration
- Exchange 2016 public folder to Office 365 migration


