


Import Multiple PST Files to Exchange Server
Bulk PST migration is primarily a mapping and verification task: administrators must identify each PST owner, connect to the correct Exchange target, map every source to the intended mailbox or folder, and confirm that the expected data arrived. This guide focuses specifically on importing multiple PST files to an on-premises Exchange Server with EdbMails.
The EdbMails PST to Exchange Migration Tool, part of the broader EdbMails PST Migration Tool family, lets you add multiple PST files to a restore job, connect to a supported on-premises Exchange environment, map source PST files to target mailboxes, and run the migration from one application. For the single-PST procedure and connection details, use the PST to Exchange step-by-step guide.
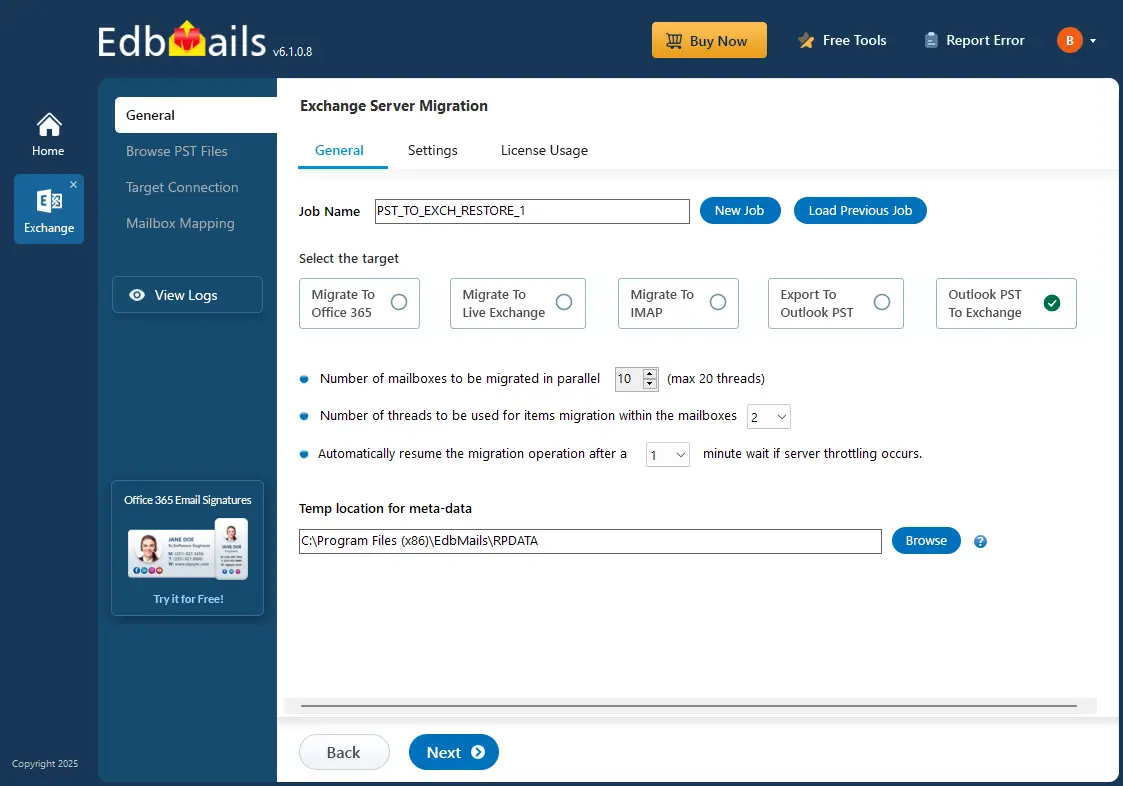
EdbMails supports incremental tracking for supported re-runs, source-to-target mailbox mapping, selective migration, parallel processing, and detailed migration logs. Actual throughput varies with PST size, source condition, network performance, Exchange server resources, throttling, message-size limits, and the number of concurrent migration tasks.
The following sections cover bulk migration planning, target prerequisites, adding multiple PST files, Exchange connection, mailbox mapping, migration, verification, and troubleshooting.
Bulk PST to Exchange migration planning
- Create a PST-to-mailbox inventory.
Record each PST filename, owner, approximate size, intended Exchange mailbox, and whether a special destination such as a Public Folder is required.
- Review Exchange lifecycle and compatibility.
Exchange Server 2016 and 2019 reached end of Microsoft support in October 2025. Confirm the support status of the target and the EdbMails build compatibility before production migration.
- Prepare the target in advance.
Create required mailboxes, Public Folder destinations, permissions, and connection settings before the migration window.
- Stage large projects.
Use manageable batches based on department, PST owner, file size, or business priority. Parallel processing can improve throughput, but target server health and throttling still matter.
- Keep source PST files until validation.
Retain the source PST files until logs and representative mailbox data have been verified on Exchange.
Prerequisites to Migrate PST to Exchange Server
- Use a supported Windows computer
Install EdbMails on a Windows computer that can reliably access the PST files and connect to the target Exchange environment. Outlook is not required for the direct PST-to-Exchange migration path.
- Ensure to create mailboxes on the target Exchange server
- If the selected on-premises Exchange connection method requires impersonation, configure the required role for the migration account
Steps to set impersonation rights in Exchange 2007
See the Steps to set impersonation rights in Exchange 2019, 2016, 2013, 2010
- Review the connection method, throttling policy, and effective message-size limits on the target Exchange server. If the selected on-premises connection uses EWS, tune throttling only when necessary and monitor server health.
- Use a supported Windows computer
Steps to Import Bulk PST Files into Exchange Server
Step 1: Download and install the EdbMails application
- Download and install EdbMails software on your computer that can be connected to your target Exchange server.
- Start the EdbMails application on your system.
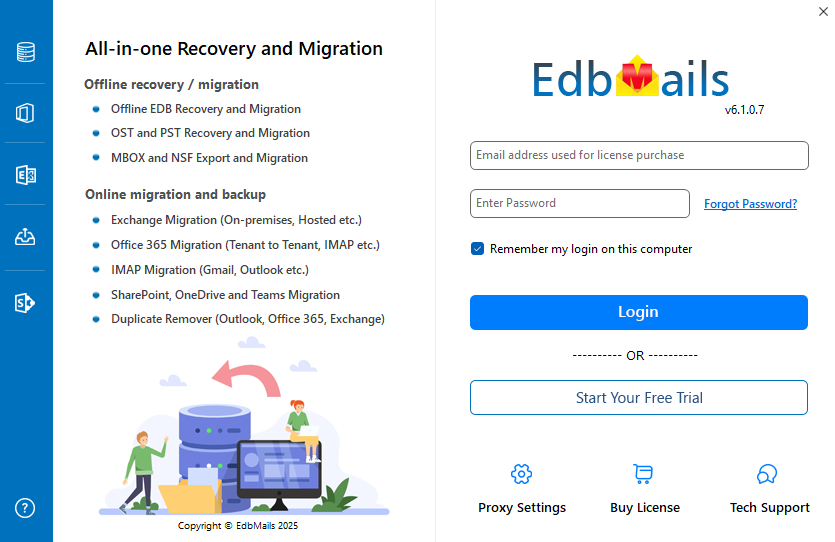
- Enter your registered email ID and password and click ‘Login’. If you are a new user, select ‘Start Your Free Trial’ to proceed with the trial version.Note: The trial version supports migration of up to 30 items per folder for evaluation. For production migration beyond the trial limit, purchase the appropriate Exchange Migration license from the EdbMails website.After completing the purchase, close and reopen the application. Then log in using the same email ID and password used during the purchase to activate the license successfully.
- Download and install EdbMails software on your computer that can be connected to your target Exchange server.
Step 2: Select ‘Live Exchange Migration’ option
- Choose the 'Live Exchange Migration' option.
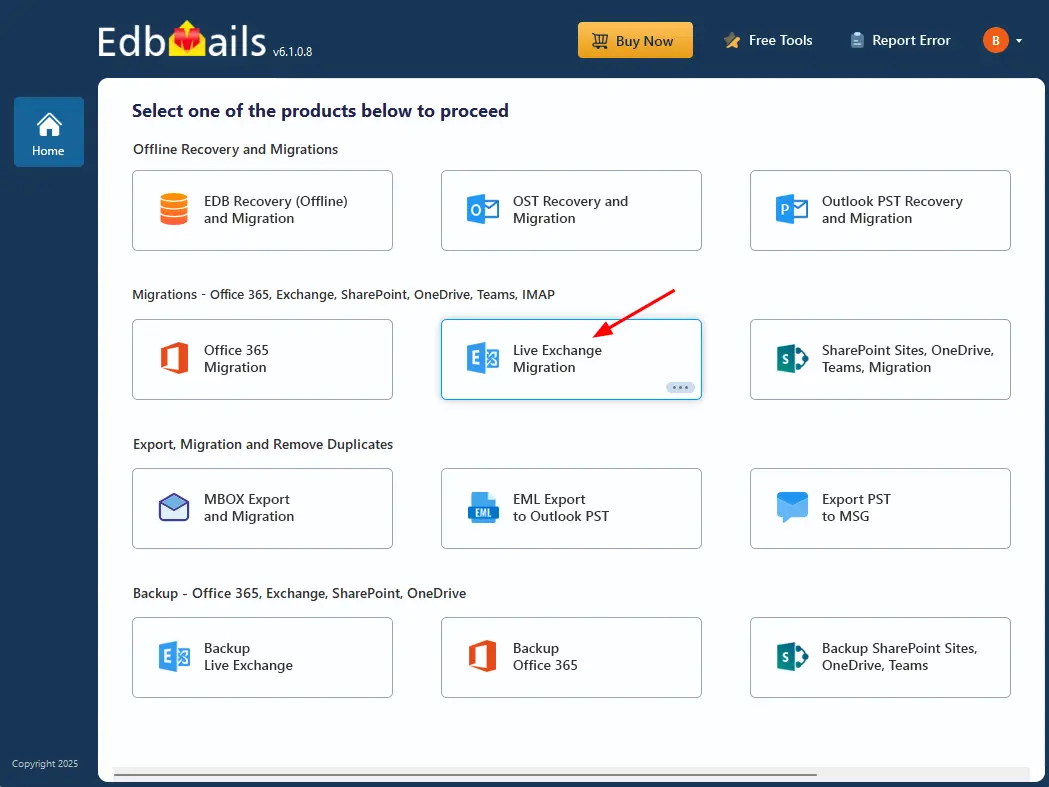
- Select ‘Restore PST to Live Exchange Server’ option.
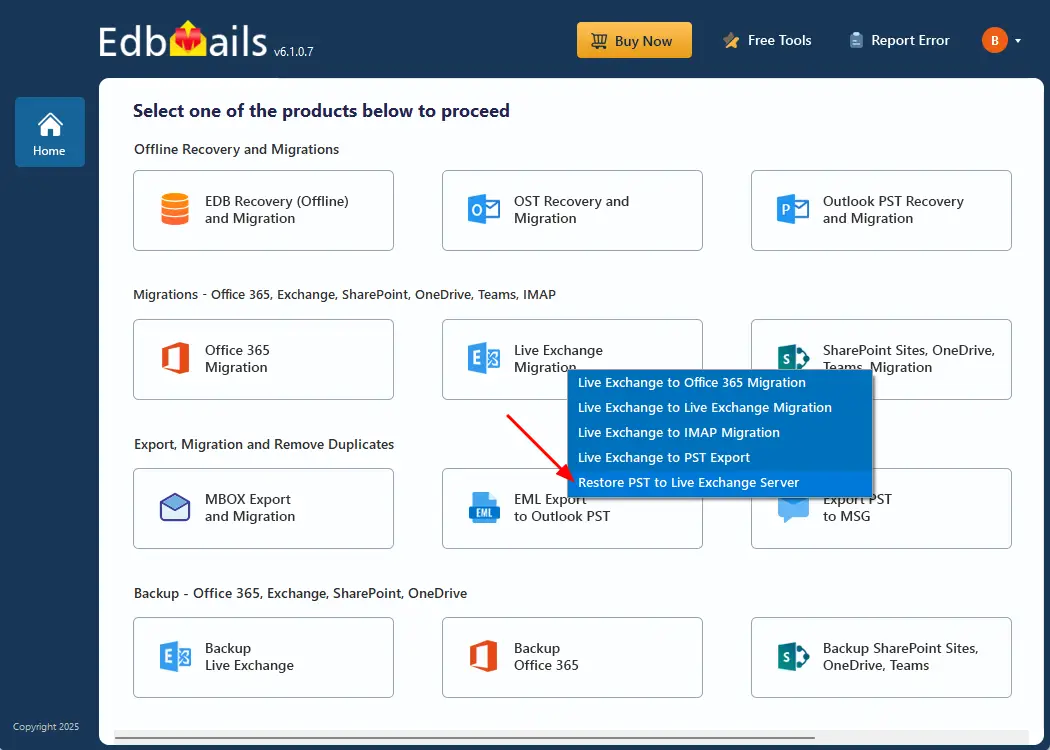
- You can either keep the default job name or click the ‘New Job’ button to change the job name.
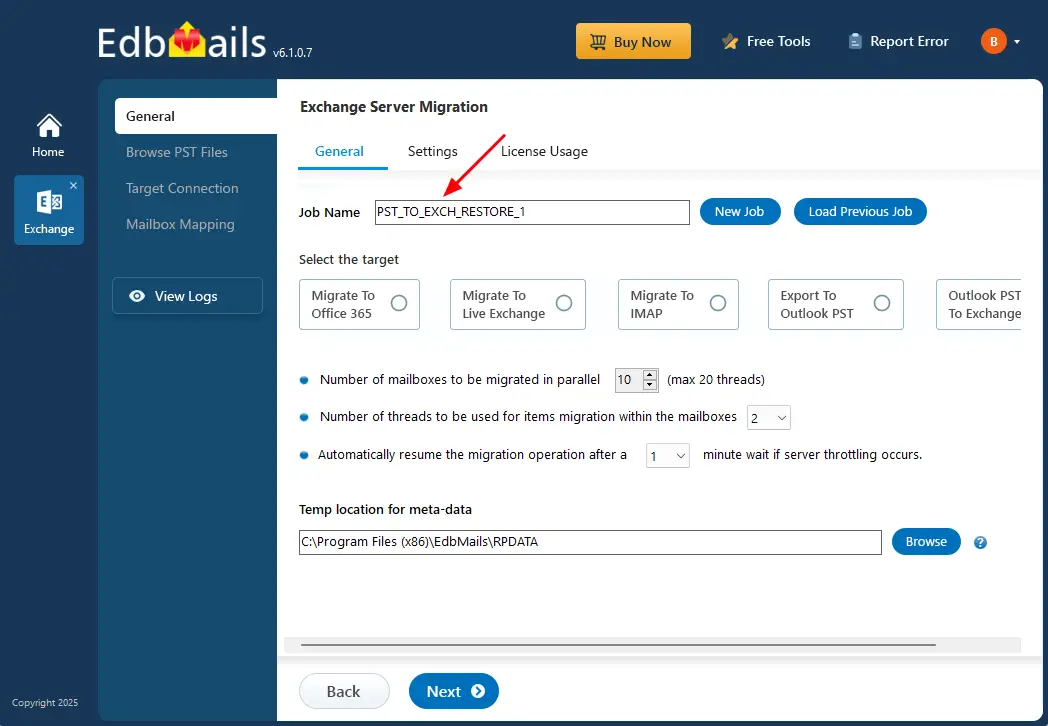
- Choose the 'Live Exchange Migration' option.
Step 3: Add the PST files
- Click the ‘Add file(s)’ button to select the PST file/files for restore option.
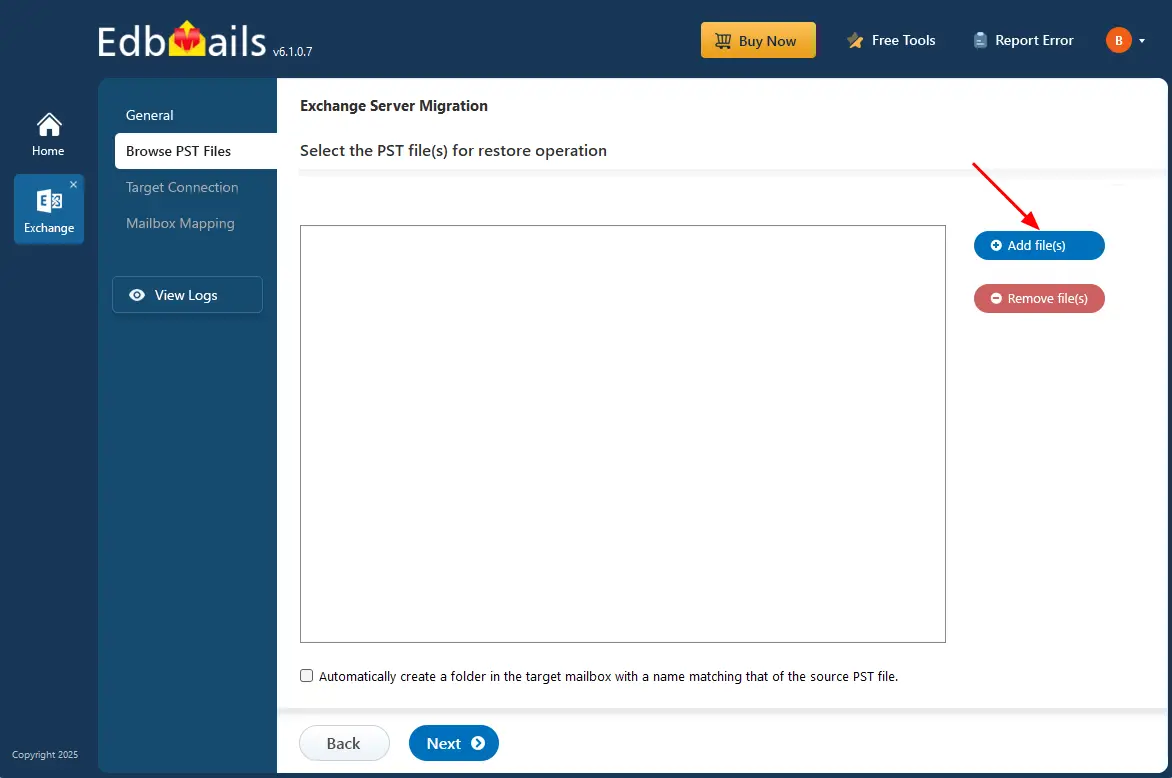
- Choose the multiple PST files you wish to select from your computer drive.
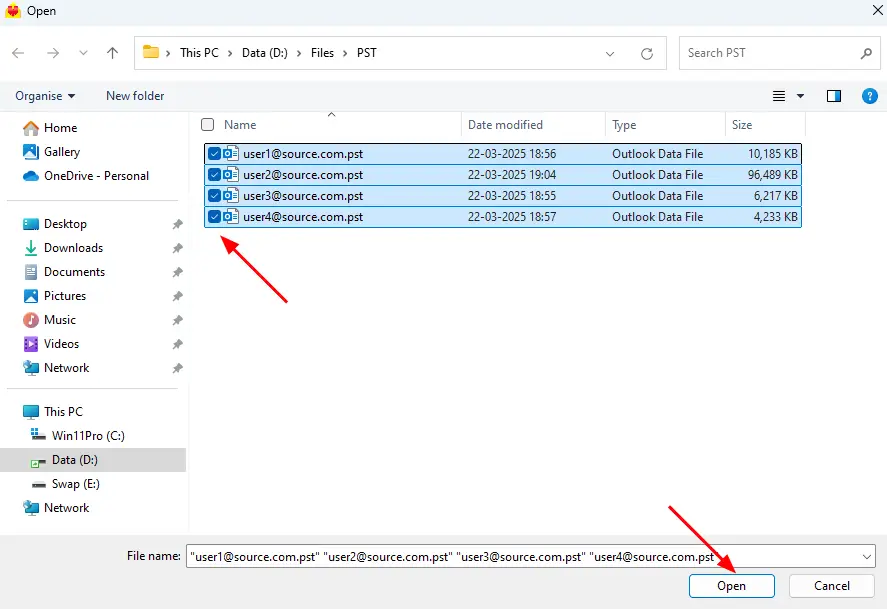
- Verify the selected PST files.
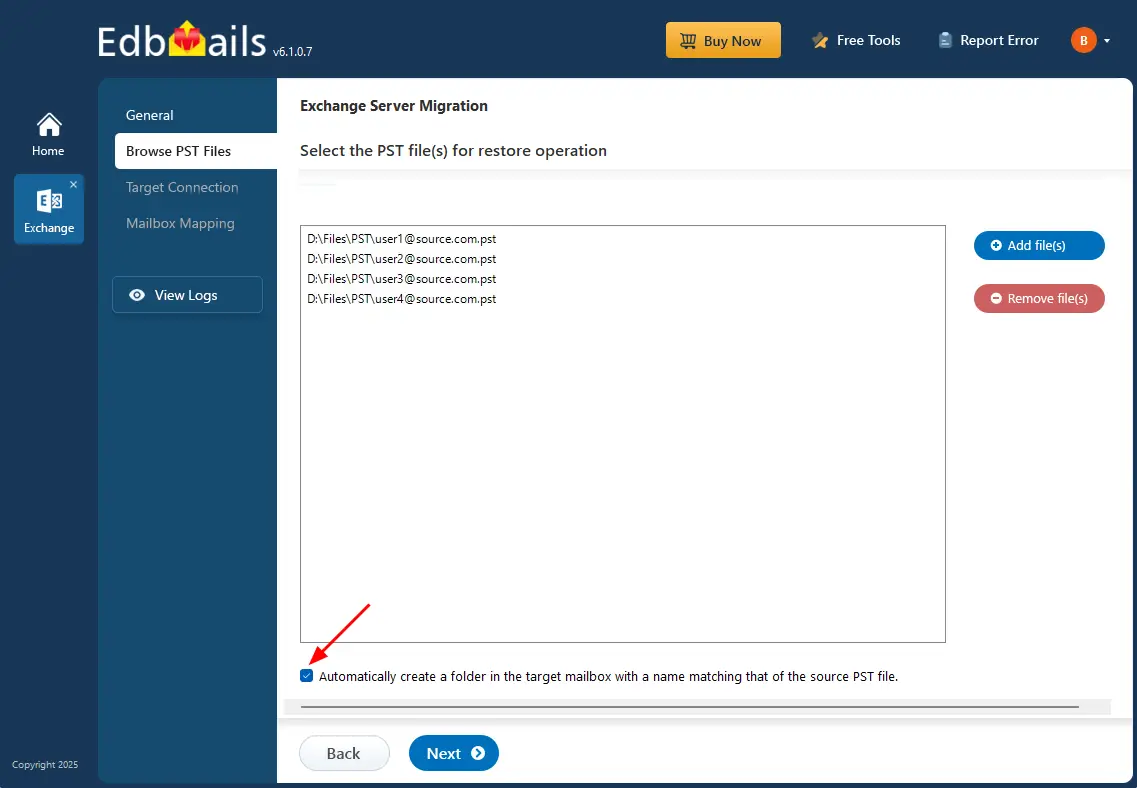
- To create a folder in the target mailbox with the same name as the source PST file, refer to the screenshot below.
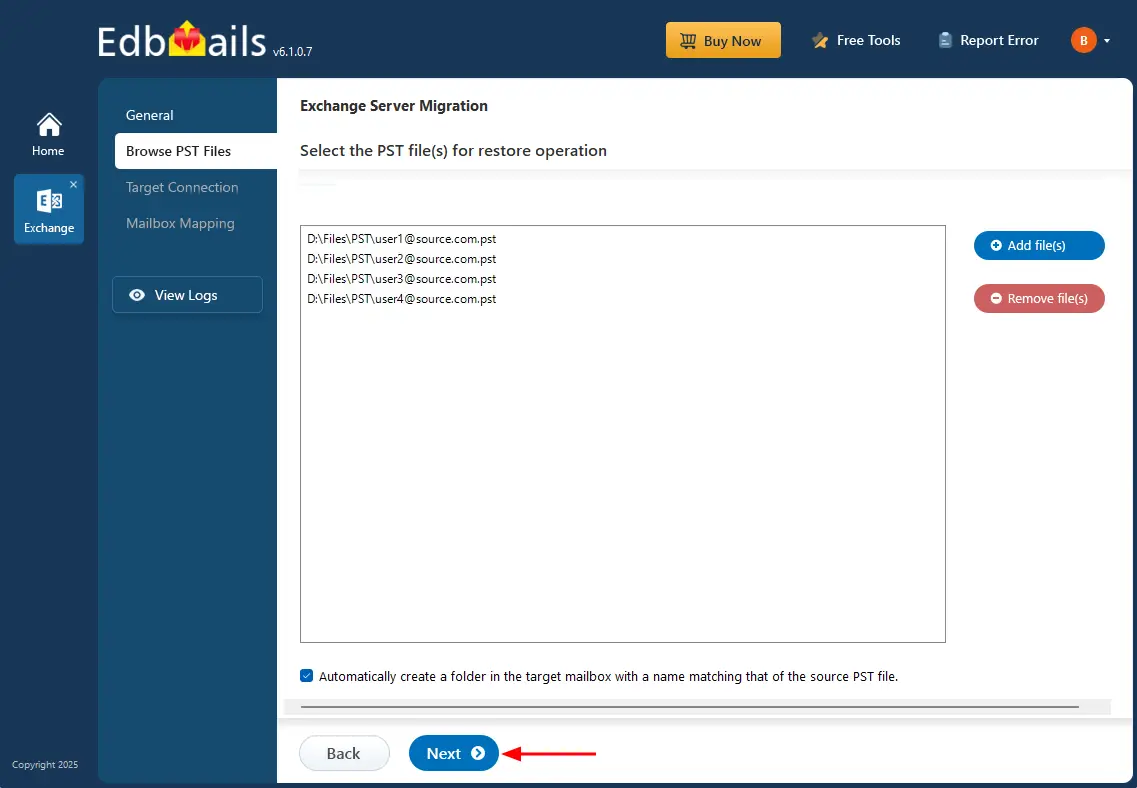
- Click the ‘Next’ button to proceed.
- Click the ‘Add file(s)’ button to select the PST file/files for restore option.
Step 4: Connect to target Exchange server
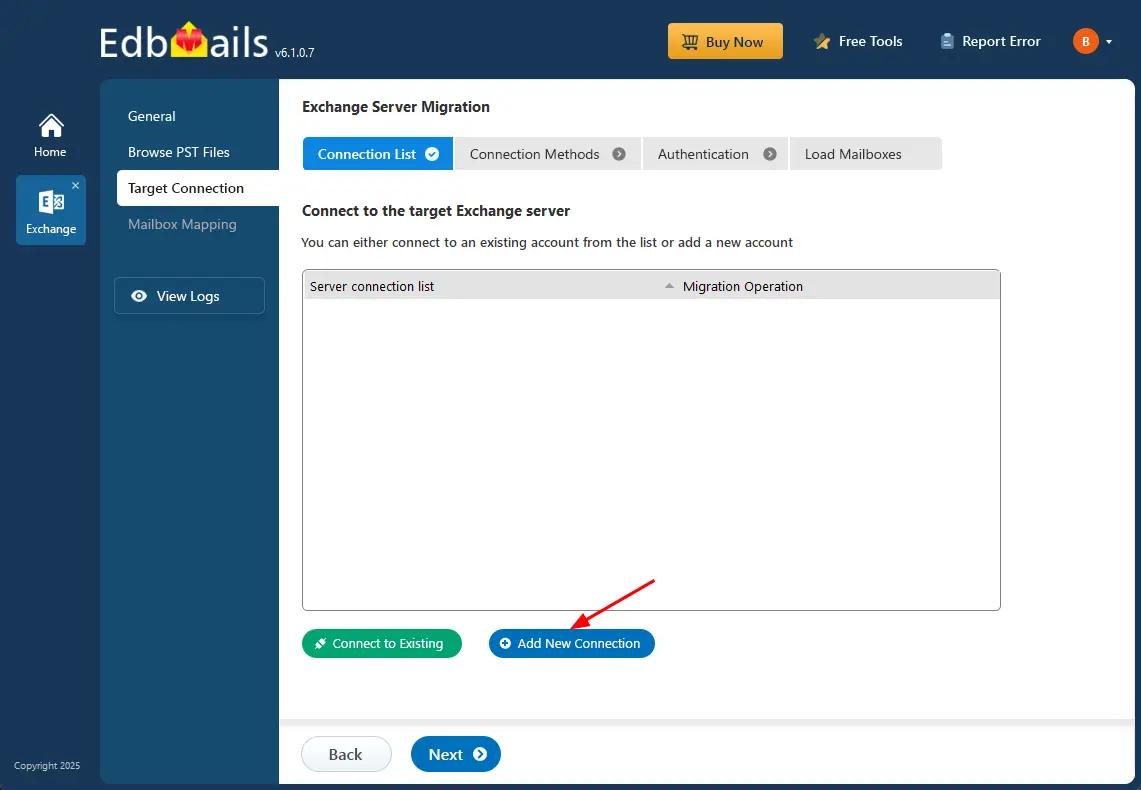
- Click ‘Add New Connection’ to create a new connection to the target Exchange server. If you have already configured the target connection, choose it from the connection list and click ‘Connect to Existing’.
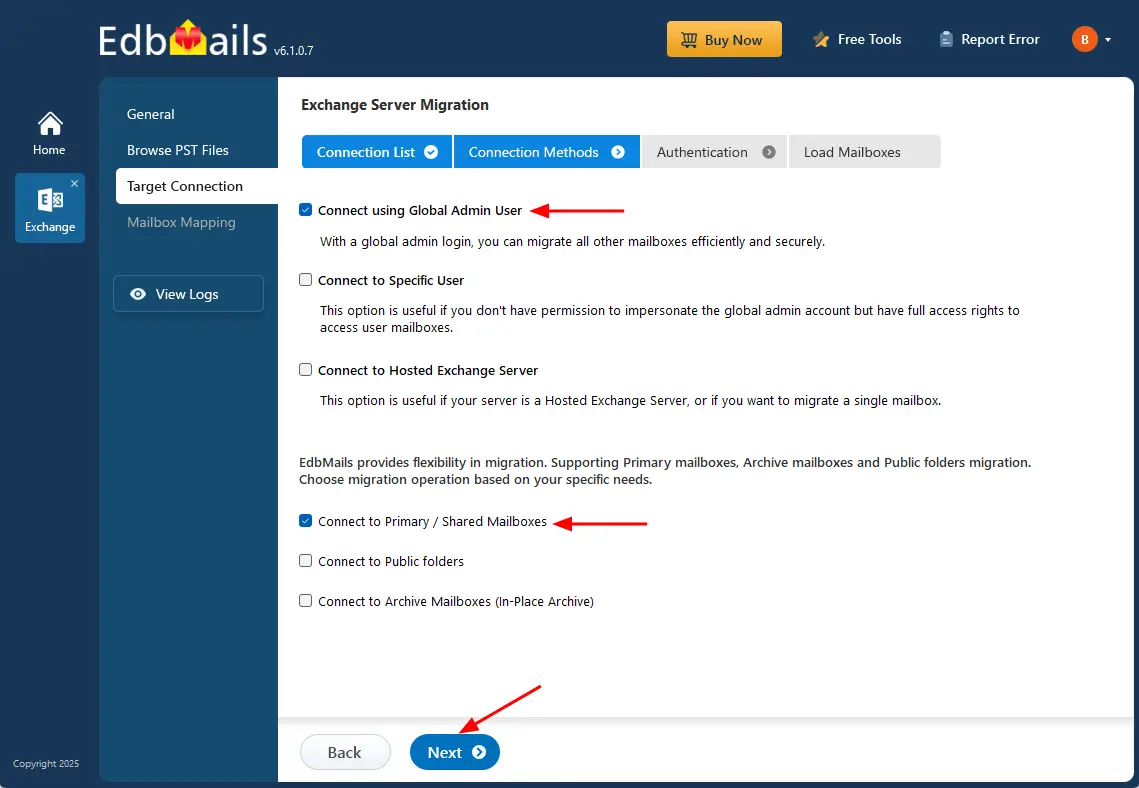
- Select the connection option supported by your target Exchange version and EdbMails build. If the selected on-premises connection method requires Exchange impersonation, configure the required role for the migration account before continuing.
Different options to connect to Exchange server in EdbMails
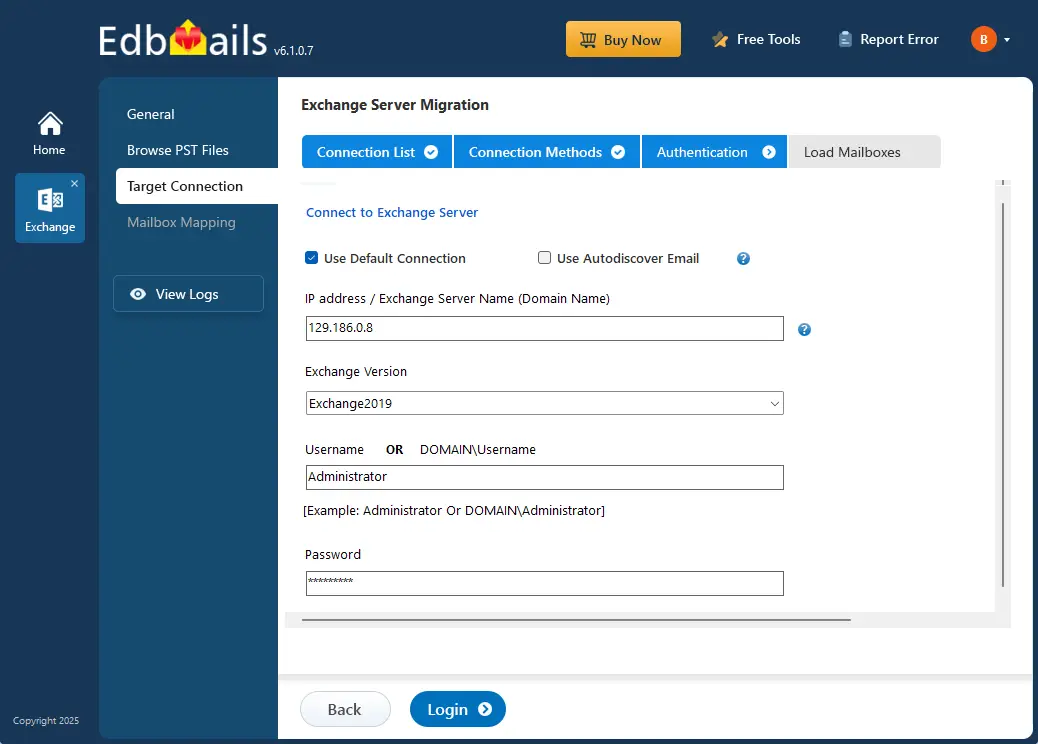
- Enter the target Exchange server details and click the ‘Login’ button
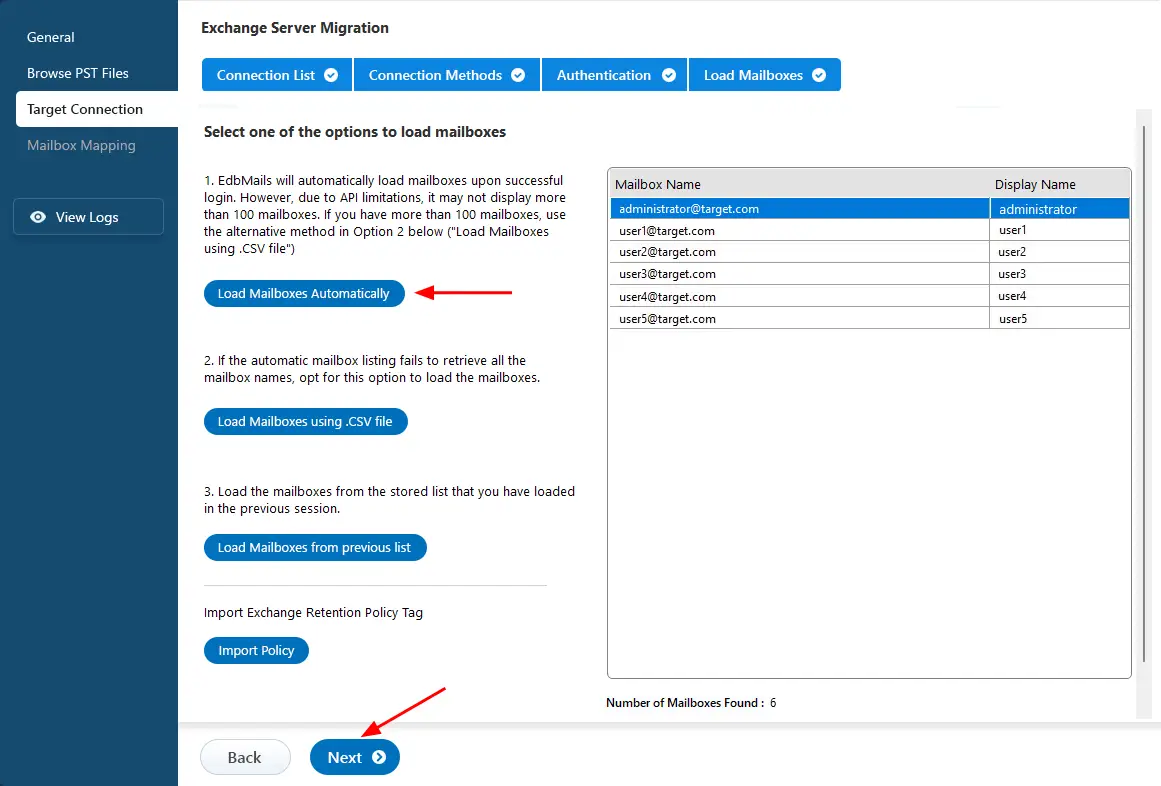
- Select a suitable method to load mailboxes from the target Exchange server. For large environments or when automatic discovery does not return all required mailboxes, choose the ‘Load mailboxes using .CSV file’ option.
- Select ‘Load Mailboxes Automatically’ and click the ‘Next’ button to continue.
- Click ‘Add New Connection’ to create a new connection to the target Exchange server. If you have already configured the target connection, choose it from the connection list and click ‘Connect to Existing’.
Step 5: PST to Exchange server mailbox mapping
- Select the option to map the mailboxes between source and the target server.
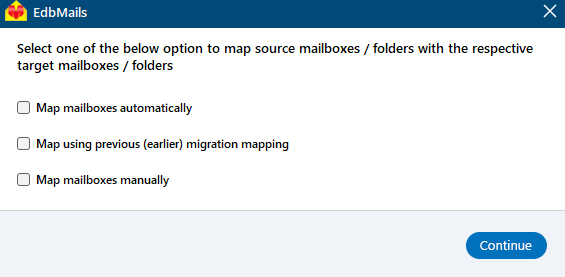
- EdbMails can suggest automatic source-to-target mappings where identifiers align. Review every proposed match and manually change the target mailbox where required before starting the restore.
- Select the option to map the mailboxes between source and the target server.
Step 6: Start to migrate PST to Exchange server
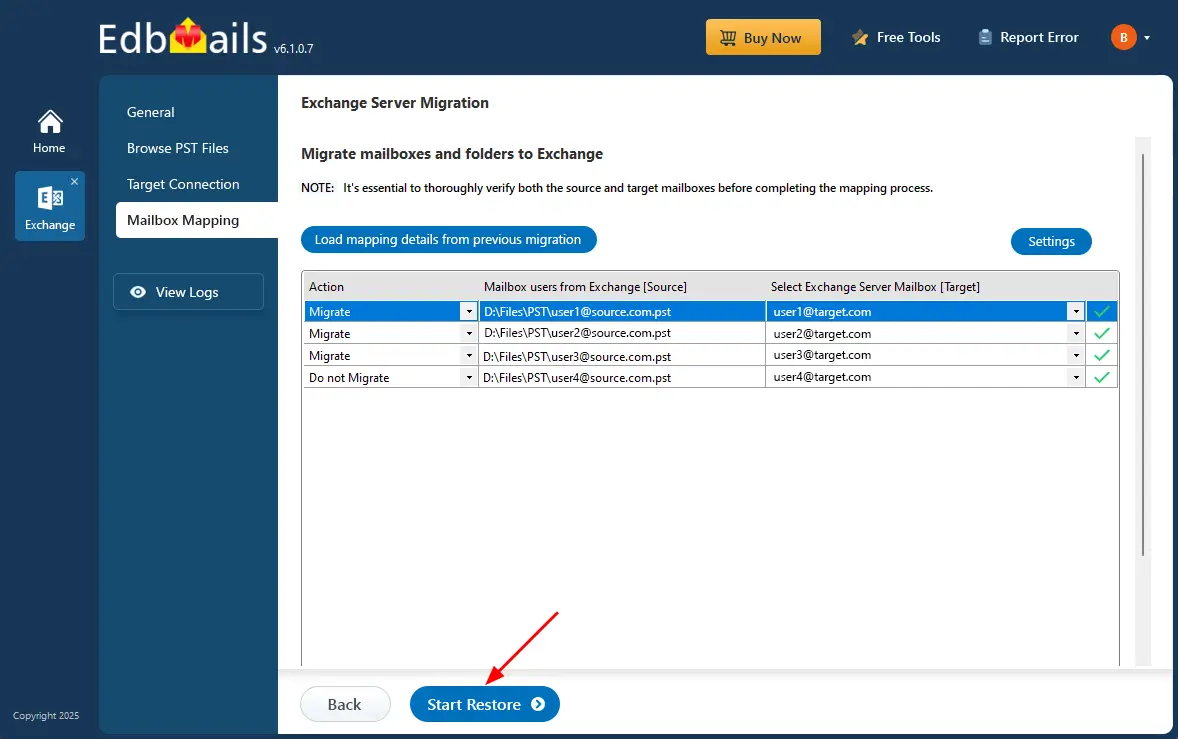
- Verify the mailboxes mapping
- Click the ‘Start Restore’ button to initiate the migration process.
- While Restoring, you can track progress in real-time. Once completed, a confirmation message will appear.
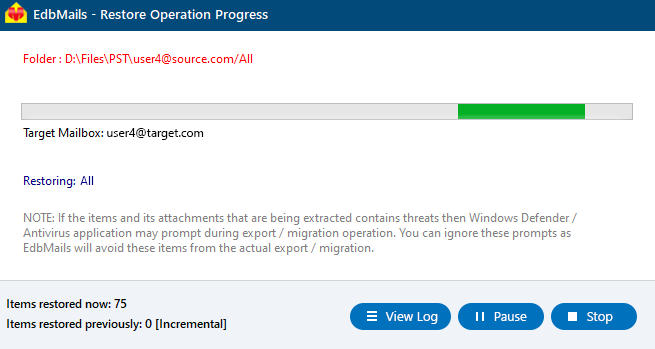
- Once the process is complete, the software prompts the message to review the migration status. Click the 'View Log' button to view the migration report.
Troubleshooting guide to Import PST Files to Exchange Server
If you encounter any difficulties during the bulk PST to Exchange server migration, refer to the troubleshooting guide for solutions
Advantages of EdbMails for Bulk Import PST to Exchange Server
- Direct Migration Capability:
EdbMails enables users to import PST to Exchange server directly, streamlining the process by removing any intermediary steps. This streamlining enhances operational efficiency and reduces complexity.
- Support for legacy Exchange environments:
EdbMails provides compatibility with Exchange versions documented by the product. Microsoft support lifecycle is separate: Exchange Server 2016 and 2019 reached end of support in October 2025, while Exchange Server Subscription Edition is the current supported on-premises release.
- Incremental migration for supported re-runs:
For supported re-runs from the same source/computer to the same target, EdbMails uses migration tracking to avoid needlessly reprocessing items already recorded as migrated. Review the migration log after each re-run, especially if the source content or target mapping changed.
- Folder hierarchy and metadata:
EdbMails preserves supported source folder structure, message properties, attachments, and readable metadata when those properties are supported by the target Exchange environment.
- Advanced Filtering Options:
EdbMails offers advanced filtering options, enabling users to select specific emails based on criteria such as date range, attachments, subject, sender address, recipient address, message size etc. This targeted approach ensures only relevant data is imported.
- Automatic Mapping of Mailboxes:
EdbMails Exchange migration automatically maps PST file mailboxes to corresponding mailboxes in Exchange server, reducing the manual effort and overall migration time.
- Process large PST sources:
EdbMails can process large PST files, but migration time and successful item delivery still depend on source condition, system resources, network performance, Exchange server load, throttling, and effective message-size limits.
- User-friendly Interface:
Designed with an intuitive interface, EdbMails simplifies complex tasks associated with PST migrations. Users can navigate the software interface easily.
- Detailed reporting:
EdbMails generates migration reports with operation status and folder/item information to support verification and troubleshooting.
Frequently Asked Questions (FAQ)
Do I need Outlook installed to import multiple PST files to Exchange?
Can I map different PST files to different Exchange mailboxes?
Can I import PST data to Exchange Public Folders?
Can I re-run a bulk PST migration without duplicating completed items?
How should I handle large PST files?
Can I use Exchange impersonation for the migration account?
Does Microsoft's October 2026 EWS retirement affect on-premises Exchange Server?
How do I verify a bulk PST migration?