Migrate Hosted Exchange to Office 365
Migrating from Hosted Exchange providers such as Intermedia, Rackspace, or GoDaddy to Office 365 is a growing priority for organizations to take the benefits of cloud-based solutions. Office 365 delivers scalable infrastructure, enhanced collaboration, strong security, and easy accessibility, making it an ideal choice for modern businesses. However, migrating from a Hosted Exchange environment to Office 365 can be technically challenging and requires careful planning to ensure a smooth migration.
EdbMails Exchange Migration software simplifies this process by supporting various migration types, including mailboxes, public folders, and archive mailboxes. It guarantees the secure transfer of emails, calendars, contacts, tasks, and others without any data loss or downtime.
EdbMails makes migration simple and automated, allowing even novice users to easily manage the process. The software offers key features such as incremental migration to avoid duplicates and advanced filtering options for a customized migration. Whether migrating a small number of mailboxes or handling a large-scale transition, EdbMails ensures a smooth, hassle-free migration from Hosted Exchange server to Office 365.
Hosted Exchange to Office 365 migration prerequisites
- Step 1: Set the impersonation role to the admin user on the source server
If you are using global admin account to connect to source Hosted Exchange server, then set the Application Impersonation permissions to list and migrate other user mailboxes
- Step 2: Create mailboxes on the target Office 365 server
Before you migrate Hosted Exchange to Office 365, ensure that you create mailboxes for users in your organization and assign suitable licenses to them.
If you plan to migrate Public folders to Office 365, ensure that you create and configure the Public folders on the target server.
Steps to create Office 365 Public folder and assign admin permissions
- Step 3: Add a custom domain to Office 365 (Optional)
If you have a custom email domain from your hosting provider to which you want to migrate and receive emails, you must add and verify the domain on Office 365.
- Step 4: Configure Office 365 to send and receive large messages
Increase the message size limit on Office 365 to 150 MB. This option enables you to bypass message size limitations during the migration.
- Step 1: Set the impersonation role to the admin user on the source server
Steps to migrate Hosted Exchange to Office 365 using EdbMails
Step 1: Download and install EdbMails software
- Download and install EdbMails on any computer.
System requirements for Hosted Exchange to Office 365 migration
- Launch the EdbMails application and 'Login' with your email address and password or choose 'Start Your Free Trial' to continue.
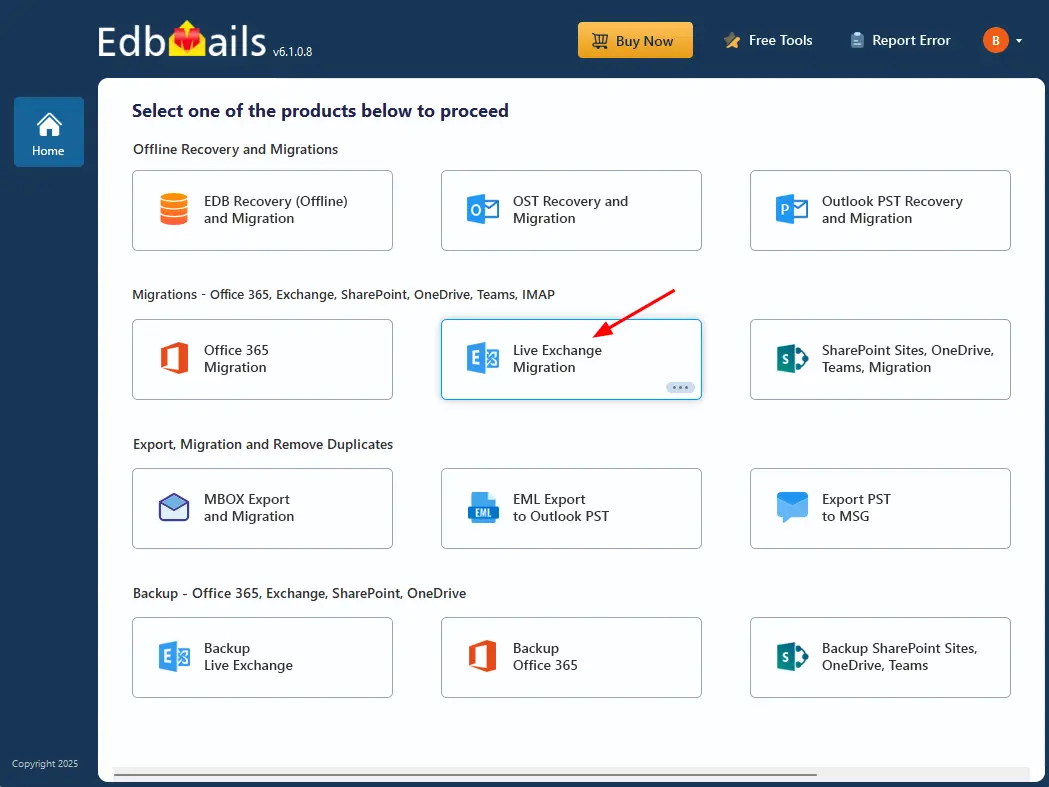
- Select 'Live Exchange migration' option.
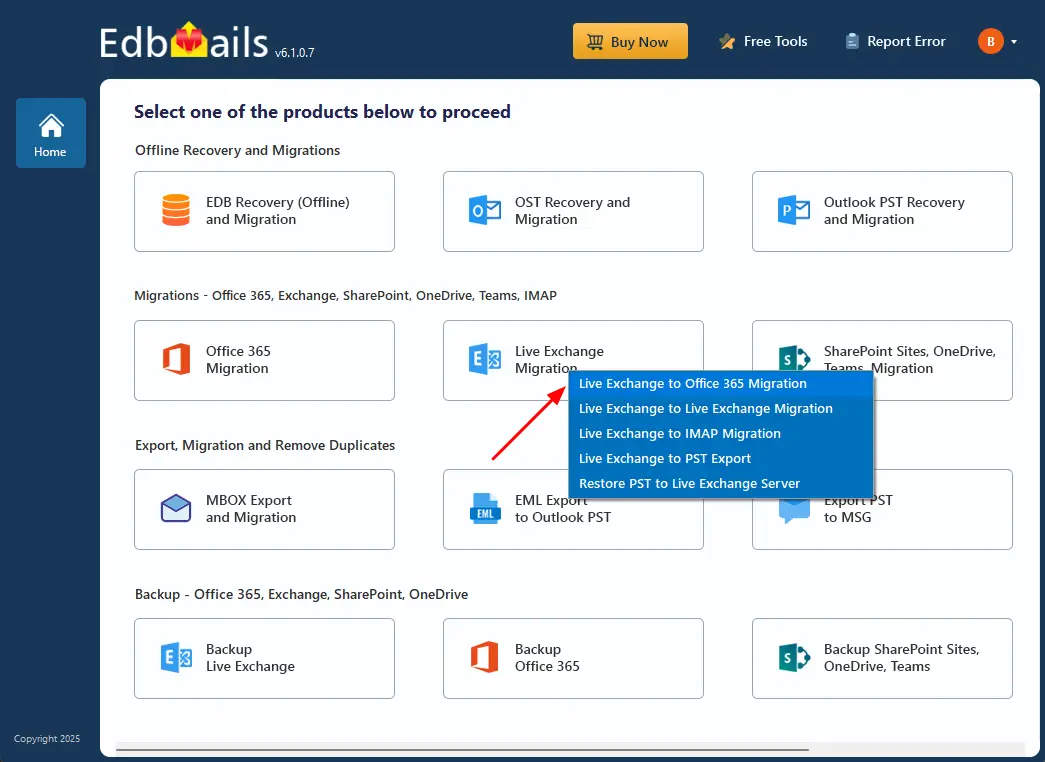
- Select 'Live Exchange to Office 365 Migration' option.
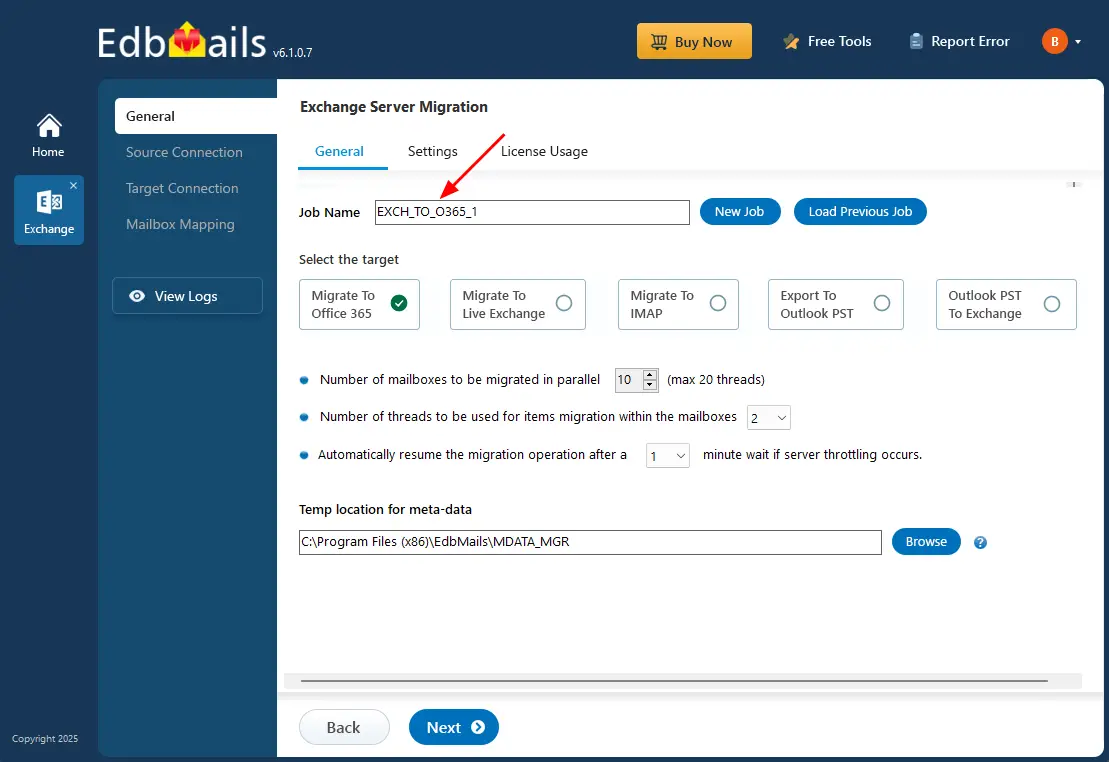
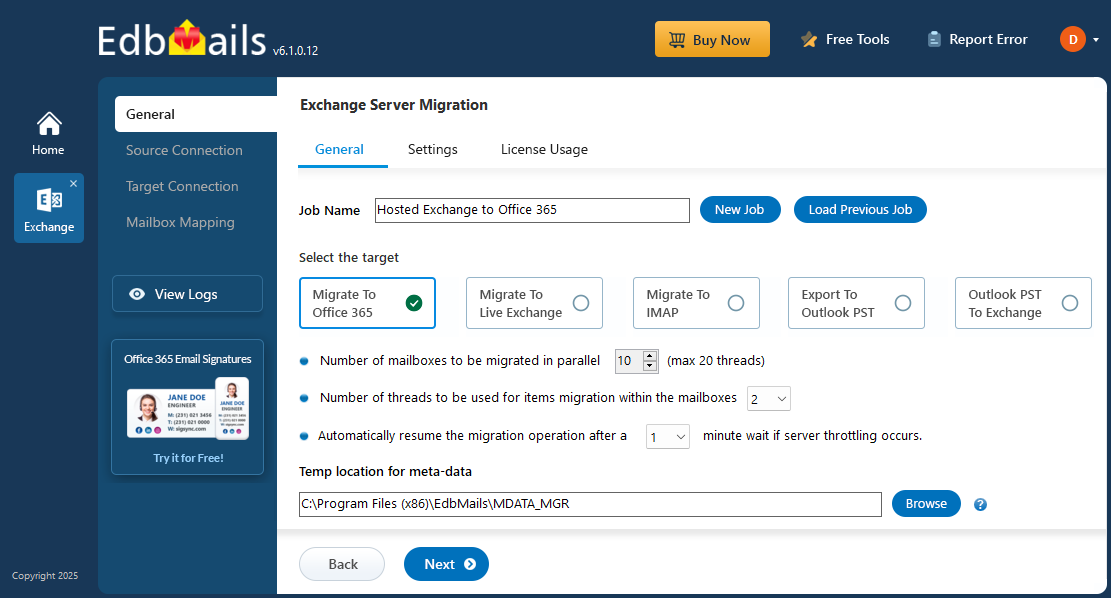
- You can either keep the default job name or click 'New Job' to change it.
- Download and install EdbMails on any computer.
Step 2: Connect to the source Hosted Exchange server
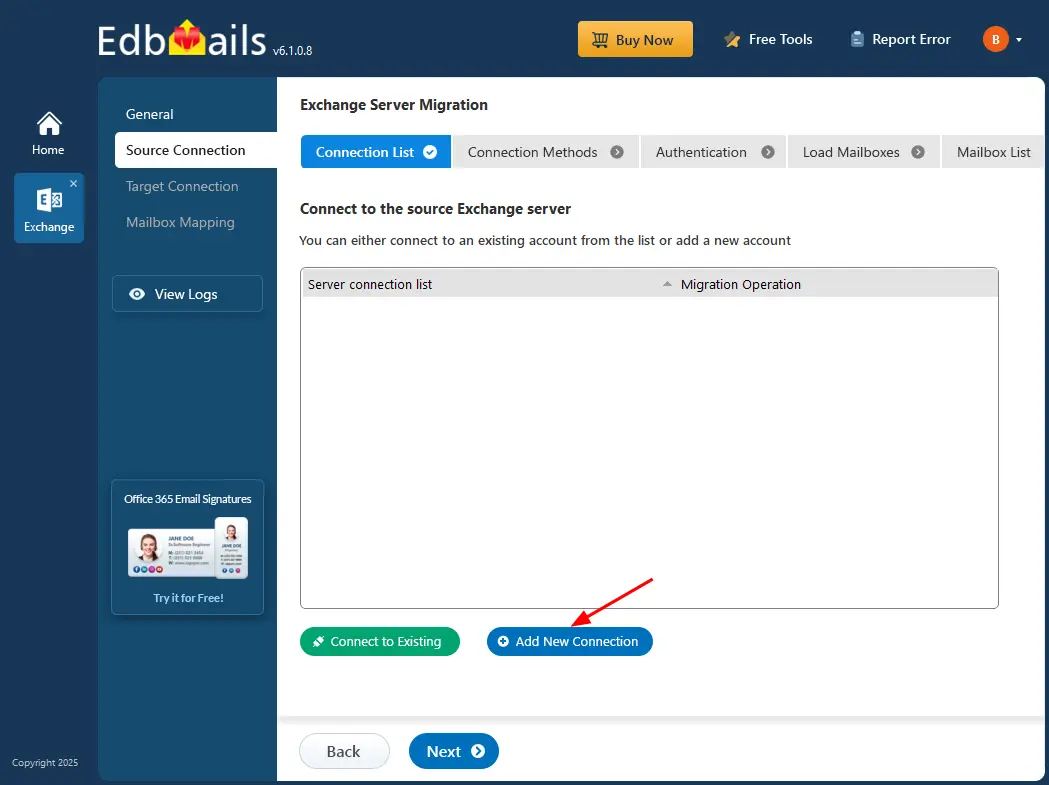
- To establish a new connection to the source Hosted Exchange server, click ‘Add New Connection’. To reuse a previous connection, select it from the list and click ‘Connect to Existing’.
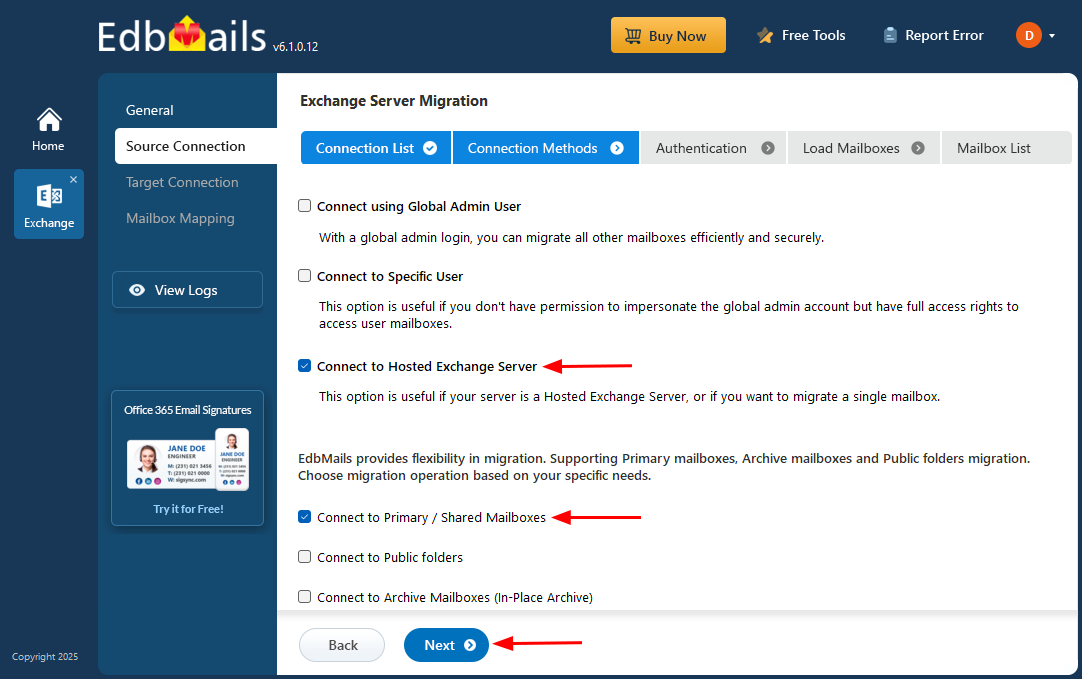
- Select ‘Connect to Hosted Exchange Server’ and the required migration option.
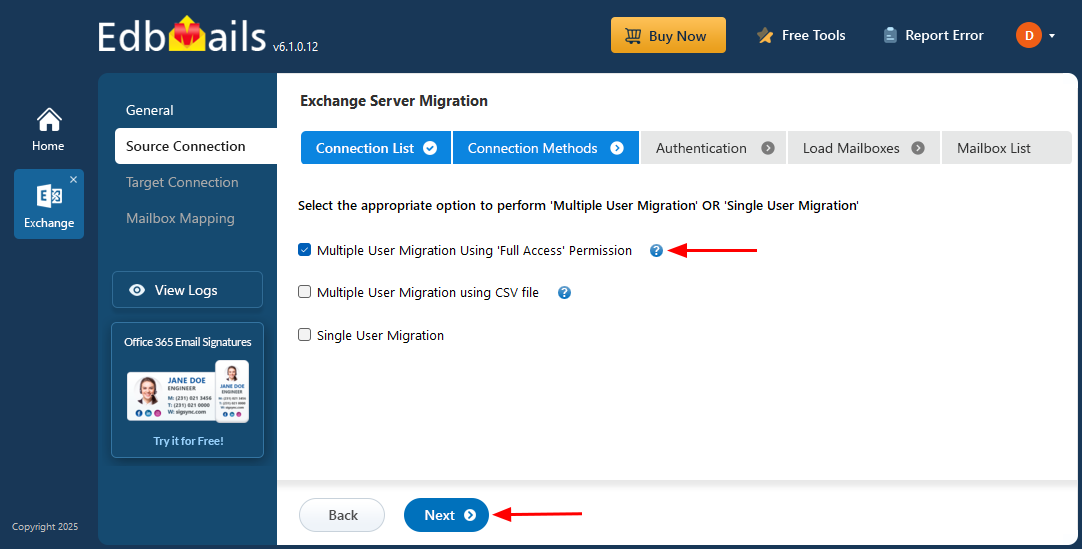
- Select the appropriate option to perform ‘Multiple user migration’ or ‘Single User migration’.
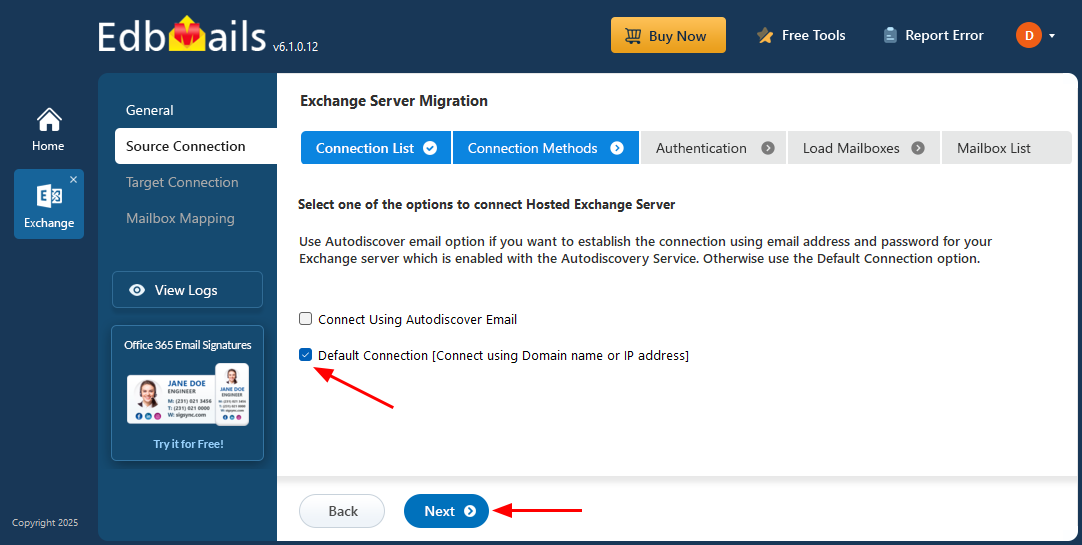
- Select 'Connect Using Autodiscover Email' with your email address or password if your Hosted Exchange server has Autodiscover enabled, or choose 'Default Connection' to connect using the domain name or IP address.
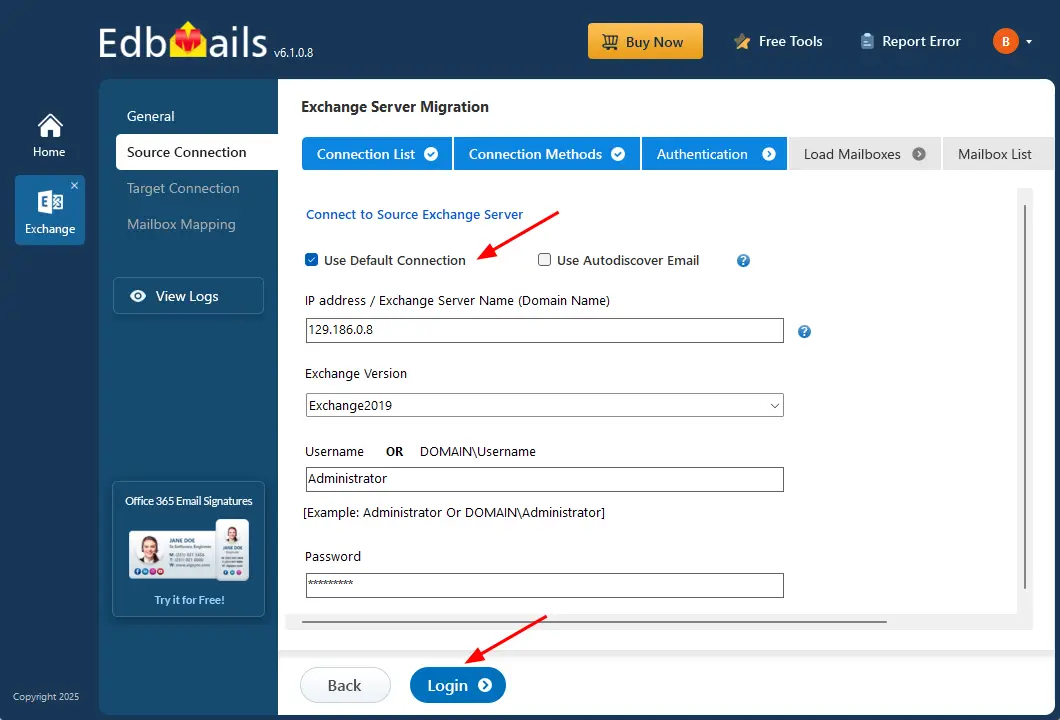
- Enter the source server details and click the ‘Login’ button.
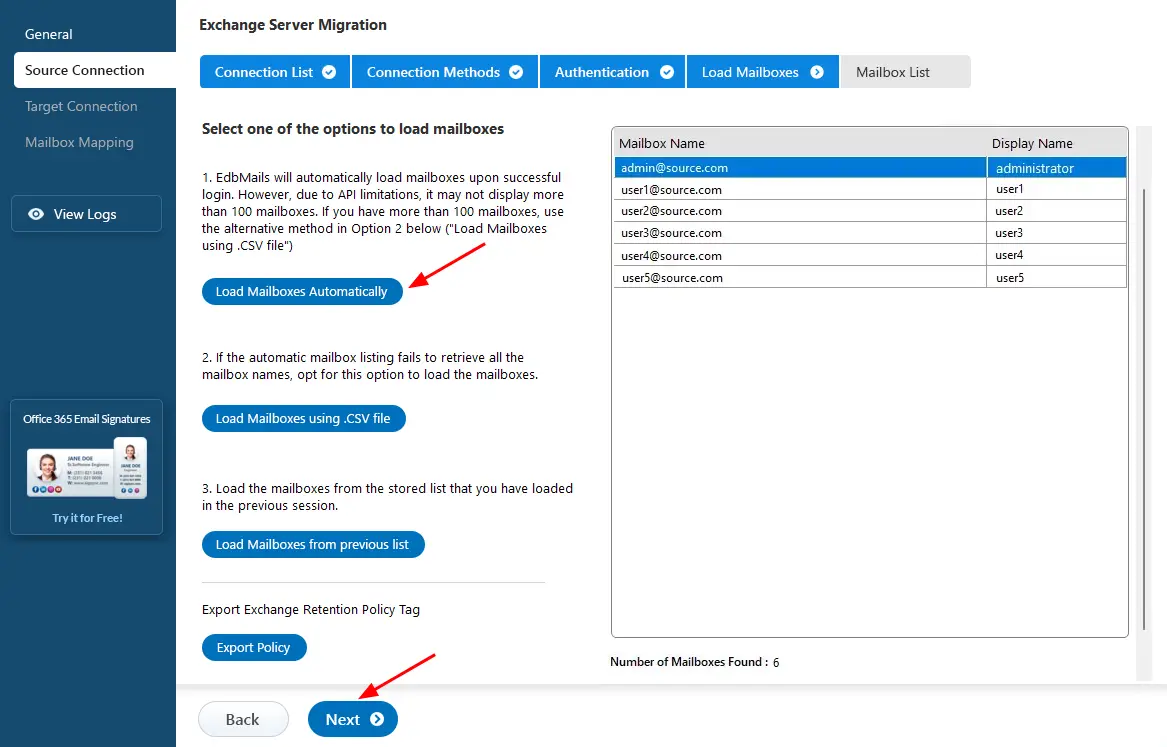
- Choose the option to load the mailboxes. EdbMails will automatically retrieve mailboxes from your source Hosted Exchange server. Alternatively, you can load mailboxes using a CSV file.
Step 3: Select the hosted Exchange server mailboxes
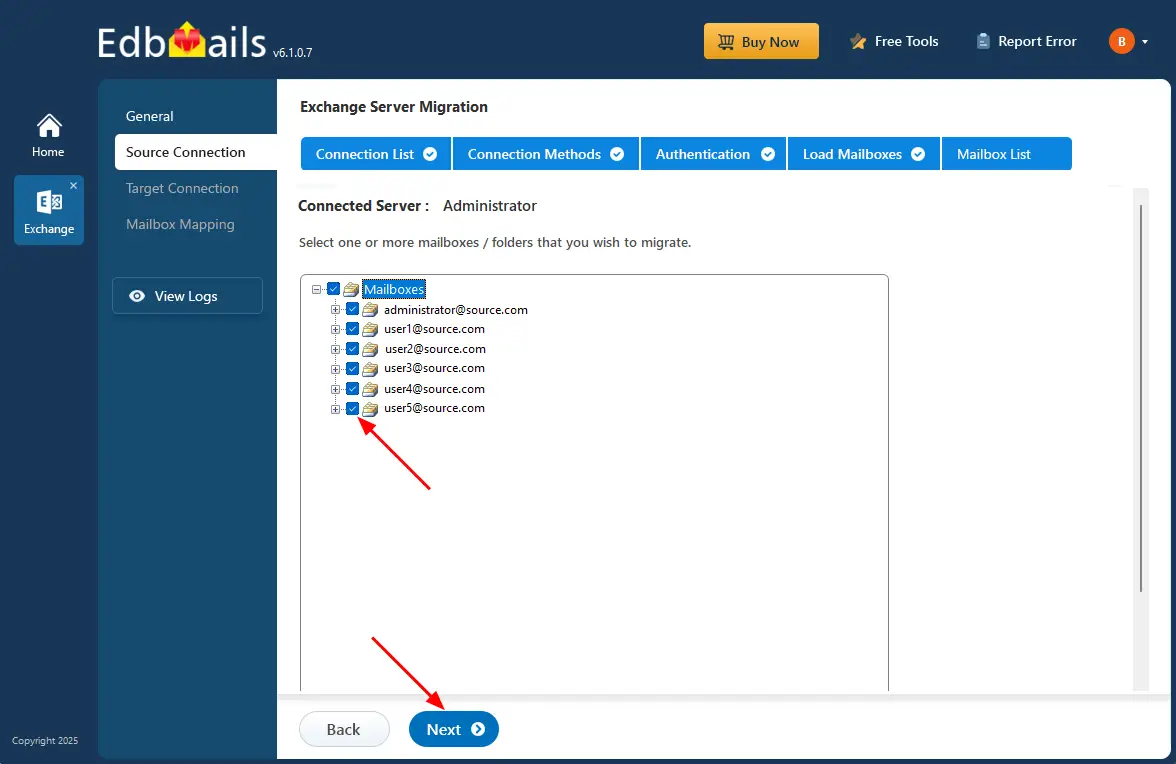
- Choose the mailboxes you wish to migrate to the target Office 365 server.
Step 4: Connect to target Office 365 server
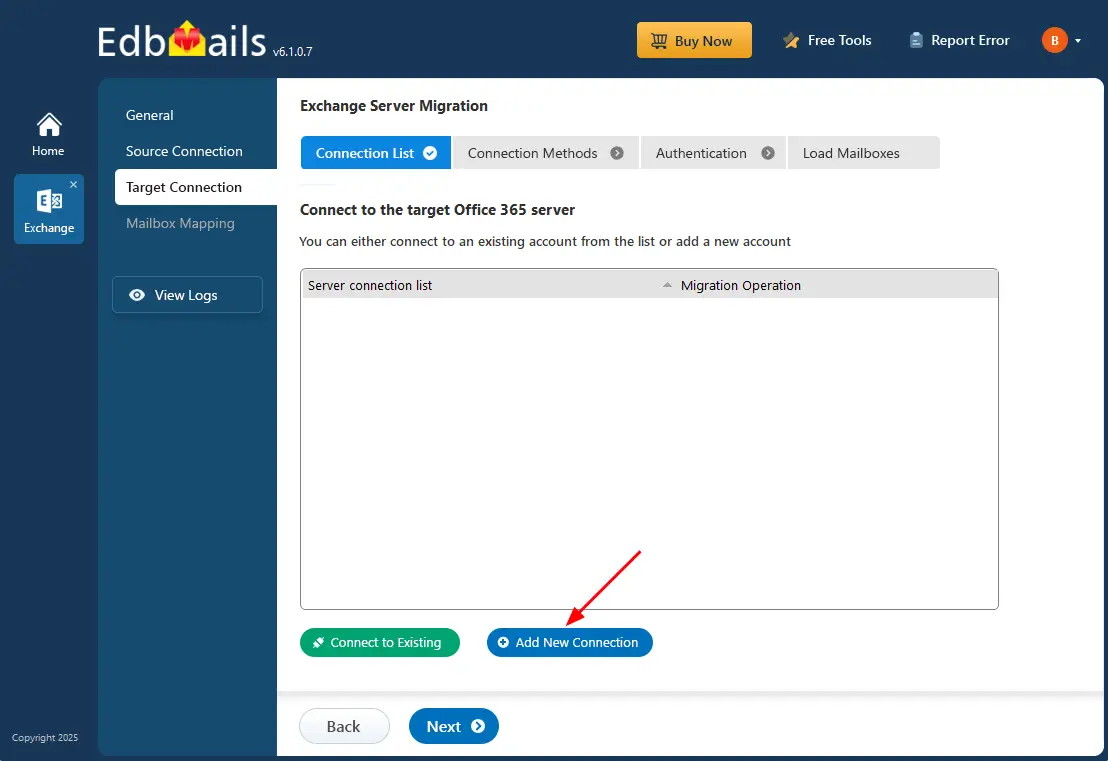
- To set up a new connection with your target Office 365 account, click ‘Add New Connection’. If you've connected before, just pick it from the list and click ‘Connect to Existing’ to continue.
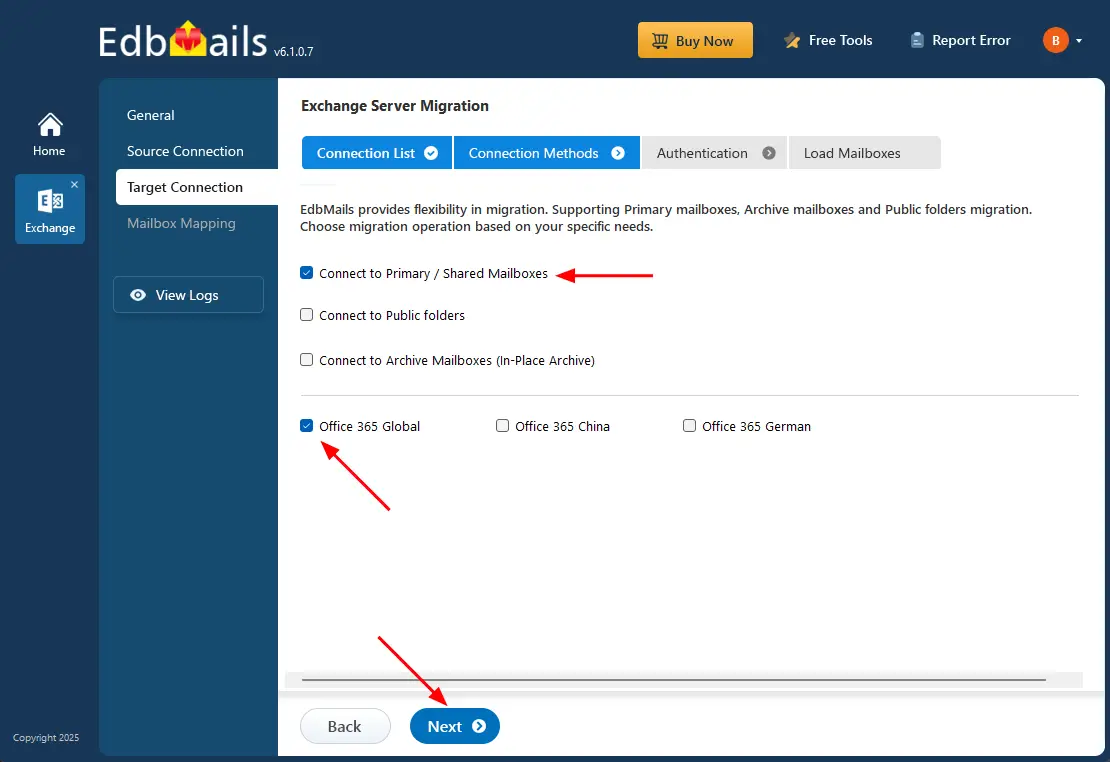
- Select the required connection options and click the ‘Next’ button.
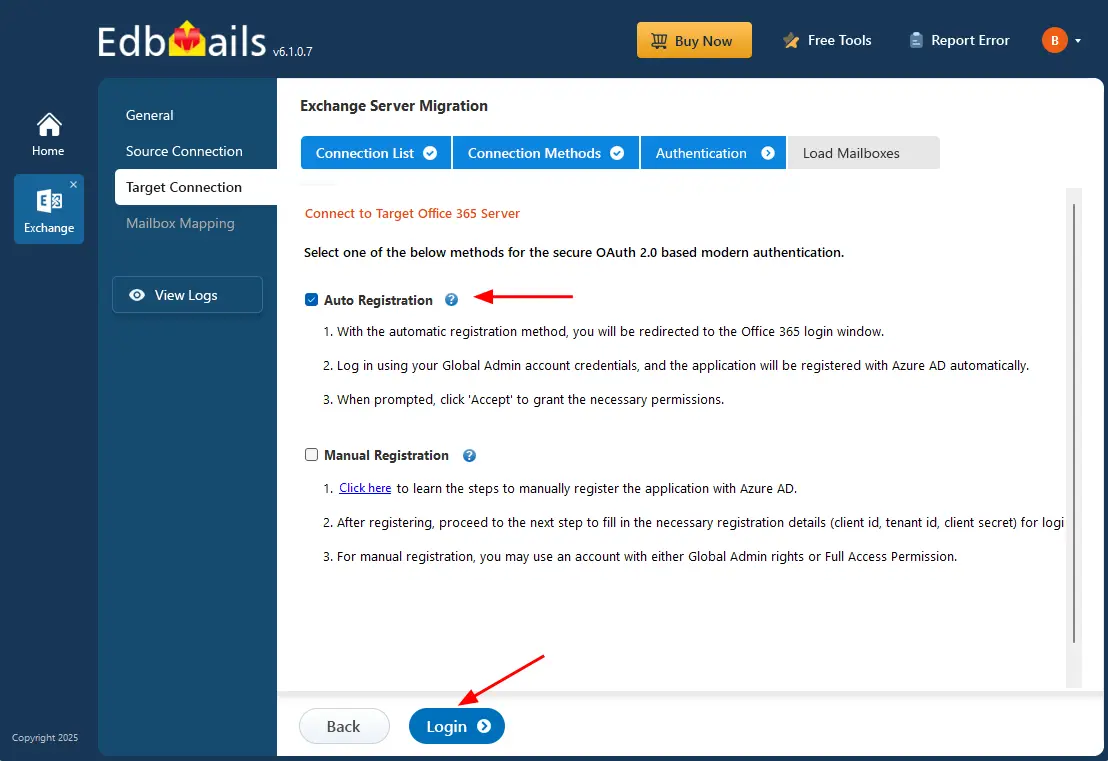
- Select one of the authentication methods to connect to Office 365 and click the ‘Login’ button to continue.
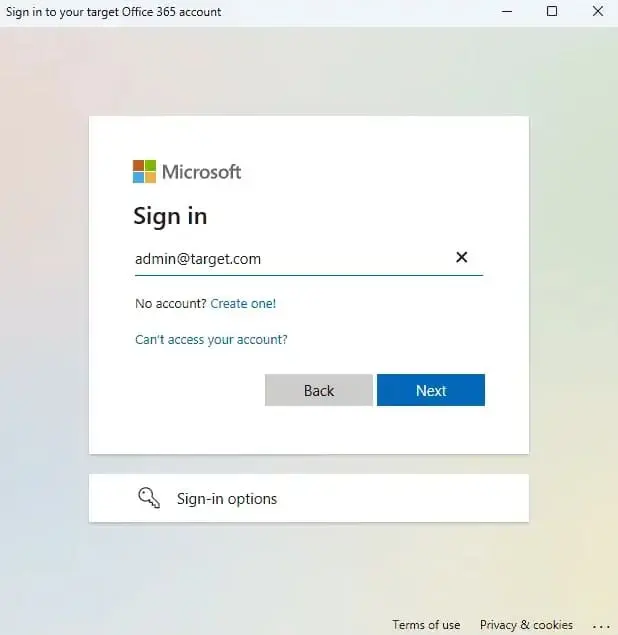
- Authenticate on Microsoft sign-in page.
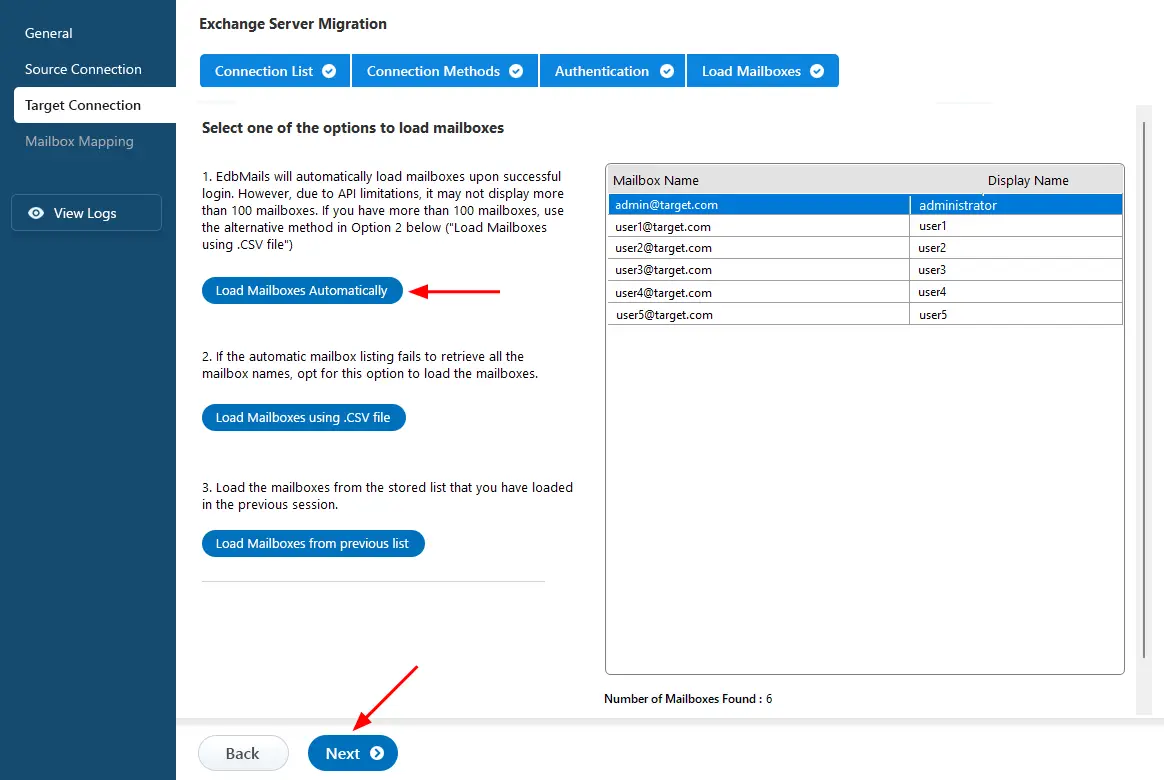
- Choose a method to load the mailboxes. You can also upload a CSV file containing the mailbox details, then click ‘Next’ to proceed.
Step 5: Hosted Exchange to Office 365 mailboxes mapping
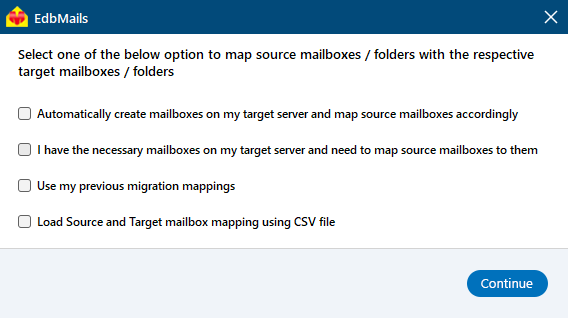
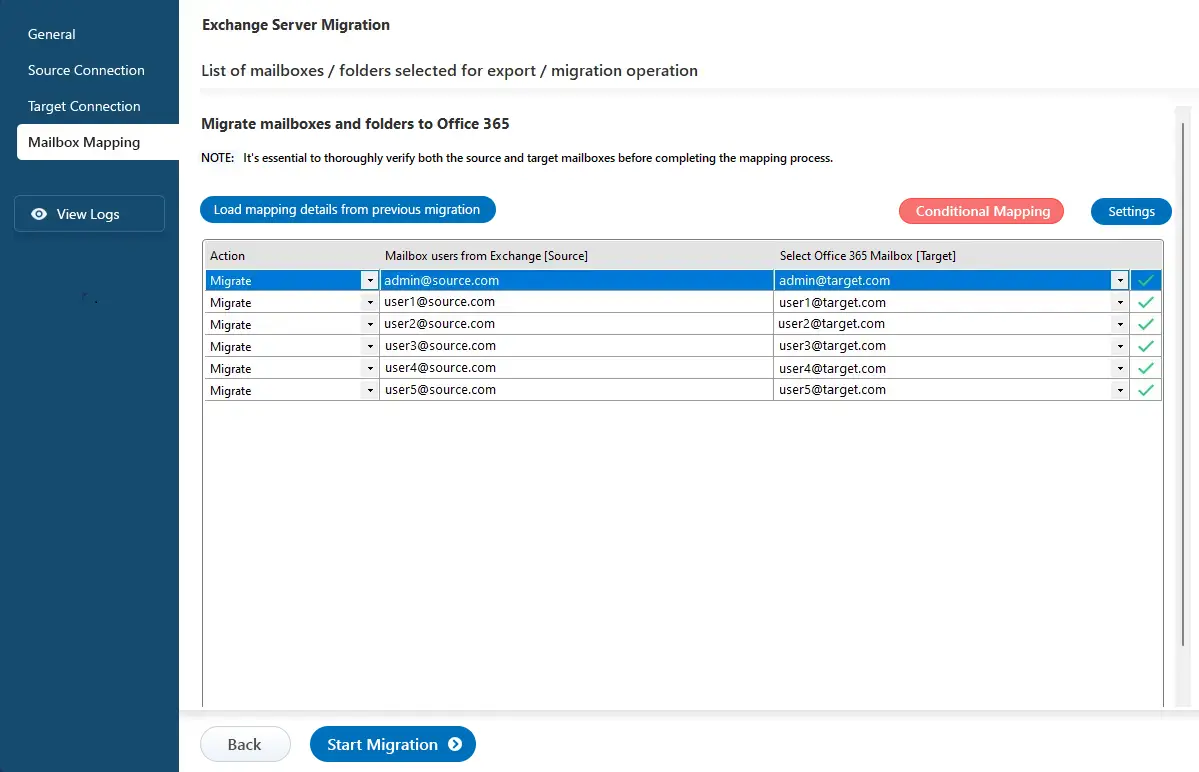
- Choose the required mailbox mapping option.
- EdbMails automatically creates mailboxes on your target Office 365 server and assigns the necessary licenses.
Learn more about the automatic mailbox creation process on the target Office 365 server.
- EdbMails automatically maps mailboxes from the source Hosted Exchange server to the target Office 365 mailboxes. You can also map them manually or use a CSV file for mailbox mapping.
Step 6: Start to Migrate from Hosted Exchange to Office 365
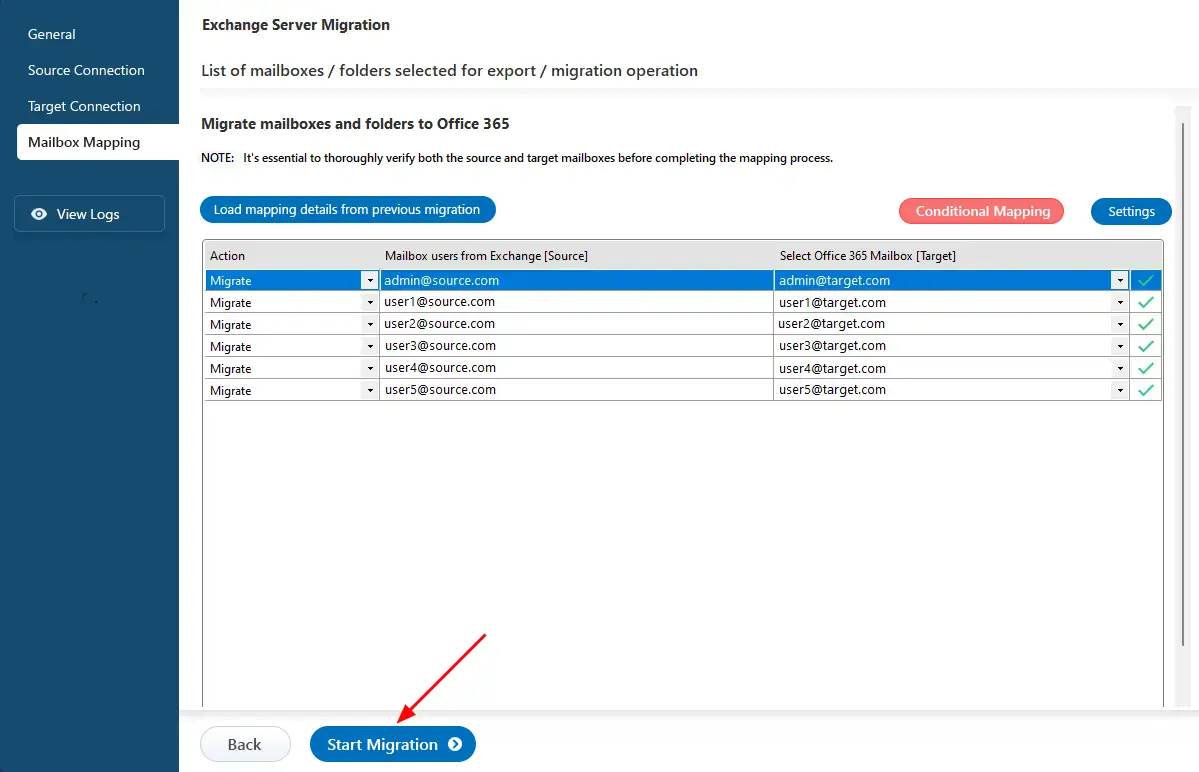
- Click the 'Start Migration’ button to initiate the migration process.
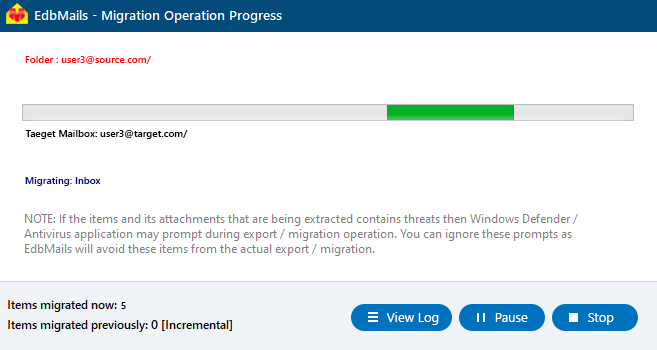
- You can track the migration progress using the progress bar. Once the process is complete, EdbMails will display a confirmation message. Click ‘View Logs’ to review the detailed migration report.
Hosted Exchange to Office 365 post-migration tasks
- Step 1: Update Office 365 MX records in your DNS
Update your MX records in your DNS to start receiving messages on Office 365. This switch ensures smooth email operation with your newly migrated server. Additionally, set up the Autodiscover record for the Outlook connectivity to the migrated mailboxes.
- Step 2: Create Outlook Profiles for the new domain users
If Outlook encounters connectivity hiccups with Office 365, create fresh Outlook profiles for each user in your domain. This action will help troubleshoot and establish proper connections.
- Step 1: Update Office 365 MX records in your DNS
Troubleshooting Guide to Migrate Hosted Exchange to Office 365
For potential solutions to migration errors, refer to the Exchange migration troubleshooting guide. For further information regarding EdbMails Exchange/ Hosted Exchange migration, visit the Frequently Asked Questions.


