- Reseller
- Products Exchange EDB / Email Recovery Tools
- EDB Recovery and MigrationRecover EDB to PST, EDB to Office 365 and Exchange NO Duplicate Migration
- OST Recovery and MigrationRecover OST to PST, OST to Office 365 and Exchange Migration
- PST Recovery and MigrationRecover Outlook PST, PST to Office 365 and Exchange Migration
- MBOX Export and MigrationExport MBOX to PST, MBOX to Office 365 and Exchange Migration
- NSF Export and MigrationExport NSF to PST, NSF to Office 365 and Exchange Migration
- EML to PST ExportEML files export to Outlook PST format
- PST to MSG ExportOutlook PST files export to MSG format
- MSG to PST ExportExport MSG files Outlook PST files
Exchange and Office 365 Migration- Exchange Server MigrationMigrate Exchange 2007, 2010, 2013, 2016, 2019 to Office 365 tenants. Also, migrate between Exchange servers and PST
- Office 365 MigrationMigrate Source Office 365 tenants to Destination Office 365 tenants. Also, migrate to Exchange Server and PST
- IMAP Email Backup & MigrationMigrate all IMAP email servers (Gmail, Zimbra, Zoho, Yahoo etc.), Office 365, Exchange and Backup to Outlook PST
- SharePoint Online MigrationMigrate documents, files and folders from SharePoint sites
- OneDrive for Business MigrationMigrate documents, files and folders from OneDrive
- Microsoft Teams MigrationMigrate Teams, documents, files and folders etc.
Exchange and Office 365 Backup- Office 365 BackupIncremental, Granular, Encrypted and Compressed Office 365 Mailboxes Backup
- Exchange Server BackupIncremental, Granular, Encrypted and Compressed Exchange Mailboxes Backup
- SharePoint, OneDrive & Teams BackupBackup Online site collections, Team sites, Office 365 groups, all documents etc.
- Duplicate Remover - Office 365, Exchange, IMAP & Outlook Remove duplicate emails, calendars, contacts, journal etc. from Office 365, Exchange, IMAP, Outlook, Gmail, Zimbra, Zoho Mail etc.
- More Products
- Features
- Video Tutorials
- Free Tools
- FAQ
- Knowledge Base
Create Public Folder in Office 365 (Microsoft 365)
Steps to create Public Folder in Office 365
Note: The instructions and visual references provided below are specifically tailored for the new Exchange admin center. If you are using the classic Exchange admin center or the Exchange Control Panel (ECP), there might be some variations in the process. However, the overall principles remain consistent regardless of the interface.
- Log in to the Exchange admin center using your Office 365 global admin account.
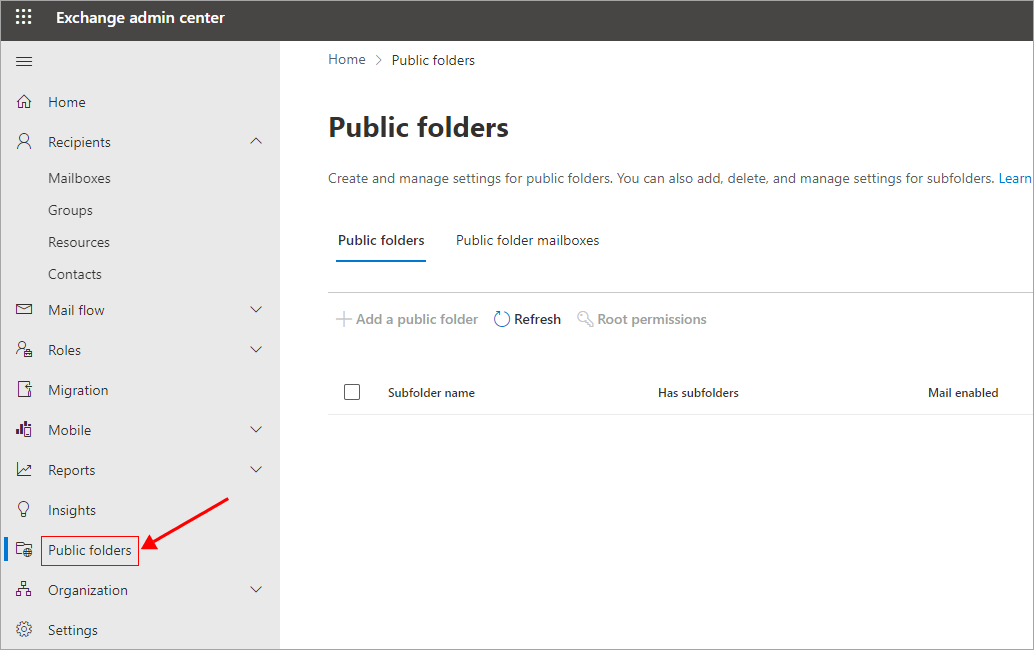
- Select the ‘Public folders’ tab from the left panel
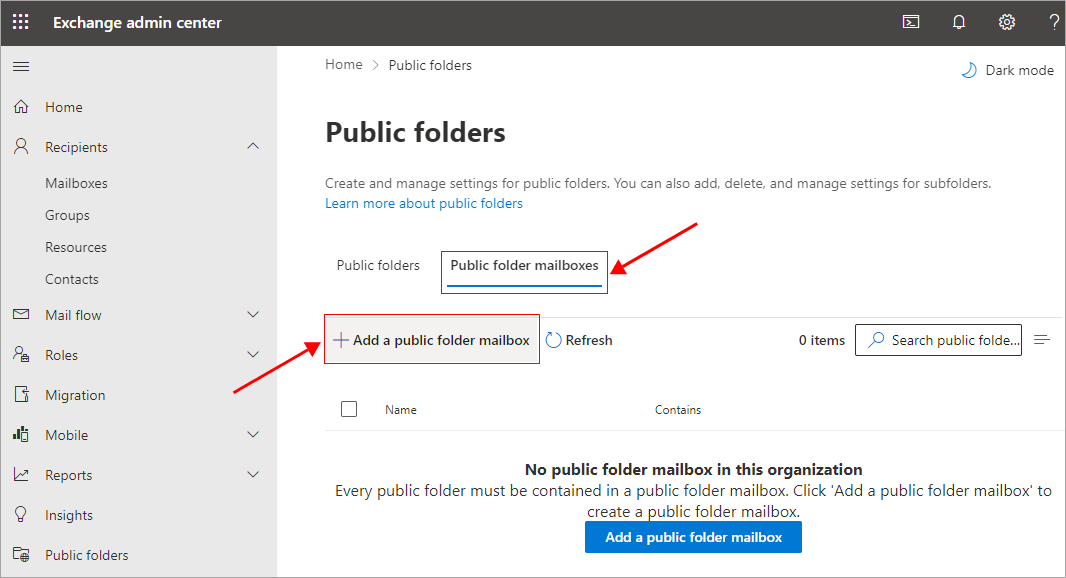
- Select the 'Public folder mailboxes' tab and click the '+ Add a public folder mailbox' button.
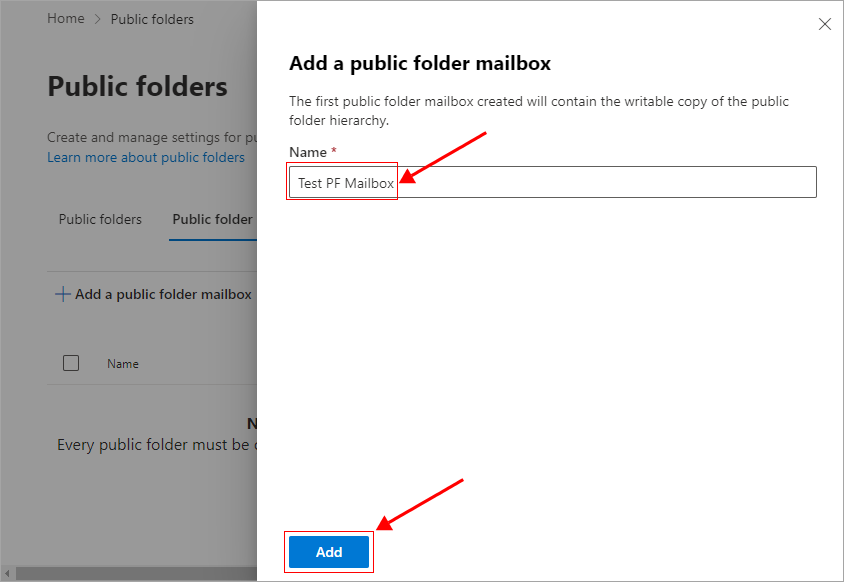
- Give a name to the Public folder mailbox and click the ‘Add’ button.
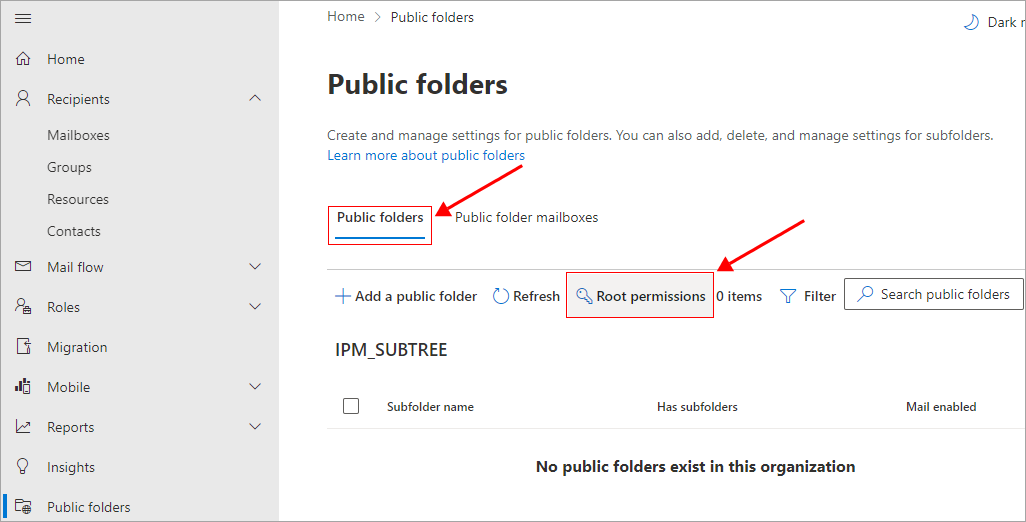
- Close the window and under the Public folders tab click 'Root permissions'.
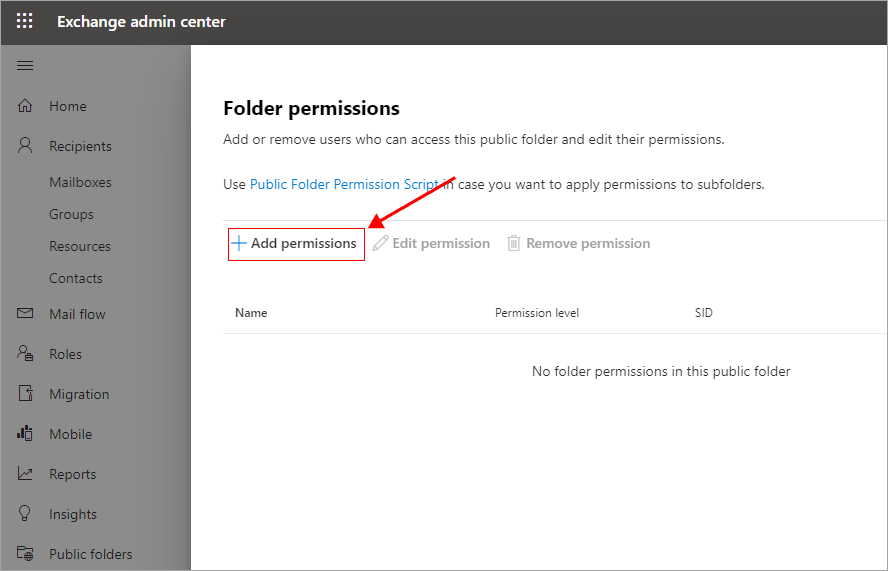
- Click the ‘+ Add permissions’ button.
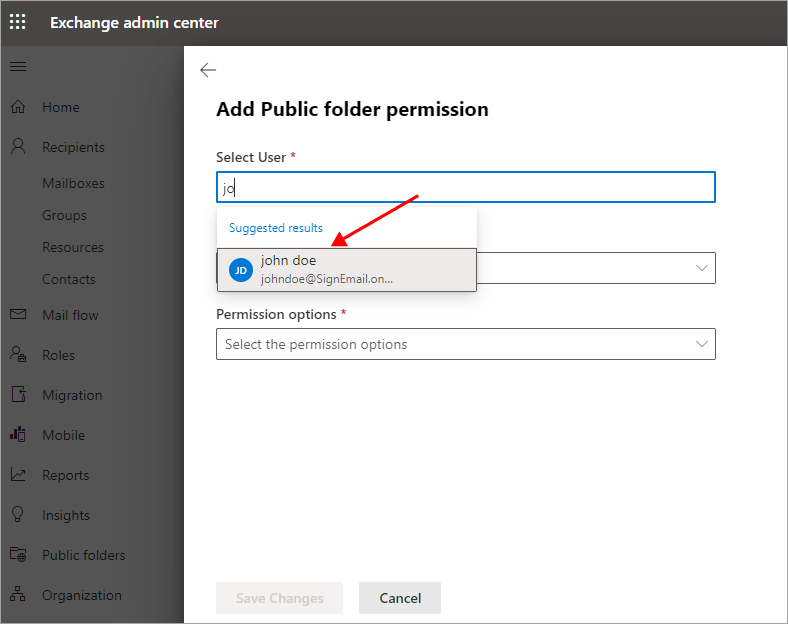
- Search for the administrator account and select
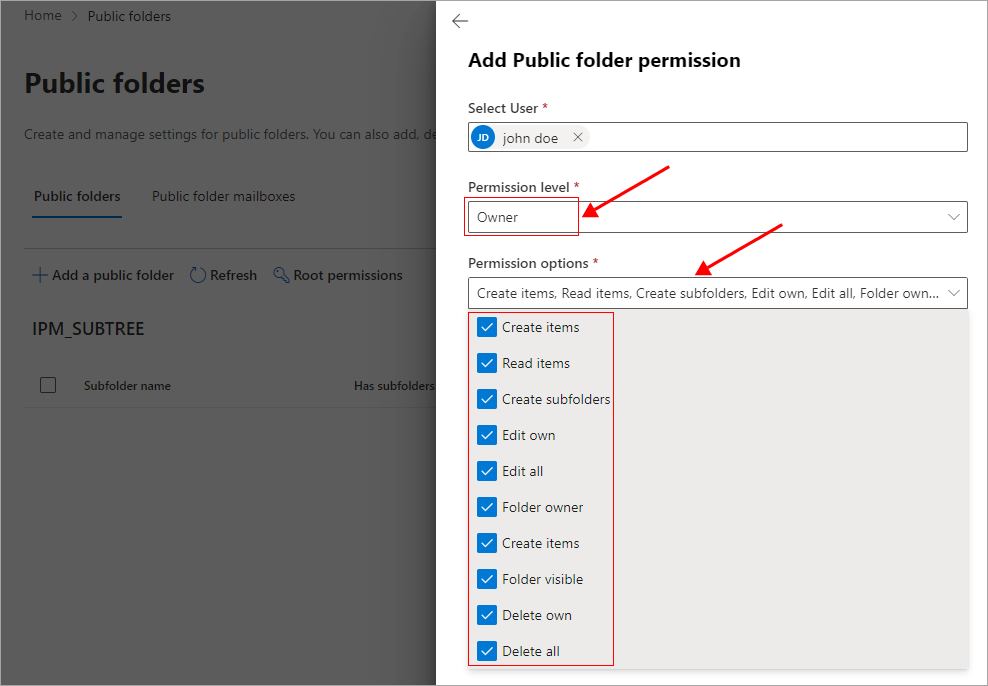
- Set the permission level as ‘Owner’ and set the required permissions
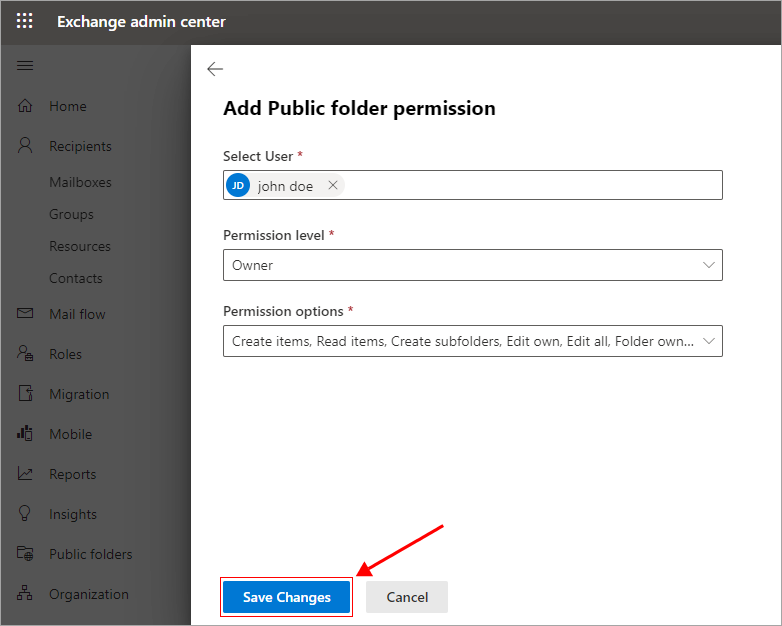
- Save the changes
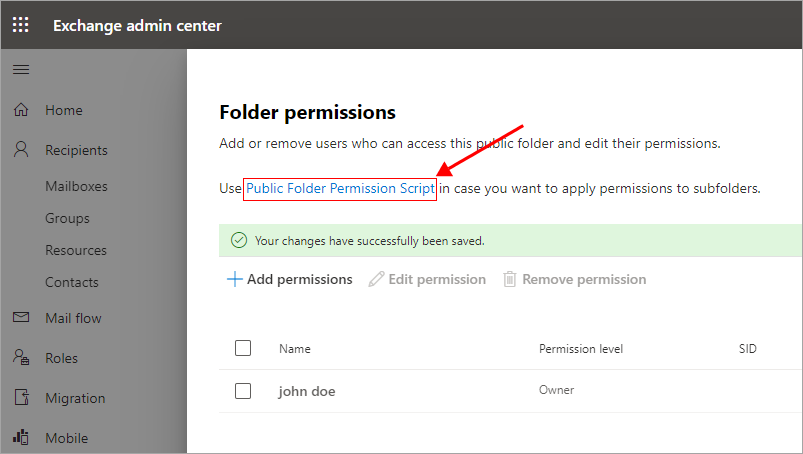
- If you want to set the permissions to subfolders, click on the link as shown in the screenshot below. Download the script and then execute it to apply the desired modifications across the entire folder hierarchy.
Refer to this Microsoft article to learn more about managing your public folders.
See Steps to migrate Office 365 Public folders using EdbMails
EdbMails Demo / Trial Version
Step 1. Download and install EdbMails
Step 2. Click the 'Start Your Free Trial' button

Hi, May I help you?
Hide Chat Now
