Step By Step Guide to Backup Office 365 Mailboxes
Protecting Office 365 mailboxes through regular backups is essential for ensuring data security, compliance, and availability. While Office 365 includes basic retention features, it does not offer a comprehensive backup solution. This can leave organizations vulnerable to data loss caused by accidental deletions, corruption, or regulatory issues. Implementing a reliable Office 365 Backup strategy is critical to safeguard business data and ensure smooth recovery when needed.
EdbMails Office 365 Backup Tool offers a secure and efficient way to back up your Office 365 data—including user mailboxes, archive mailboxes, and public folders. Your backups are protected with military-grade AES 256-bit encryption, ensuring they remain safe and inaccessible to unauthorized users. You can choose to use the default encryption set by the application or enhance security by setting your own private encryption key for an added layer of protection.
One of the standout features of EdbMails is its incremental backup capability. After the initial full backup, only newly added or modified items are backed up. This reduces backup time, minimizes storage usage, and ensures your data stays consistently up to date.
In this step-by-step guide, we’ll walk you through how to perform a backup of Office 365 mailboxes using EdbMails. With strong encryption and intelligent backup mechanisms, EdbMails provides a reliable and secure solution for protecting your Office 365 mailbox data.
Prerequisites to backup Office 365
- Ensure your computer or external drive has sufficient free storage space to store the Office 365 backup data.
- You must have a global admin account with a mailbox for automatic registration of the EdbMails application in Microsoft Entra ID (Azure Active Directory).
- For manual registration, you can use either a global admin account or any user account with full access permissions to the mailboxes.
- A stable internet connection is required throughout the backup process.
- The Office 365 tenant should be active and accessible.
Steps to perform Office 365 Backup using EdbMails
Step 1: Download and install EdbMails Office 365 backup software
- Download and install the EdbMails application on any computer with Windows OS.
- Enter your email address and password to login or if you haven’t registered an account click on ‘Start Your Free Trial’.
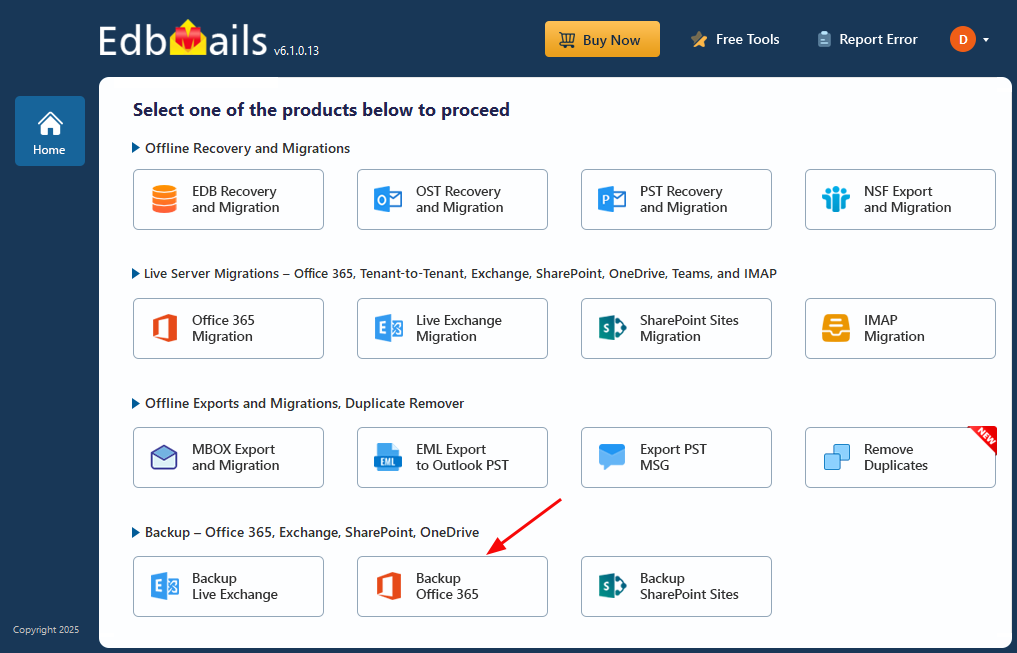
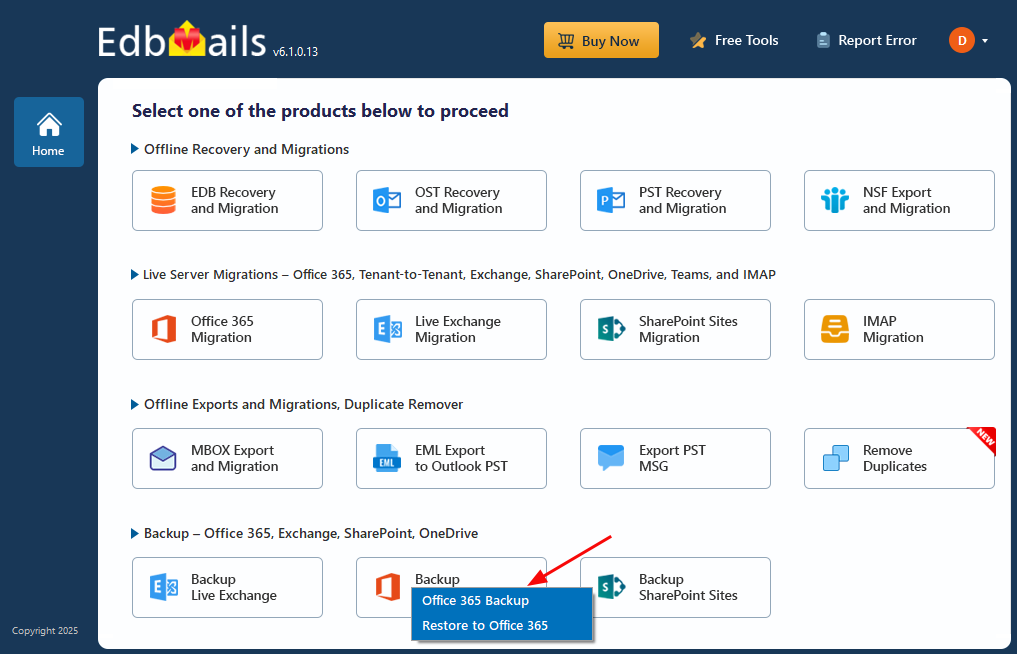
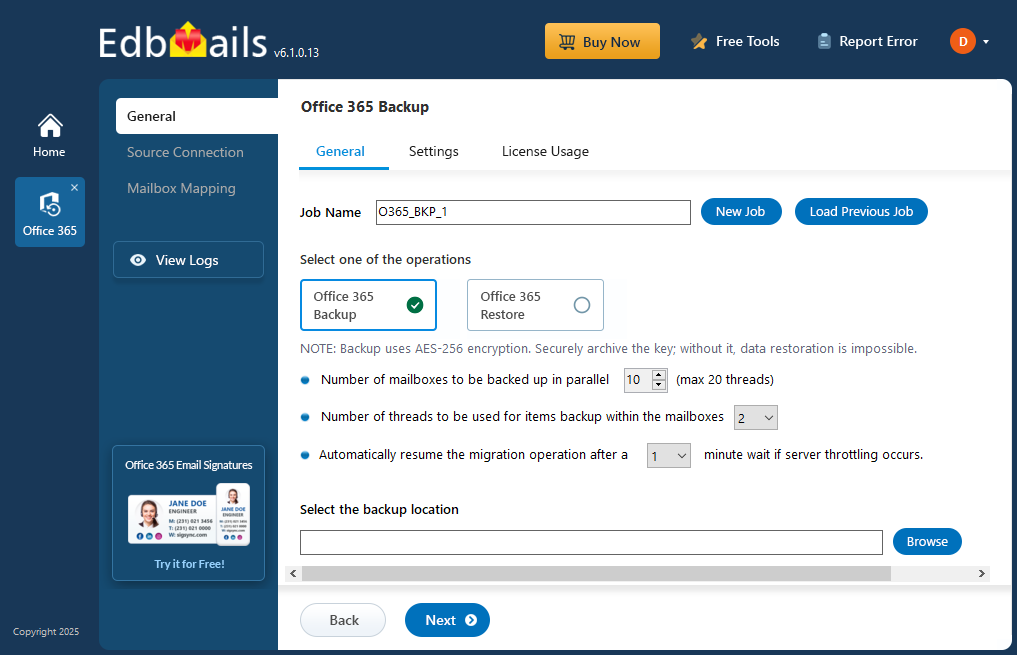
- Select ‘Backup Office 365’.
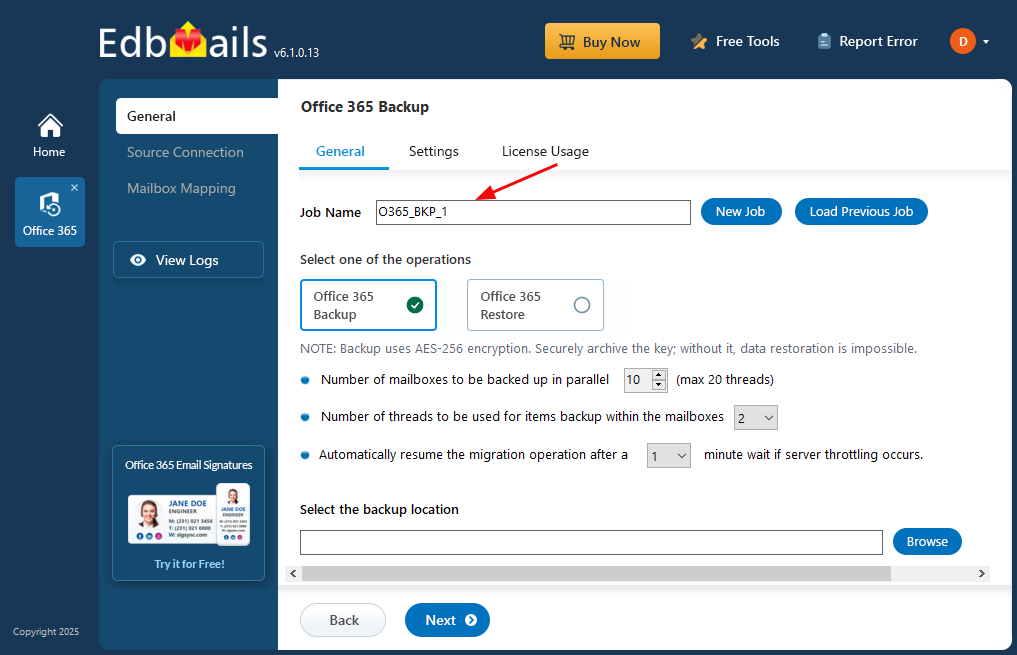
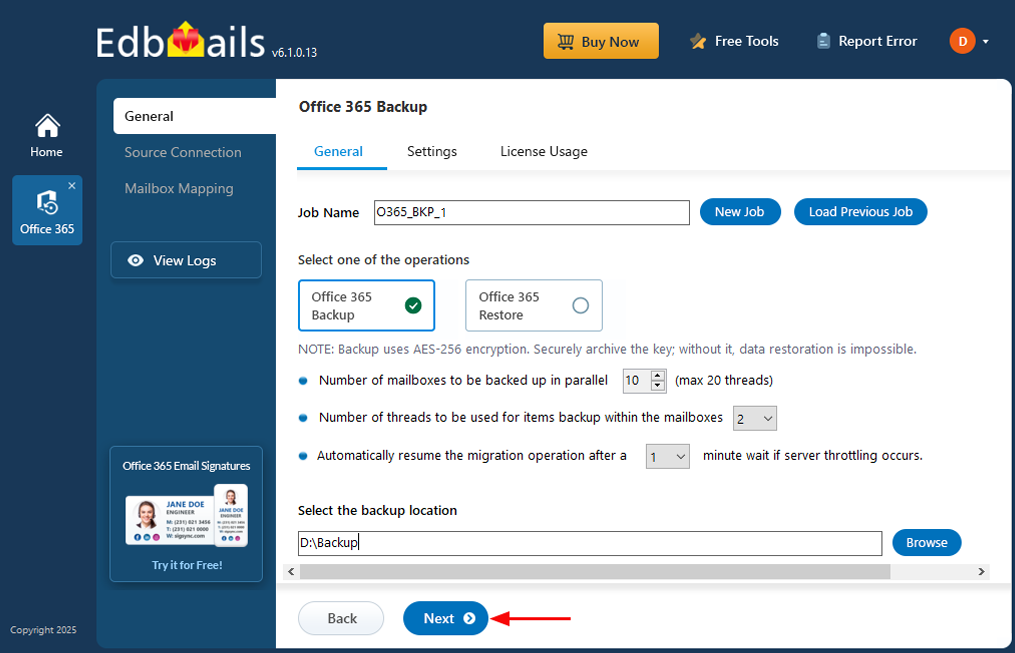
- Select the operation as ‘Office 365 Backup’.
- Use the suggested job name or click ‘New Job’ to create your own.
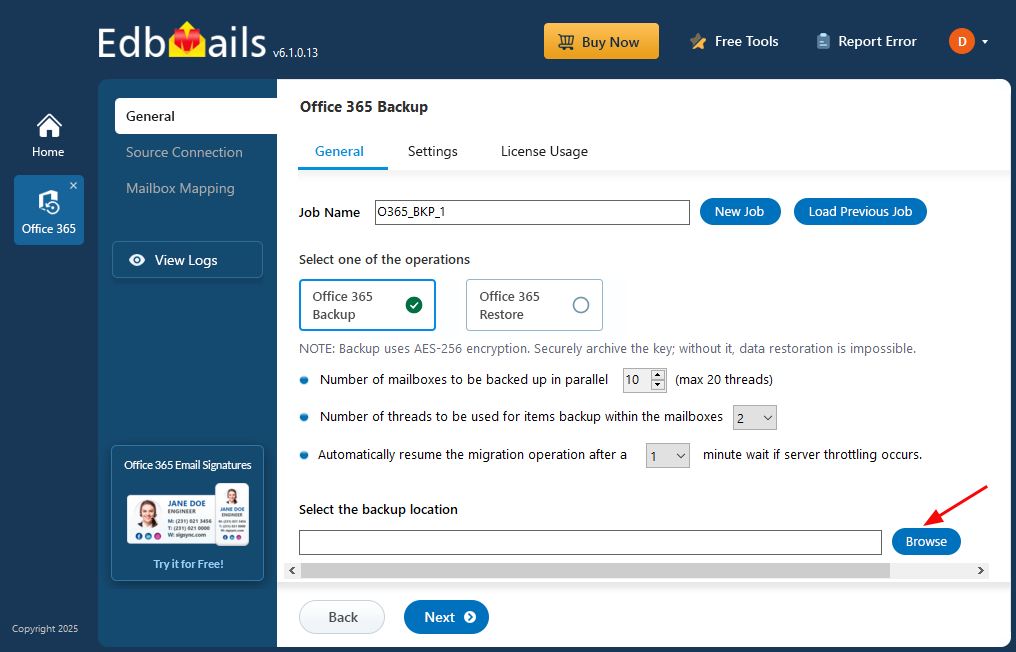
- Click the ‘Browse’ button.
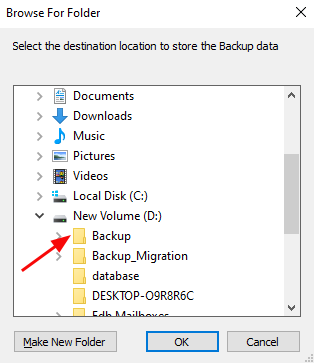
- Select the location to store the backup data.
- Click ‘Next’ to continue.
Step 2: Connect to the source Office 365 server
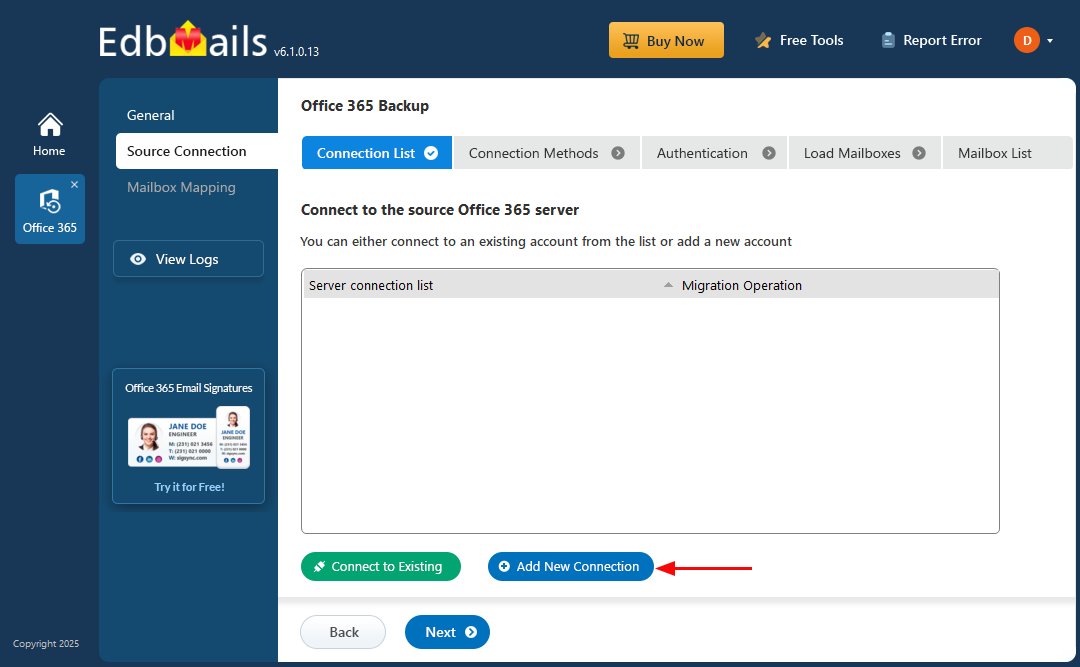
- Click ‘Add New Connection’ to set up a new connection to the source Office 365 server. If you already have a connection, select it from the list and click ‘Connect to Existing’ to continue.
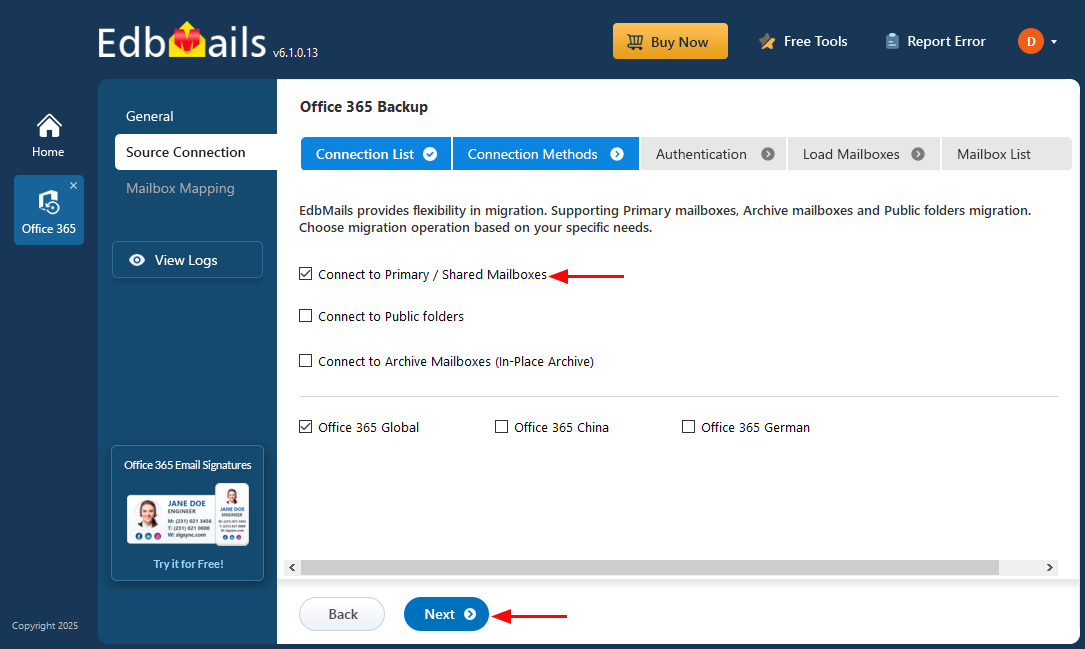
- Choose the required connection options and click the ‘Next’ button.
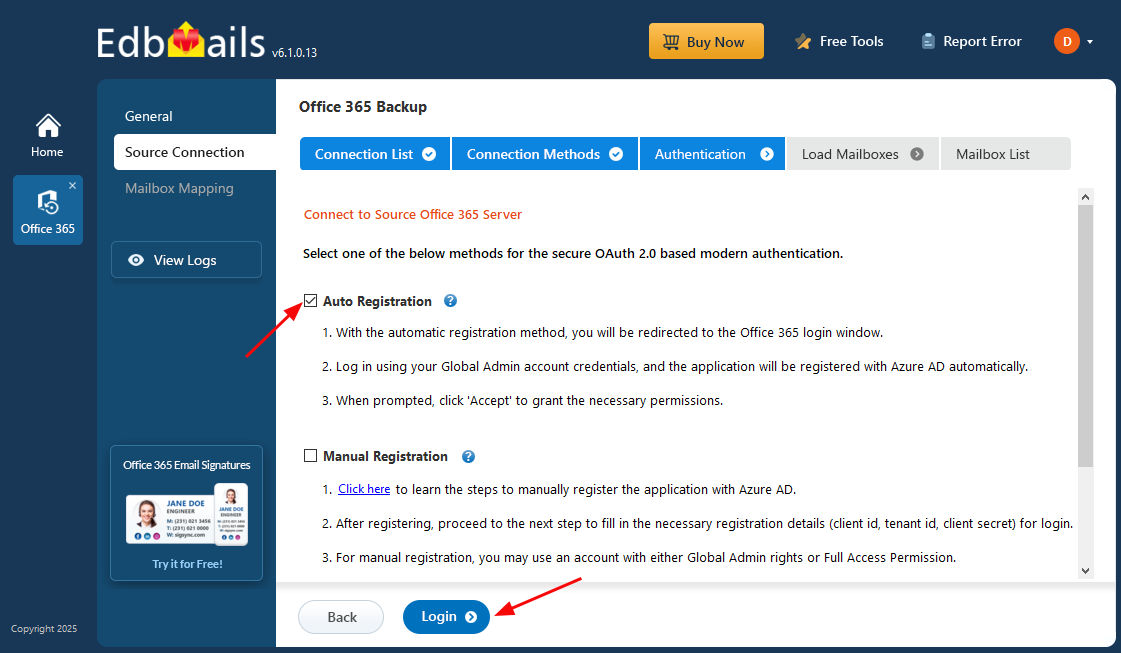
- Choose one of the authentication methods, then click ‘Login’ to proceed.
Connect to Office 365 server using secure modern authentication
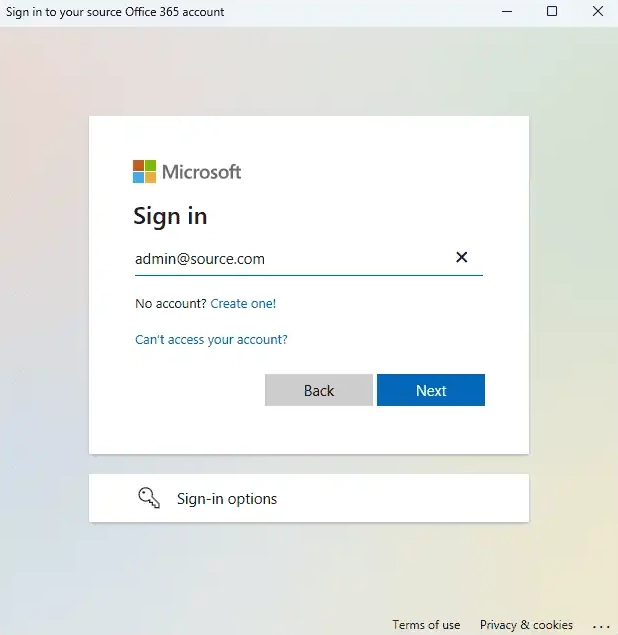
- Authenticate on Microsoft sign-in page.
- Once you're logged into the source Office 365 server, choose how to load the mailboxes. EdbMails loads mailboxes automatically, but due to Microsoft API limitations, it may display only up to 100. If you have more than 100 mailboxes, select the ‘Load Mailboxes using .CSV file’ option to load all mailboxes without restriction.
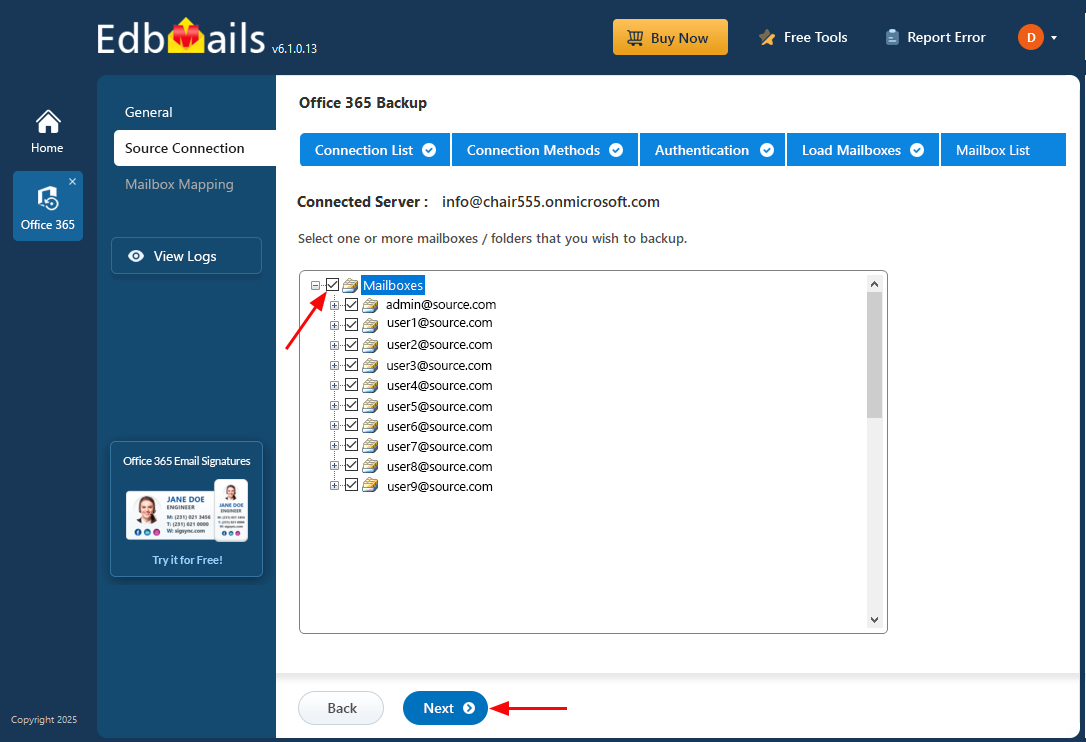
- Choose the mailboxes you wish to migrate from the source Office 365 server, then click ‘Next’ to continue.
Step 3: Start Office 365 Backup operation
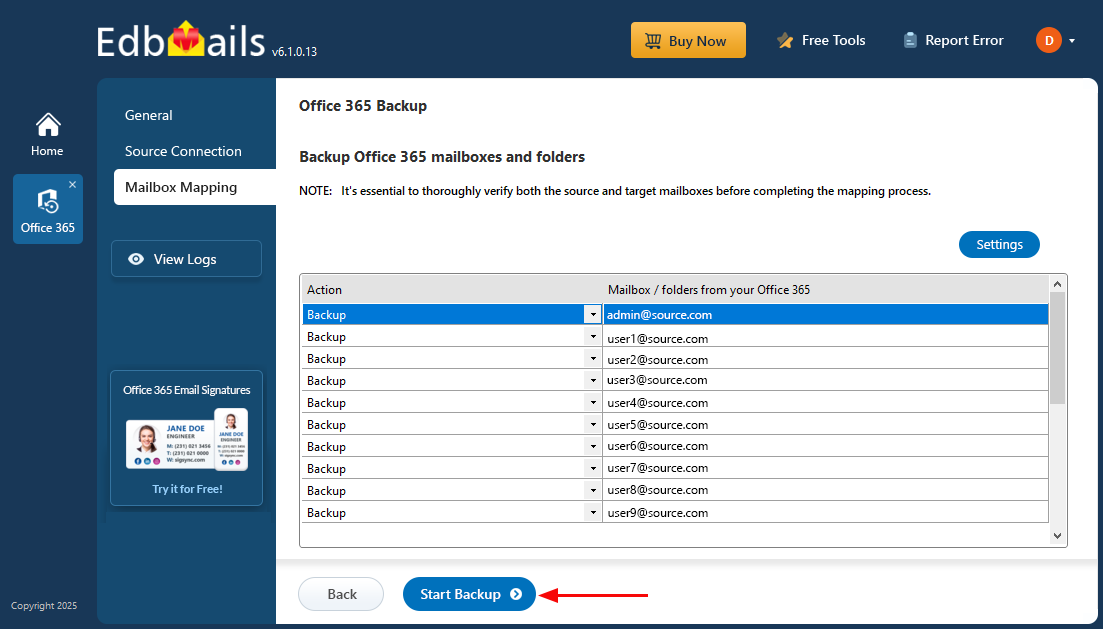
- Verify the mailboxes you have selected for backup and click the ‘Start Backup’ button
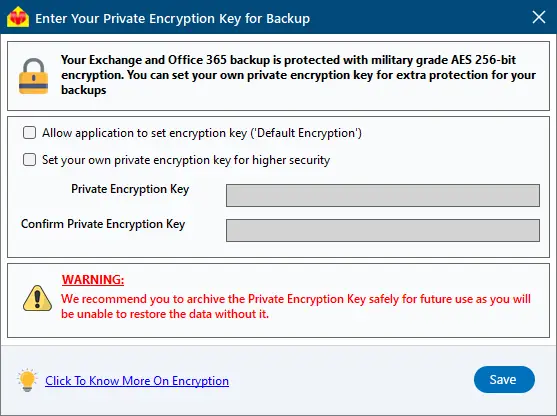
- Select the option to set the encryption key. You can either allow the application to use the default encryption or set your own private encryption key for enhanced security.
- If you choose to set a private encryption key, make sure to save it somewhere safe—you’ll need it whenever you back up or restore your data.
- Click the ‘Save’ button
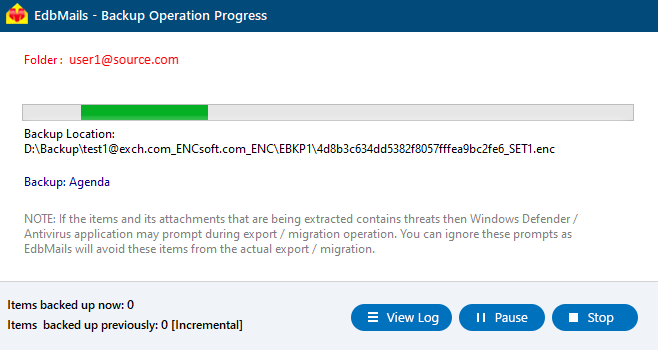
- The backup process has now started. You can track its progress using the progress bar. Once the operation is complete, EdbMails will display a backup completion message. Click the ‘View Logs’ button to see the detailed backup report.


