Step By Step Guide to Restore Exchange Mailbox Data
EdbMails Exchange Server Backup Tool allows you to restore Exchange Server data from encrypted backup files. These backups are securely stored using AES 256-bit encryption, ensuring that your data remains safe and protected while stored on your local drive.
The software also supports incremental restore, meaning you can restore only the changes made since the last backup. This feature helps save time and bandwidth, ensuring that the restore process is both efficient and targeted, without needing to restore the entire dataset.
EdbMails ensures that the restored data retains its original structure, permissions, and metadata. Whether you're restoring a full mailbox, specific folders, or individual items, you can be confident that the process will be secure and precise.
In this step-by-step guide, you'll learn how to restore Exchange Server data from these encrypted backups, ensuring a smooth and reliable restore operation every time.
Prerequisites to restore Exchange server mailboxes:
Before you begin restoring mailboxes to your Exchange Server using EdbMails, ensure the following conditions are met to avoid interruptions and ensure a smooth restore process:
- Both the Exchange Server and the Windows operating system should be updated with the latest security patches and cumulative updates to avoid compatibility issues during the restore.
- The system where EdbMails is installed must have proper network access and should not be blocked by firewall rules when connecting to the Exchange Server.
- If you're using a Global Admin account to connect to the Exchange Server, impersonation rights must be configured to allow access to user mailboxes during the restore.
- Before starting the restore process, make sure that the necessary mailboxes are created on the target server. You have the option to let EdbMails automatically create these mailboxes on the destination Exchange server, simplifying the process. However, if you prefer to create them manually, you can follow the instructions linked below.
- To speed up the restore process, it’s helpful to adjust the EWS throttling settings on your target Exchange server.
Steps to Create Custom EWS Throttling Policies on Exchange Server
- To ensure that large emails are properly restored, you may need to increase the message size limit on the target server.
Step to restore Exchange mailboxes using EdbMails
Step 1: Download and install EdbMails Application
- Download and install the EdbMails application on any Windows computer that can connect to the target Exchange server.
- Login to EdbMails application with your registered email ID and password, or click 'Start Your Free Trial' to explore the features without signing up.
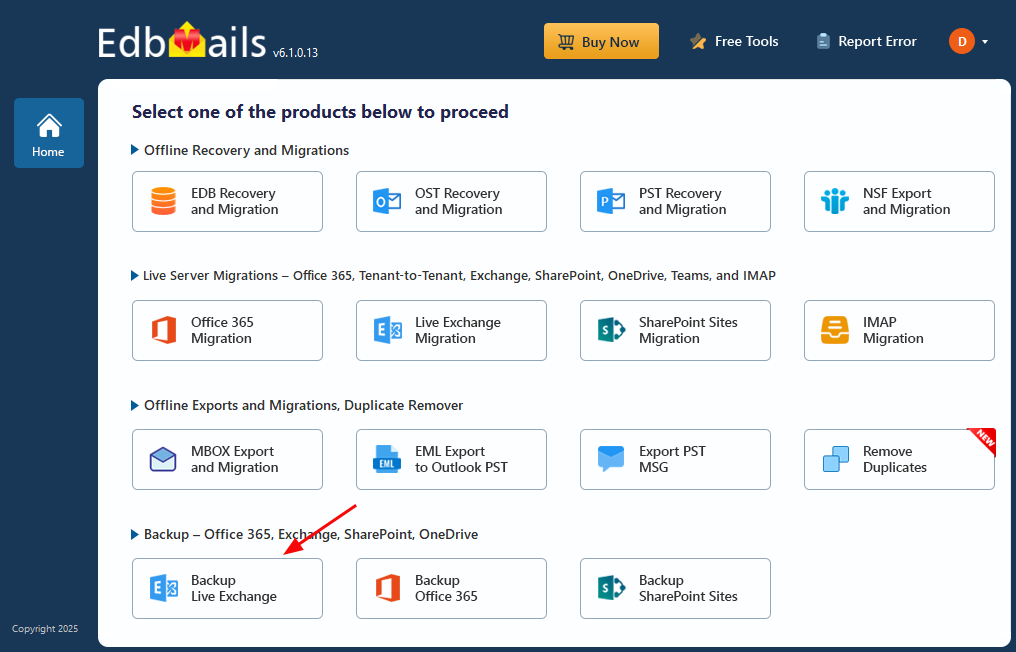
- From the list of the product, select ‘Backup Live Exchange’.
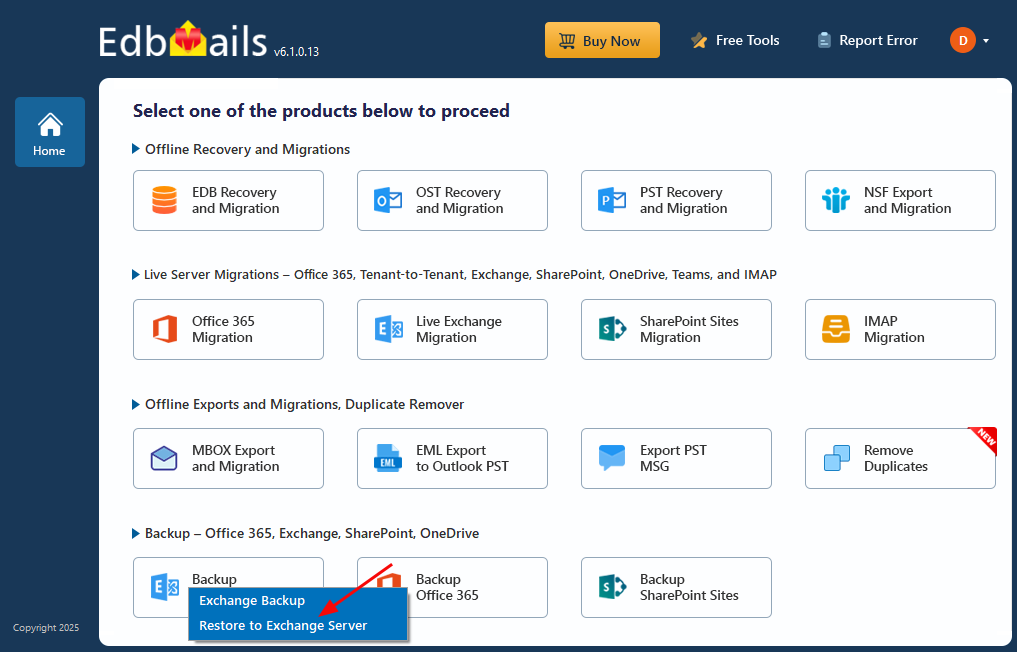
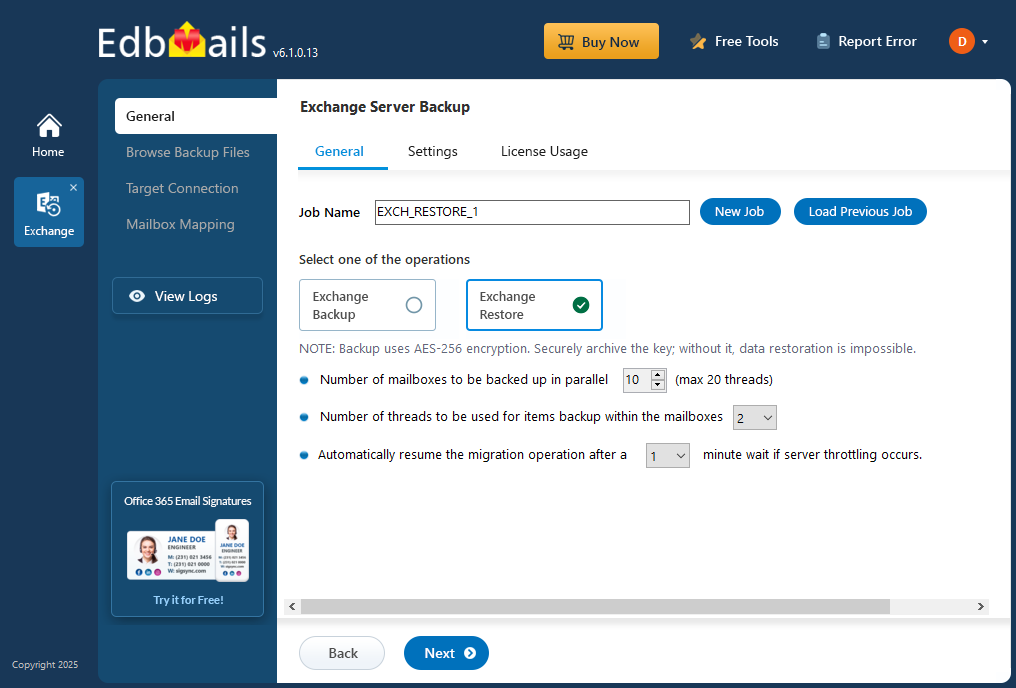
- Select ‘Restore to Exchange Server’.
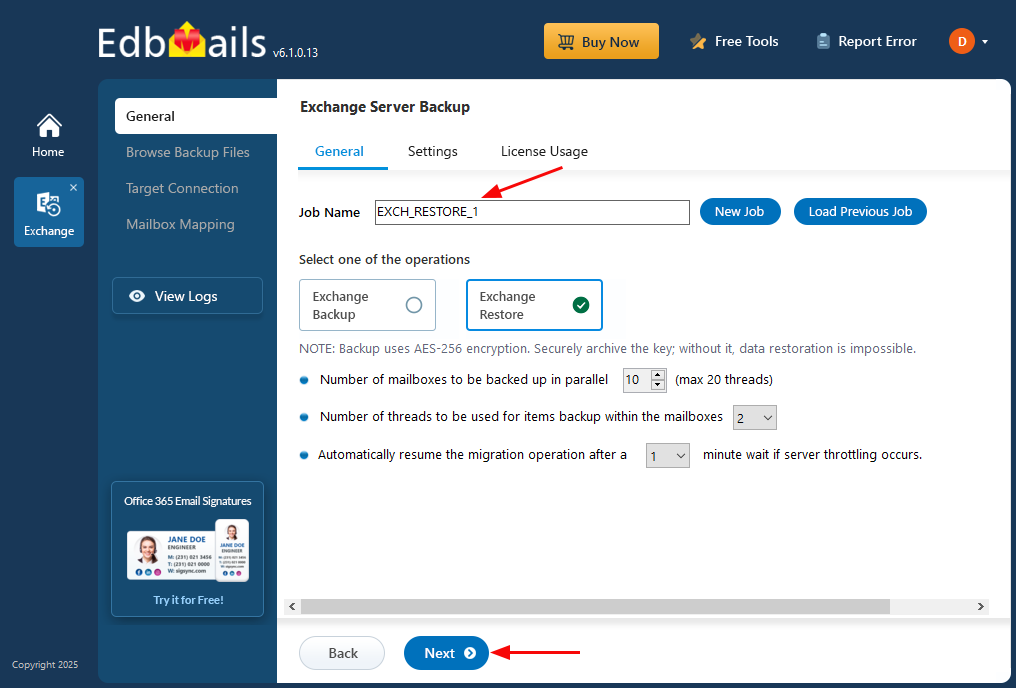
- You can either use the default job name or click ‘New Job’ to change and click on 'Next'.
Step 2: Select the encrypted backup files
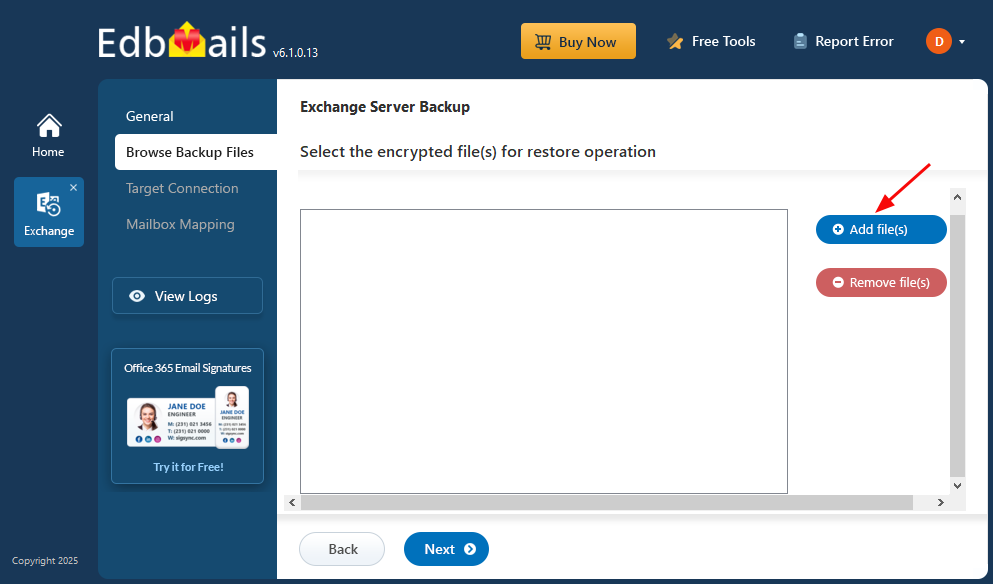
- Click ‘Add file(s)’.
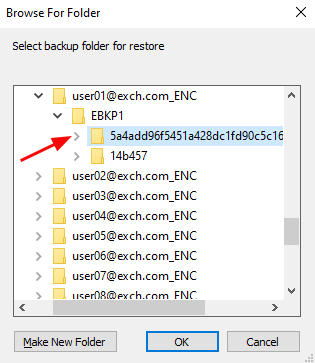
- Select the encrypted backup files from your computer and click ‘Next’.
Step 3: Connect to target Exchange server
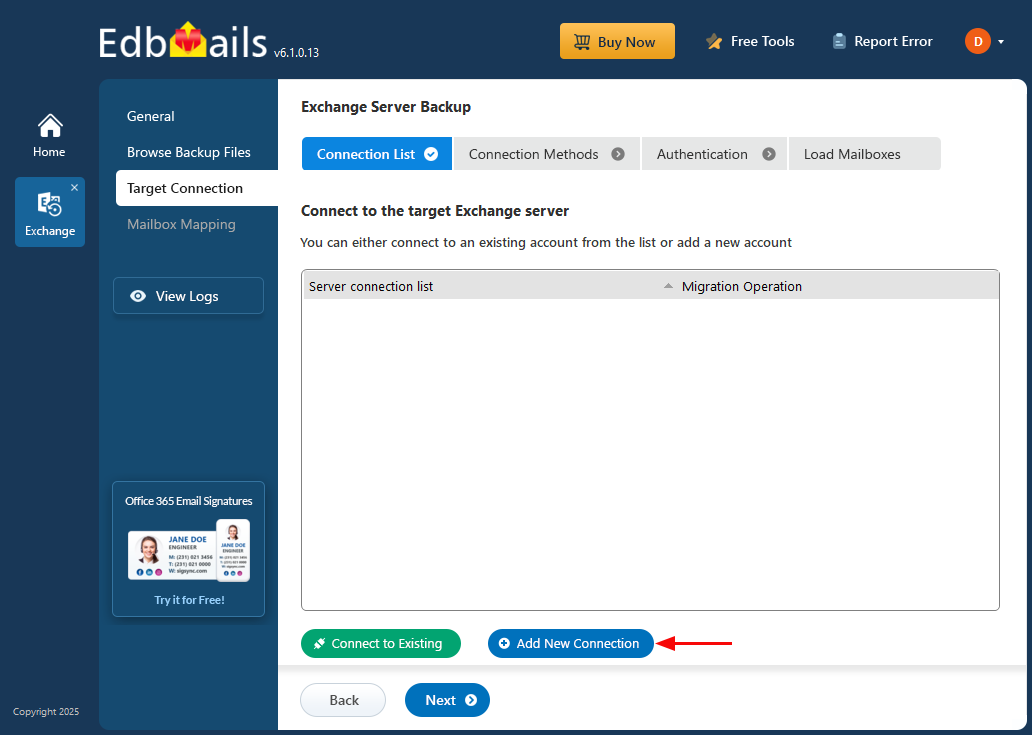
- Click ‘Add New Connection’ to set up a fresh connection to your Exchange server. If you’ve already created one, just select it from the list and click ‘Connect to Existing’ to continue.
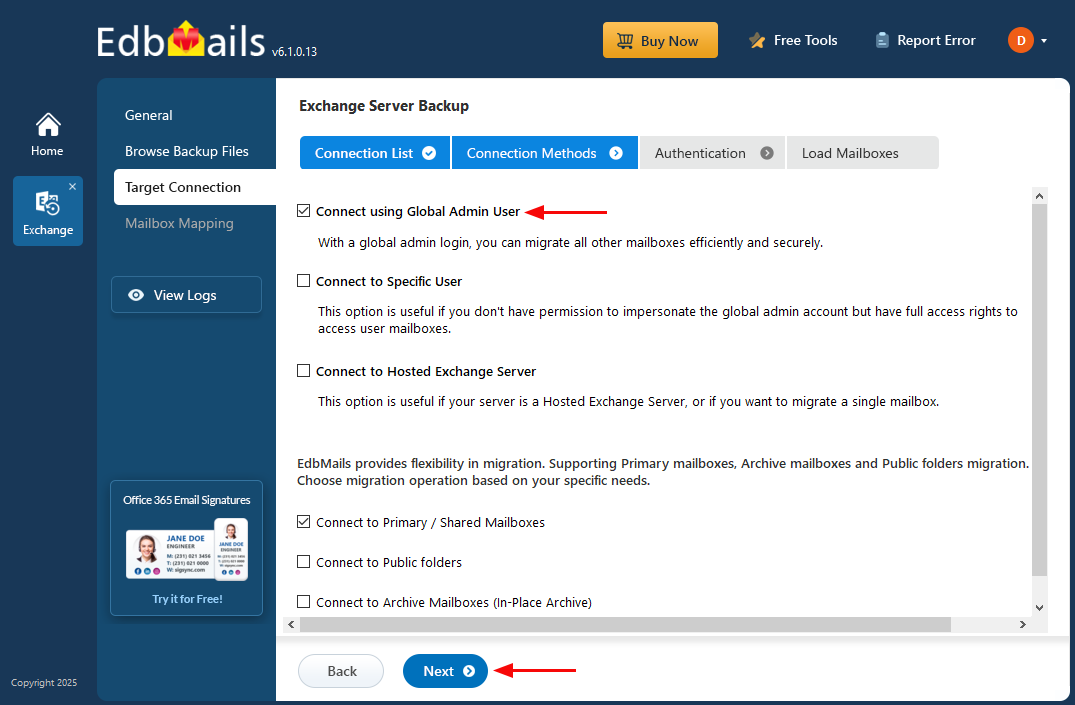
- Select the required connection options then click ‘Next’ to proceed.
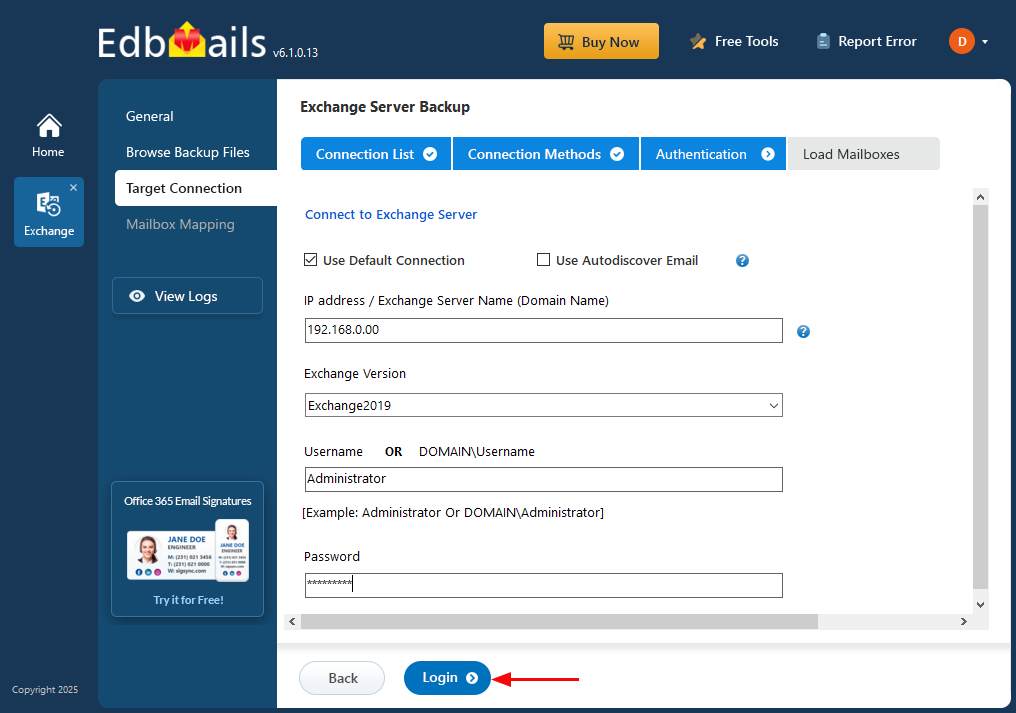
- Enter the details of the target Exchange server, then click ‘Login’.
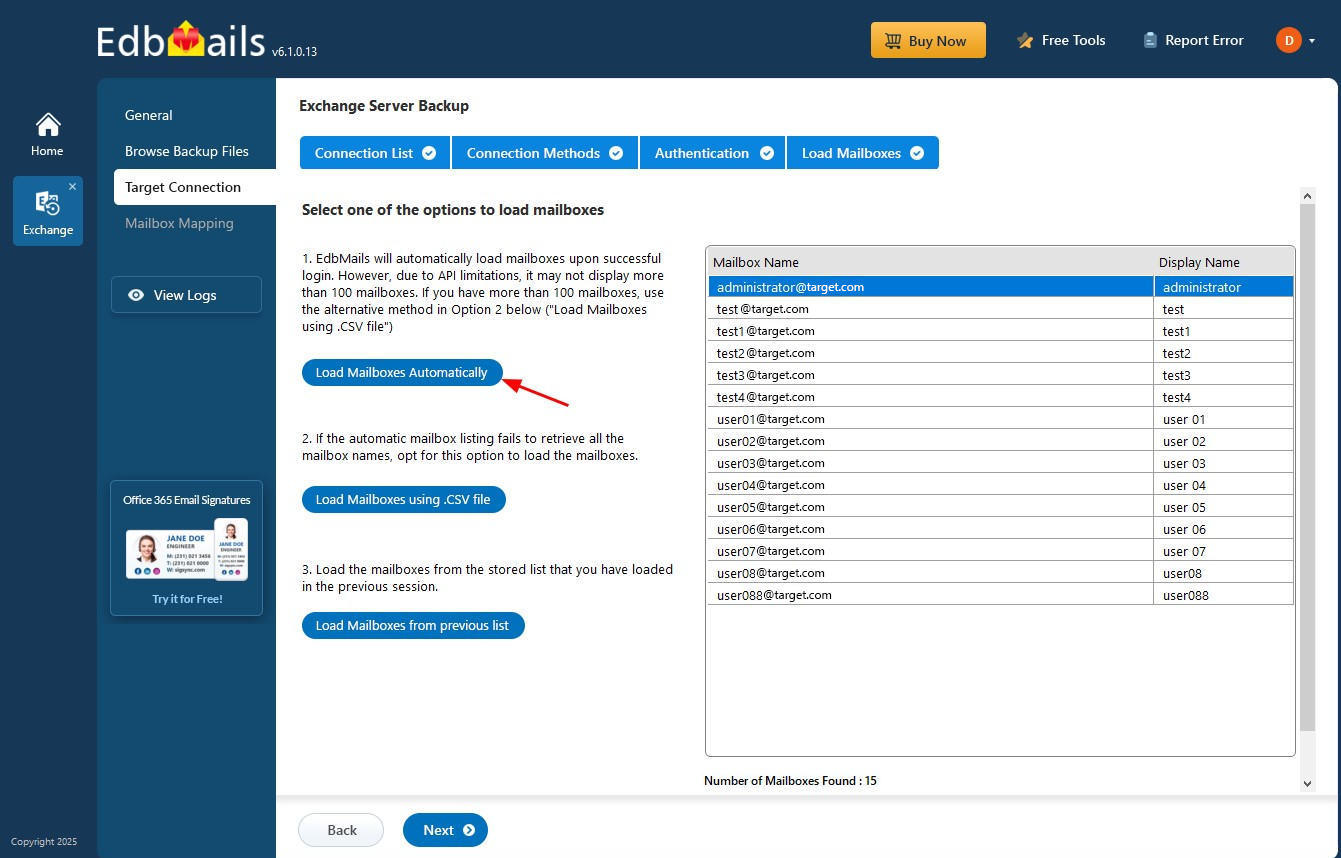
- Choose a method to load the mailboxes and click ‘Next’. You can also import mailboxes using a CSV file.
Step 4: Choose target mailboxes
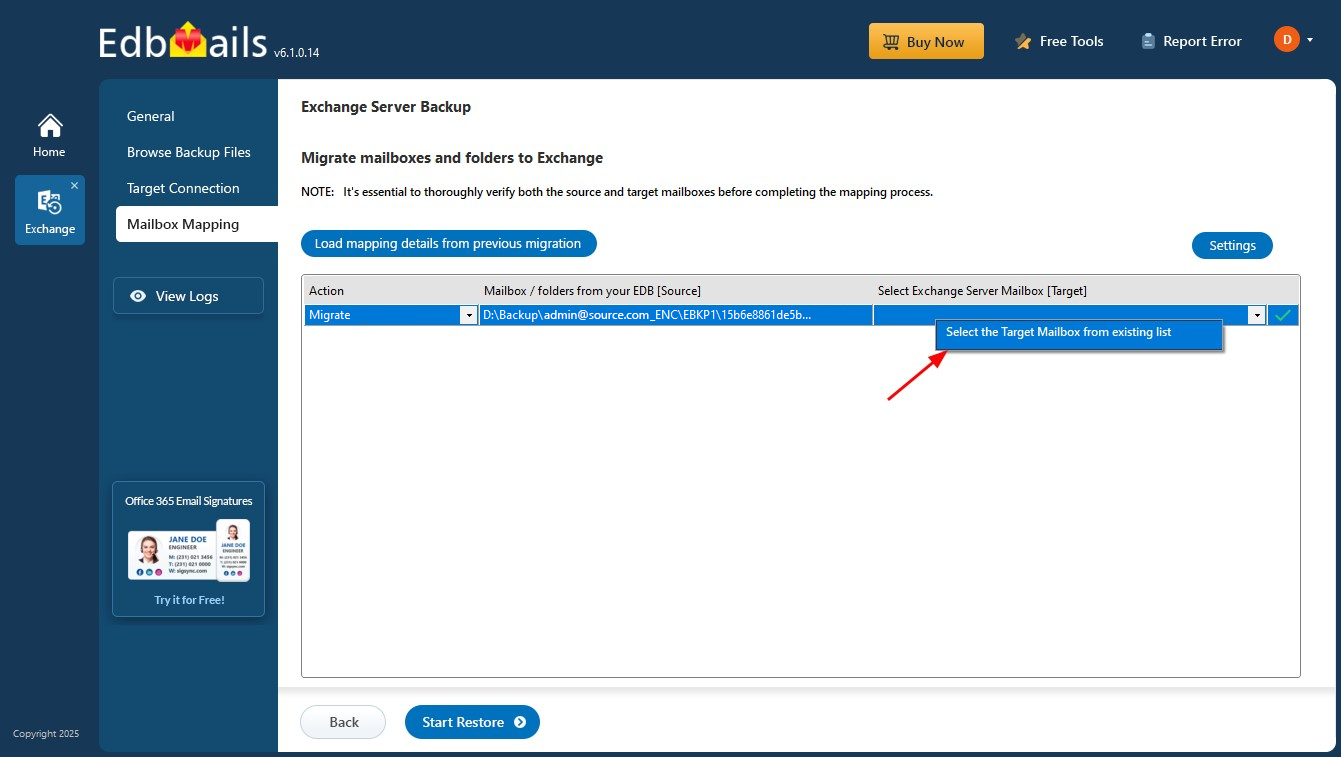
- Click on the target mailbox field and select the Exchange mailboxes to which the backup data should be restored.
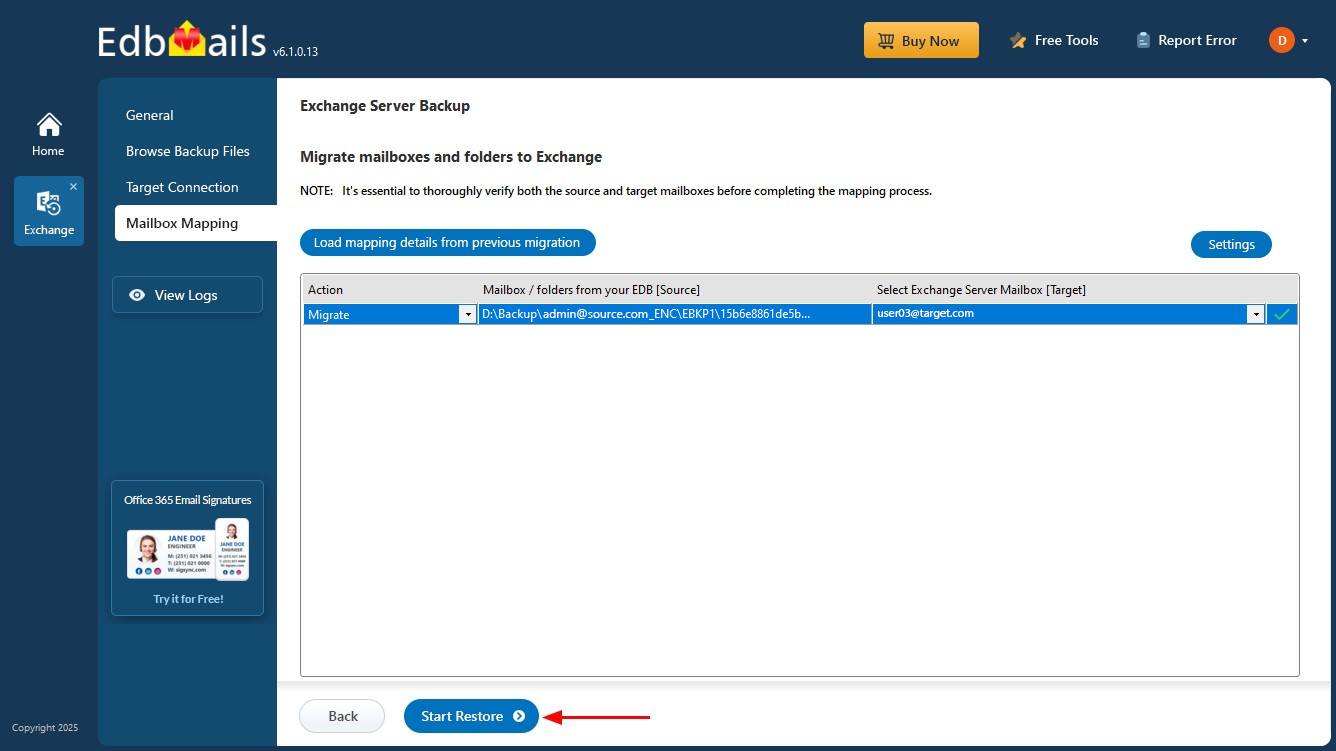
- Verify the selected mailboxes and confirm that the 'Action' is set to 'Migrate'. Then, click 'Start Restore' to initiate the process.
- The restore process has started, and you can monitor its progress in the progress bar. Once it's complete, a confirmation message will appear. Click ‘View Logs’ to see the full details of the restore operation.


