Step by Step Guide to Restore Office 365 Mailboxes
Restoring Office 365 mailboxes plays a crucial role in ensuring uninterrupted access to important communication data and meeting regulatory or organizational requirements. Mailbox restoration may be necessary due to accidental deletions, data corruption, or during tenant-to-tenant transitions. A reliable restore solution helps organizations maintain data integrity and streamline mailbox management when changes or issues arise.
EdbMails Office 365 Backup Tool provides a secure and efficient method to back up and restore Office 365 mailboxes. The tool supports AES-256-bit encryption, ensuring that your backup files remain safe and compliant with data security standards. Whether restoring to the original mailbox or a different Office 365 account, EdbMails maintains folder structures, permissions, and metadata throughout the process.

With support for both complete and item-level mailbox restoration, EdbMails allows you to selectively restore emails, contacts, calendars, and more. This flexibility helps organizations restore exactly what is needed without affecting existing data, making it ideal for planned updates or addressing specific mailbox issues.
The step-by-step instructions that follow will guide you through using EdbMails to perform a secure and organized Office 365 mailbox restoration. From selecting the encrypted backup to mapping mailboxes and executing the restore, the tool simplifies the process while offering full control and transparency
Prerequisites to restore Office 365
Steps to restore Office 365 mailboxes using EdbMails
Step 1: Download and install EdbMails Application
- Download and install the EdbMails application on your computer.

- Enter your email address and password to log in. If you haven't registered yet, click 'Start Your Free Trial' to explore the features.

- Select ‘Backup Office 365’.

- Select the operation as ‘Restore to Office 365’.

- You can either use the default job name or click ‘New Job’ to change and click on ‘Next’.

- Download and install the EdbMails application on your computer.
Step 2: Select the backup files for restoration
- Click ‘Add file(s)’.

- Select the encrypted backup file from your local drive or network location, then click ‘Next’ to continue.

- Click ‘Add file(s)’.
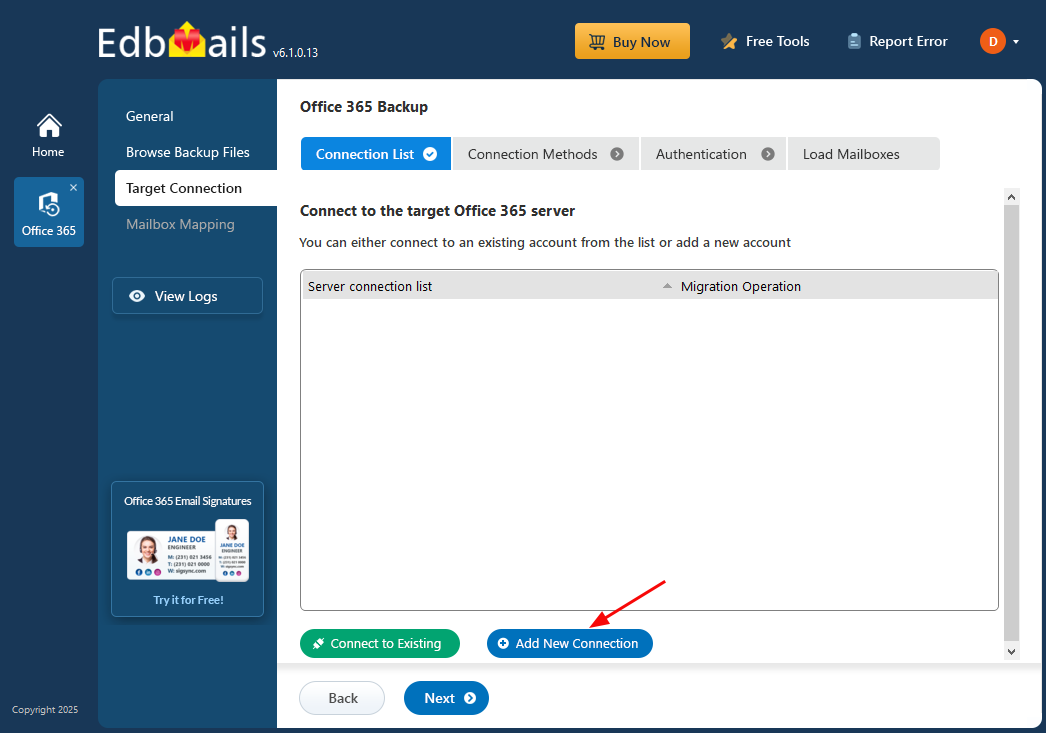
Step 3: Connect to the target Office 365 server
- Click ‘Add New Connection’ to set up a new connection to the Office 365 server. If you’ve already configured one, select it from the list and click ‘Connect to Existing’ to proceed.
- Choose the required connection options and click the ‘Next’ button.

- Choose one of the authentication methods, then click ‘Login’ to proceed.

- Authenticate on Microsoft sign-in page.

- Now, select your preferred method for loading mailboxes. EdbMails automatically displays the mailboxes, but due to Microsoft API limitations, only up to 100 mailboxes may be shown. To load more than 100, use the Load Mailboxes using .CSV file option to import the complete list without restriction.

- Click ‘Add New Connection’ to set up a new connection to the Office 365 server. If you’ve already configured one, select it from the list and click ‘Connect to Existing’ to proceed.
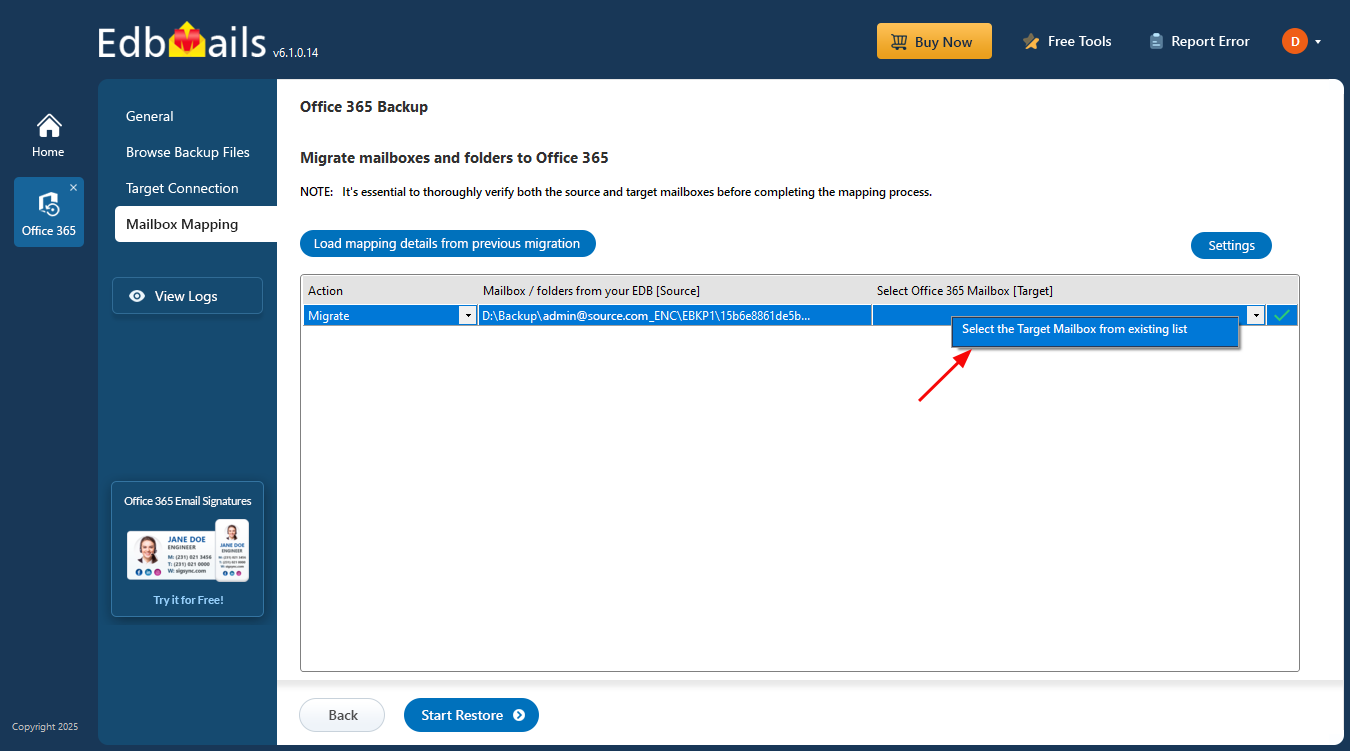
Step 3: Choose target mailboxes
- Click on the target mailbox cell and select the desired Office 365 mailbox.
- Click the ‘Start Restore’ to initiate the restore process.

- When the restore is complete, EdbMails will show a confirmation message. Click ‘View Logs’ to see the restore operation report. To make sure everything is in place, sign in to the target mailbox and check the restored items.

- Click on the target mailbox cell and select the desired Office 365 mailbox.

