Step by step guide convert MSG files to PST
MSG files are individual email messages created by Microsoft Outlook that store detailed components such as sender, recipient, subject, and attachments. While useful for saving or sharing specific messages, managing large volumes of MSG files becomes disorganized and inefficient. PST, on the other hand, is a structured Outlook data file that stores emails, calendars, contacts, and other items in a unified format. Converting MSG to PST is essential when users need to consolidate scattered emails into a single file for better accessibility, backup, and import into Outlook. Manual conversion methods like dragging and dropping into Outlook folders are time-consuming, error-prone, and not ideal for batch operations. They also require Outlook to be installed and don’t preserve folder hierarchy or metadata accurately.
EdbMails provides a professional MSG to PST Converter to this challenge by enabling users to convert unlimited MSG files into PST files quickly and securely. The software maintains original formatting and metadata without any data loss. It supports batch conversion, maintains folder structure, and simplifies the entire task with an intuitive interface. Whether you're handling a personal archive or an enterprise mailbox migration, EdbMails offers a reliable and scalable way to manage MSG to PST conversion with precision.
Planning to conversion MSG to PST
1. Check Storage Requirements
- Review the total size of your MSG files to estimate how much space you'll need.
- Make sure your computer has enough free storage to accommodate the resulting PST file.
- If necessary, plan to split large PST files into smaller parts for easier handling and management.
2. Identify Important Data
- Go through your MSG files and list the folders and items you actually need (Inbox, Sent Items, Contacts, Calendar, etc.).
- Focus on essential content to keep the PST file size manageable.
- Delete any outdated or unnecessary data to avoid clutter and speed up the conversion process.
3. Check System Readiness
- Confirm that your system has adequate RAM and processing power to handle the conversion smoothly.
- Close unnecessary applications to free up system resources during the process.
4. Choose the Right Tool
- Use a trusted solution like EdbMails MSG to PST Converter.
- It supports all Outlook versions, maintains folder hierarchy, and offers advanced options like selective export and PST file splitting.
- The tool can handle an unlimited number of MSG files without size limitations or data loss.
- Once the conversion is complete, open the PST file in Outlook and verify that all essential emails, contacts, and calendar items have been transferred correctly.
- Check folder structures and filtered items to ensure nothing important was missed.
Prerequisites to convert MSG to PST
- Ensure Microsoft Outlook is installed on your system and that at least one Outlook profile is configured. This is required for the conversion process to work properly.
- Install the latest updates for Outlook to avoid compatibility issues and ensure a smooth experience.
- Check available disk space on your computer. Converting MSG files to PST—especially large or numerous files—can require significant storage.
Steps to convert MSG files to PST using EdbMails
Step 1: Download and Install the EdbMails application
- Download and install the EdbMails application on a Windows operating system
- Log in using your registered email address and password, or choose ‘Start Your Free Trial’ to proceed without registration.
Step 2: Select MSG to PST Converter Tool
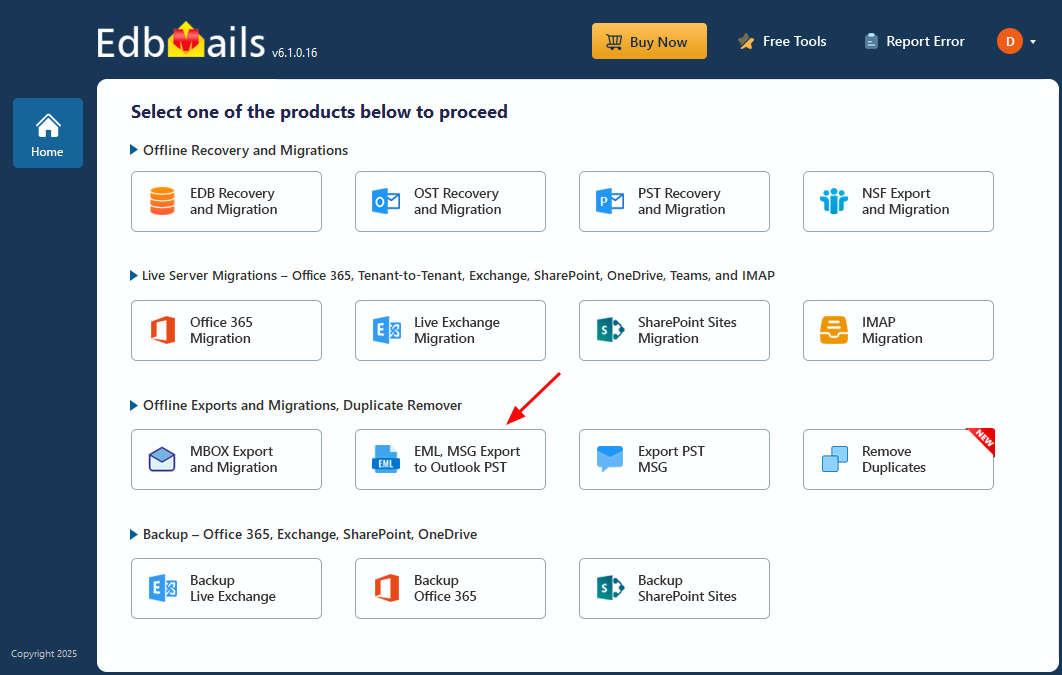
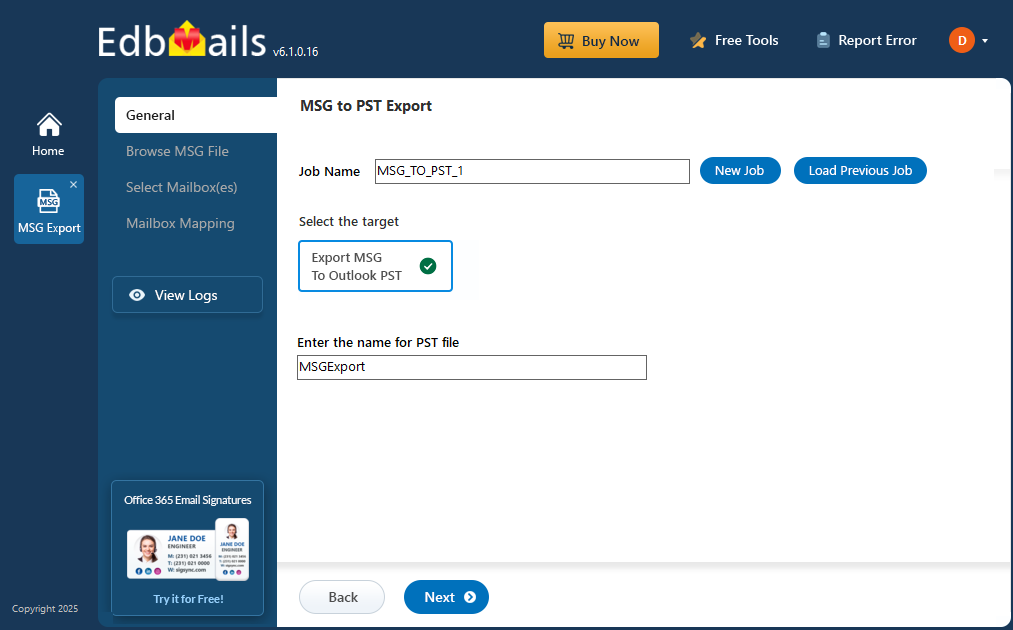
- Select ‘EML, MSG Export to Outlook PST’ from the list of products.
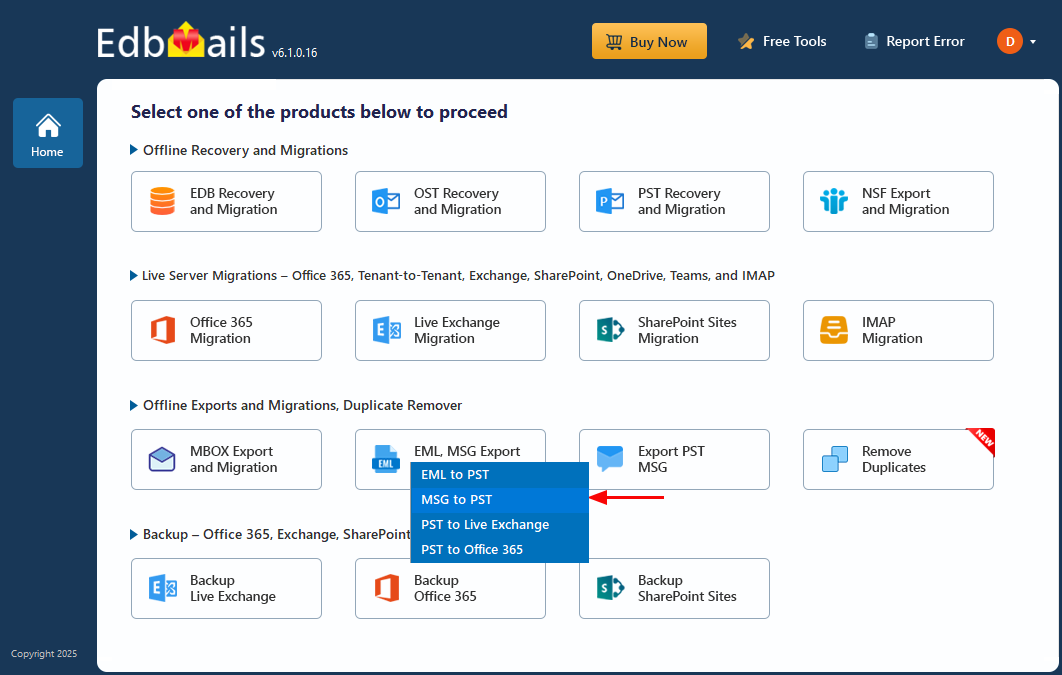
- Select ‘MSG to PST’ option
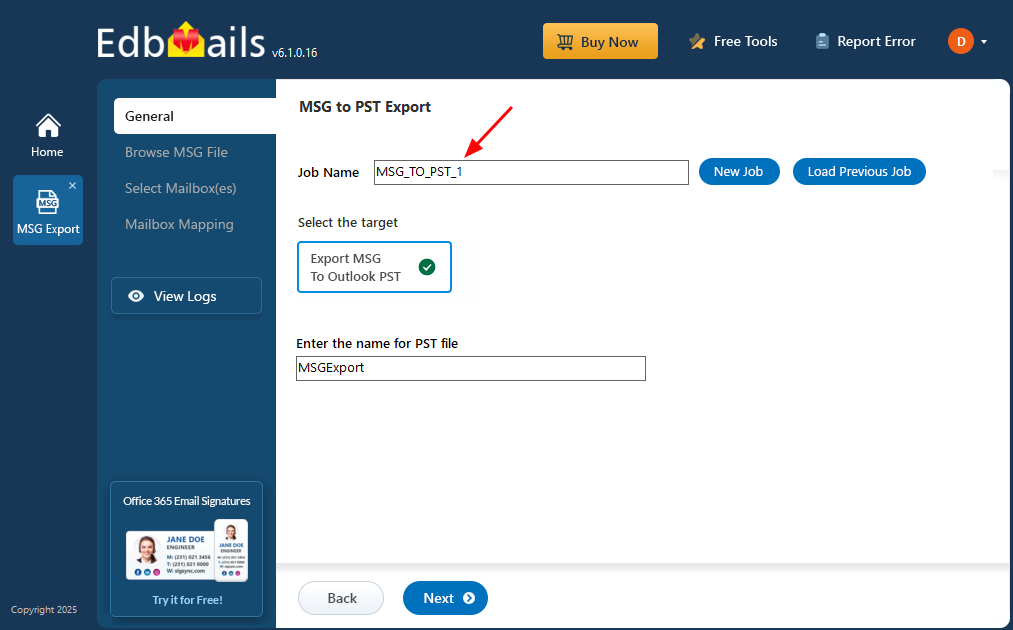
- Proceed with the default job name or click on ‘New Job’ to change.
Step 3: Browse MSG Folder
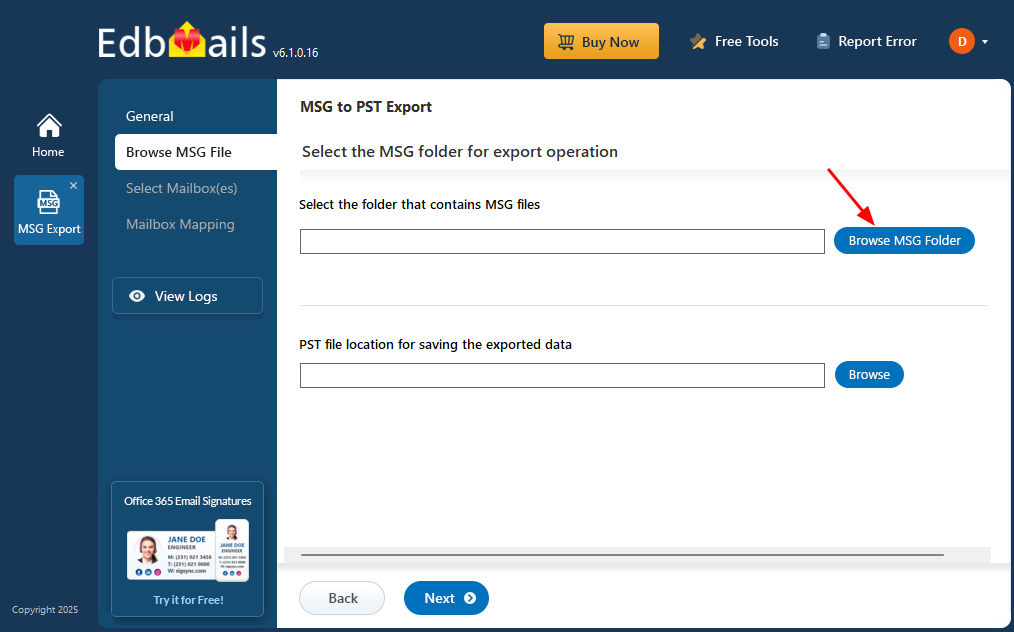
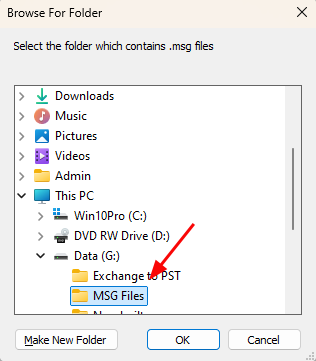
- Click the ‘Browse MSG Folder’ button.
- Browse and select the offline MSG files.
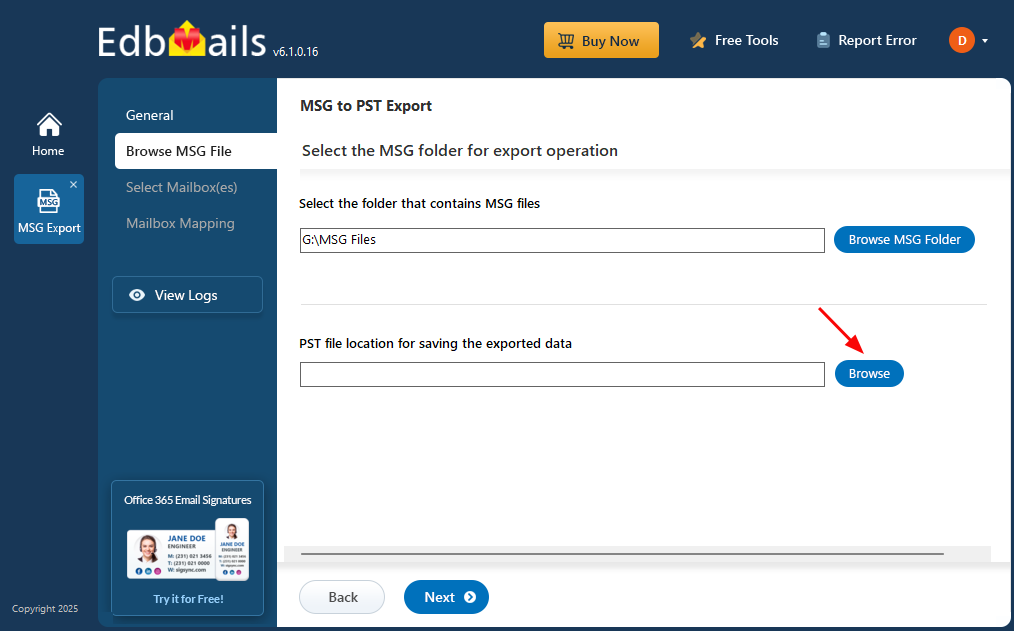
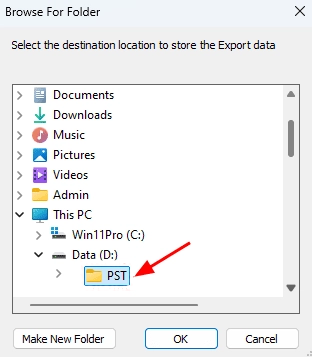
- Click the ‘Browse’ button.
- Choose the desired location where the exported PST files should be saved. Click ‘Next’ to continue.
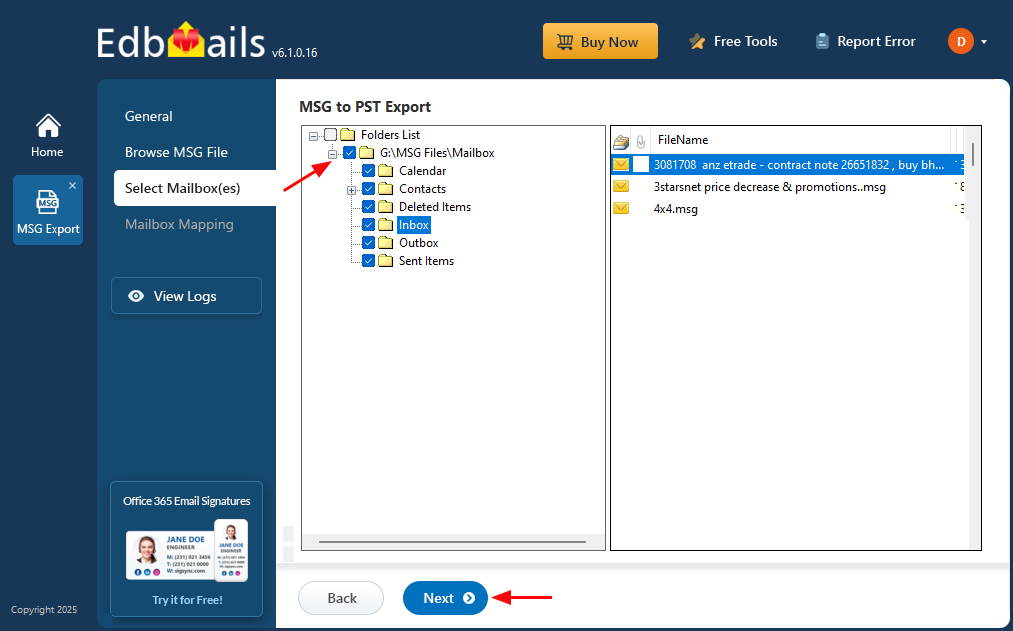
- Select the MSG file / folders and click the ‘Next’ button.
Step 4: Convert MSG to PST
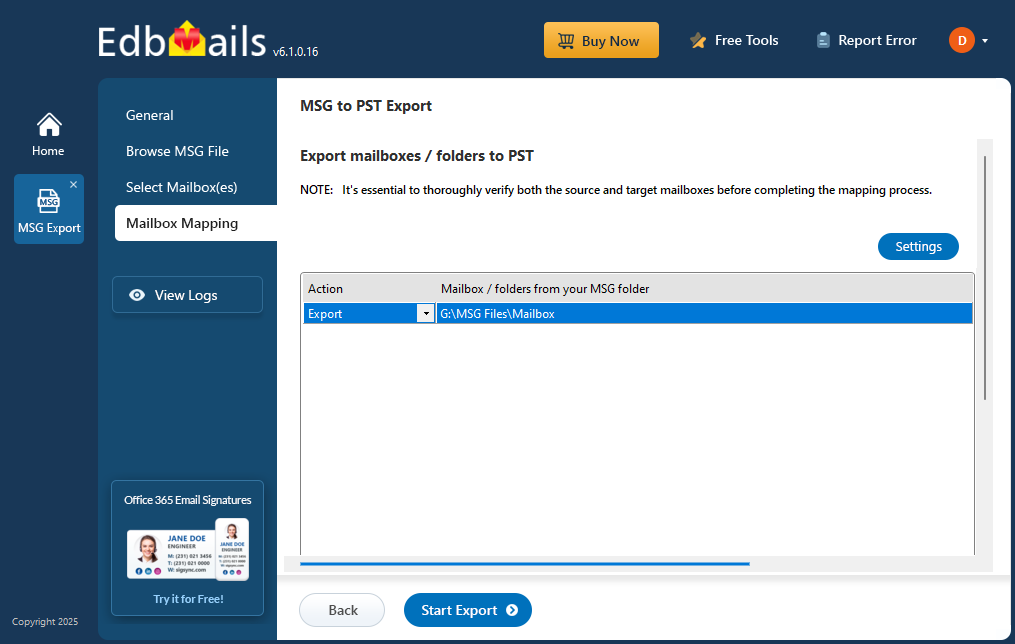
- Verify the selected MSG files and ensure the 'Action' is set to 'Export'.
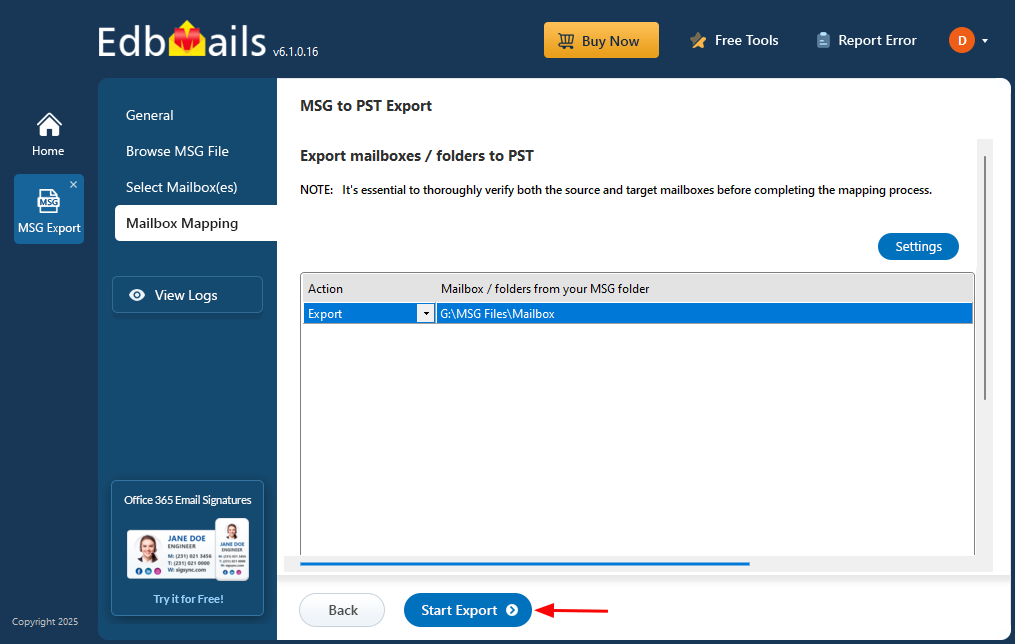
- Click the ‘Start Export’ button to initiate the export process.
- That’s all! You can watch the export progress live as it happens. When the conversion finishes, EdbMails will prompt you to check the export status. Simply click the ‘View Logs’ button to see a detailed report of the MSG to PST export operation.
Post-export steps : MSG to PST
1. Check the Export Log
Click on the ‘View Log’ button to open a detailed report of the export process. This log provides:
- The total count of successfully converted items
- Folder-wise export statistics
- A full record of the process
2. Open and Verify the PST File in Outlook
Launch Microsoft Outlook and open the newly created PST file. Carefully check the contents to make sure:
- All emails, contacts, calendar entries, and other mailbox items are present
- The folder structure is intact and properly organized
- No important data is missing or misplaced


