IMAP to PST Export : Step-by-Step Guide
Many organizations depend on email platforms like Gmail, Zimbra, and Yahoo that operate on the IMAP protocol to manage their mailboxes. Although IMAP effectively syncs emails across multiple devices, it does not provide built-in backup support for calendars, contacts, or mailbox size control. Because of this limitation, exporting mailboxes to PST files, the format used by Microsoft Outlook, becomes a reliable solution for secure backups, offline access, and long-term data storage.
Manual IMAP to PST exports can be slow and risky, especially when dealing with large mailboxes. They may result in data inconsistencies, disrupted folder hierarchy, or performance slowdowns, making it important to rely on a dependable automated solution that preserves data accuracy and ensures a seamless export process.

EdbMails IMAP Migration Software simplifies the entire process by enabling secure and accurate export of emails, attachments, and folders from IMAP servers into structured PST files. Its advanced filtering options let you select emails by date, subject, or sender for precise control over exported data. Features like free PST split and merge help manage large mailboxes efficiently, while the built-in mailbox preview ensures you export exactly what you need. With EdbMails, you can confidently back up IMAP mailboxes to PST without data loss or disruption.
Prerequisites to Export IMAP to PST
- Make sure you have your IMAP server hostname, port number, email address, and password available.
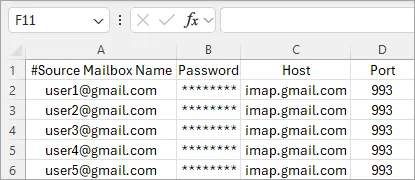
- For exporting multiple users, first download the sample CSV from the EdbMails application and update it with each user’s mailbox details, including IMAP server hostname, port number, email address, and password.
- If you're connecting to Gmail, create an app password and use it in place of password.
- To export IMAP to PST with EdbMails, you need to have Microsoft Outlook installed on your computer. Install the latest applicable updates for MS Outlook ensure that you have sufficient space on your computer to save the output PST file.
- For a successful IMAP to PST export operation, ensure to create an Outlook profile.
Steps to Export IMAP to PST using EdbMails
Step 1: Download and install EdbMails
- Download and install EdbMails IMAP migration software on your computer

- Start the EdbMails application on your system.
- Enter your registered email ID and password, then click ‘Login’. If you haven’t registered yet, choose ‘Start Your Free Trial’ to continue with the trial version.Note: The trial version includes all major features and allows exporting up to 30 items per folder. To export unlimited items without restrictions, purchase a valid license from the EdbMails website.
Click here to purchase the license from the EdbMails website.
After purchasing, close and reopen the application, then sign in with the same email ID and password used during the purchase to activate the license successfully.

See the complete list of system requirements for IMAP to PST export.
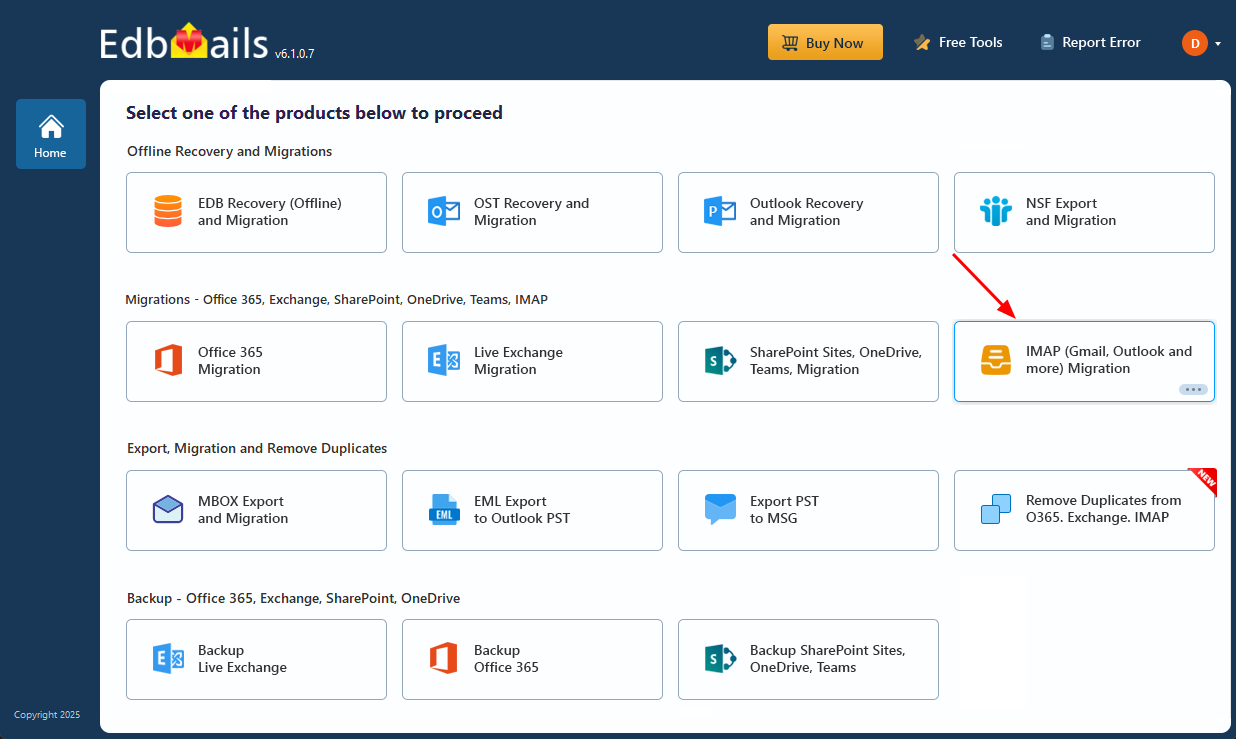
- Select the option ‘IMAP (Gmail, Outlook & more) Migration’
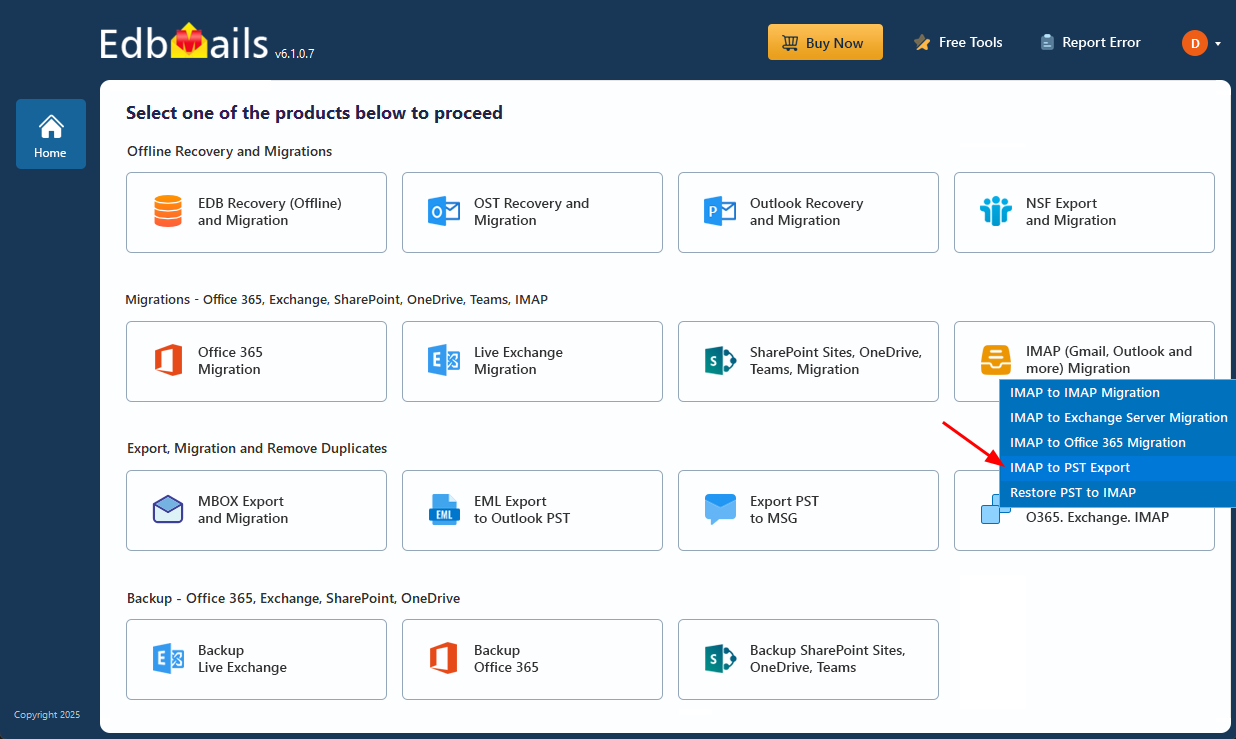
- Select ‘IMAP to PST Export’.
- You can proceed using the automatically assigned job name or choose ‘New Job’ to set a name of your choice before continuing with the process.

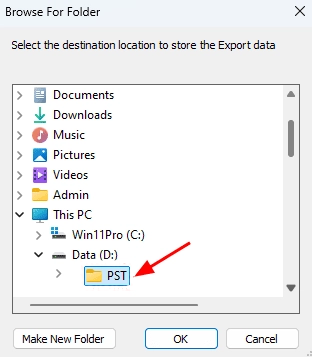
- Click the ‘Browse’ button to choose the location where the PST file will be saved for the exported data.
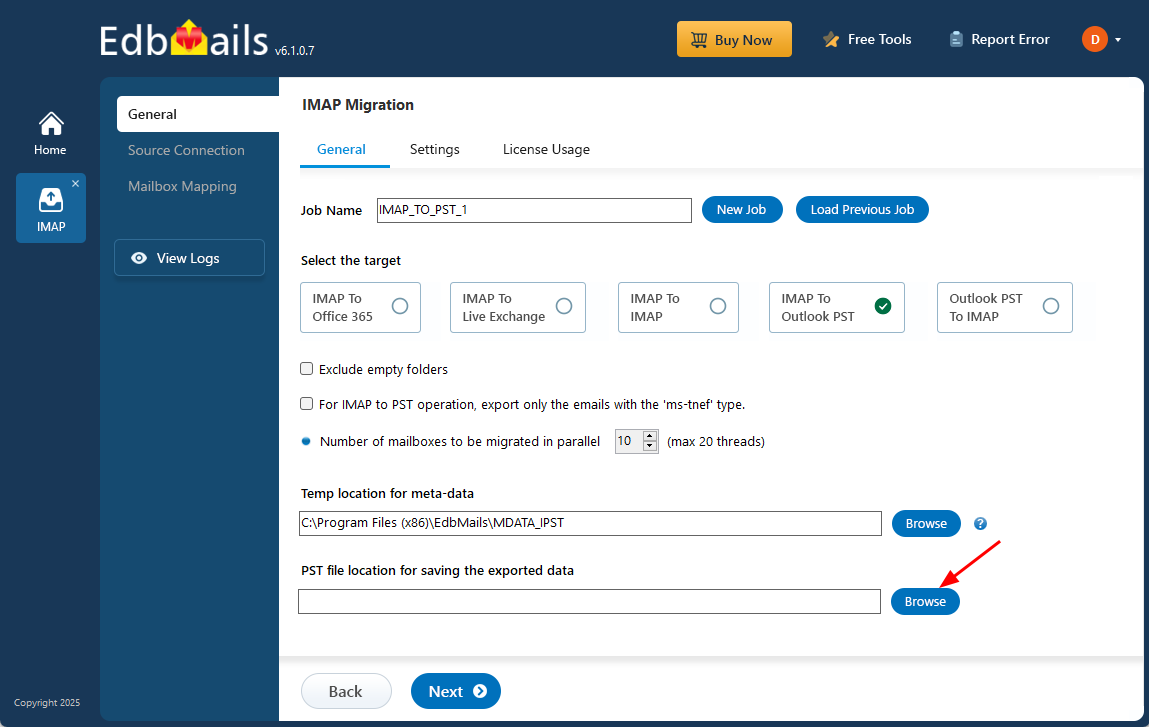
- Select a destination on your computer to store the exported PST files and ensure the selected drive has sufficient free space to handle the file size.
- Download and install EdbMails IMAP migration software on your computer
Step 2: Connect to Source IMAP Server
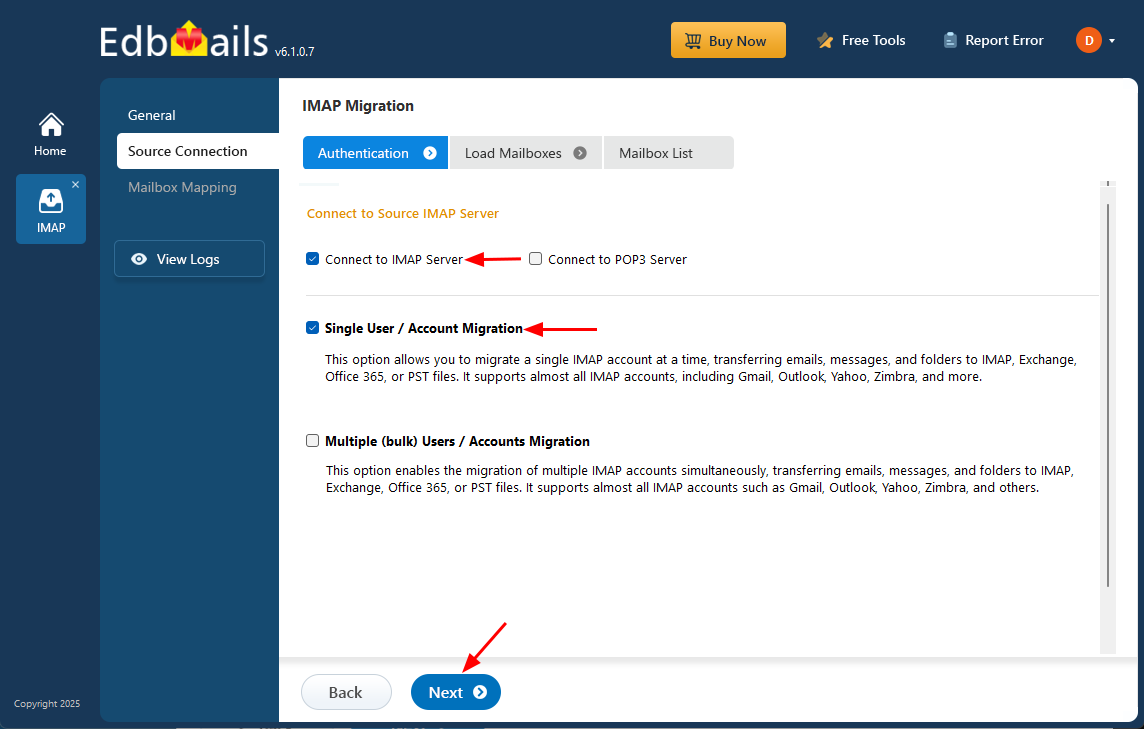
- To migrate a single account, select ‘Single User / Account Migration’, choose the required option such as ‘Connect to IMAP Server’ or ‘Connect to POP3 Server’, and then click ‘Next’ to proceed.
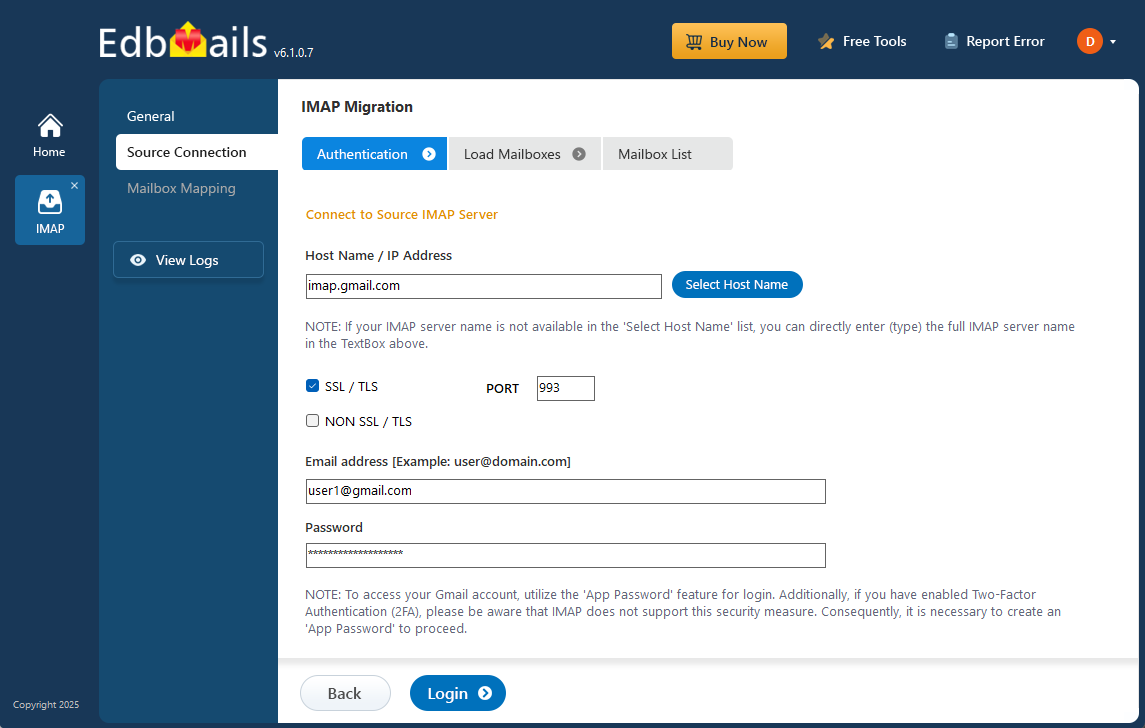
- Select the correct IMAP host name from the list or enter it manually, then provide your email address and password. If you are connecting to a Gmail account, generate an app password and use it for logging-in instead of your regular account password.
- Click the ‘Login’ button.
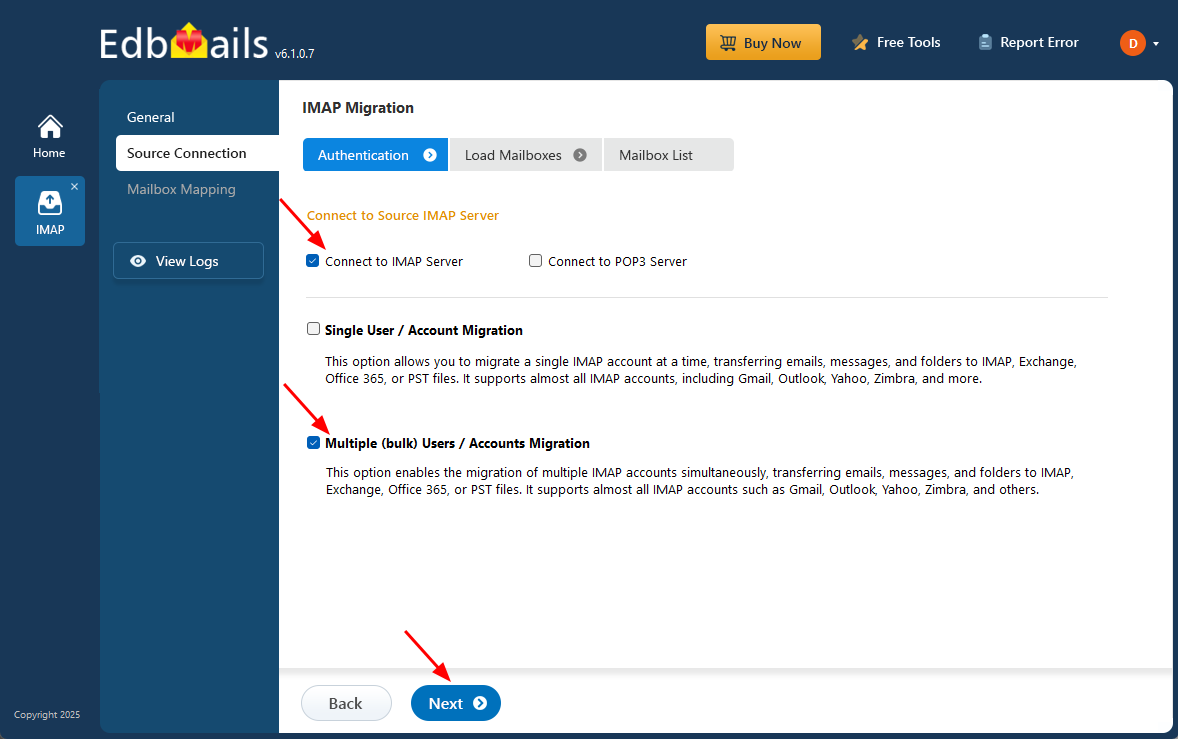
- For migrating multiple mailboxes, choose ‘Multiple (bulk) Users/Accounts Migration’, then select the appropriate option such as ‘Connect to IMAP Server’ or ‘Connect to POP3 Server’, and then click ‘Next’.
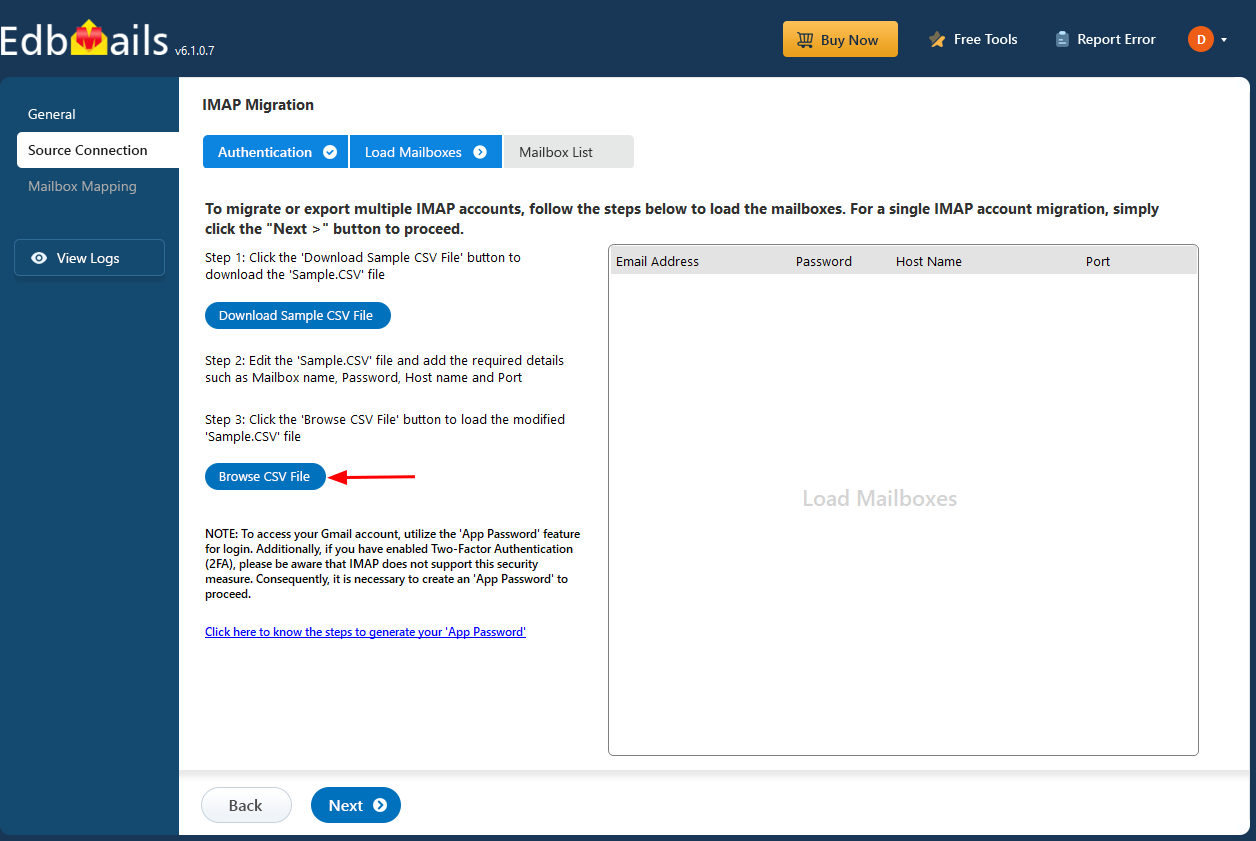
- Download the ‘Sample.CSV’ file by clicking ‘IMAP Migration CSV File’.
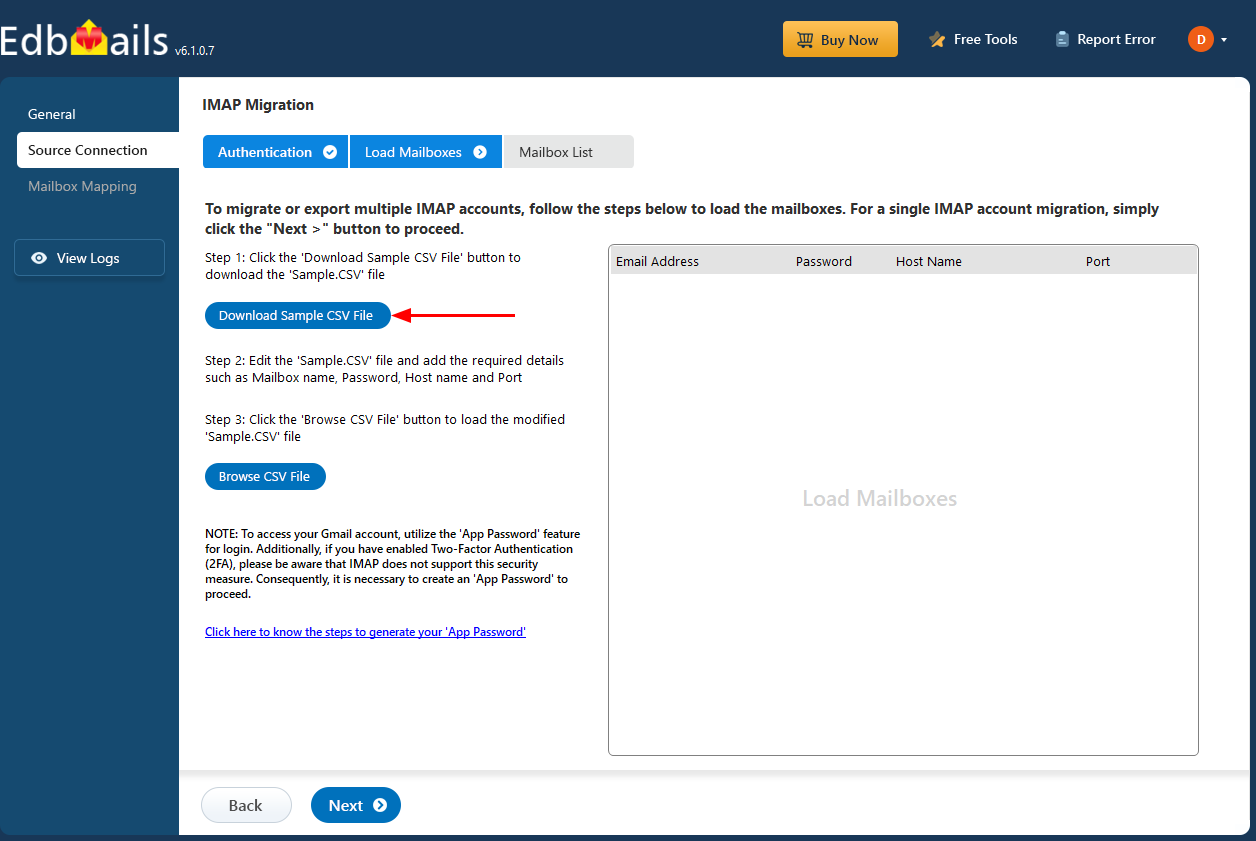
- Modify the CSV file with the required details such as email address, password, host name and port number and save the changes.
- Close the CSV file, then click 'Load Modified CSV File' and choose the modified ‘Sample.CSV’ file.
- Verify the mailboxes, and click 'Next'.
- To migrate a single account, select ‘Single User / Account Migration’, choose the required option such as ‘Connect to IMAP Server’ or ‘Connect to POP3 Server’, and then click ‘Next’ to proceed.
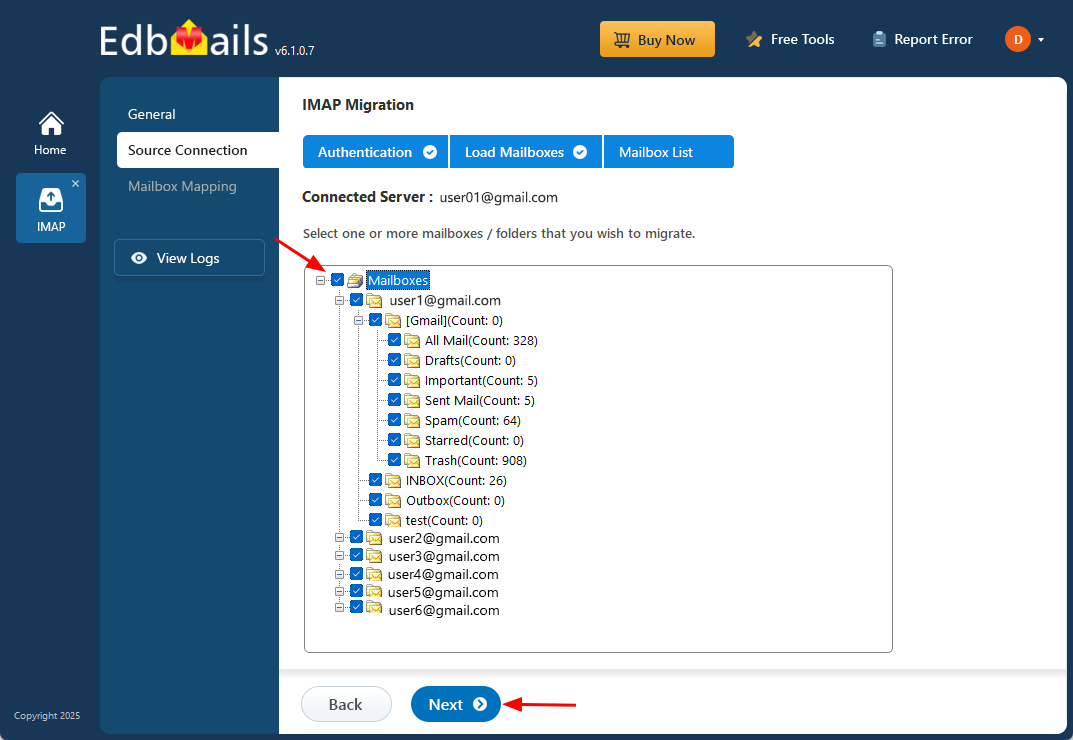
Step 3: Select Source IMAP mailboxes
- Choose the mailboxes or particular folders you need to migrate and once your selection is complete, click ‘Next’ to proceed.
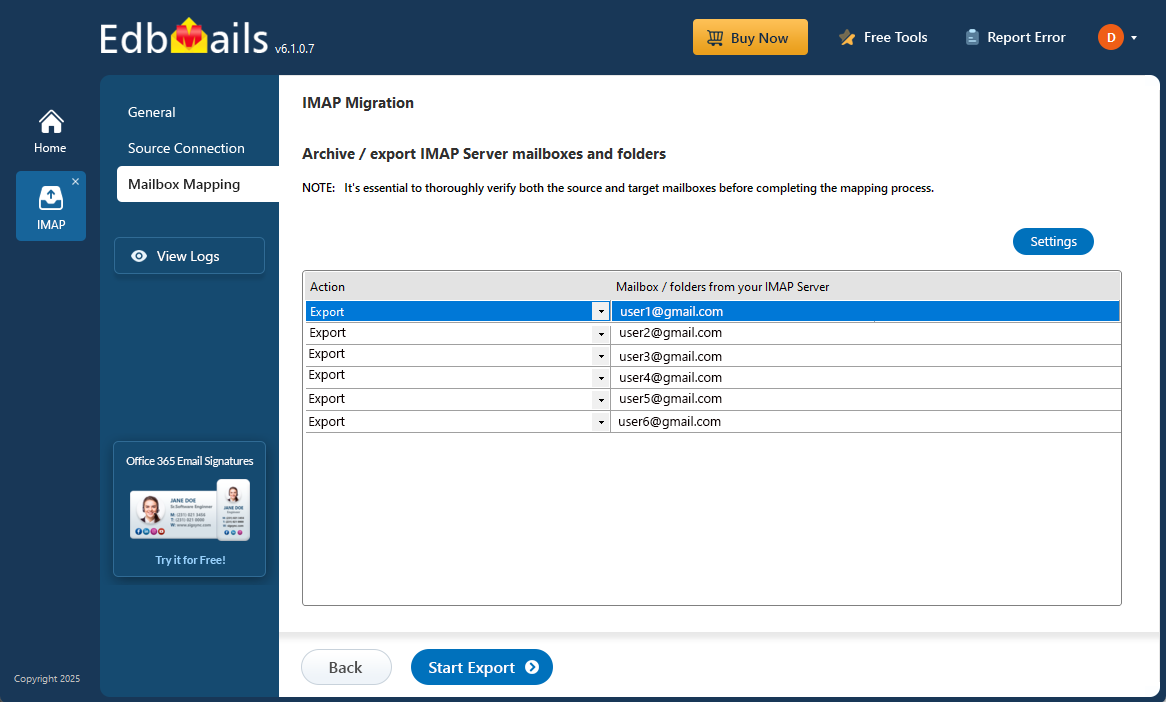
- Verify both the source and target mailbox/folders and ensure ‘Action’ is set to ‘Export’.
- Choose the mailboxes or particular folders you need to migrate and once your selection is complete, click ‘Next’ to proceed.
Step 4: Start IMAP to PST Export operation
- To begin the export, click on ‘Start Export’

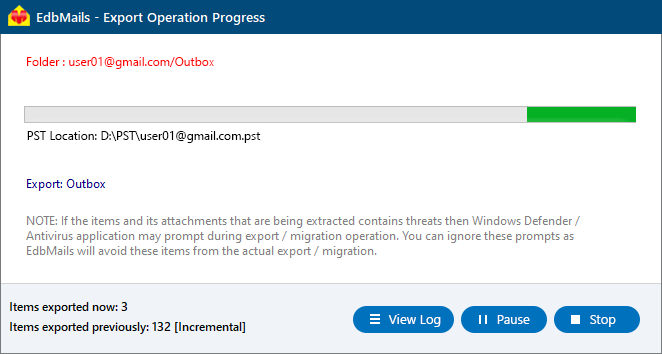
- The export process has now started, and you can track its status through the progress bar. After the export is successfully completed, a confirmation message will appear. Click on the ‘View Log’ option to open the migration report, where you can see a detailed summary including the total items exported along with the number of items processed from each folder.
- To begin the export, click on ‘Start Export’
Advantages of EdbMails to export IMAP to PST
- EdbMails is an all-in-one tool that easily supports backing up IMAP to Outlook PST files and importing PST files to IMAP.
- Support for all IMAP servers such as Outlook, Gmail / G Suite, IceWarp, Zoho, Zimbra, Rackspace, cPanel, Plesk, Dovecot, and many more.
- You can export single or multiple PST files in bulk from IMAP servers
- EdbMails provides the option to split the output PST file into manageable size during the export operation.
- EdbMails offers a free PST file viewer, allowing you to easily view PST file data.
- EdbMails free PST merge tool can combine multiple PST files into a single file.
- Export to Outlook PST without any size limitations for mailbox or mail items.
- During the export operation, EdbMails maintains the folder hierarchy of the folders and emails, ensuring that your data is consistent.

