Open Xchange email to Office 365 Migration
Open-Xchange (OX) is an email and collaboration platform that can provide email, calendars, contacts, and file-sharing capabilities through hosting providers and private deployments. Organizations may move OX email to Microsoft 365 when they want Exchange Online together with Microsoft 365 administration and collaboration services.
Microsoft 365 (formerly Microsoft Office 365) provides a complete set of productivity tools designed to support modern business communication and collaboration. It includes advanced email management, strong security features, and seamless integration with Microsoft services such as Microsoft Teams, Microsoft SharePoint, and Microsoft OneDrive. The platform offers automatic updates, centralized administration, and improved teamwork through a cloud-based environment. With its scalable infrastructure and enterprise-level capabilities, Microsoft 365 enables organizations to maintain efficient operations while supporting secure and reliable communication.
Migrating from Open-Xchange to Office 365 can seem technically demanding, but EdbMails IMAP Migration Tool simplifies the process. It provides a guided workflow for migrating IMAP-accessible email data without manual scripting. The IMAP scope includes messages, attachments, folders, and supported message metadata; contacts, calendars, and other OX collaboration data require separate migration methods.
Automatic mailbox mapping can reduce repetitive setup where source and target identifiers align. Administrators should review the final mailbox and folder mapping before migration. EdbMails also supports selective folder migration and concurrent mailbox processing. Users can continue accessing the source while migration data is transferred; plan the final mail-flow cutover separately.
For destination-wide Microsoft 365 prerequisites, authentication, mapping, and cutover planning, use the main IMAP to Office 365 migration guide.
User Query
"We are looking to migrate from Open-Xchange email to Office 365 while retaining all our existing email data and user settings. We have a large number of users, and the migration must be seamless, with minimal disruption to our daily operations. Is there a solution that can simplify this process and ensure a smooth transition without compromising data integrity or causing downtime?"
Open Xchange email to Office 365 Migration Plan
Planning is one of the most important steps before you begin the Open Xchange email to Office 365 migration. Here is a checklist of points to consider before you migrate.
- Determine the size of the data and the number of mailboxes you want to migrate.
- Make a list of all the data and permissions from Open Xchange email that you want to transfer.
- Create appropriate user mailboxes on Office 365 and assign licenses to them.
- Ensure you have enough network capacity and bandwidth to migrate.
- Communicate the migration plan and flow to your end users.
Open Xchange email to Office 365: Pre-migration Activities
- Find the IMAP server name of your Open Xchange email server. You canfind this information from your server’s dashboard settings or by connecting your emailsystem to Outlook.
- Have the users email address, passwords, IMAP hostname and port number.
- Create mailboxes on your target Office 365 server. You can choose the option toautomatically create target mailboxes in EdbMails. If you prefer to create them manually,refer to the links below.
- If you have a custom email domain from your hosting provider to which you want to migrateand receive emails, you must add and verify the domain on Office 365.
Steps to add a custom domain to Office 365 and Steps to add DNS records to connect your domain.
- Configure Office 365 to send and receive large messages.
Follow the steps to increase the message size on Office 365 to 150MB and see tips to optimize IMAP migration to Exchange online.
Steps to Migrate emails from Open Xchange to Office 365
Step 1: Download and install EdbMails IMAP migration software
- Download and install EdbMails on any Windows-based computer to get started with your email migration.
See a detailed list of EdbMails system requirements for IMAP migration.
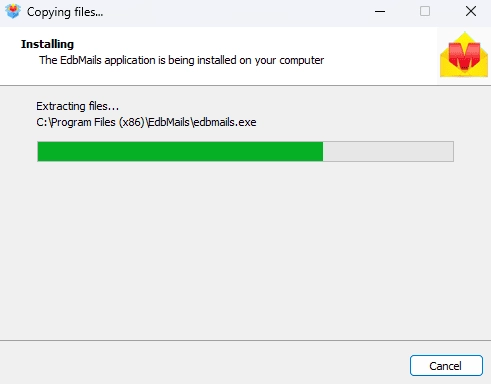
- Open the EdbMails application on your system.
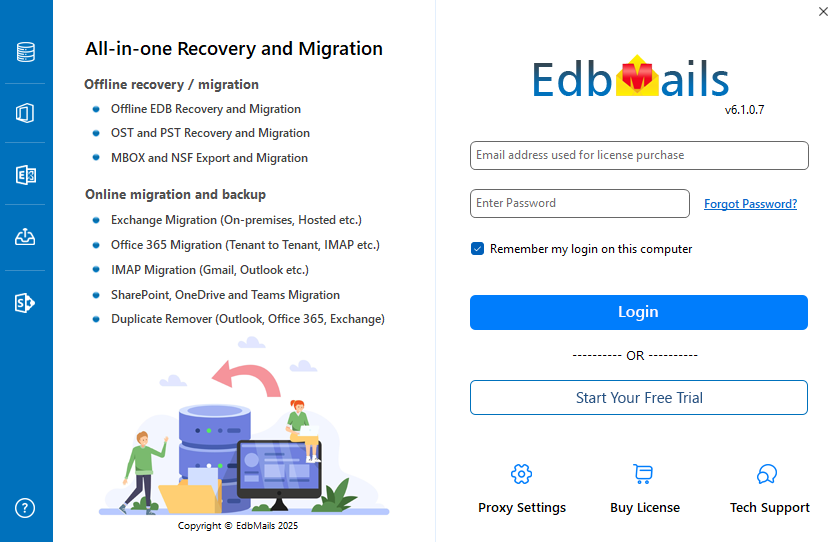
- Enter your registered email address and password, then click ‘Login’. If you are accessing EdbMails for the first time, choose ‘Start Your Free Trial’ to proceed with the trial version.Note: The trial version provides access to all key features and allows you to migrate up to 30 items per folder. To migrate all eligible items for licensed mailboxes, purchase the required IMAP Migration license from the official EdbMails website.
Click here to view IMAP Migration pricing details.
After completing the purchase, close the application and reopen it. Sign in again using the same email address and password used during the purchase to successfully activate your license.
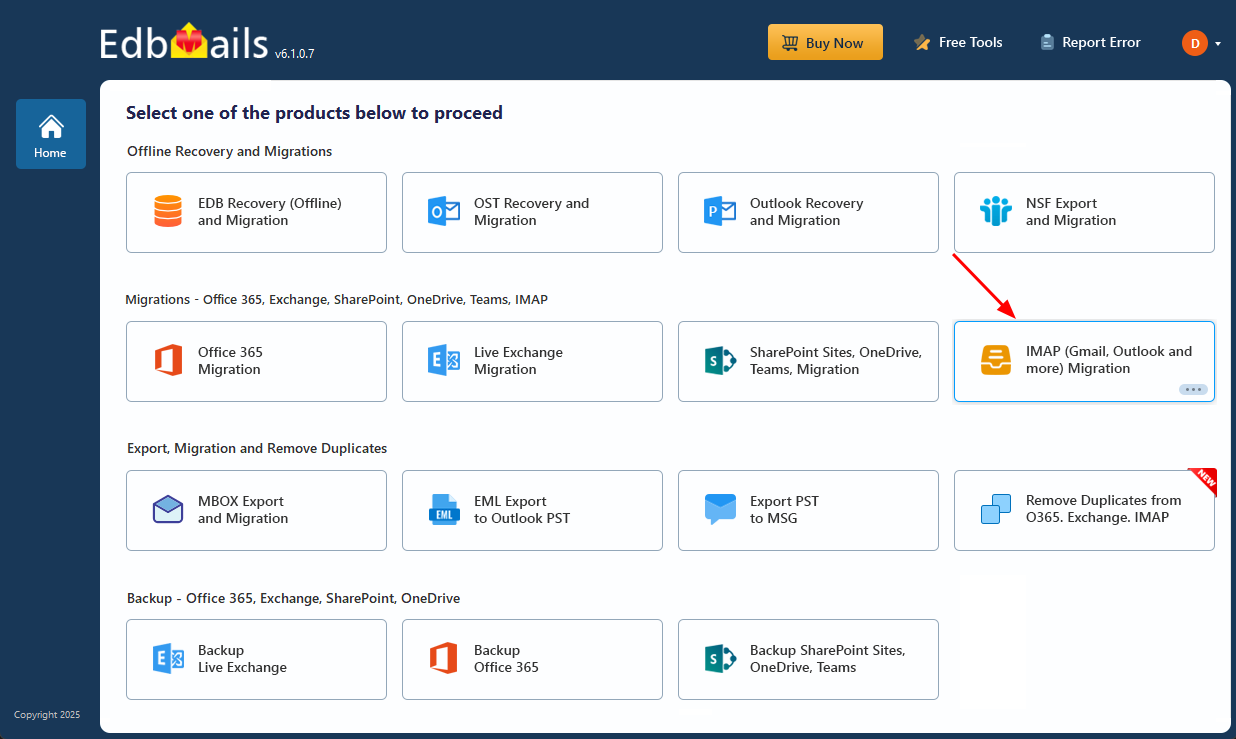
- Select the option ‘IMAP (Gmail, Outlook and more) Migration’
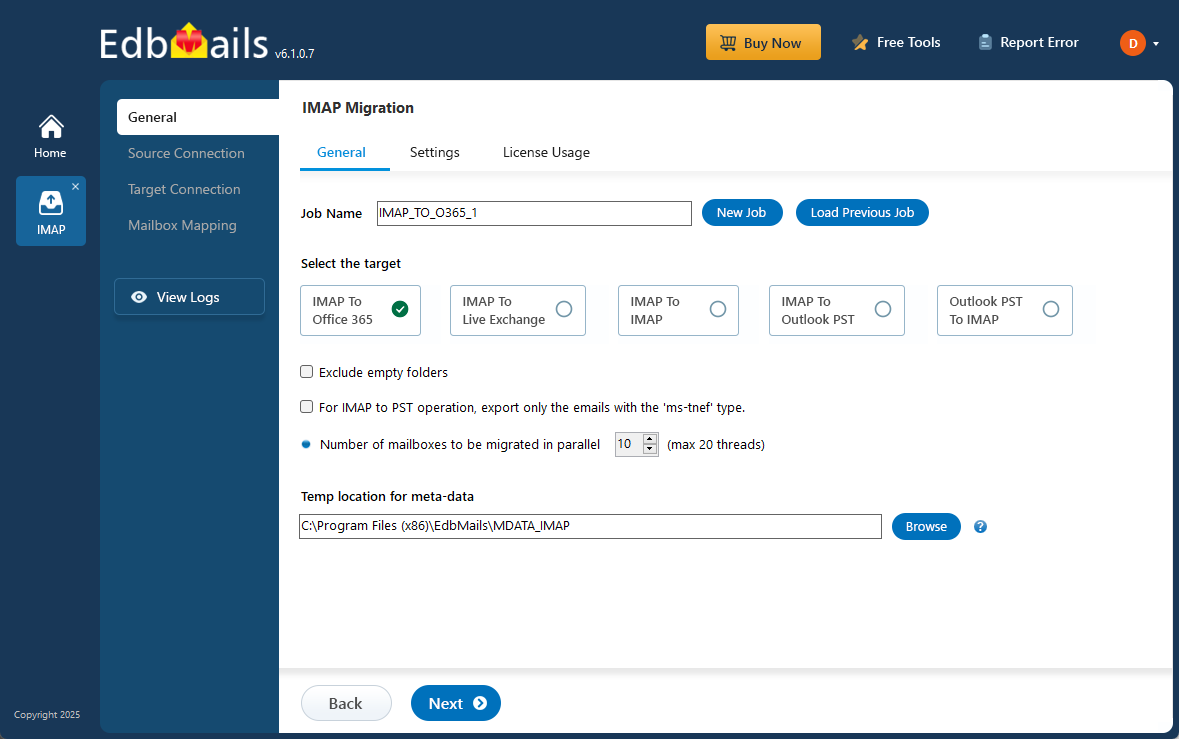
- Select ‘IMAP to Office 365 Migration’.
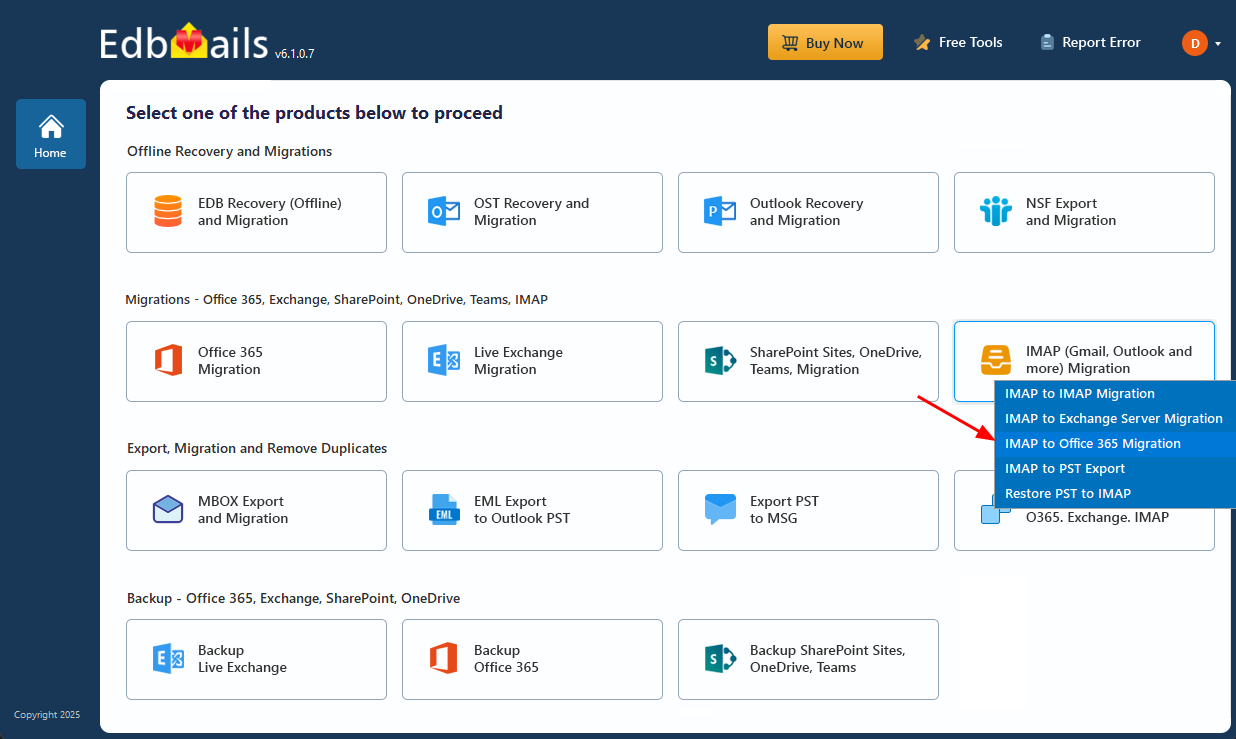
- A default job name is automatically assigned. If you want, click ‘New Job’ to give it a custom name for easier identification.
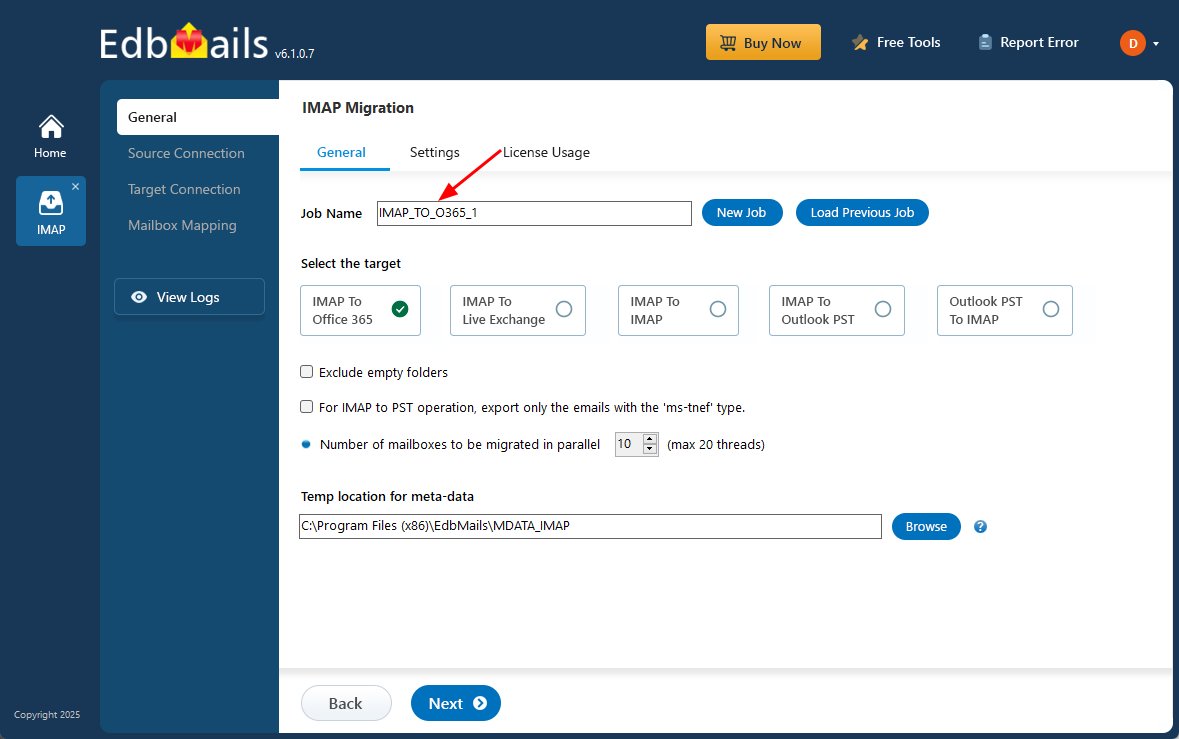
- Download and install EdbMails on any Windows-based computer to get started with your email migration.
Step 2: Connect to the source Open Xchange email server
- To migrate a single mailbox from your Open Xchange server, click ‘Single User / Account Migration’, choose the suitable connection option such as ‘Connect to IMAP Server’ or ‘Connect to POP3 Server’. Click ‘Next’ to proceed.
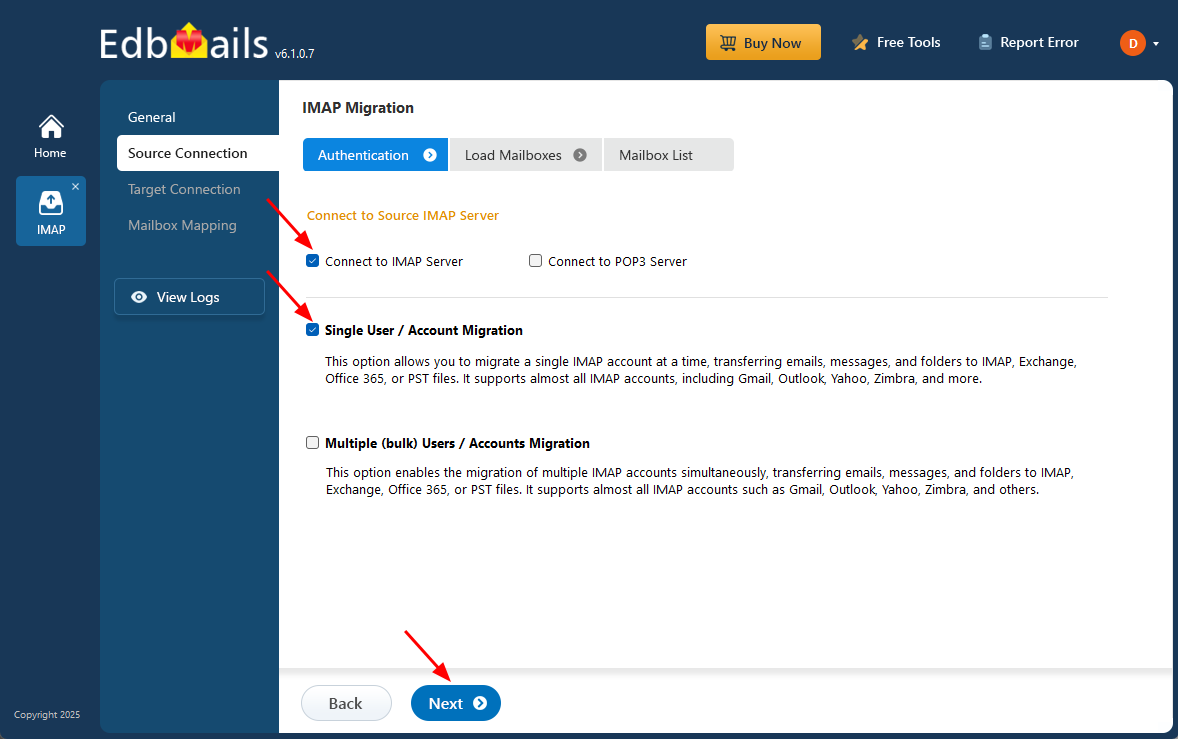
- Open-Xchange deployments are provider-specific. Use the IMAP server hostname, port, TLS/SSL mode, username format, and credential published by the hosting provider or server administrator. Secure IMAP commonly uses port 993, but verify the actual deployment before migration.
- Click the ‘Login’ button to proceed.
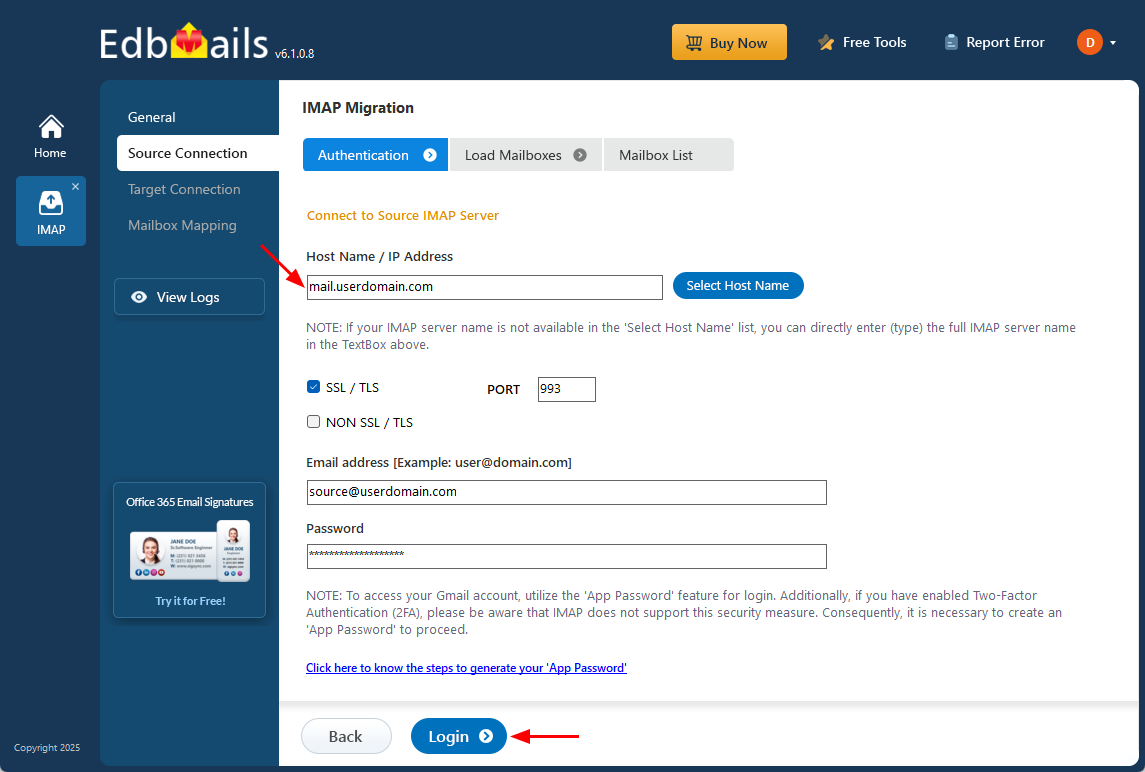
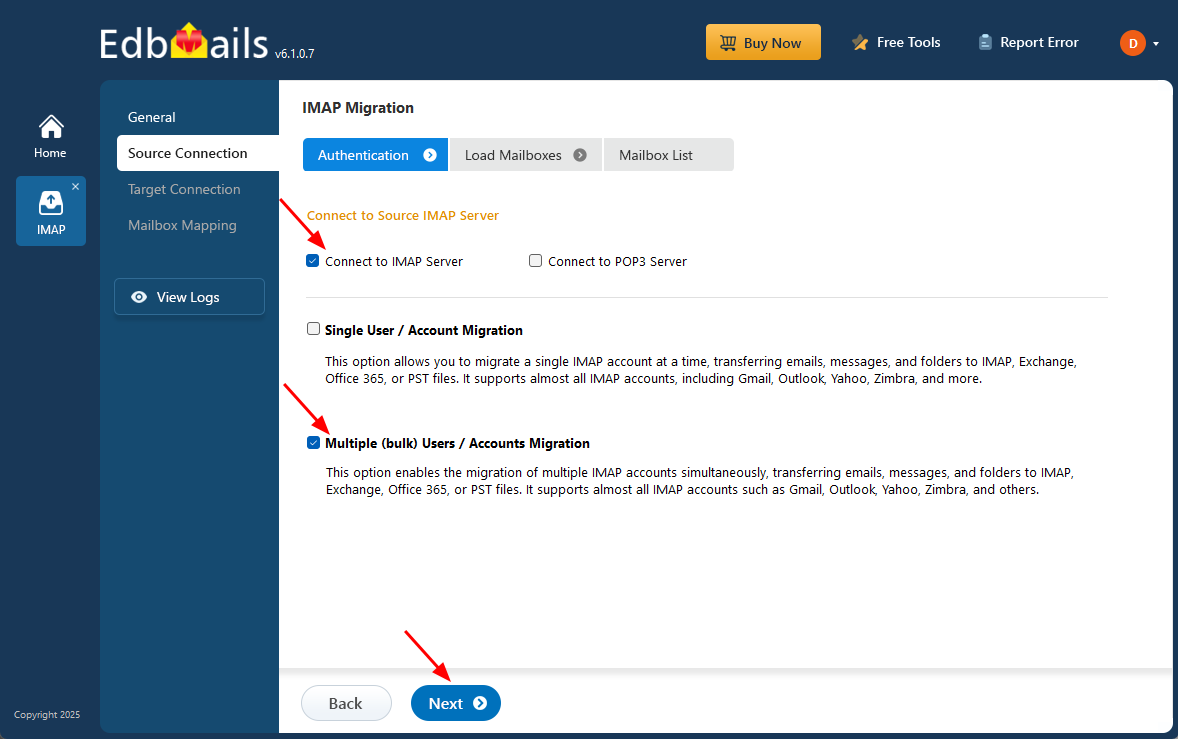
- To connect and migrate multiple Open Xchange email user mailboxes at once, select the ‘Multiple (Bulk) Users/Accounts Migration’ option.
- Choose the suitable connection method such as ‘Connect to IMAP Server’ or ‘Connect to POP3 Server’.
- Then proceed by clicking ‘Next’.
- Click ‘IMAP Migration CSV File’
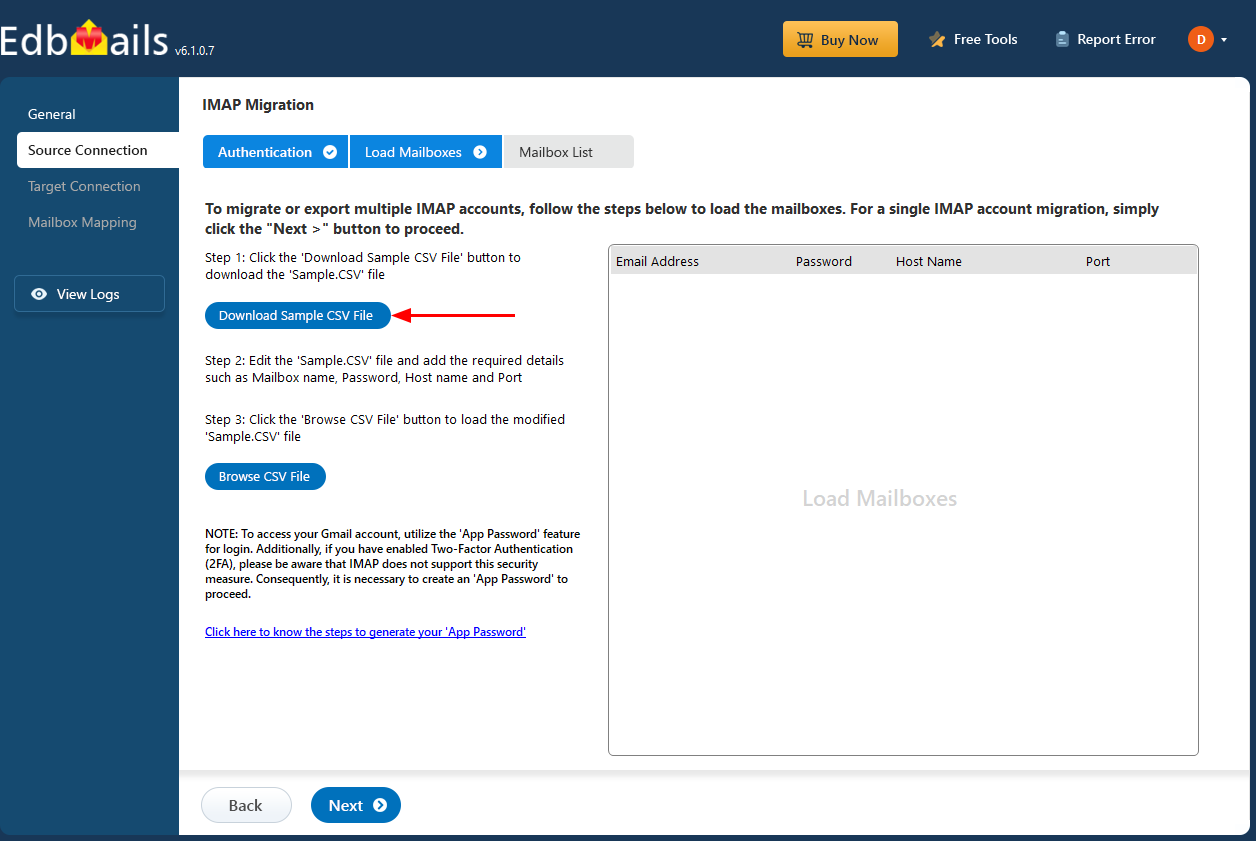
- Edit the CSV file and fill in the required information, including the email address, password, server hostname, and port number.
- After completing the updates, save the file and close it.
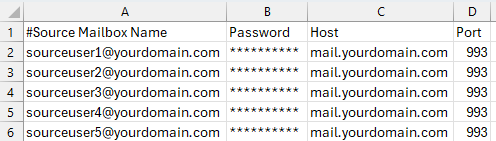
- After entering the required details in the CSV file, save your changes and close the file to continue with the next steps.
- Next, click the 'Load Modified CSV File' button, locate your updated CSV file, select it, and open it to proceed.
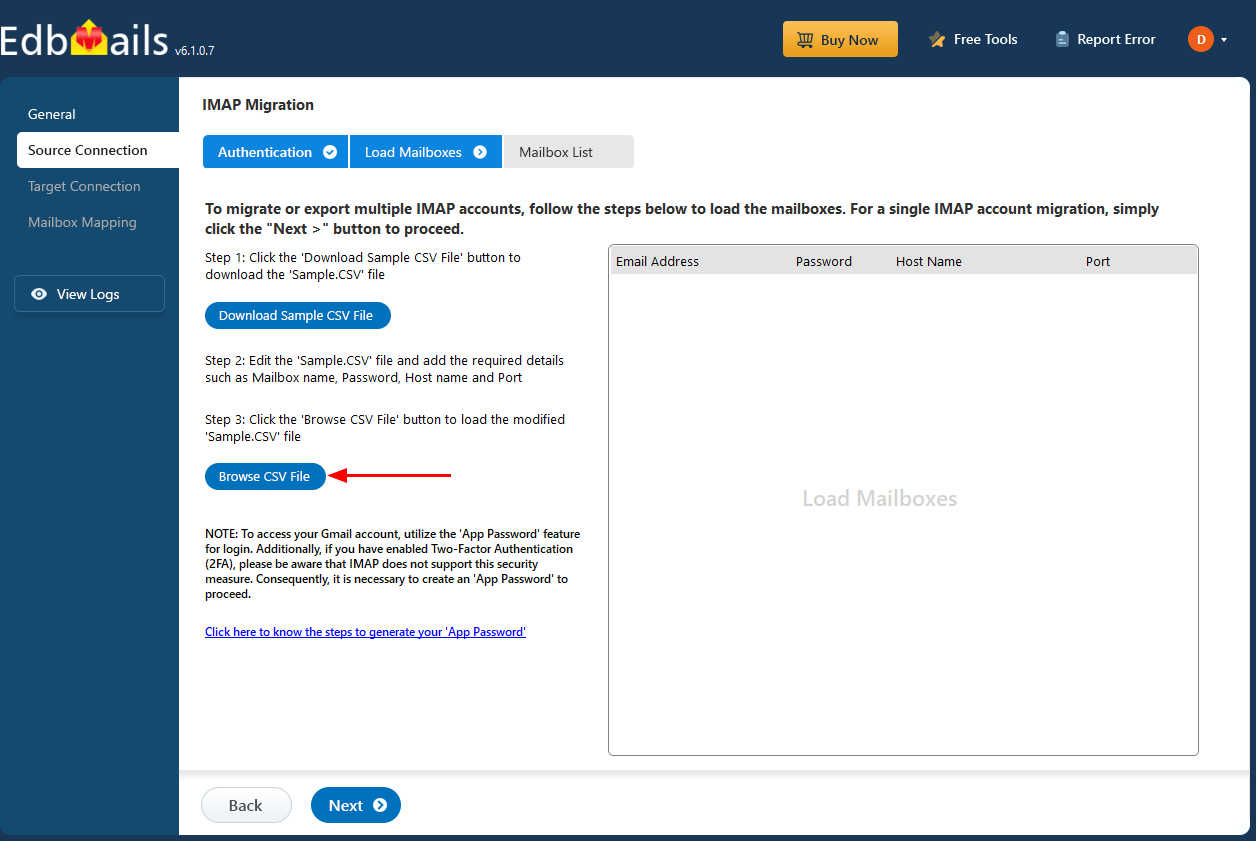
- Choose the specific mailboxes or individual folders you wish to migrate. Once your selection is complete, click ‘Next’ to continue.
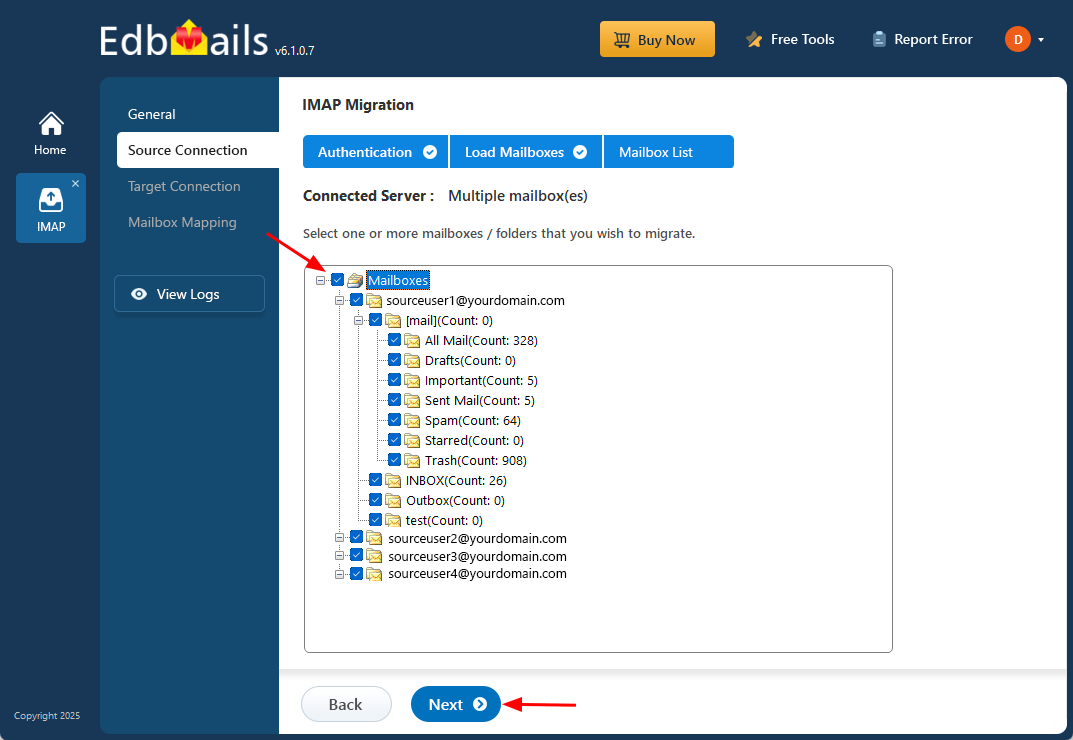
- To migrate a single mailbox from your Open Xchange server, click ‘Single User / Account Migration’, choose the suitable connection option such as ‘Connect to IMAP Server’ or ‘Connect to POP3 Server’. Click ‘Next’ to proceed.
Step 3: Connect to the target Office 365 server
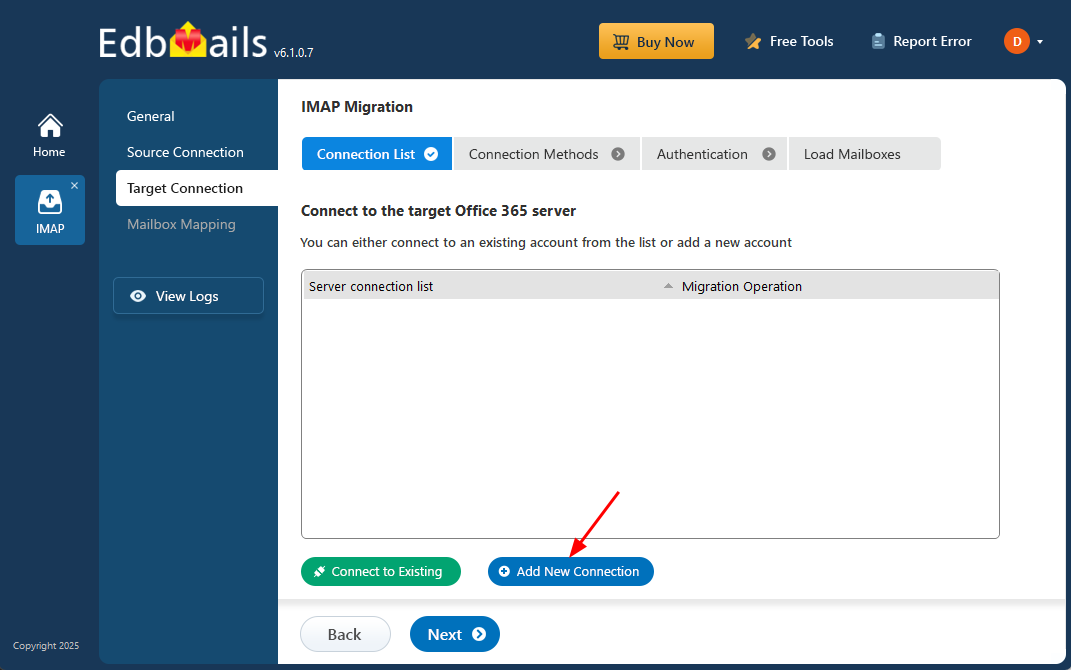
- Select the ‘Add New Connection’ option to establish a connection with your target Office 365 account.
- If you have previously set up a connection, you can choose it from the available list and click ‘Connect to Existing’ to proceed.
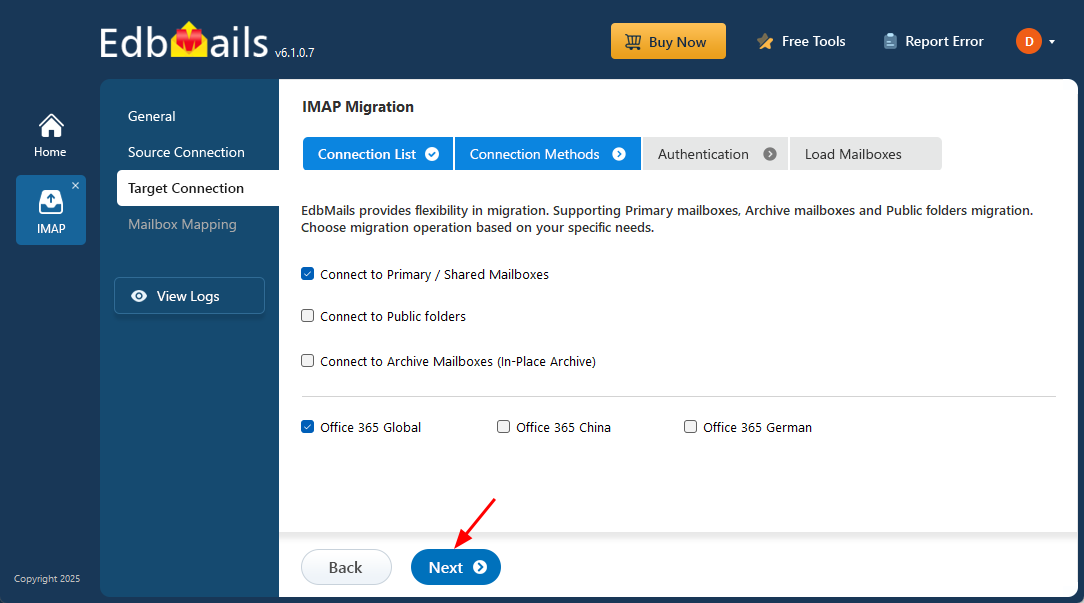
- EdbMails supports flexible migration, allowing you to transfer primary mailboxes, archive mailboxes, and public folders efficiently within a single platform.
- Select the required connection preferences and click ‘Next’ to move forward with the authentication steps.
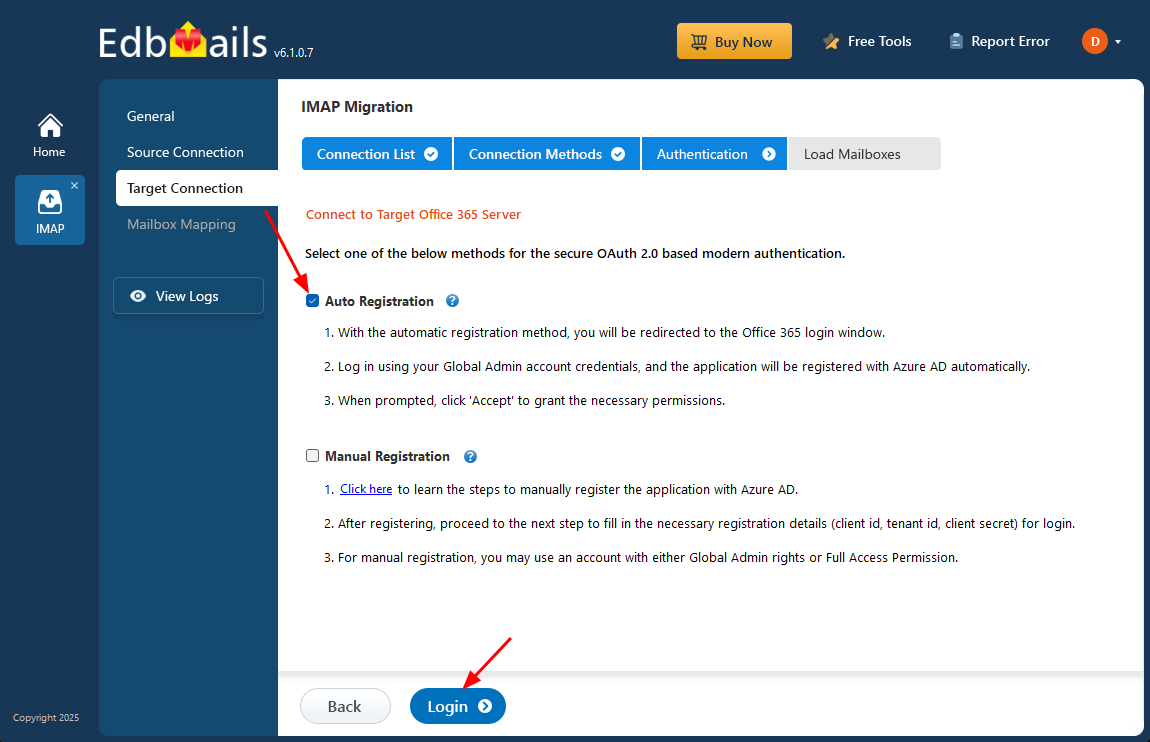
- Choose any of the available options to create a secure connection through OAuth 2.0 modern authentication.
- Select Auto Registration for a quick and hassle-free configuration. Simply log in with a Global Admin account and approve the required permissions to automatically register the application in Azure AD.
- Or select Manual Registration if you want to provide the Azure AD application details manually. This option supports both Global Admin accounts and accounts with Full Access permissions.
- Click the ‘Login’ button to continue.
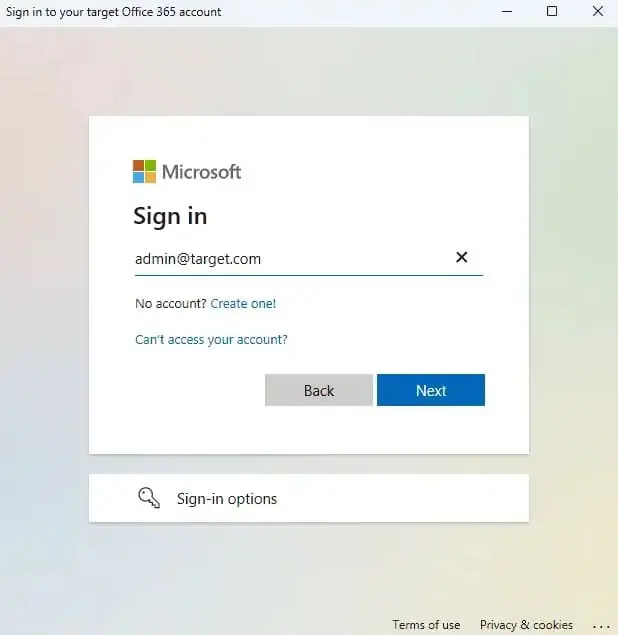
- Authenticate on Microsoft sign-in page.
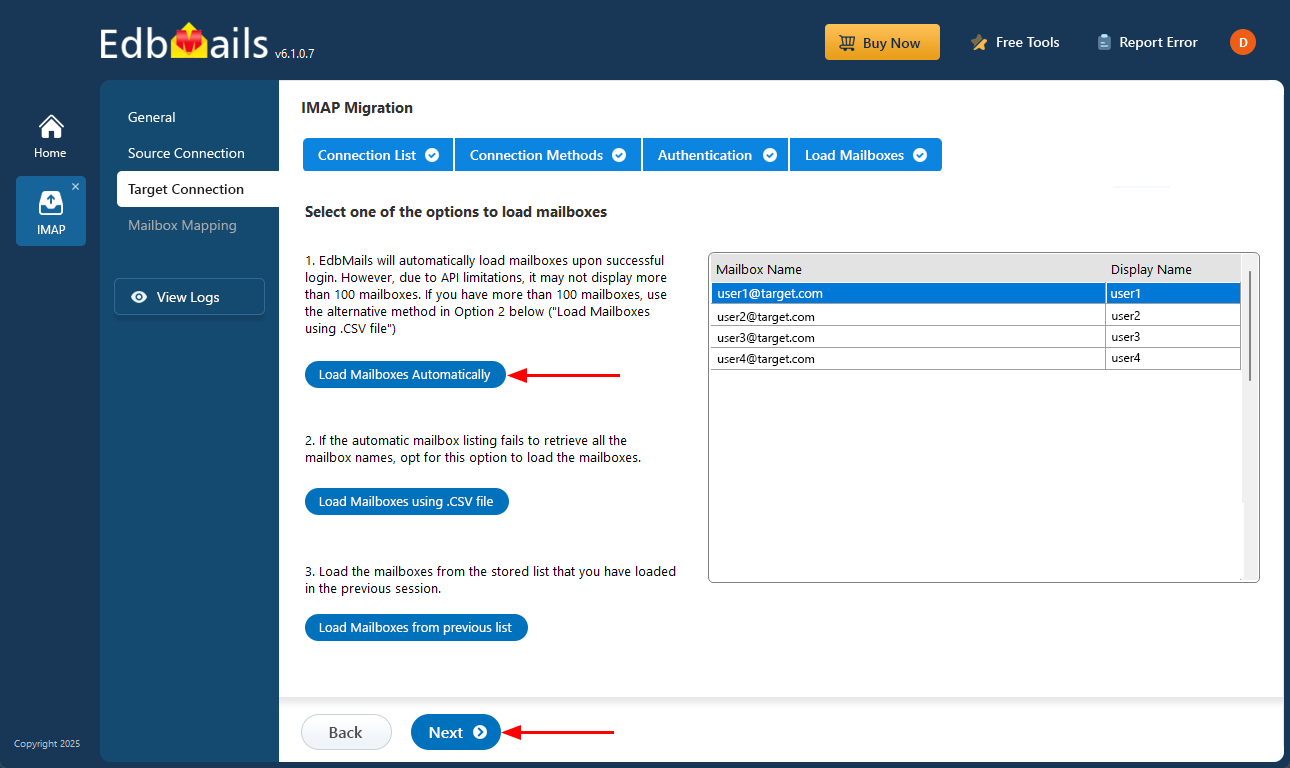
- Once authentication is completed successfully, select any one of the following methods to load the mailboxes:
i) Load Mailboxes Automatically: EdbMails loads the mailboxes automatically after login, making the setup quick and simple. If the automatic mailbox list does not return every required target, use the CSV-loading option below and verify the destination mailbox list before continuing.
ii) Load Mailboxes using CSV file: If the automatic method does not retrieve all mailbox names, choose the ‘Load Mailboxes using .CSV file’ option to manually select and load the required mailboxes.
iii) Load Mailboxes from previous list: You can directly access mailboxes from the list that was imported and saved during your previous session.
- Select ‘Load Mailboxes Automatically’ and click ‘Next’ to proceed.
Step 4: Open Xchange email to Office 365 mailboxes mapping
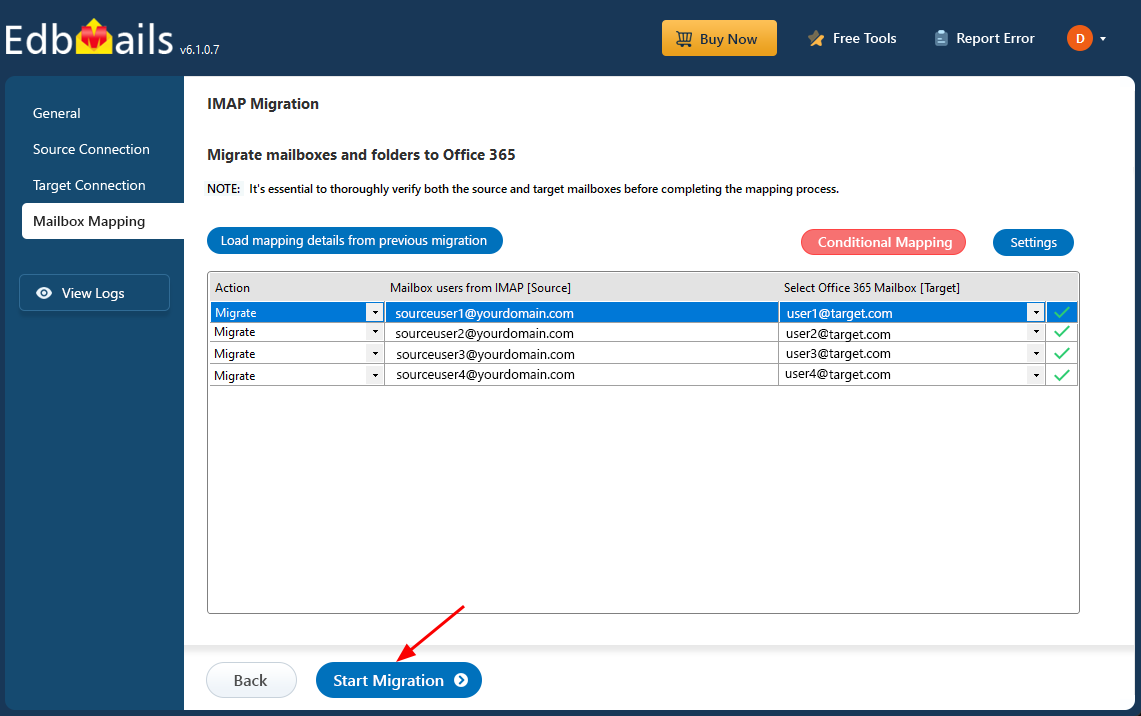
- Choose one of the available options to map the source and target mailboxes
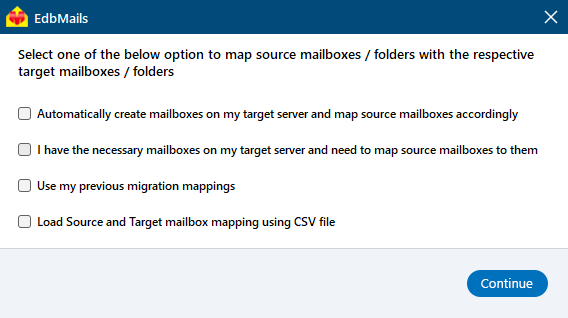
- Where supported and selected, EdbMails can assist with target mailbox creation and source-to-target mapping. Verify Microsoft 365 licensing and review every mailbox and folder mapping before production migration.
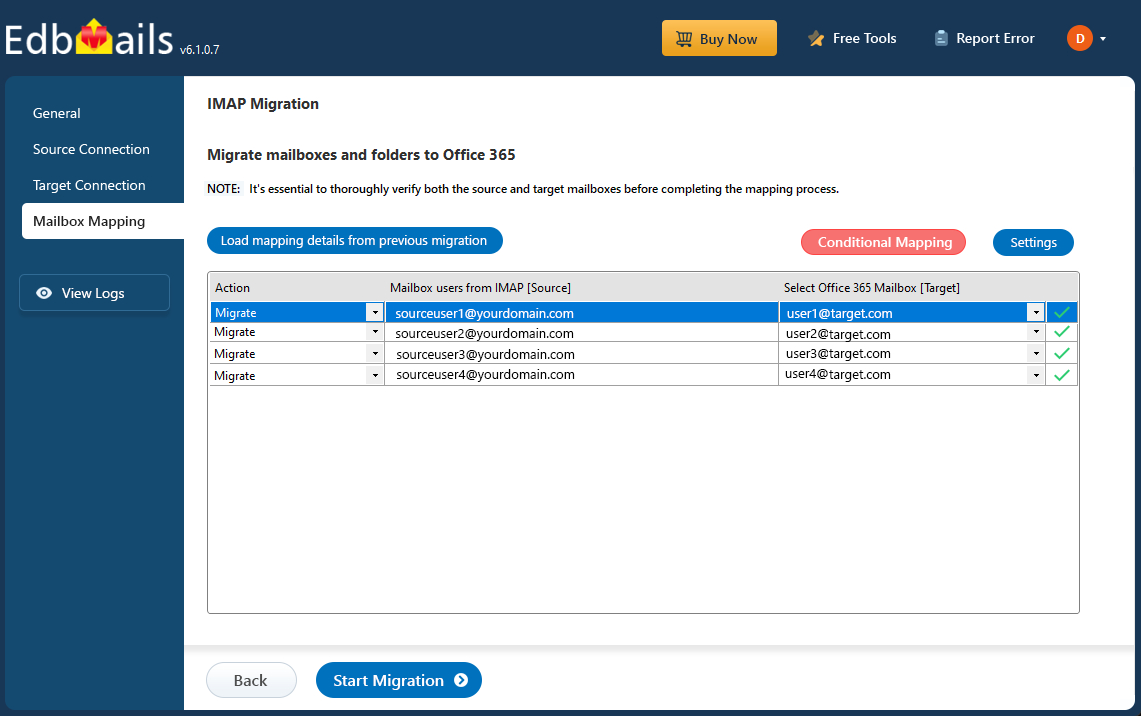
- Choose one of the available options to map the source and target mailboxes
Step 5: Start Open Xchange email to Office 365 migration
- Once the mailboxes are mapped, click the 'Start Migration'button to begin the migration process.
- Click the 'View Logs' button to access the migration report, which provides detailed information on the items migrated from each folder and mailbox. The report includes mapping details, the number of emails migrated, and any issues encountered during the migration process, helping you track and verify the migration of your data.
- Also log into your target server to verify the migrated items.
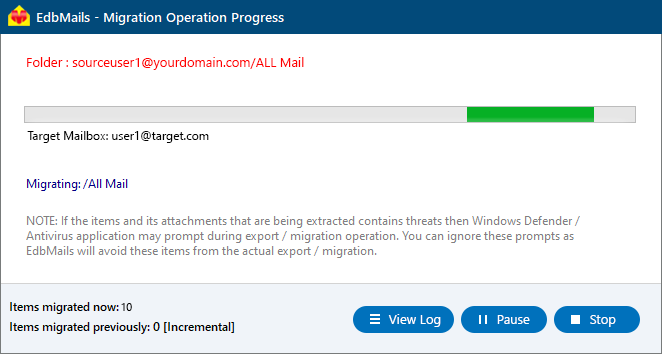
- Once the mailboxes are mapped, click the 'Start Migration'button to begin the migration process.
Open Xchange email to Office 365 post-migration tasks
- Step 1: Update the MX records to point to Office 365
Ensure the MX records are updated to direct your email traffic to the Office 365 server, enabling smooth email flow. Alongside, make sure to configure the Autodiscover record so Outlook can automatically detect and connect to the newly migrated mailboxes, so users can connect to the Microsoft 365 mailboxes.
- Step 2: Create a new Outlook profile for users in the new domain
In case users face issues connecting to Office 365 mailboxes, configure a new Outlook profile for each user within the new domain to restore proper functionality.
- Step 1: Update the MX records to point to Office 365
Open Xchange email to Office 365 migration troubleshooting
For troubleshooting, check out our knowledge base articles. If you have additional questions, browse the FAQs or contact our dedicated support team for personalized assistance.
Advantages of EdbMails for Open Xchange email to Office 365 Migration
- Incremental Migration Support
EdbMails offers incremental migration support for Open Xchange email to Office 365 migration, ensuring that only the new or modified data is transferred after the initialmigration. This helps reduce migration time and prevents unnecessary duplication of alreadymigrated data, ensuring efficiency and accuracy.
- Preserve supported email data
EdbMails is designed to retain supported messages, attachments, folders, and common message properties exposed by the Open-Xchange IMAP service and accepted by Microsoft 365. Review migration reports and verify representative target data after the transfer.
- Real-time Progress Tracking and Reporting
EdbMails provides real-time progress tracking andreporting, allowing you to monitor the status of your Open Xchangeemail to Office 365 migration in real-time. The detailed reports ensure transparency throughoutthe migration, helping administrators track progress, troubleshoot issues, and ensure theprocess runs smoothly.
- Automated Migration Workflow
With EdbMails, the entire migration process is automated, minimizing manual intervention. Oncethe setup is complete, the software handles the transfer of data automatically, streamlining theworkflow and reducing human errors. This automated approach ensures a fast and error-freemigration with minimal downtime.
- Guided Setup Wizard
EdbMails simplifies the migration process with its guided setup wizard. Thiseasy-to-follow interface walks users through the setup of source and target servers, IMAPconfigurations, and other migration settings. The intuitive design makes it accessible for bothtechnical and non-technical users, ensuring a smooth experience.
- Microsoft 365 modern authentication
The Microsoft 365 target uses the current EdbMails OAuth-based connection workflow. Source Open-Xchange authentication depends on the hosting provider or server configuration.