Tiscali to Office 365 Email Migration
Move Tiscali email to Microsoft 365 using Tiscali's secure IMAP service. Tiscali currently documents imap.tiscali.it as the incoming IMAP server, port 993, with SSL/TLS and password authentication.
EdbMails IMAP Migration Tool migrates supported messages, attachments, mail folders, folder hierarchy, and common message properties from Tiscali to Microsoft 365. Contacts, calendars, tasks, and other non-mail data are outside the standard IMAP workflow.
For single or bulk migration, connect the Tiscali source with the provider's documented IMAP settings, prepare the Microsoft 365 target, review mailbox mapping, run a pilot, and use follow-up incremental passes where required before final cutover.
Use this provider-specific page together with the main IMAP to Office 365 migration guide.
Tiscali to Office 365 Migration Overview
| Area | Tiscali source | Microsoft 365 target |
|---|---|---|
| IMAP server | imap.tiscali.it | Current EdbMails Microsoft 365 target connection |
| Secure IMAP port | 993 with SSL/TLS | OAuth-based target authentication |
| Migration scope | Email messages and mail folders available through IMAP | Supported email data written to the destination mailbox |
| Contacts/calendars/tasks | Not transferred through standard IMAP | Handle separately if required |
The migration should be planned as an email-focused IMAP project, with non-mail data handled separately if required.
How EdbMails Supports Tiscali to Office 365 Email Migration
EdbMails provides a graphical IMAP-to-Microsoft 365 workflow with bulk CSV loading, selective folder migration, pause/resume, concurrent mailbox processing, incremental follow-up runs, mailbox mapping, and migration reports. These controls help administrators stage the project and verify target mailboxes before changing production mail flow.
For generic Microsoft 365 destination prerequisites and workflow details, use the main IMAP to Office 365 migration guide.
Tiscali email to Office 365 Migration Planning
- Inventory Tiscali mailboxes, mailbox sizes, folders, aliases, and active users.
- Use imap.tiscali.it, port 993, SSL/TLS, and the source mailbox password.
- Create/provision Microsoft 365 target mailboxes and assign licenses.
- Add and verify the custom domain if required.
- Review source limits, target throttling, message-size policies, and bandwidth.
- Run a pilot mailbox before production migration.
Pre-migration activities for Tiscali email to Office 365 Migration
Tiscali source
- IMAP server: imap.tiscali.it.
- Port: 993.
- Security: SSL/TLS.
- Authentication: Tiscali email address and password.
- For bulk migration, prepare the EdbMails CSV and validate a small test set first.
Microsoft 365 target
- Create/provision target mailboxes and assign licenses.
- Use the current EdbMails OAuth-based Microsoft 365 target connection.
- Run a pilot before production migration.
Step-by-Step Guide to Migrate from Tiscali to Office 365
Step 1: Download and install EdbMails IMAP migration software
- Download EdbMails and install the EdbMails software on your computer.
See a detailed list of EdbMails system requirements for IMAP migration.
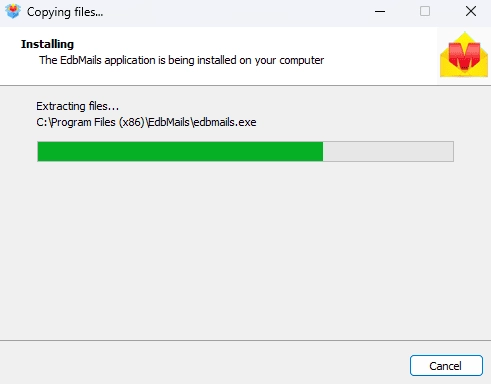
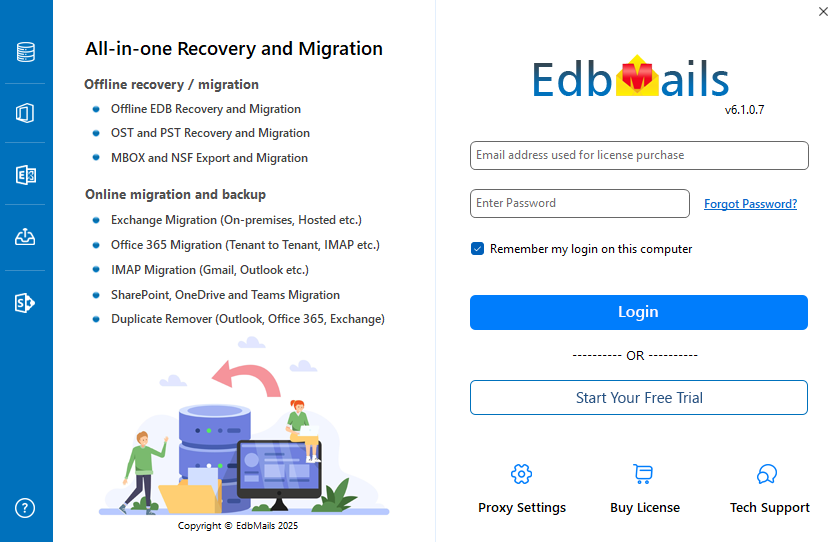
- Launch the EdbMails application on your computer.
- Enter your registered email address and password, then click ‘Login’. If you’re using EdbMails for the first time, choose ‘Start Your Free Trial’ to proceed with the trial version.Note: The EdbMails IMAP trial lets you evaluate the workflow and migrate up to 30 items from each folder. To migrate all eligible items for licensed mailboxes, purchase the required IMAP migration license.
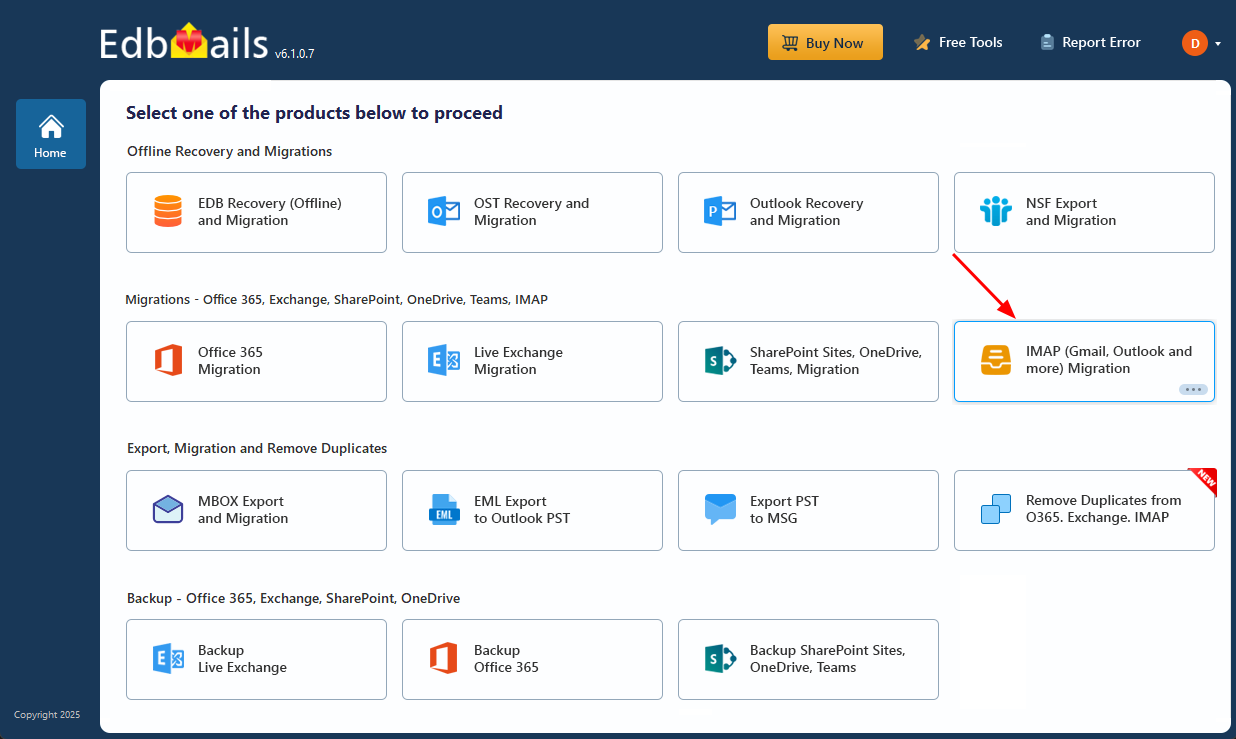
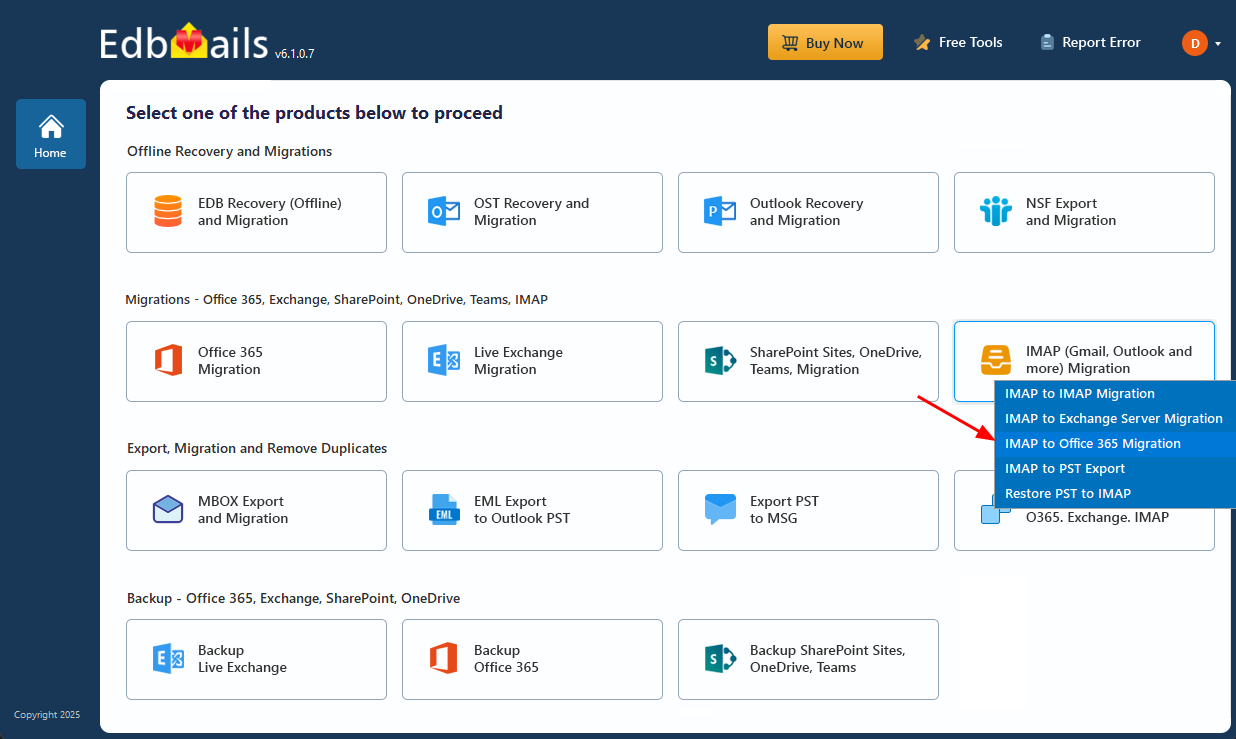
- Select the option ‘IMAP (Gmail, Outlook & more) Migration’.
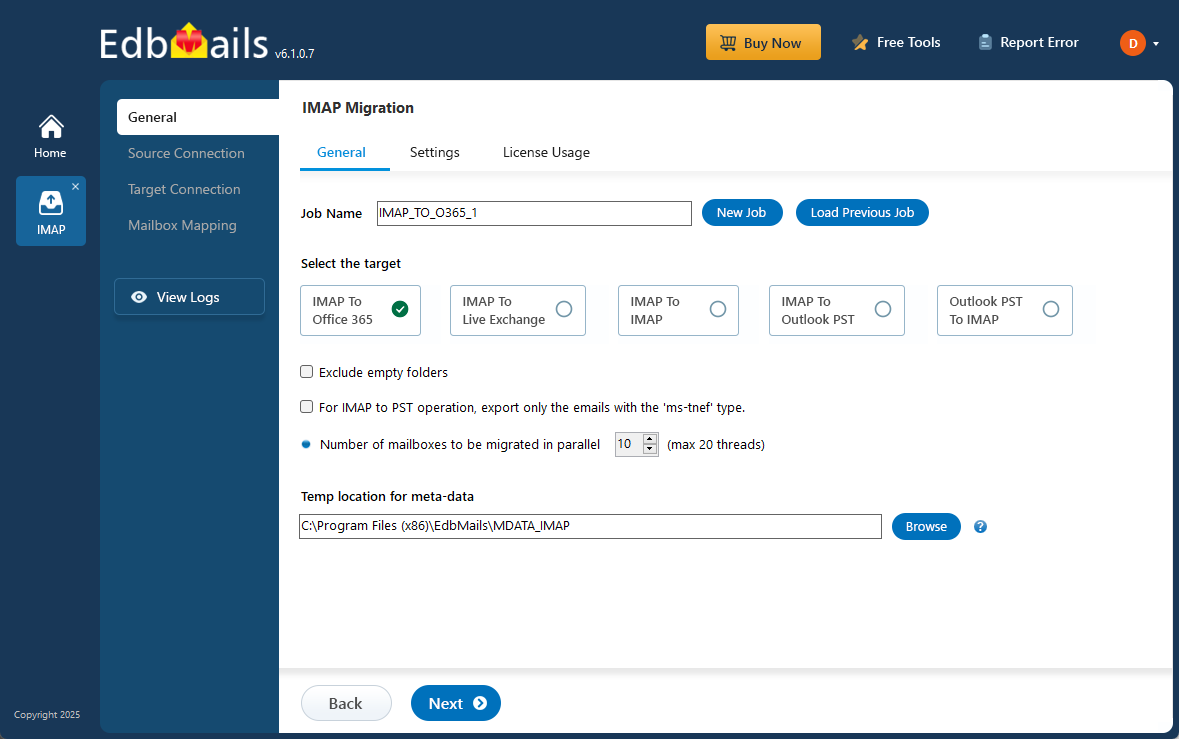
- Select ‘IMAP to Office 365 Migration’.
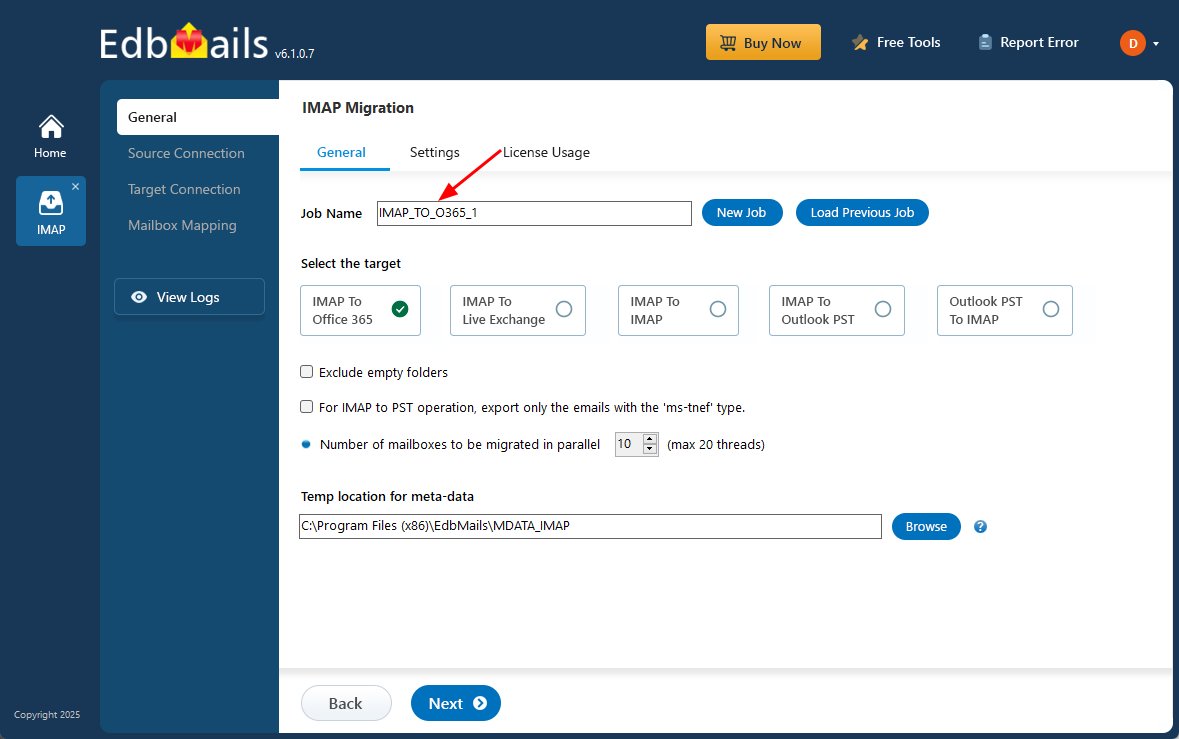
- Use the default job name or click 'New Job' to modify the job name
- Download EdbMails and install the EdbMails software on your computer.
Step 2: Connect to source Tiscali email server
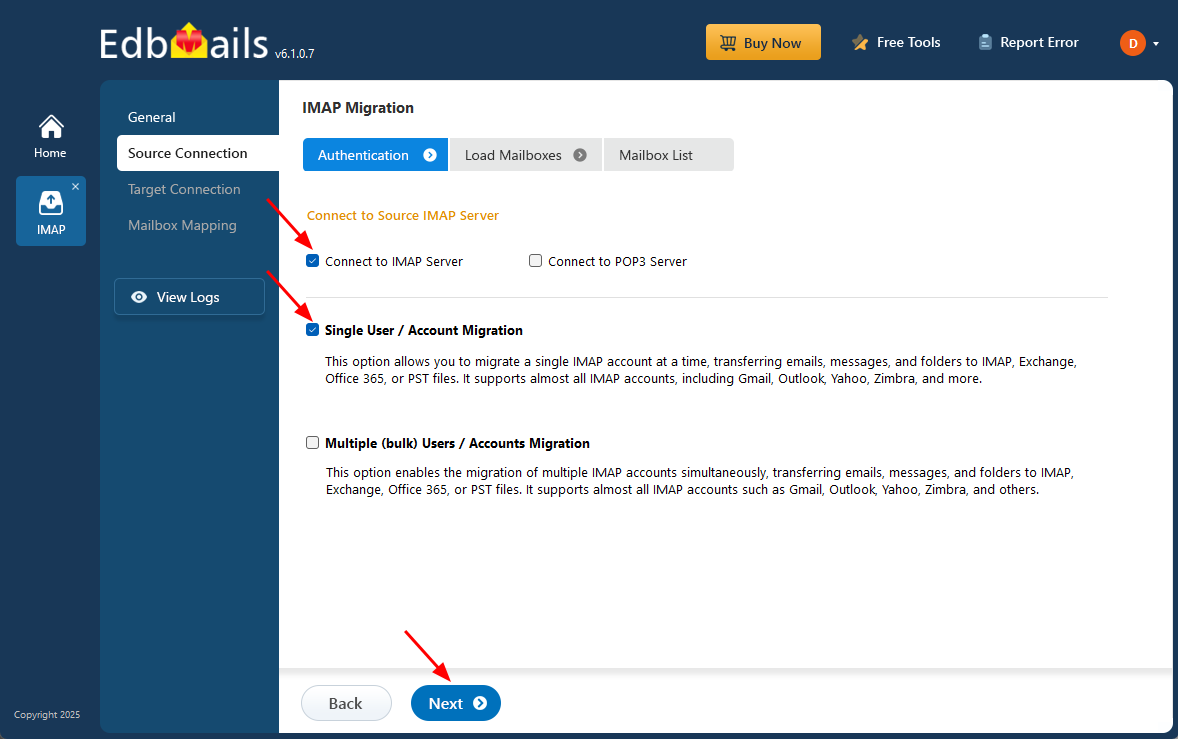
- To connect a single Tiscali account for migration, click ‘Single User / Account Migration.’
- For this email-migration workflow, choose ‘Connect to IMAP Server’ and continue with the provider-specific IMAP settings below.
- Click ‘Next’ to proceed.
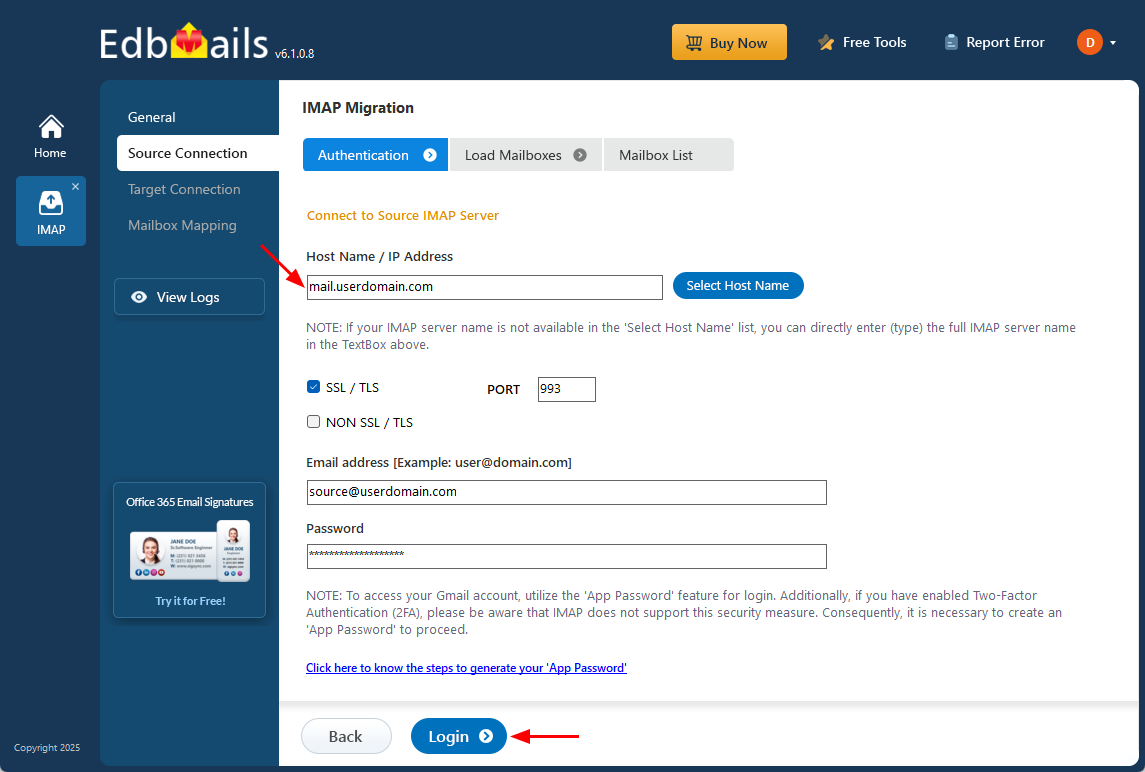
- Enter imap.tiscali.it as the IMAP server, use port 993 with SSL/TLS, and provide the Tiscali email address and password.
- Next, click the ‘Login’ button.
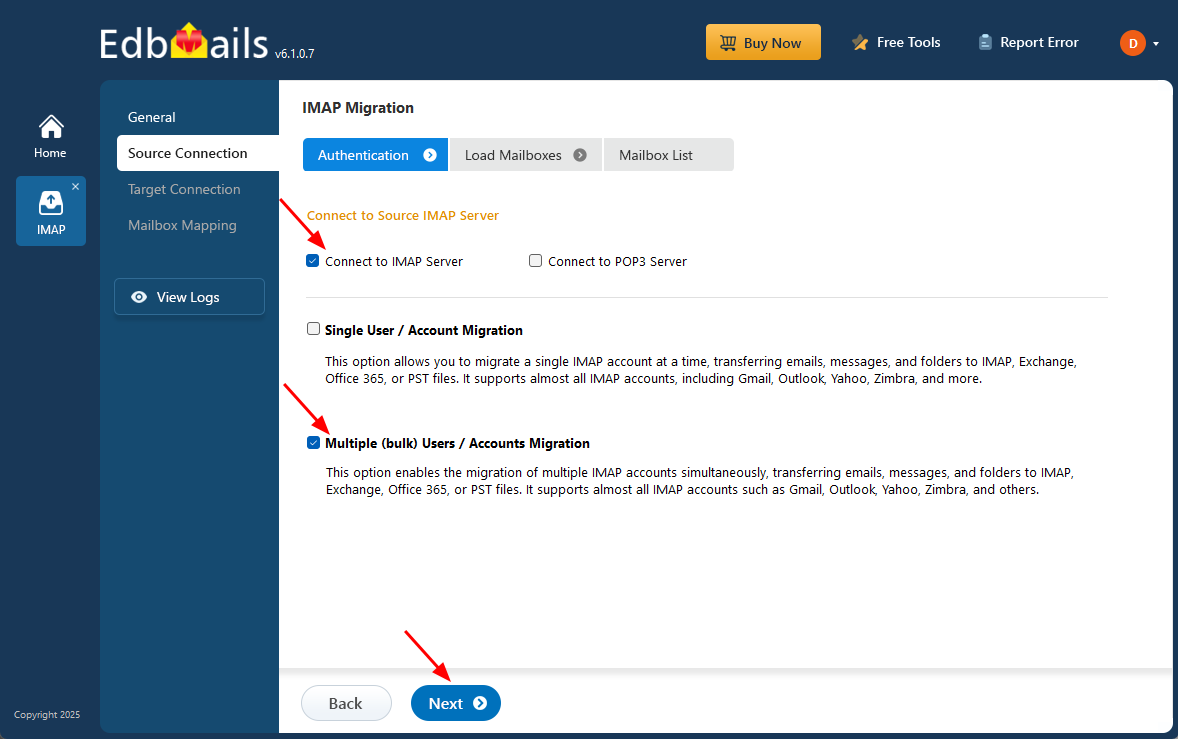
- To connect multiple Tiscali mailboxes, select ‘Multiple (Bulk) Users/Accounts Migration’, choose ‘Connect to IMAP Server’, and click ‘Next’.
- Then proceed by clicking ‘Next’.
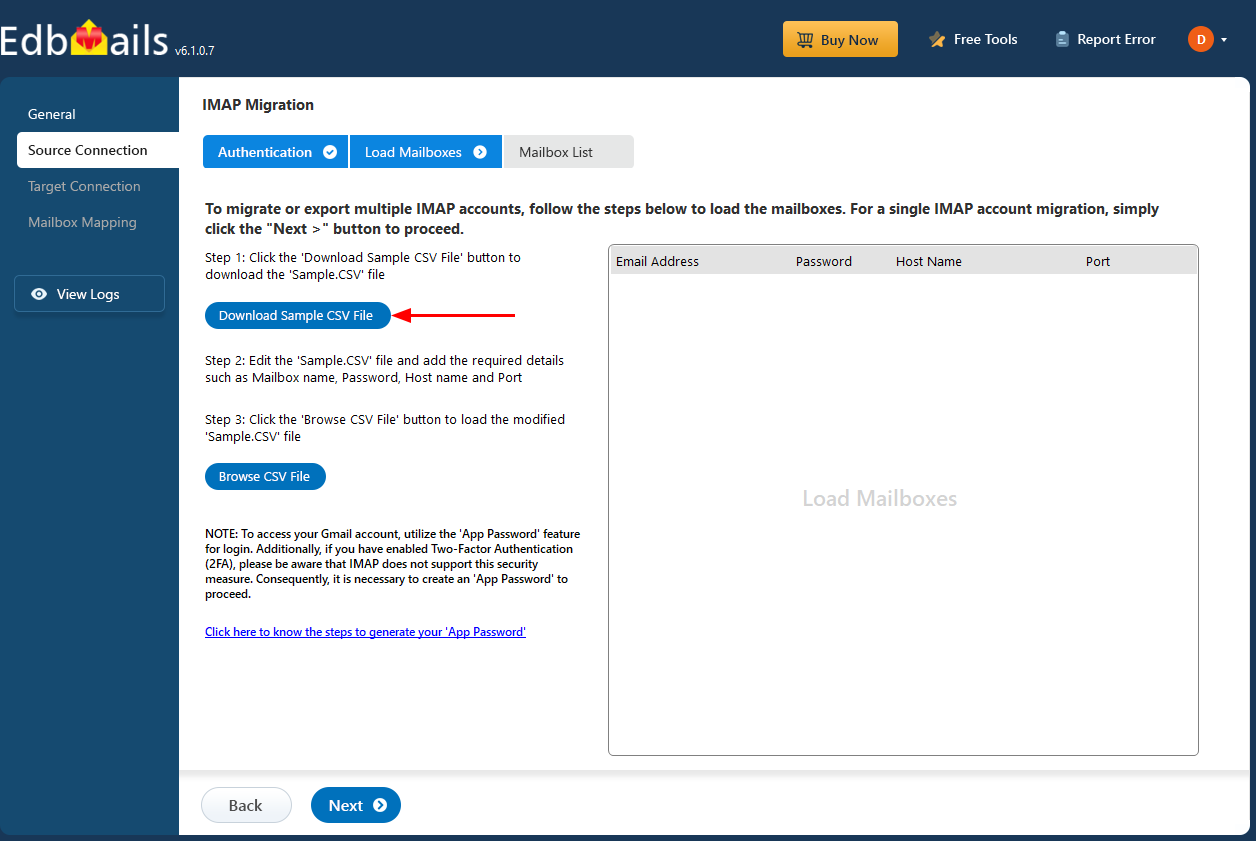
- Click ‘IMAP Migration CSV File’.
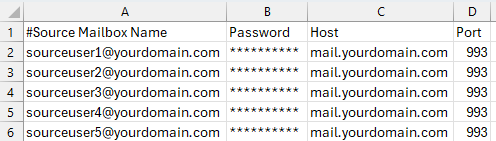
- Update the CSV file by adding the necessary details like email address, password, host name, and port number. Once done, save the file.
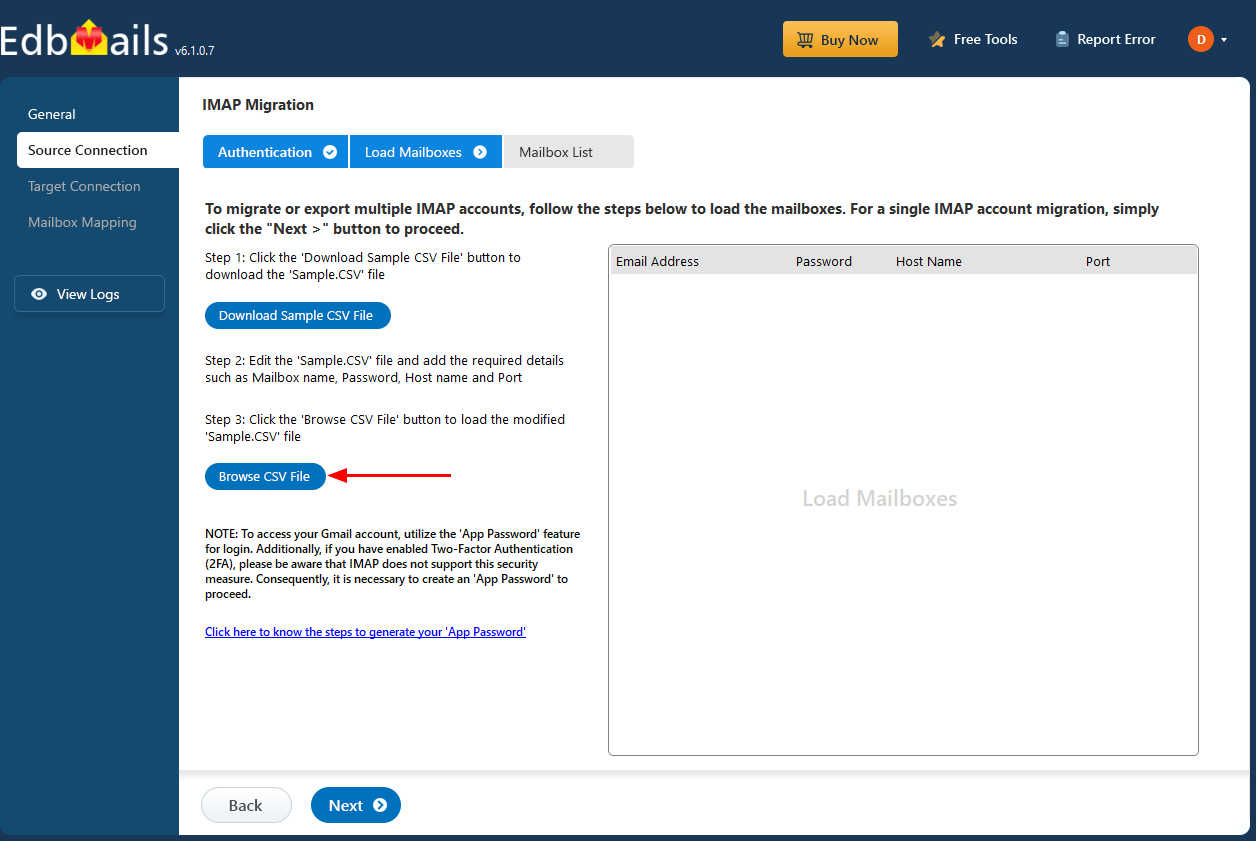
- Close the CSV file, click the 'Load Modified CSV File' button, and select the updated file.
- Verify the mailboxes, and click ‘Next’.
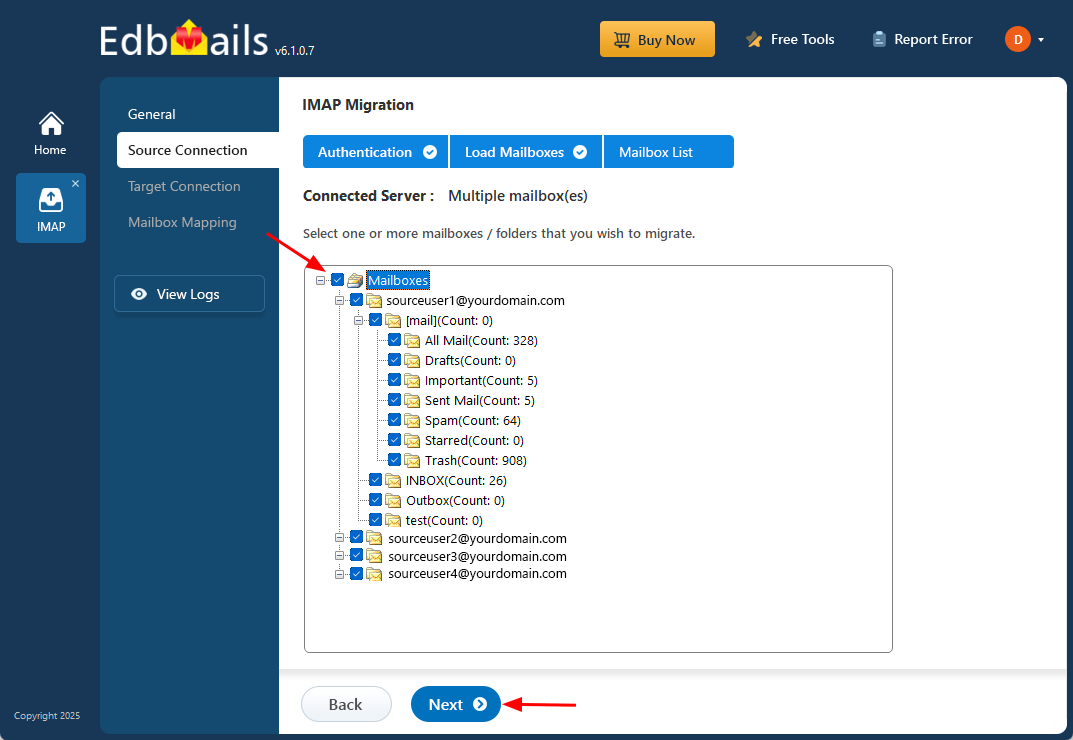
- Select the mailboxes or folders to migrate, then click ‘Next’.
Step 3: Connect to the target Office 365
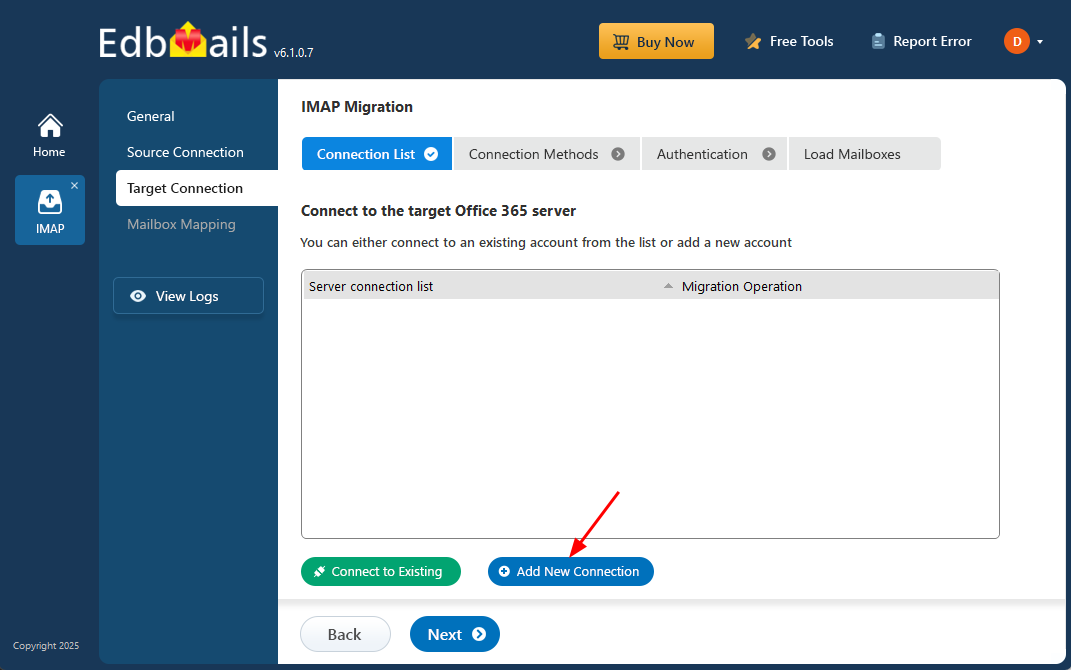
- Click the ‘Add New Connection’ button to create a new connection to your target Office 365 server. To use an existing connection, simply select it from the list and click ‘Connect to Existing’ to continue.
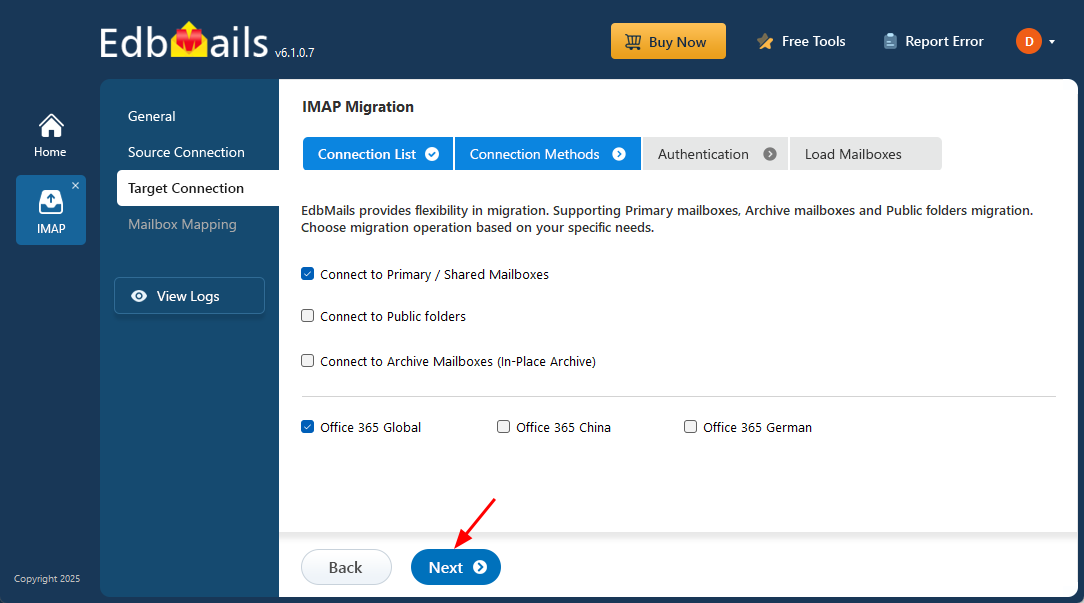
- Select the Microsoft 365 mailbox connection option appropriate for the destination mailbox used for this IMAP email migration, then continue with the current EdbMails OAuth-based authentication workflow.
- Choose the necessary connection options and click ‘Next’ to continue with authentication methods.
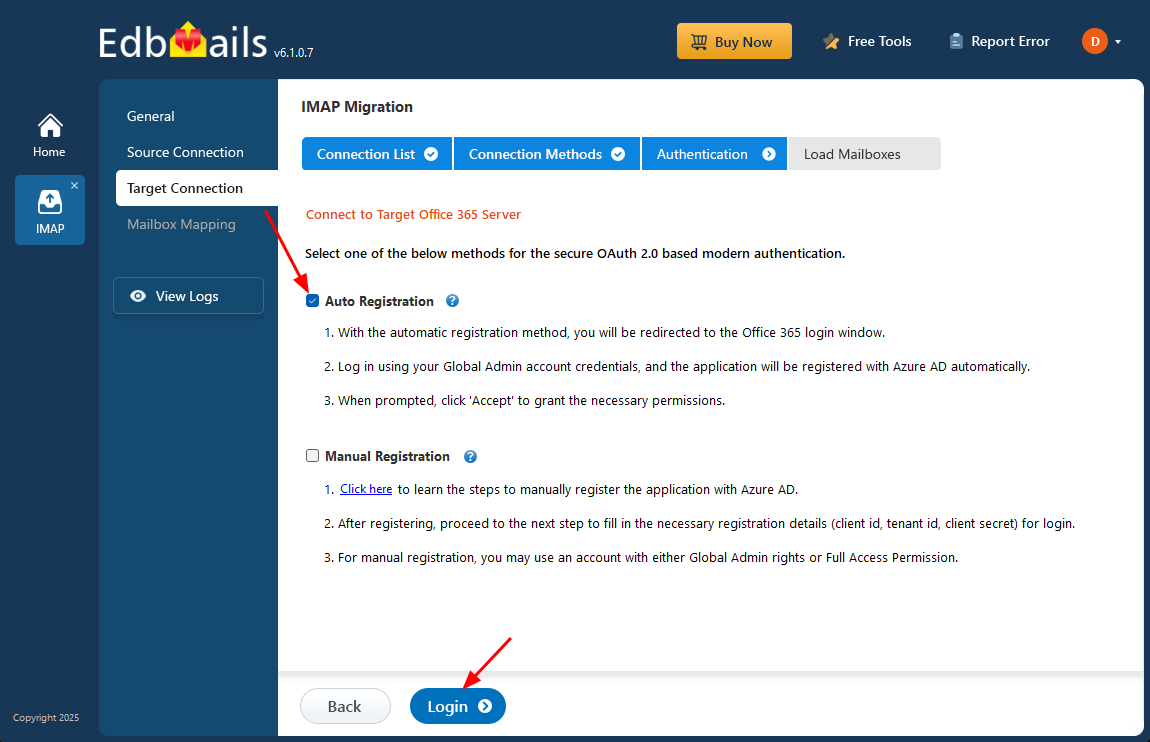
- Select your preferred secure authentication method for the target Office 365 account.
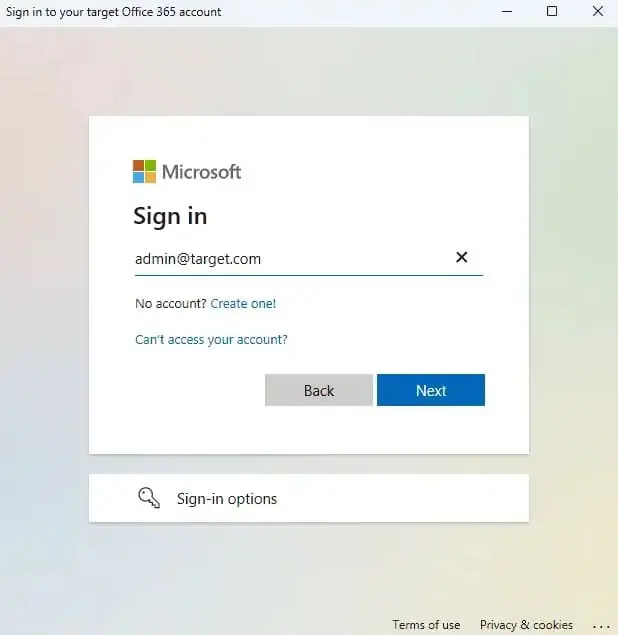
- The sign-in process is completed through the official Microsoft login page, where your credentials are securely verified using OAuth 2.0, ensuring safe and protected access.
- Click ‘Login’ to continue.
- Authenticate on Microsoft sign-in page.
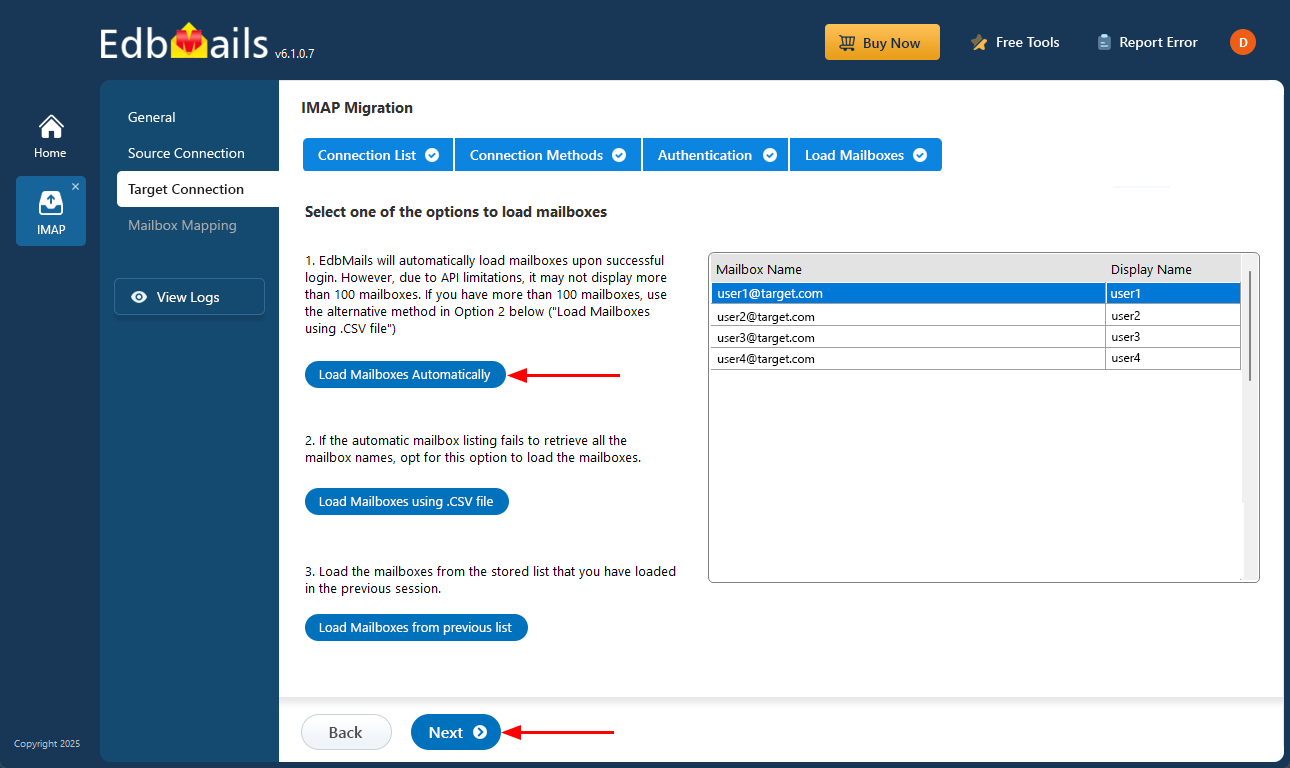
- Choose the required method to load target Microsoft 365 mailboxes. If the automatic mailbox list does not return every required target, use the supported CSV-loading option and verify the destination mailbox list before continuing.
- Click the ‘Next’ button to continue.
- Click the ‘Add New Connection’ button to create a new connection to your target Office 365 server. To use an existing connection, simply select it from the list and click ‘Connect to Existing’ to continue.
Step 4: Tiscali email to Office 365 mailboxes mapping
- Select the required mapping option.
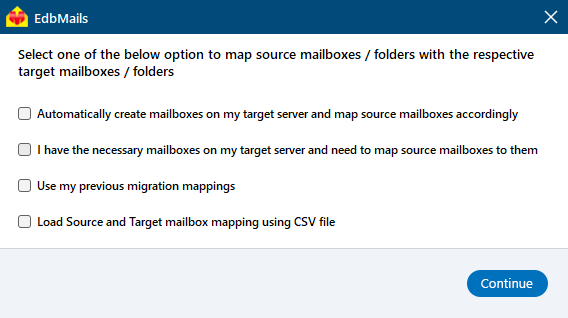
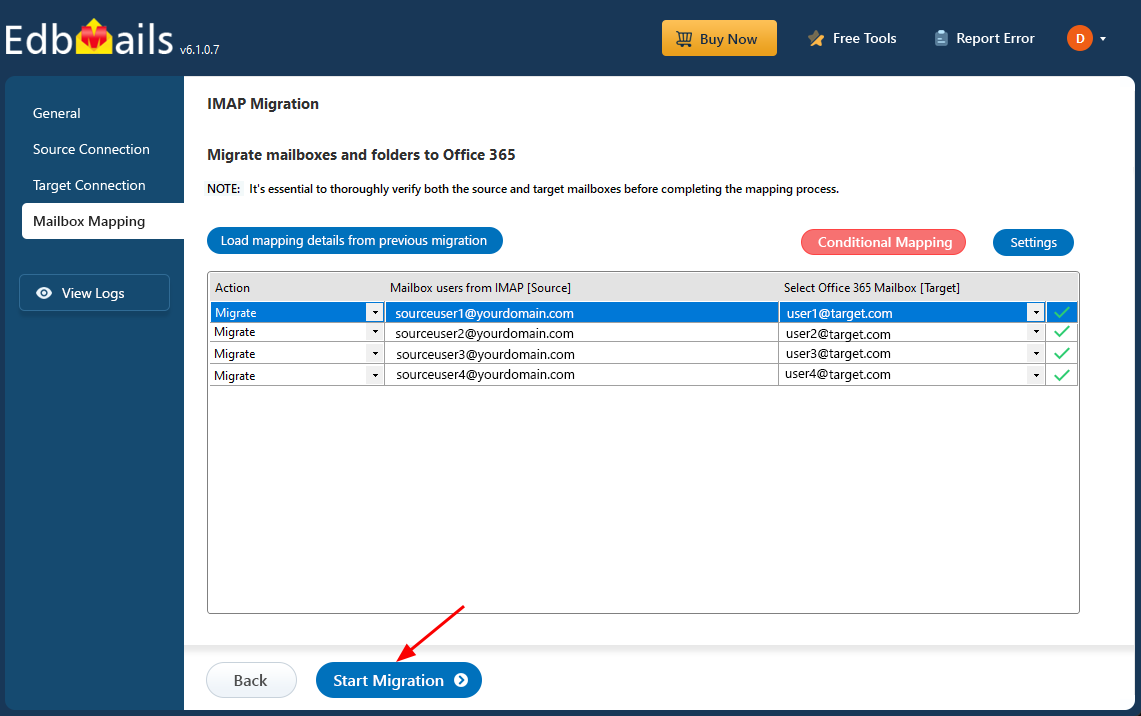
- Where supported and selected, EdbMails can assist with target mailbox creation and automatic mapping. Verify Microsoft 365 licensing and review every source-to-target mailbox mapping before starting the production migration.
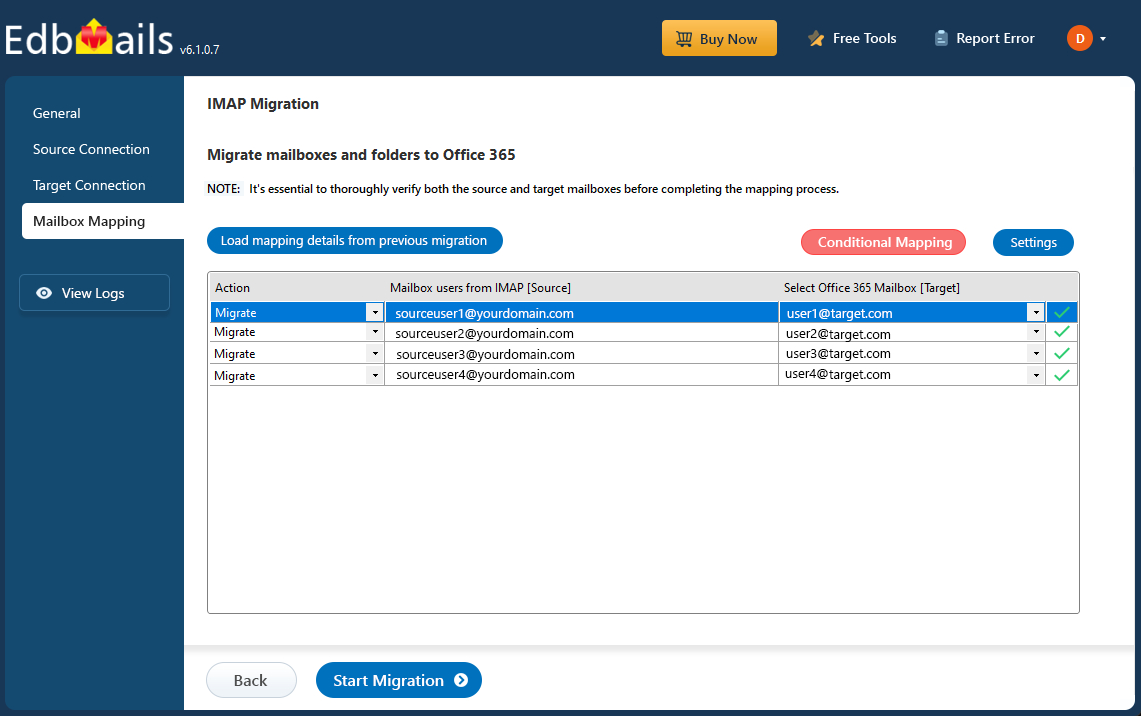
- Select the required mapping option.
Step 5: Start Tiscali email to Office 365 migration
- After mapping the mailboxes, click the ‘Start Migration’ button to initiate the migration process
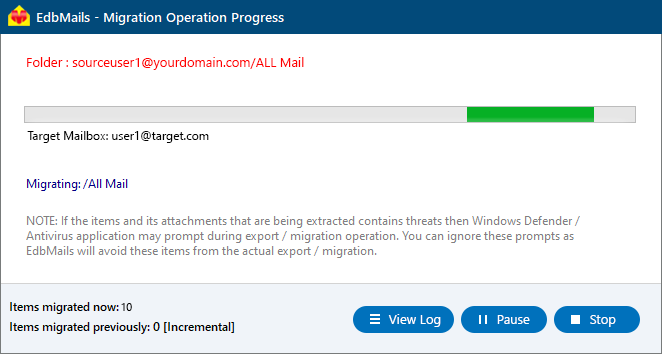
- You can now track the migration progress using the progress bar. When the migration is complete, EdbMails will display a confirmation message.
- Click the 'View Logs' button to open the migration report, which provides a detailed summary of the entire process, including the total number of items migrated from each folder.
- Login to your target server and verify the items.
- After mapping the mailboxes, click the ‘Start Migration’ button to initiate the migration process
Tiscali email to Office 365 Post-migration Tasks
- Verify the Microsoft 365 target
Review migration reports and check representative folders, messages, attachments, item counts, and user access.
- Update mail DNS when ready
If Microsoft 365 becomes the production mail service, update the required MX/DNS records only after target validation.
- Validate Outlook/client access
Confirm Microsoft 365 sign-in and Autodiscover behavior and recreate Outlook profiles only where required.
- Retain the source during validation
Keep the Tiscali mailbox available for the agreed transition period before decommissioning the old email service.
- Verify the Microsoft 365 target
Troubleshooting Guide for Tiscali email to Office 365 Migration
For common migration issues, check the knowledge base articles. For more information on EdbMails IMAP migration, visit the frequently asked questions (FAQs) section or contact our dedicated support team for personalized assistance.
Benefits of EdbMails for Tiscali to Office 365 Email Migration
- Provider-specific source connection
Use Tiscali's documented secure IMAP endpoint, port 993, and SSL/TLS settings.
- Bulk mailbox migration
Load multiple Tiscali accounts through CSV and process migration batches efficiently.
- Selective migration
Select required mailboxes/folders and apply supported IMAP filters.
- Incremental follow-up runs
Process eligible new or changed email items after the initial pass for staged migration.
- Mailbox mapping and verification
Review mappings, migration reports, and representative target data before completing the cutover.