Rackspace to AWS Migration
Rackspace Email can be migrated to an IMAP-compatible mail platform hosted in AWS, or to an existing Amazon WorkMail organization that was created before AWS stopped accepting new WorkMail customers on April 30, 2026. AWS has announced that Amazon WorkMail reaches end of support on March 31, 2027, so new migration projects should not adopt WorkMail as a long-term target. Existing WorkMail customers should plan a subsequent move before the end-of-support date.
For an AWS-hosted target other than WorkMail, confirm that the selected mail platform exposes a supported IMAP endpoint and define its authentication, TLS, mailbox, DNS, backup, and administration requirements before migration. Standard IMAP migration covers email messages, attachments, folders, and supported message properties; contacts, calendars, tasks, and platform-specific settings require separate handling.
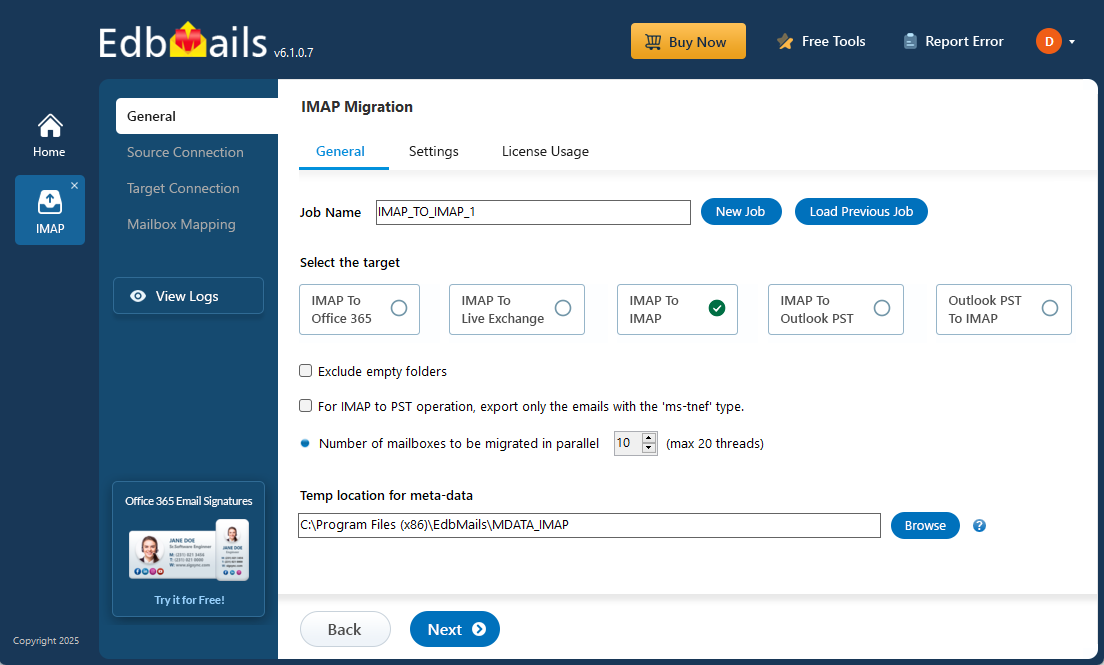
The EdbMails IMAP Migration Tool provides a guided Rackspace-to-IMAP-target workflow with mailbox selection, mapping, filters, concurrent processing, incremental follow-up runs, and migration reports. For the broader server-to-server process, use the IMAP to IMAP migration guide. The target can be an existing WorkMail organization during its remaining supported lifetime or another IMAP-compatible mail platform hosted in AWS.
Use the secure IMAP/TLS settings supported by both endpoints, protect migration credentials, run a pilot mailbox, and verify representative target data before changing production mail flow.
Why do users want to Migrate from Rackspace to AWS?
Organizations may move Rackspace email into an AWS-hosted mail environment when they already operate a supported mail platform in AWS or need infrastructure control that fits their architecture. Amazon WorkMail is now a legacy target: AWS stopped accepting new customers on April 30, 2026 and will end WorkMail support on March 31, 2027.
- Existing Amazon WorkMail organizations: Existing customers can continue using WorkMail until March 31, 2027, subject to AWS support terms, while planning a replacement.
- Other AWS-hosted mail platforms: A third-party or self-managed mail server on AWS can be a target when it provides supported IMAP access and the organization accepts responsibility for administration, security, backups, deliverability, and availability.
- Architecture control: Hosting a mail platform in AWS can provide infrastructure flexibility, but the email service itself must be designed, secured, monitored, and maintained separately from the migration.
- Target validation: Confirm the target platform, IMAP endpoint, user provisioning, authentication method, TLS configuration, mailbox quotas, and DNS plan before production migration.
Rackspace to AWS Migration Planning
Before you begin to migrate from Rackspace to AWS, proper planning is crucial to ensure a successful and seamless transition. Follow the below checklists of important considerations:
- Streamline the migration process by removing any unused mailboxes, redundant mail items, and duplicate files from the source server.
- Create an inventory of essential items including user email addresses, passwords, source and target server details, network settings, DNS configurations, MX records, firewall settings, licensing plans, data permissions, and any other dependencies.
- Determine the size of the data and the number of mailboxes that will be migrated to AWS, enabling better resource allocation.
- Choose between a cutover migration (migrating all data at once) or a staged migration (migrating data in phases) based on your specific requirements.
- Estimate the time required for the migration, considering factors such as data size and network capabilities.
- Ensure that your network has sufficient capacity and bandwidth to handle the migration process effectively.
- Communicate the migration plan and upcoming changes to end users and stakeholders, minimizing disruptions and facilitating a smooth transition.
- Conduct a test migration to identify and address any potential issues before proceeding with the actual migration.
- Begin the migration process, ensuring that endpoints are correctly configured and MX records are updated as needed.
- Decommission any unused apps and associated settings after the migration is successfully completed.
Pre-migration activities for Rackspace to AWS Migration
- For Rackspace Email, verify secure IMAP access using secure.emailsrvr.com on port 993 with SSL/TLS.
- Confirm the target AWS-hosted mail platform exposes a supported IMAP endpoint and prepare the required target mailboxes and credentials.
- For an existing Amazon WorkMail organization, use the regional WorkMail IMAP endpoint in the form imap.mail.<region>.awsapps.com with IMAPS port 993 and SSL. Do not provision WorkMail as a new long-term target because AWS no longer accepts new customers and support ends March 31, 2027.
Steps to Migrate from Rackspace to AWS
Step 1: Download and install the EdbMails software
- Download and install the EdbMails application on your computer to get started with the Rackspace to AWS migration process.
See EdbMails system requirements for Rackspace to AWS email migration.
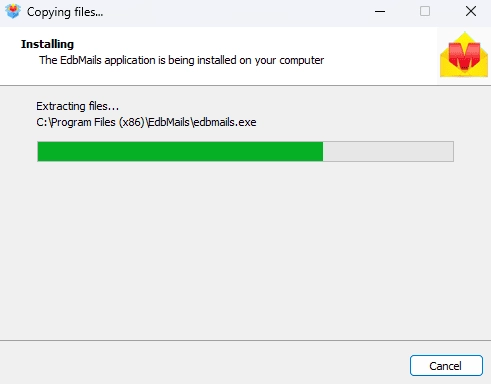
- Launch the EdbMails application on your computer.
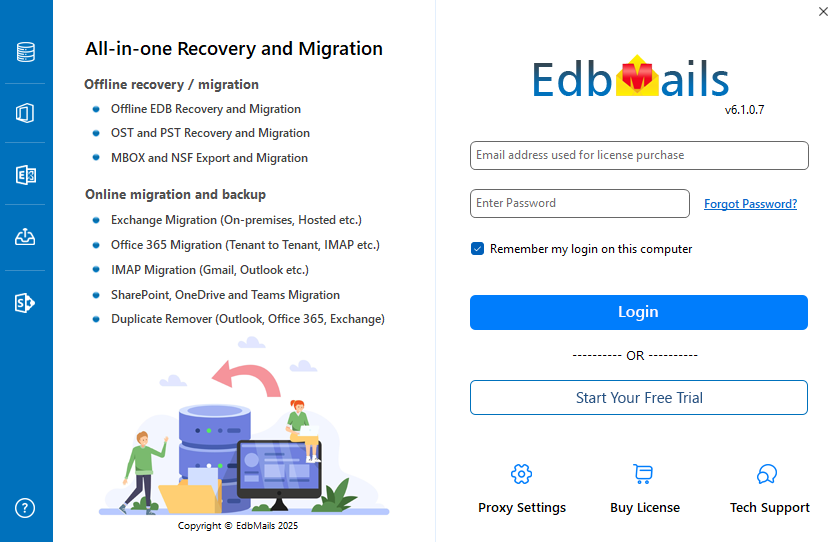
- Enter your registered email ID and password, then click ‘Login’. If you are opening EdbMails for the first time, select ‘Start Your Free Trial’ to begin using the trial version.Note: The trial version provides access to all key features and allows migrating up to 30 items per folder. To migrate all eligible items for licensed mailboxes, purchase the required IMAP Migration license from the official EdbMails website.After completing the purchase, close the application and reopen it. Then sign in using the same email ID and password used during the purchase to successfully activate your license.
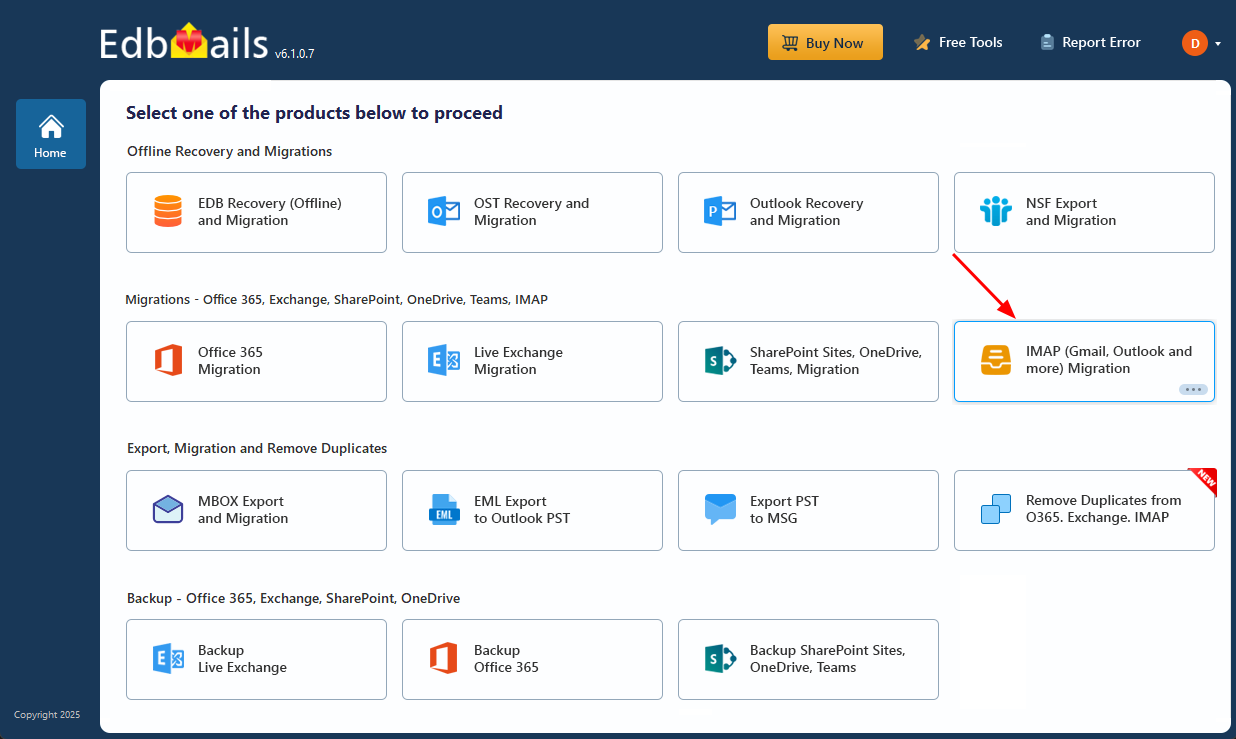
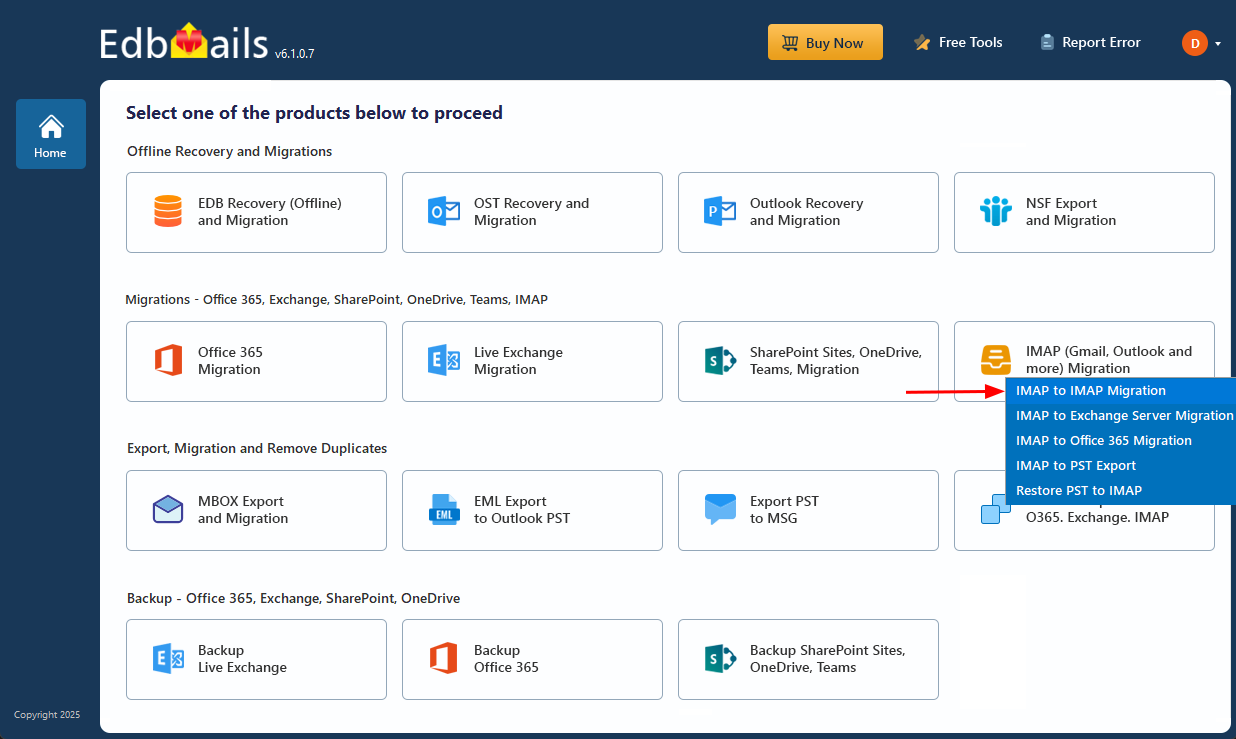
- Select the ‘IMAP (Gmail, Outlook & more) Migration’.
- Select ‘IMAP to IMAP Migration’.
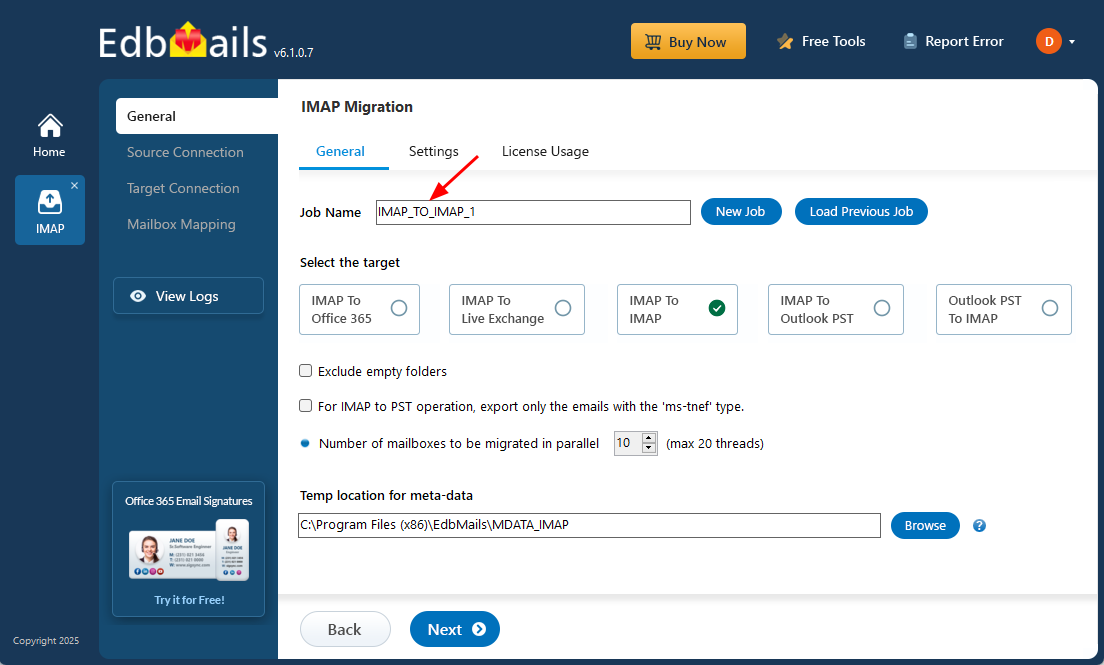
- Use the default job name provided by EdbMails, or click ‘New Job’ to create a custom name for easier identification.
- Download and install the EdbMails application on your computer to get started with the Rackspace to AWS migration process.
Step 2: Connect to the source Rackspace server
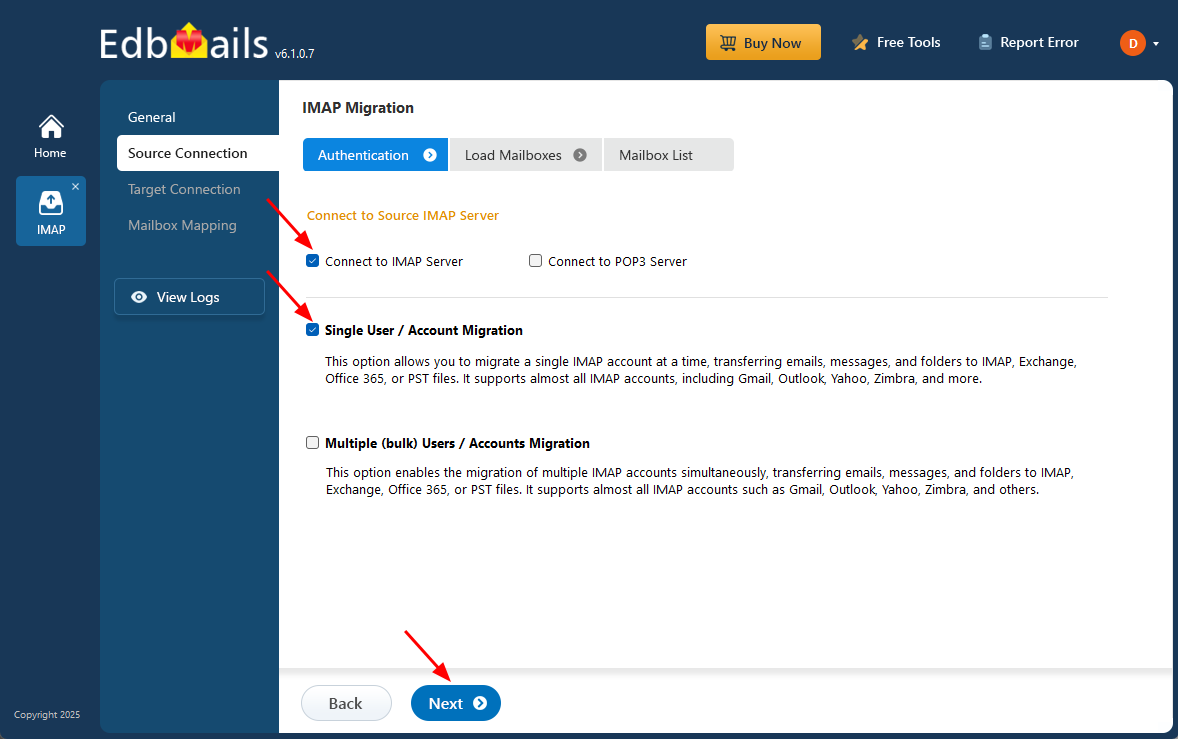
- To connect a single Rackspace account for migration, click ‘Single User / Account Migration’, choose the suitable connection option such as ‘Connect to IMAP Server’ or ‘Connect to POP3 Server’.
- Click ‘Next’ to proceed.
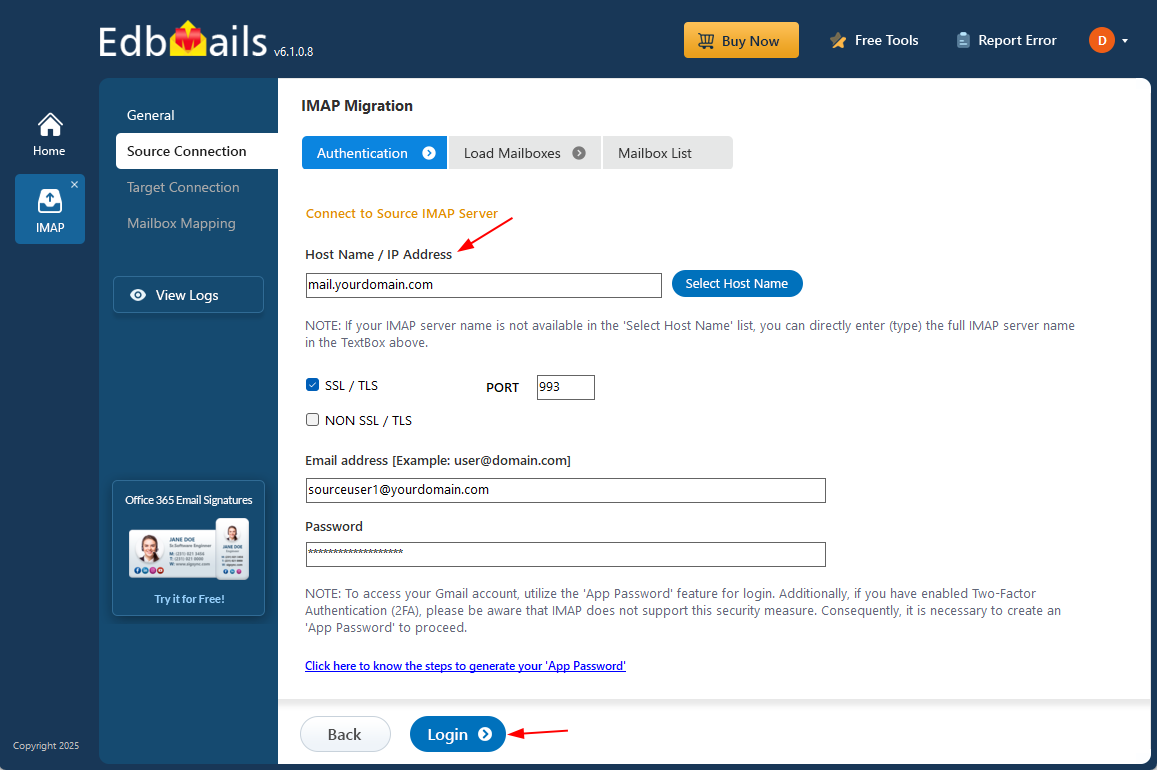
- For Rackspace Email, use secure.emailsrvr.com with port 993 and SSL/TLS.
- Enter the full Rackspace Email address and current mailbox password.
- Click the ‘Login’ button to proceed.
- To migrate multiple Rackspace mailboxes at once, select ‘Multiple (bulk) Users/Accounts Migration’, choose the suitable connection method such as ‘Connect to IMAP Server’ or ‘Connect to POP3 Server’.
- Then proceed by clicking ‘Next’.
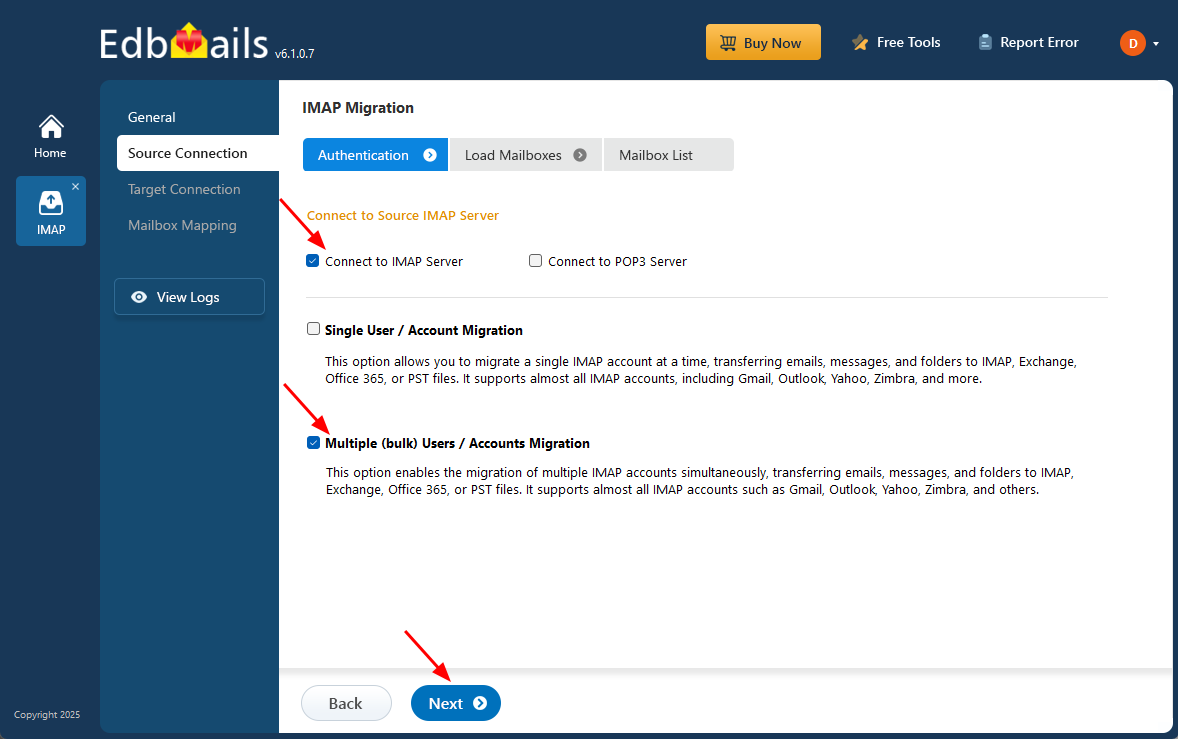
- Click ‘IMAP Migration CSV File’ and choose a destination folder on your local computer to save the CSV file.
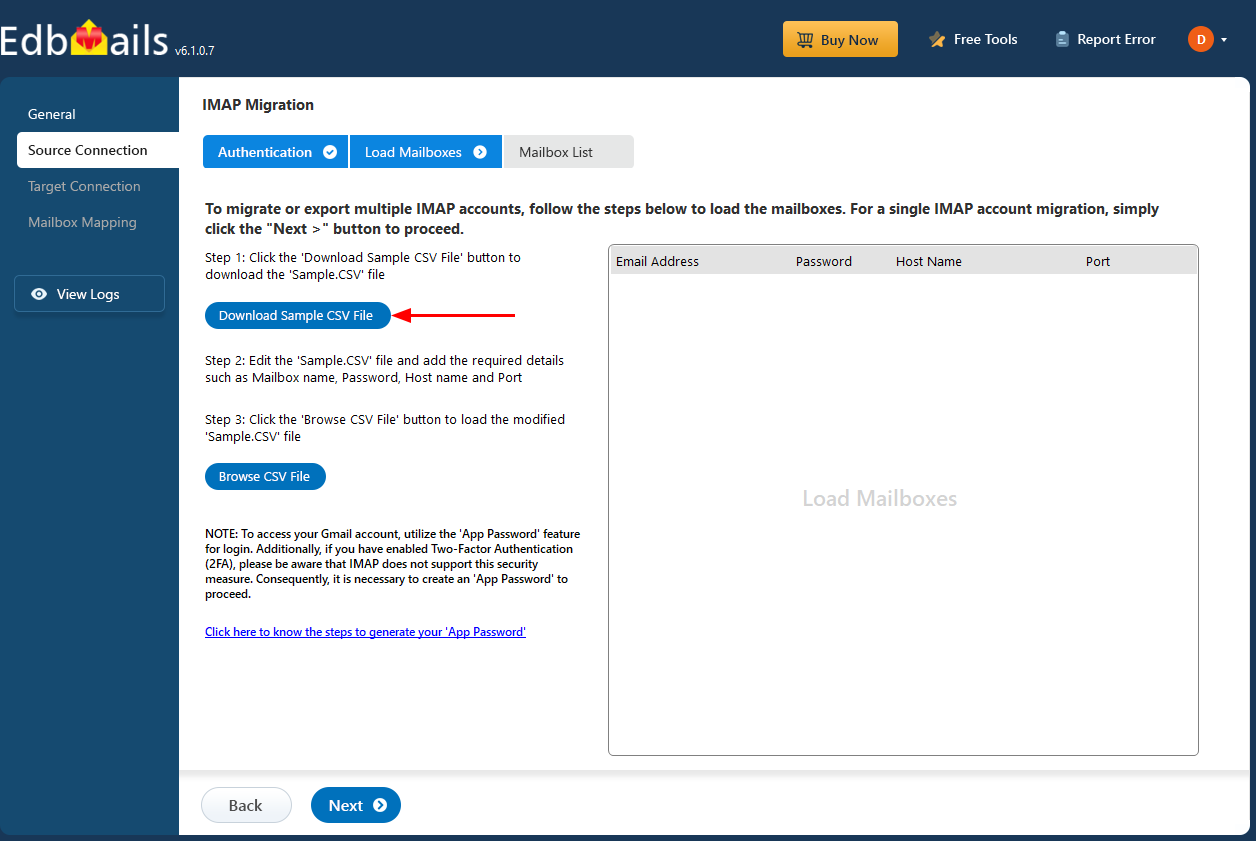
- Open the CSV file and provide the required information for each Rackspace account you plan to migrate.
- This includes the user’s email address, password, IMAP server name, and corresponding port number.
- Once all information is added, save your changes and close the CSV file.
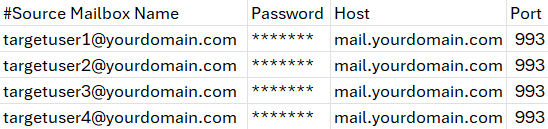
- Now, click the 'Load Modified CSV File' button, open the CSV file and click ‘Next’ to proceed.
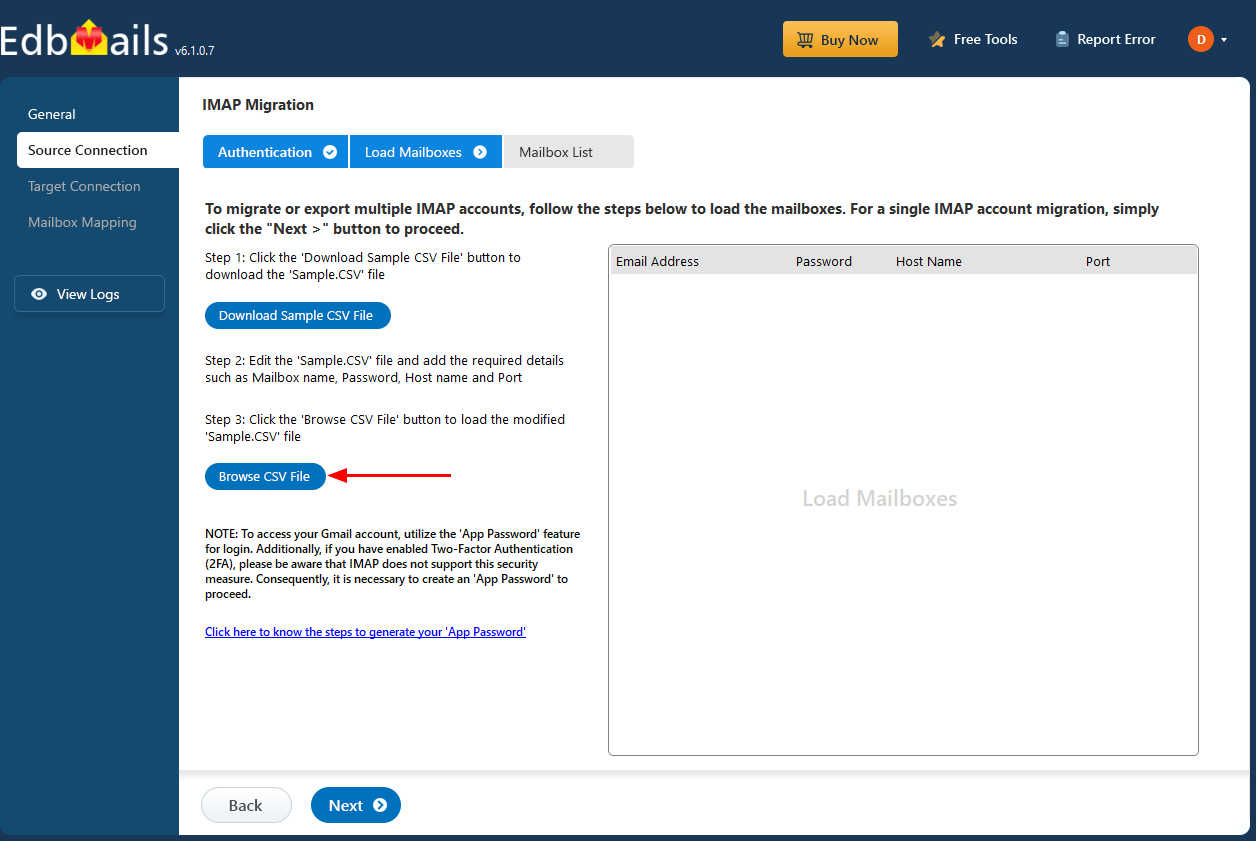
Step 3: Select the source Rackspace server mailboxes
- Choose the mailboxes or specific folders you wish to migrate, and then click ‘Next’ to continue.
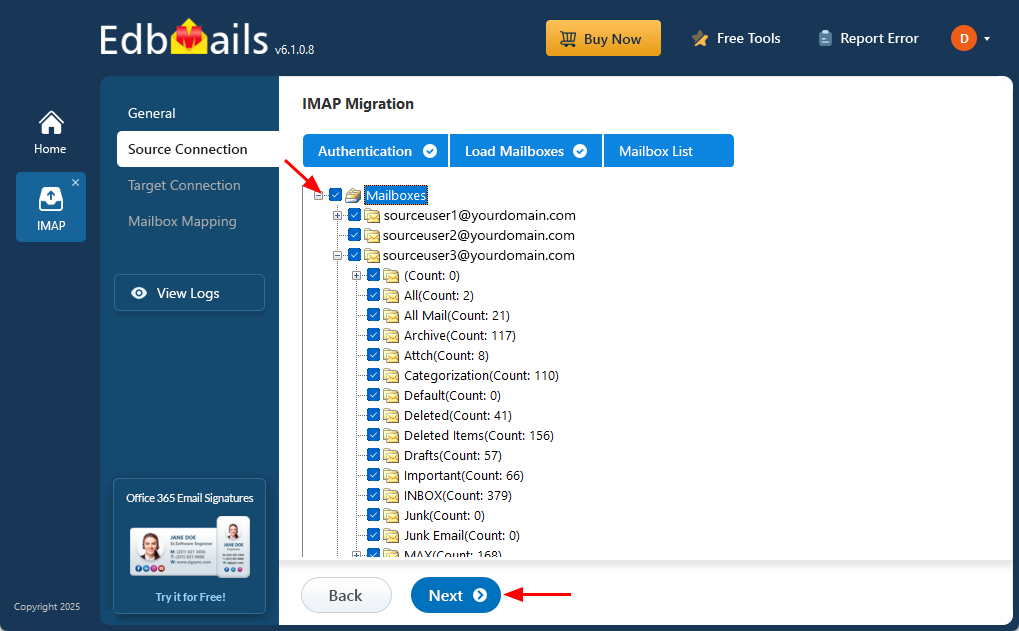
- Choose the mailboxes or specific folders you wish to migrate, and then click ‘Next’ to continue.
Step 4:Connect to the target AWS server
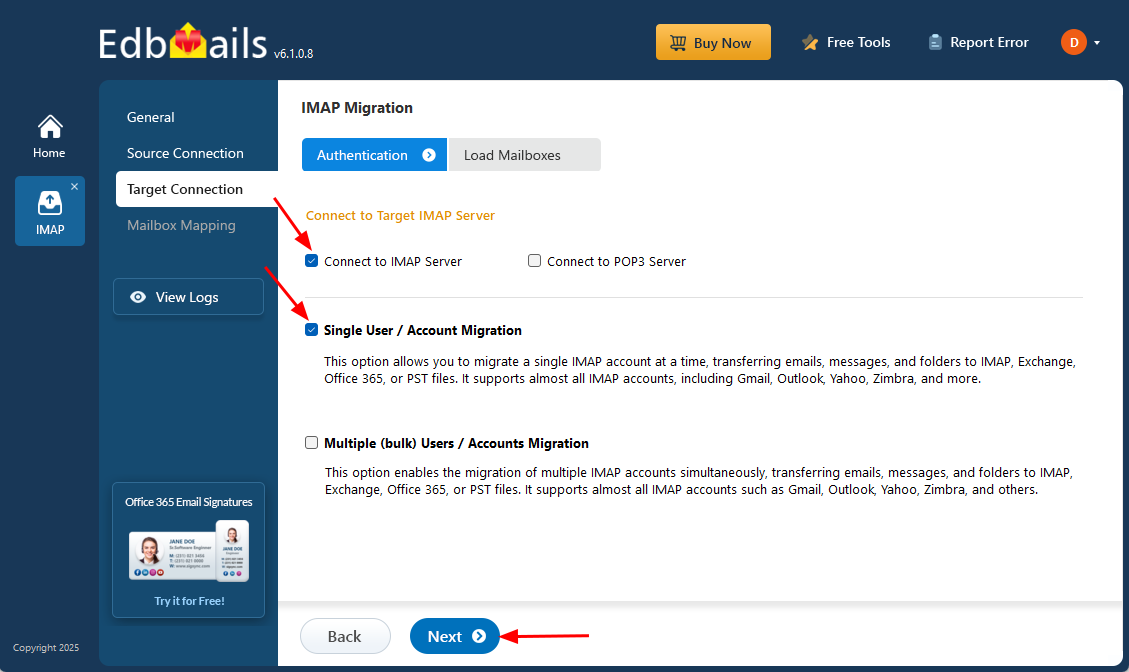
- To connect a single user account, select ‘Single User / Account Migration’. Then, choose the required protocol, such as ‘Connect to IMAP Server’ or ‘Connect to POP3 Server’, and click ‘Next’ to proceed.
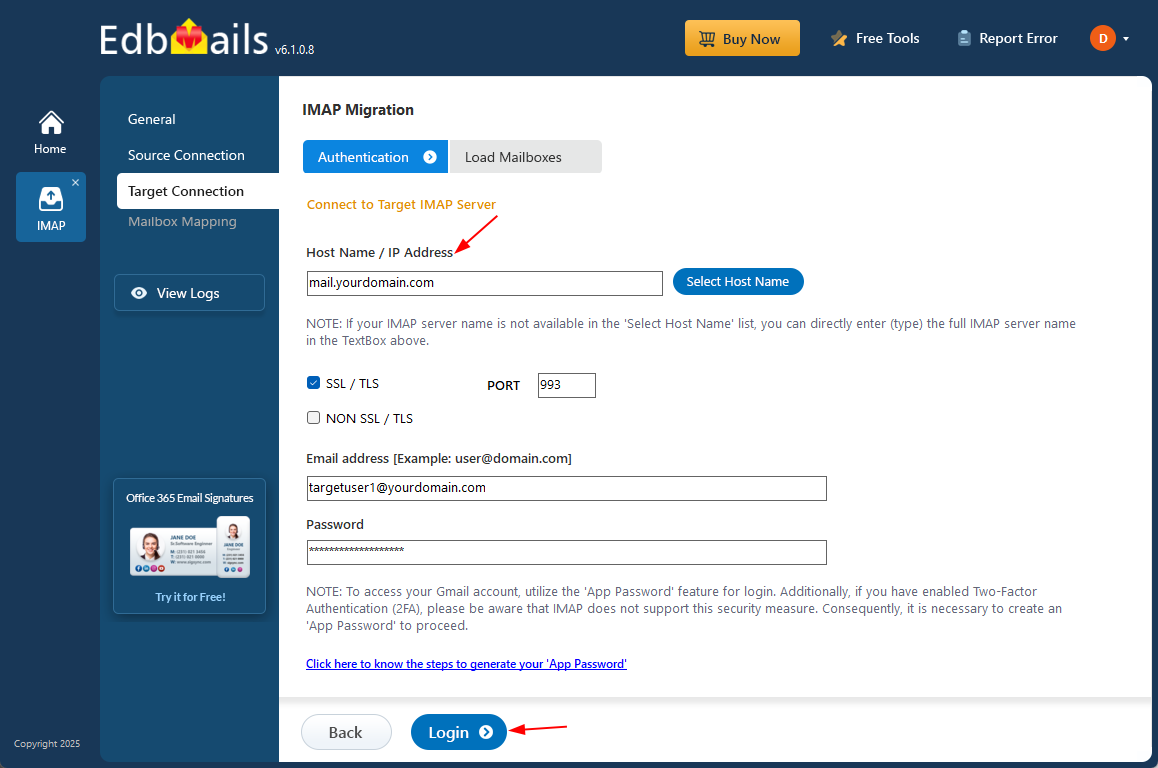
- For the target connection, enter the IMAP host name, port, TLS mode, and authentication details supplied by the selected AWS-hosted mail platform.
- For an existing Amazon WorkMail organization, use the region-specific endpoint imap.mail.<region>.awsapps.com, port 993, SSL required, and the full WorkMail email address as the username. For other AWS-hosted mail platforms, use that platform’s documented IMAP settings.
- Click the ‘Login’ button.
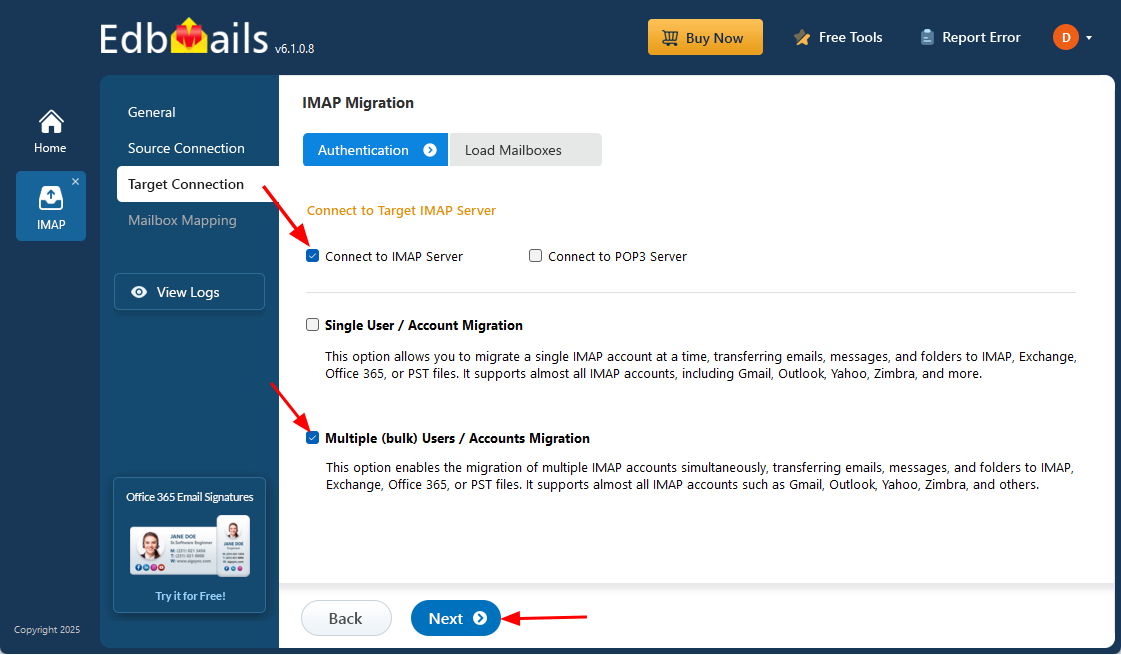
- To set up a connection for multiple target AWS mailboxes, choose the ‘Multiple (Bulk) Users/Accounts Migration’ option and click ‘Next’ to continue.
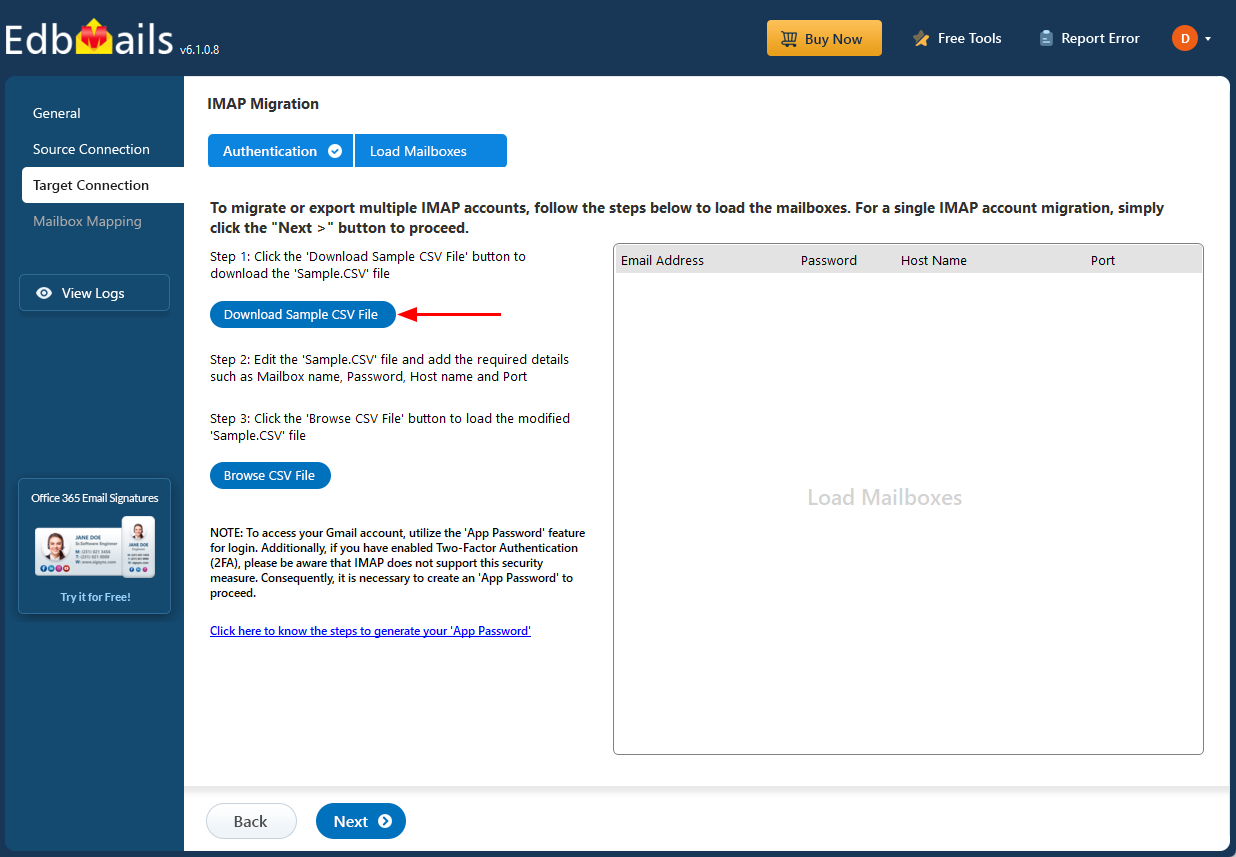
- Click ‘IMAP Migration CSV File’ to automatically download a sample CSV template to your computer for entering mailbox details.
- Open the CSV file and fill in the necessary details, including the email address, password, IMAP server hostname, and port number for each mailbox. After completing the entries, save the file to proceed with the migration.
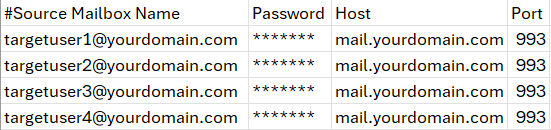
- Once completed, save the CSV file to apply the changes.
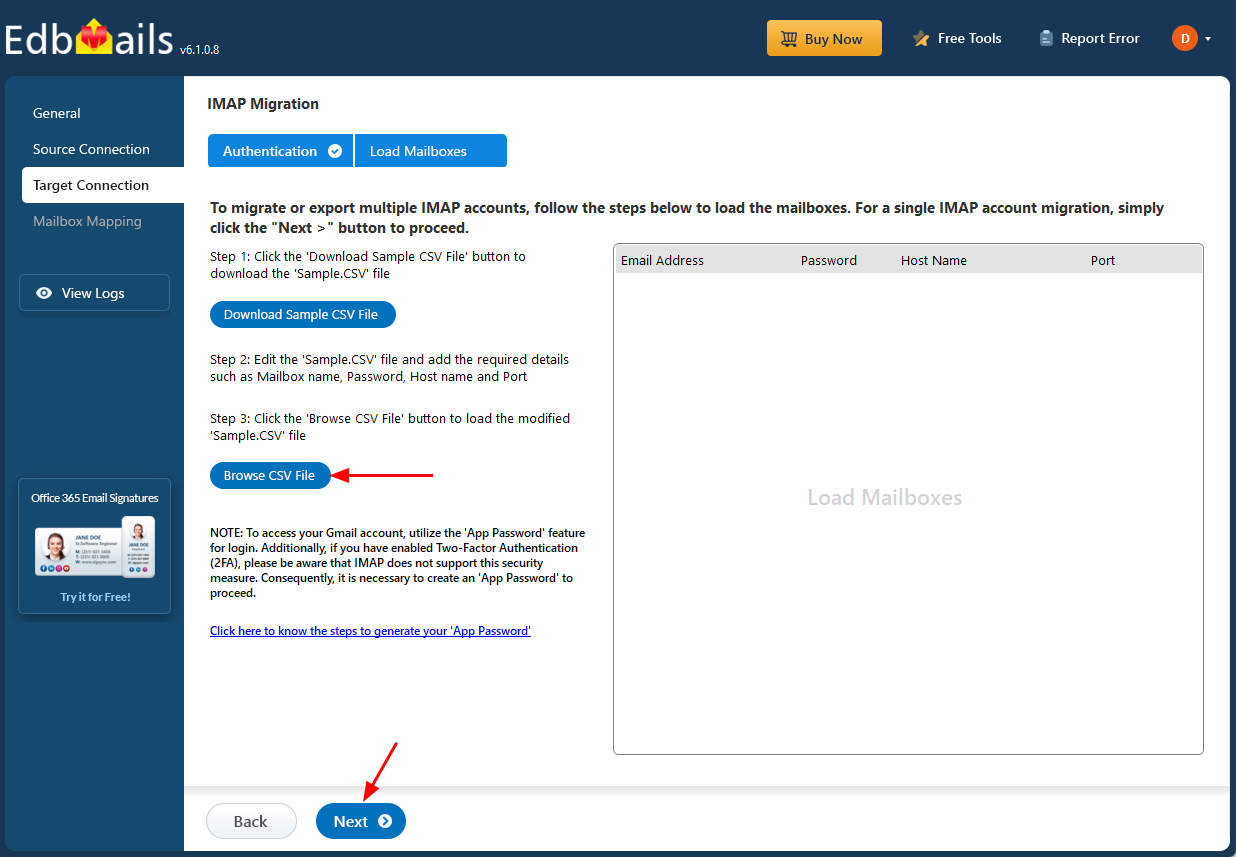
- Then, click the 'Load Modified CSV File' button, open the CSV file and click ‘Next’ to proceed.
- To connect a single user account, select ‘Single User / Account Migration’. Then, choose the required protocol, such as ‘Connect to IMAP Server’ or ‘Connect to POP3 Server’, and click ‘Next’ to proceed.
Step 5: Rackspace to AWS mailboxes mapping
- Select one of the mailbox mapping options.
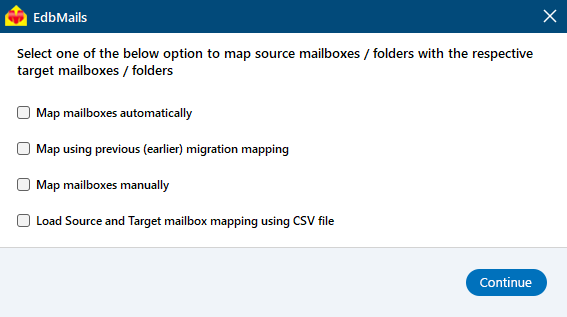
- EdbMails can automatically map source and target mailboxes where identifiers align. Review every mapping and adjust it manually where required.
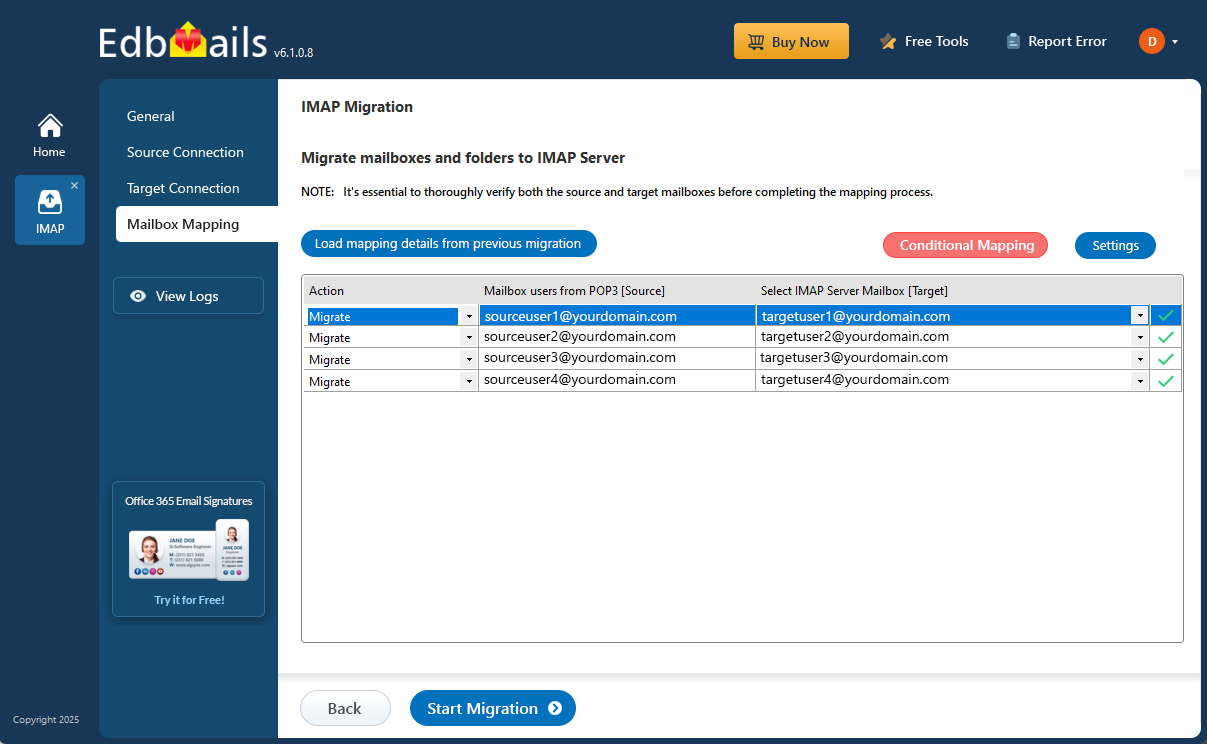
- Select one of the mailbox mapping options.
Step 6: Start Rackspace to AWS migration
- After mapping the mailboxes, click the ‘Start Migration’ button to initiate the migration process.
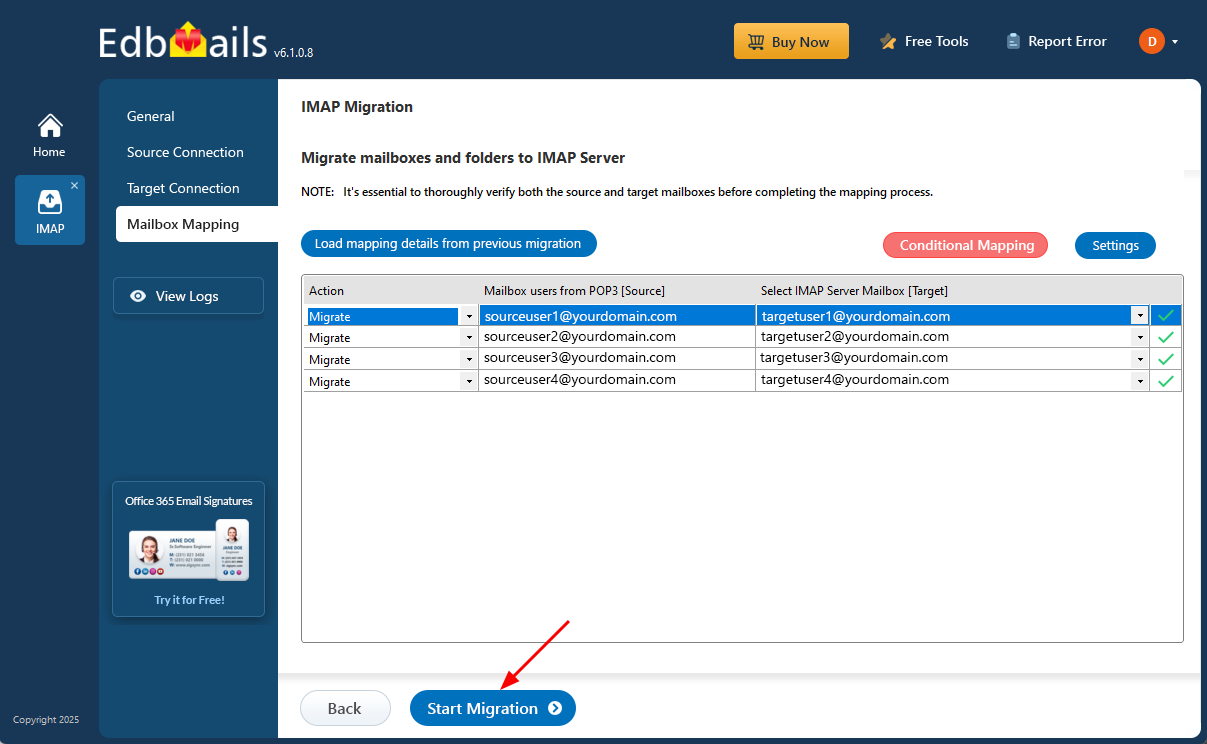
- Click on the ‘View Logs’ button to open the migration report. It gives you a detailed overview of the process, showing how many emails, folders, and mailbox items were migrated.
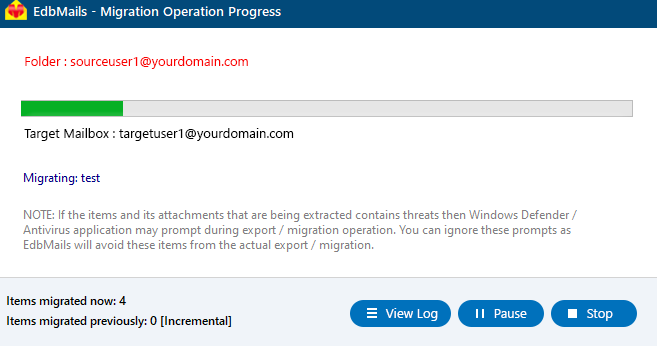
- Also, log in to your target server and verify the migrated items.
- After mapping the mailboxes, click the ‘Start Migration’ button to initiate the migration process.
Rackspace to AWS Post-migration Tasks
Step 1: Update DNS records (MX record) to point to AWS
- Updating MX Records:
In order to redirect incoming email traffic from Rackspace to AWS, it is necessary to modify the MX records within your DNS provider's portal. This crucial step ensures that emails are correctly routed to your AWS account, ensuring a smooth transition.
- Configure required client-discovery records:
Configure any DNS or client-discovery records required by the selected AWS email platform. The exact records depend on whether the target is Amazon WorkMail or another IMAP-compatible mail server hosted in AWS.
- Optional temporary forwarding:
Where Rackspace forwarding is available and appropriate for the cutover design, use it temporarily after validating the target. Keep the source accessible until follow-up migration and mail-flow verification are complete.
- Updating MX Records:
- Step 2: Decommission or delete the user mailboxes on Rackspace server
Once you have confirmed that new mail is being delivered successfully to the AWS target environment and the migrated data has been verified, you can proceed with decommissioning or disabling the corresponding Rackspace source mailboxes. Additionally, make sure to remove any licenses that have been assigned in Rackspace. Follow these steps to perform the necessary actions:
- Log in to the Rackspace Cloud Control Panel.
- Navigate to the ‘Email’ section and click on ‘Mailboxes.’
- Select the desired mailbox(es), whether it's a single mailbox or multiple ones.
- Locate the 'Manage' option adjacent to the specific mailbox, and then proceed to click on 'Delete Mailbox' in the upper-right corner.
Troubleshooting guide for Rackspace to AWS Migration
For common migration issues, check the knowledge base articles. For more information on EdbMails IMAP migration, visit the frequently asked questions section or contact our support team.
Why choose EdbMails for Rackspace to AWS migration?
EdbMails Rackspace to AWS migration tool offers several benefits for a seamless and efficient migration process:
- User-Friendly Interface: EdbMails provides a user-friendly interface that simplifies the migration process. With its intuitive design, users can easily navigate and utilize the tool without extensive technical knowledge.
- Supported email migration: EdbMails migrates supported Rackspace messages, attachments, folders, subfolders, and common message properties exposed through IMAP and accepted by the target. Verify representative target data after migration.
- Incremental Migration: EdbMails supports incremental follow-up runs so eligible new or changed mail can be processed after the initial pass, supporting staged cutover and reducing repeated processing.
- Advanced Filter Options: Users can apply advanced filters during the migration process to selectively migrate specific mailbox items based on date range, subject, sender, or other criteria. This flexibility enables users to customize their migration and migrate only the necessary data.
- Robust Reporting and Monitoring: EdbMails provides comprehensive reporting and monitoring features. You can track the progress of the migration, monitor mailbox item counts with the detailed log reports, ensuring transparency and accountability throughout the migration process.
- Pause and Resume Functionality: The tool offers the flexibility to pause and resume the migration process as needed. This feature is beneficial in case of interruptions or when you want to prioritize certain mailboxes for migration.
- Source access during the copy phase: Users can generally continue accessing Rackspace while mailbox data is being copied. Final DNS, forwarding, or account decommissioning changes should be scheduled and verified separately.
- Cost-Effective Solution: EdbMails offers a cost-effective solution for Rackspace to AWS migration. By automating the migration process and reducing manual effort, it helps save time, resources, and associated costs.
Frequently Asked Questions (FAQ)
Does EdbMails preserve folder hierarchy?
Can I apply filters to only migrate specific date ranges or senders when migrating from Rackspace to AWS?
Can I pause and resume the migration process with EdbMails when migrating from Rackspace to AWS?