Installation process
To migrate IMAP mailboxes, the program can be installed on any machine with a connection to both the source and the target environment. The following guide provides a clear process to install and configure EdbMails for seamless IMAP mailbox migration. After setup, it’ll be ready to migrate mailboxes with zero downtime securely.
System Requirements & Prerequisites
Before beginning installation:
- Ensure the installation host (Windows machine) has stable network connectivity to both the source and target IMAP servers.
- Verify that the necessary firewall or network rules allow outbound/inbound IMAP (default ports 143 / 993) and any custom ports used.
- Confirm adequate disk space and system memory to handle migration tasks and temporary data caching.
- If migrating large mailboxes, ensure the machine’s hardware meets performance requirements (CPU, RAM, I/O throughput).
Installation wizard
The installation uses a standard step-by-step wizard. The following steps outline the typical flow.
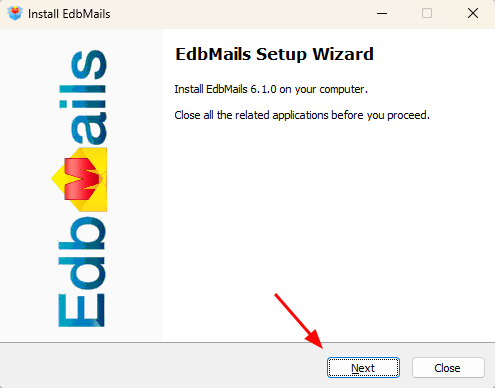
1. Start the Setup: Double-click the downloaded setup file to launch the installation wizard. Click ‘Next’ to proceed with the setup.
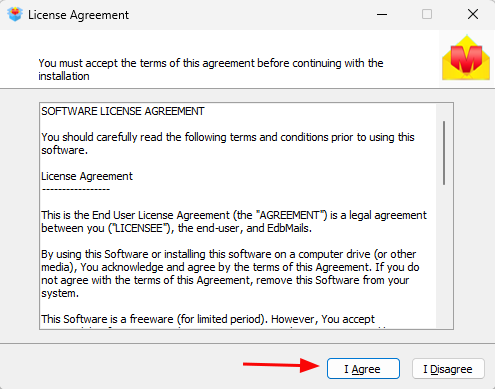
2. License Agreement: Review the license agreement carefully and click 'I accept' to proceed with the installation
3. Installation Path: The application will be installed in the default location unless you choose a custom path. If desired, a custom folder may be specified. Ensure the selected path has read/write permissions.
4. Launch Post-Install: After the installation is complete, the application will launch automatically.
System Impact of the EdbMails Application
During installation and configuration,
- EdbMails may apply changes to ensure compatibility and successful connection with the source and target environments.
- The installer verifies the operating system environment and applies essential runtime components.
- Minimal system-level modifications are performed to maintain security and operational stability.
- The application is optimized to run efficiently, with minimal CPU and memory usage during migrations.
Operating System Requirements
- The application checks for and installs the required version of .NET Framework if it’s not already present.
- Windows 7 and later versions (including Windows 10, Windows 11, and Windows Server editions) are supported.
- A stable internet connection is essential for cloud or hosted migrations.
- Adequate permissions must be available on the machine to install software and perform mailbox operations.
Exchange Server and Office 365 Configuration Requirements
Proper role assignments and permissions are mandatory for the migration to impersonate user accounts and access mailboxes.
Source Exchange Server Changes
The administrator account used to connect to the source Exchange server must be assigned:
- ApplicationImpersonation
- View-Only Configuration role
These permissions allow EdbMails to access and migrate all mailboxes within the organization.
Target Exchange Server Changes
The administrator account on the target Exchange server must also hold:
- ApplicationImpersonation role
- View-Only Configuration role
These roles guarantee that the destination environment allows mailbox access for smooth data import.
Office 365 (Exchange Online) Configuration
For migrations to or from Office 365, the administrator account must be assigned the following roles:
- ApplicationImpersonation
- View-Only Recipients
- View-Only Configuration
With these permissions, the migration engine can impersonate users, list recipient details, and migrate all mailboxes securely.


