- Reseller
- Products
EDB Recovery and Migration
EdbMails lets you recover corrupted, damaged, and offline Exchange EDB files, convert EDB mailboxes to PST format, and directly migrate mailbox data to Office 365 and live Exchange Server.
 EDB to PSTRecover corrupted, damaged, offline EDB files and convert Exchange EDB mailboxes to PST file format
 Public Folder to ExchangeMigrate public folders from an Exchange offline EDB file to live Exchange Server
 EDB to Live Exchange MigrationDirectly migrate offline Exchange database (EDB) files to live Exchange server
 Archive Mailbox to Office 365Migrate archive mailboxes from offline EDB files directly to Office 365
 EDB to Office 365 MigrationDirectly migrate offline Exchange database (EDB) files to Office 365
Public Folder to Office 365Migrate public folders from an offline Exchange EDB file to Office 365
EDB to Office 365 MigrationDirectly migrate offline Exchange database (EDB) files to Office 365
Public Folder to Office 365Migrate public folders from an offline Exchange EDB file to Office 365OST, PST, MBOX, NSF, EML, MSG Export and Migration
EdbMails lets you to recover OST and PST files, export OST, PST, MBOX, NSF, EML, and MSG files to PST files, and directly migrate OST, PST, MBOX, and NSF mailbox data to Office 365 and live Exchange Server.
 OST Recovery and MigrationRecover offline OST files, convert OST to PST, and migrate OST to Office 365 and Exchange Server
 PST Recovery and MigrationRecover Outlook PST files , Export PST to PST, migrate PST to Office 365 and Exchange Server
 MBOX Export and MigrationExport MBOX to PST, migrate MBOX to Office 365 and Exchange Server
 NSF Export and MigrationExport NSF to PST, migrate NSF to Office 365 and Exchange Server
 EML to PST ExportConvert EML files to Outlook PST files
 PST to MSG ExportConvert Outlook PST file to MSG file format
 MSG to PST ExportExport MSG files to Outlook PST files
Office 365, Exchange Migration
EdbMails lets you securely migrate mailboxes across Microsoft 365, Exchange, Google Workspace (G Suite), and IMAP-supported servers such as Outlook, Gmail, Zimbra, Zoho Mail, and cPanel, ensuring zero downtime.
 Office 365 MigrationMigrate between Office 365 tenants, Office 365 to Exchange, Office 365 to PST, PST files to Office 365.
 Exchange MigrationMigrate between any Exchange Servers, Exchange to Office 365, Exchange to PST, PST files to Exchange.
 Tenant to Tenant MigrationMigrate Mailboxes, Public Folders, Archive Mailboxes between Office 365 Tenants.
 Exchange to Office 365Migrate Mailboxes, Public Folders, Archive Mailboxes from live Exchange server to Office 365.
 Office 365 to IMAPMigrate Office 365 to IMAP, Office 365 to Gmail, Office 365 to Outlook, Office 365 to Zoho etc.
 Exchange to IMAPMigrate from live Exchange Server to IMAP servers such as Gmail, Outlook, and Zoho Mail.
 Public Folder to Office 365Migrate Public Folders between Office 365 tenants with complete folder hierarchy and mailbox data integrity.
 Exchange to PSTExport live Exchange Server mailboxes, public folders, and archive mailboxes to Outlook PST files.
SharePoint, OneDrive & Microsoft Teams Migration
EdbMails lets you migrate SharePoint sites, OneDrive data, Microsoft Teams, teams, channels, chats, permissions, and documents between Microsoft 365 tenants while maintaining the existing folder structure and data integrity.
Google Workspace / G Suite Migration
EdbMails Google Workspace Migration Tool migrates emails, calendars, contacts, and more from Google Workspace to Office 365, Exchange, and IMAP using a Google Admin account without requiring individual user credentials.
 Google Workspace MigrationMigrate emails, calendars, contacts, tasks from G Suite to Office 365, G Suite to Exchange, G Suite to IMAP Servers
 Google Workspace to Office 365Migrate emails, calendars, contacts, tasks from Google Workspace / G Suite to Office 365
 Google Workspace to Exchange ServerMigrate emails, calendars, contacts, tasks from Google Workspace / G Suite to on-Premise Exchange Server
 Google Workspace to IMAPMigrate emails, calendars, contacts, tasks from Google Workspace / G Suite to IMAP, Outlook, Zimbra, Zoho etc.
IMAP Migration
EdbMails IMAP Migration tool lets you easily migrate emails from IMAP servers such as Outlook, Gmail, Zoho Mail, Zimbra, cPanel, and more. Supports IMAP to IMAP, Office 365, Exchange Server, PST, and bulk PST to IMAP migration.
 IMAP Email Backup & MigrationBackup and migrate emails from IMAP servers to PST, Office 365, and On-Premises Exchange Server
 IMAP to Office 365Migrate emails, folders, and attachments from IMAP servers to Office 365
 IMAP to ExchangeMigrate emails, folders, and attachments from IMAP servers to on-premises Exchange Server
 IMAP to PSTExport emails, folders, and attachments from IMAP servers to Outlook PST files for backup
 PST to IMAPMigrate emails, folders, and attachments from bulk PST files to IMAP servers
Duplicate Remover
EdbMails Duplicate Remover lets you easily remove duplicate items from Office 365 and Exchange Server, and from IMAP, Outlook, Gmail, Zimbra, Zoho Mail, etc., ensuring a clean and organized mailbox.
 Remove DuplicatesEasily clean up your Office 365, Exchange, Outlook and IMAP accounts by removing duplicate emails.
 Remove Duplicates from Office 365Remove duplicate emails, calendars, contacts, journal tasks, etc. from Office 365.
 Remove Duplicates from Exchange ServerRemove duplicate emails, calendars, contacts, journal tasks, etc. from live Exchange Server.
 Remove Duplicates from IMAP, OutlookRemove duplicate emails, attachments from IMAP, Outlook, Gmail, Zimbra, Zoho Mail etc.
Exchange, SharePoint, OneDrive, Teams and Office 365 Backup
EdbMails enables secure, automated backup and recovery for Microsoft 365 services including Exchange Online, SharePoint, OneDrive, Teams, and Live Exchange Server with complete data protection and restore flexibility.
Office 365 BackupIncremental, Granular, Encrypted and Compressed Office 365 Mailboxes Backup
Exchange Server BackupIncremental, Granular, Encrypted and Compressed Exchange Mailboxes Backup SharePoint, OneDrive & Teams BackupBackup Online site collections, Team sites, Office 365 groups, all documents etc.
Windows Data Recovery
EdbMails Windows Data Recovery Software lets you recover permanently deleted data, including photos, videos, documents, and archived files, from partitions on hard drives, SSDs, USB drives, SD cards, and external storage devices.
- Features
- Video Tutorials
- Free Tools
- FAQ
- Knowledge Base
How can we help you?
Search our Knowledge Base to quickly find answers to your questions.
How to recreate Outlook profile after the migration?
Problem:
After you migrate to the target Exchange server or Office 365 tenant and complete the domain name transfer, Outlook is unable to connect to the new server. You receive the following error message:
Outlook cannot log on. Verify you are connected to the network and are using the proper server and mailbox name. The Microsoft Exchange information service in your profile is missing required information. Modify your profile to ensure that you are using the correct Microsoft Exchange information service.
Solution:
The preceding issue occurs when the registry for the active Outlook profile still contains the pre-migration settings of the Autodiscover service, which connects Outlook with Exchange. To fix this issue, create a new Outlook profile and make it the default one. You can do this activity manually for each individual user or enable Outlook to do it automatically by using Group Policy or Microsoft Intune for every user on your domain. Find out how to create a new Outlook profile by navigating to the corresponding section from the following links.
Steps to create an Outlook profile for individual user
- Exit from Outlook
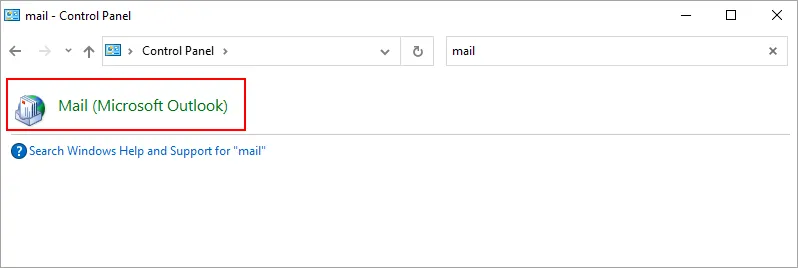
- Open Windows Control Panel and select 'Mail'
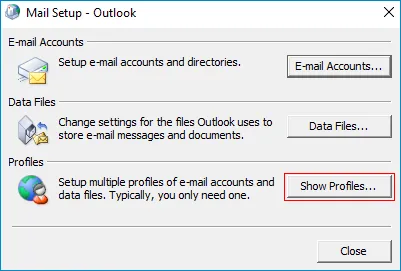
- Click Show Profiles...
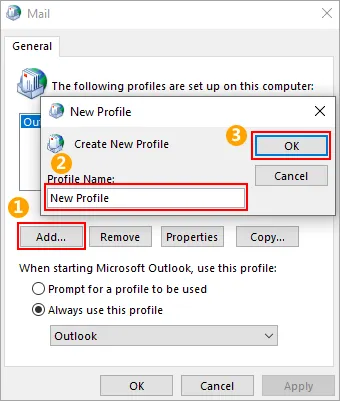
- Click 'Add' and the name for the new Outlook profile and click 'OK'
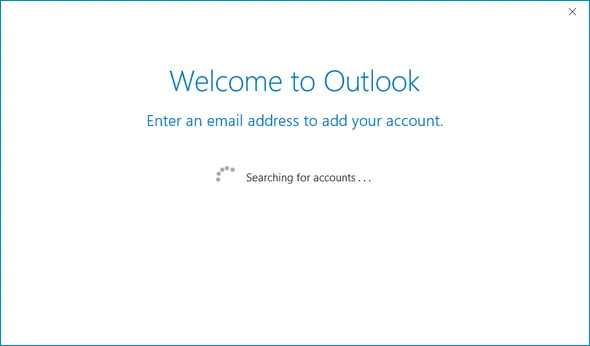
- Follow the wizard and add your email account. Click 'Finish'
- Choose 'Always use this profile' and select the new profile from the dropdown
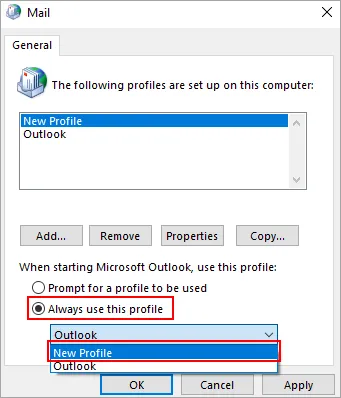
- Click 'OK'
- Now, Outlook should be opened without any issues and connect to the appropriate Exchange server.
Steps to create a new Outlook profile for all users
With a simple script, you can create a new Outlook profile and set it as default. To create new Outlook profiles for all the users, run this script on multiple computers using Group Policy.
In this case, the script will be run as a user logon script. You can set a Group Policy Object (GPO) to execute user logoff if required.
Generate a script file to create new Outlook profile
- Open Notepad and paste the following code as per your Outlook version:
Outlook 2010
reg add "HKCU\Software\Microsoft\Windows NT\CurrentVersion\Windows Messaging Subsystem\Profiles\<name>"
reg add "HKCU\Software\Microsoft\Windows NT\CurrentVersion\Windows Messaging Subsystem\Profiles" /v DefaultProfile /t REG_SZ /d "<name>" /F
reg add "HKCU\Software\Microsoft\Exchange\Client\Options" /v PickLogonProfile /t REG_DWORD /d "0" /fOutlook 2013
reg add HKCU\Software\Microsoft\Office\15.0\Outlook\Profiles\<name>
reg add "HKCU\Software\Microsoft\Office\15.0\Outlook" /v DefaultProfile /t REG_SZ /d "<name>" /FOutlook 2016
reg add HKCU\Software\Microsoft\Office\16.0\Outlook\Profiles\<name>
reg add "HKCU\Software\Microsoft\Office\16.0\Outlook" /v DefaultProfile /t REG_SZ /d "<name>" /F - Save the file as a BAT file.
- Give permission for the BAT file in the network location accessible for all users.
Note: Replace <name> with a new Outlook profile.
Create a GPO logon script
- Log in to your Windows Server domain controller (DC).
- Open 'Server Manager' and navigate to 'Tools' > 'Group Policy Management'
Note: Install this feature in case if you are not able to find it. To install, follow the below steps.
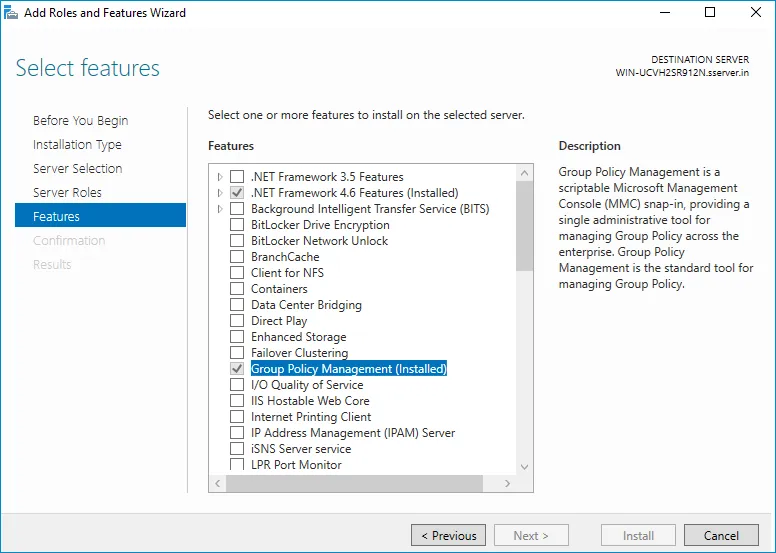
- In the Server Manager, choose 'Manage' > 'Add Roles and Features' and follow the wizard instructions.
- Choose the 'Group Policy Management' feature in the 'Features' tab
- Click 'Next' to proceed to the confirmation page.
- Click 'Install' to enable Group Policy Management.
- In the 'Group Policy Management' window, right-click on your domain on the left side panel, and choose 'Create a GPO in this domain, and Link it here…'
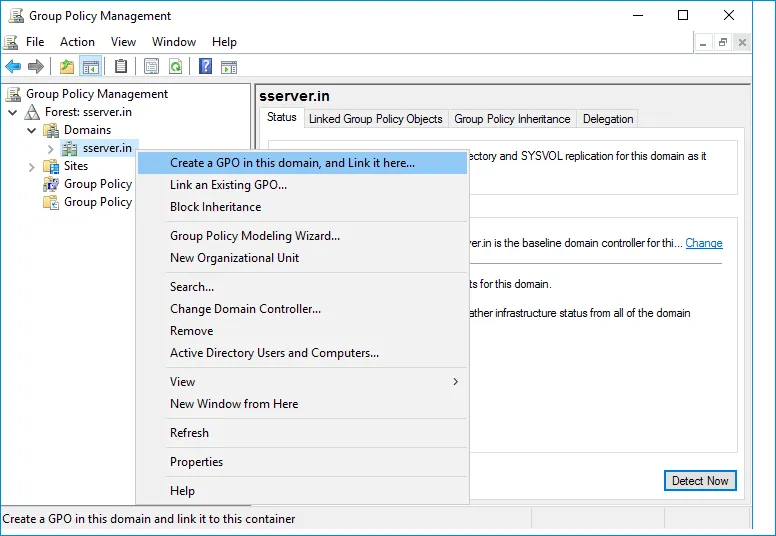
- Enter the name of the new GPO and click 'OK'.
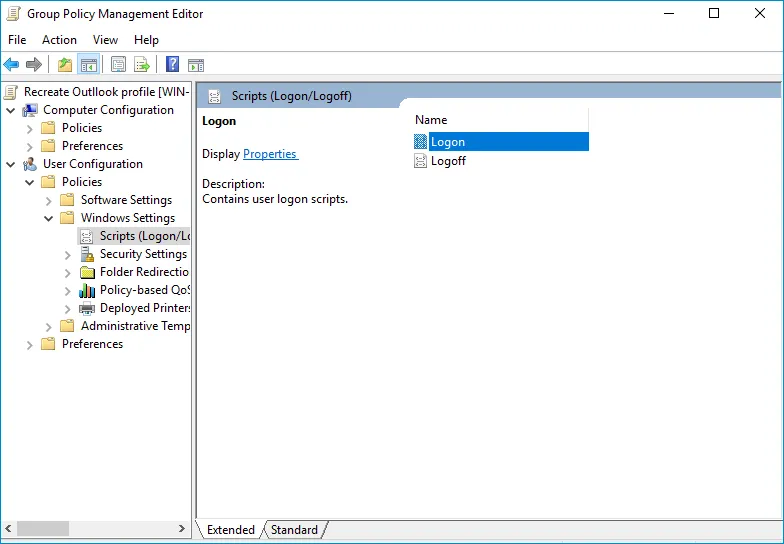
- Choose the 'Group Policy Objects' container on the menu, find the newly created GPO, right click on it and choose 'Edit'. The 'Group Policy Management Editor' will be displayed.
- Navigate to 'User Configuration' > 'Policies' > 'Windows Settings' > 'Scripts (Logon/Logoff)' and double-click the 'Logon'
- Click 'Add' and then click 'Browse'. Select the BAT file you created previously
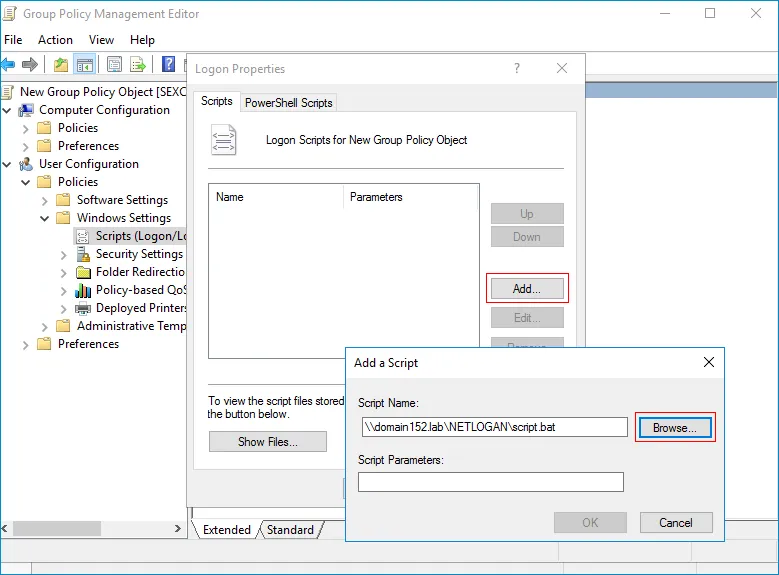
- Click 'OK' subsequently
Close the GPO window. The script will be executed for every user when they login to their workstations. The Outlook startup wizard will appear when they open Outlook.
After you finish all the preceding steps successfully, there should no longer be an issue with the Autodiscover feature connecting to the proper on-premises Exchange server or Office 365.
Related topics:
- Do I need to set Impersonation Rights to each and every user account
- Invalid user or password
- Unexpected XML Content
- Error: ErrorInvalidSerializedAccessToken
- ErrorQuotaExceeded
- Could not map Exchange web service folder - Error
- Login issues - Not Found Error
- Free/Busy status migration
- How to allow PowerShell to connect to Exchange Server via IP address?
- Connect to Exchange server via PowerShell
EdbMails Demo / Trial Version
Step 1. Download and install EdbMails
Step 2. Click the 'Start Your Free Trial' button


Hi, May I help you?
Hide Chat Now