Prerequisites for migration in an exchange and Office 365 hybrid environment
In a hybrid Exchange environment, such as Exchange to Exchange or Exchange to Office 365, having coexisting mailboxes for the same user can create challenges when distinguishing between the source and target mailboxes during migration. If you're using an AD synchronization tool like Azure Active Directory Connect or Azure AD Sync to synchronize data within your hybrid Exchange setup, it's essential to configure specific attributes to streamline the migration operation.
Below are the prerequisites for managing migrations using EdbMails in a hybrid Exchange environment. These prerequisites are primarily met through the configuration of specific attributes in the hybrid setup.
Once you have implemented one of the solutions outlined below, you can proceed with the migration operation using EdbMails.
Set the attribute msExchMailboxGuid to NULL
- Use the following cmdlet to stop the scheduler in Azure AD Connect.
Set-ADSyncScheduler -SyncCycleEnabled $false
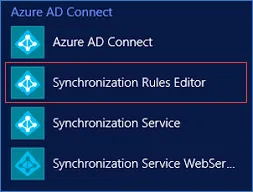
- Run the ‘Synchronization Rules Editor’ tool from the ‘Start’ menu and ‘run as administrator’ as shown.
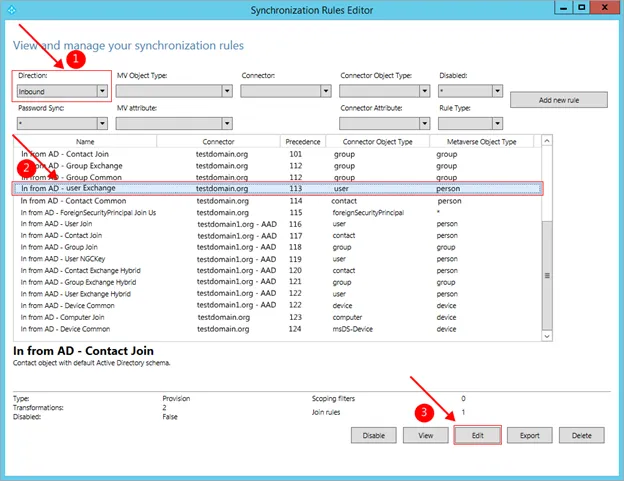
- Select the option ‘Inbound’ under ‘Direction’ drop-down menu (or from the ‘Rule Types’ menu, in the case you are using ‘Azure AD sync’)
- Select the rule ‘In from AD - User Exchange’ and click ‘Edit’ . Note down the ‘Precedence’ value. In the below screenshot it is ‘113’. This value needs to be used in the next step.
- Click ‘Yes’ to disable the rule and create a copy of the rule.
- Under 'Descriptions', change the value of the Precedence to '200'.
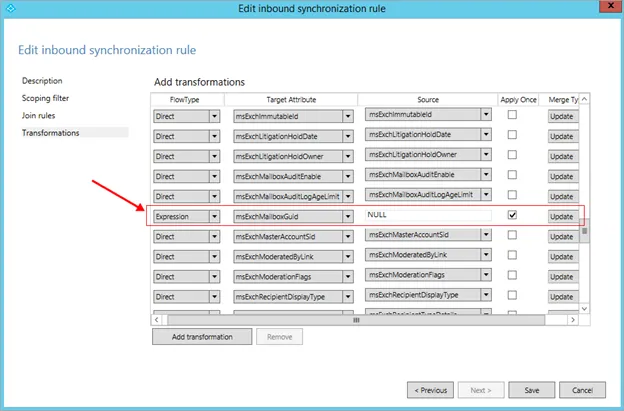
- In the ‘Transformations’ tab look for the attribute ‘msExchMailboxGuid’ and set the following values.
- Under 'Flow Type'->Select 'Expression'
- Under 'Source', corresponding to this row-> Select 'NULL'
- Select the checkbox 'Apply Once'
- Under 'Merge Type'->Select 'Update'.
- Click 'Save' after configuring the above changes
- Delete the original rule that you have disabled in Step 5
- Change the Precedence value of the newly created rule (the copy that you have created in Step 5) to the value used in the original rule. It was ‘113’.
- Execute the below command to restart the scheduler you had turned off in Step 1.
Set-ADSyncScheduler -SyncCycleEnabled $true
- Execute the below command to perform a full synchronization.
Start-ADSyncSyncCycle -PolicyType Initial
After performing the synchronization, you can perform migration within your hybrid environment by creating mailboxes and assigning licenses to your Office 365 account.
If the license has been previously allocated, but the user doesn't have a mailbox, revoke the license and then reassign it
It's important to note that once the mailboxes have undergone migration, Office 365 users will remain synchronized with your on-premises AD environment.
Consequently, you should handle Office 365 mailboxes, such as altering their email addresses, through your on-premises Exchange server.
If you decide to remove the mailboxes from your on-premises organization or decommission the on-premises server, making changes to or deleting their cloud equivalents in Office 365 won't be possible unless you disable directory synchronization.
- Use the following cmdlet to stop the scheduler in Azure AD Connect.
Remove the attribute msExchMailboxGuid from the AD synchronization
We highly recommend opting for the first solution 'Solution I' as it's simpler to implement and requires less of your time. However, if this option isn't viable or if the initial solution doesn't yield the desired results in your specific environment, you can then consider proceeding with this alternative approach.
If the synchronization process has been completed, and the synchronized users already have values assigned to the msExchMailboxGuid attribute in Office 365, you may explore another avenue. This involves permanently removing (hard-deleting) all of the synchronized users from Office 365, reconfiguring the synchronization process to exclude the msExchMailboxGuid attribute, and then performing the synchronization again. Navigate through the links below for the details.
If the aforementioned solution is not working for you, you can try removing the synced users manually from Office 365 or remove the attribute msExchMailboxGuid to remove the synced users in Office 365.
- Remove synced users from Office 365
- Configure or Reconfigure AD synchronization tools to migrate to Office 365
Remove Synced users from Office 365
- Open 'Synchronization Service Manager' in 'Azure AD Connect'.
- Select the 'Connectors' tab.
- Select 'Active Directory Domain Services' as the connection type.
- Right click and select 'Properties'
- From the 'Properties' window, head over to the 'Configure Directory Partitions' and click on 'Containers'.
- Enter the password of the local AD user and click 'OK'.
- In the 'Select Containers' window, uncheck the selection for HybridUsers and click 'OK'.
- To do a full AD synchronization, open Windows PowerShell command and execute the command below.
Start-ADSyncSyncCycle -PolicyType Initial
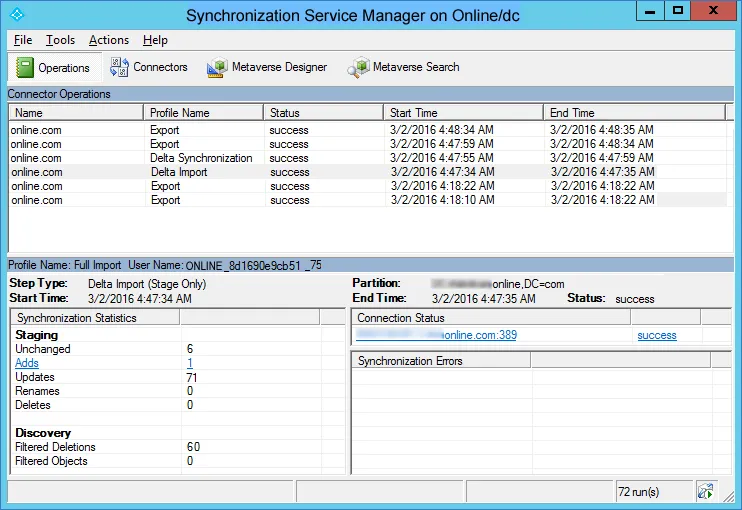
- Open 'Synchronization Service Manager' and verify if the status of the connectors are successful. You can view the synced accounts under the Deleted 'Users' page of the Office 365 admin center. Finally, you can delete the users from the Azure AD admin center.
- After deleting the users from the Azure AD admin center there will be no synchronized accounts which you can verify from the Office 365 admin center. If you would like to know how to delete the users from Azure AD, follow the steps below.
Hard-deleting user mailboxes with the Exchange Online module
Note: To connect to Office 365 as part of the Windows Azure service, you must install the required module for Windows PowerShell.
Run the below command to connect to your Office 365 server using global admin account:$cred = Get-Credential
Connect-MsolService -Credential $cred
Now, either permanently delete all recently deleted users at once or proceed with individual removals
Execute this command to delete all user mailboxes in the batches,get-msoluser -returndeletedusers -All | remove-msoluser -removefromrecyclebin -force
Caution: The execution of this cmdlet may require some time to finish, and the duration can vary depending on the quantity of mailboxes for deletion. While it's processing, you might notice PowerShell appearing unresponsive If you want to delete user mailboxes one by one, execute the below command to get the list of deleted users:
Get-MsolUser -ReturnDeletedUsers | Select UserPrincipalName, ObjectId
This will provide you with the User Principal Name (UPN) and the ObjectId parameter for these users. To delete a specific user, run the following cmdlet while supplying the correct <ObjectId> value:
Remove-MsolUser -RemoveFromRecycleBin -ObjectId <ObjectId>
Hard Deletion of user mailboxes using Microsoft Entra admin center
- Login to Microsoft Entra Admin Center from this link.
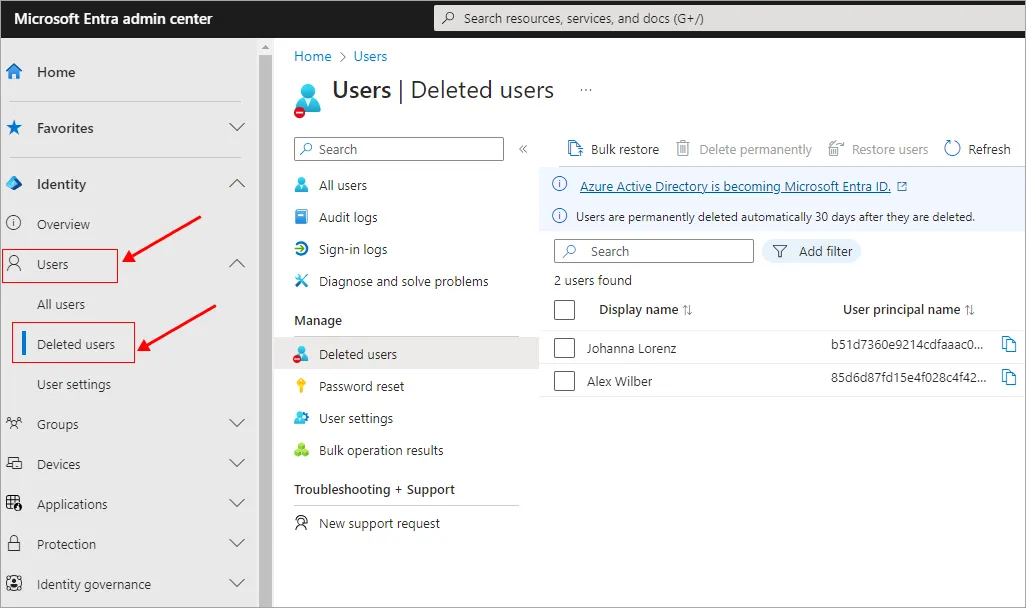
- Select Users from the left pane and navigate to Deleted users.
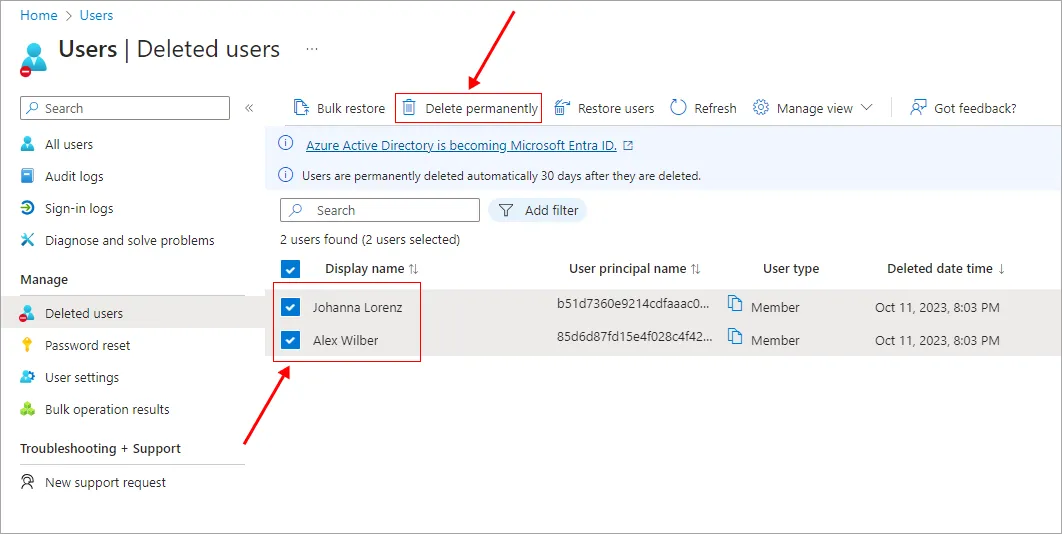
- Select the users you want to delete and click the button Delete permanently to permanently delete all the users. Click the ‘OK’ Button
Note :
All your user mailboxes that have been soft-deleted will be automatically and permanently removed after a span of 30 days. In the event that these mailboxes were under litigation hold, they will only be permanently deleted once the hold has been lifted, although this action will occur no sooner than 30 days after the initial soft deletion.
Upon successfully executing all the aforementioned procedures, there should be no synchronized accounts remaining in your Office 365 environment, and you can confirm this status through the Microsoft 365 admin center.
Configure or Reconfigure AD synchronization tools to migrate to Office 365
You can prevent the attribute msExchMailboxGuid from syncing every time by following the steps below.
- Open Azure AD Connect app.
- Click on Configure and choose Custom synchronization options from the list. Click Next.
- Enter your Azure credentials under Connect to Azure AD.
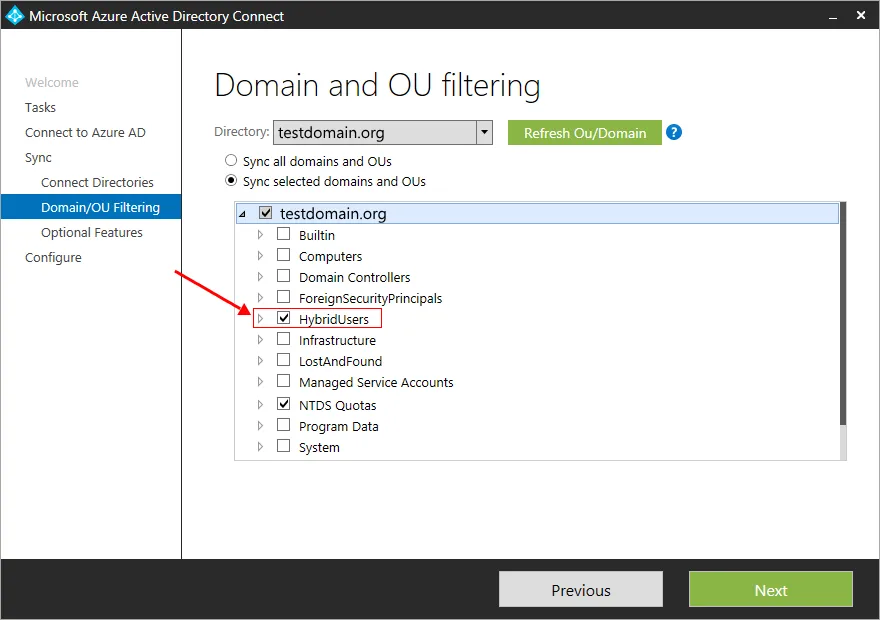
- In the Domain / OU Filtering tab select the option HybridUsers and click on the Next button at the bottom.
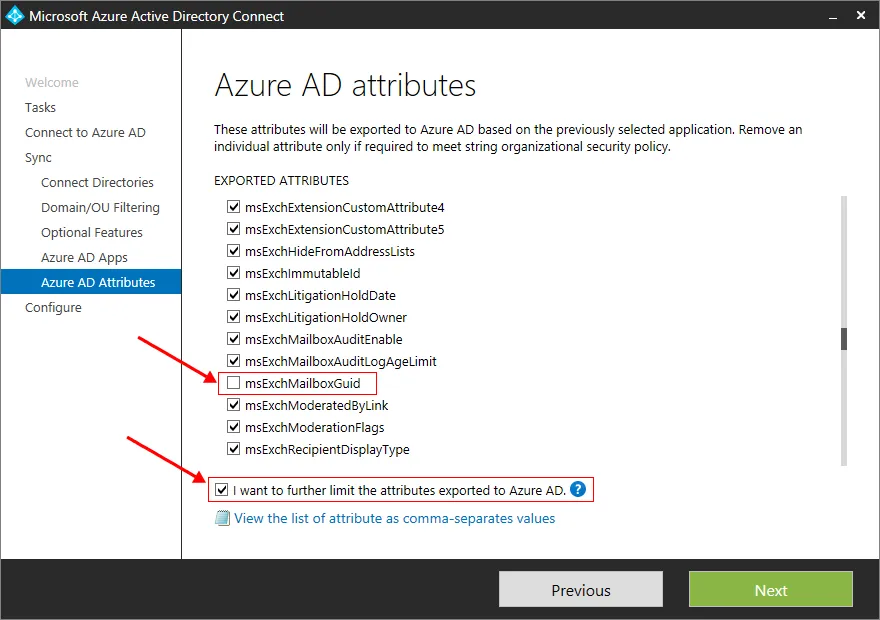
- In the ‘Azure AD Attributes’ tab, uncheck the option ‘msExchMailboxGuid’ and check the option ‘I want to further limit the attributes exported to Azure AD’ and click on the ‘Next’ button.
- In the ‘Configure’ tab, check the option ‘Start the synchronization process when configuration completes’.
- Click on the ‘Configure’ button to initiate the full synchronization. After the synchronization is complete, the attribute ‘msExchMailboxGuid’ is no longer synced to the user accounts.
Click here for the steps to migrate mailbox data from on-premise Exchange server to Office 365 using EdbMails.

