Migrate Exchange 2013 to 2016
Microsoft Exchange Server 2013 reached end of life on April 11, 2023, so it no longer receives security updates, bug fixes, or technical support from Microsoft. If your organization is still running this version, upgrading to a newer release like Microsoft Exchange Server 2016 or Microsoft Exchange Server 2019 is essential to keep your environment secure and reliable. Delaying the migration can increase the risk of data breaches and security issues due to unpatched vulnerabilities. Migrating from Exchange 2013 to 2016 helps maintain a secure, stable, and fully functional email system with zero downtime.
Manual migration methods using the Exchange Admin Center (EAC) or PowerShell scripts can be difficult and time-consuming. They require strong technical knowledge to handle tasks like mailbox export, database setup, and managing migration batches. In many cases, Exchange 2013 to 2016 migration done manually may result in longer downtime, incomplete migration, or even data loss, especially in large or hybrid environments. For a smooth experience, many organizations prefer automated solutions that simplify Exchange 2013 migration to 2016 and ensure a reliable, step-by-step process with minimal disruption.

For a smooth and reliable upgrade, EdbMails Exchange Migration Software provides a practical solution. It streamlines the entire migration process, enabling migration from Exchange 2013 to newer versions like Exchange 2016, 2019, or Office 365. With EdbMails, you get a secure and fast migration experience without data loss. It maintains complete data integrity by preserving emails, contacts, calendars, tasks, public folders, archive mailboxes, along with their metadata and original folder structure, ensuring a hassle-free migration.
What’s new in Exchange Server 2016?
What Is the Best Way to Migrate Exchange 2013 to 2016?
The most reliable way to migrate Exchange 2013 to 2016 is by using a dedicated and automated migration tool such as EdbMails Exchange Migration software. It simplifies the complex process of migrating mailboxes, public folders, shared mailboxes, and archive mailboxes while preserving complete data integrity. All essential mailbox items, including emails, contacts, calendars, permissions, tasks, journals, and notes, are securely migrated without downtime or data loss.
EdbMails offers several advanced features that make the Exchange 2013 to 2016 migration process faster and more efficient. Its incremental migration ensures that only new or modified items are transferred in subsequent migrations, preventing duplication. The concurrent migration option enables multiple mailboxes to be migrated simultaneously, significantly reducing the overall migration time. With automatic mailbox mapping, the software intelligently matches source and target mailboxes, minimizing manual effort. Additionally, advanced filter options allow you to migrate specific folders, date ranges, or item types based on your organization’s needs.
By combining security, flexibility, and performance, EdbMails provides an ideal solution to migrate from Exchange 2013 to 2016. It ensures a smooth, reliable, and fully compliant migration experience, helping organizations upgrade to Exchange Server 2016 with confidence and minimal disruption.
Exchange 2013 and 2016 Coexistence scenario
Exchange Server 2013 and Exchange Server 2016 can coexist within the same Active Directory (AD) environment. However, a direct upgrade from Exchange 2013 to 2016 is not currently supported. For successful coexistence, Exchange 2013 must be updated to Cumulative Update 10 or later on all Exchange 2013 servers in the organization, including Edge Transport servers.
With the EdbMails Exchange Migration Tool, you can directly migrate from Exchange 2013 to Exchange 2016, eliminating the need for complex coexistence setups. The software ensures a smooth and secure migration, preserving all your mailbox data, folder structures, and permissions.
Here is a general overview of the steps you can follow to migrate Exchange 2013 to 2016 in the same AD environment:
- Install Exchange Server 2016 in a new organization
If you are planning to introduce Exchange Server 2016 into an existing Exchange Server 2013 organization, it is recommended to create a new Exchange organization and install Exchange Server 2016 into it. This will allow you to gradually transition to Exchange Server 2016 while keeping Exchange Server 2013 in place.
- Upgrade the AD schema
Before installing Exchange Server 2016, you will need to upgrade the AD schema to include the new attributes and objects introduced in Exchange Server 2016. To do this, you will need to run the following command on a domain controller
Command: Copy & Pastesetup.exe /PrepareSchema
- Prepare the AD domains
After upgrading the schema, prepare the AD domains in which you plan to install Exchange Server 2016. To do this, you will need to run the following command on a domain controller:
Command: Copy & Pastesetup.exe /PrepareAD /OrganizationName:<Contoso ABC>
- Install Exchange Server 2016
After preparing the AD domains, you can proceed with the installation of Exchange Server 2016. Run the Exchange Server 2016 setup program and follow the prompts to install the software.
- Configure the mail flow
After installing Exchange Server 2016, configure the mail flow between the two Exchange servers. You can do this by creating a send connector in Exchange Server 2016 that routes mail to Exchange Server 2013.
- Migrate from Exchange 2013 to 2016
Set up EdbMails software for Exchange migration and directly migrate all of your mailbox data from the source to the target. Test and verify the migration and add MX records for proper mail flow.
In the following sections, we describe in detailed steps to configure Exchange 2016, the pre migration tasks, Exchange 2013 to 2016 migration steps and post migration activities.
- Install Exchange Server 2016 in a new organization
Exchange 2013 to 2016 Migration Checklist
Before you migrate Exchange 2013 to 2016, it’s essential to have a well-structured plan to ensure a seamless transition with minimal disruption. Below is a detailed checklist to guide you through each stage of the migration process.
- Prepare Users for the Migration
Start by informing and training your users about the upcoming Exchange 2013 to 2016 migration. Help them understand the new features, updated interface, and workflow changes. Communicate clearly with all stakeholders to ensure everyone is aware of the migration schedule and expected outcomes.
- Plan the Migration
Define the scope and type of migration based on your organization’s needs. Decide which mailboxes, public folders, and Exchange objects will be migrated and establish a clear timeline. Proper planning helps reduce downtime and ensures a smooth Exchange Server 2013 to 2016 migration.
- Prepare the Target Environment
Make sure that the Exchange 2016 server is installed and configured properly, and that all necessary prerequisites are met.
- Migrate Mailbox Data
Migrate all mailbox content, including emails, folders, contacts, calendars, and tasks from Exchange 2013 to the Exchange 2016 server.
- Migrate Other Exchange Objects
Migrate additional Exchange components such as room and equipment mailboxes, public folders, distribution lists, and shared mailboxes. This ensures that all essential communication and collaboration resources are available in the new environment.
- Configure Outlook Clients
Update and reconfigure Outlook profiles on user computers to connect to the new Exchange 2016 server. Verify that users can access their mailboxes and that all data is synchronized correctly.
- Test the migration:
Test the migration to ensure that everything has been migrated properly and that users can access their mailbox data on the Exchange 2016 server.
- Decommission the Exchange 2013 Server
Once testing is complete and all data has been validated, safely decommission the Exchange 2013 server. Remove it from the network and update DNS records and connectors to point to Exchange 2016.
- Prepare Users for the Migration
Exchange 2013 to 2016 migration prerequisites
- Step 1: Check that your system meets the Exchange 2016 setup requirements.
Before you migrate your mailbox data to Exchange 2019, ensure that your current environment and hardware is compatible for the transfer. The following links will help you to know about the network, hardware,.NET framework and operating system requirements for installing Exchange server 2016.
- Network and directory requirement for Exchange 2016
- Hardware Requirements for Exchange 2016
- Supported operating systems for Exchange 2016
- Supported .NET Framework in Exchange 2016
- Supported Outlook clients in Exchange 2016
Exchange server version Coexistence scenario Requirement Migration Exchange 2016 Can coexist with Exchange 2013 Install Cumulative Update 21(CU21) or later on Exchange 2013 EdbMails supports direct Exchange migration 2013 to 2016 Note: Exchange 2016 requires Active Directory forest functional level of Windows Server 2008 R2 or higher and a .NET Framework 4.8 on a Cumulative Update (CU) of 15. The Mailbox and Edge Transport servers require Windows Server 2012 Standard or Datacenter and higher. See the Exchange 2016 server supportability matrix for more information.
- Step 2: Prepare your system with the following prerequisites for Exchange 2016
Ensure that you meet the following prerequisites for Active Directory, Windows 2016 Mailbox server and Windows 2016 Edge Transport servers for installing Exchange 2016.
- Step 3: Decide on the approach for Exchange 2013 migration to 2016
Consider if you want to migrate all your mailboxes at once or migrate it in phases. EdbMails can help you with a complete Exchange 2013 to 2016 migration without affecting your users. The advantage with it is that you can keep using your mailboxes even during the migration without disconnecting your Exchange server.
Current environment and requirement Ideal migration approach Migration flow You want to move all mailboxes from Exchange 2013 to 2016 in a single event and within a limited time frame. Full Exchange 2013 to 2016 Migration Set up the Exchange 2016 server and migrate all mailboxes in a single session. Suitable for large mailbox migrations. You have limited time and want to migrate mailboxes from Exchange 2013 to 2016 in phases or over weekends. Staged Exchange migration Migrate mailboxes and data in stages, starting with the most recent data, followed by the rest. You want to migrate from Exchange 2013 to a Hybrid Exchange 2016 and Office 365 environment. Migrate from Hybrid Exchange to Office 365 Migrate from the source server to a Hybrid Exchange and Office 365 environment. See the prerequisites for a Hybrid deployment. Note: The specific migration method depends on the number of mailboxes, size of the data and your organizational requirements.
- Step 4: Set up the target Exchange Server 2016 for migration
Given below is a list of key points for installing and preparing the Exchange 2016 server for migration.
- Prepare the AD and domains
- Before installing Exchange Server 2016, you need prepare your Active Directory forest and its domains for the new version of Exchange.
- If you have a separate team to manage the Active Directory schema, you must extend the active directory schema, else proceed to the next step to prepare the Active Directory.
- If you have multiple domains you need to additionally prepare the Active Directory domains.
- Install Exchange server 2016
Before installing the Exchange server 2016, ensure that you meet the server system requirements and prerequisites as outlined above. Next, follow the link to install Exchange 2016 mailbox server and edge transport server using the setup wizard.
- Prepare a clean Exchange 2016 target environment
- Install and upgrade Exchange to the latest cumulative update to keep your server up to date.
- Create and configure a Send connector to send mail outside the Exchange organization.
- By default, Exchange automatically creates receive connectors for inbound mail flow when the mailbox server is installed. However, if you want to configure custom receive connectors for certain mail flow scenarios, follow the steps in the link.
- Add accepted domains to allow recipients to send and receive email from another domain.
- Configure the default email address policy to add the accepted domain to every recipient in the organization.
- Configure external URLs (domains) on the virtual directories in the Client Access (frontend) services on the Mailbox server to allow clients to connect to your server from the internet (outside the organization’s network).
- Configure internal URLs on the virtual directories in the Client Access (frontend) services on the Mailbox server to allow clients to connect to your server from the internal network.
- Configure SSL certificates from a third-party certificate authority for services such as Outlook Anywhere and Exchange ActiveSync.
- Verify the Exchange server installation by running the command Get-ExchangeServer on the Exchange Management Shell (EMS)
- Create mailboxes and Public folder on the target 2016 Exchange server
Ensure to create mailboxes on the target server and assign suitable licenses to them. You can choose EdbMails to automatically create mailboxes on the target Exchange server. However, if you want to create mailboxes manually follow the link below:
Steps to create mailboxes in Exchange 2013 server.
If you are planning to migrate to public folders, create mail-enabled Public folders on your target server and assign the admin permissions.
Steps to create Public folder in Exchange 2013 server and assign admin permissions.
- Install cumulative updates (CU) on Exchange server 2013
For migrating Exchange server 2013 to Exchange 2016, it is required that you have installed the latest cumulative updates (CU) on the source server (2013).
- Create trust relationship between forests (Optional)
A forest trust is an authentication between two domains within the same Active Directory forest which creates a trust between two root domains for exchanging information. By creating a trust in advance, it is possible to address the trust issues during the cross-forest authentication. See steps for cross forest migration from Exchange 2013 to 2016.
Note: Creating a forest trust relationship applies to Windows Server 2008, Windows Server 2008 R2 and Windows Server 2012. It is not required for SBS based environments.
- Assign management roles to the admin account
Ensure that you have set the following permissions to the admin account on the source (2013) and target server (2016)
- On the source
- ApplicationImpersonation
- View-Only Configuration - Run the cmdlet New-ManagementRoleAssignment using the Exchange Management Shell to assign the View-Only Configuration role to the admin.
- Organization Management role group. It is an elevated permission that is required to migrate Public folders.
- On the target
- ApplicationImpersonation
- View-Only Recipients
- View-Only Configuration
- On the source
- Verify the mailbox of the admin account
Check to see if the admin account that has been assigned management roles has a valid and non-hidden mailbox on the Exchange 2013 server. See how to configure user mailbox properties for the users from the Exchange admin center (EAC).
- Configure the throttling and message-size limits
You can manually change the EWS throttling and message size limits on the target Exchange 2016 server by following the steps outlined in the links below.
- Prepare the AD and domains
- Step 1: Check that your system meets the Exchange 2016 setup requirements.
Steps to perform Exchange 2013 to 2016 Migration
Step 1: Download and install the EdbMails software
- Download and install the EdbMails application on your computer running on Windows OS.

- Launch the EdbMails application on your computer.
- Enter your registered email ID and password, then click ‘Login’. If you don’t have an account yet, choose ‘Start Your Free Trial’ to proceed with the trial version.Note: The trial version gives access to all major features and allows migration of up to 30 items per folder. To enable unlimited migration, purchase an Exchange Migration license from the official EdbMails website.Once the license purchase is completed, close the application and open it again. Then sign in with the same email ID and password used during the purchase to activate your license successfully.

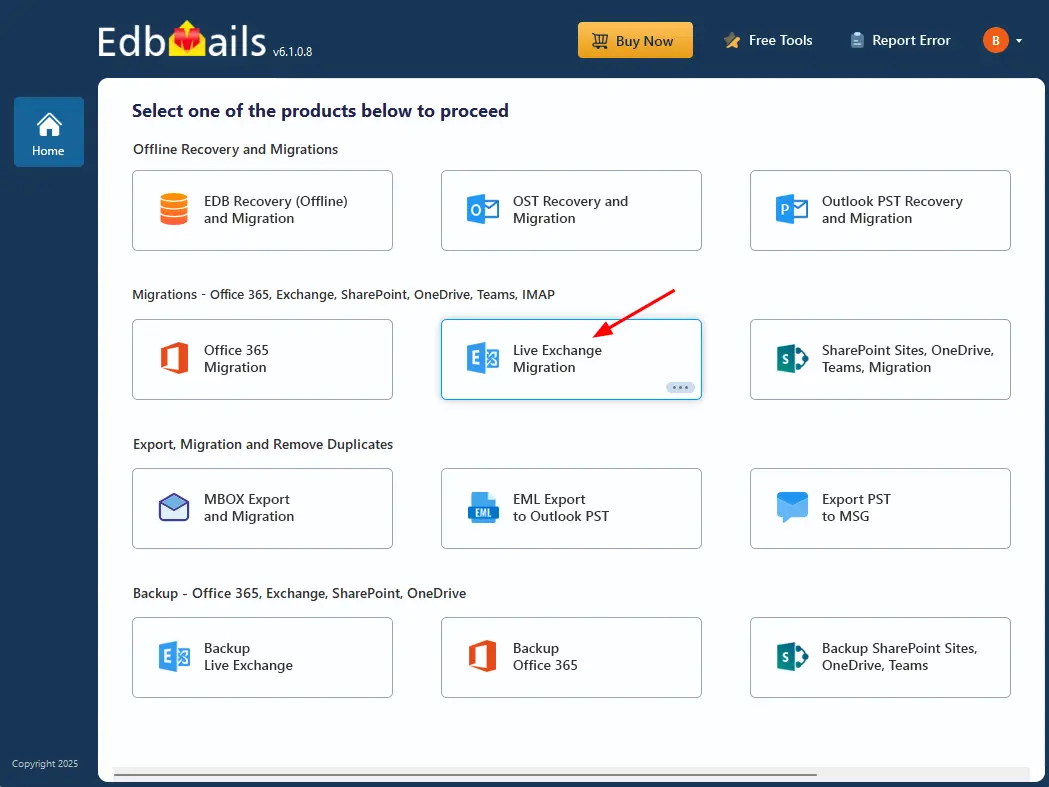
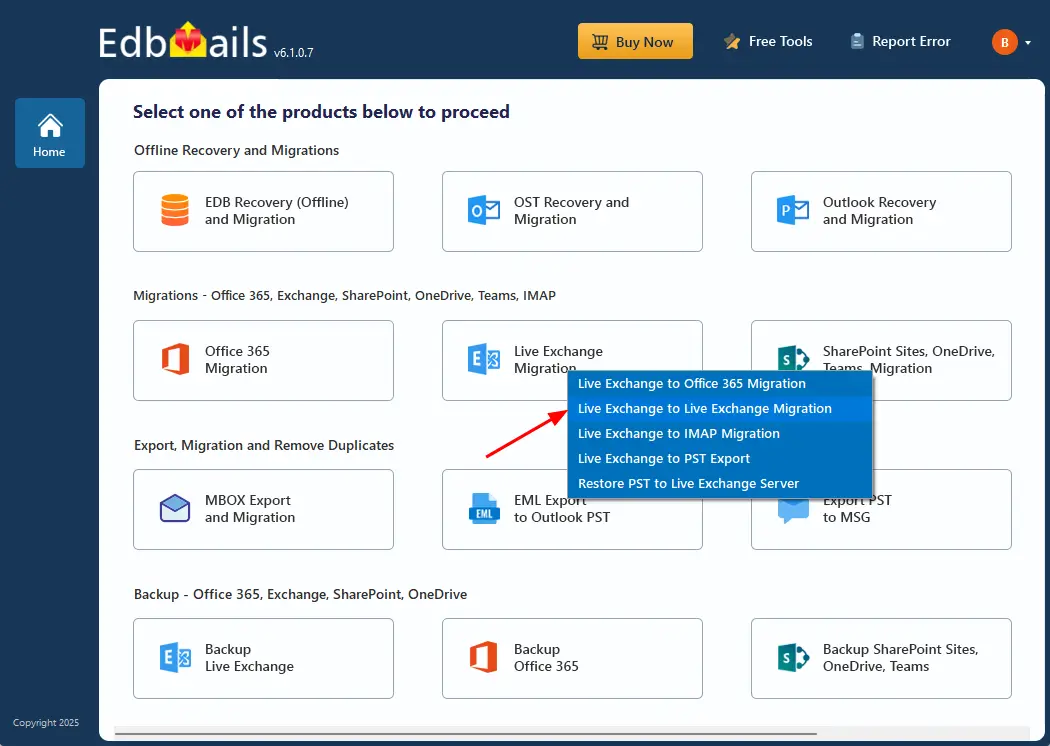
- Select ‘Live Exchange Migration' option.
- Select ‘Live Exchange to Live Exchange Migration' option.
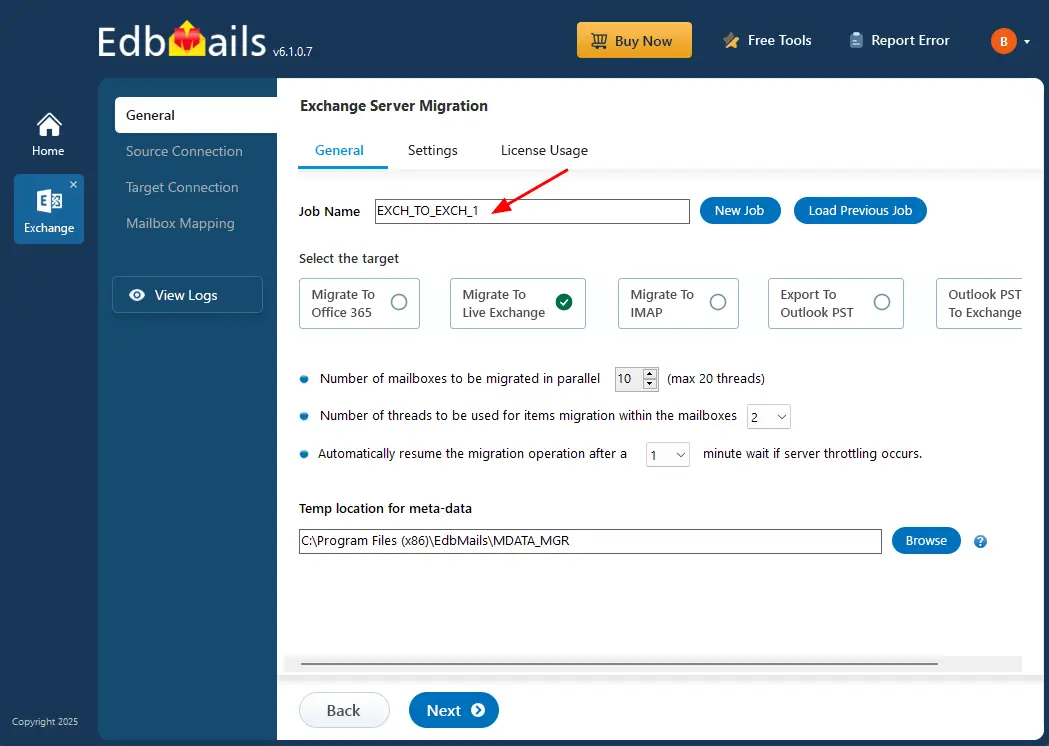
- Keep the default job name or click 'New Job' to change it, then click 'Next'.
- Download and install the EdbMails application on your computer running on Windows OS.
Step 2: Connect to source Exchange 2013 server
- Click ‘Add New Connection’ to set up a fresh connection with the source Exchange server. If you’ve already created one, select it from the list and click ‘Connect to Existing’ to continue.

EdbMails allows you to migrate mailboxes, public folders, and archive mailboxes from the source Exchange to the target server.
- Select the required connection options and click the ‘Next’ button.
Different options to connect to Exchange server in EdbMails.

- Enter the source Exchange 2013 server details, including the IP address (Domain name), Exchange version, username, and password.
- Click the ‘Login’ button to proceed.

- After signing in to your target Exchange 2016 server, select the preferred method to load the mailboxes.
- EdbMails provides an automatic option to load mailboxes, making the setup quick and simple. Due to Microsoft API limitations, this method displays up to 100 mailboxes at a time.
- For large environments or when specific mailboxes need to be included, choose the ‘Load Mailboxes using .CSV file’ option. This method enables manual selection and offers complete control over the mailbox loading process.
- Select ‘Load Mailboxes Automatically’ and click ‘Next’ to continue.

- Click ‘Add New Connection’ to set up a fresh connection with the source Exchange server. If you’ve already created one, select it from the list and click ‘Connect to Existing’ to continue.
Step 3: Select Exchange server 2013 mailboxes to migrate to Exchange 2016
- Choose the Exchange 2013 mailboxes / folders you wish to migrate.
- Click the ‘Next’ button.

Step 4: Connect to target Exchange 2016 server
- To connect to the target Exchange Server 2016, click the ‘Add New Connection’ button to establish a fresh connection. If you wish to use a previously saved connection, simply select it from the list and click ‘Connect to Existing’ to continue.

- Select the required connection options and click the ‘Next’ button.
check Different options to connect to Exchange server in EdbMails

- Enter the target Exchange server 2016 details and click the ‘Login’ button to continue.

- Once you've successfully logged in, select the required option for loading the target Exchange 2016 server mailboxes.

- To connect to the target Exchange Server 2016, click the ‘Add New Connection’ button to establish a fresh connection. If you wish to use a previously saved connection, simply select it from the list and click ‘Connect to Existing’ to continue.
Step 5: Exchange 2013 to 2016 mailboxes mapping
- Select the required mapping option
- If you’ve installed EdbMails on your target Exchange 2016 server, you can opt to let EdbMails automatically create the necessary mailboxes for you, streamlining the setup and reducing manual work.
Learn more about automatic mailbox creation.
EdbMails also handles automatic mapping between source and target mailboxes. This is particularly useful when migrating a large number of mailboxes.

Step 6: Start Exchange 2013 to Exchange 2016 migration
- After completing the mailbox mapping, click the ‘Start Migration’ button to initiate the migration process.

- While the migration is running, you can monitor its real-time progress through the progress bar. When the migration finishes, a confirmation message will be displayed. To review the details of the operation, simply click the ‘View Logs’ button to access the complete migration report.

- After completing the mailbox mapping, click the ‘Start Migration’ button to initiate the migration process.
Exchange 2013 to 2016 Post Migration Tasks
There are several post-migration tasks that you should perform after completing an Exchange 2013 to Exchange 2016 migration. These tasks can help ensure that your Exchange 2016 deployment is functioning properly and that your users are able to access their email, calendars, and other Exchange services.
- Verify that all mailboxes have been successfully migrated to the new Exchange 2016 server.
- Test the functionality of all client access protocols (e.g., Outlook Web App, Outlook Anywhere).
- Test the functionality of all Exchange services (e.g. Outlook calendar, contacts, tasks).
- Test the functionality of any third-party applications that integrate with Exchange (e.g., CRM, archiving).
- Update the domain name in the DNS records to point to the new Exchange 2016 server.
- To receive messages on the Exchange server 2016, update MX records to enable email to work with the new server you have migrated to. In addition, configure the Autodiscover record to allow Outlook to connect to the migrated mailboxes.
- Create a new Outlook profile for users in the new domain
- Ensure you have the latest version of Outlook installed to avoid compatibility issues. Configure the Outlook profile for each user in your domain if Outlook has problems connecting to the new Exchange server.
- Monitor the performance of the new Exchange 2016 server to ensure that it is functioning properly.
- Decommission and uninstall Exchange server 2013
- Remove the Exchange 2013 server from the load balancer, if you have one.
- Remove the Exchange 2013 server from the Exchange organization by using the Remove-ExchangeServer cmdlet.
- Remove the Exchange 2013 server from Active Directory. This can be done by using the Active Directory Users and Computers console or the Remove-ADObject cmdlet.
- If you want to completely remove Exchange 2013 from the server, you can use the Install-WindowsFeature cmdlet to remove the Exchange 2013 server roles.
- Once all these steps are complete, you can decommission the Exchange 2013 server and remove it from your network.
- Follow the instructions on the Microsoft’s website to decommission Exchange Server 2013
It's important to thoroughly test your Exchange 2016 deployment after the migration to ensure that everything is working as expected and that your users are able to access their email and other services. It's also a good idea to document any issues that you encounter during the testing process so that you can troubleshoot them more effectively.
Troubleshooting guide for Exchange 2013 to 2016 Migration
Refer to the Exchange migration troubleshooting guide for effective solutions to common migration errors.
 .
. Benefits of EdbMails for Exchange 2013 to 2016 Migration
EdbMails Exchange Migration software is designed to simplify and accelerate the Exchange 2013 to 2016 migration process while maintaining complete data integrity. It provides a range of advanced features that make complex migrations effortless, secure, and highly efficient.
- Granular and Selective Migration With EdbMails granular migration capability, you can choose to migrate only specific mailbox items such as emails, contacts, calendars, and tasks. This selective migration ensures that only relevant data is transferred, keeping your new Exchange environment clean and organized.
- Incremental Migration The incremental migration feature transfers only newly added or modified items during subsequent migrations. This eliminates data duplication, conserves bandwidth, and significantly improves overall migration efficiency.
- Public Folder and Shared Mailbox Support EdbMails also fully supports the migration of Exchange 2013 Public folders to Exchange 2016, helping organizations preserve shared resources and maintain uninterrupted access during the upgrade. Additionally, it allows the migration of public folders to shared mailboxes, promoting better organization, collaboration, and accessibility.
- Automatic Mailbox and Folder Mapping Automatic mailbox mapping between the source and target servers minimizes manual configuration and reduces administrative workload. This feature is especially beneficial for large-scale or enterprise migrations.
- Concurrent Mailbox Migration EdbMails supports concurrent mailbox migration, allowing multiple mailboxes to be migrated simultaneously. This high-performance feature greatly reduces the total migration time and ensures zero downtime for end users.
- Flexible Filter Options Customizable include/exclude filters let you migrate only essential data based on date range, folder type, or specific item categories. This helps optimize performance and manage storage space efficiently in the target Exchange 2016 environment.
- Detailed Migration Reports At the end of the migration, EdbMails automatically generates a comprehensive report summarizing mailbox status, migrated items (such as emails, contacts, and folders), and any issues encountered. These detailed insights provide complete transparency and control throughout the migration. Learn more
- 24/7 Expert Technical Support To support users at every step, EdbMails offers 24/7 free technical assistance, ensuring a smooth and stress-free migration experience from start to finish.
Frequently Asked Questions (FAQ)
What are the benefits of upgrading from Exchange 2013 to Exchange 2016?
There are several benefits to upgrading from Exchange 2013 to Exchange 2016, including:
- Improved performance and scalability: Exchange 2016 has been designed to handle larger mailbox sizes and higher levels of concurrent user activity, making it a more robust and scalable solution for larger organizations.
- Enhanced security features: Exchange 2016 includes a number of security enhancements, such as anti-malware and anti-spam protection, data loss prevention, and support for multi-factor authentication.
- Improved user experience: Exchange 2016 includes a number of user-friendly features, such as a redesigned web interface, support for touch-enabled devices, and the ability to search for items across all folders.
- Greater integration with other Microsoft products: Exchange 2016 integrates seamlessly with other Microsoft products, such as Skype for Business and OneDrive for Business, making it easier for users to collaborate and share information.
What are the hardware and software requirements for Exchange 2016?
The hardware and software requirements for Exchange 2016 depend on the number of users and the workloads you expect to place on the server.
Minimum hardware requirements for Exchange 2016 include
- 64-bit processor with at least four cores
- 8 GB of RAM
- At least 100 GB of free hard drive space
Minimum software requirements for Exchange 2016 include:
- Windows Server 2016 Standard or Datacenter
- .NET Framework 4.7.2 or later
- Windows Management Framework 5.1
It is important to note that these are the minimum requirements and you may need to use more powerful hardware and software depending on your specific needs and workloads.
How do I migrate my users, mailboxes, and data from Exchange 2013 to Exchange 2016?
There are several methods for migrating from Exchange 2013 to Exchange 2016.
- In-place upgrade: This method involves installing Exchange 2016 on the same server as Exchange 2013 and upgrading the existing server. It is typically only recommended for small organizations with a single server.
- Staged migration: This method involves setting up a new Exchange 2016 server and migrating users, mailboxes, and data to it in stages. It is typically recommended for larger organizations with multiple servers.
- Cutover migration: This method involves setting up a new Exchange 2016 server and migrating all users, mailboxes, and data to it in a single cutover. It is typically recommended for small organizations with a single server.
- Hybrid migration: This method involves setting up a new Exchange 2016 server and migrating some users, mailboxes, and data to it while keeping others on the existing Exchange 2013 server. This method is typically recommended for organizations with a mix of on-premises and cloud-based users.
Can I migrate to Exchange 2016 in-place, or do I need to set up a new server?
In most cases, it is not recommended to perform an in-place upgrade from Exchange 2013 to Exchange 2016. Instead, it is typically recommended to set up a new Exchange 2016 server and migrate users, mailboxes, and data to it using one of the methods described above.
There are a few exceptions to this rule, such as small organizations with a single server and minimal customization. In these cases, an in-place upgrade may be possible, but it is important to carefully plan and test the process to ensure a smooth transition.
How long will the migration process take and what downtime can I expect?
The length of the migration process will depend on several factors, including the size of your organization, the number of users and mailboxes being migrated, and the method you choose for the migration. When you use EdbMails for the Exchange migration, you do not have any downtime issues.
Can I perform a test migration before moving everything over to Exchange 2016?
Yes, it is generally recommended to perform a test migration before moving everything over to Exchange 2016. This allows you to identify and resolve any issues before the actual migration, ensuring a smoother transition for your users.
How do I handle any issues that arise during the migration process?
It is important to carefully plan and test the migration to minimize the risk of issues arising. However, if issues do arise during the migration process, there are several steps you can take to troubleshoot and resolve them
- Check the Exchange 2016 documentation and EdbMails Exchange migration troubleshooting guide for common issues.
- Use the Exchange Management Shell to run diagnostic commands and gather more information about the issue.
- Use event logs and other tools to identify the root cause of the issue and determine the best course of action.

