Migrate Exchange 2013 to Office 365
Support for Exchange Server 2013 ended on April 11, 2023, so it no longer receives security updates, bug fixes, or technical support. Continuing to use it can increase security and compliance risks for your organization. To keep your systems secure and running without disruption, it’s important to migrate Exchange 2013 to Office 365. With Exchange Online, you get stronger security, automatic updates, modern collaboration features, and reliable cloud access with zero downtime. This migration not only safeguards your data but also enables your organization to take advantage of Microsoft’s latest productivity features within Microsoft 365.

Migrating to Exchange Online brings clear benefits compared to Exchange Server 2013, such as simpler management, better scalability, regular updates, and more advanced features beyond email and communication. At the same time, a smooth migration requires careful planning and the right approach to ensure a flawless experience.
EdbMails Exchange Migration Software provides a fast, secure, and dependable way to migrate from Exchange 2013 to Office 365 while maintaining complete data integrity. It supports incremental migration, allowing only newly added or updated items to be migrated after the initial sync, which helps avoid duplicates and saves time. The software includes automatic throttling management that adjusts the migration speed based on Microsoft limits, ensuring smooth performance. It also allows selective migration of specific mailboxes or folders and generates detailed migration reports for better tracking and transparency.
What Does ‘End of Life’ Mean for Exchange Server 2013?
When Microsoft declares a product as reaching its end of life, it means the extended support period has officially ended. This doesn’t mean your Exchange Server 2013 will stop functioning overnight; it will still run, but it will no longer receive security patches, performance updates, or official assistance from Microsoft. In simple terms:
- No new updates or security fixes will be released.
- Getting help from Microsoft or other vendors becomes increasingly difficult.
- The system becomes more vulnerable to emerging cyber threats.
- As more organizations move away from Exchange 2013, community and third-party support will also diminish.
While some organizations may continue operating Exchange 2013 beyond its support period (similar to how a few still use Exchange 2010), doing so increases long-term risks. Over time, compatibility issues, unsupported tools, and security vulnerabilities make it harder to maintain a stable and secure environment.
Professional Software to Migrate Exchange 2013 to Office 365
EdbMails Exchange Migration Software makes Exchange 2013 to Office 365 migration simple, without requiring advanced technical skills. With EdbMails, you can migrate emails, contacts, tasks, notes, folders, attachments, archive mailboxes, and shared mailboxes, ensuring no disruption to your daily operations. The software automates key steps in the migration process, ensuring a smooth transition. It supports secure modern authentication for Office 365, ensuring that the migration is both protected and efficient, while maintaining complete data consistency between the source and target servers. Whether you're migrating from on-premises Exchange to Office 365, Hosted Exchange to Office 365, between different Exchange servers, or even across forests or domains, EdbMails ensures a reliable and hassle-free migration every time.
Key Considerations Before Exchange 2013 to Office 365 Migration
Before you migrate Exchange 2013 to Office 365, it’s important to plan carefully to ensure a secure migration. The following checklist will help you prepare your environment and avoid common pitfalls during the migration process:
- Determine whether your current Exchange 2013 setup is Hybrid or Non-Hybrid.
- Decide if you want to migrate all mailboxes at once or follow a phased migration approach.
- Inform and prepare end users in advance, and communicate key changes to all stakeholders.
- Conduct short training sessions to help users get familiar with the new Microsoft 365 environment.
- Assess the total data size and number of mailboxes to be migrated.
- Verify internet bandwidth, network performance, and overall connectivity.
- Plan whether to include Shared Mailboxes and Public Folders during migration.
- Add and configure your domains before migrating to Office 365 from Exchange 2013.
- Ensure all Outlook clients are updated to the latest version compatible with Office 365.
- Create required mailboxes and select appropriate Microsoft 365 licenses.
- Perform a test migration to confirm that the setup and permissions are properly configured.
- Start the Exchange 2013 to Office 365 migration and update MX records to point to the target.
- Recreate Outlook profiles for users and safely decommission the old Exchange 2013 server once everything functions correctly.
Exchange 2013 to Office 365 Migration Prerequisites
- Step 1: Decide on the Exchange to Office 365 migration approach
The first step in migrating from Exchange 2013 to Office 365 is to plan your migration strategy. Various migration paths are available depending on your source and target environments.
Current environment and migration requirement Ideal migration approach Migration flow Move all email, calendar, and contacts from Exchange Server 2013 to Office 365 (Microsoft 365) in a single batch Exchange cutover migration Set up your target Office 365 tenant and migrate everything to the cloud in a single batch. Move mailboxes from Exchange Server 2013 to Exchange Online in smaller batches or over weekends Staged Exchange migration Migrate your mailbox data in stages and transfer the most recent data first, followed by the others. Move to Office 365 gradually with specific on-premise requirements not supported in Exchange Online Hybrid migration Migrate from Exchange 2013 to a hybrid deployment, keeping both Exchange Server and Office 365 during the transition. Use the Microsoft 365 Mail Migration Advisor to find the best migration path based on your organization's specific needs and requirements.
- Step 2: Check the bandwidth and network requirements
Make sure your network and bandwidth can handle the migration. The requirements will vary based on how much data you need to move.
As a general rule, you should allow for at least 1.5 times the size of your mailbox data to account for overhead.
For instance, if your mailbox data totals 50 GB, you should plan for at least 75 GB of bandwidth to manage the data transfer. This is a general guideline; your exact needs may vary based on your organization’s size and complexity.
If you've got a firewall or proxy server set up, double-check that it's set to allow the right traffic between your Exchange Server 2013 and Office 365. You can also test your existing network with Microsoft tools.
See network and migration planning, performance factors and best practices for Microsoft 365 migration.
- Step 3: Determine the Microsoft 365 license plan suited to your needs
Microsoft 365 comes in two options: a cloud-based subscription service or a one-time purchase with a perpetual license. There are Office 365 business plans and Office 365 enterprise plans, each suited to different user needs. Compare the Office 365 business plans and Office 365 enterprise plans through these links. You can select a licensing plan that fits your needs or sign up for a 30-day free trial to decide later.
- Step 4: Set up your target Office 365 tenant for the migration
Prepare your tenant implementation and deploy it, following the tenant roadmap for Microsoft 365. If you're installing Office apps on your computer, check the system requirements for Microsoft 365 and the Office configuration support matrix. Since Office 365 is cloud-based, it's crucial to understand where your Microsoft 365 customer data is stored.
- Step 5: Add and verify the custom domain on Office 365
If you're migrating to Office 365 and want to receive emails on your custom domain from your hosting provider, you'll need to add and verify the domain in Office 365. This allows you to use your own domain name (like example.com) for email addresses and other Office 365 services.
To set up your custom domain, follow these steps:
- Verify ownership of the domain by adding a TXT record to your DNS configuration.
- Add the new domain to your Office 365 tenant.
- Update your DNS records to direct to Office 365.
Steps to add a custom domain to Office 365 and steps to add DNS records to connect your domain.
- Step 6: Create mailboxes and mail-enabled Public folders
Before you migrate Exchange 2013 to Office 365, make sure to create mailboxes for your organization's users and assign appropriate licenses to them. If you need to create multiple user accounts simultaneously, you can use the "Bulk add users" feature to create accounts in bulk using a CSV file.
- Add users and assign licenses to Office 365 users
- Add several users at the same time to Office 365
- Assign Microsoft 365 licenses to user accounts
If you are planning to migrate Public folders from Exchange 2013 to Office 365, first, create and configure the Public folders on the target server.
If you are planning to migrate Archive mailboxes from Exchange 2013 server to Office 365, enable In-Place Archive mailboxes in Office 365.
- Step 7: Set the impersonation role on the source to the admin user
Make sure to grant the following permissions to the admin account on both the source and target servers, and ensure that the mailboxes you migrate aren't hidden from the address lists.
- On the source server:
- Grant "ApplicationImpersonation" and "View-Only Configuration" permissions.
- To assign the "View-Only Configuration" role, use the Exchange Management Shell to run the cmdlet "New-ManagementRoleAssignment" for the admin.
- On the target server:
- Ensure that you have a global admin account with a mailbox for Auto Registration of EdbMails application on your Entra ID (Azure Active Directory). However, you can use either a global admin account or any user account with full access rights in the Manual Registration method.
- On the source server:
- Step 8: Verify the mailbox of the admin account
Ensure that the admin account assigned management roles has a valid and non-hidden mailbox on the Exchange 2013 server. To configure user mailbox properties for users from the Exchange Admin Center (EAC) refer to this Microsoft article.
- Step 9: Configure Office 365 to send and receive large messages
Follow the steps to increase the message size on Office 365.
- Step 1: Decide on the Exchange to Office 365 migration approach
Steps to Migrate Exchange 2013 to Office 365
Step 1: Download and Install EdbMails software
- Download and install the EdbMails software on your Windows computer that is connected to your source Exchange 2013 server.
See the detailed list of EdbMails system requirements for Exchange 2013 to Office 365 migration.

- Launch the EdbMails application on your computer.
- Enter your registered email ID and password, then click ‘Login’. If you do not have an account yet, select ‘Start Your Free Trial’ to begin using the trial version.Note: The trial version includes all important features and allows migration of up to 30 items per folder. To enable unlimited migration, purchase an Exchange Migration license from the EdbMails website.Once the license is purchased, close and reopen the application. Then sign in again with the same email ID and password used during the purchase to activate the license successfully.

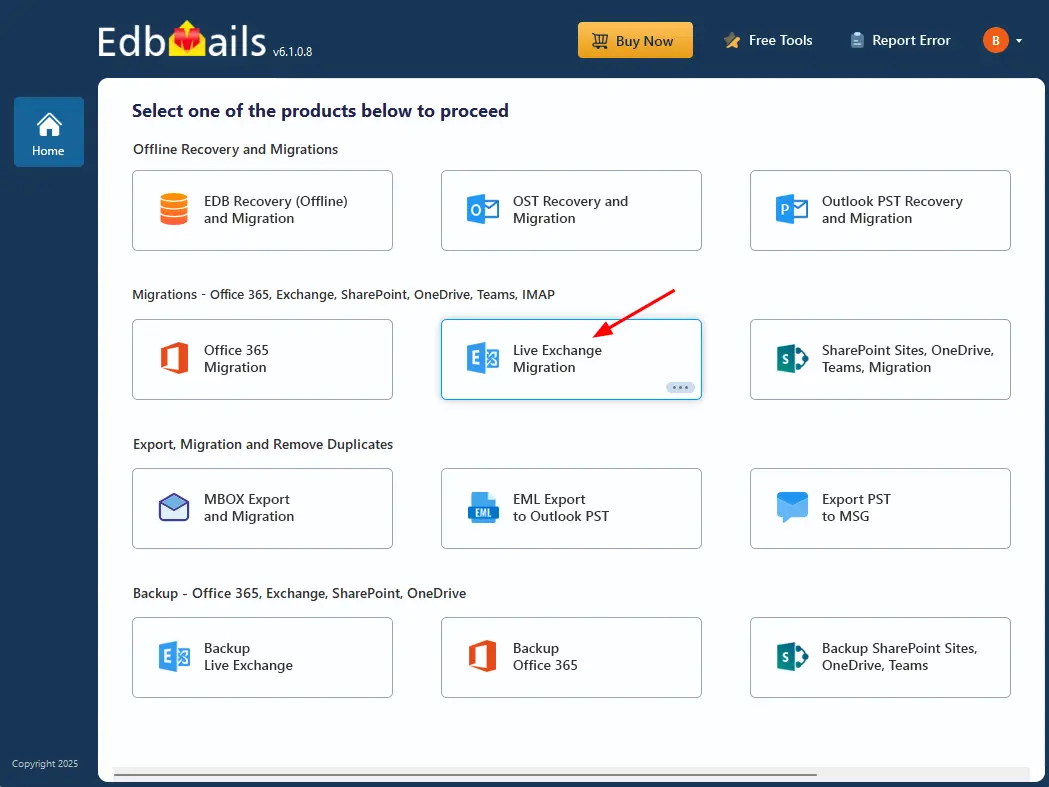
- Select ‘Live Exchange Migration’ option.
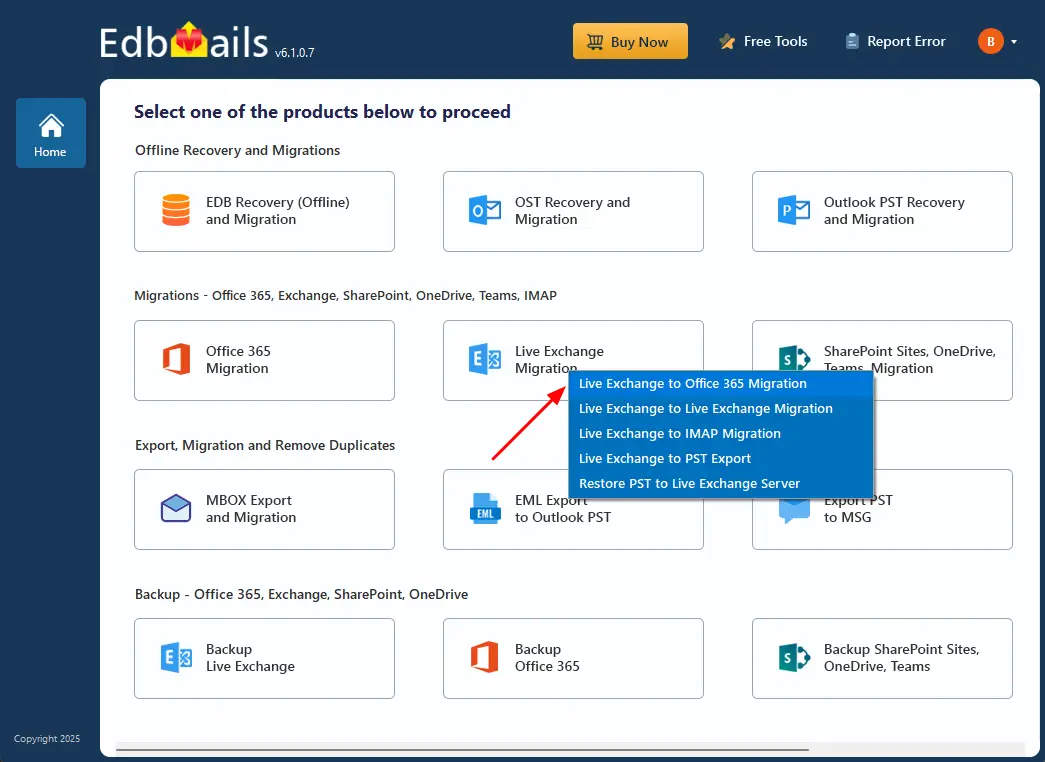
- Select 'Live Exchange to Office 365 Migration' option.
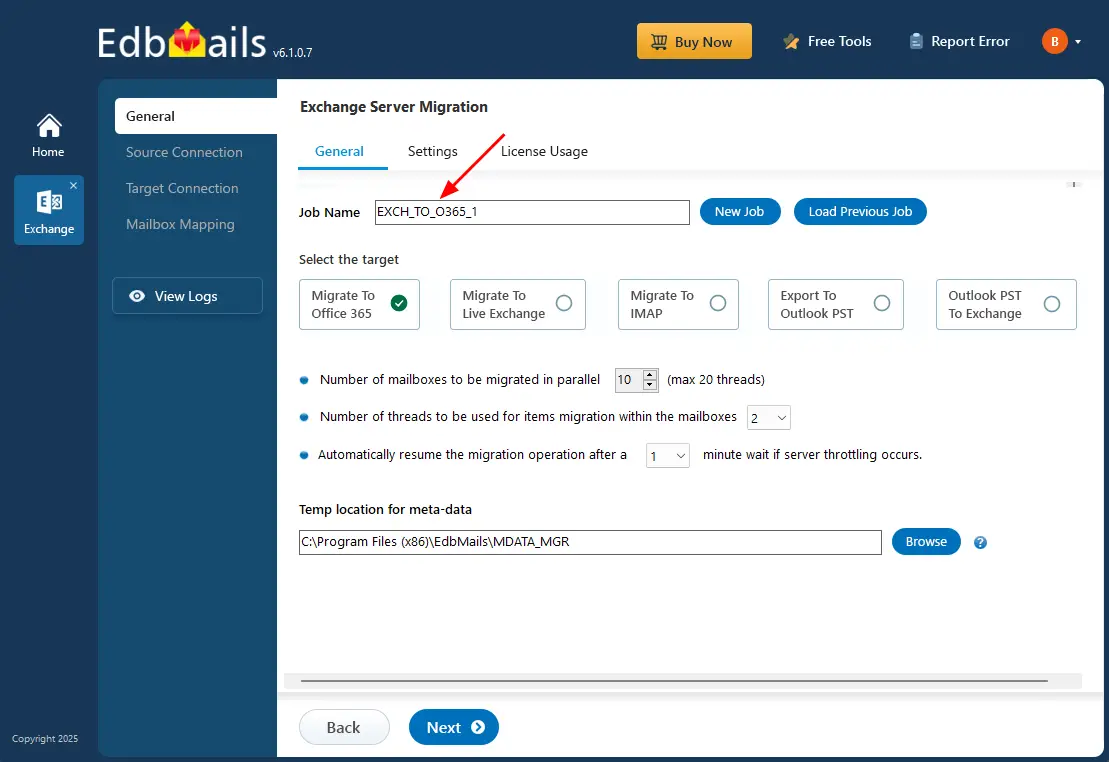
- Use the default job name or click 'New Job' to modify.
- Download and install the EdbMails software on your Windows computer that is connected to your source Exchange 2013 server.
Step 2: Connect to the source Exchange 2013 server
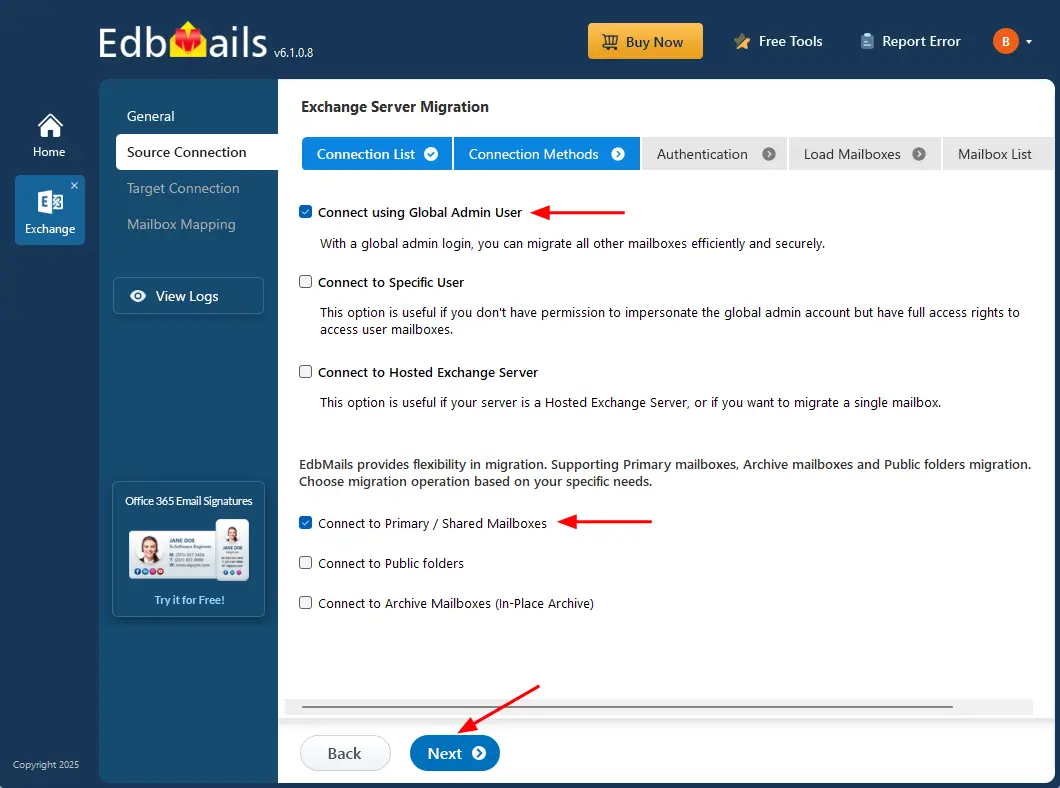
- To create a new connection with the source Exchange 2013 server, click ‘Add New Connection’. If a connection has already been configured earlier, simply select it from the list and click ‘Connect to Existing’ to proceed.
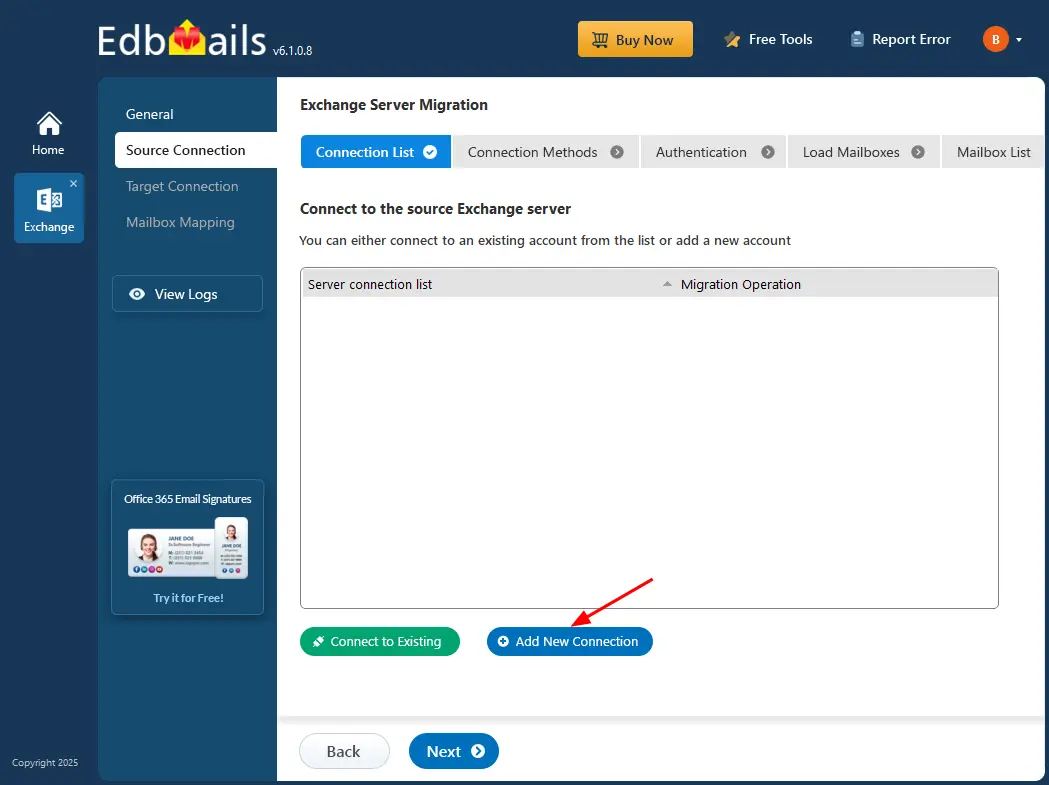
- Select the required connection options and click the ‘Next’ button.
Different options to connect to Exchange server in EdbMails.
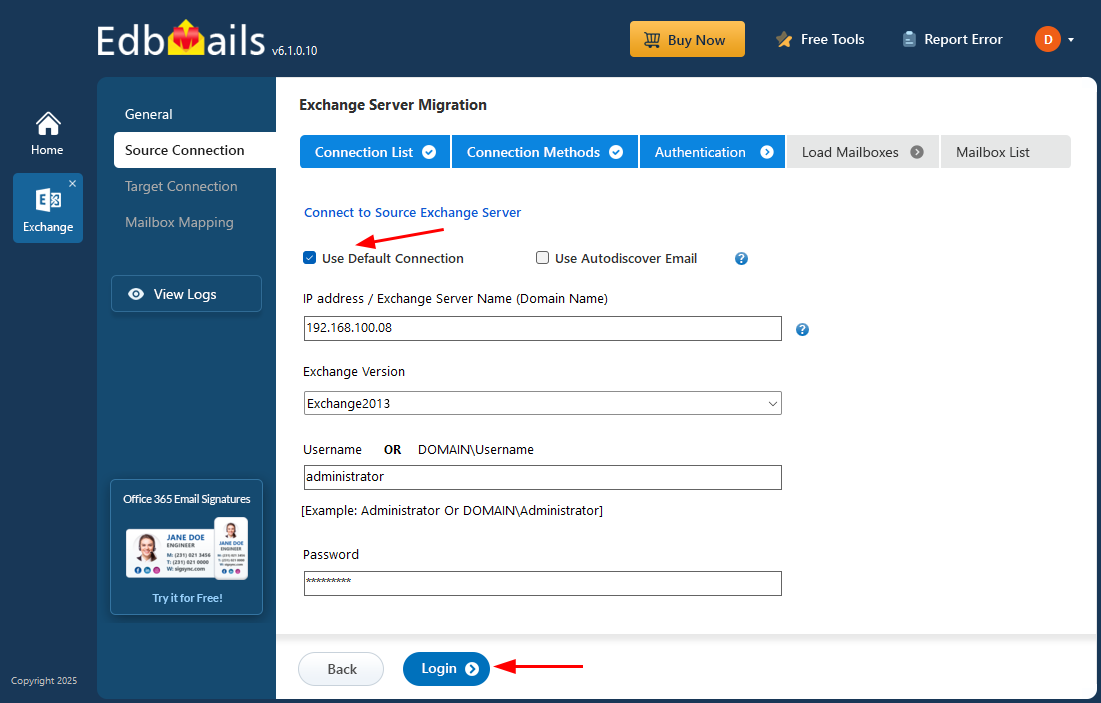
- Select the ‘Use Default Connection’ option and provide the Exchange server name along with the corresponding version, or choose ‘Use Autodiscover Email’ to sign in directly using your user credentials.
- Enter the required source Exchange 2013 server information such as the IP address (Domain name), Exchange version, Username, and Password.
- After entering all the necessary details, click ‘Login’ to continue.
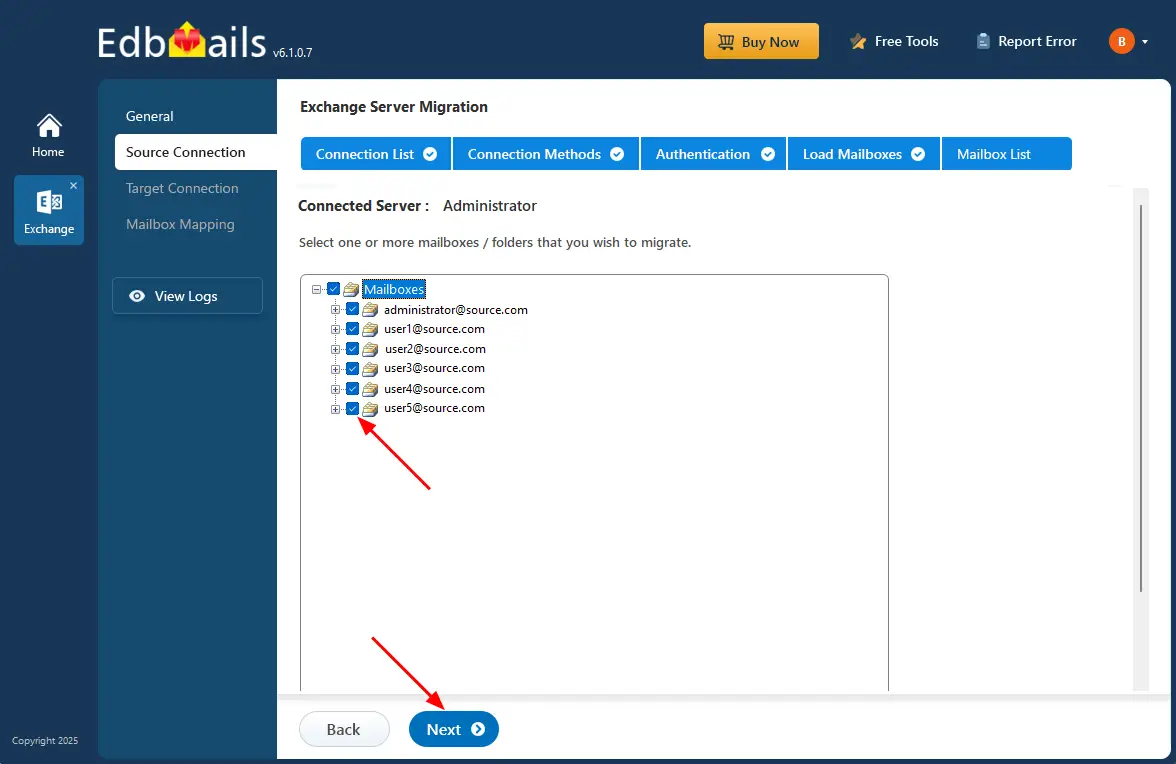
- EdbMails automatically detects and loads mailboxes from the Exchange 2013 server. Due to Microsoft API limits, only up to 100 mailboxes are displayed at a time. If you have more than 100 mailboxes, use the CSV option to add the remaining mailboxes for migration
- Select ‘Load Mailboxes Automatically’ to include public folders, then click ‘Next’ to continue.

- Choose the mailboxes or folders you want to migrate from your Exchange 2013 server, then click ‘Next’ to continue.
- To create a new connection with the source Exchange 2013 server, click ‘Add New Connection’. If a connection has already been configured earlier, simply select it from the list and click ‘Connect to Existing’ to proceed.
Step 3: Connect to target Office 365 server
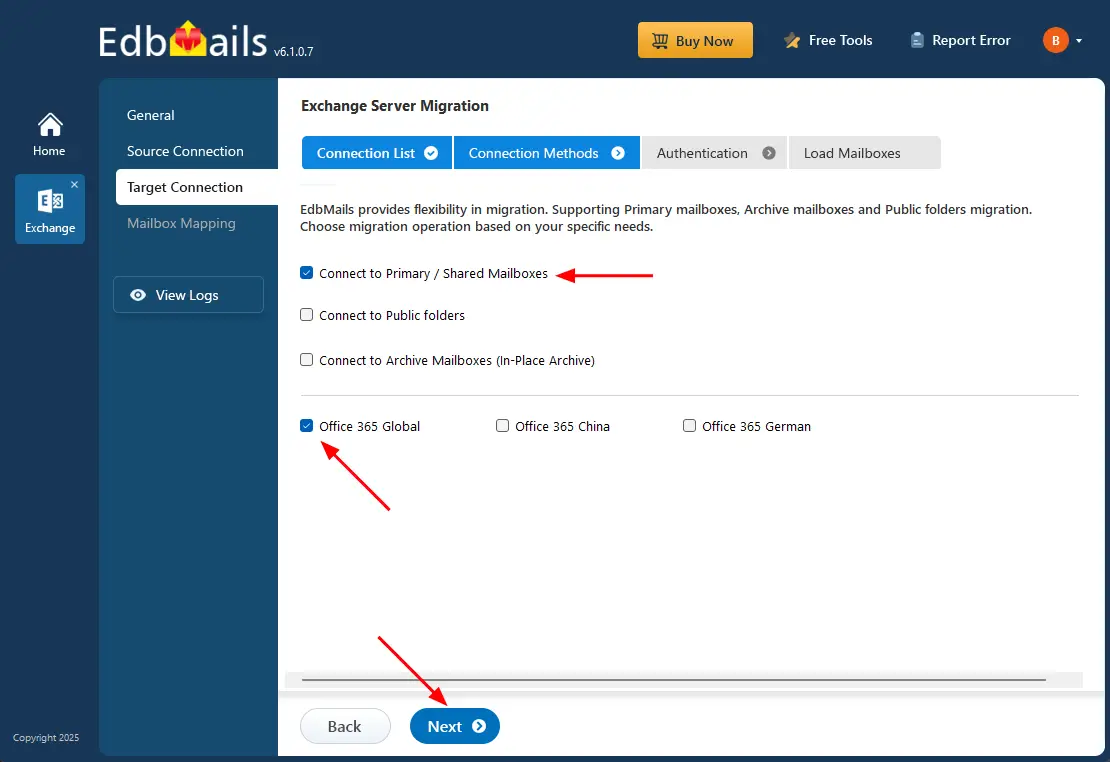
- Click ‘Add New Connection’ to set up a fresh connection to the target Office 365. If you've connected before, choose it from the list and click ‘Connect to Existing’ to continue.
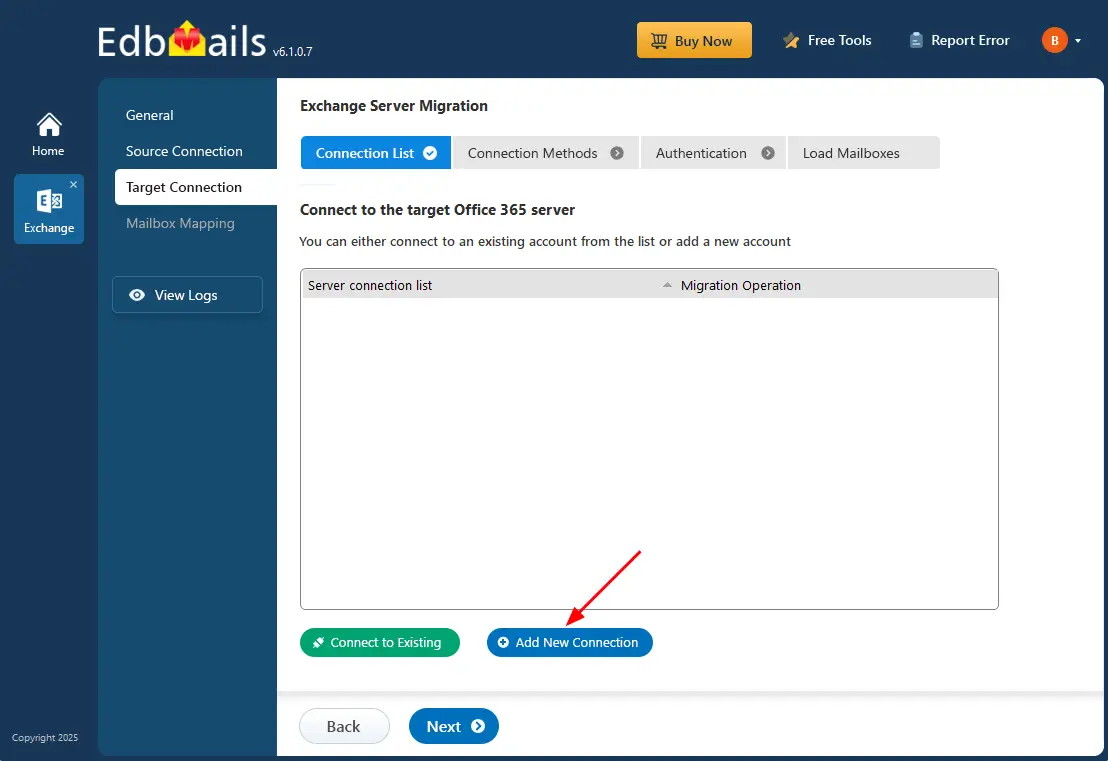
- Select the required connection options and click the ‘Next’ button.
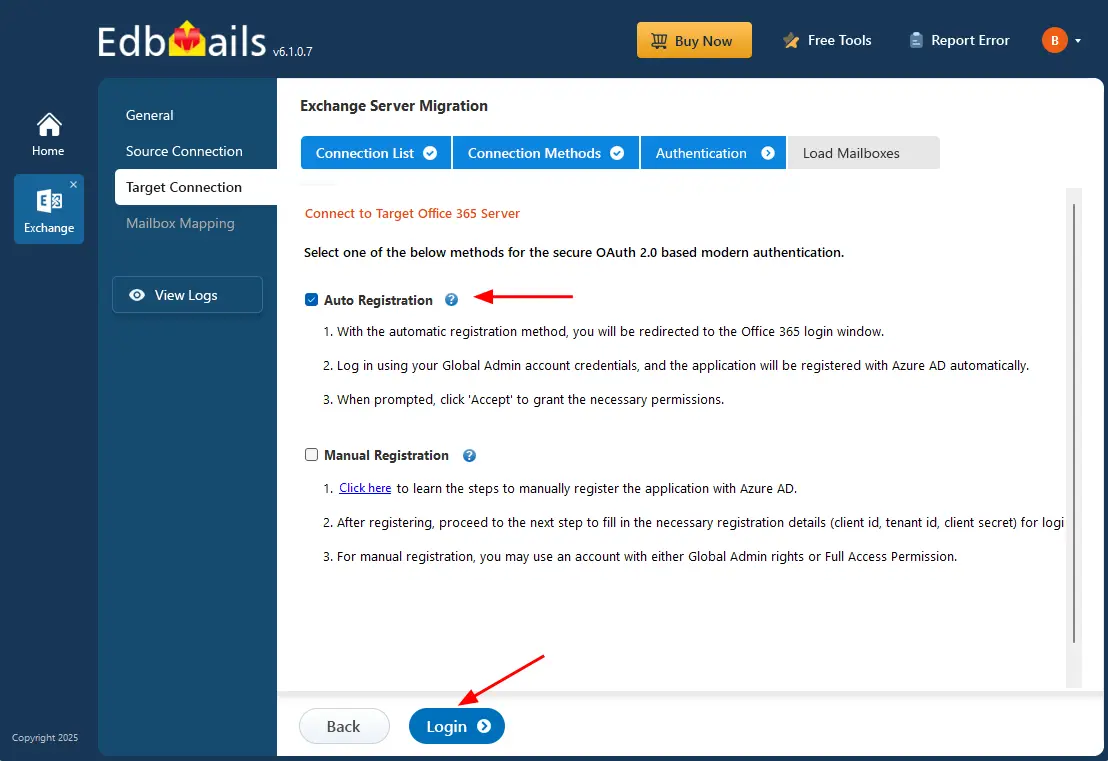
- Select one of the authentication methods to connect to Office 365 and click the ‘Login’ button to continue.
Connect to Office 365 server using secure modern authentication.
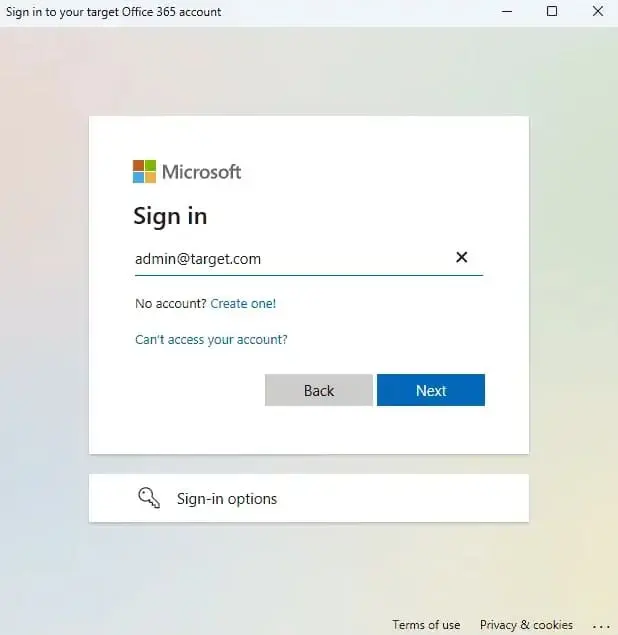
- Authenticate on Microsoft sign-in page.
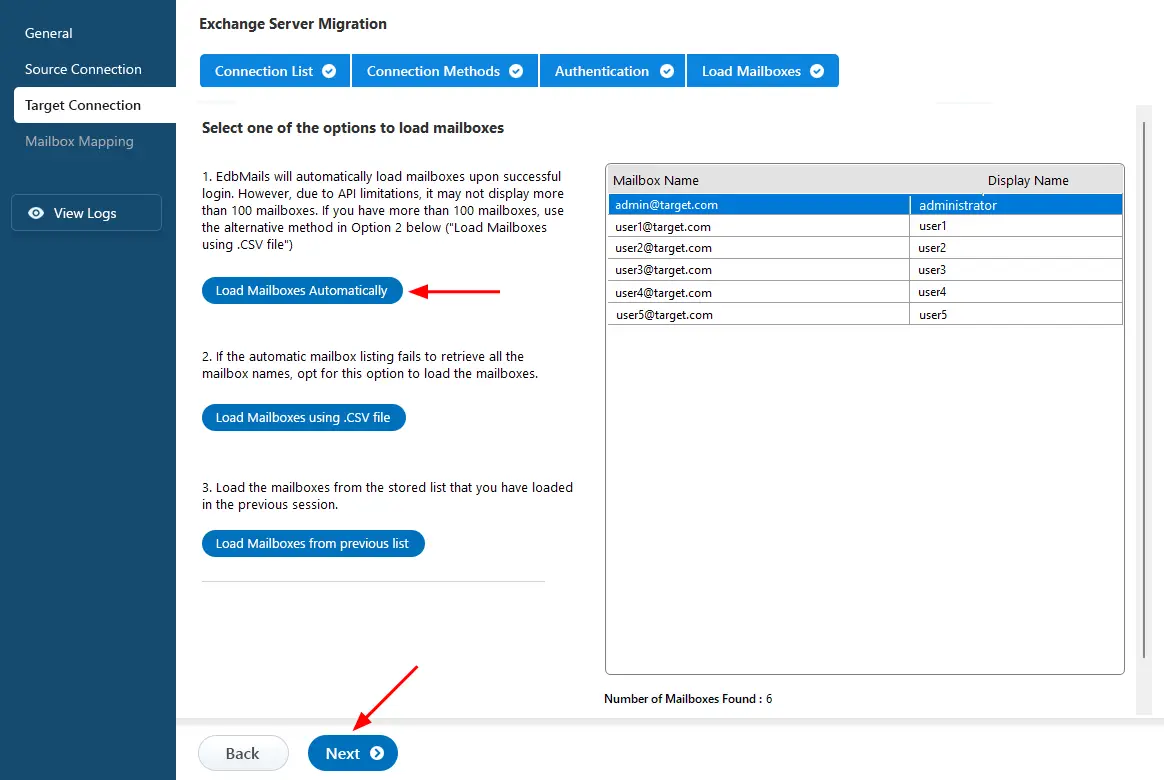
- Choose the method to load your Office 365 mailboxes and click ‘Next’.
Steps to load mailboxes via CSV file.
- Click ‘Add New Connection’ to set up a fresh connection to the target Office 365. If you've connected before, choose it from the list and click ‘Connect to Existing’ to continue.
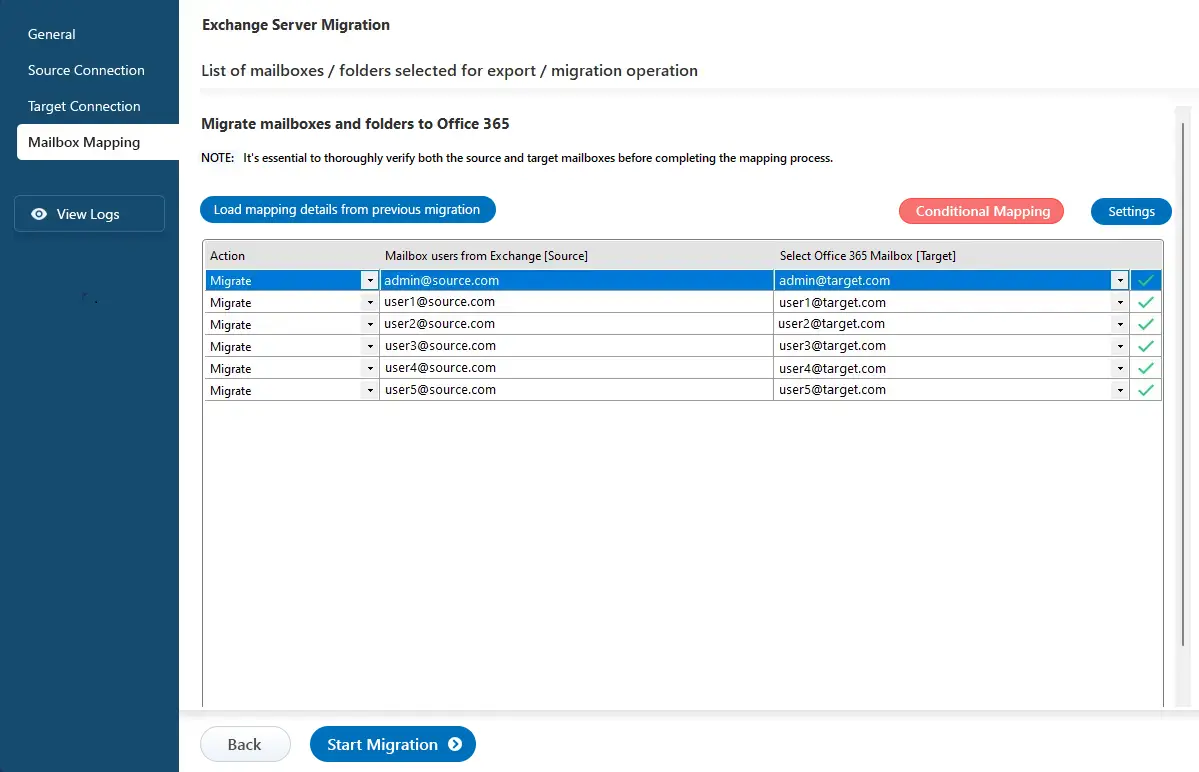
Step 4: Map mailboxes between Exchange 2013 and Office 365 servers
- Select one of the mapping options.
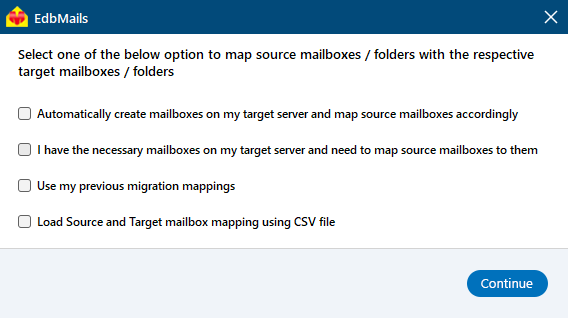
- EdbMails offers an automatic feature to create mailboxes on the target Office 365 server and map source and target server mailboxes. Alternatively, you can map mailboxes manually or use the CSV file method for mapping.
- Select one of the mapping options.
Step 5: Start the migration from Exchange 2013 to Office 365
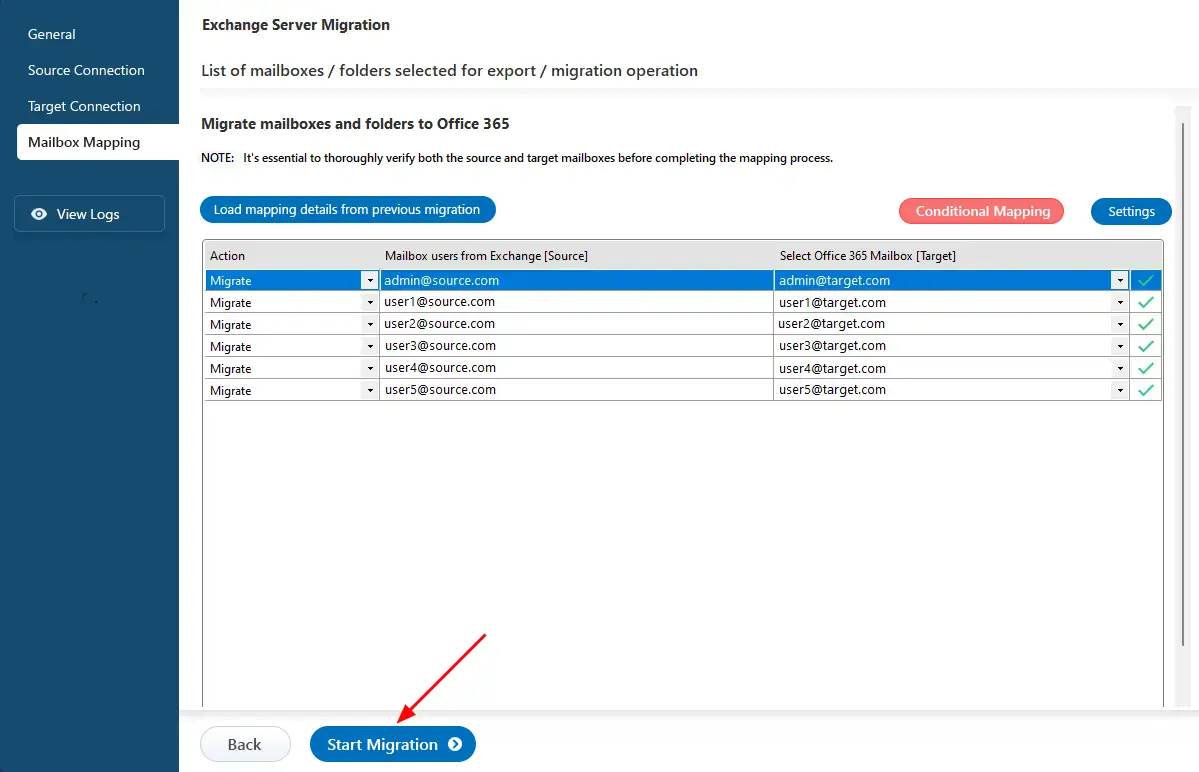
- Once mailbox mapping is complete, click the ‘Start Migration’ button.
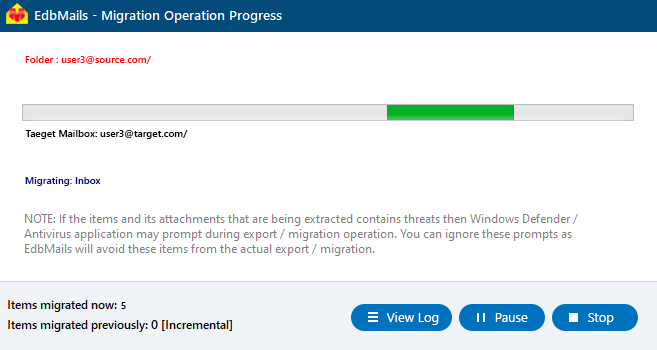
- You can track the migration in real time using the progress bar. Once it’s done, EdbMails displays a confirmation message. Click ‘View Logs’ to see a detailed report of the migration operation.
- Once mailbox mapping is complete, click the ‘Start Migration’ button.
Exchange 2013 to Office 365 Post Migration Tasks
Following are the post migration tasks you might want to consider once you've completed the Exchange 2013 to Office 365 migration.
- Step 1: Verify the migration
Once the migration process is done, ensure that the mailbox data has been migrated to Office 365 correctly. With the EdbMails migration report, you can view the count of migrated emails, number of folders, number of mailbox items etc.
- Step 2: Update the MX records to point to Office 365
Update MX record to accept emails in Office 365 to allow it to function in the new server you have moved to. Also, configure the Autodiscover record for Outlook to work with the moved mailboxes depending on your environment.
- Step 3: Create a new Outlook profile for users in the new domain
At this point, ensure you have the latest version of Outlook installed to avoid compatibility issues. If you are an Office 365 user on a mail client such as Thunderbird , you go to the mail account settings and update the servers to Office 365. This is how you configure the Outlook profile for every user in the domain when Outlook experiences issues with connecting to Office 365 mailboxes.
- Step 4: Decommission and uninstall Exchange server 2013
It is advisable to wait for several days, log in to your email, and ensure that all items are functioning properly. Finally, decommission the source Exchange server.
- Remove the Exchange server from the load balancer: Next, if your Exchange 2013 server is in a load balancing environment, then it must be taken offline, to avoid receiving new connections.
- Remove the Exchange server from the Exchange organization: After you remove the Exchange server from the load balancer, ensure that you uninstall it or, at least, delete it from the Exchange organization. This has to be done with either Exchange Management Console or the Exchange Management Shell.
- Uninstall Exchange 2013: Next, uninstall the Exchange server from the Add/Remove Programs feature in Windows or the Exchange Setup program to uninstall the Exchange server from the system.
- Remove the server from Active Directory: Lastly, delete the server from the Active Directory to completely decommission it. To do this, you can use the Active Directory Users and Computers tool or the Active Directory Sites and Services tool.
Check out Microsoft’s guidelines to determine how to decommission Exchange Server 2013 to familiarize how it should be done. See the list of post migration tasks after you finish the Office 365 migration.
- Step 1: Verify the migration
Troubleshooting guide for Exchange 2013 Migration
See Exchange migration troubleshooting guide for possible solutions related to common migration errors. For more information on EdbMails Exchange migration refer to the frequently asked questions (FAQs)
Decommissioning Exchange Server 2013
After completing the Exchange 2013 to Office 365 migration, one of the final post-migration tasks is to properly decommission the old Exchange server. This step helps clean up your environment and prevents unnecessary maintenance or security risks.
Benefits of Using a Third-Party Tool Like EdbMails for Migration
- An easy way to migrate Exchange 2013 to Office 365
Experiencing difficulties with your Exchange 2013 to Office 365 migration? EdbMails eliminates the technical hurdles associated with migration. With EdbMails easy to use software interface, you can effortlessly transfer mailboxes within minimum clicks.
- Single hop Exchange 2013 to Office 365 migration
EdbMails is the perfect tool for direct migration from Exchange 2007, 2010, and 2013 directly to Office 365. It also facilitates the migration of mailboxes from Exchange 2016, 2019, and Hosted or Live Exchange servers to Office 365, guaranteeing complete data consistency without any intermediate steps.
- Delta Migration from Exchange to Office 365
EdbMails offers incremental migration, allowing only new and updated items to be transferred, which helps prevent duplicates in future migrations to the same target mailbox. This feature works with all Office 365 mailboxes, public folders, shared mailboxes, and archive mailboxes.
- Migrate Exchange Public folders to Office 365
Along with user mailboxes, EdbMails also facilitates the migration of Exchange 2013 Public folders to Office 365. Additionally, it supports the migration of in-place archives to Office 365.
- Ability to selectively include or exclude email items and folders.
During Exchange 2013 to Office 365 migration, EdbMails allows you to utilize filter options to include or exclude mail items based on criteria such as Date, Subject, Sender, and Recipient Address. You also have the option to exclude emails and attachments that exceed a designated size limit.
- Batch or individual Exchange mailbox migration
EdbMails gives you the flexibility to migrate a single Exchange mailbox or multiple mailboxes in batches. You can seamlessly transfer folders, selected attachments, contacts, and calendars from both On-Premises and Hosted Exchange environments to Office 365.
- Automatic management of Office 365 throttling
EdbMails automatically manages Office 365 throttling and connection disruptions seamlessly during the migration process. You can easily pause and resume the migration at any time without risking data loss.

