


Exchange 2003 to Exchange 2010/2013/2016/2019 Migration
Migrating from Exchange Server 2003 is no longer optional for organizations that still rely on it. Once a widely used email and collaboration platform, it has reached end of life and is no longer supported by Microsoft. Running this outdated system can lead to security risks, compliance concerns, compatibility issues with modern email clients, and limited integration with newer technologies. To keep business data safe and accessible, it is important to migrate mailboxes and public folders from Exchange 2003 to a modern Exchange Server such as 2010, 2013, 2016, or 2019. Since direct migration to these versions is not supported, a reliable method is to extract data from offline EDB files and migrate it to a live Exchange environment using the EdbMails EDB to Exchange Migration Tool, ensuring a smooth process with zero downtime.
EdbMails ensures a secure and smooth migration with complete control over every step. It allows you to migrate mailboxes, attachments, calendars, contacts, and tasks while keeping the original folder structure and permissions intact. It eliminates the need for complex, multi-step upgrades and enables a direct, downtime-free migration from Exchange 2003 to the desired Exchange version without any risk of data loss.

Prerequisites to migrate Exchange 2003 Server Data
- Step 1: Check that your system meets the Exchange server setup requirements
The following links help you to set up your target Exchange server. Learn more about the network, hardware, coexistence scenarios, and operating system requirements for installing Exchange.
- Step 2: Prepare your system with the following prerequisites for Exchange
Complete the following prerequisites for Active Directory, Windows Mailbox server, and Windows Edge Transport servers before installing the target Exchange server.
- Step 3: Set up the target Exchange server for migration
Given below is a list of key points for installing and preparing the Exchange server for migration.
- Prepare the AD and domains
- Before installing Exchange Server, you need to prepare your Active Directory forest and its domains for the new version of Exchange.
- If you have a separate team to manage the Active Directory schema, you need to first extend the active directory schema, else proceed to the next step to prepare the Active Directory.
- Install an Exchange server on your computer. Ensure that you meet the server system requirements and prerequisites as outlined previously. Next, follow the link to install Exchange 2016 or install Exchange 2019 from the setup wizard based on which server you want to migrate to.
- Prepare a clean Exchange target environment. Configuring Exchange Server for Mail Flow and Connectivity
- Create and configure a Send connector to send mail outside the Exchange organization.
- By default, Exchange automatically creates receive connectors for inbound mail flow when the mailbox server is installed. If you need to configure receive connectors manually, follow the steps in the link.
- Add accepted domains to allow recipients to send and receive email from another domain.
- Configure the default email address policy to add the accepted domain to every recipient in the organization.
- Configure external URLs (domains) on the virtual directories in the Client Access (frontend) services on the Mailbox server to allow clients to connect to your server from the internet (outside the organization’s network).
- Configure internal URLs on the virtual directories in the Client Access (frontend) services on the Mailbox server to allow clients to connect to your server from the internal network.
- Configure SSL certificates from a third-party certificate authority for services such as Outlook Anywhere and Exchange ActiveSync.
- Verify the Exchange server installation by running the command Get-ExchangeServer on the Exchange Management Shell (EMS).
- Create mailboxes and Public folders on the Exchange server
Before you migrate your mail data, ensure that you create mailboxes on the target server and assign suitable licenses to them. For the Public folder migration, create mail-enabled Public folders.
- Assign management roles to the admin account
- Application Impersonation
- View-Only Recipients
- View-Only Configuration
- Also assign the Organization Management role group to the admin user. It is an elevated permission that is required for mailbox and Public folder migration.
- Verify the mailbox of the admin account
Check to see if the admin account that has been assigned management roles has a valid and non-hidden mailbox on the Exchange server.
- Configure the throttling and message-size limits
Change the EWS throttling and message size limits manually on the Exchange server by following the steps in the link.
- Prepare the AD and domains
- Step 1: Check that your system meets the Exchange server setup requirements
Steps to Migrate Exchange 2003 EDB to Exchange 2019
Step 1: Download and install EdbMails
- Download and install EdbMails on your Windows system.
- Open the EdbMails application on your computer.
- Enter your registered email ID and password, then click ‘Login’. If you have not created an account yet, select ‘Start Your Free Trial’ to continue with the trial version.Note: The trial edition includes all core features and allows migration of up to 30 items per folder in all mailboxes. To perform unlimited migration, you need to purchase an Exchange Migration license from the EdbMails website.Once the purchase is complete, close the application and reopen it. Then log in again using the same email ID and password used during the purchase to activate your license successfully.

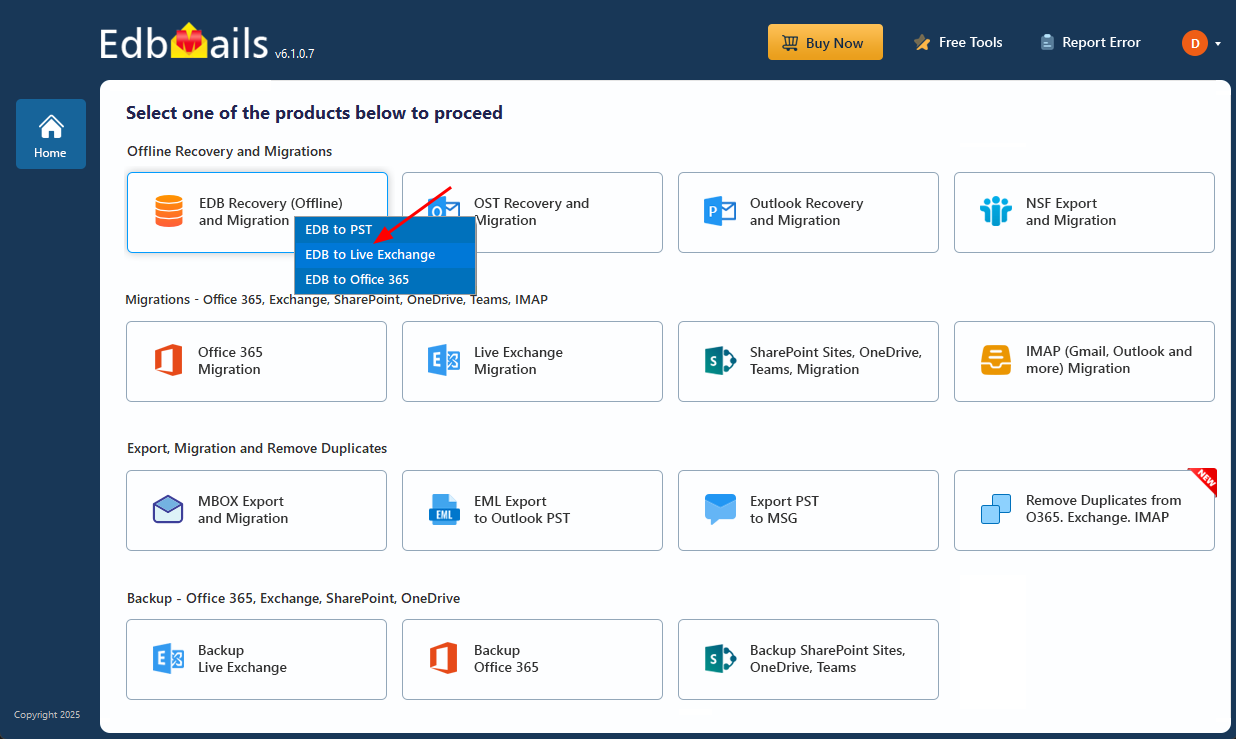
- Select ‘EDB Recovery (Offline) and Migration’ and choose 'EDB to Live Exchange'.
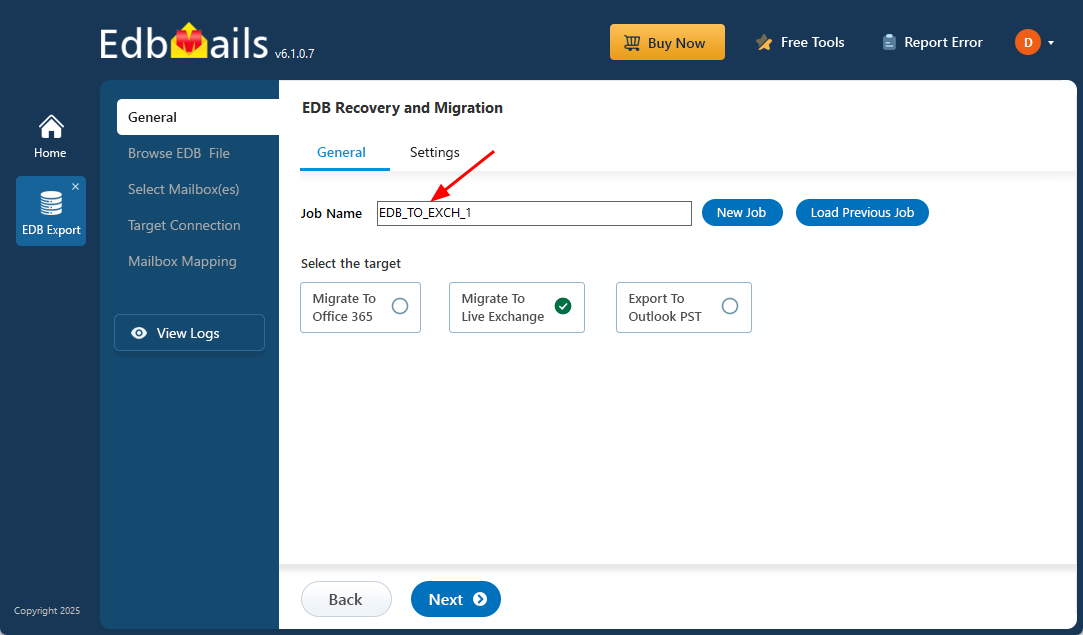
- You can keep the default job name or click the ‘New Job’ option if you want to assign a different name to the migration job.
Step 2: Load the Offline Exchange 2003 EDB File
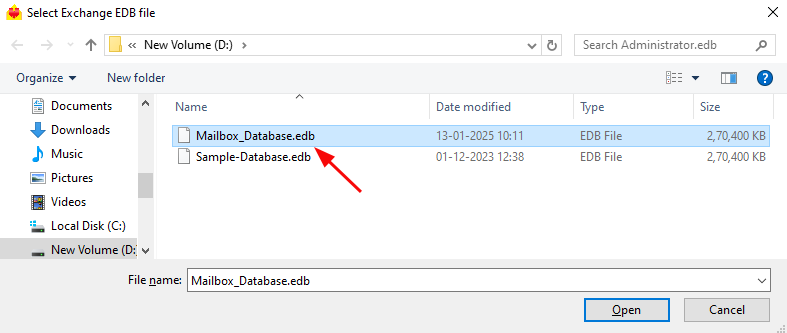
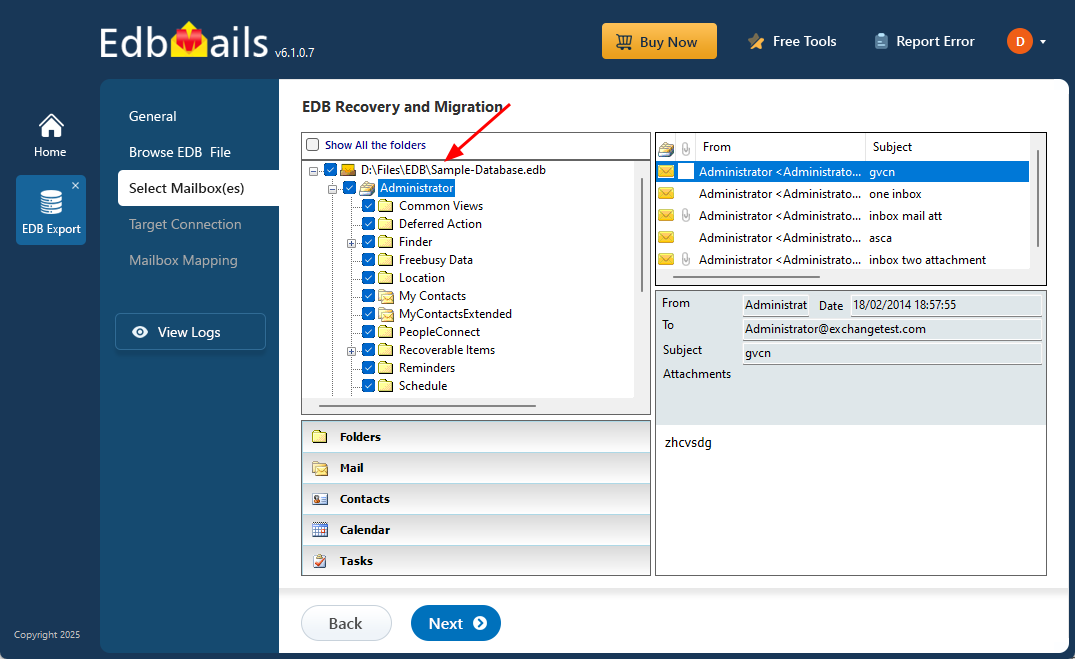
- Click ‘Browse for EDB file’ and select your offline EDB file.
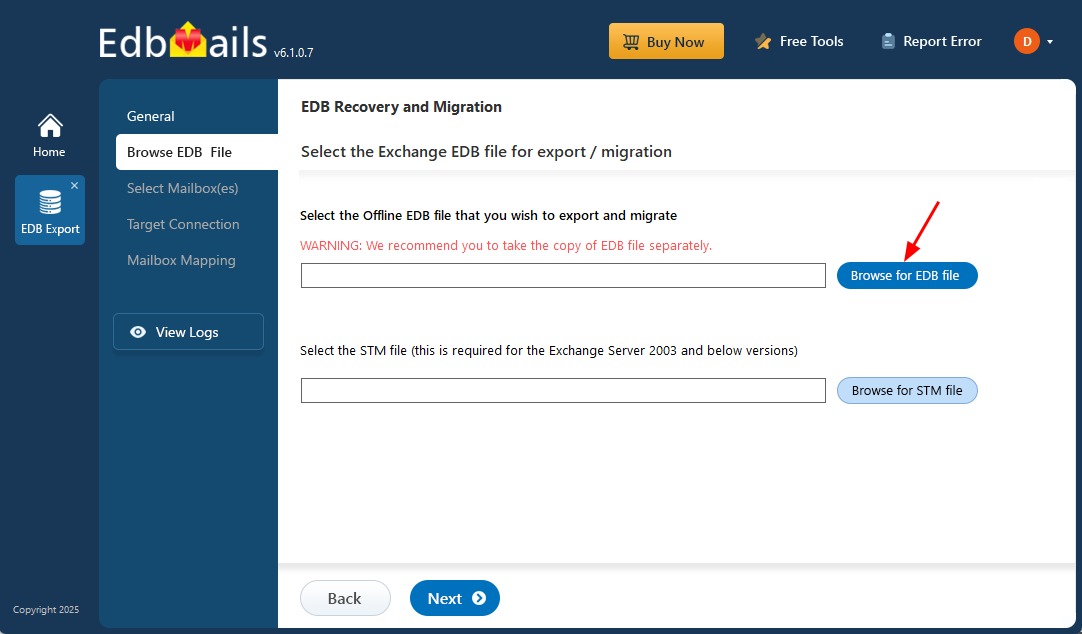
- Select the offline EDB file from your local drive, then click the ‘Next’ button to continue.
- EdbMails will scan and recover data from corrupted files if needed.
- Once scanned, preview the mailbox items and select the required mailboxes and folders to migrate.
- Click ‘Browse for EDB file’ and select your offline EDB file.
Step 3: Connect to the target Exchange Server 2019
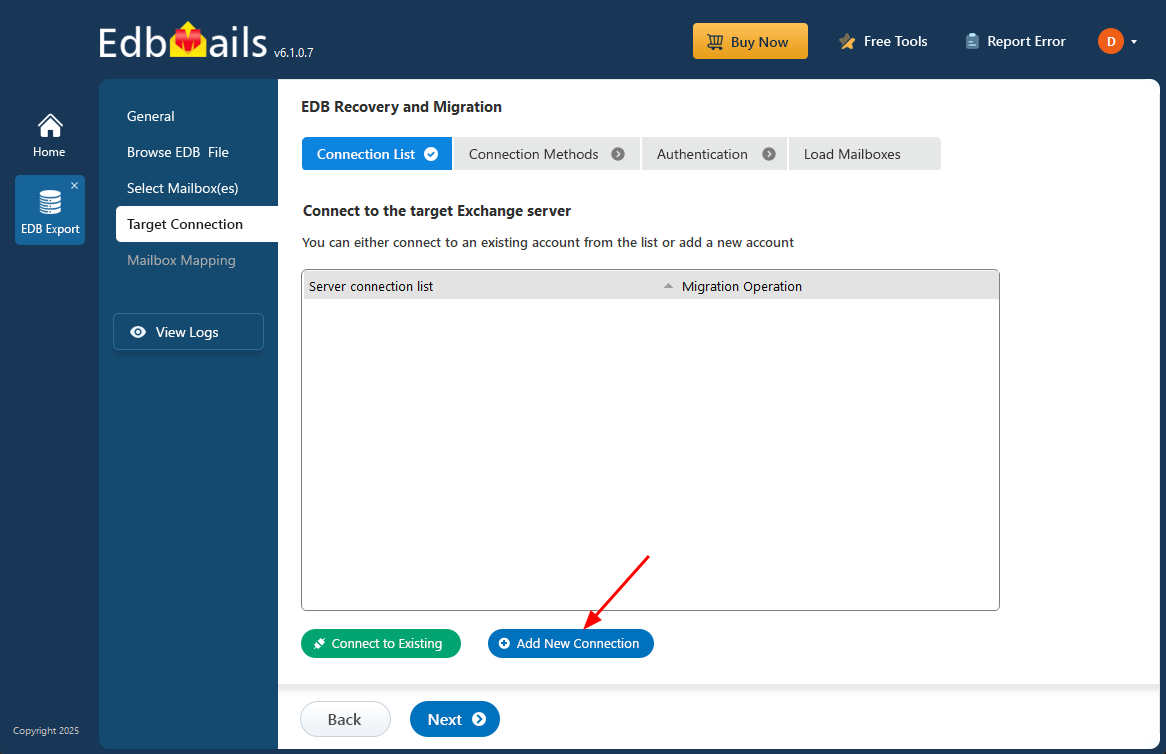
- To create a new connection with the source Exchange server, select ‘Add New Connection’. If a connection has already been set up previously, choose it from the available list and click ‘Connect to Existing’ to proceed.
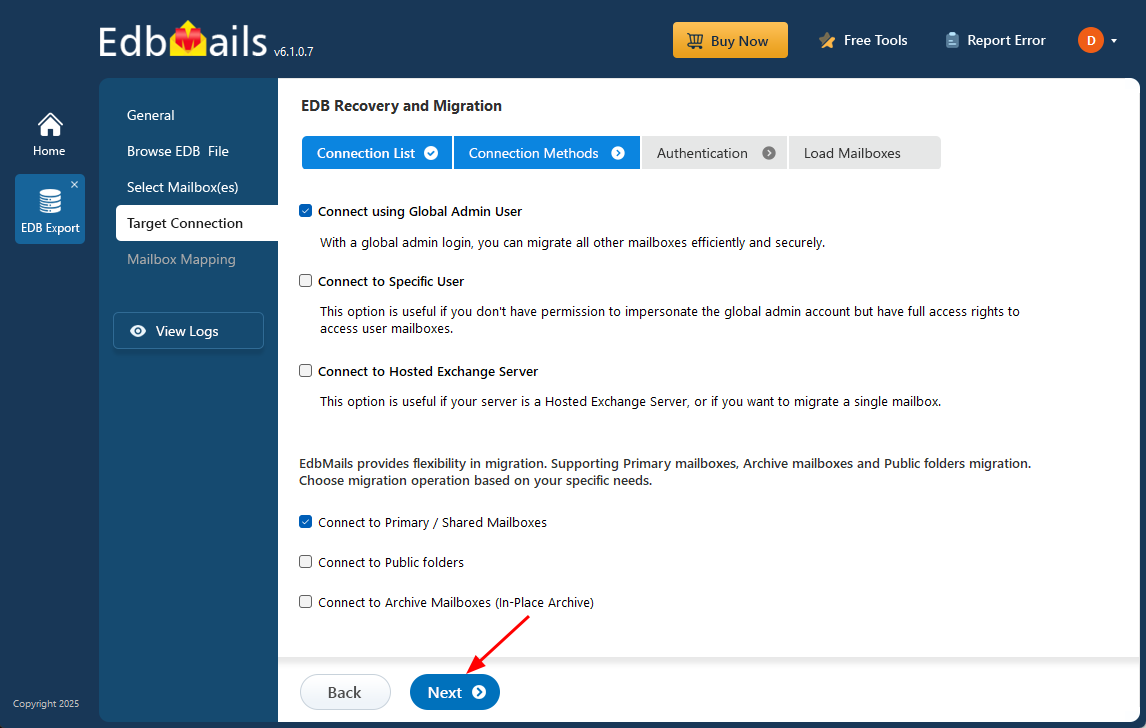
- Select the required connection options and click the ‘Next’ button.
Different options to connect to Exchange server in EdbMails
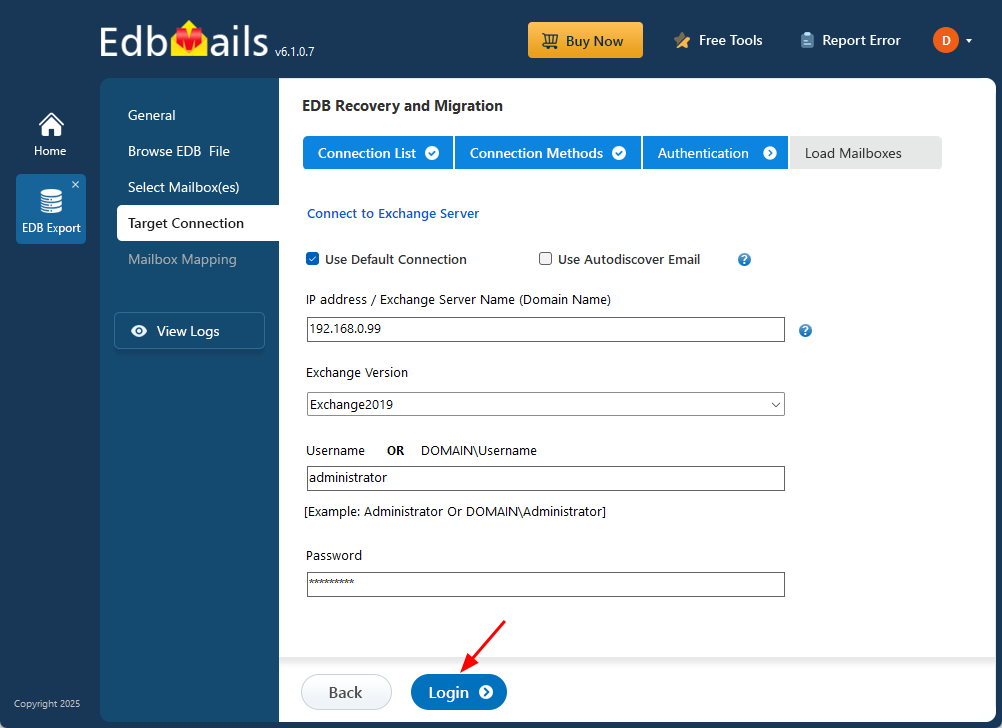
- Enter the Target Exchange server details such as IP address (Domain name), Exchange version, Username and password.
- Then click the ‘Login’ button to continue.
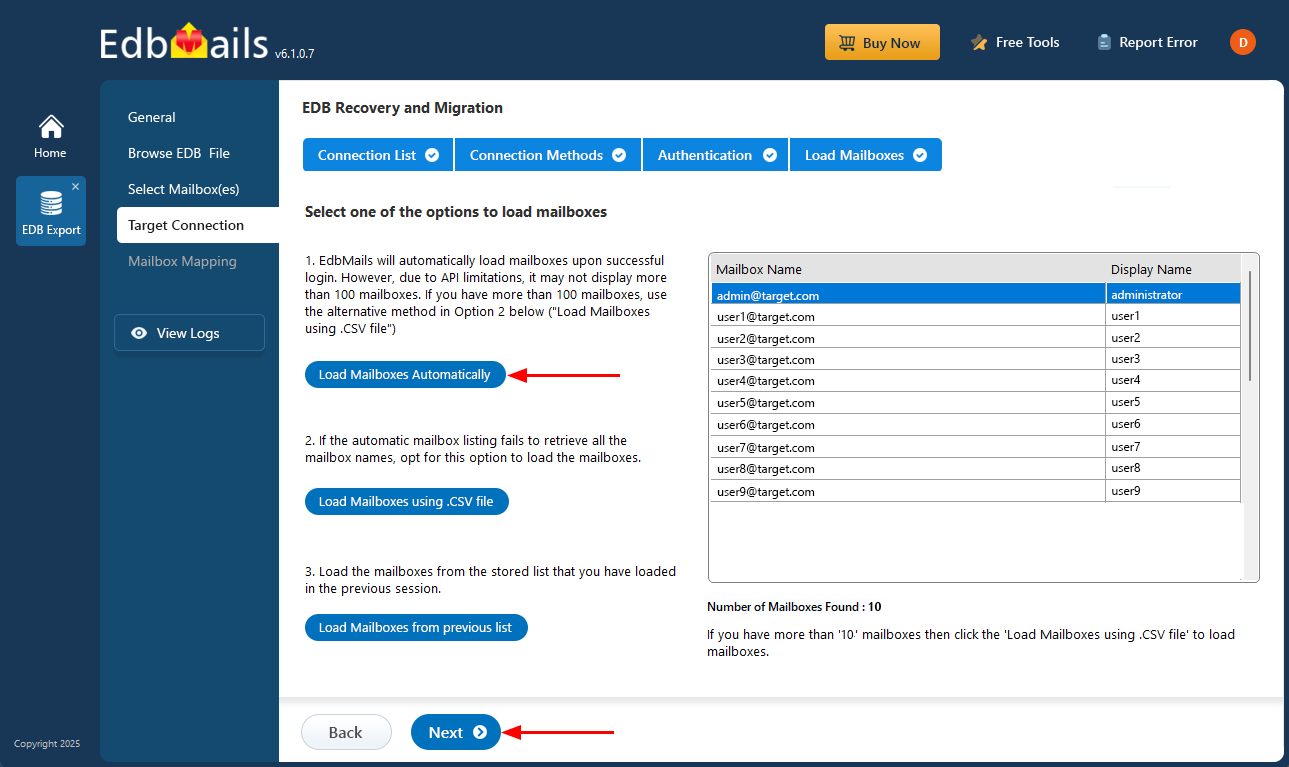
- After successful authentication, select one of the following options to load the mailboxes:
i) Load Mailboxes Automatically: After signing in, EdbMails automatically loads and displays the available mailboxes, making the configuration process simple. Due to Microsoft API limitations, only up to 100 mailboxes may be displayed. If your environment has more than 100 mailboxes, use the alternative option below.
ii) Load Mailboxes using CSV file: If the automatic option does not display all mailbox names, choose ‘Load Mailboxes using .CSV file’ to load the required mailboxes.
iii) Load Mailboxes from previous list: This option allows you to quickly access the mailbox list that was saved and imported during your previous session.
- Select ‘Load Mailboxes Automatically’ and click ‘Next’ to proceed.
- To create a new connection with the source Exchange server, select ‘Add New Connection’. If a connection has already been set up previously, choose it from the available list and click ‘Connect to Existing’ to proceed.
Step 4: Map source and target mailboxes
- Choose the required mailbox mapping option
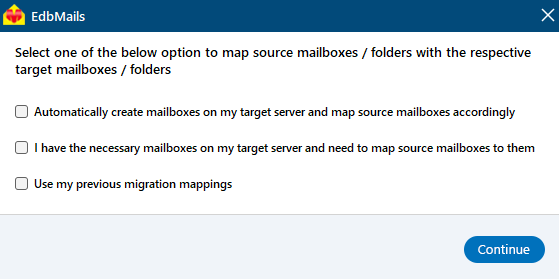
- EdbMails automatically maps source mailboxes to target servers.
- You can adjust mappings manually and apply filters to migrate specific data based on date, subject, or folder, etc.
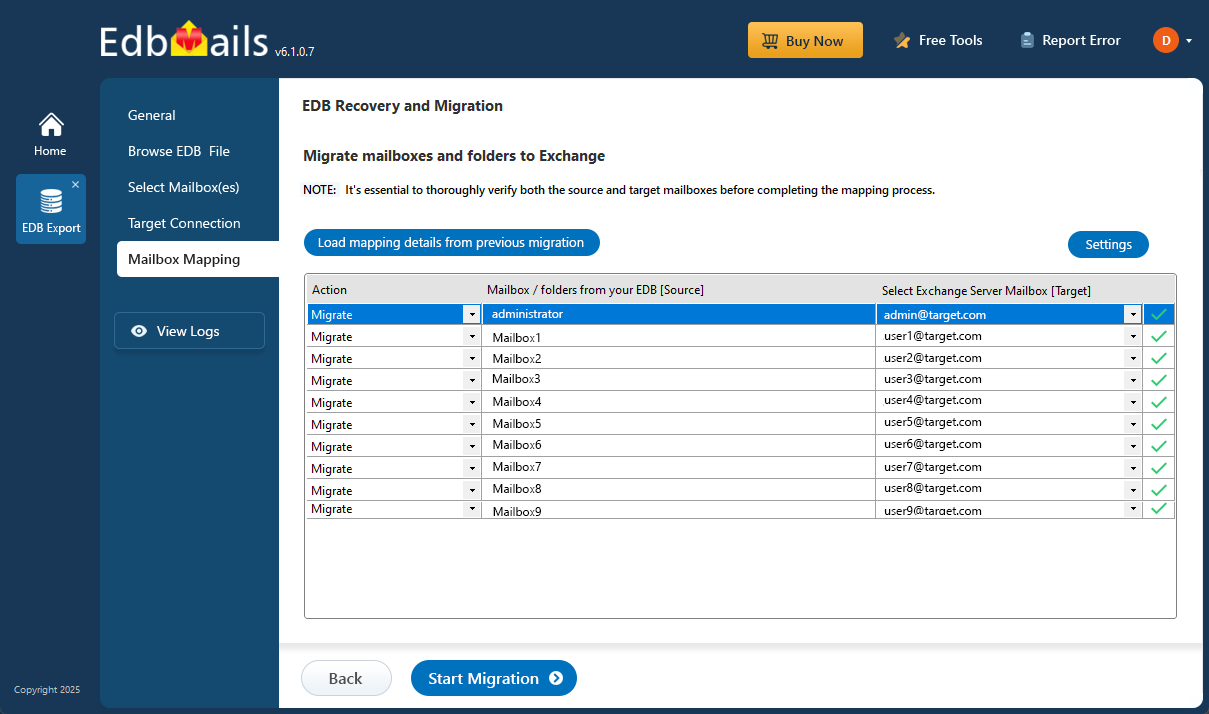
- Choose the required mailbox mapping option
Step 5: Start the Exchange 2003 to Exchange 2019 migration
- Click ‘Start Migration’ to begin. Monitor progress in real time. After completion, review the migration log report to verify item counts and ensure all data has been successfully migrated.
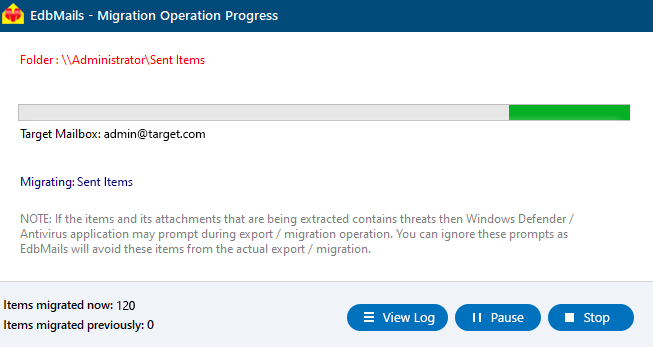
- Click ‘Start Migration’ to begin. Monitor progress in real time. After completion, review the migration log report to verify item counts and ensure all data has been successfully migrated.
Advantages of Migrating from Exchange 2003 to the Latest Exchange Server
Upgrading from Exchange 2003 to a modern Exchange environment brings significant improvements in performance, security, and manageability. Key advantages include:
- Enhanced Security: The latest Exchange versions include advanced security protocols, encryption, and threat protection features that safeguard against modern cyberattacks and vulnerabilities.
- Improved Reliability and Performance: The latest Exchange servers, such as Exchange 2013, 2016, and 2019, deliver better stability, faster data processing, and higher uptime, ensuring smooth communication and reduced maintenance efforts.
- Compliance and Data Protection: Newer versions are designed to meet current compliance standards such as GDPR and HIPAA, helping organizations maintain legal and regulatory requirements.
- Better User Experience:Enhanced Outlook integration, web-based access through Outlook on the Web (OWA), and improved mobile synchronization make email management more convenient for users.
- Simplified Administration:The Exchange admin center (EAC) and PowerShell management tools simplify mailbox administration, monitoring, and reporting tasks.
- Larger Mailbox Support and Storage Efficiency: Latest Exchange servers support larger mailboxes and provide better database management, backup, and recovery options.
- Long-Term Support and Updates: Upgrading ensures continued support from Microsoft, access to regular updates, bug fixes, and new feature enhancements.

