Office 365 Groups Mailbox to Regular Mailbox Migration
Office 365 Groups provide a shared space for team communication and collaboration where members can manage emails, files, and calendars in one place. Over time, when teams reorganize or projects close, it becomes necessary to move Group mailbox data to a regular user mailbox. This ensures personal ownership of important conversations, simplifies mailbox management, and supports long-term data retention or compliance needs.
Performing this migration manually can be complex and time-consuming, especially when preserving folder hierarchy, metadata, and permissions. The EdbMails Office 365 migration tool simplifies the entire process by enabling a direct and automated transfer of mailbox data. It securely connects to both the Group and regular mailboxes, performs precise mapping, and ensures a seamless migration without data loss or downtime.
This step-by-step guide explains how to migrate an Office 365 Group mailbox to a regular mailbox efficiently using EdbMails.
Common reasons for Office 365 groups mailbox to regular mailbox migration
- Project or team closure: When a project completes or a team dissolves, organizations transfer Group mailbox data to a regular mailbox to preserve essential communication and documentation without maintaining inactive Groups.
- Individual data ownership: A regular mailbox provides complete control to a single user. Migrating ensures data accountability and enables easier management of sensitive or project-specific information after team transitions.
- Simplified access management: Managing access in a Group mailbox can become complex when members change roles or leave. Migration to a user mailbox ensures direct accessibility and eliminates unnecessary permission dependencies.
- Compliance and retention policies: Certain compliance standards require data to reside under individual accounts. Migrating helps apply retention tags, legal holds, and audit policies effectively within Microsoft 365’s security framework.
- Mailbox performance optimization: Large or inactive Group mailboxes may affect search and indexing speed. Moving data to a regular mailbox improves performance and maintains optimal mailbox efficiency for end users.
- Streamlined data management: A regular mailbox offers easier organization, folder management, and backup capabilities. Migration helps centralize critical messages and attachments for better tracking and retrieval.
- Ownership transfer during role changes: When project ownership changes, transferring the Group mailbox data to a user mailbox ensures smooth handover of communication and responsibilities without losing previous correspondence.
- Reducing storage complexity: Consolidating Group mailbox data into a regular mailbox minimizes redundant storage usage and simplifies administrative tasks related to space monitoring and mailbox cleanup.
- Transition from Shared to dedicated access: Migrating allows users to shift from shared collaboration to dedicated access. It supports focused communication management and reduces overlap caused by shared Group permissions.
Security Highlights During Migration
- OAuth 2.0 Authentication: EdbMails uses Microsoft’s OAuth 2.0 Modern Authentication, including MFA support, to securely connect to Office 365 and Exchange accounts. This ensures login is fully handled by Microsoft and prevents password-based vulnerabilities.
- TLS Encryption for Data in Transit: EdbMails uses TLS/SSL encrypted channels during migration to protect mailbox data while it travels between source and destination servers. This prevents data interception and ensures secure communication throughout the migration.
- No Third-Party Data Storage (Direct Migration): EdbMails does not store, cache, or route data through external servers. The tool performs direct server-to-server migration, meaning all mailbox data flows only between your source and target tenants under your control.
Office 365 groups mailbox to regular mailbox: pre-migration
Before starting the migration, ensure the following prerequisites are met:
- Active Microsoft 365 admin account with required permissions
- Access to both the source (Group mailbox) and destination (regular mailbox)
- EdbMails Office 365 migration tool installed on your system
- Stable internet connection and sufficient mailbox storage space
Steps to migrate Office 365 group mailbox to regular mailbox
Step 1: Download and set up the EdbMails application
- Download and install the EdbMails Office 365 migration tool on your computer.
- After the installation completes, log in using your registered email address and password, or click ‘Start Your Free Trial’ to begin exploring the software.
Ensure that your system meets the necessary requirements for Office 365 Group mailbox to Regular mailbox migration.
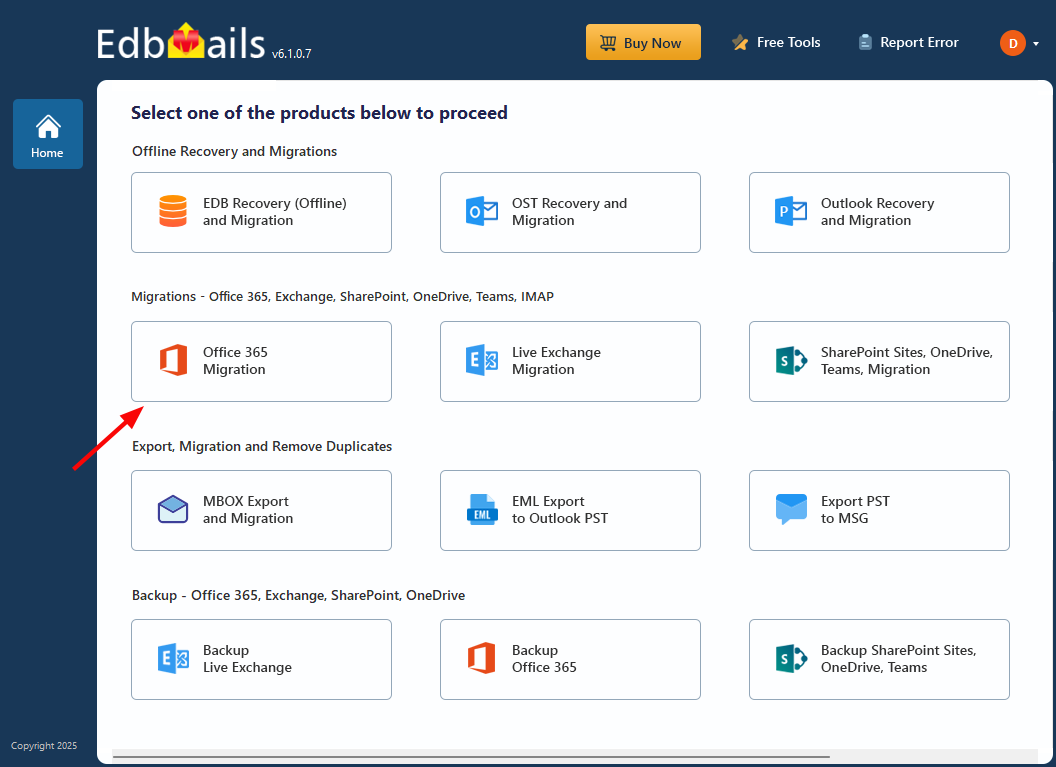
- Once logged in, launch the EdbMails software and choose ‘Office 365 Migration’ from the main dashboard.
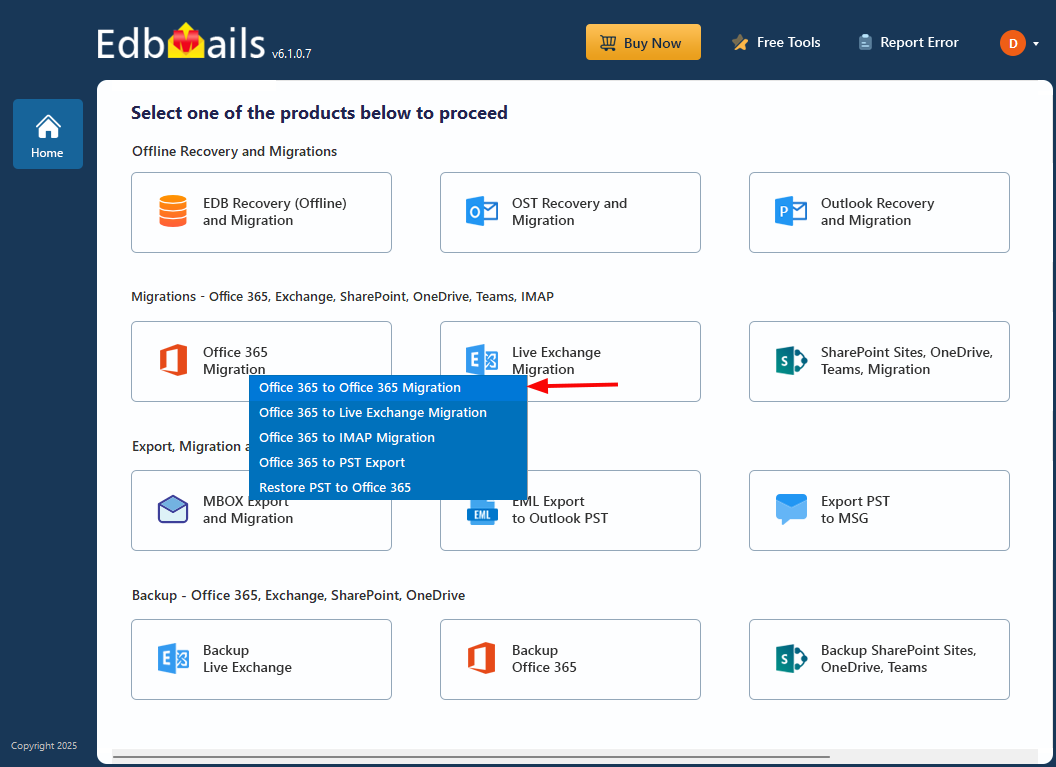
- Select the ‘Office 365 to Office 365 Migration’ option.
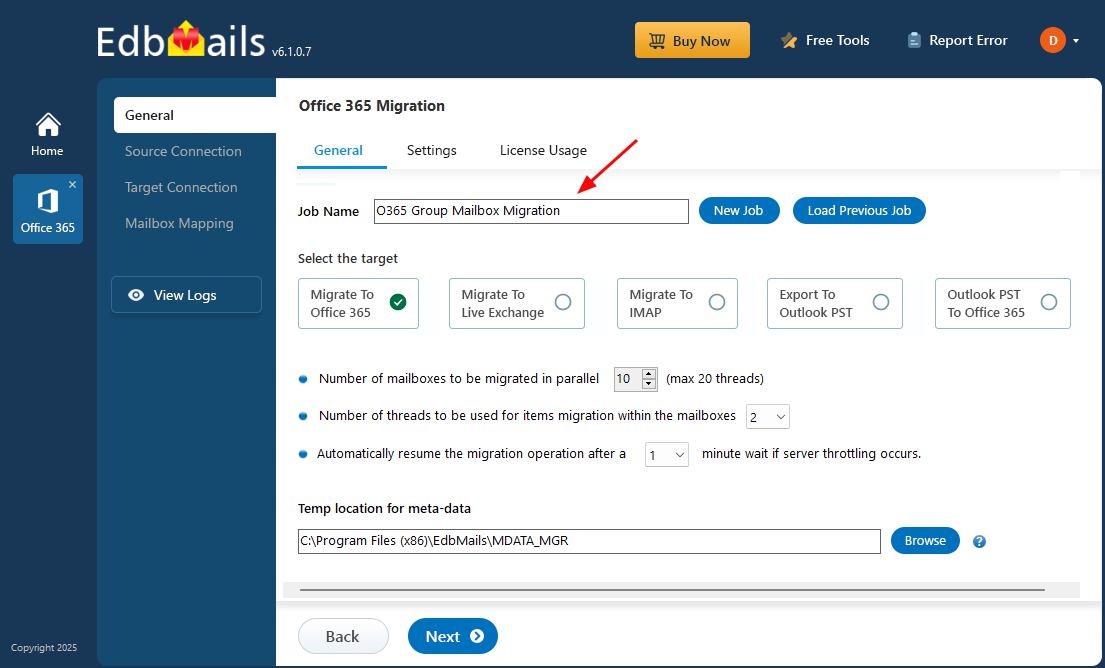
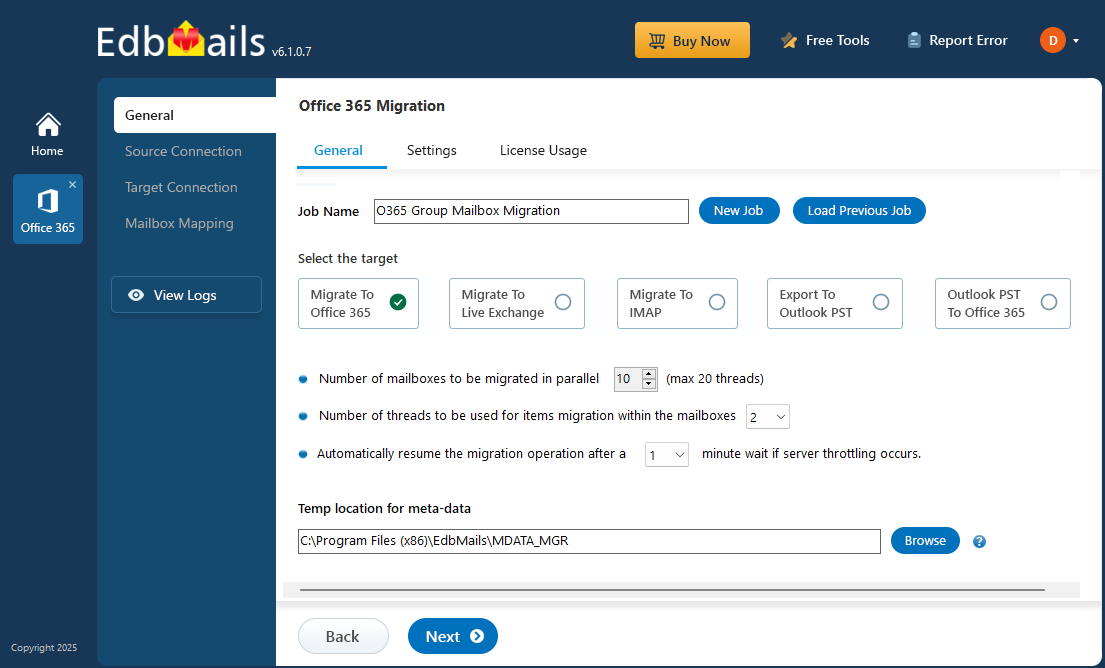
- You can either use the default job name or create a new custom job by selecting ‘New Job’. After confirming your choice, click ‘Next’ to proceed.
Step 2: Connect to the source Office 365 account
- Click ‘Add New Connection’ to create a new connection for your source Office 365 account, or select ‘Connect to Existing’ if you’ve previously set up one.
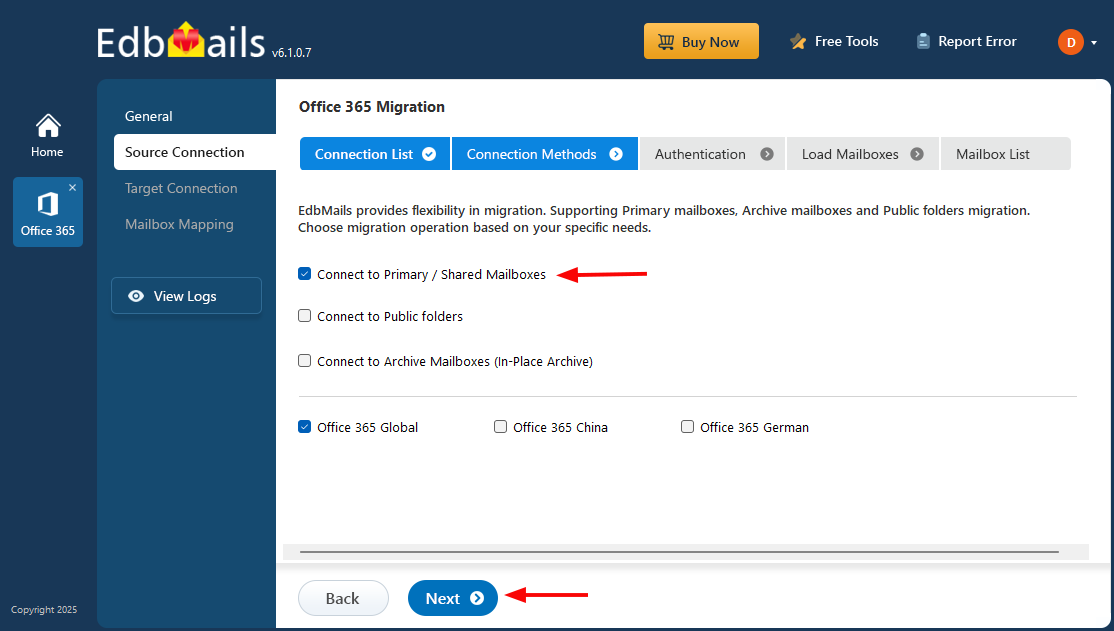
- From the available connection options, choose ‘Connect to Primary/Shared Mailboxes’ and then click ‘Next’.
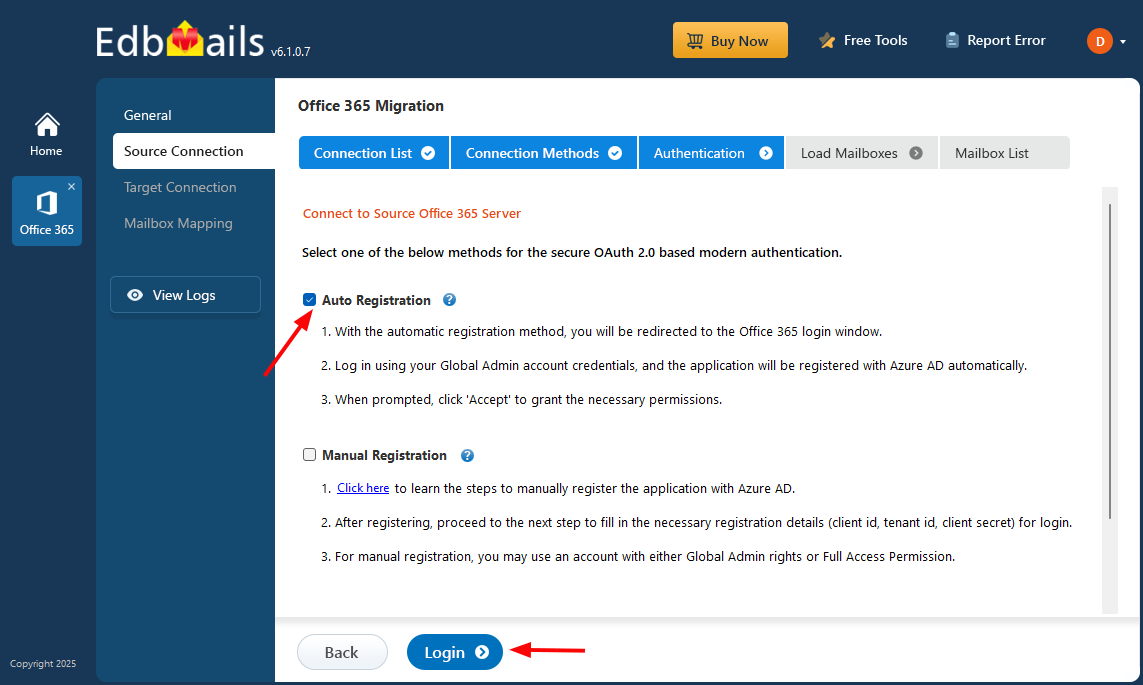
- Select your preferred authentication method, and click ‘Login’ to proceed. You’ll be redirected to the official Microsoft sign-in page to verify your credentials securely.
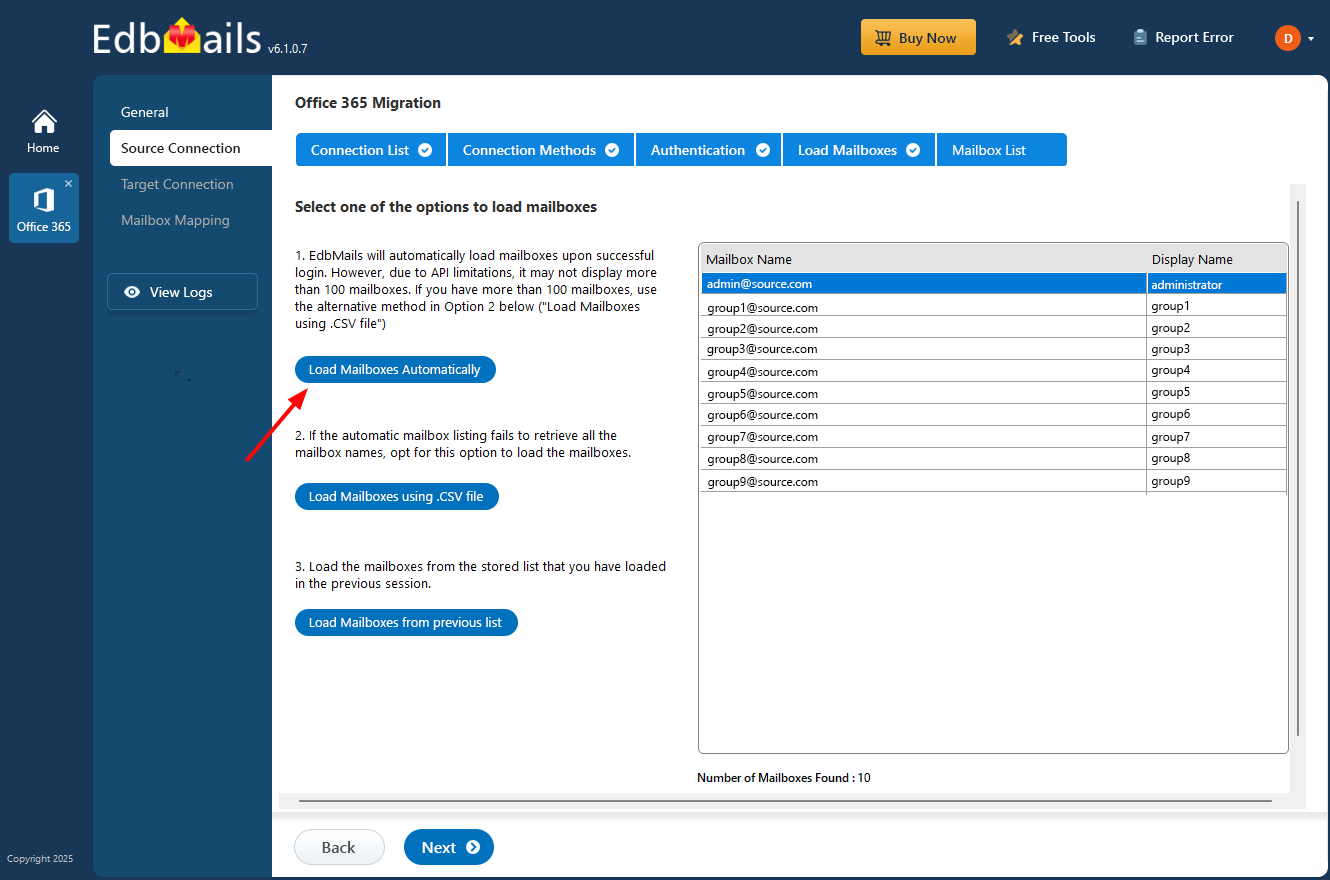
- After successful authentication, select a method to load your source mailboxes. By default, EdbMails automatically loads up to 100 mailboxes into the interface. If your organization has more mailboxes, you can load them using a CSV file.
Step 3: Select source Office 365 Group mailboxes
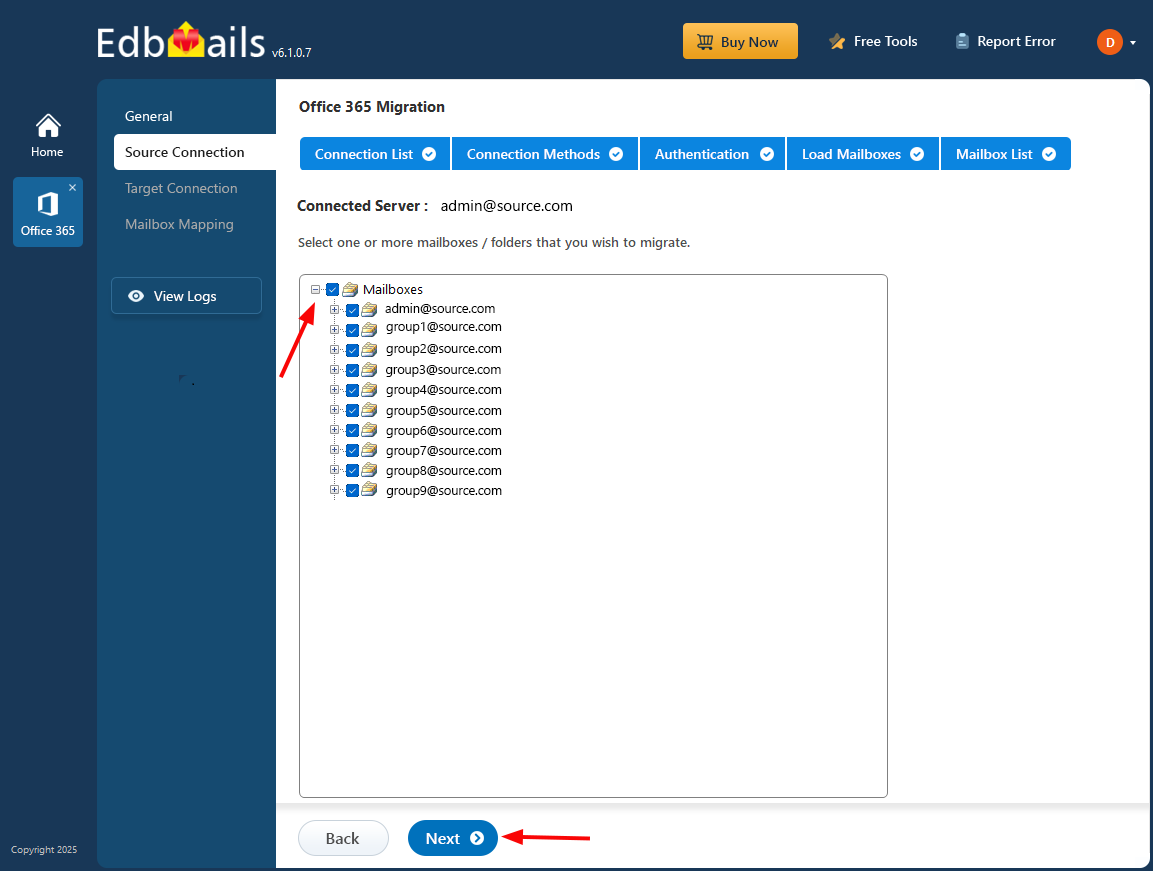
- In this step, carefully review and select the Office 365 Group mailboxes that need to be migrated to the target regular mailbox. Once the selection is complete, click ‘Next’ to move forward.
Step 4: Connect to the target Office 365 tenant (Regular mailboxes)
- Click ‘Add New Connection’ to create a new connection with your target Office 365 tenant, or use an existing connection by selecting it and clicking ‘Connect to Existing’.
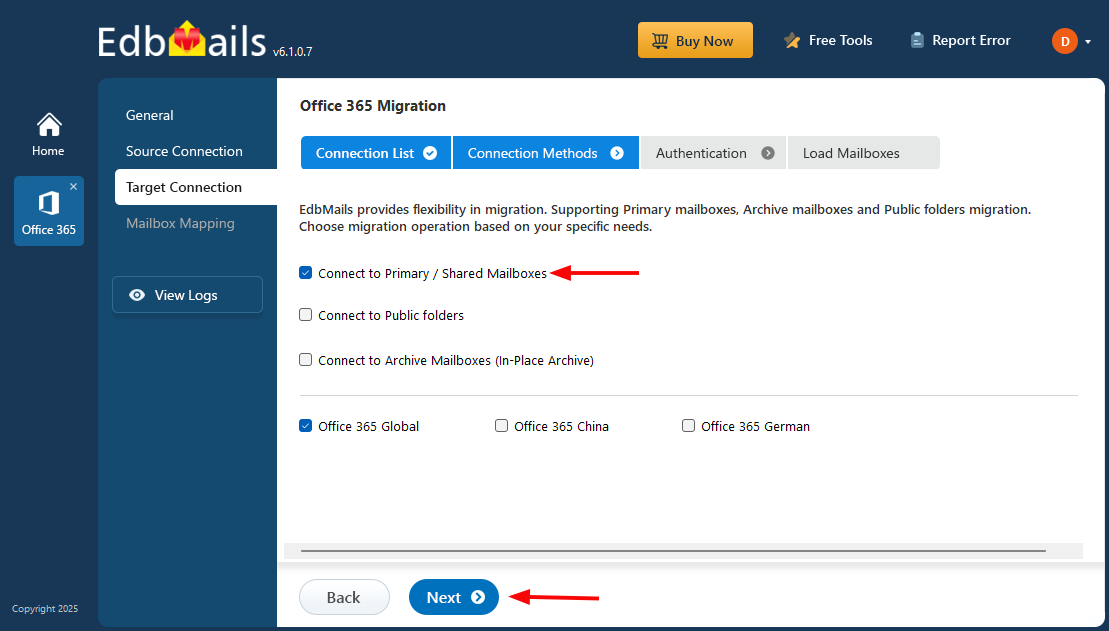
- Choose ‘Connect to Primary / Shared Mailboxes’ and click ‘Next’ to proceed.
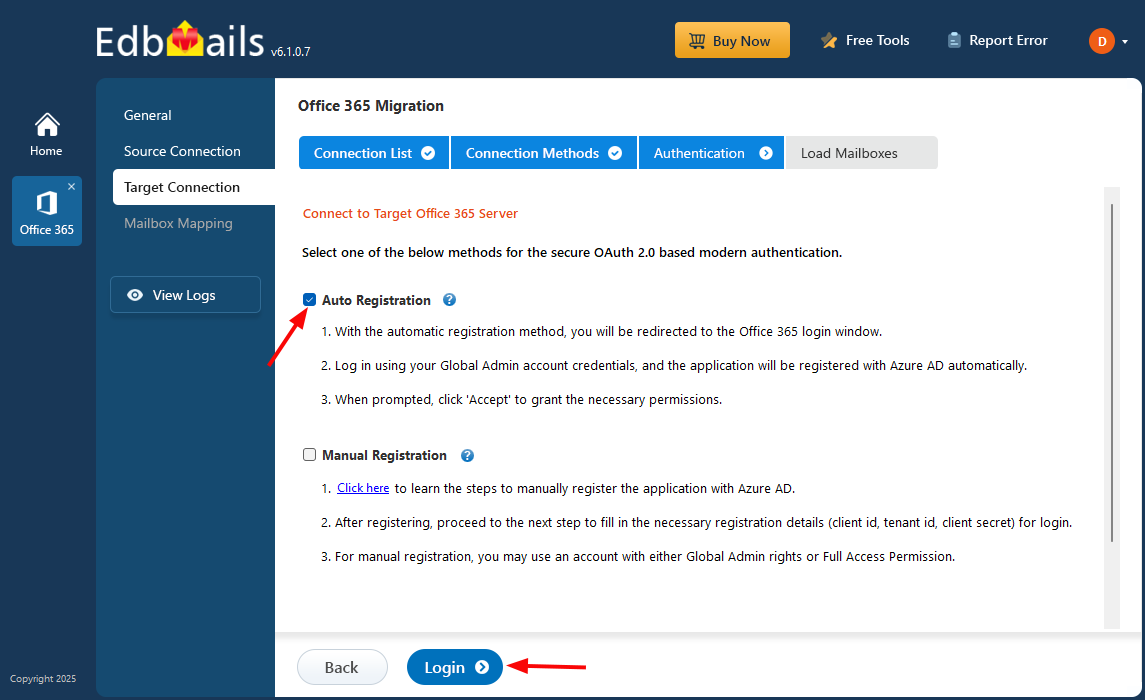
- EdbMails uses OAuth 2.0 modern authentication for secure access. Select this method and click ‘Login’ to authenticate. You’ll be redirected to the Microsoft login page to complete the sign-in process.
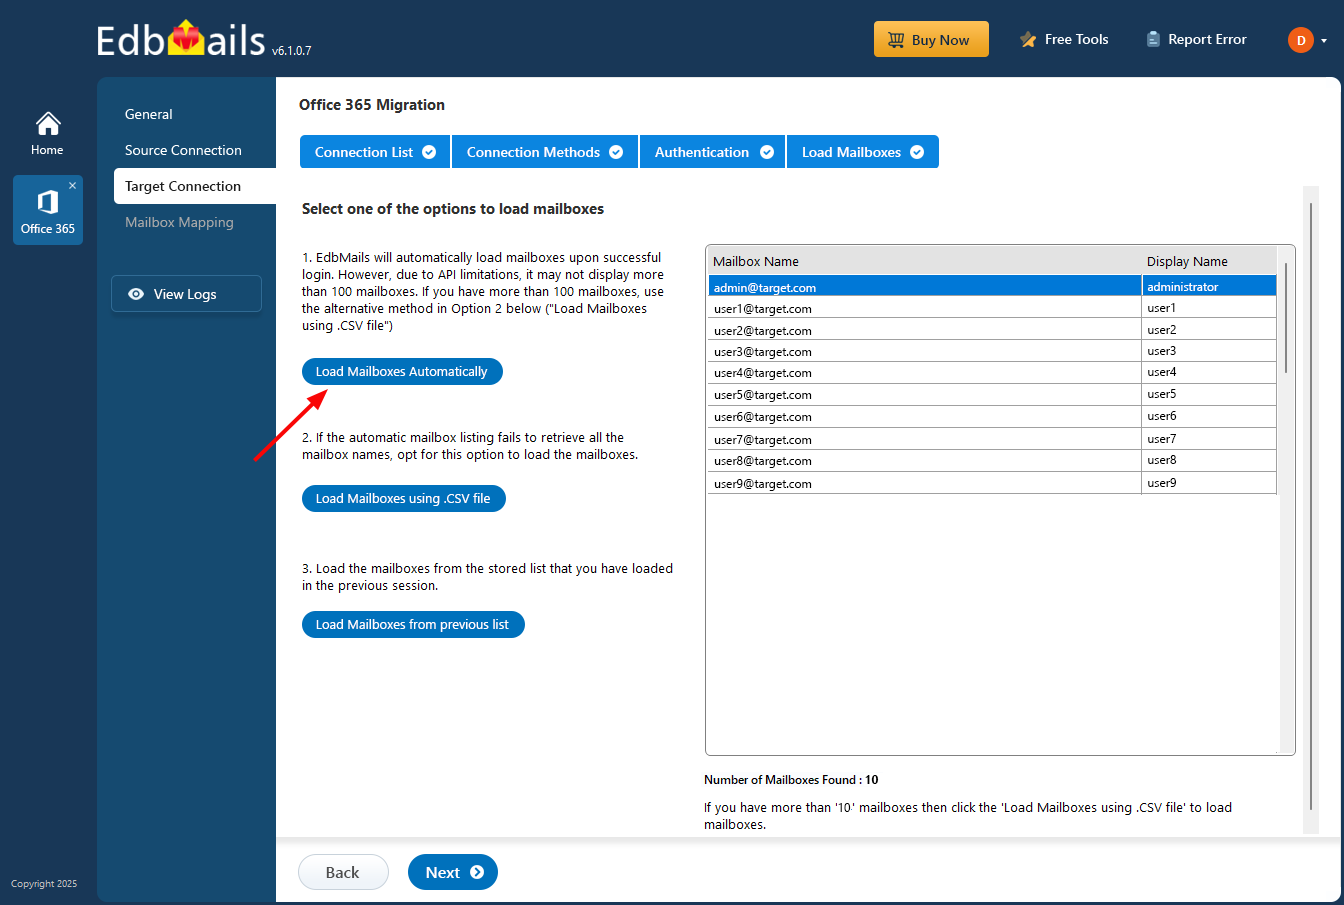
- Once connected, choose a method to load the target mailboxes. If the regular user mailboxes do not appear automatically, import them manually using a CSV file to ensure complete visibility.
Step 5: Map source and target mailboxes
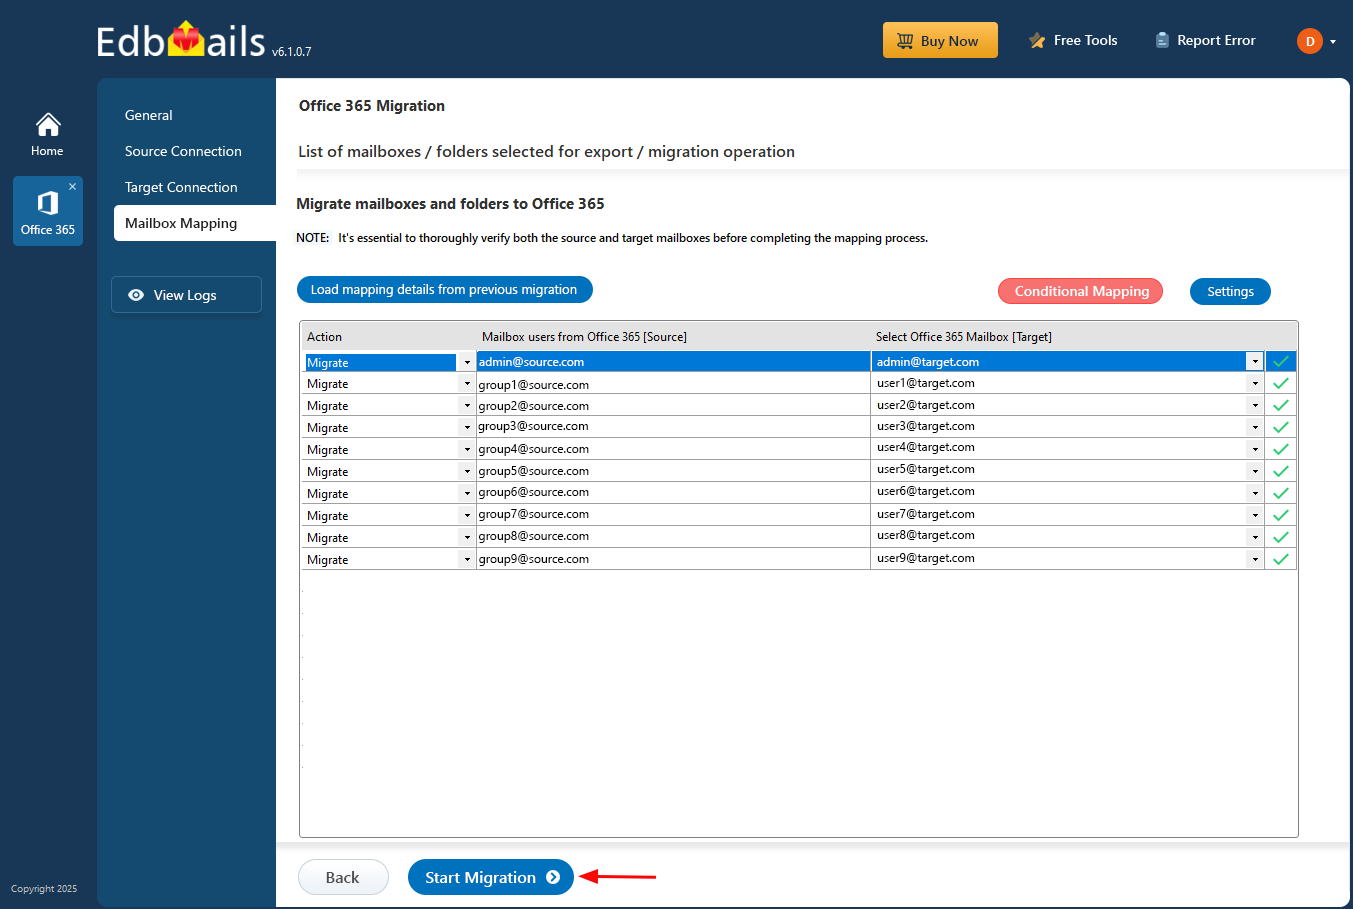
- Choose the required mailbox mapping option
- Mapping helps EdbMails identify the correct destination for each mailbox. The tool automatically maps source Group mailboxes to their corresponding target regular mailboxes.
- You can also perform manual mapping if needed.
Step 6: Start Office 365 Group mailbox to Regular mailbox migration
- Once the mapping is finalized, click ‘Start Migration’ to begin transferring data from the Office 365 Group mailboxes to the regular mailboxes.
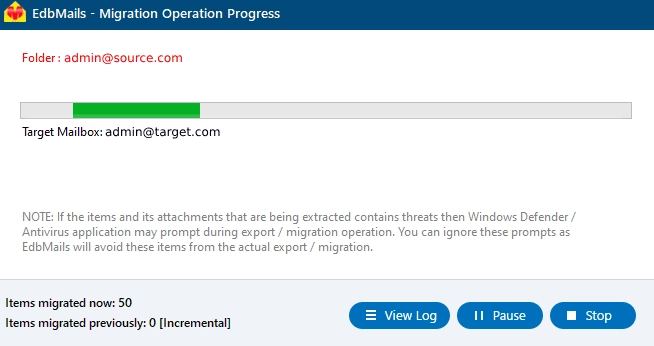
- EdbMails automatically initiates the migration and manages it in the background. You can monitor real-time progress within the interface. After completion, click ‘View Logs’ to open a detailed migration report showing the number of items transferred from each folder.
Post migration tasks
If you are migrating group mailboxes from old domain to new domain follow the below post-migration steps
Step 1: Update the MX records to point to Office 365
Update the MX records to enable and receive email messages on the target Office 365 server. In addition to this setup, configure the Autodiscover record to allow Outlook to connect to the migrated mailboxes.
Step 2: Create a new Outlook profile for users in the new domain
Configure and recreate the Outlook profile for each user in your domain if Outlook has problems connecting to Office 365 mailboxes.
Frequently Asked Questions (FAQs)
Does the migration affect mailbox permissions?
Can I perform incremental migration for large Group mailboxes?
Is downtime required during migration?
Can I filter which emails or folders to migrate?


