Migrate between Office 365 (Microsoft 365) Tenants
Office 365 (Microsoft 365) Tenant to Tenant migration is one of the important tasks that must be carried out during mergers and acquisitions, while migrating the data to a single tenant. As most of the organizations depend on Office 365 to run their day-to-day operations, migrating data across tenants needs proper management. EdbMails Office 365 Migration tool provides an effortless method for the concerned users.
Merging or acquiring can be difficult, especially when it comes to the migration of data. Risks like human error in migration, inability to transfer mails or servers crashing unexpectedly can be encountered. EdbMails will avoid these situations with an automatic process so that all emails are transferred without any delay or server breakdown. Security is also a main concern while merging; EdbMails ensures that data is migrated securely, maintaining both the integrity and confidentiality of your data.

EdbMails allows you to perform concurrent mailbox migration, enabling the migration of multiple mailboxes at once and achieving the same results much faster than planned. The tool facilitates incremental migration of the mailbox, so that each subsequent migration only transfers newly added or changed items. Therefore, redundant items are not migrated to the target server and it does not consume your internet bandwidth, thus resulting in faster overall migration.
The sections below walk through the full Office 365 tenant to tenant migration process — planning, prerequisites, execution, post-migration tasks, and troubleshooting — so you have everything you need for a clean transition to the new tenant environment.
Office 365 Tenant migration plan
To manage a Microsoft tenant-to-tenant migration successfully, it needs proper planning. The right plan allows you to speed up the migration process and to carry out a clean, trouble-free migration. The following is the migration checklist for Microsoft 365 tenant-to-tenant migration:
- Create a comprehensive inventory of items for migration.
- Determine the size and number of mailboxes to be migrated.
- Decide whether to migrate Public folders and Shared mailboxes.
- Communicate the migration plan and any expected changes to end users ahead of time.
- Prepare the domain and Active Directory services required on the target server.
- Create the mailboxes & Public Folders on the target Office 365 server.
- Assign the appropriate licenses to all target mailboxes.
- Ensure network bandwidth and capacity for migration.
- Consider the message size limits on Office 365.
- Do a test migration to Office 365 before proceeding with the actual migration.
- Start the migration and verify the endpoint, as well as add DNS records.
- Set up new profiles on Outlook and make sure that mail is coming in correctly.
- Remove permissions and licenses from the source Office 365 tenant.
Office 365 Tenant to Tenant Migration Prerequisites
On the source Office 365 Tenant:
- You'll need a global admin account for automatic registration of the EdbMails application on your Entra ID (Azure Active Directory). If you prefer, a global admin account or any user account with full access rights works equally well for manual registration.
- Verify that your network and bandwidth can handle the migration load before you start. Ensure that your network and bandwidth meet the requirements for the migration.
Microsoft's documentation on network and migration planning and performance factors and best practices for Microsoft 365 tenant to tenant migration.
On the target Office 365 Tenant:
- Set up your target Office 365 tenant using the Tenant roadmap for Microsoft 365 as your reference.
- Review the available licensing plans and pick one that fits your organization's needs. A 30-day free trial lets you validate your requirements before selecting a plan. The Office 365 business plans comparison and enterprise plans comparison are good starting points.
- Mailboxes need to exist on the target tenant before migration. EdbMails can create them automatically and assign the right licenses, but if you'd rather handle this manually, these resources cover the process:
- If public folders are part of the migration scope, make sure they're created on the target tenant and that admin permissions are correctly assigned. See create and assign public folder permissions in Office 365.
- For In-Place archive migration between tenants, the archive mailbox must be enabled on both the source and the target. Follow the steps to enable online archive in Office 365.
See the full guide to migrate archive mailboxes to Office 365.
- Assign the Organization Management role group in Exchange Online to the admin user. This elevated permission is required specifically for public folder migration.
- If you plan to keep receiving emails on a custom domain from the source tenant, that domain needs to be added and verified on the target Office 365 tenant.
You'll need a global admin account with an active mailbox for automatic registration of the EdbMails application on your Entra ID (Azure Active Directory). If you prefer, a global admin account or any user account with full access rights works equally well for manual registration.
- For environments running Active Directory Federation Services, a new domain must be configured on the target tenant for AD FS. Large message support doesn't carry over automatically — use the steps to increase the message size limit on Office 365 to raise it to 150MB on the target.
- Large message support doesn't carry over automatically — use the steps to increase the message size limit on Office 365 to raise it to 150MB on the target.
Office 365 Tenant to Tenant migration steps using EdbMails
Step 1: Download and install EdbMails software
- Download and install EdbMails on your computer. It’s compatible with all Windows server and client operating systems.
- Open the EdbMails application, enter the email and password you used to sign up on the EdbMails website and click ‘Login.’ Alternatively, you can click ‘Start Your Free Trial.’
- Check the detailed system requirements for EdbMails Office 365 Tenant to Tenant Migration.

- Choose the ‘Office 365 Migration’ option

- Select ‘Office 365 to Office 365 migration’

- You can either keep the default job name or click the 'New Job' button to specify job name of your choice.

Step 2: Connect to source Office 365 Tenant
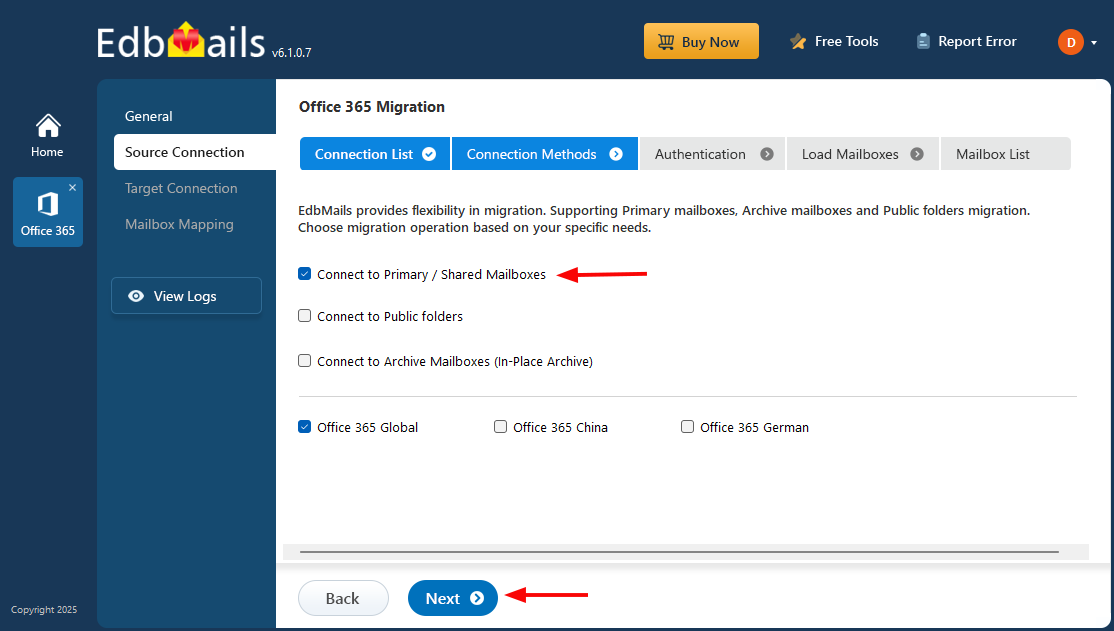
- Click on ‘Add New Connection’ to add a new connection to the source Office 365. In case you already have a connection, select it from the list and click on ‘Connect to Existing’ to proceed further.

- Select the required connection options and click on ‘Next’ to continue.
- Choose the proper source authentication method and click on ‘Login’ to proceed.
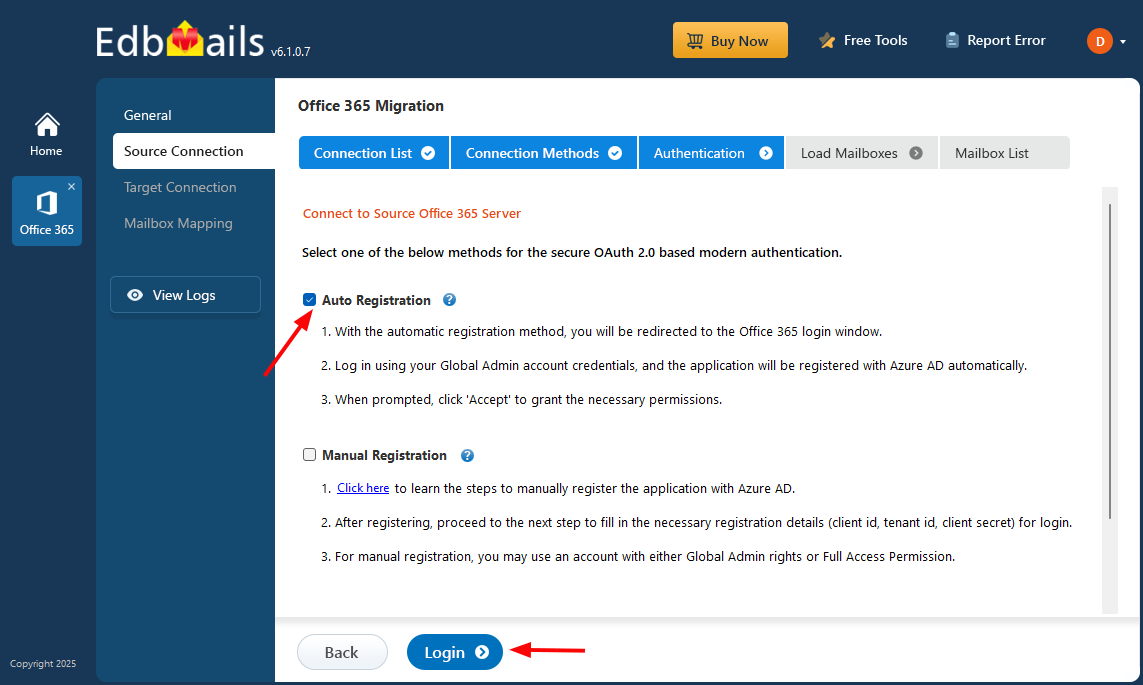
Connect to the Office 365 server using secure modern authentication.
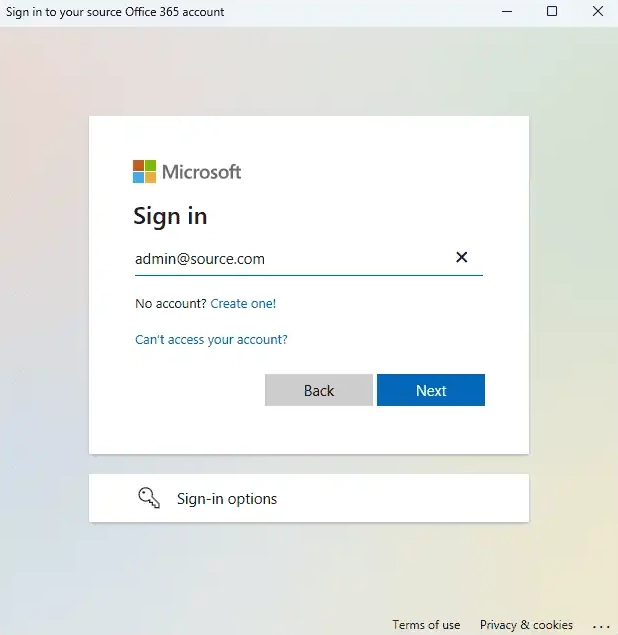
Log in on the Microsoft sign-in page using a global admin account that has an active mailbox.
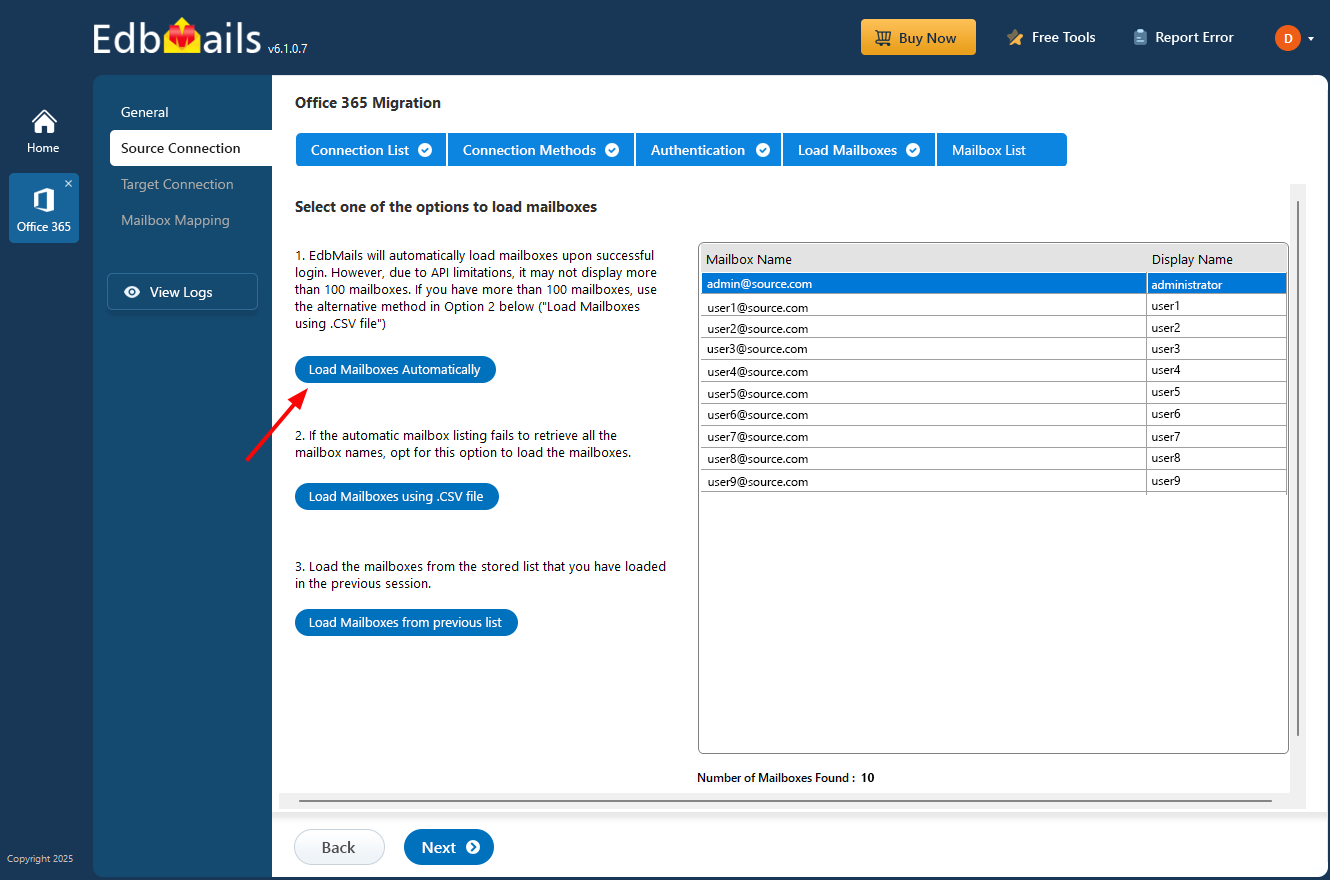
- After successful authentication, choose a method to load the mailboxes. EdbMails automatically retrieves mailboxes from your source Office 365 server. If the required mailboxes aren’t visible through this method, you can also upload them using a CSV file. Alternatively, you can load mailboxes from a previously saved list for convenience.
- Click on ‘Add New Connection’ to add a new connection to the source Office 365. In case you already have a connection, select it from the list and click on ‘Connect to Existing’ to proceed further.
Step 3: Select the mailboxes from the source Office 365 Tenant
- Select the mailboxes and folders from the left pane of the main migration window to proceed.
- Click ‘Next’ to set up the connection with the target Tenant.
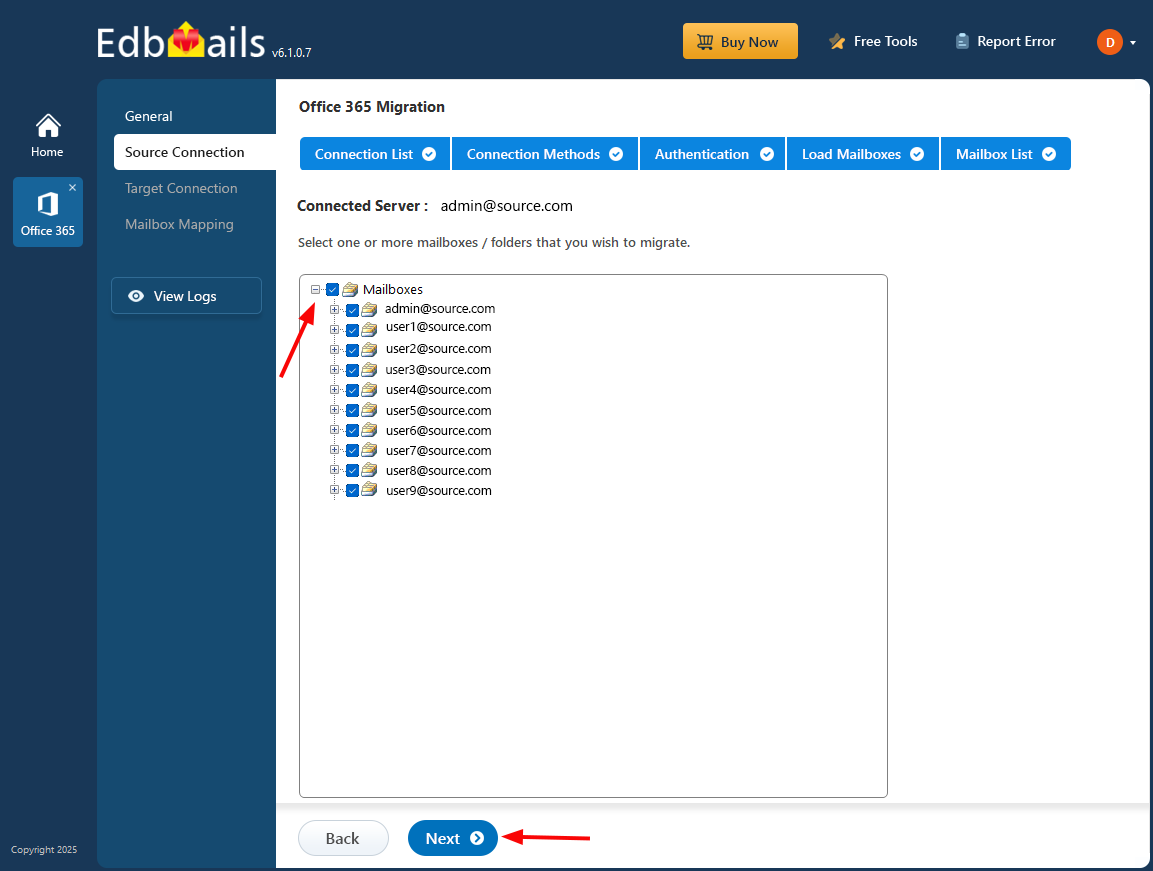
Tip: If this is your first migration using EdbMails, it will be a full migration. For any subsequent migrations from the same source to the target, the process will be incremental.
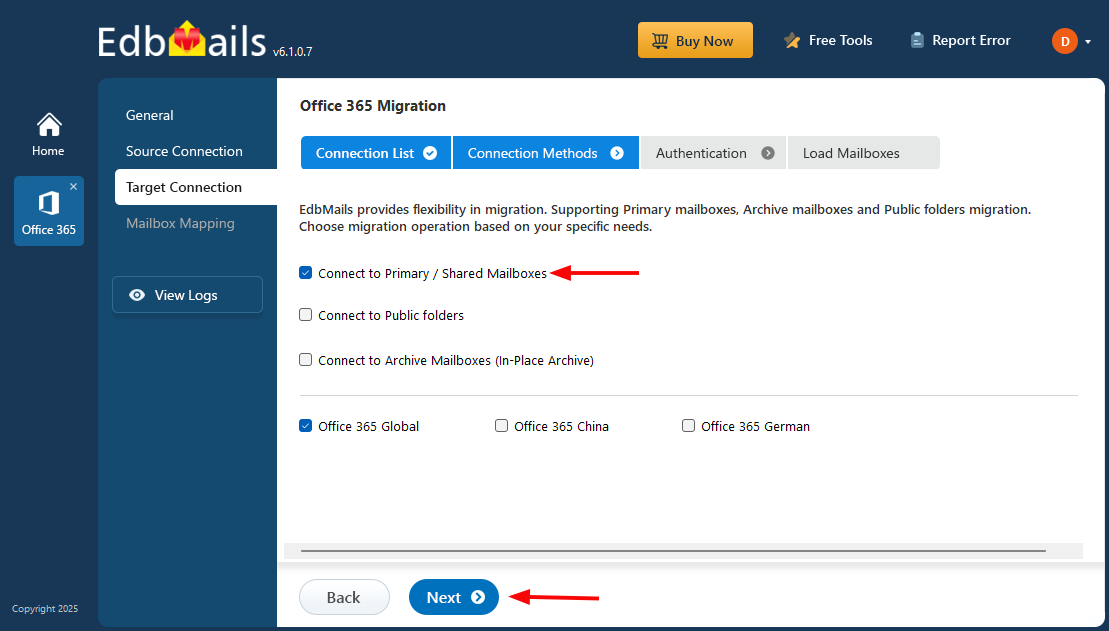
Step 4: Connect to target Office 365 tenant
- Click ‘Add New Connection’ to establish a new connection to the target Office 365. If you prefer to use an existing connection, select it from the list and click ‘Connect to Existing’ to proceed.
- Select the appropriate connection options and click ‘Next’ to continue.
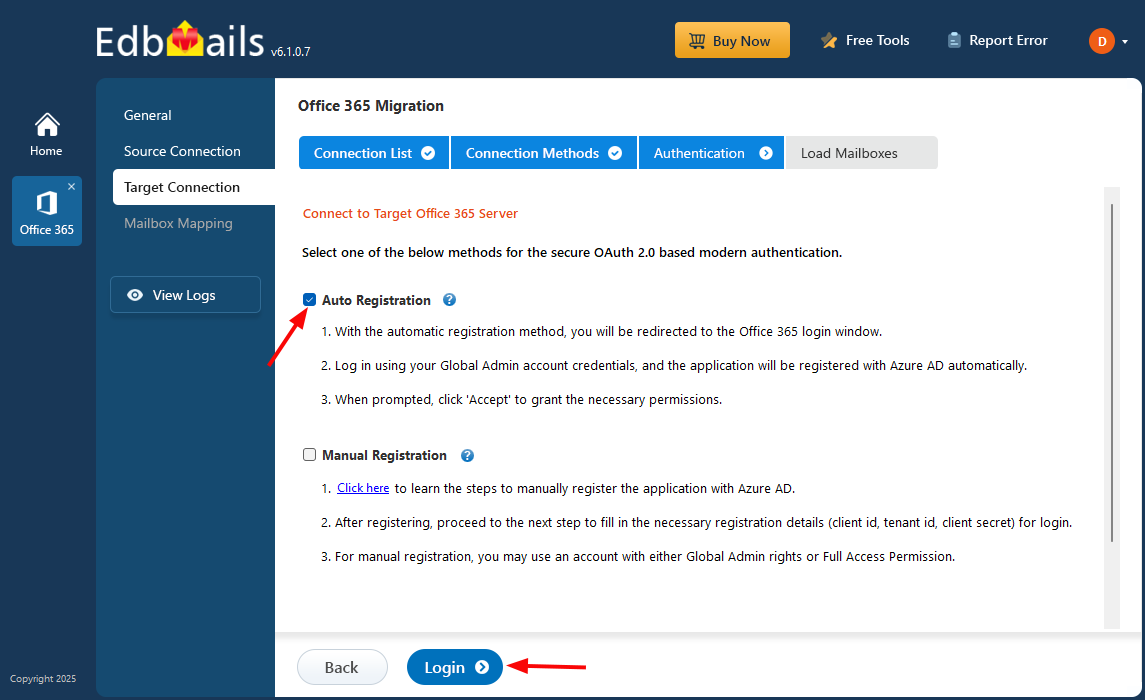
- Select the appropriate target tenant authentication method, click ‘Login’ to proceed, and authenticate via the Microsoft sign-in page.
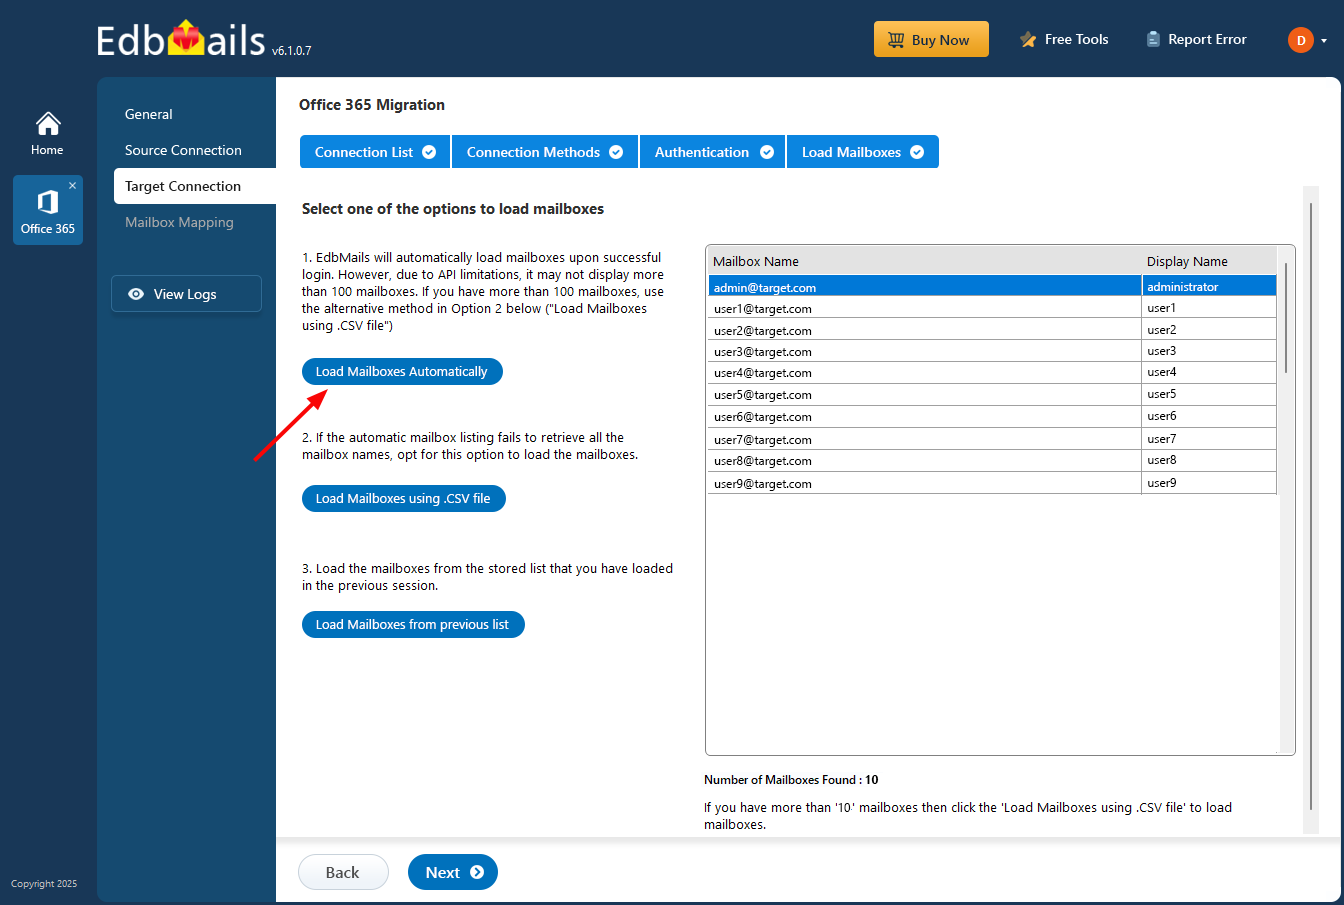
- Choose a method to load the mailboxes. Alternatively, you can upload the mailboxes using a CSV file.
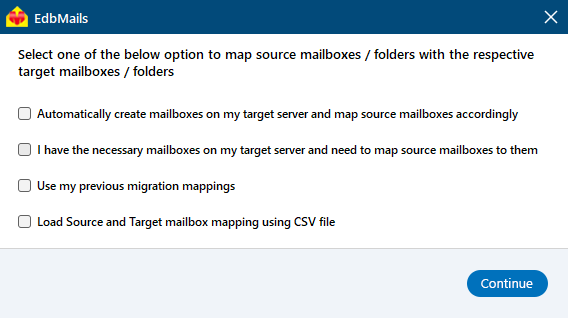
Step 5: Map source and target tenant mailboxes
- Select the appropriate option to map the mailboxes between the source and target tenants.
- EdbMails automatically creates mailboxes on your target tenant and assigns the required licenses.migration report.
Click here to know more about automatic mailbox creation
Click here to know about user-defined mailboxes / folders mapping
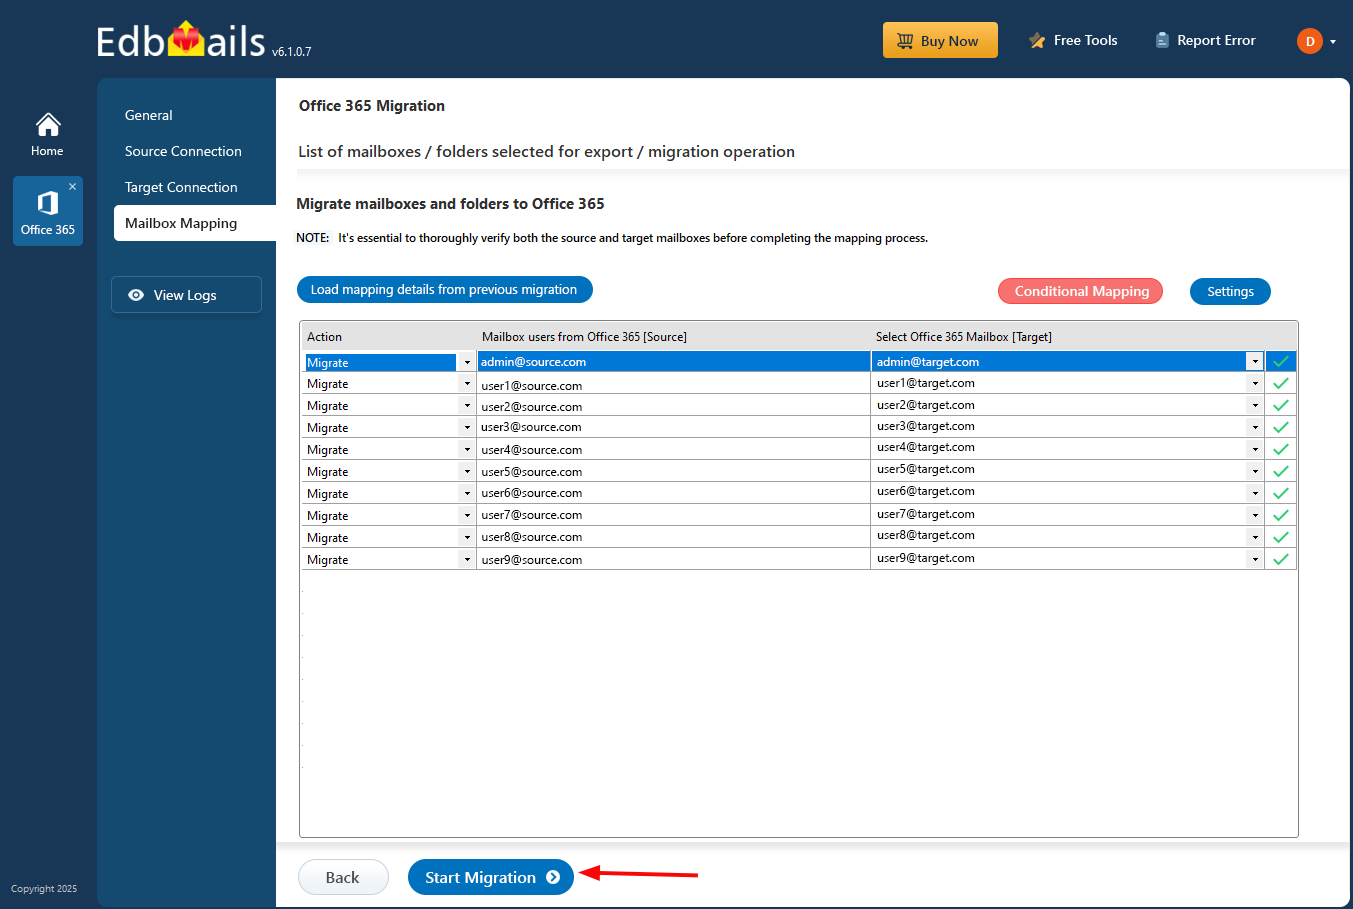
- Once mailboxes are successfully created on the target server, EdbMails automatically maps mailboxes and folders between the source and target tenants, which is particularly beneficial for large-scale migrations. Alternatively, you can manually map source folders and subfolders to specific target locations as needed.

- Select the appropriate option to map the mailboxes between the source and target tenants.
Step 6: Start Office 365 Tenant to Tenant migration
- Once you have completed the mailbox mapping, Click the ‘Start Migration’ button to begin the migration process.
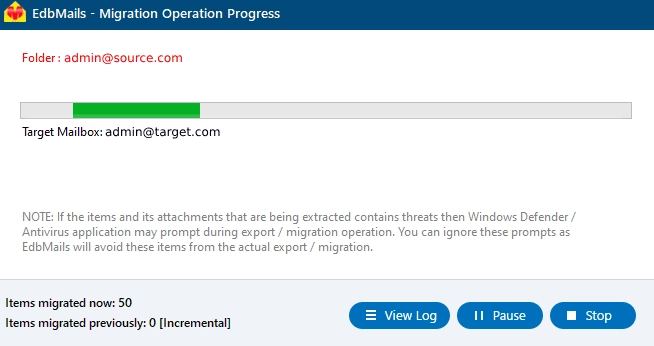
- The migration process has begun. Once completed, a notification will appear. You can click the ‘View Log’ button to review the migration report.
- Once you have completed the mailbox mapping, Click the ‘Start Migration’ button to begin the migration process.
Tenant to Tenant Post-Migration Activities
Step 1: Update the MX Records to Point to the Target Office 365 Tenant
Now, you add your existing domain to your target Office 365 tenant. At this point, if you have not already done so, update the DNS records, particularly the MX record, to ensure that mail flow occurs and mail can be received, and also add the Autodiscover record so that Outlook will be able to connect to the migrated mailboxes.
Step 2: Clear the Auto-Complete List in Outlook
Step 3: Set Up a New Outlook Profile After Migration
- Check that the latest version of Outlook is installed on each machine; older versions tend to throw compatibility errors after a tenant migration.
- If Outlook won't connect to the Office 365 mailboxes, create a new profile for the user — fixing a broken one rarely works cleanly after a tenant migration.
- Put in the new server address, username, and password.
- Send a test email both ways to make sure users can send and receive before you sign off.
Step 4: Remove the Old Office 365 Subscription Plan
Only do this after the mailbox data has been checked and verified on the target side. Once you're confident that nothing was missed, go ahead and remove the Office 365 subscription plan from the source tenant along with any domains attached to it.
Microsoft 365 Tenant migration troubleshooting
Refer to the troubleshooting guide for Office 365 Tenant to Tenant migration assistance. For additional details on EdbMails Office 365 Tenant migration, refer to the frequently asked questions.

