Staged Office 365 Migration
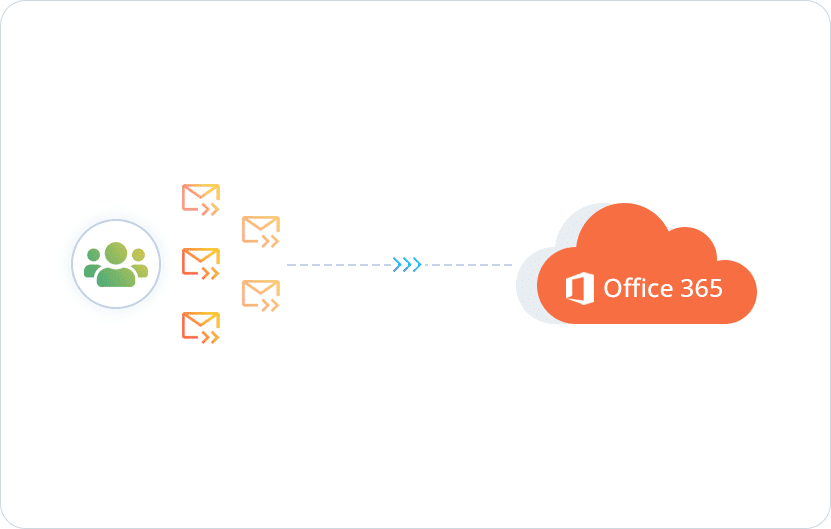
EdbMails Office 365 Migration software supports staged migration, a practical solution for medium to large enterprises dealing with significant data volumes. This approach is beneficial for organizations that cannot afford extended maintenance breaks, as it reduces downtime and ensures a smooth migration without disrupting ongoing operations.
Initial Migration Phase:
In the first phase, data older or newer than a specified date is migrated first. This phase usually takes place during a weekend or outside of regular working hours to minimize the impact on daily operations. Once this data is migrated, the domain is transferred to the target server and/or MX records are updated. This ensures that the most critical and recent data is quickly accessible in the new environment.
Final Migration Phase:
After the initial migration, the remaining data is transferred. This phase allows users to begin working in the new environment with access to the most recent information, while older data continues to migrate in the background. This method ensures that users experience zero disruption and can continue their work with the necessary information readily available.
- Staged Migration Scenarios
- Swift Transition:
The company operates continuously and currently uses Office 365. To improve efficiency, there's an urgent need to migrate mailboxes to Office 365. However, due to a significant amount of data, minimizing downtime is crucial. In EdbMails, users can select specific mailboxes and folders for migration. Additionally, they can migrate specific items within defined date ranges, such as data from the last month, while also excluding standard and custom folders as needed.
The initial phase focuses on migrating data from the past two months, ensuring employees have immediate access to recent data critical for ongoing operations. After completing this phase, updating MX records directs email traffic to Office 365, facilitating a smooth transition to the second migration stage. Here, the remaining data is migrated, allowing all users to gradually access their older data over time.
- Company Merger Data Integration:
Ahead of a merger, two companies using separate Office 365 environments plan to consolidate onto a unified Office 365 platform. During the transition, both companies continue operations independently. The strategy involves migrating the majority of their data beforehand, focusing initially on items older than one month and excluding non-email folder types. Migration operations continue uninterrupted, even during business hours. EdbMails helps by enabling selective data migration, allowing for the exclusion of non-email folder types, and supporting seamless operations during business hours. The initial phase migrates the bulk of the data, while the second phase just before the merger ensures all remaining and updated data is migrated, preparing both companies for unified operations on the new platform. After updating MX records, use date filters to ensure only the most recent and relevant data is migrated, ensuring a smooth transition to a unified Office 365 environment.
- Mitigating Slow Internet Connectivity:
Due to poor IT infrastructure, a company plans to relocate quickly while migrating data to Office 365. Despite a small number of mailboxes, slow internet speeds necessitate a staged migration approach. Initially, migrating data from the past two weeks enables swift operations in the new location with Office 365. The first phase includes all data types configured with appropriate filters. Following the initial migration, MX records are updated, and the second phase commences. EdbMails plays a crucial role by facilitating selective data migration with advanced filtering capabilities, supporting uninterrupted operations during the transition, and ensuring the second phase of migration completes the data transfer smoothly.
- Swift Transition:
- Steps to perform staged migration using EdbMails
Step 1: Download and Install EdbMails
- DownloadEdbMailsSetup.exe and complete the installation.
- Launch the application and click ‘Login’ or ‘Start Your Free Trial’.
- Ensure your EdbMails system requirements for Office 365 migration.

Step 2: Select migration option
- Select ‘Office 365 Migration’ from the dashboard.
- Choose ‘Office 365 to Office 365 Migration’.
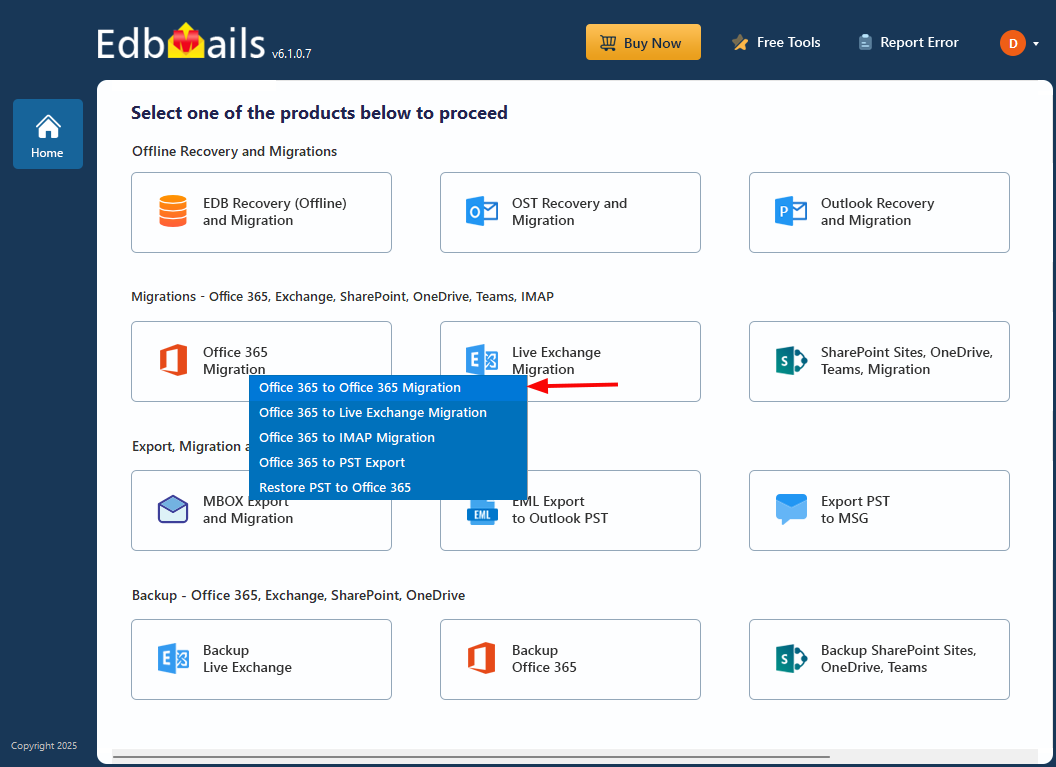
- Optionally, set a custom job name for the migration task.
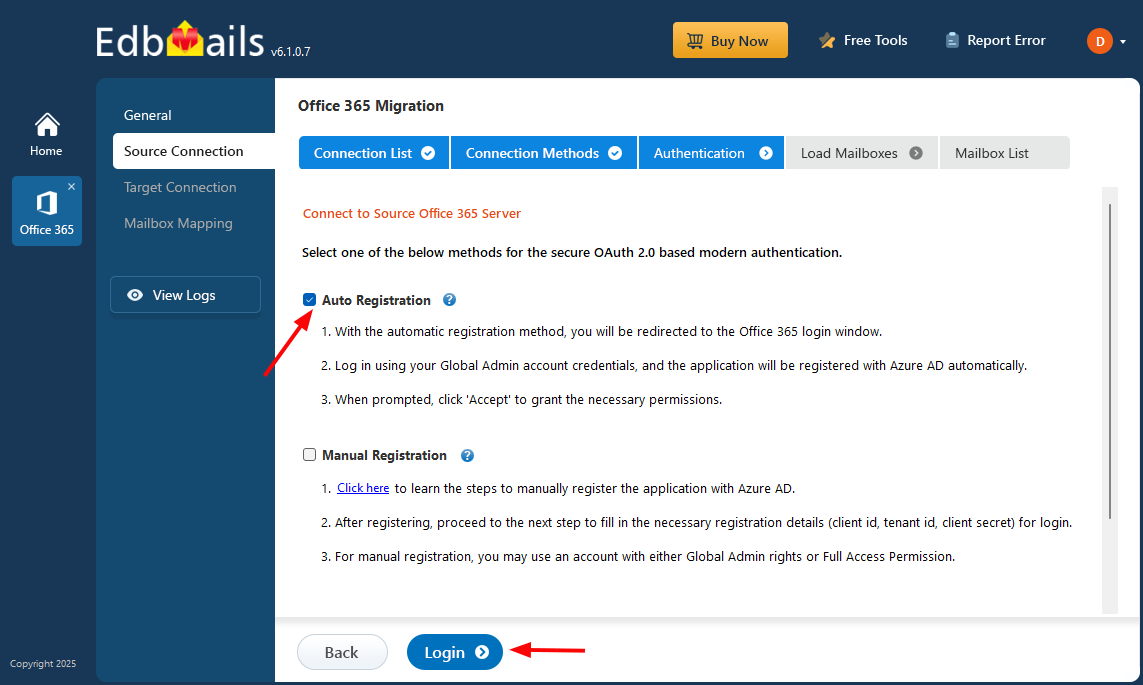
Step 3: Connect to source Office 365 server
- Click ‘Add New Connection’ to set up a new connection to the source tenant. If a connection was previously established, you can select it from the list and click ‘Connect to Existing’ to continue.
- Use OAuth 2.0 modern authentication and sign in securely via Microsoft.
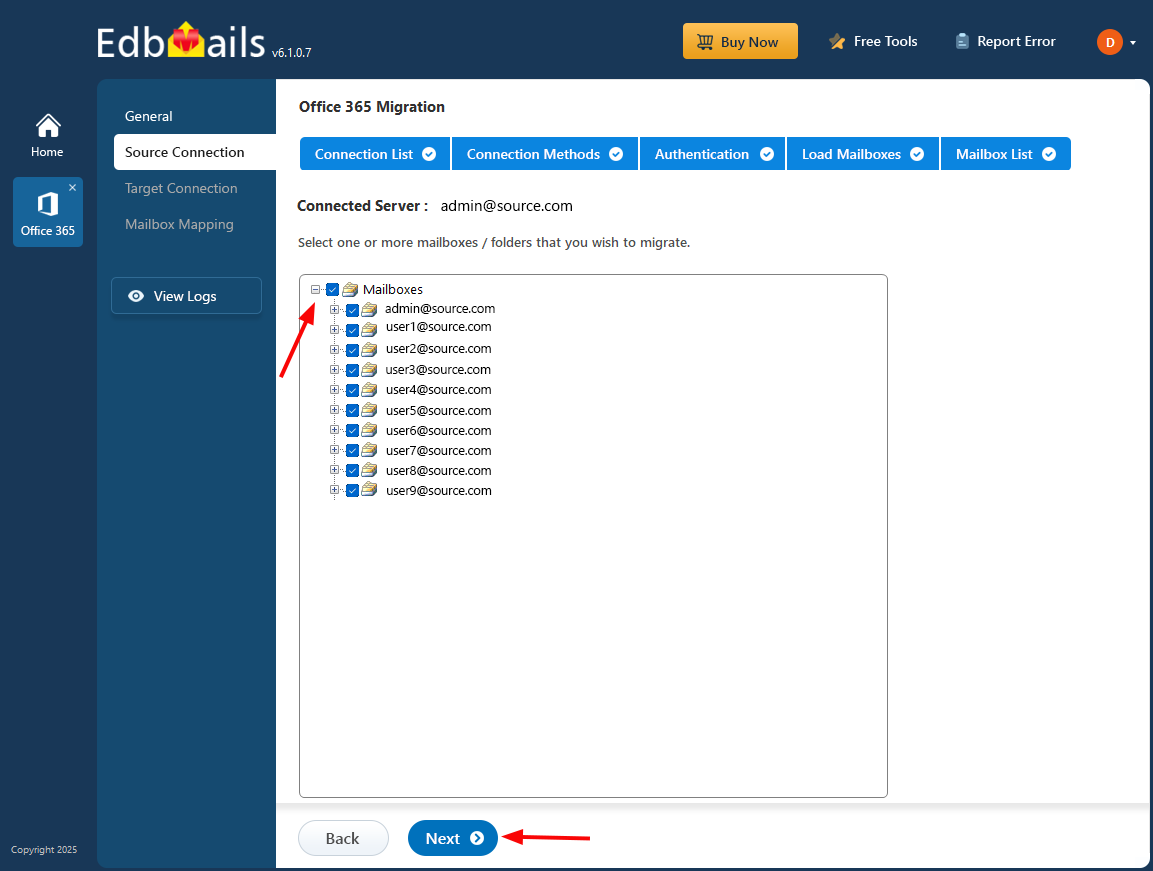
- Load source mailboxes manually or import them using a CSV file.
- Select the mailboxes you wish to migrate and click ‘Next’.
Step 4: Connect to target Office 365 server
- Click ‘Add New Connection’ to configure the destination tenant. To reuse an existing connection, select it from the list and click ‘Connect to Existing’ to move forward.

- Authenticate with secure Microsoft login using modern authentication.
- Load the target mailboxes or use a CSV file for bulk import.
- Click ‘Add New Connection’ to configure the destination tenant. To reuse an existing connection, select it from the list and click ‘Connect to Existing’ to move forward.
Step 5: Source and target servers mapping
- EdbMails performs automatic mapping of source and target mailboxes.
- You can also map mailboxes and folders manually for granular control.
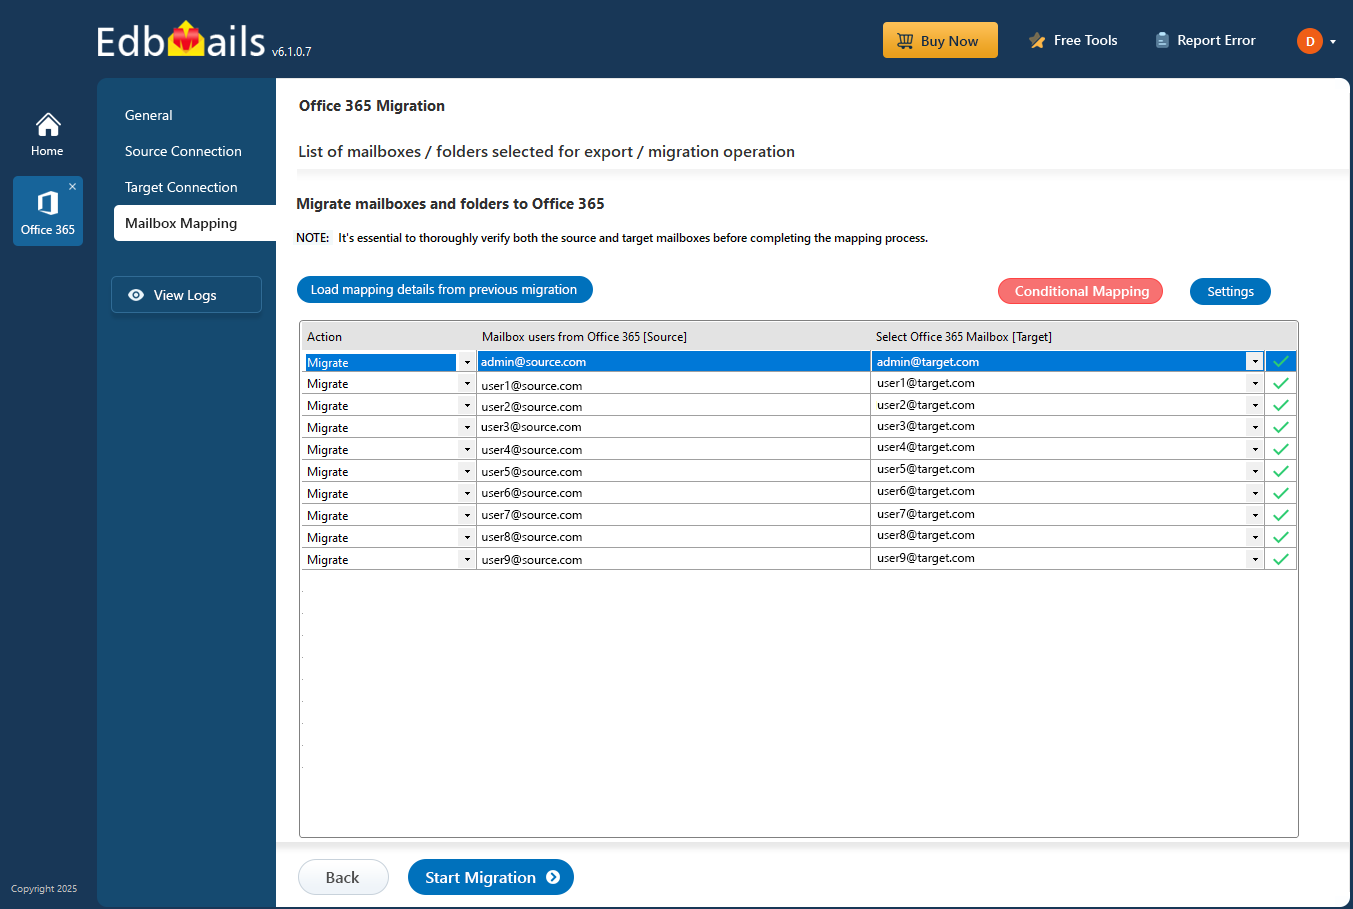
- For instance, if you want to transfer the majority of your data during the first stage of the migration, enable the 'Include Filter' option and select the relevant date range. If your goal is to move to a new Office 365 server as quickly as possible, migrate only the most recent data by choosing the corresponding date range.
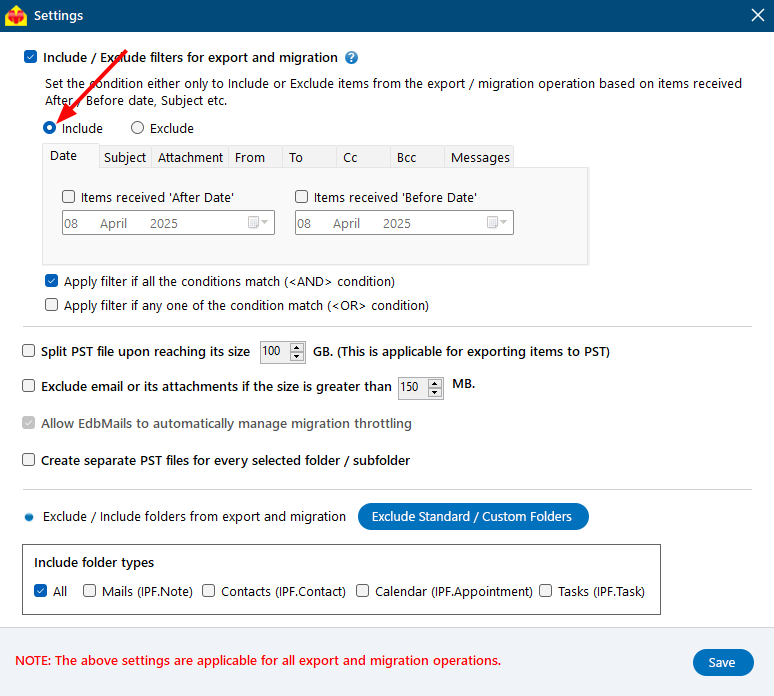
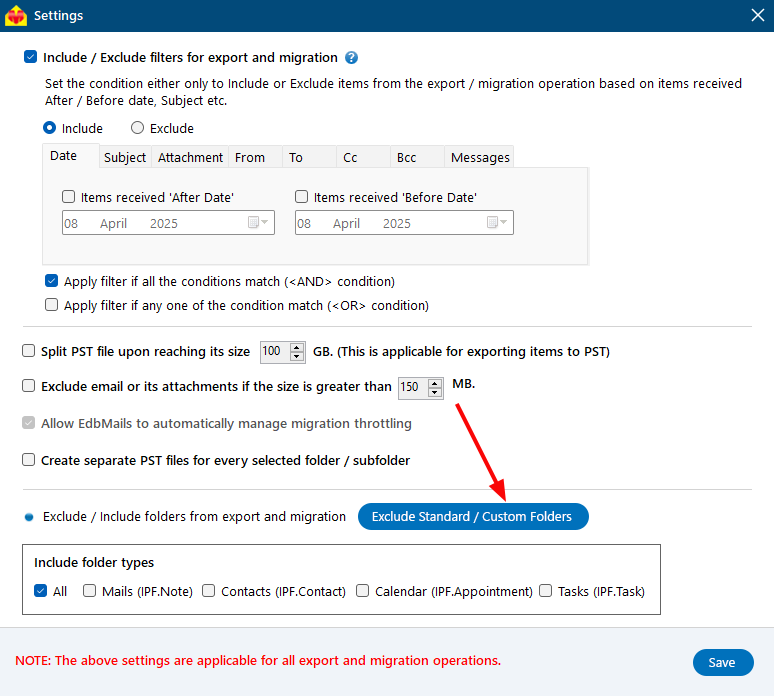
- If you prefer to exclude certain folders from the first stage, click on the ‘Exclude Standard / Custom folders’ button and specify the folders you wish to exclude.
Step 6: Start PST to Office 365 migration
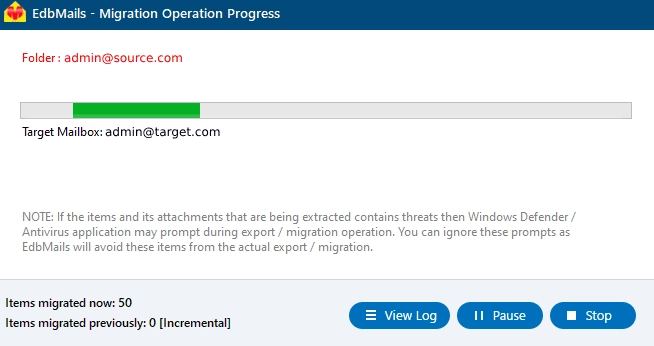
- Click ‘Start Migration’ to begin transferring the data.
- Monitor the process, pause or resume anytime, and access the migration report through the ‘View Logs’ option.
- Post migration steps
Step 1: Update the MX records to point to Office 365
First, add your domain to Office 365. If you haven’t updated DNS records before, modify the MX records to ensure emails are properly routed to Office 365. Additionally, configure the Autodiscover record to allow Outlook to connect to the migrated mailboxes.
Step 2: Clear the Auto-Complete list in Outlook
See manage suggested recipients with Auto-Complete.
Step 3: Create a new Outlook profile after migration
- Ensure each user has the latest Outlook version installed to avoid compatibility issues.
- Set up Outlook profiles for each user in your domain if they experience connectivity problems with Office 365 mailboxes.
- Configure Outlook with the new server settings, including server address, username, and password.
- Test email functionality to confirm that users can send and receive emails successfully.
Step 4: Remove the old Office 365 subscription plan
Once the migration is complete and you have confirmed the integrity of the migrated mailbox data, proceed to remove the Office 365 subscription plan from the source tenant, along with any associated domains.

