Office 365 Public folder migration
A public folder is used to store and share information, like emails, contacts, and calendars, across an organization. The Public folder administration and migration can be complicated because of public folder permissions and structure. Migration to a public folder requires proper planning, and the right tool to ensure a successful migration to a public folder. EdbMails Office 365 migration software helps in easy migration to the public folder, which requires minimum resource and simplifies the overall effort. EdbMails Office 365 migration tool is easy to install and to set up the source and target server, and start the migration.
No PowerShell scripting needed for public folders migration with EdbMails. The intuitive graphical user interface handles all aspects of the process, such as connecting to the server, delta migration, and automatic Public Folder mapping between the source and target servers.

The software takes care of security and data integrity while migrating your data with strong encryption protocols to protect against any loss. EdbMails allows 1:1 migration, so you don’t face any issues during migration with accurate migration, keeping the exact structure and hierarchy of the source public folders in the target environment.
This article will outline pre-migration tasks and a step-by-step guide for migrating Office 365 public folders to Microsoft 365 with EdbMails and showcase how its automated options make an efficient and seamless migration.
Planning a Public folder to Office 365 migration
Before the migration from Office 365, it is crucial to ensure sufficient time and effort have been placed into the migration's planning stage to provide a seamless migration process.
- Understand the type of your current migration environment (Hybrid/Non-Hybrid)
- Determine the number & size of Public Folders you wish to migrate
- Define whether you wish to migrate the data of the public folders in one go or by stages.
- Inform the end-users about the migration plan and the change.
- Test your internet connection speed, network settings, etc.
- Perform a test (pilot) migration.
Office 365 Public folder migration: Pre-migration tasks
On the Office 365 source server:
- For the automatic registration of the application, you must have a global admin account with a mailbox to connect to the source Office 365 server. Manual registration of the application needs any user account with full access rights. Know more
- Grant the required public folder access permissions to the admin account
See the steps to assign the required permissions to the admin user
On the target Office 365 server:
- Prepare your target Office 365 Tenant. Refer to the tenant roadmap for Microsoft 365.
- If you intend to migrate your source Public folders to Office 365 Public folders, make sure you have created and configured the Public folder mailboxes on the target server.
Create an Office 365 Public folder and assign admin permission
- Check your network and bandwidth requirements for the migration. Refer to network and migration planning, performance factors, and best practices for Office 365 Public folder migration
- If you have a custom domain from your host that you want to migrate and receive emails, you need to add and verify the domain in your target Office 365 account.
- Configure Office 365 to send and receive large mailboxes.
Follow the steps below to increase the message size to 150 MB in Office 365.
Note: Public folder migration to Office 365 with EdbMails doesn’t need any PowerShell scripts. The following explains the public folder migration method through the application's GUI.
Migrate Public folders from Office 365 to Office 365
Step 1: Download and install EdbMails Office 365 migration software
- Download EdbMails and install the application on your computer
See a detailed list of EdbMails system requirements for Office 365 migration.

- Enter the appropriate details and click ‘Login’ or click ‘Start Your Free Trial’

- Download EdbMails and install the application on your computer
Step 2: Select the ‘Office 365 to Office 365 Migration’ operation
- Choose the 'Office 365 Migration' option.

- Select ‘Office 365 to Office 365 migration’

- You can keep the default job name or click the ‘New Job’ button to customize the job name.

- Choose the 'Office 365 Migration' option.
Step 3: Connect to the source Office 365 server
- Click the ‘Add New Connection’ button to set up a new connection to the source Office 365 account. If you prefer to use an existing connection, simply choose it from the list and click ‘Connect to Existing’ to continue.

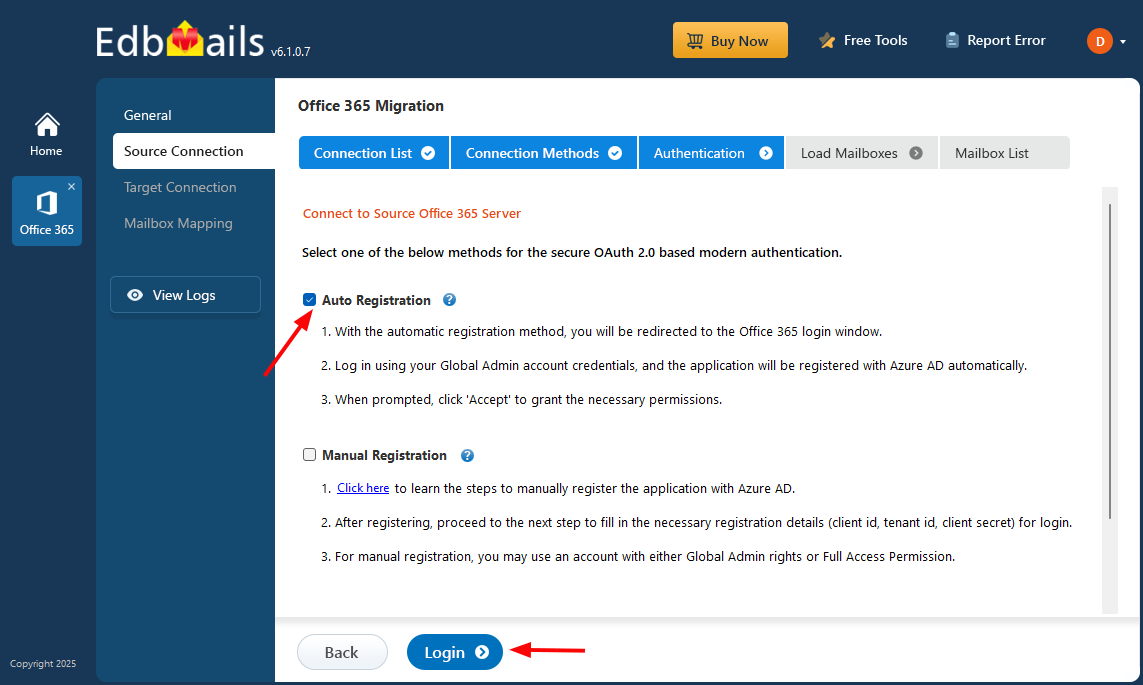
- Choose ‘Connect to Public folders’ and click the ‘Next’ button

- Choose the desired connection method and click the ‘Login’ button to proceed.
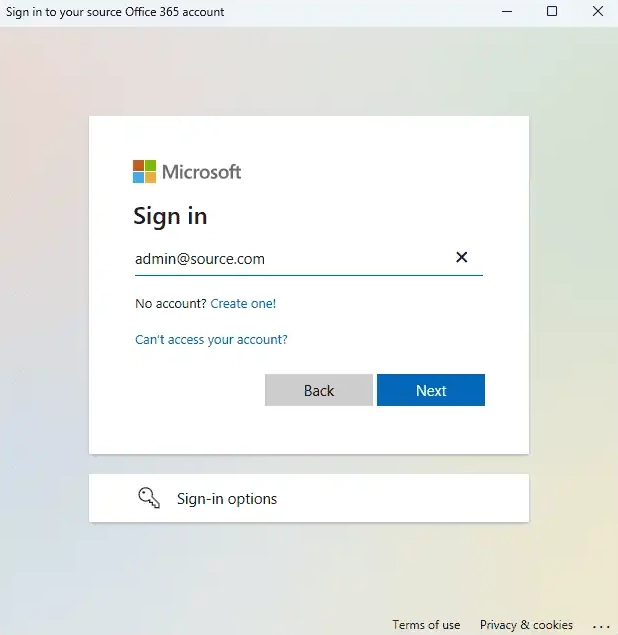
Connect to Office 365 server using secure modern authentication
- Sign in on the Microsoft authentication page using a global admin account that has a mailbox.
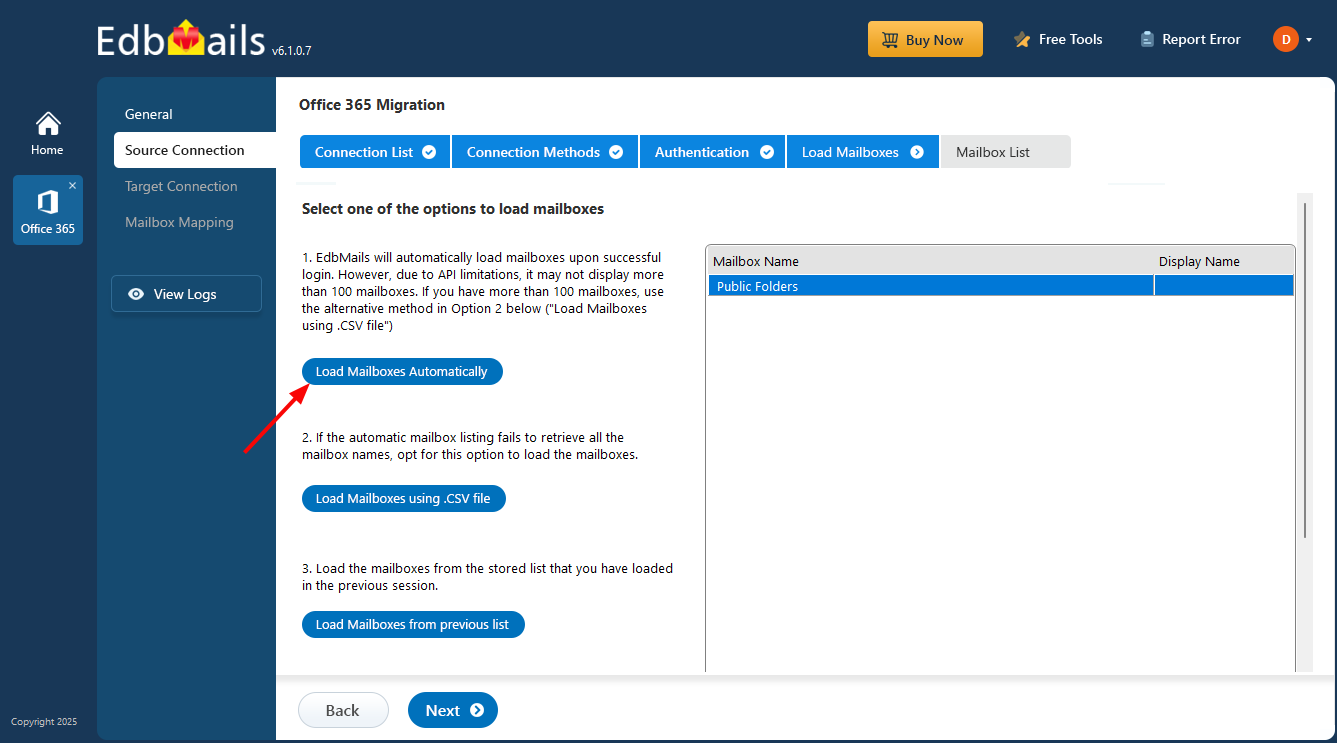
- Once authentication is successful, select a method to load the mailboxes and click the 'Next' button
- Choose the public folders you wish to migrate from the source Office 365 server, then click ‘Next’ to continue.
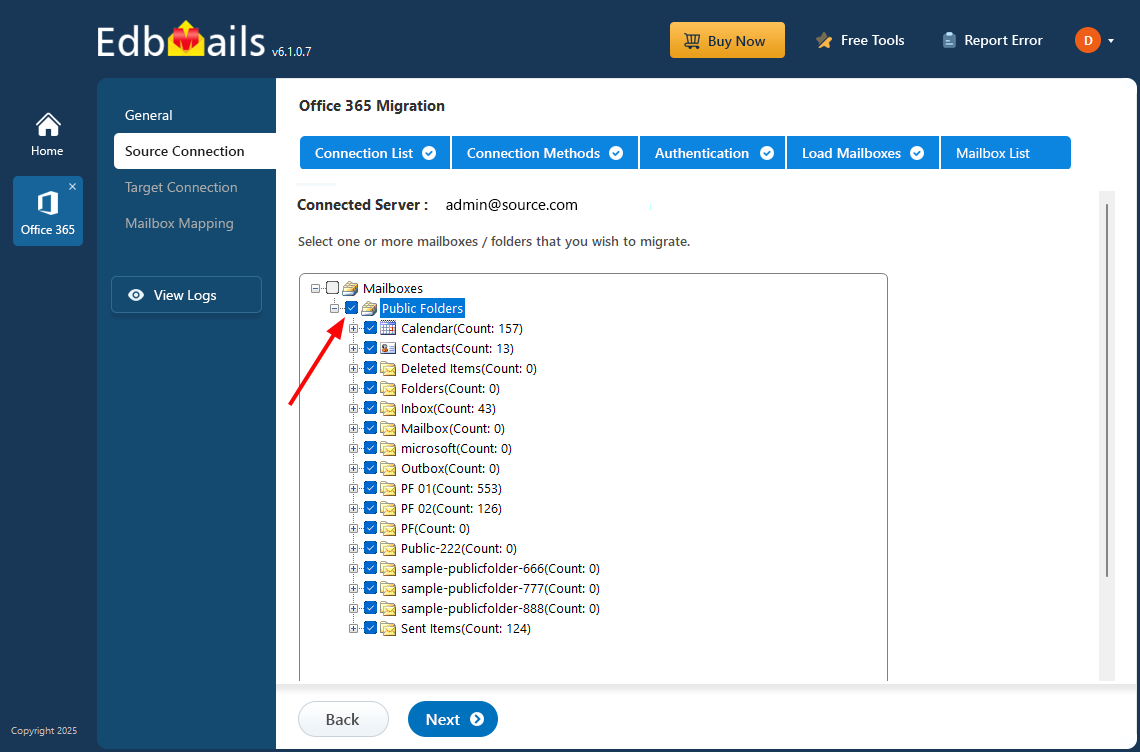
Tip: If this is the first time you’re migrating with EdbMails, the migration is a full migration. On subsequent migrations from the same source to the target, the migration is incremental.
- Click the ‘Add New Connection’ button to set up a new connection to the source Office 365 account. If you prefer to use an existing connection, simply choose it from the list and click ‘Connect to Existing’ to continue.
Step 4: Connect to target Office 365 server
- Click the ‘Add New Connection’ button to create a new connection to the target Office 365 account. If you prefer to use an existing connection, select it from the list and click ‘Connect to Existing’ to move forward.

- Select ‘Connect to Public folder’ and authenticate on Office 365 sign in page

- Select one of the authentication methods and click the ‘Login’ button to continue.
- And authenticate on Microsoft sign in page

- Select one of the methods to load the mailboxes..

- Click the ‘Add New Connection’ button to create a new connection to the target Office 365 account. If you prefer to use an existing connection, select it from the list and click ‘Connect to Existing’ to move forward.
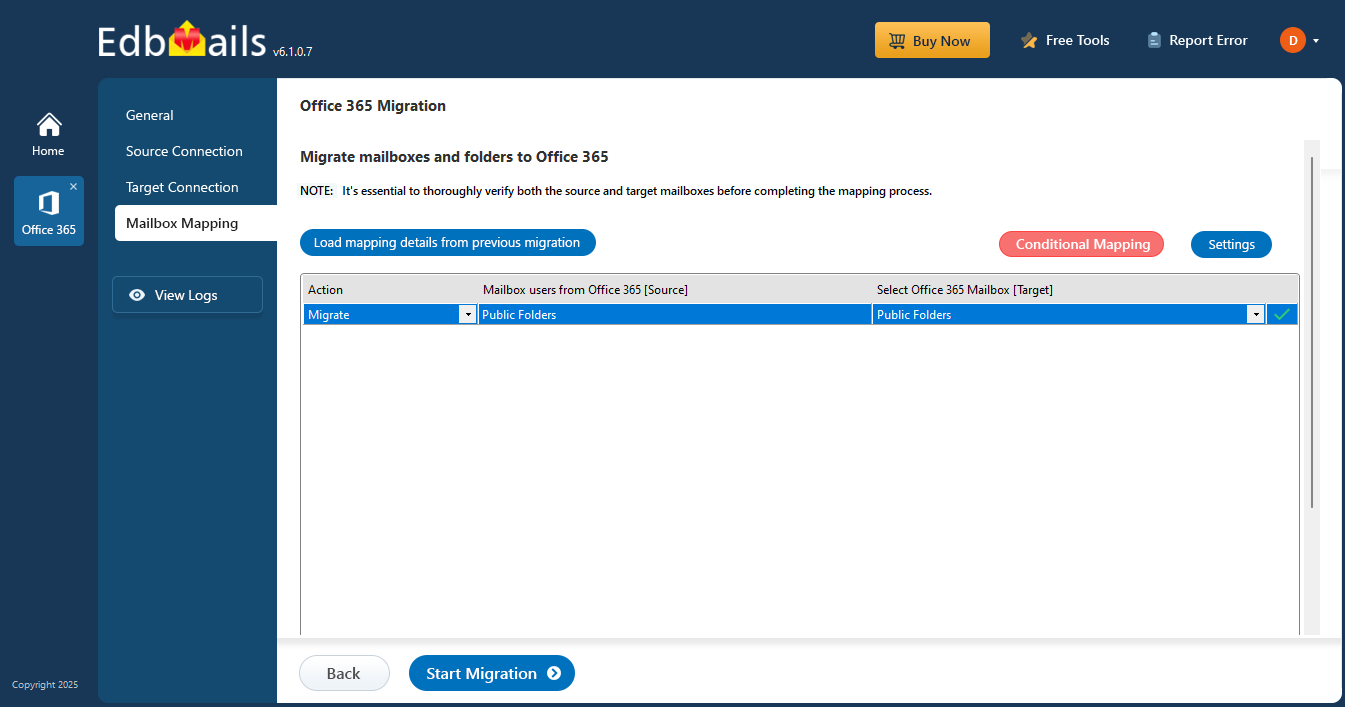
Step 5: Public folder mapping between source and target servers
- EdbMails automatically maps public folders between the source and target servers. You can also manually map source folders to the required target folders and map the source and target folders using a CSV file.
- EdbMails automatically maps public folders between the source and target servers. You can also manually map source folders to the required target folders and map the source and target folders using a CSV file.
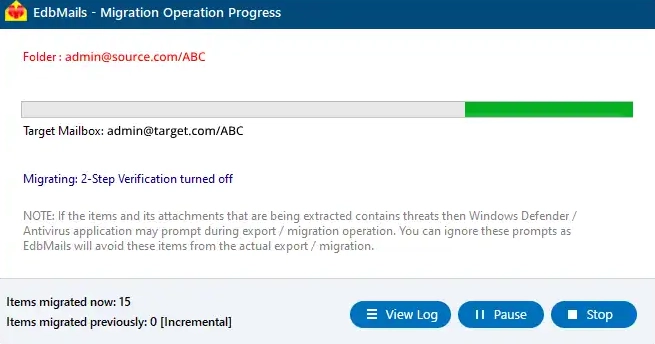
Step 6: Start the Public folder migration to Office 365
- Click the 'Start Migration’ button to initiate the migration process.

- The migration has started. Click the ‘View Log’ button to view the migration report. Then, log in to your target server to verify the migrated items.
- Click the 'Start Migration’ button to initiate the migration process.
Office 365 migration troubleshooting guide
Check the Office 365 migration troubleshooting guide or the Public folder troubleshooting page for fixes to common problems. For anything else, the Office 365 migration FAQs likely has the answer.
Advantages of using EdbMails for Public folder migration
EdbMails automates the entire Office 365 public folder migration — no PowerShell scripts, no manual work. The full folder hierarchy shows up as a tree structure, so you can see exactly what you're working with before anything moves. From there, picking specific public folders, subfolders, or individual items — emails, calendars, tasks, contacts, journals — is straightforward. The interface does not assume you have a technical background, and it does not require one.
- EdbMails exactly reproduces the source public folder structure in the target.
- EdbMails offers zero downtime during Office 365 Public folder migration.
- You get an incremental migration feature through which only new and modified source items get migrated on the next migration runs, this avoiding duplicates and reduces internet bandwidth and total migration time.
- EdbMails can automate features like public folder mapping, which reduces the manual work.
- You can migrate Public folders of any size between the Office 365 tenants, irrespective of the technical knowledge and expertise required.
- EdbMails secures your Office 365 Public folder migration.
- Free trial offered, along with 24x7 technical support, helps test tool functionality.

