Office 365 Archive mailbox to Exchange migration
Migration from Office 365 archive mailbox to Exchange is critical for multiple strategic and operational requirements. Some organization require on-premises storage in accordance with regulations and data residence policies. Cost management is also another consideration as management of large-scale deployments on-premises could be more predictable and cheaper to manage than an ongoing subscription payment. Performance considerations, especially in environments with unreliable internet connectivity, further support the move to on-premises storage for improved access speed and performance.
Moreover, storing data locally also gives better control over data security and backup plan and allows it to work along with the existing legacy systems while contributing to the overall migration of data from the cloud to on-premises infrastructure.
EdbMails Office 365 migration software provides a smooth and efficient solution for this migration process with specialized features required for every volume of mailboxes and guarantees complete data integrity throughout the process. EdbMails offers an efficient mechanism to transfer the archives to Exchange server. Multiple mailboxes can be migrated at the same time, while it takes care of all kinds of migration scenarios. EdbMails can be selected for your enterprise organization, as it offers the move of archives without any issues and maximum efficiency. The software supports all versions of Exchange servers including Exchange 2007, 2010, 2013, 2016, 2019 as target server.
Planning a migration from Office 365 archive mailbox to exchange
- Remember to activate the archive mailboxes and make them visible in Office 365.
- Create and enable Archive mailboxes on the Exchange server.
- Keep in mind that In-Place Archiving is a feature that is included with an Exchange Enterprise client access license (CAL).
- See more details on In-Place Archiving in Exchange server.
- Whether you'd like to migrate source Archive mailboxes to target Primary mailboxes or Archive mailboxes.
- Determine whether you want to move everything at once or in stages.
- Check your internet connection speed and network configuration.
- Communicate the migration plan and the changes to your end users.
- Perform a test Office 365 migration before you start the actual one.
Pre Migration activities for archive mailbox to exchange migration
Step 1: Check that you meet the following requirements on Office 365
- Ensure you have a global admin account for the automatic registration method to connect to both the source Office 365 server.
- Ensure that you meet the network and bandwidth requirements for the migration.
See performance factors and best practices for Office 365 archive mailbox to Exchange migration. - Enable archive mailboxes on source Office 365 server.
Step 2: Check that your system meets the Exchange server setup requirements.
The following links will help you to know about the network, hardware and operating system requirements for the Exchange server you want to install and migrate to.
Note: Exchange 2010 has reached the end of support on October 13, 2020 and Exchange 2013 will reach the end of support on April 11, 2023. Therefore it is highly recommended that you migrate your mail data and Archive mailboxes to Exchange 2016 and 2019.
- Step 3: Prepare your target system with the following prerequisites
Complete the following prerequisites for Active Directory, Windows Mailbox server, and Windows Edge Transport servers before installing the Exchange server.
- Step 4: Setup Exchange server for migration
Given below is a list of key points for installing and preparing the Exchange server for migration. If you have already installed and set up your Exchange server, skip to point 4 in this step.
- Prepare AD and domains
- Before installing Exchange Server, you need to prepare your Active Directory forest and its domains for the new version of Exchange.
- If you have a separate team to manage the Active Directory schema, you need to first extend the active directory schema, else proceed to the next step to prepare the Active Directory.
- If you have multiple domains you need to additionally prepare the Active Directory domains.
- Install Exchange server on your computer
Before installing the Exchange server, ensure that you meet the server system requirements and prerequisites as outlined previously. Next, follow the link to install Exchange 2016 or install Exchange 2019 from the setup wizard.
- Prepare a clean Exchange target environment
- configure a Send connector to send mail outside the Exchange organization.
- By default, Exchange automatically creates receive connectors for inbound mail flow when the mailbox server is installed. If you need to configure receive connectors, follow the steps in the link.
- Add accepted domains to allow recipients to send and receive email from another domain.
- Configure the default email address policy to add the accepted domain to every recipient in the organization.
- Configure external URLs (domains) on the virtual directories in the Client Access (frontend) services on the Mailbox server to allow clients to connect to your server from the internet (outside the organization’s network).
- Configure internal URLs on the virtual directories in the Client Access (frontend) services on the Mailbox server to allow clients to connect to your server from the internal network.
- Configure SSL certificates from a third-party certificate authority for services such as Outlook Anywhere and Exchange ActiveSync.
- Verify the Exchange server installation by running the command Get-ExchangeServer on the Exchange Management Shell (EMS).
- Create mailboxes and Public folders on the Exchange server
Before you migrate, ensure that you have mailboxes on the Exchange server and have assigned suitable licenses to them. Ensure that you also have the In-Place archiving enabled.
- Assign management roles to the admin account
If you are using a global admin account to connect to the Exchange server, ensure that impersonation rights are set.
See the steps to set impersonation rights on Exchange server.
- Configure the throttling and message-size limits
To create custom throttling policies and set maximum message size limits on the target Exchange server, follow the steps provided in the links below.
- Prepare AD and domains
Steps to migrate archive mailbox from Office 365 to exchange
Step 1: Download and install EdbMails Office 365 migration software
- Download EdbMails and install the EdbMails application on any computer that can be connected to the source and target server. You can also perform the migration operation by installing EdbMails on a non-Exchange server computer.
See a detailed list of EdbMails system requirements for Office 365 Archive mailbox to Exchange migration.
- Launch EdbMails software and click ‘Login’ or ‘Start Your Free Trial’

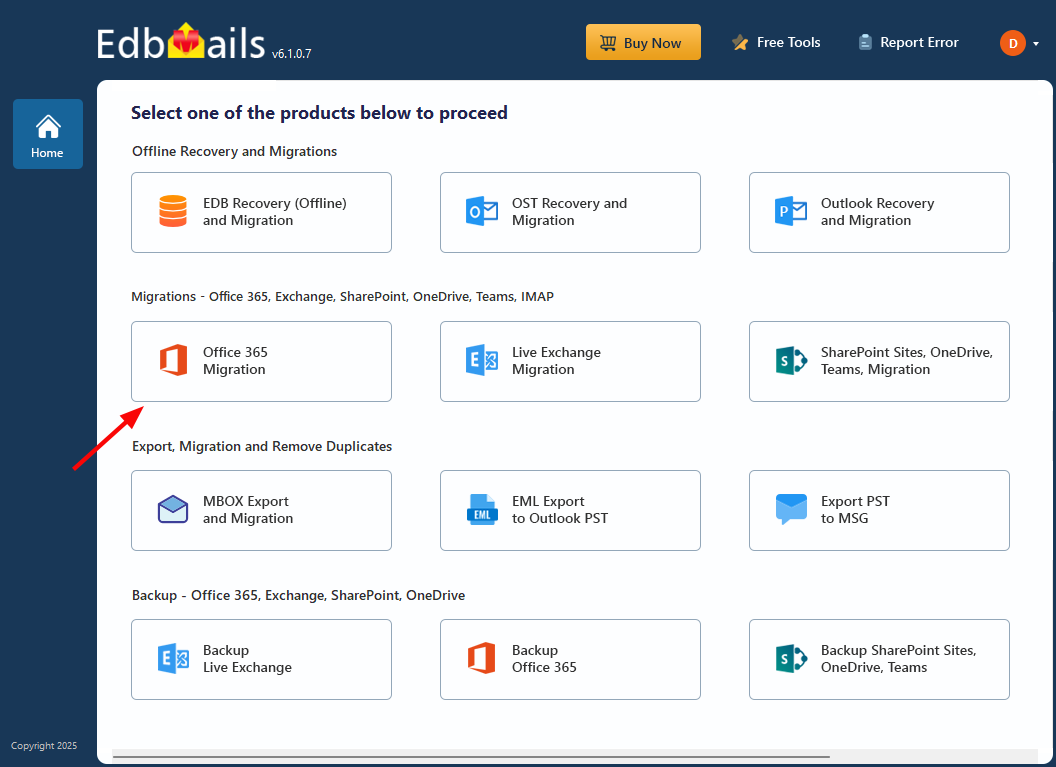
- Select the ‘Office 365 Migration’ option
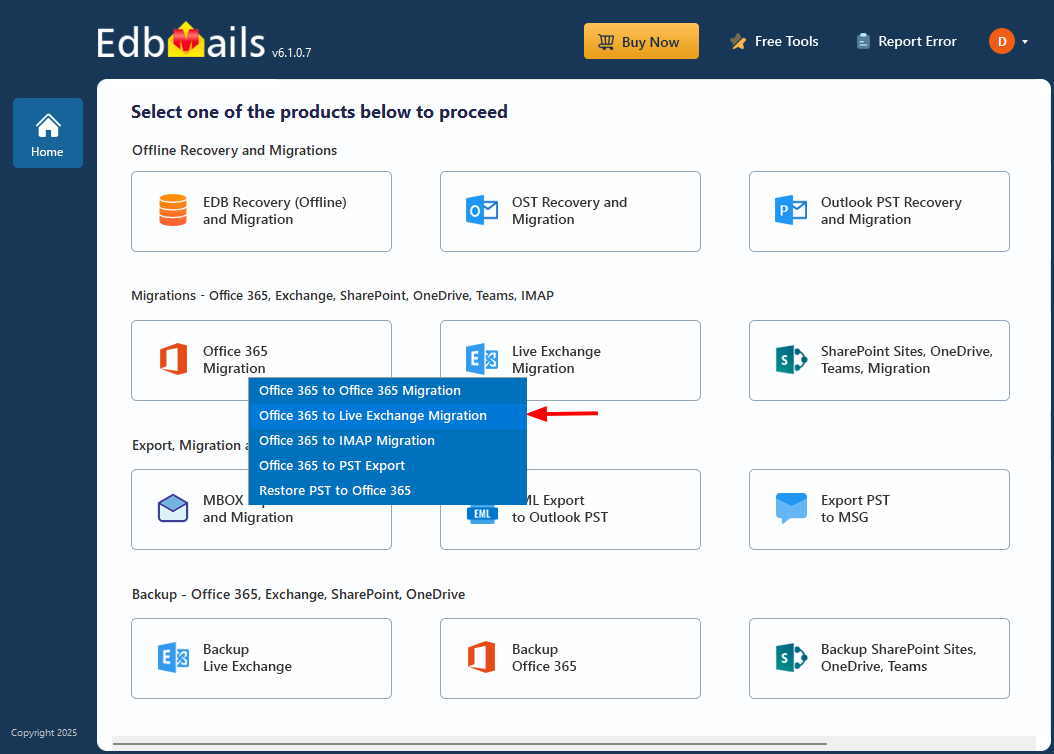
- Choose the ‘Office 365 to Live Exchange Migration’ from the dropdown list
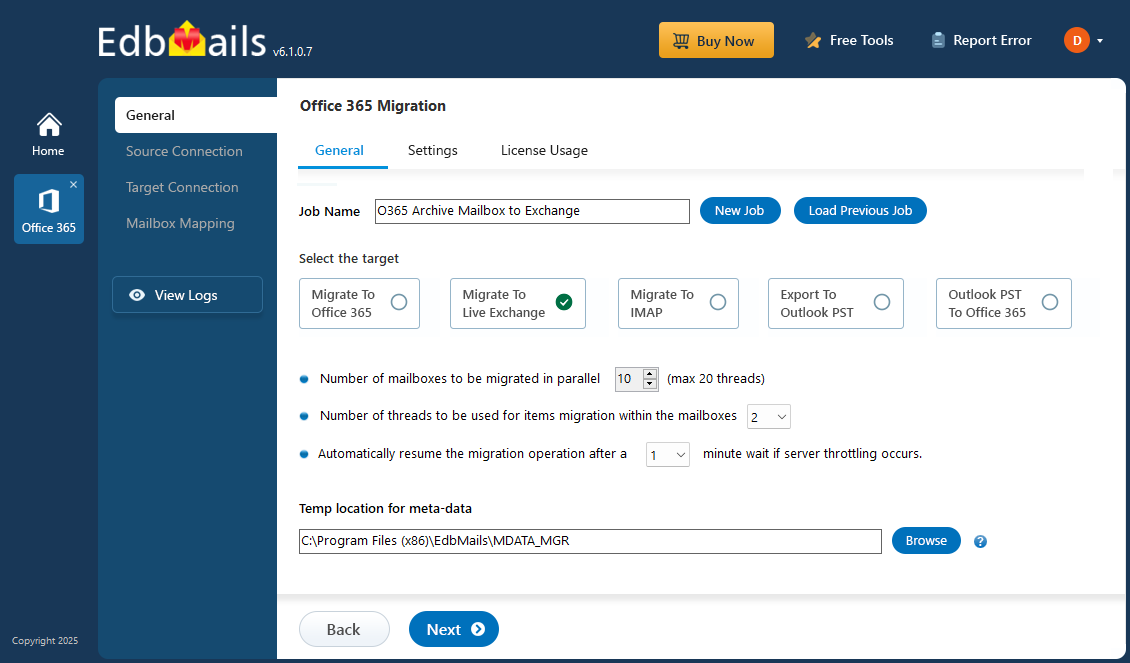
- You can either keep the default job name or click the ‘New Job’ button to change the name of your choice.
- Then, Click the ‘Next’ button to continue.

- Download EdbMails and install the EdbMails application on any computer that can be connected to the source and target server. You can also perform the migration operation by installing EdbMails on a non-Exchange server computer.
Step 2: Connect to the source Office 365 server
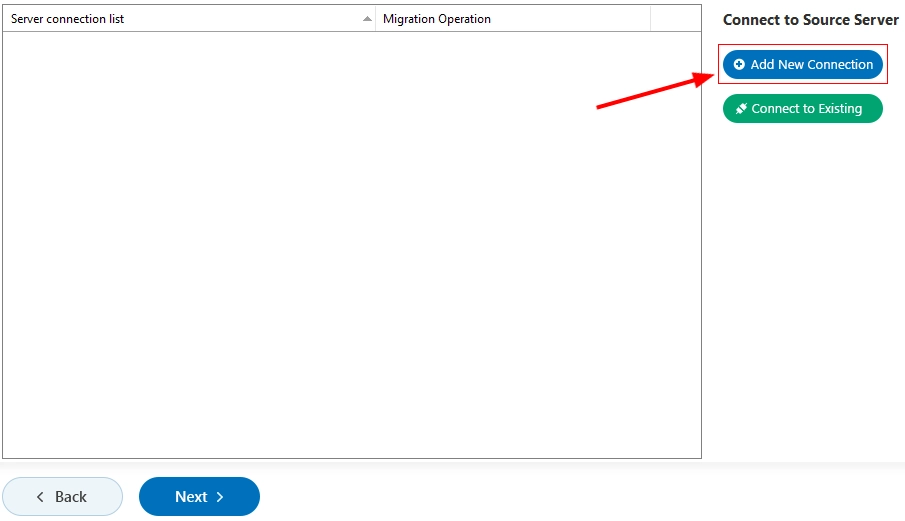
- To create a new connection to the source Office 365, click the 'Add New Connection' button. If you'd like to use a previously saved connection, select it from the list and click 'Connect to Existing' to proceed.
- Select ‘Connect to Archive Mailboxes (In-Place Archive)’
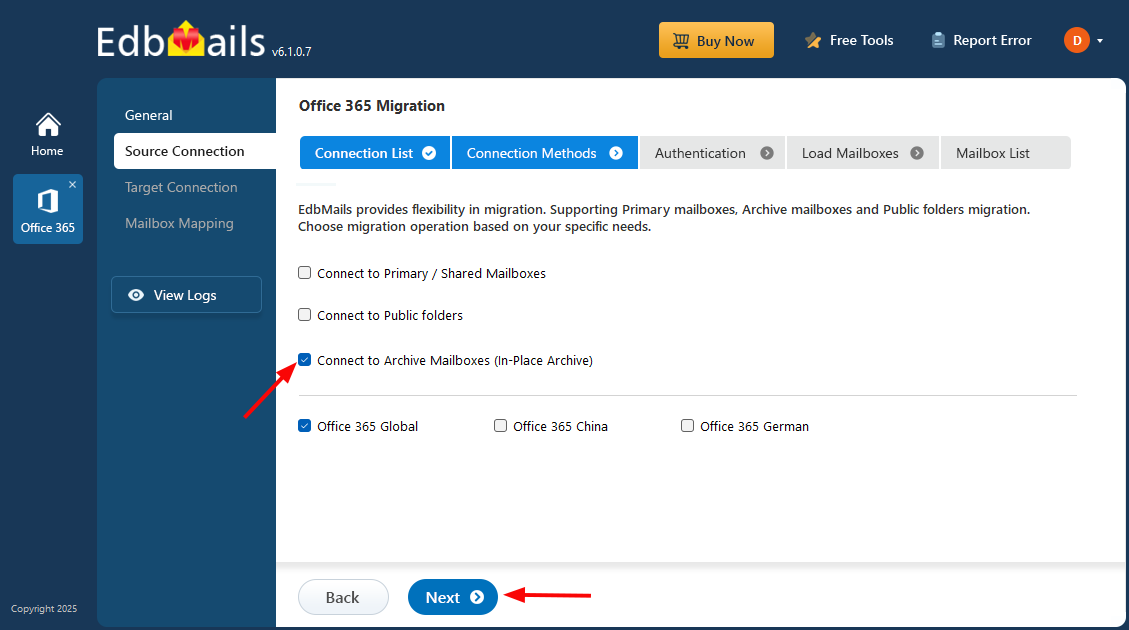
- Select your preferred authentication method to continue.
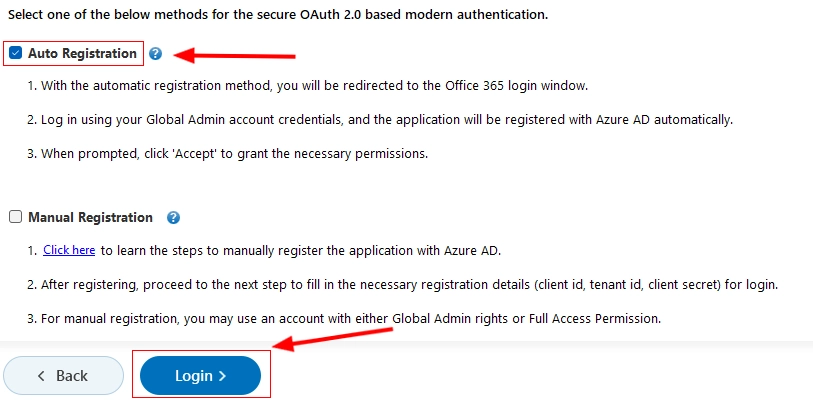
Connect to Office 365 server using secure modern authentication
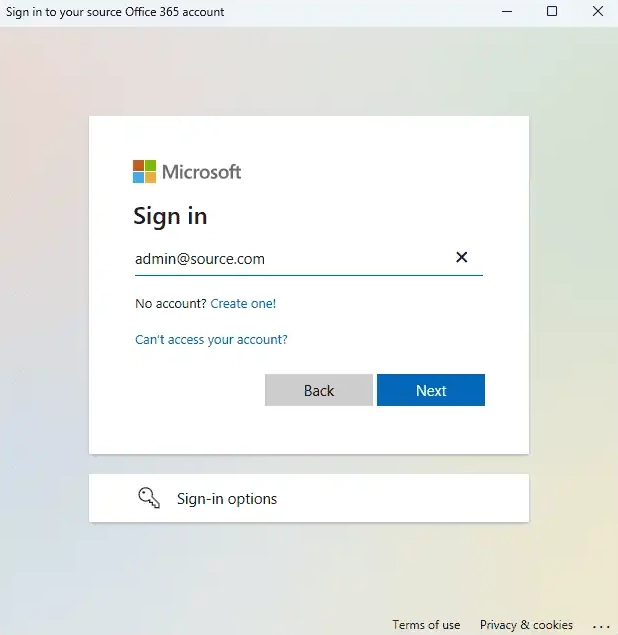
- Log in on the Microsoft authentication page using a global admin account
- Once authentication is successful, choose a method to load the mailboxes. Alternatively, you can load and migrate the mailboxes using a CSV file.

- To create a new connection to the source Office 365, click the 'Add New Connection' button. If you'd like to use a previously saved connection, select it from the list and click 'Connect to Existing' to proceed.
Step 3: Select archive mailboxes
- Select the archive mailboxes you want to migrate, then click ‘Next’ to connect to the target server.
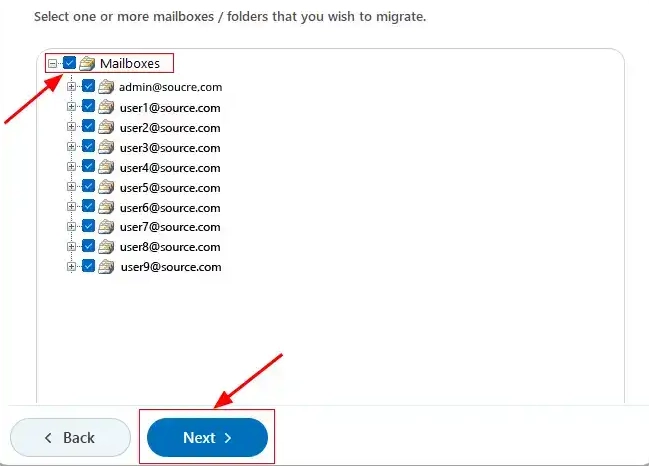
Tip: If this is your first migration with EdbMails, it will perform a full migration. Any subsequent migrations from the same source to the target will be incremental.
- Select the archive mailboxes you want to migrate, then click ‘Next’ to connect to the target server.
Step 4: Connect to target Exchange server
- Click the ‘Add New Connection’ button to set up a new connection to the target Exchange server. To use an existing connection, select it from the list and click ‘Connect to Existing’ to continue.
Click here to know more about various methods to connect to the Exchange server in EdbMails.

- Select the appropriate connection options and click ‘Next’ to continue.

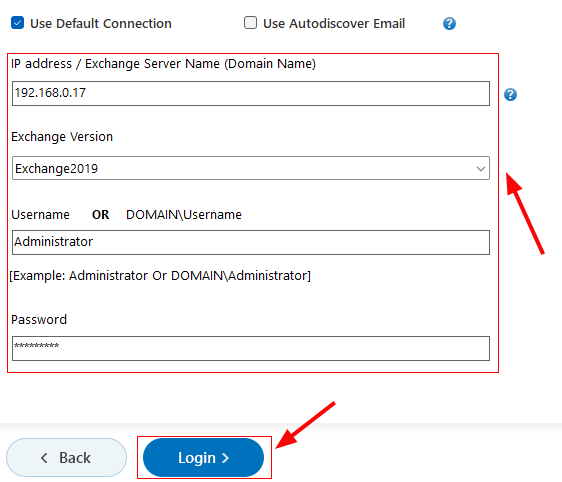
- Enter the Exchange server details and click the ‘Login’ button
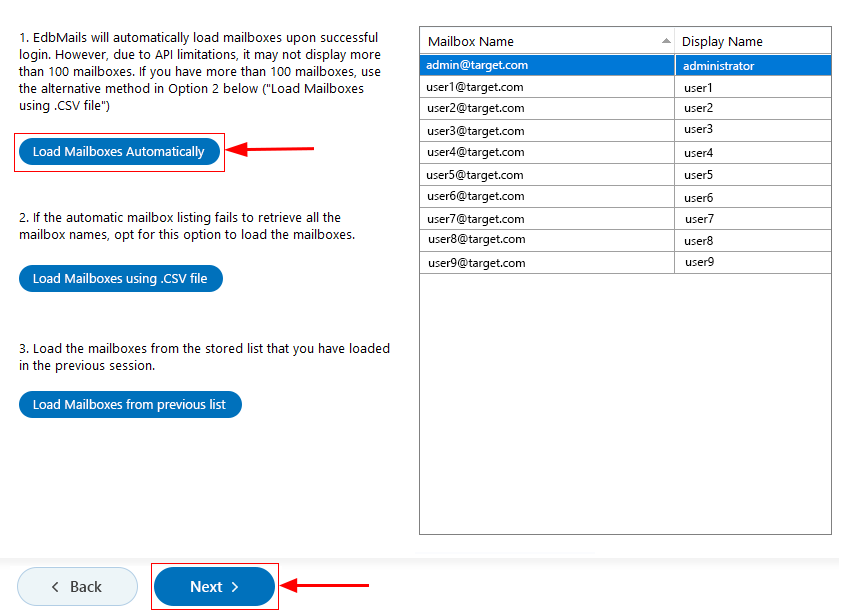
- Select one of the methods to load the mailboxes and click the ‘Next’ button to proceed.
- Click the ‘Add New Connection’ button to set up a new connection to the target Exchange server. To use an existing connection, select it from the list and click ‘Connect to Existing’ to continue.
Step 5: Map source and target mailboxes
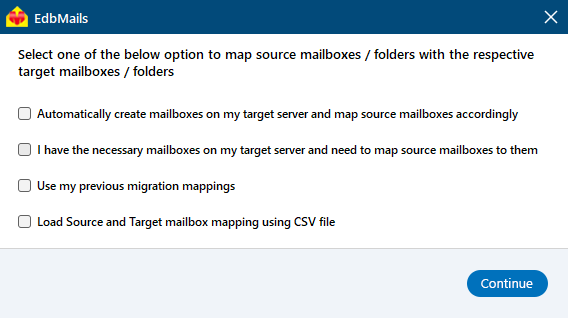
In the mapping window, choose the required option from the following:
- Automatically create mailboxes on the target server and map source mailboxes accordingly.
- I have necessary mailboxes on my target server and need to map source mailboxes to them.
- Use previously saved migration mappings.
- Load Source and Target mailbox mapping using CSV file.
- If you have installed EdbMails on your Exchange server, you can opt to automatically create mailboxes on the target Exchange server.
- Click here to know more about automatic mailbox creation
- Click here to know about user-defined mailboxes / folders mapping
- EdbMails automatically maps mailboxes and folders between the source and target servers, which is especially useful for large-scale migrations. Alternatively, you can manually map source folders and subfolders to specific target locations as required.

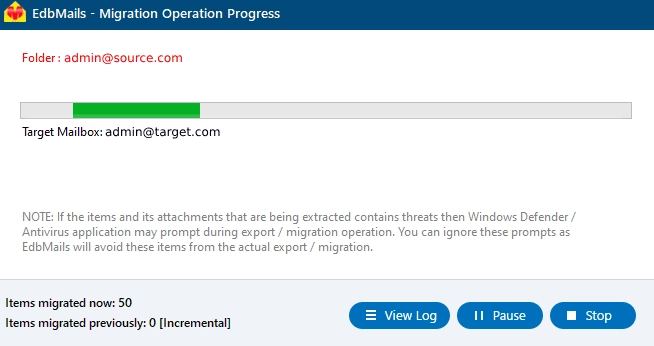
Step 6: Start Office 365 Archive mailbox to Exchange migration
- After completing the mailbox mapping, click the ‘Star Migration’ button to initiate the migration process.
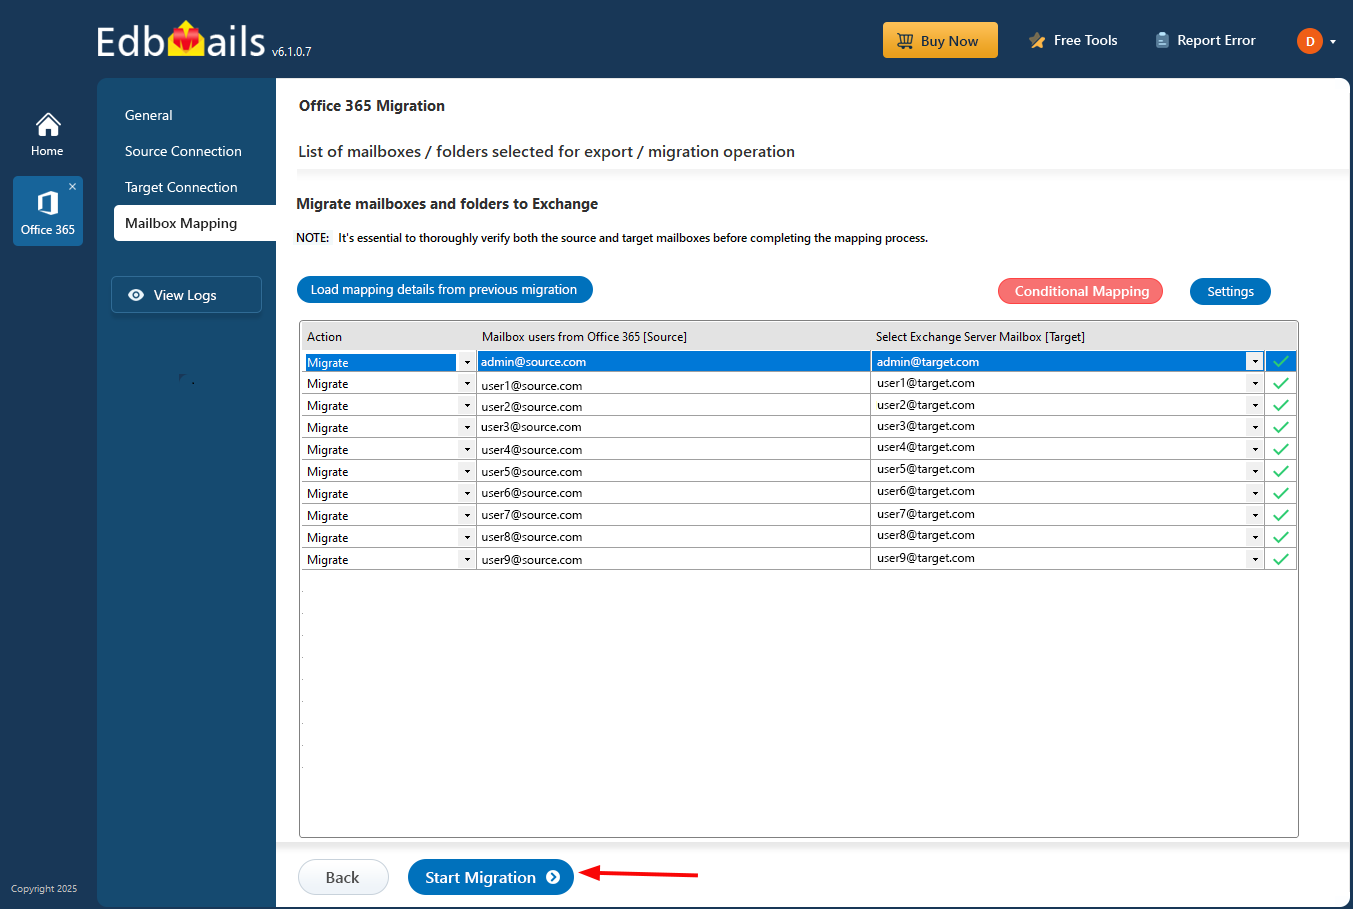
- Once the migration is finished, a message will be displayed. Click the ‘View Log’ button to access the migration report.
- After completing the mailbox mapping, click the ‘Star Migration’ button to initiate the migration process.
Office 365 archive mailbox to Exchange server post migration tasks
- Step 1: Update the MX records to point to the Exchange server
In order to receive messages in the Exchange server, you will need to update your MX record DNS settings so that you will receive email to your new server location that you have migrated to. In addition, configure the Autodiscover record to allow Outlook to connect to the migrated mailboxes.
- Step 2: Create a new Outlook profile for users in the new domain
- Install the latest version of Outlook to avoid compatibility issues.
- For every user within your domain, if Outlook cannot connect to mailboxes of Office 365, you need to set an Outlook profile for each of them.
- Set up new server parameters in outlook, such as Server address, user name and password.
- Check the email flow to ensure emails are being sent and received.
- Step 3: Remove the old Office 365 subscription plan
After the migration is successful and you have verified the data, remove the Office 365 subscription plan from the source and any domains associated if you no longer plan to use it.
- Step 1: Update the MX records to point to the Exchange server
Office 365 archive mailbox to exchange migration troubleshooting
If you require any solution regarding errors in Office 365 migration, then please have a look at the Office 365 migration troubleshooting guide. If you have any queries concerning with the EdbMails Office 365 archive mailbox migration, then you can refer to the frequently asked questions (FAQs), where you can find various answers in detail.
Benefits of EdbMails for Office 365 Archive mailbox to Exchange migration
EdbMails Office 365 migration software offers several benefits while migrating the Office 365 archive mailboxes to Exchange, making it a best choice for this process.
- EdbMails supports any mailbox size without any problem. Bulk size archive mailboxes are transferred without affecting performance.
- Best way for small business and enterprise users to migrate from Office 365 to on-premise Exchange.
- There's a feature called incremental migration in the application. This will guarantee only newly and changed items will be migrated from the source, thus the duplicated items on the target server cannot happen again when the migration process repeats.
- EdbMails, automatically map archive mailboxes from source to destination servers, which speeds up the process and save manual efforts.
- It replicates the mailbox items and folders from the source to the target without affecting your data.
- EdbMails features an intuitive interface that simplifies the migration process, making it accessible even to those with limited technical expertise.
- EdbMails offers secure Office 365 migration and uses modern authentication with TLS encryption for migration.
- Free 24x7 technical support facility with a free trial option to test the software functionality.
Additional resources:

