


Office 365 Migration Guide: Planning, Steps and Checklist
An Office 365 migration involves more than copying mailbox data. The project should account for the source platform, users and mailboxes, Microsoft 365 workloads, identity, licensing, permissions, applications, network capacity, security requirements, cutover tasks, and post-migration validation.
This guide explains how to plan and carry out a Microsoft 365 (Office 365) migration from assessment through cutover. It covers migration methods, scope definition, pilot testing, production migration, incremental passes, validation, and user readiness. For product capabilities, supported scenarios, and licensing, see the EdbMails Office 365 migration software page.
Who this guide is for
This guide is for administrators and project teams planning a move to or between Microsoft 365 environments. It provides a common planning framework for Exchange Server, IMAP, Google Workspace, PST, and tenant consolidation projects while recognizing that each source has different preparation and migration requirements. For a detailed product procedure, use the guide that matches the source environment, such as the Exchange to Office 365 migration guide or the dedicated tenant-to-tenant migration steps.
Prefer a condensed action list instead? Our Office 365 migration checklist covers the same planning stages in a quick-reference format.
Planning and preparation
Before starting the migration, review the source and target environments so that the migration scope, required resources, and cutover activities are clear. See common Office 365 migration challenges for issues that should be considered before the production migration.
The preparation phase should define the business objective, in-scope users and workloads, migration method, owners, success criteria, pilot group, communication plan, cutover sequence, and recovery actions. Record these decisions before production work begins.
- Step 1: Inventory the current environment
Create an inventory of source servers, users, mailbox types, data volume, Microsoft 365 workloads, Outlook and mobile clients, network capacity, and applications that depend on the current mail system. Include CRM platforms, ticketing systems, scanners, multifunction devices, SMTP relays, and custom applications so that each dependency has an owner and a transition plan.
Pay special attention to older Outlook installations, low-bandwidth locations, and applications that are configured for the current environment. These dependencies may require updates before or after cutover. If workloads other than Exchange Online mailbox data are in scope, review their current Microsoft 365 service limits and migration requirements separately before including them in the migration plan.
- Step 2: Choose the appropriate migration method
Choose the migration approach that matches the source environment and migration requirement. Cutover, staged, hybrid, and IMAP migration methods serve different source environments and deployment requirements. Review the requirements and limitations of the applicable method before deciding how the migration will be performed.
See our full comparison of Office 365 migration methods for a side-by-side breakdown of org size, source environment, and downtime for each option.
- Step 3: Define the migration scope
Classify active mailboxes, shared mailboxes, archive mailboxes, public folders, Microsoft 365 Groups, and other workloads as migrate, retain, archive, or exclude. Confirm retention policies, legal holds, records-management requirements, and business ownership before deleting or excluding any data.
A documented scope helps control migration time, licensing, target storage, and post-migration cleanup. Share the final scope with technical owners and business stakeholders before the pilot begins.
- Step 4: Document responsibilities, cutover, and recovery
Document the order of operations, task owners, approval points, user communications, support contacts, and acceptance criteria. Recovery planning should identify how mail flow, DNS, identity, and user access will be restored if cutover validation fails; it should not assume that copied data can simply be rolled back.
- Step 5: Run a representative pilot
Select users with different mailbox sizes, folder structures, permissions, client versions, and network locations. Use the pilot to confirm authentication, mapping, filters, throughput, reports, user access, and the expected cutover sequence. Resolve the findings before scheduling the production migration.
- Step 1: Inventory the current environment
Office 365 Migration Prerequisites
On the source tenant:
- A Global Administrator account with a mailbox for automatic app registration against Microsoft Entra ID. If automatic registration is not used, configure manual registration with the account and permissions required for the selected connection method.
- Bandwidth. Verify that sufficient network bandwidth is available for the migration. Actual migration throughput varies with data volume, network conditions, Microsoft 365 service behavior and throttling, and the number of mailboxes being processed. Review Microsoft's detailed performance guidance before scheduling the production migration.
- Public folder permissions. If public folders are in scope, configure the required administrative permissions before the pilot migration.
- Archive mailboxes. If In-Place Archives are migrating, they need to be enabled on the source first. Here's how.
- If directory synchronization is part of the source environment, review the identity and domain cutover plan before changing or disabling synchronization. Do not disable directory synchronization only because the mailbox data migration is starting; coordinate the change according to the tenant transition plan.
- Localized folders. If source mailboxes use localized default-folder names, verify folder mapping during the pilot. Review the Office 365 migration FAQ for the applicable configuration guidance.
On the target tenant:
- Set the tenant up properly. Microsoft's Tenant roadmap for Microsoft 365 is a sensible reference if this is your first time.
- Mailbox creation and licensing. Create the required target accounts and mailboxes, assign suitable Microsoft 365 licenses, and confirm that each target mailbox is available before migration. Follow your organization's provisioning and governance process:
- Choose a licensing plan that supports the required mailbox and workload features. Microsoft's comparison pages for business plans and enterprise plans explain the available options.
- Public folder structure on the target. If you're moving public folders, create them on the target before the migration runs.
- Archive mailboxes on the target. Enable the required archive mailboxes before migration. Follow the archive mailbox preparation steps.
- Use a global admin account on the target as well, with a mailbox, for the automatic EdbMails registration.
- Custom domain. If the same domain will be used in the target tenant, document the dependencies and coordinate its removal from the source and verification in the target. Domain transfer, DNS propagation, identity changes, and mail-flow updates can temporarily affect user access. Microsoft's instructions explain how to add a custom domain and configure DNS records.
- ADFS. If you're running Active Directory Federation Services, you'll need to set up a new domain on the target tenant for it before starting.
- Message size limits. Compare source item sizes with the supported target limits and configure the target where appropriate. Items that exceed the applicable limit should be identified during assessment and reviewed in the migration reports.
EdbMails Office 365 Migration Workflow
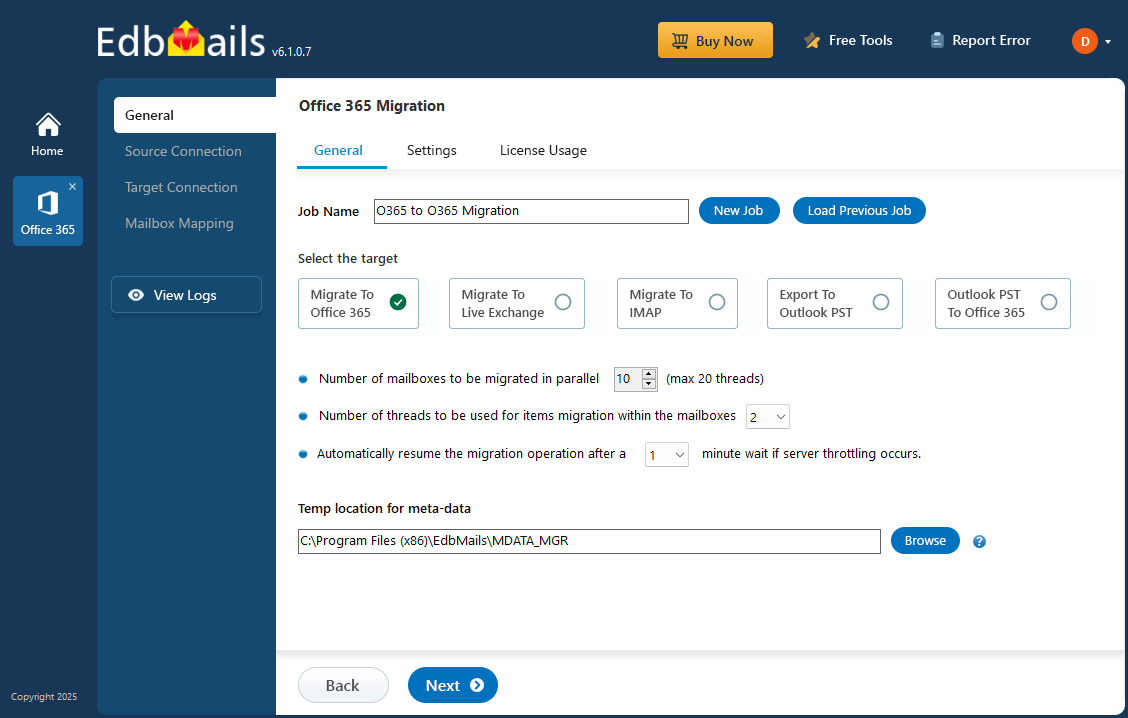
The following workflow shows how EdbMails connects the source and target, loads selected mailboxes, applies mapping, and starts the migration. The supported data depends on the selected migration scenario and source environment.
Step 1: Install
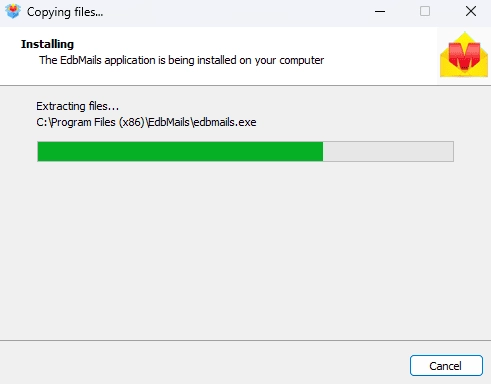
- Download the installer, run EdbMailsSetup.exe, follow the prompts. System requirements are on the docs site if you want to check first.
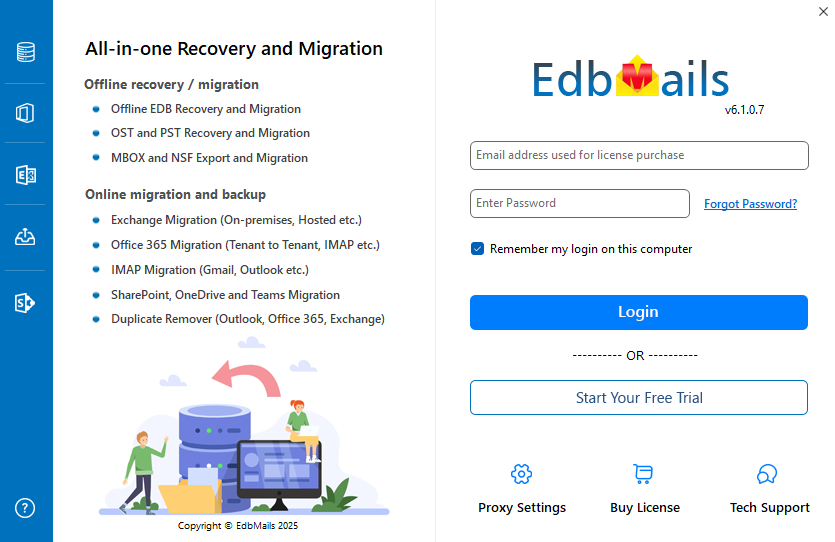
- After installation, select 'Login' if you already have an account, or 'Start Your Free Trial' to begin an evaluation.
- Download the installer, run EdbMailsSetup.exe, follow the prompts. System requirements are on the docs site if you want to check first.
Step 2: Pick the migration type
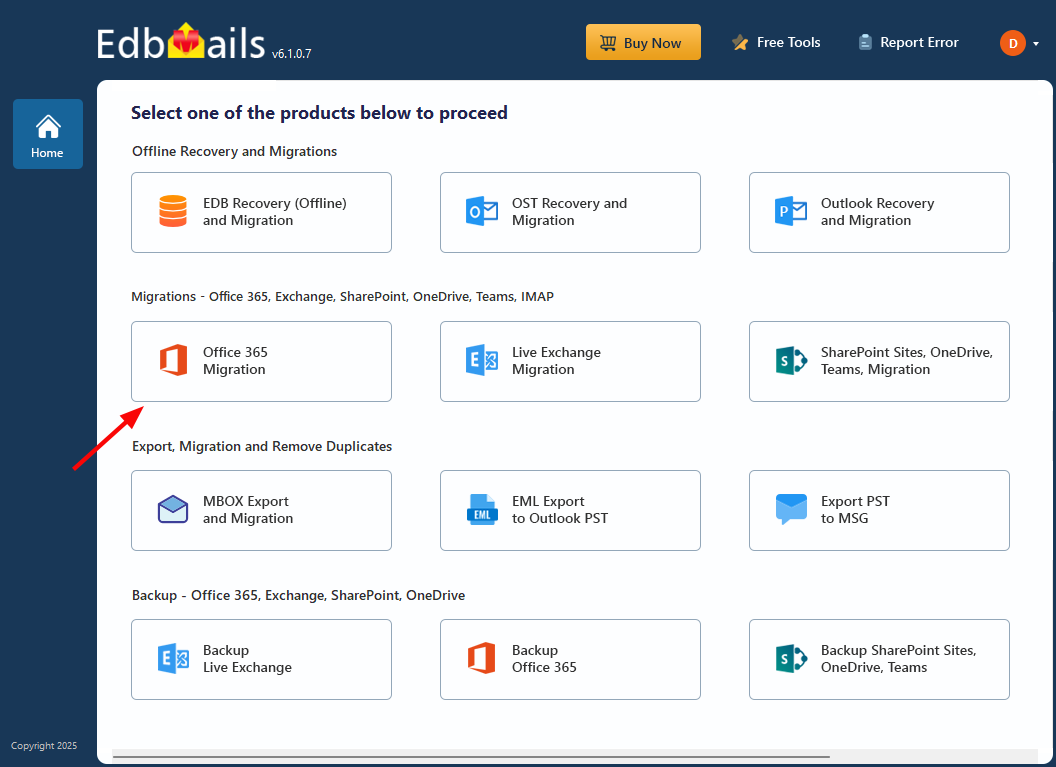
- Choose 'Office 365 Migration' from the main screen, then 'Office 365 to Office 365 Migration' from the sub-menu.
- Proceed with the default job, or click 'New Job' to modify the job name.
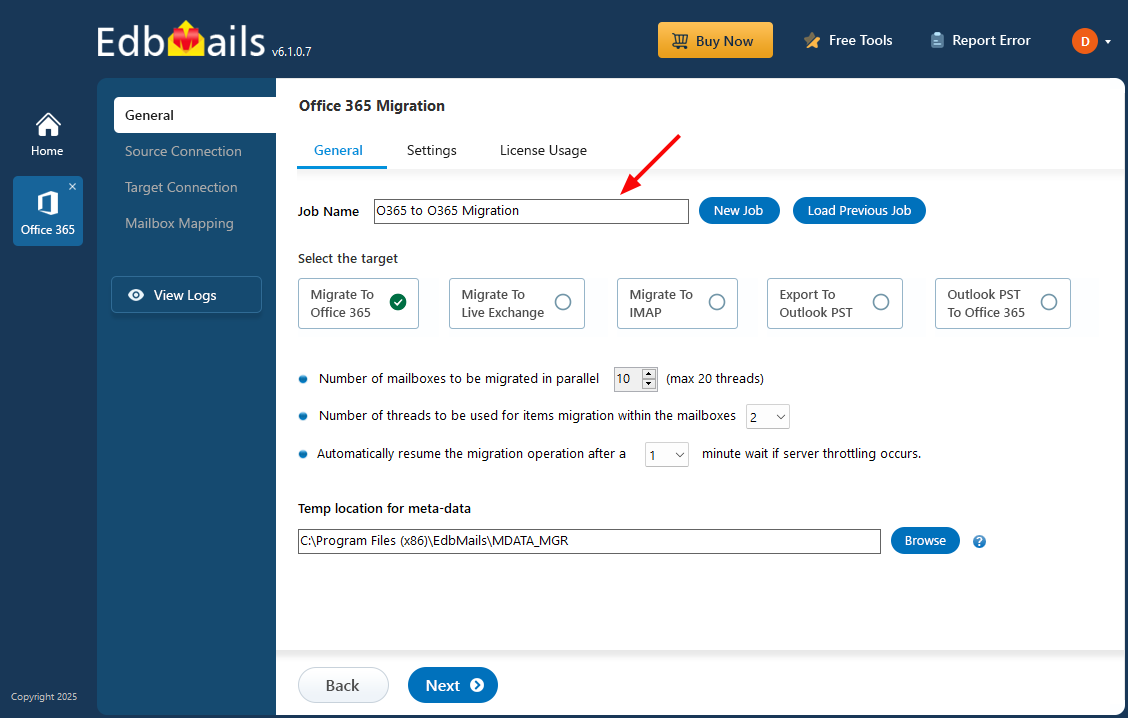
- Choose 'Office 365 Migration' from the main screen, then 'Office 365 to Office 365 Migration' from the sub-menu.
Step 3: Connect to the source
- Click 'Add New Connection'. For a previously-saved connection, pick it from the list and choose 'Connect to Existing'.
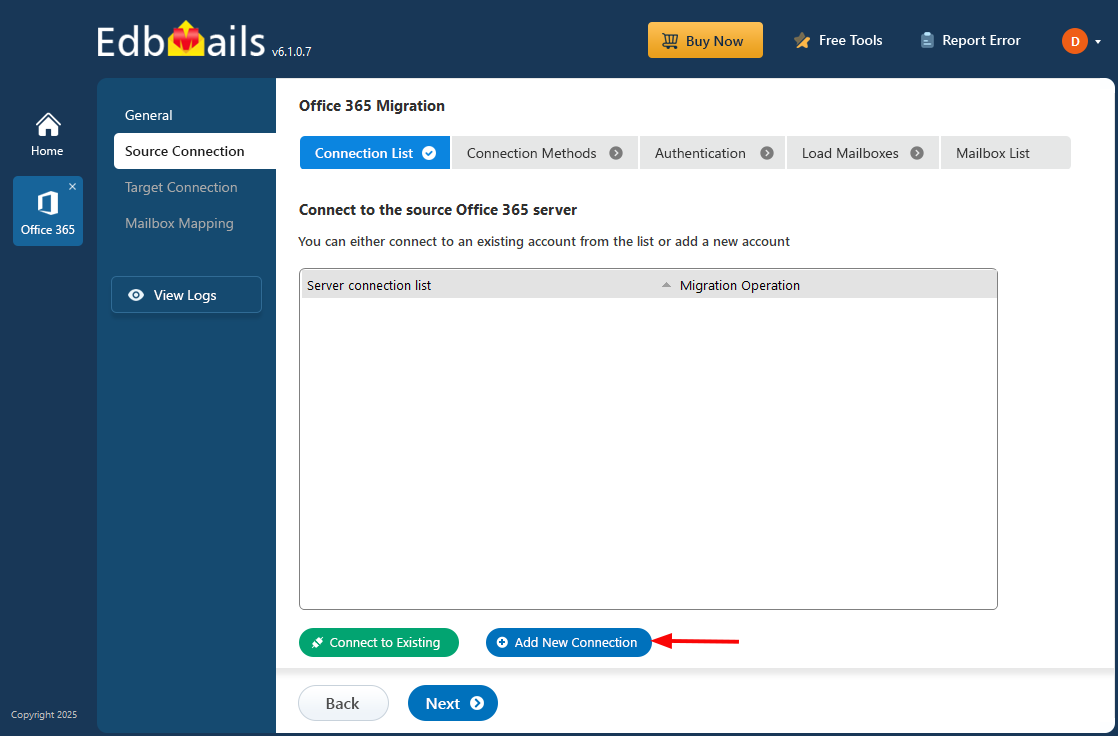
- Select your connection options, click 'Next', then pick an OAuth 2.0 modern authentication method. Reference here if you need it
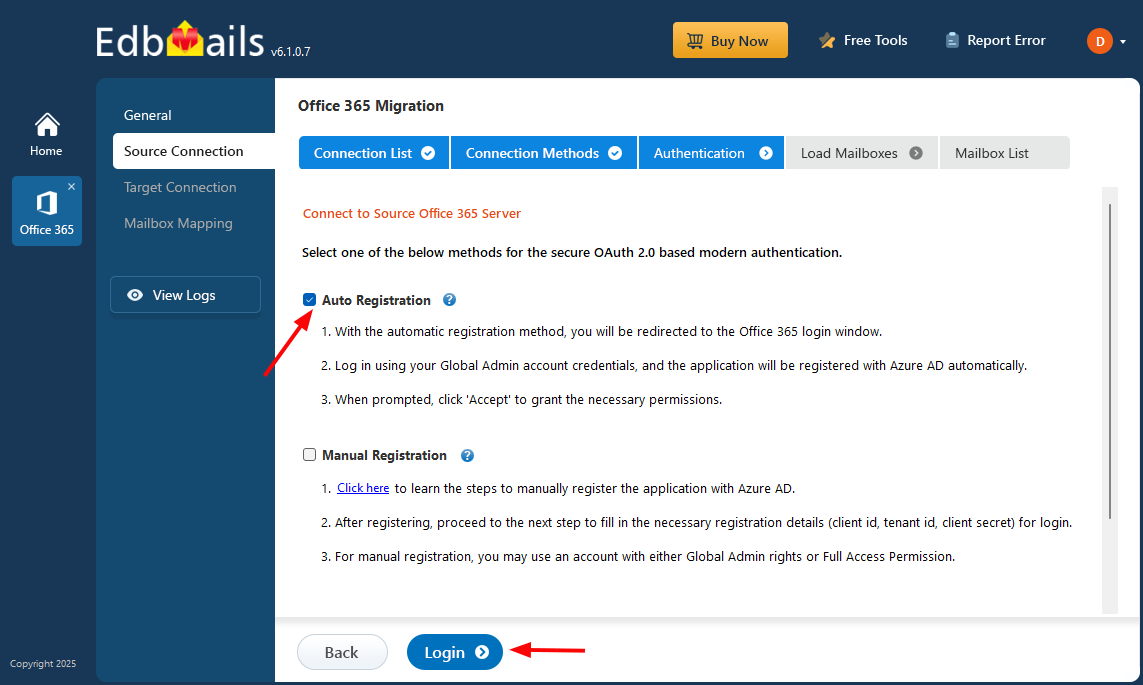
- Sign in on the Microsoft authentication page, then choose how to load the source mailboxes. EdbMails can load mailboxes automatically or from a CSV file. Use the CSV mailbox-loading method when you need to define a specific migration scope or supply a larger mailbox list. Review the loaded mailboxes before continuing.
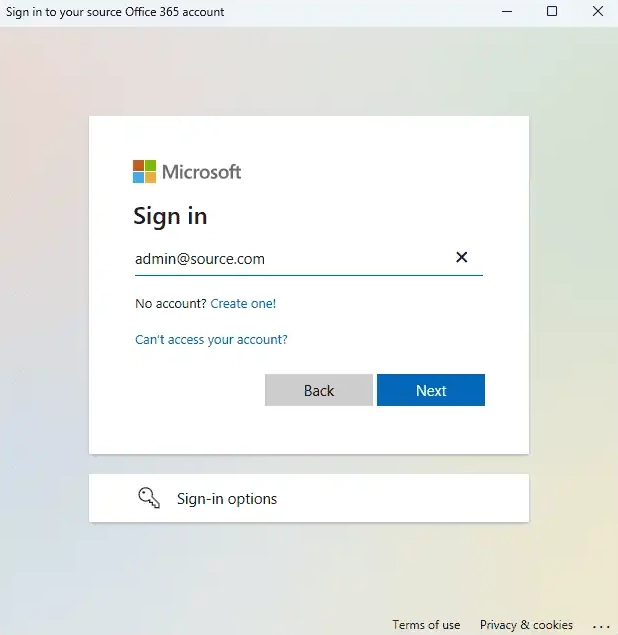
- Tick the mailboxes you want to migrate. Hit 'Next'.
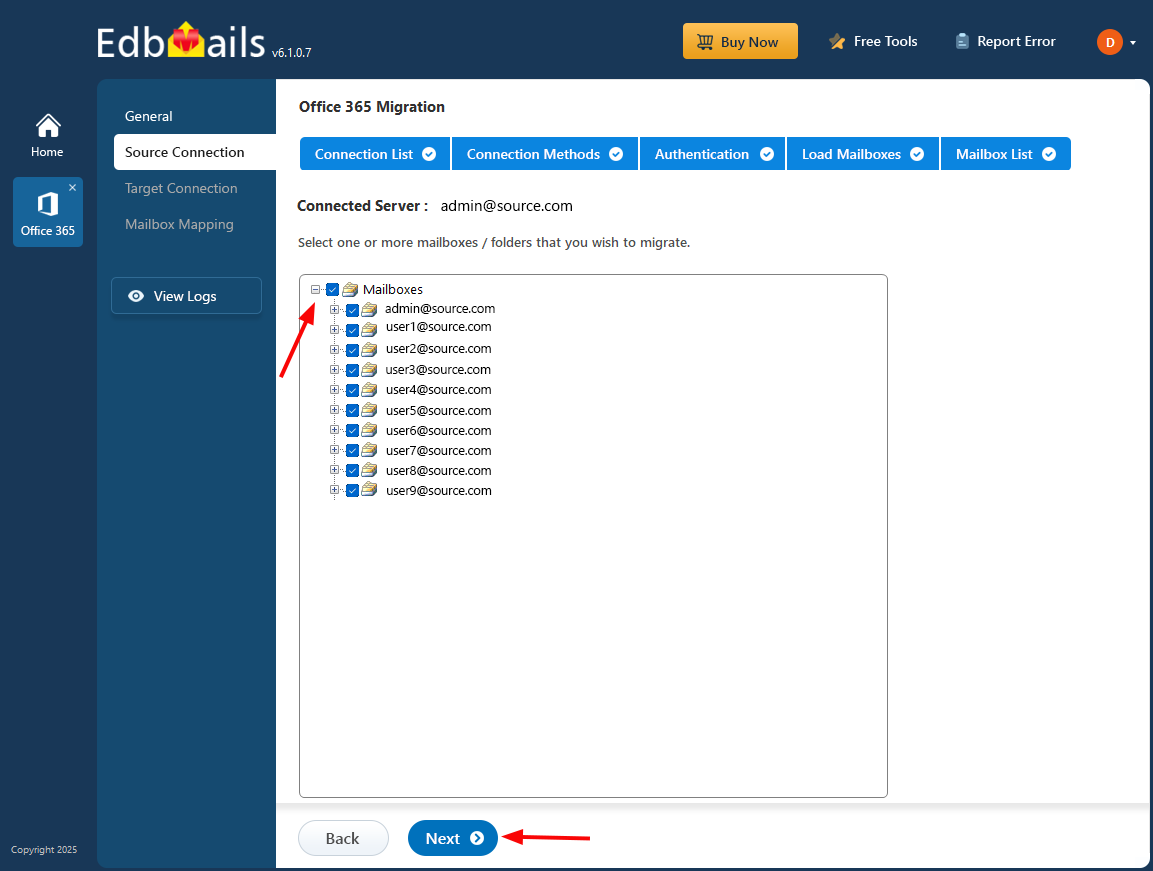
- Click 'Add New Connection'. For a previously-saved connection, pick it from the list and choose 'Connect to Existing'.
Step 4: Connect to the target
- Same pattern as the source side. 'Add New Connection' for a fresh setup, 'Connect to Existing' to reuse one.
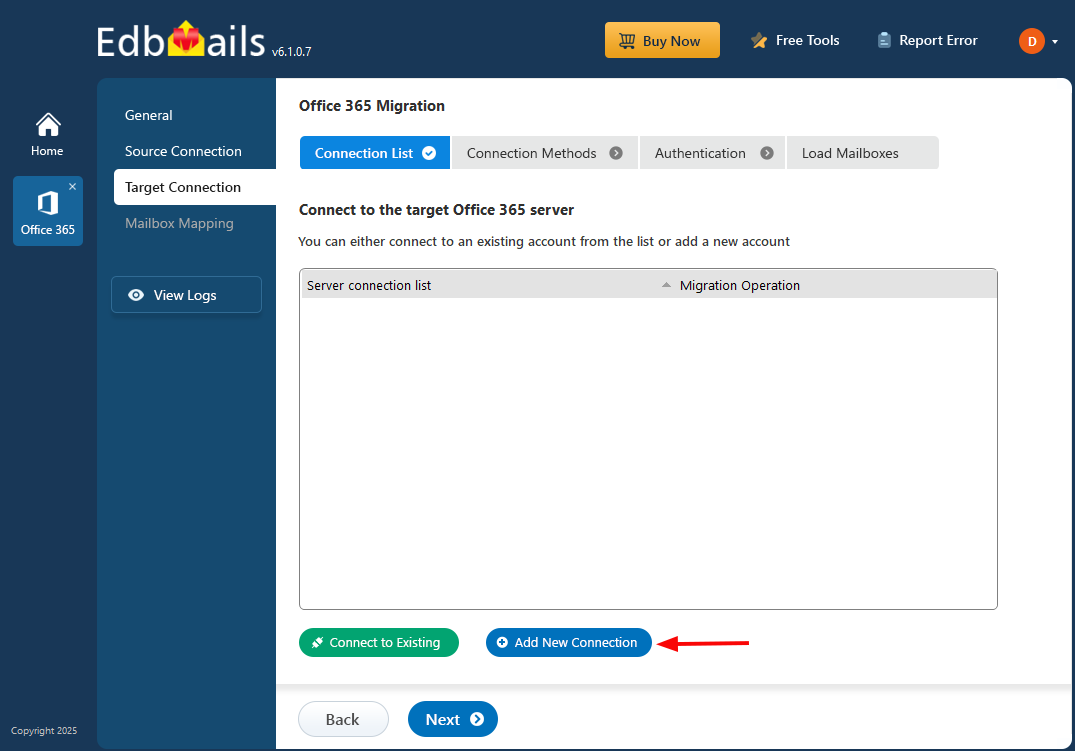
- Select the connection options and authentication method, then sign in to Microsoft. Load the target mailboxes automatically or provide a CSV list, depending on the migration scope. Confirm that every selected source mailbox has an available target before mapping.
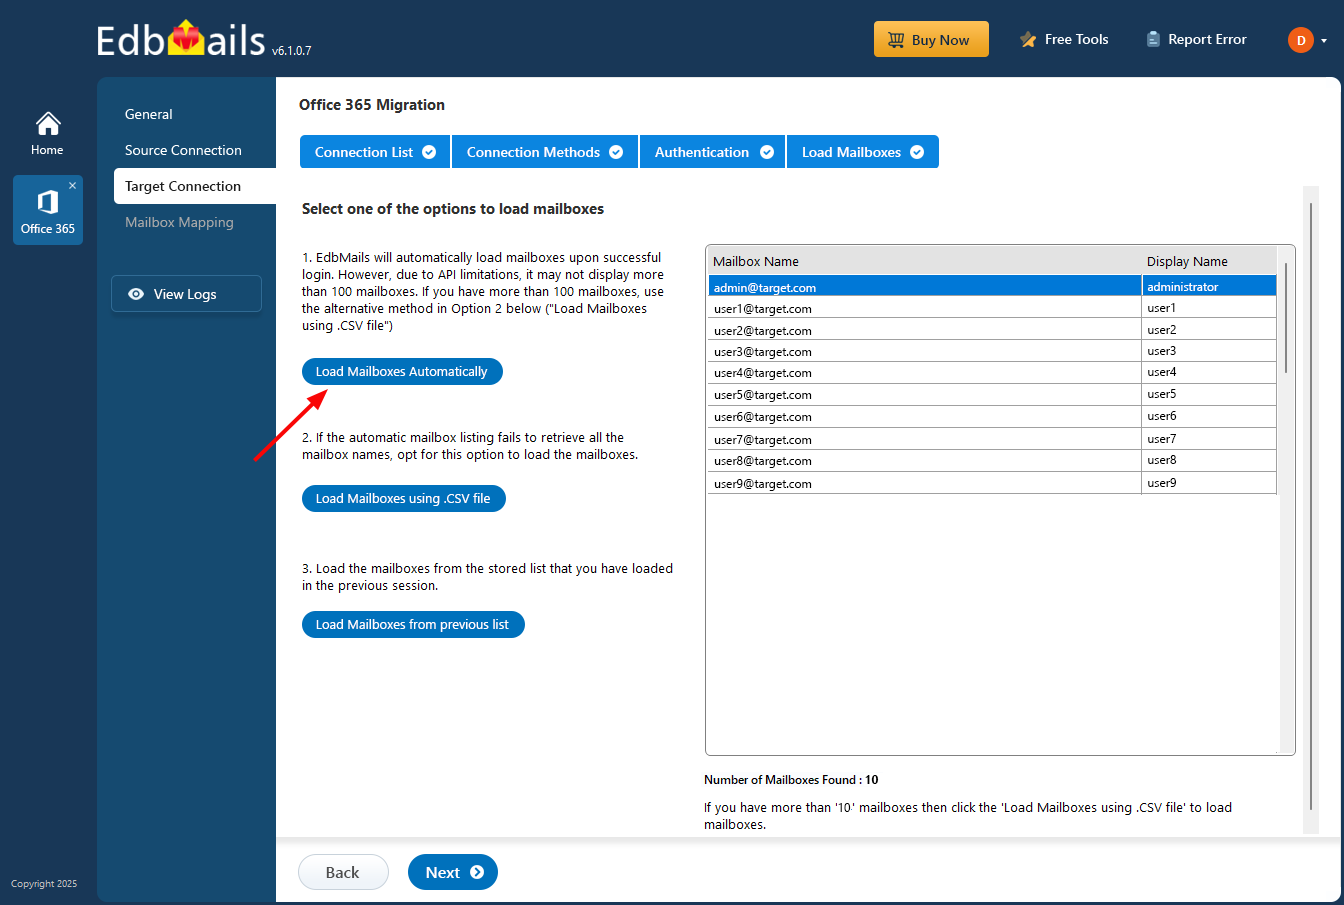
- Same pattern as the source side. 'Add New Connection' for a fresh setup, 'Connect to Existing' to reuse one.
Step 5: Map source to target
- Pick a mapping option. EdbMails can automatically match source and target mailboxes using available mailbox attributes such as display name, first/last name, and email address. Review the mapping before starting the migration.
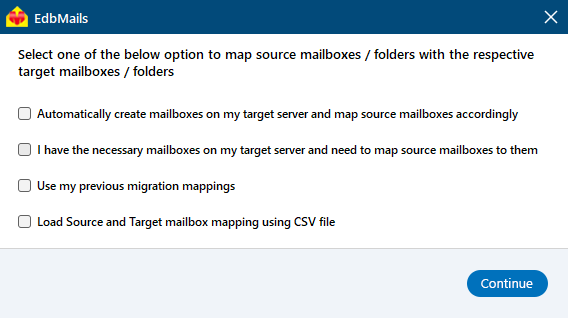
- Override the automatic mapping manually wherever you need to. Common cases: people who changed their last name between source and target, mailbox consolidation where two source mailboxes map to one target, or test mailboxes you want to point somewhere specific.
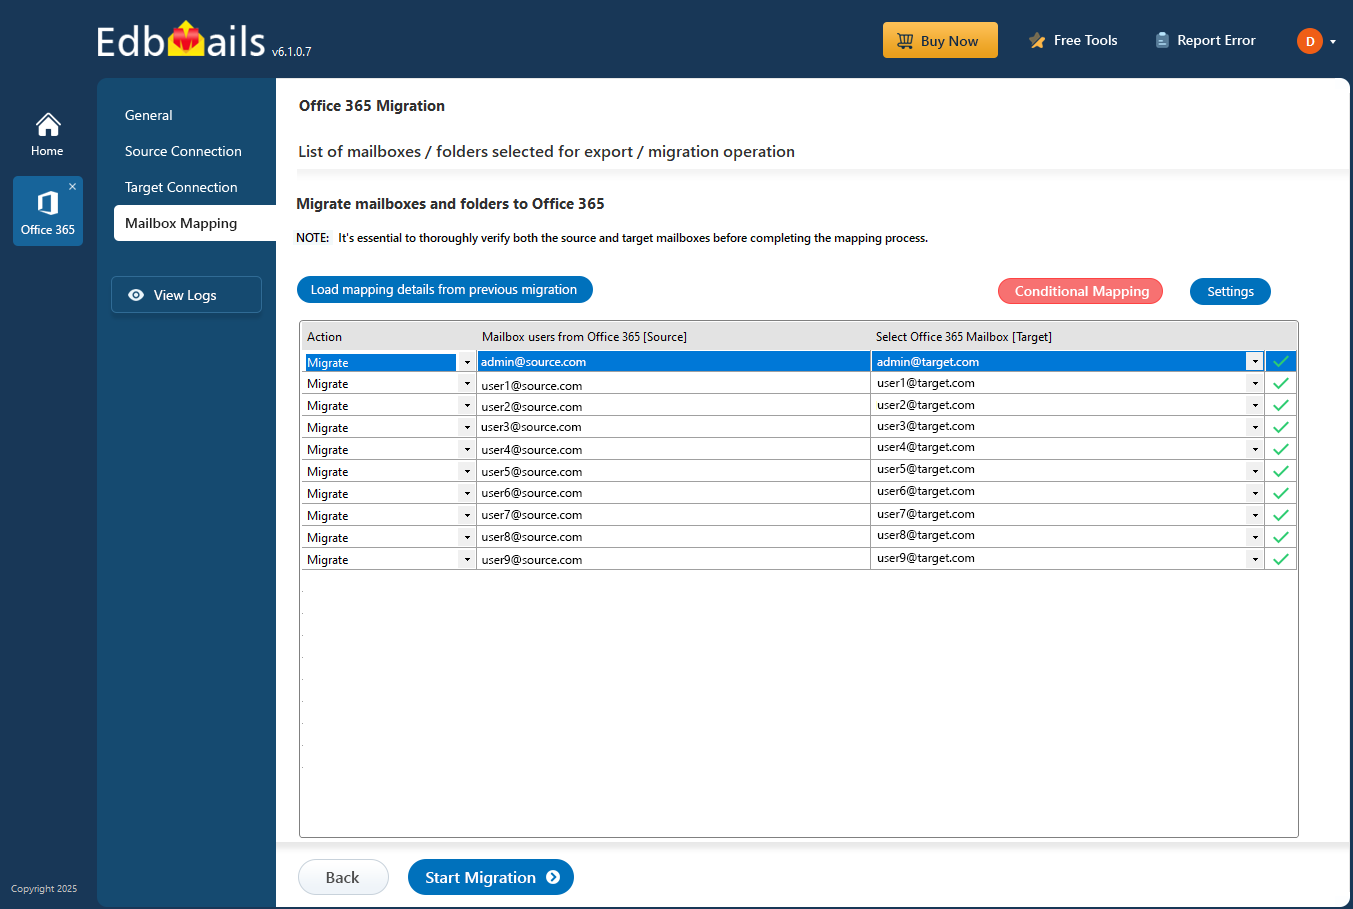
- Pick a mapping option. EdbMails can automatically match source and target mailboxes using available mailbox attributes such as display name, first/last name, and email address. Review the mapping before starting the migration.
Step 6: Start the production run
- Select 'Start Migration' after verifying the selected mailboxes, mapping, and migration settings. Monitor the job until processing is complete.
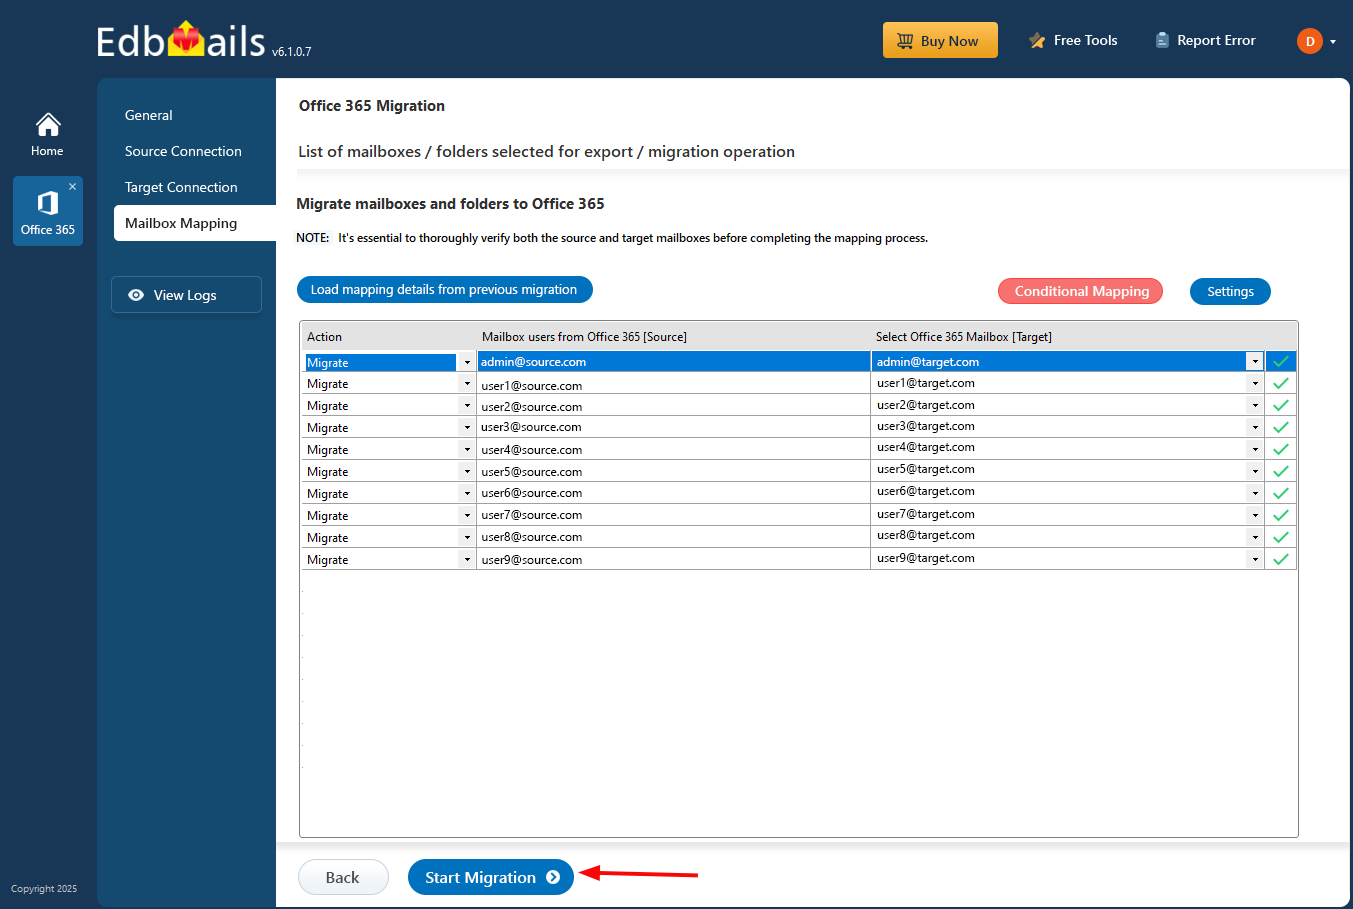
- Select 'View Logs' to review the migration report, including completed, skipped, and failed items that may require attention. If the migration is paused, resume it from the same computer and verify the final status before cutover.
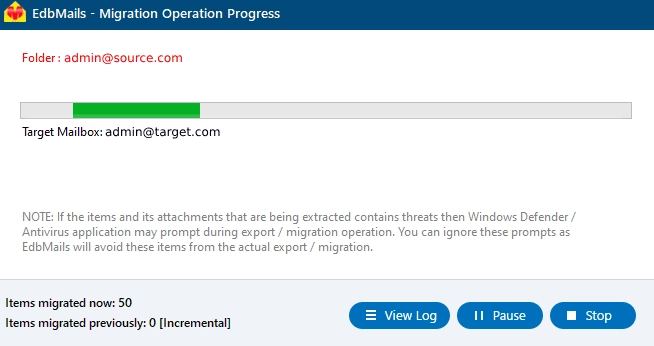
- Select 'Start Migration' after verifying the selected mailboxes, mapping, and migration settings. Monitor the job until processing is complete.
Office 365 Post-migration Activities
A completed migration job is only one project milestone. Validate the target environment, complete the cutover tasks, and confirm user access before retiring the source.
- MX records and Autodiscover
Add your domain to Office 365 if you haven't already. Then update the MX records so new mail starts routing to the target tenant. Autodiscover needs configuring too — otherwise Outlook won't know how to find the migrated mailboxes.
- Run a final delta sync
Between the time the main migration finished and the MX cutover, new mail kept arriving in the source tenant. Run one more incremental migration pass after the MX switchover to pick up anything that landed in the gap. EdbMails uses subsequent migration passes to process eligible items that were not migrated in the earlier pass, according to the selected migration settings.
- Clear Outlook's Auto-Complete list
Outlook Auto-Complete entries can retain references associated with the previous environment. If users experience addressing or delivery issues after cutover, review and clear the affected entries. See Microsoft's guidance for managing Auto-Complete.
- Recreate Outlook profiles
- Make sure everyone's on a current version of Outlook. Old versions can have authentication issues against the new tenant.
- Rebuild Outlook profiles for any user reporting connection problems.
- Set the new server details — address, username, password.
- Send a test email both ways to confirm everything's flowing.
- Reapply shared mailbox permissions
Validate shared mailbox access and delegation on the target, including Full Access, Send As, Send on Behalf, and folder-level permissions where applicable. Reapply permissions that are not present and test access with representative users.
- Retire the old subscription
Once you've verified the migration succeeded and nobody's still working out of the old tenant, cancel the old Office 365 subscription and remove any domains that aren't needed anymore. Retire the source only after the migrated data, user access, mail flow, required permissions, and target configuration have been validated.
- MX records and Autodiscover
How EdbMails Supports the Migration Process
EdbMails provides a guided interface for connecting supported source and target environments, selecting mailboxes, reviewing mapping, applying filters, running migration jobs, and checking reports. For supported scenarios, licensing, and complete product details, refer to the Office 365 Migration Tool page.
- GUI-based migration workflow — complete the supported migration steps without building a PowerShell-based data-migration process.
- OAuth 2.0 sign-in through Microsoft's own sign-in page — credentials never touch EdbMails servers.
- Incremental migration — after the initial migration, repeat the same source-to-target migration from the same computer to process eligible new or changed items according to the selected settings.
- Concurrent mailbox transfer — process multiple mailboxes concurrently according to the supported application configuration. Actual migration duration depends on data volume, network conditions, Microsoft 365 service behavior, and throttling.
- Business continuity during migration — users can continue working in the source environment during supported data-migration stages. Final domain, DNS, identity, Outlook, or other cutover changes may still require coordination.
Migration series
- Office 365 Migration Methods — choose the right approach
- Migration Checklist — pre-migration preparation list
- Migration Best Practices — what the top teams do differently
- Migration Challenges — common failure points and fixes
Frequently Asked Questions (FAQ)
How long does an Office 365 migration take?
Can I migrate between Office 365 tenants in different geographic regions?
Is there any downtime during the migration?
Can I migrate only some of the data, not everything?
Why should I run a pilot before the production migration?
How should I validate an Office 365 migration?