Migrate Shared mailbox to Microsoft 365
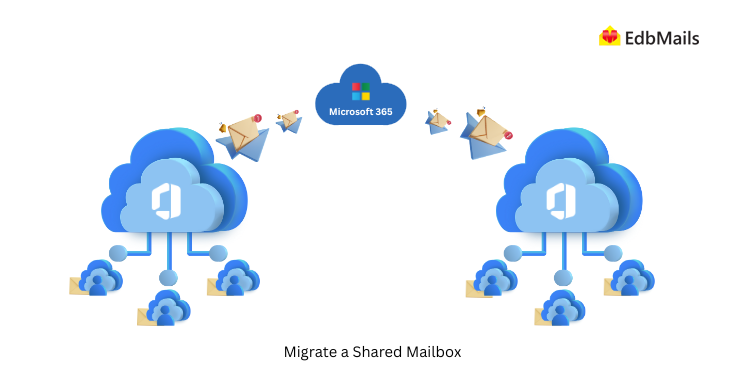
Shared mailboxes are a vital component for many organizations, allowing multiple users to access and manage emails, calendars, and contacts from a centralized mailbox. This functionality enhances team collaboration and streamlines communication processes. However, when it comes time to migrate these shared mailboxes to Microsoft 365, ensuring a seamless migration can be a challenging task.
This is where EdbMails Office 365 migration software comes into play. EdbMails offers a robust and user-friendly solution designed to simplify the Shared mailbox migration process. With its comprehensive features and step-by-step guidance, EdbMails ensures that your shared mailboxes are migrated efficiently.
EdbMails Office 365 migration software stands out due to its reliability, ease of use, and advanced capabilities. It supports the direct migration of shared mailboxes from Microsoft 365. The following section covers preparing Shared mailbox migration, migration steps, post migration tasks.
Why migrate Office 365 Shared mailbox to Microsoft 365?
- Many users want to change shared mailboxes in Office 365 to user mailboxes for better communication reliability. Shared mailboxes have limited features, which can lead to delays in responding to emails.
- Users also switch to user mailboxes for more storage space. Regular Office 365 mailboxes can store up to 1.5 TB with in-place archive, compared to 50 GB for shared mailboxes without licenses.
- Some users prefer user mailboxes for full accessibility. Moving from shared to user mailboxes provides access to emails, contacts, calendars, tasks, notes, improved security, and more mailbox space.
- Enhanced security is another reason. User mailboxes allow for individual security and retention policies, offering better tracking of user activities and protection against unauthorized access.
Preparing for the Shared mailbox migration
Before you begin the migration process, there are several things you need to do to prepare your environment. These steps include:
- Creating a Shared Mailbox in Office 365
The first step in the migration is to create a shared mailbox in the Office 365 Admin Center.
- To do this, log in to the Office 365 Admin Center, click on ‘Groups’ in the left-hand navigation menu, and then click on ‘Shared’ in the top navigation menu.
- From here, click ‘Add a shared mailbox’ and create a new shared mailbox by clicking on the ‘+’ button and following the on-screen prompts.
- Granting Permissions to the Shared Mailbox
After you have created the shared mailbox, you need to grant permissions to the users who will be accessing it.
- To do this, navigate to the ‘Permissions’ tab in the shared mailbox settings and add the users who need access.
- You can grant permissions at various levels, including ‘Full Access,’‘Send As,’ and ‘Send on Behalf.’
- Creating a Shared Mailbox in Office 365
Steps to migrate Shared mailbox to Office 365 using EdbMails
With EdbMails, you can directly migrate Office 365 Shared mailbox to Shared mailbox or primary mailbox.Step 1: Download Install EdbMails Office 365 migration tool
- Download and install the EdbMails application on your computer.
- Launch the application and ‘Login’ with your credentials or ‘Start Your Free Trial’ to access the application.
Step 2: Choose Office 365 to Office 365 migration option
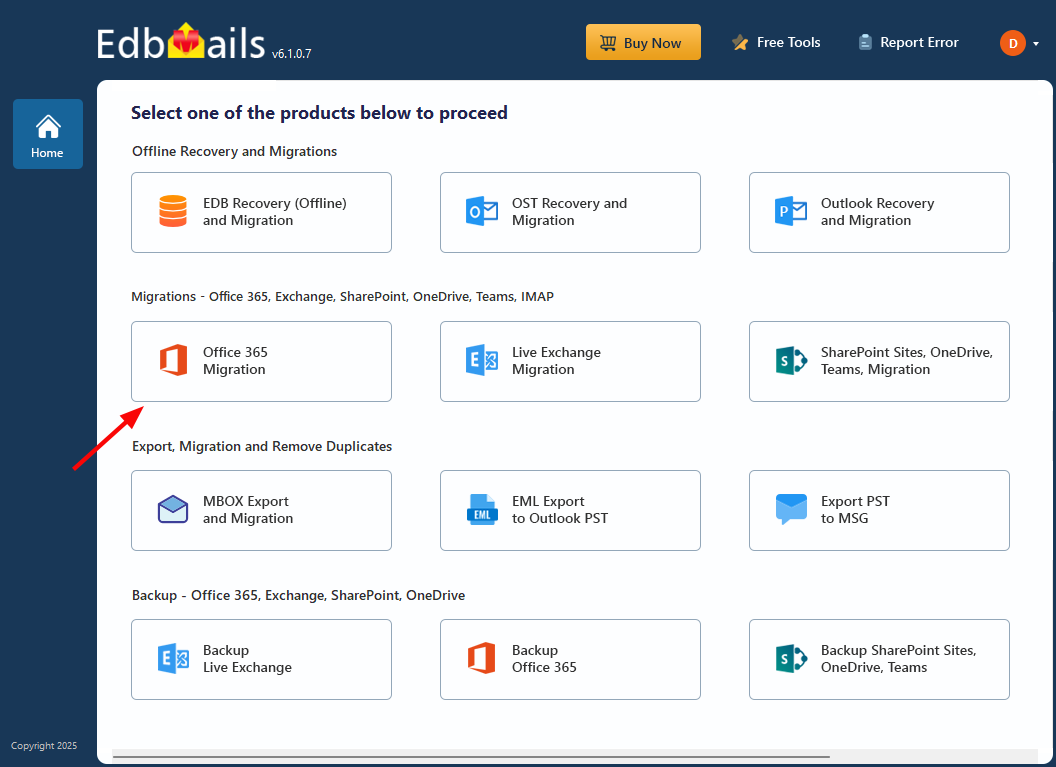
- Select the 'Office 365 Migration' option from the list of products
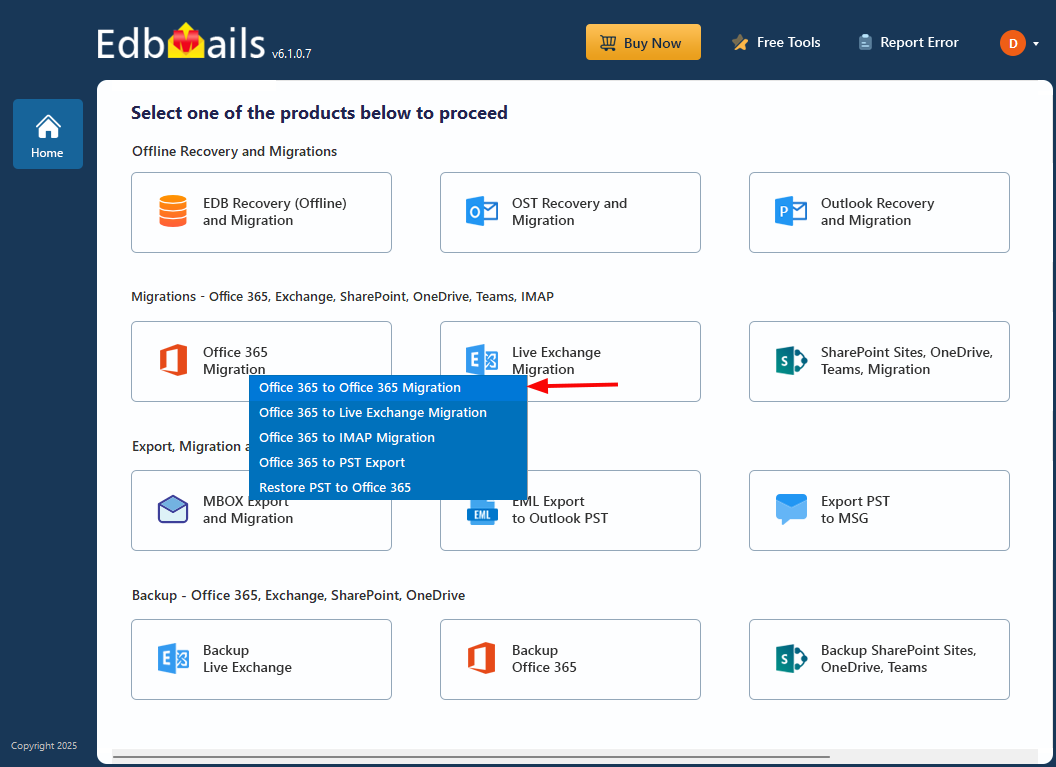
- Choose the 'Office 365 to Office 365 Migration’ option
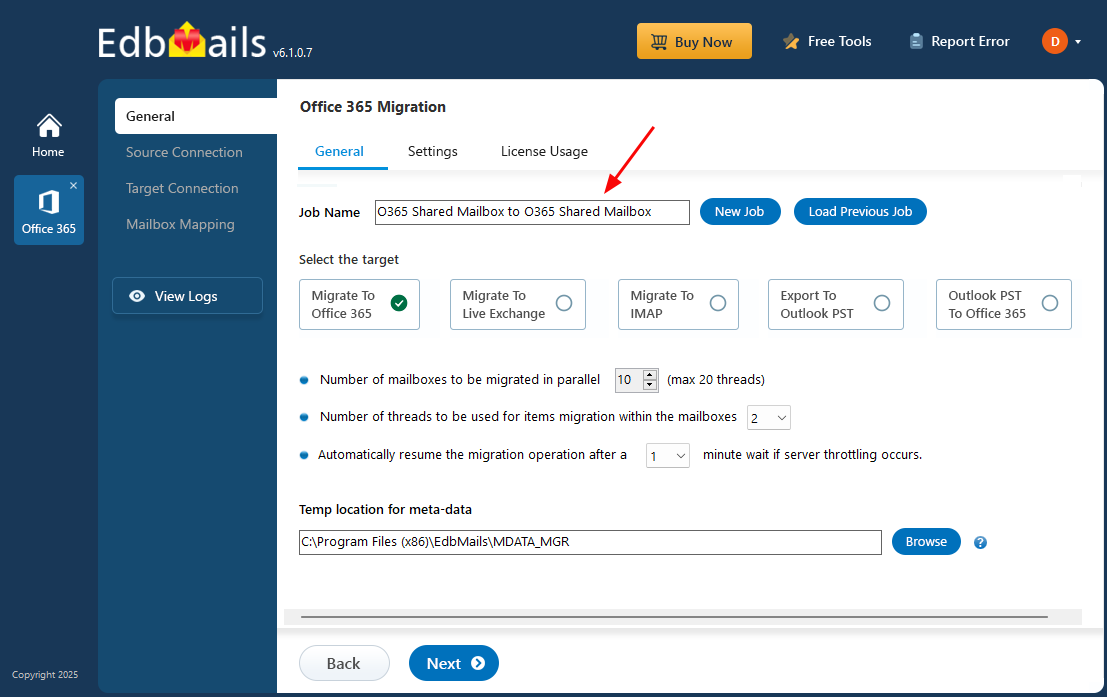
- Keep the default job name or click ‘New Job’ to specify a custom name.
Step 3: Connect to source Office 365 server
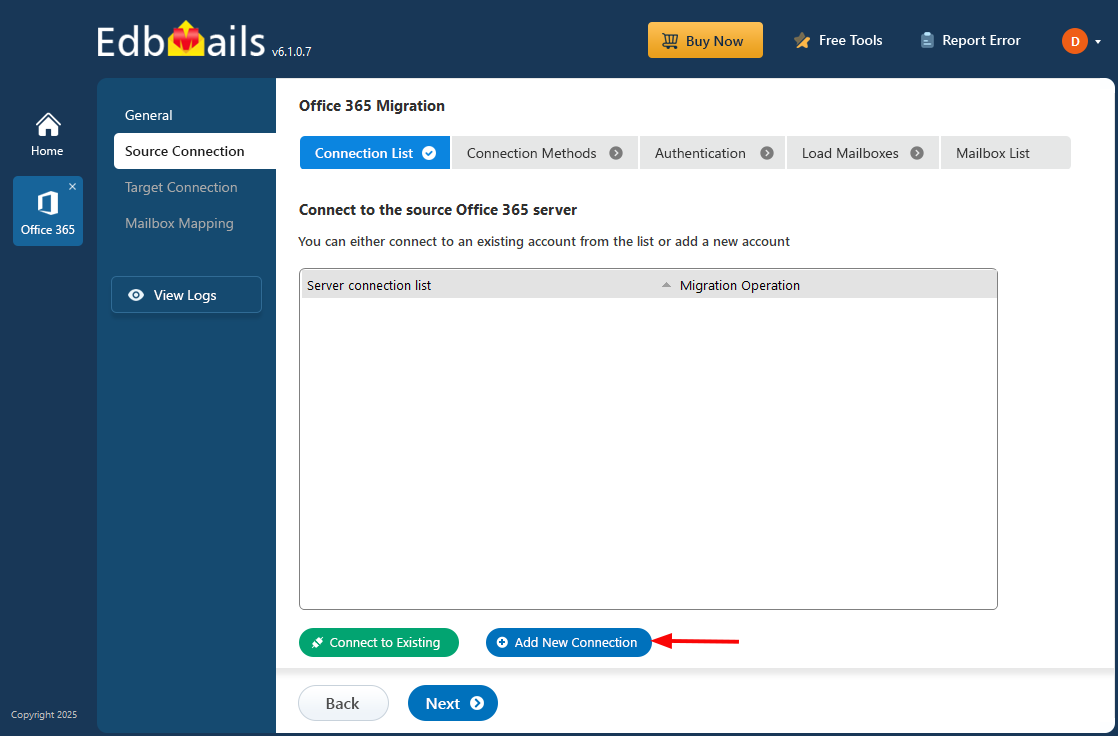
- Click the ‘Add New Connection’ button to establish a fresh connection with the source Office 365 tenant.
- To reuse an existing connection: Simply select the desired entry from the connection list and click ‘Connect to Existing’ to continue.
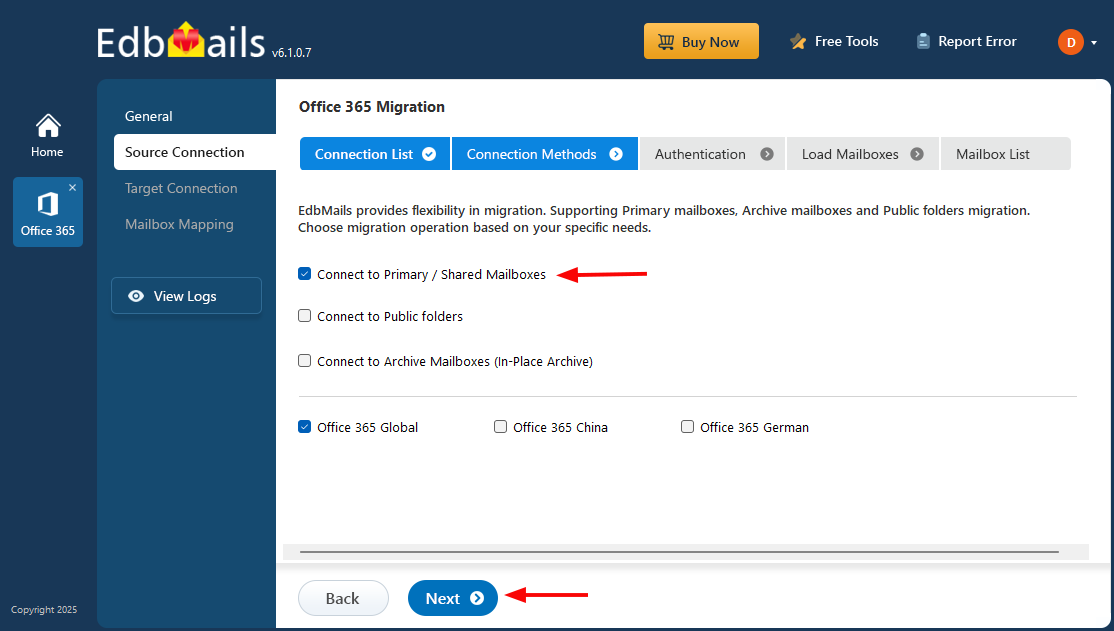
- Choose the ‘Connect to Primary / Shared Mailboxes’ connection option and click the ‘Next’ button.
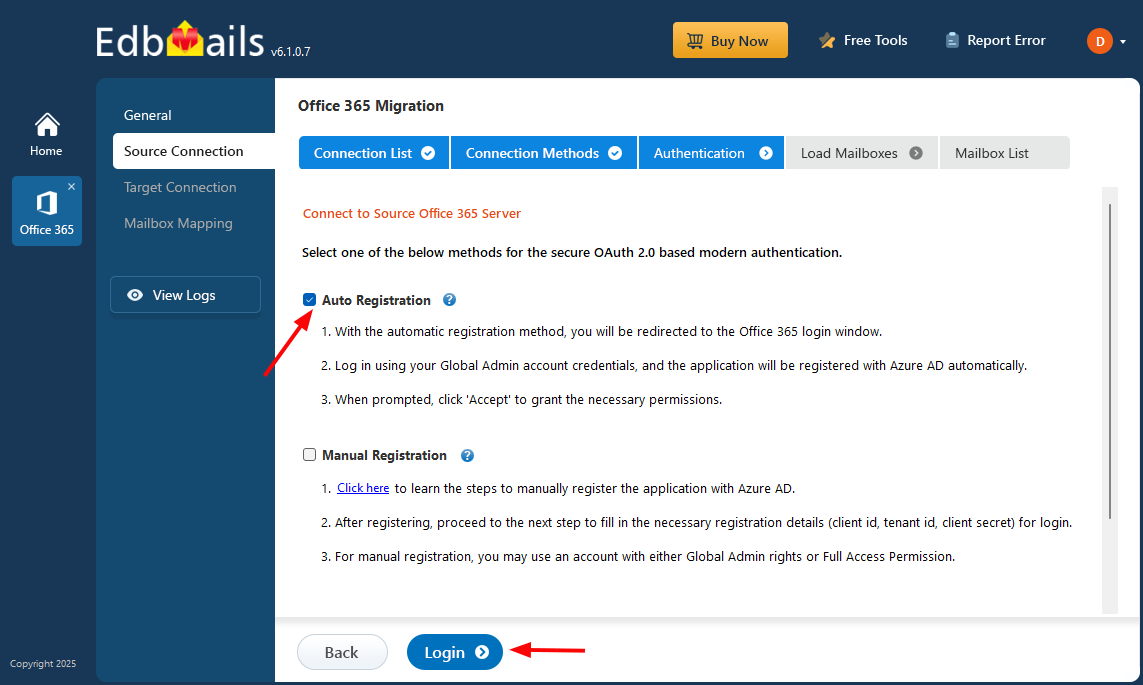
- Choose a secure OAuth 2.0-based modern authentication method from the given options, then click ‘Login’ to proceed with authorization.
- Authenticate on Microsoft sign in page
Connect to Office 365 server using secure modern authentication
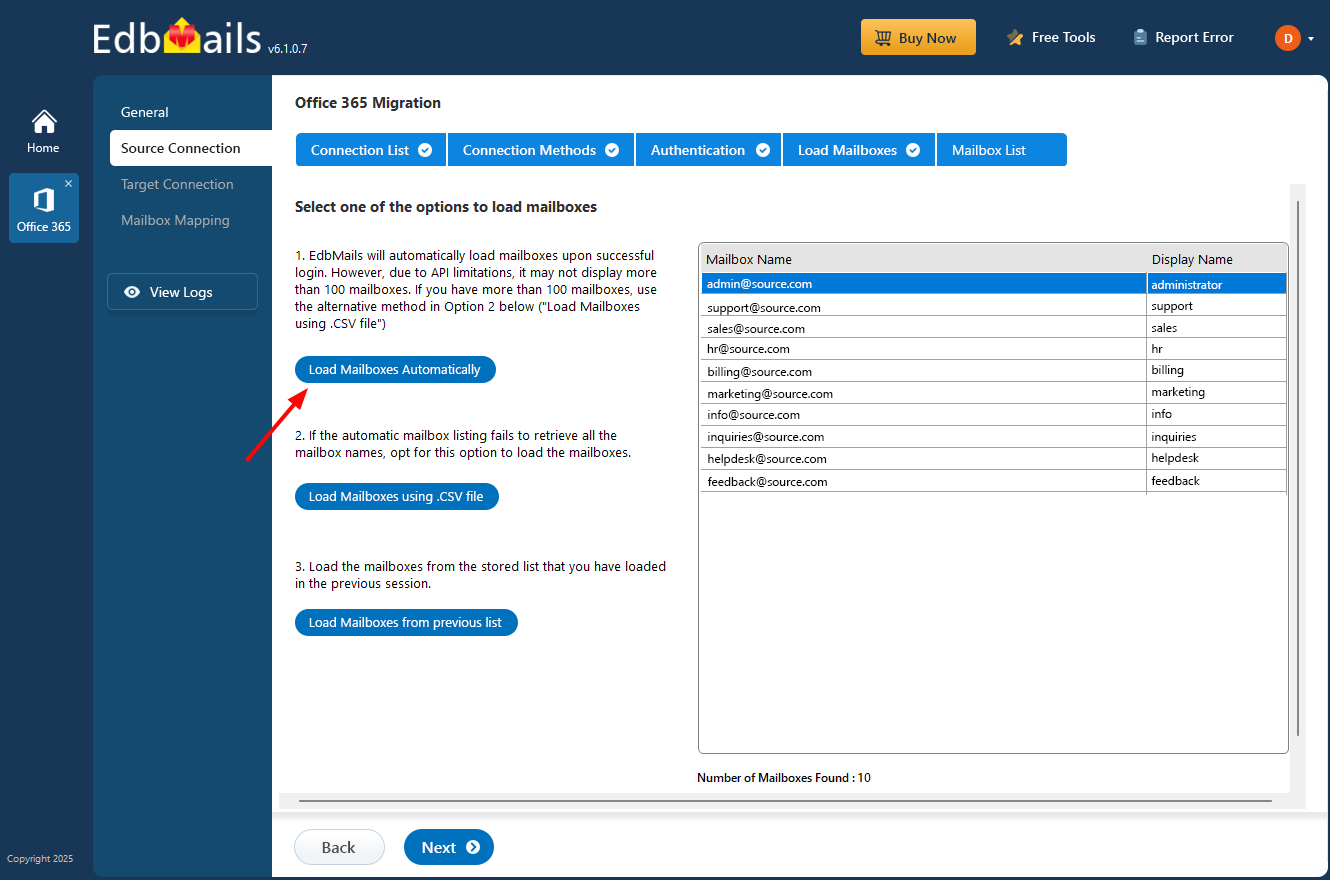
- Choose one of the available methods to load mailboxes. If a shared mailbox doesn't appear under automatic loading—due to a limitation in Microsoft's API—you can manually add it using the CSV upload method.
Step 4: Select source Office 365 Shared mailboxes
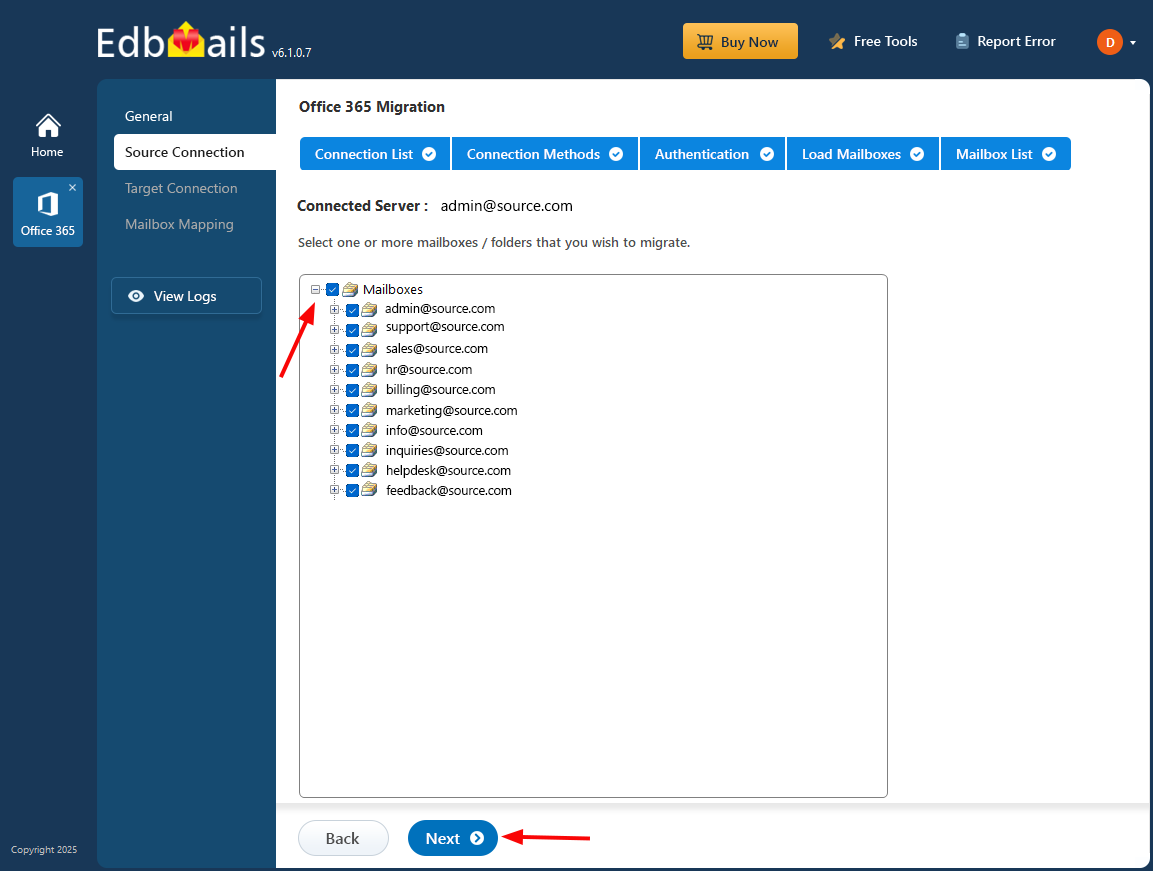
- EdbMails lists all the shared mailboxes and their associated accounts from your Office 365 tenant.
- Select the shared mailboxes you want to migrate, then click ‘Next’ to continue.
Step 5: Connect to target Office 365 tenant
- To get started, click ‘Add New Connection’ to set up a fresh connection with your target Office 365 account.
- Already have one? Just pick it from the list and click ‘Connect to Existing’.
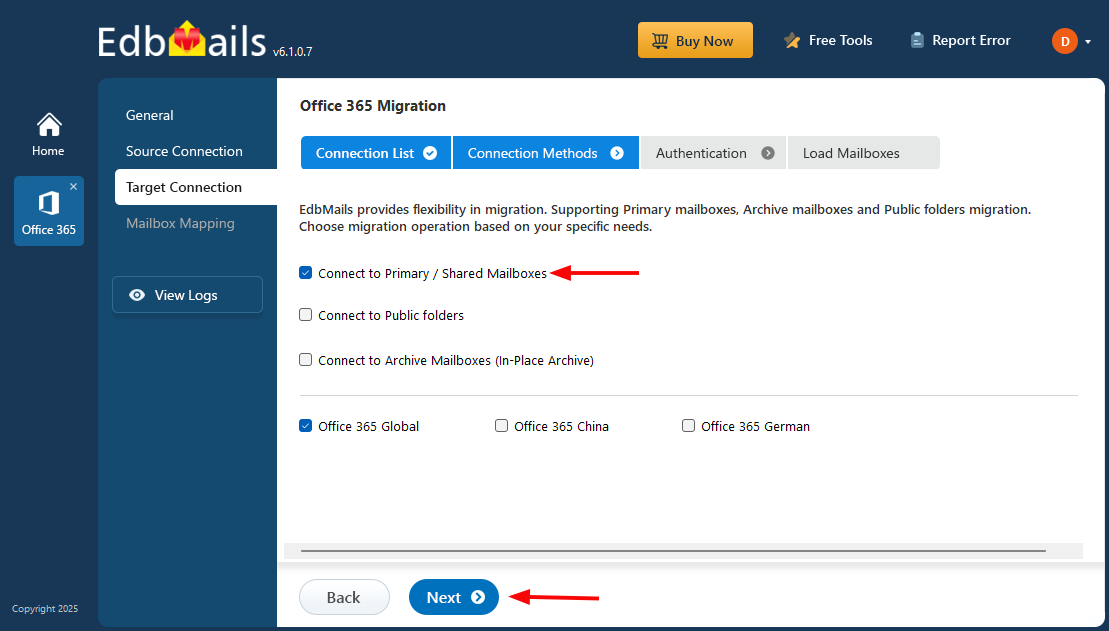
- Then, select ‘Connect to Primary/Shared Mailboxes’ and click ‘Next’ to move forward with the migration.
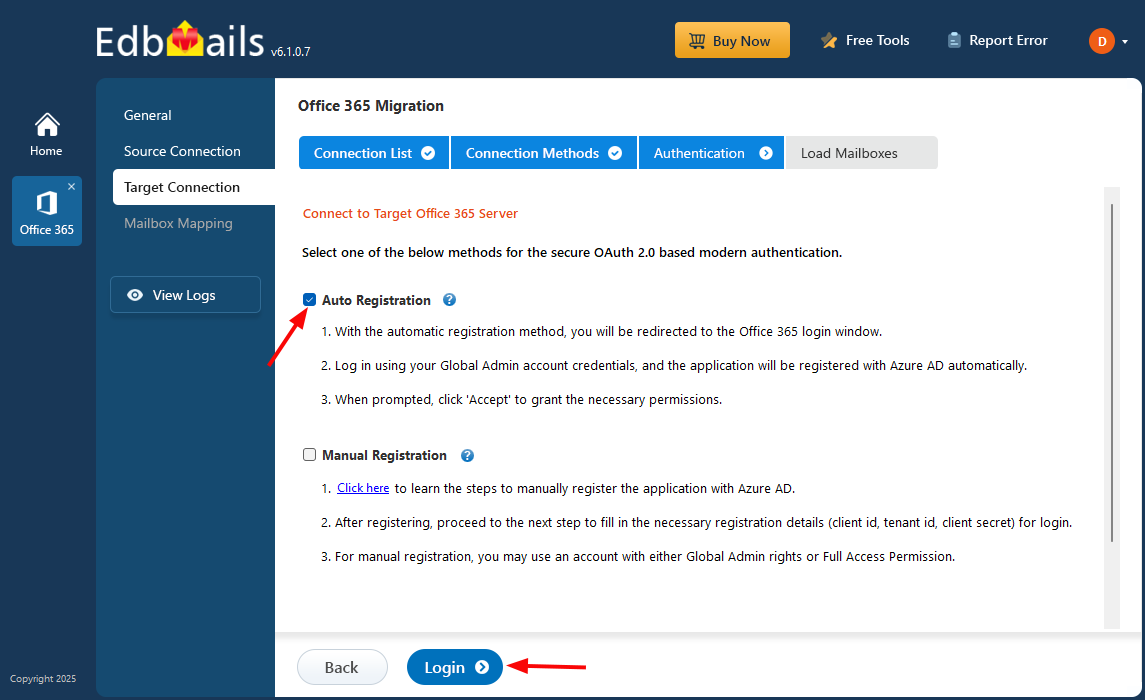
- Choose a secure OAuth 2.0 authentication method to connect to the target Office 365 server, then click ‘Login’ to proceed.
- Authenticate target Microsoft sign-in page
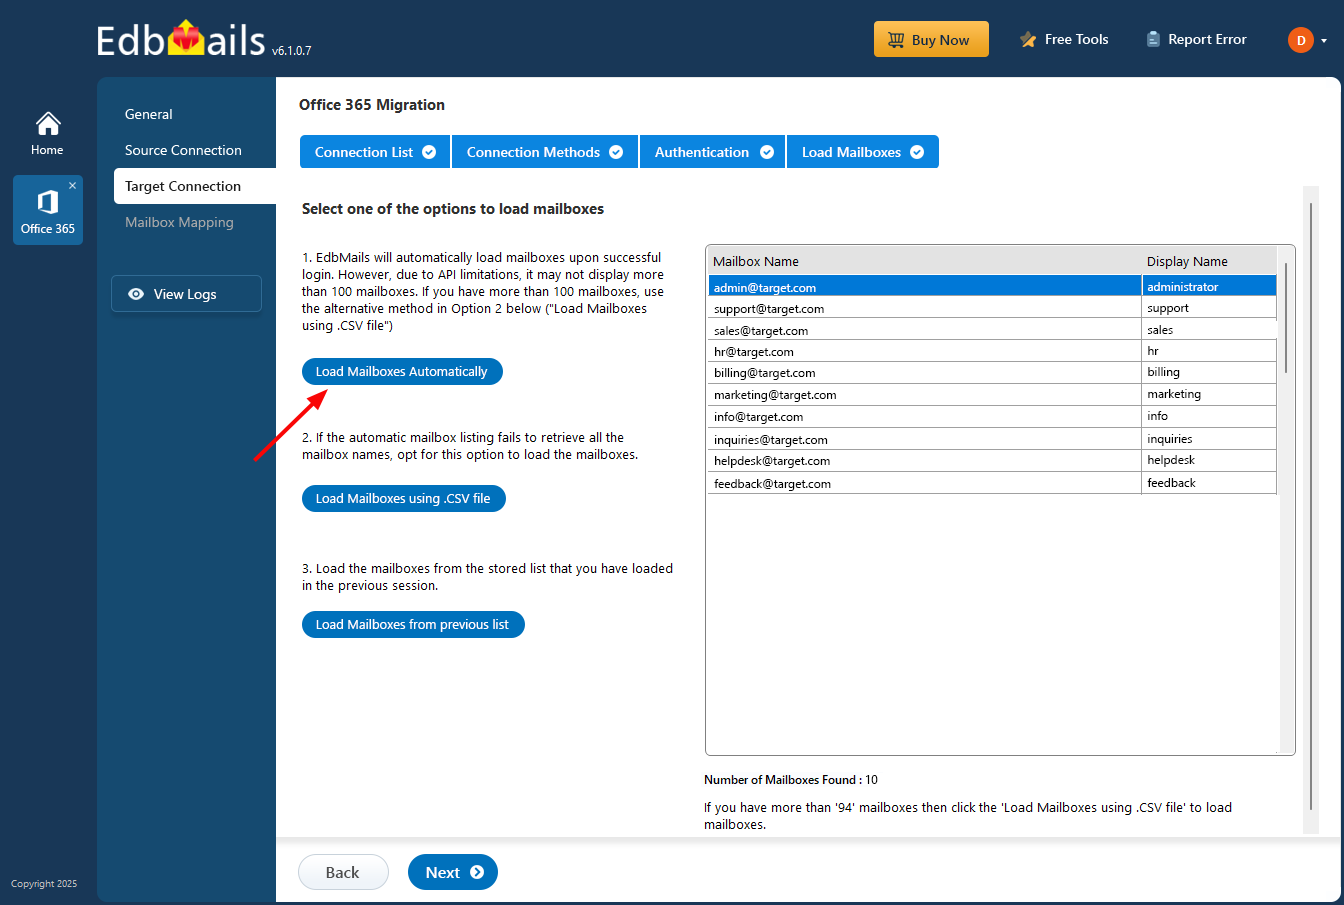
- EdbMails loads mailboxes automatically and also supports CSV import for easy mailbox setup in Office 365.
Step 6: Maps the source and target servers
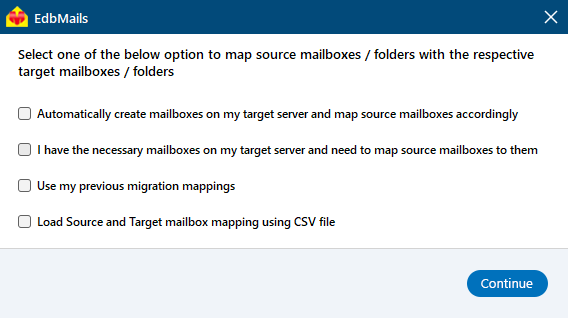
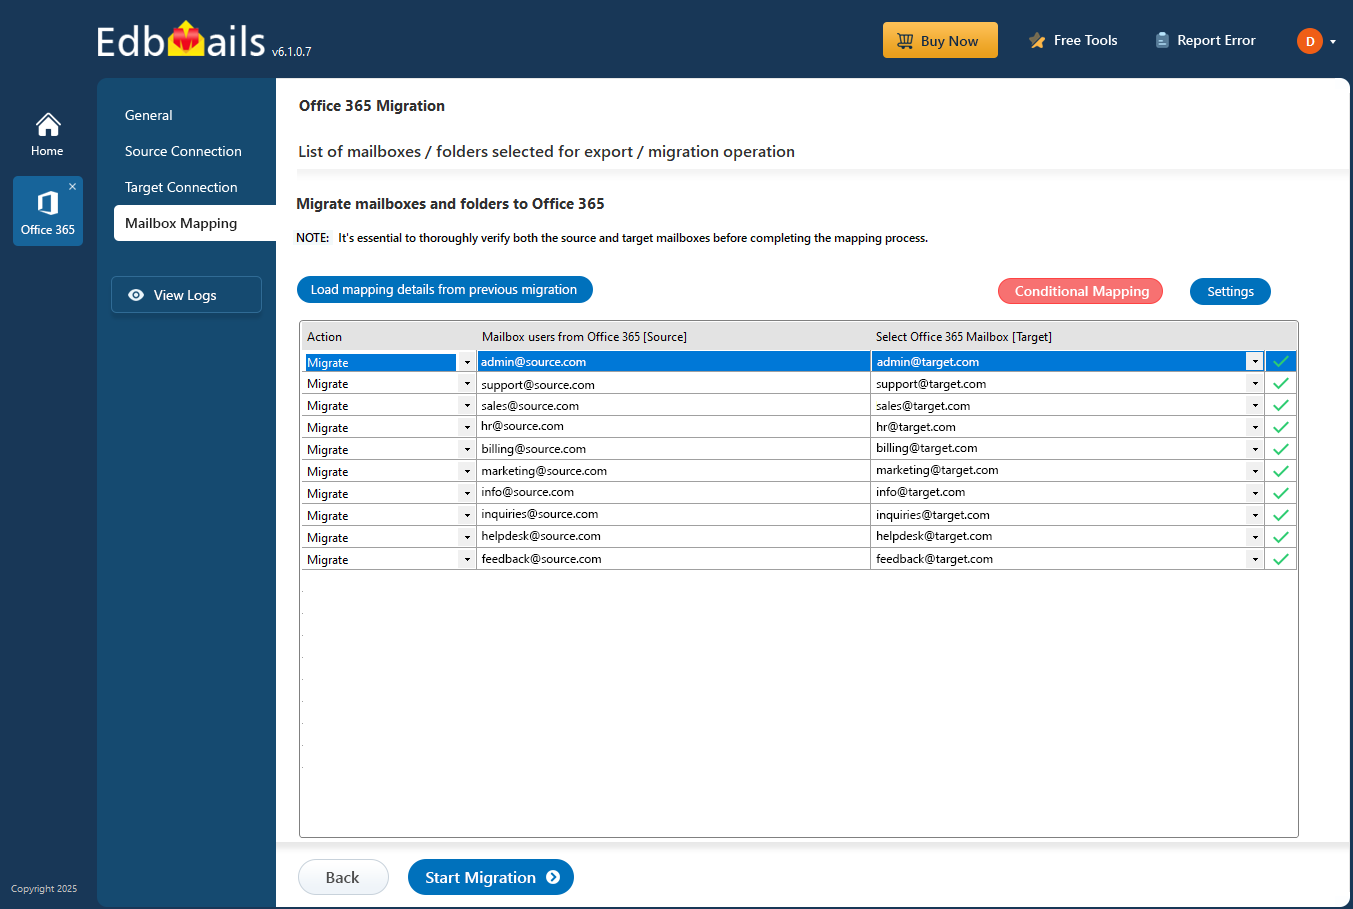
- Choose the mailbox mapping option that fits your needs.
- EdbMails automatically maps shared mailboxes between your source and target Office 365 accounts. If needed, you also have the option to map them manually.
Step 7: Start the Office 365 Shared mailbox migration
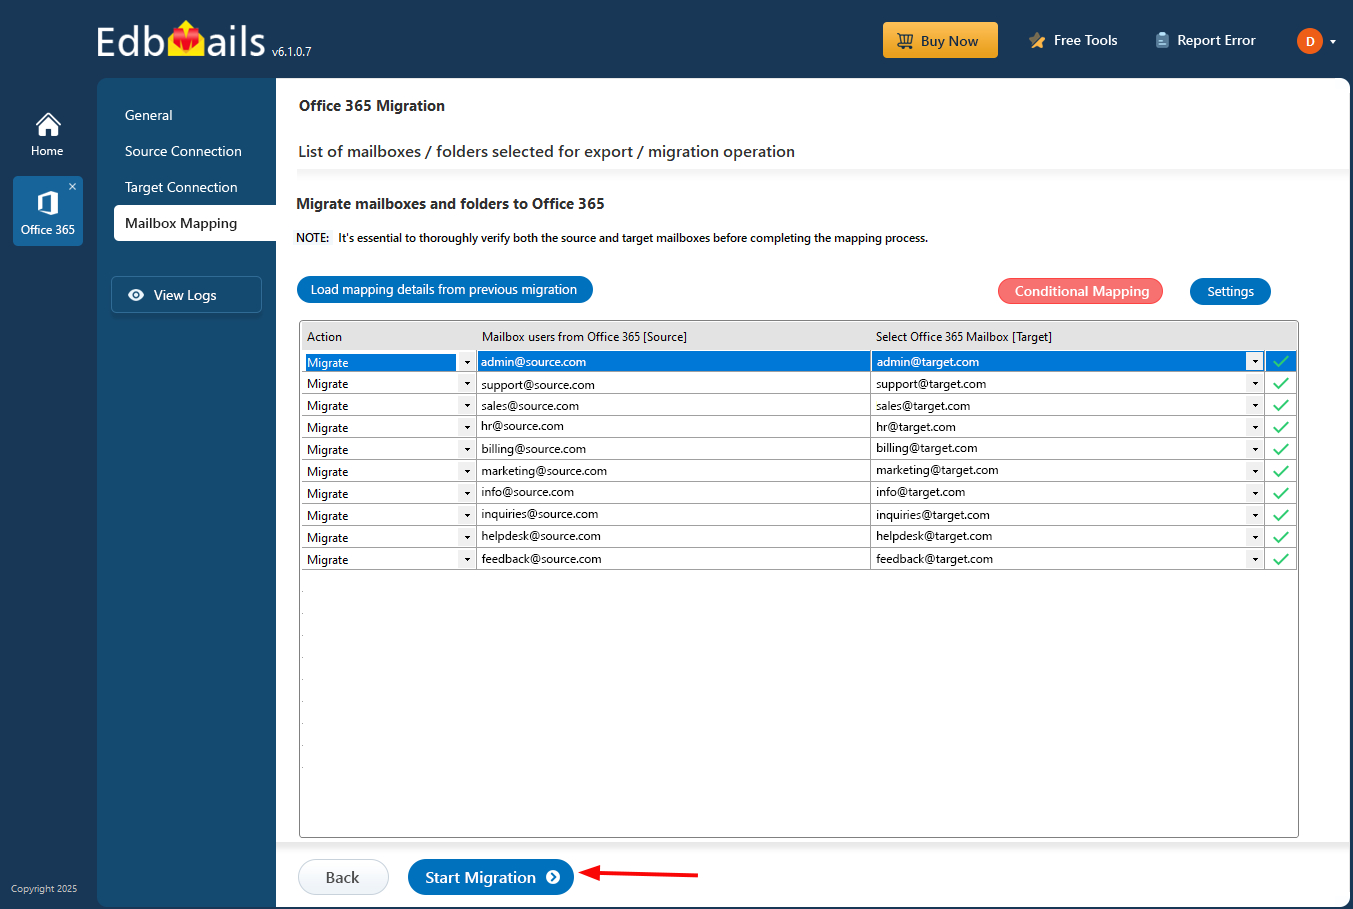
- After mapping the mailboxes, click ‘Start Migration’ to initiate the migration process.
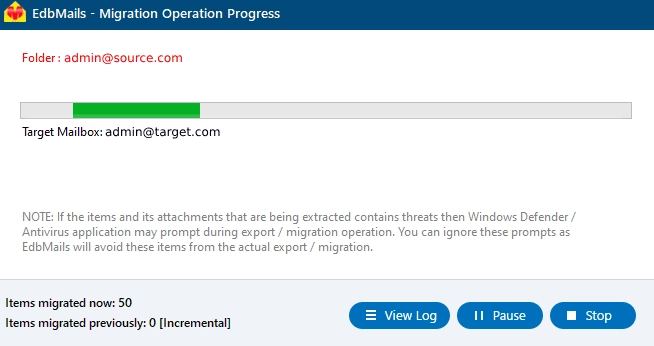
- EdbMails starts the migration automatically and notifies you when it’s complete. Click ‘View Logs’ to check the migration report. You can pause or resume the migration anytime as needed.
Microsoft 365 Shared mailbox post-migration tasks
After the migration is complete, there are several post-migration tasks you should perform to ensure that the shared mailbox is functioning correctly. These tasks include:
- Step 1: Verify the Migration
After the migration is complete, you should verify that the shared mailbox has been migrated successfully. This can be done by logging in to the shared mailbox and ensuring that all of the mailbox data has been migrated.
- Step 2: Configure Outlook Profiles
- After the migration, reconfigure the Outlook profiles for the users who need access to the shared mailbox.
- Update the profile to point to the new Office 365 mailbox.
- Test mail flow to ensure that users can send and receive email from the shared mailbox.
- Step 1: Verify the Migration
Advantages of EdbMails for migrating Shared mailboxes to Microsoft 365
- Secure migration
EdbMails ensures robust encryption protocols during data transfer, adhering to the highest security standards (AES 256-bit). It prevents unauthorized access and ensures that your sensitive mailbox data is transferred safely to Microsoft 365.
- Automatic mailbox creation
The tool automates the process of creating target mailboxes in Microsoft 365, eliminating manual intervention. It maps the source shared mailboxes with the destination automatically, reducing administrative effort and ensuring a smooth transition.
- Cost-effective solution
EdbMails offers a budget-friendly solution for small and large organizations alike. With its one-time licensing cost and no hidden fees, it’s designed to handle even large-scale migrations without exceeding your budget.
- Zero downtime migration
EdbMails guarantees minimal business disruption by ensuring zero downtime during the migration process. Users can continue to access their mailboxes while the migration occurs in the background, offering seamless business continuity.
- Multilingual support
The tool supports multiple languages, making it suitable for global businesses with diverse linguistic requirements. Whether you're migrating mailboxes in English, German, French, or other languages, EdbMails handles multilingual data effectively without data loss.


