Office 365 to IceWarp Migration
Migrating between email systems is a critical decision that impacts how organizations manage communication, data access, and user collaboration. Office 365 is a powerful cloud-based platform, but for businesses seeking a more customizable or cost-effective solution, IceWarp presents a compelling alternative. This transition is not just a platform change; it involves a deep alignment between infrastructure, security policies, and user experience. Many organizations move to IceWarp to gain more control over data, reduce recurring subscription costs, or integrate better with existing on-premises services. However, migrating from Office 365 to IceWarp brings challenges such as handling identity mismatches, managing mailbox size limitations, preserving folder structures, and ensuring that no data is lost or altered during the transfer.
EdbMails Office 365 migration software addresses these challenges through its advanced features and purpose-built capabilities. It enables direct mailbox migration from Office 365 to IceWarp using secure protocols like IMAP while retaining email attributes, folder hierarchy, and metadata. Its functionalities include selective migration, batch mailbox migration, real-time progress monitoring, and detailed logging that simplifies the technical overhead typically associated with this process. This guide provides a complete roadmap for Office 365 to IceWarp migration. It covers the essential prerequisites, recommended tools, step-by-step procedures, and post-migration best practices to ensure a seamless and secure transition.
Office 365 to IceWarp migration: Planning
Before initiating the migration process from Office 365 to an IceWarp server, ensure the following preparatory tasks are completed:
On the source Office 365 server side:
- For Auto Registration of the EdbMails application in Entra ID (Azure Active Directory), a global administrator account with an associated mailbox is required. If you prefer Manual Registration, you can use either a global admin account or any user account that has full mailbox access permissions.
- Assign the suitable Office 365 licenses for the mailboxes you wish to migrate
Click here to assign Microsoft 365 licenses to user accounts
- To migrate Office 365 public folders, archive mailboxes and shared mailboxes, ensure that you configure them appropriately.
Click here to create Office 365 Public folder and assign admin permissions.
Click here to create Shared mailboxes on Office 365 and set the required permission
Click here to enable archive mailboxes on Office 365
- Verify that you have enough bandwidth for Office 365 migration
Click here for network and migration planning, performance factors and best practices for Office 365 migration.
- For large messages(items) migration, configure Office 365 to increase the message size limit.
Click here for the steps to increase the message size on Office 365 to 150MB.
On the target IMAP server side :
- Get your IceWarp account IMAP host name, port number, email address and password required for login.
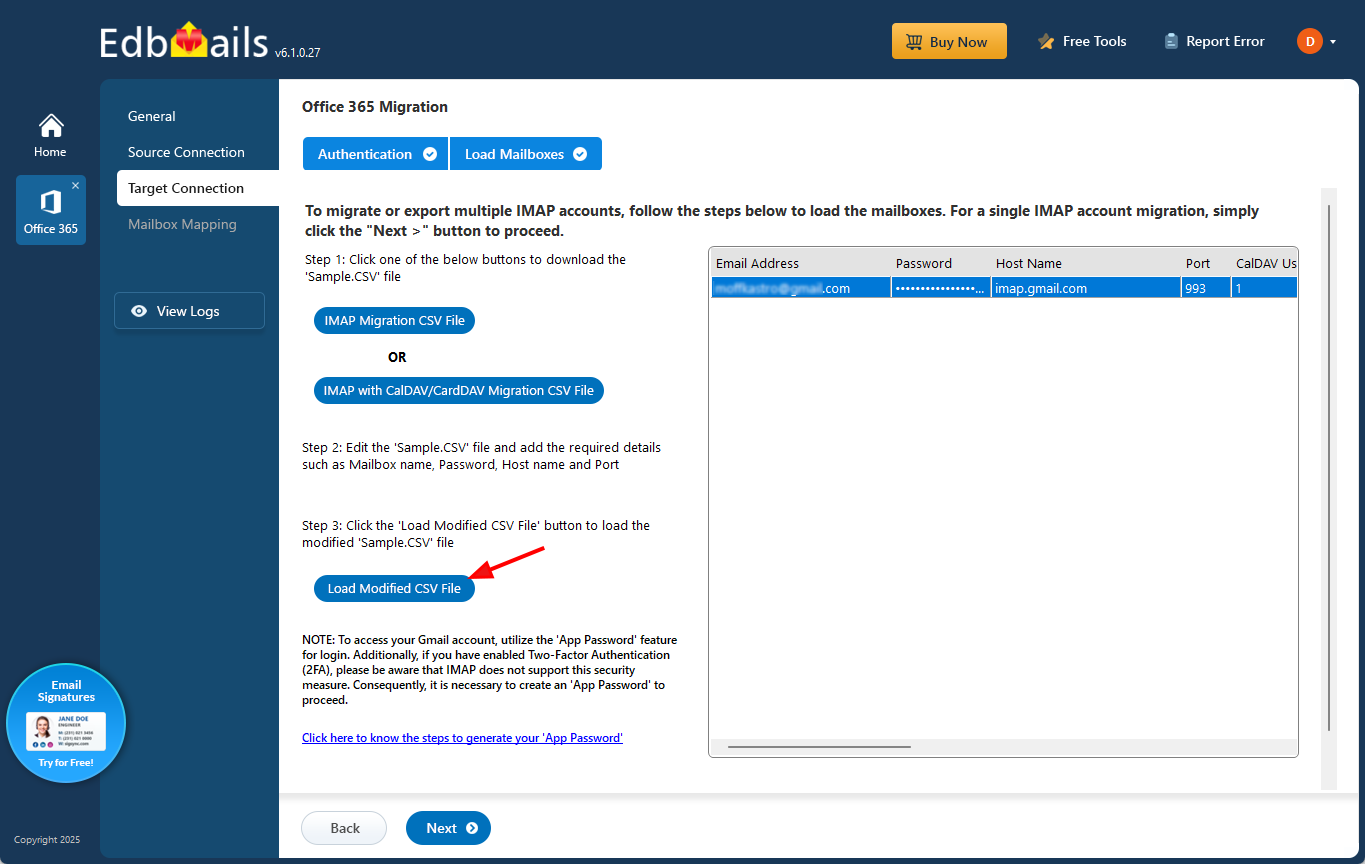
- If you're migrating multiple mailboxes, download the sample CSV file from EdbMails and fill in the required details, including the email address, password, IceWarp IMAP server hostname, and port number.
Steps to migrate from Office 365 to IceWarp using EdbMails
Step 1: Download and install EdbMails tool
- Download and set up the EdbMails application on your computer.
- Open the software and either Login with your registered email and password or click on ‘Start Your Free Trial’ to get started.
See EdbMails system requirements to ensure compatibility for Office 365 to IceWarp migration
- Open the EdbMails application and proceed by clicking ‘Login’ using your registered email and password, or select ‘Start Your Free Trial’ to begin without an account.
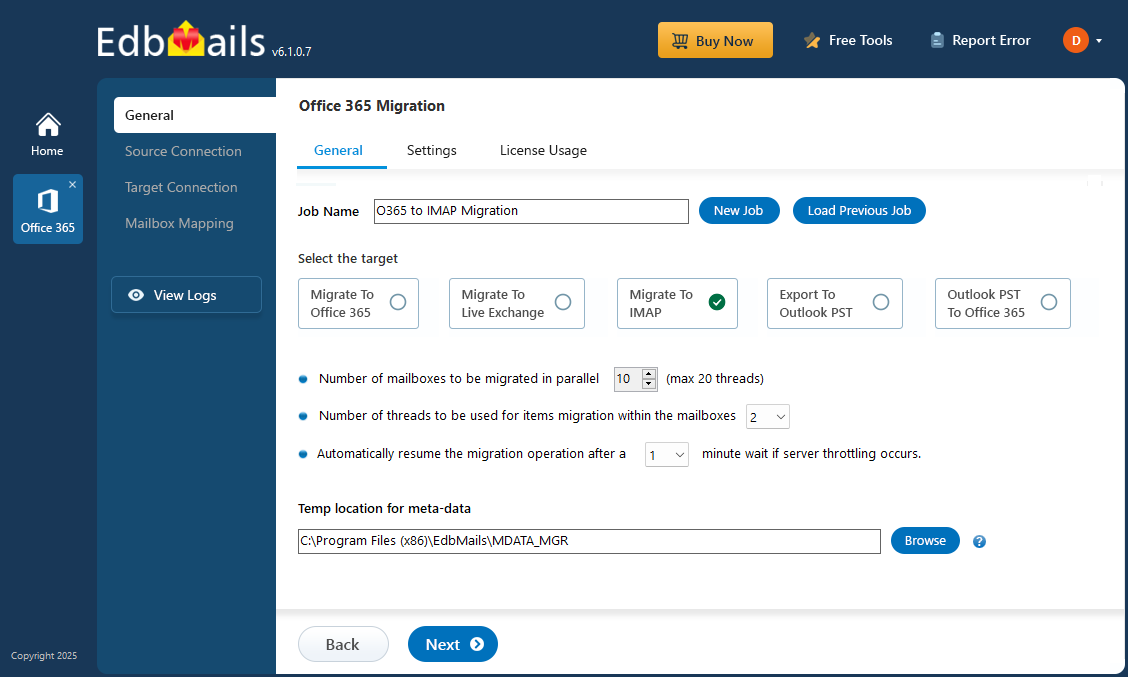
Step 2: Choose the Office 365 to IMAP migration
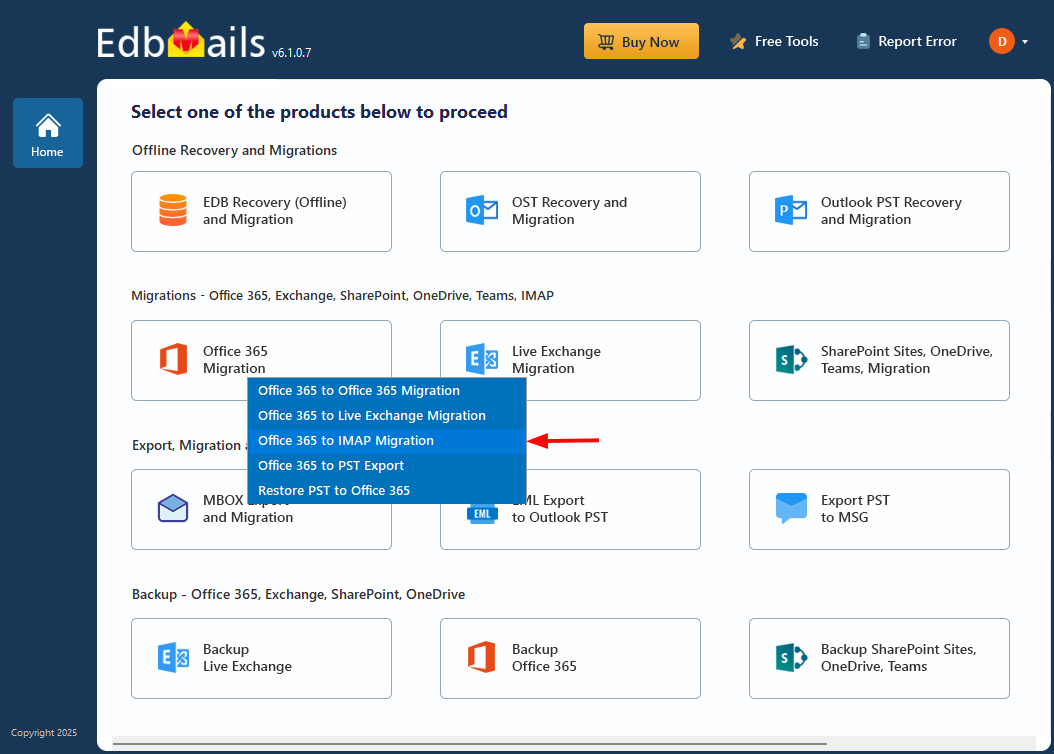
- Click on ‘Office 365 Migration’ and choose ‘Office 365 to IMAP migration’.
- Use the default job name or click ‘New Job’ to set a different name.
Step 3: Connect to source Office 365 server
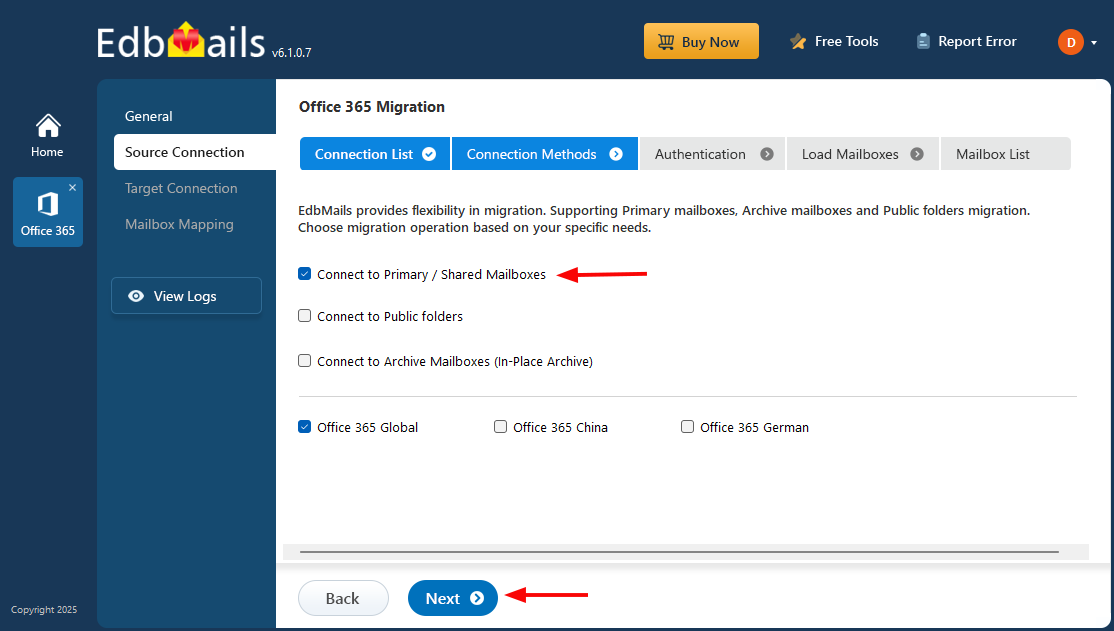
- Click on ‘Add New Connection’ to configure a fresh link to your source Office 365 account, or select ‘Connect to Existing’ if you’ve already set one up.
- Select the appropriate connection options and click ‘Next’.
- Choose your authentication type, enter the required details, and click ‘Login’ to move forward.
- Log in using the Microsoft authentication page to access your Office 365 account.
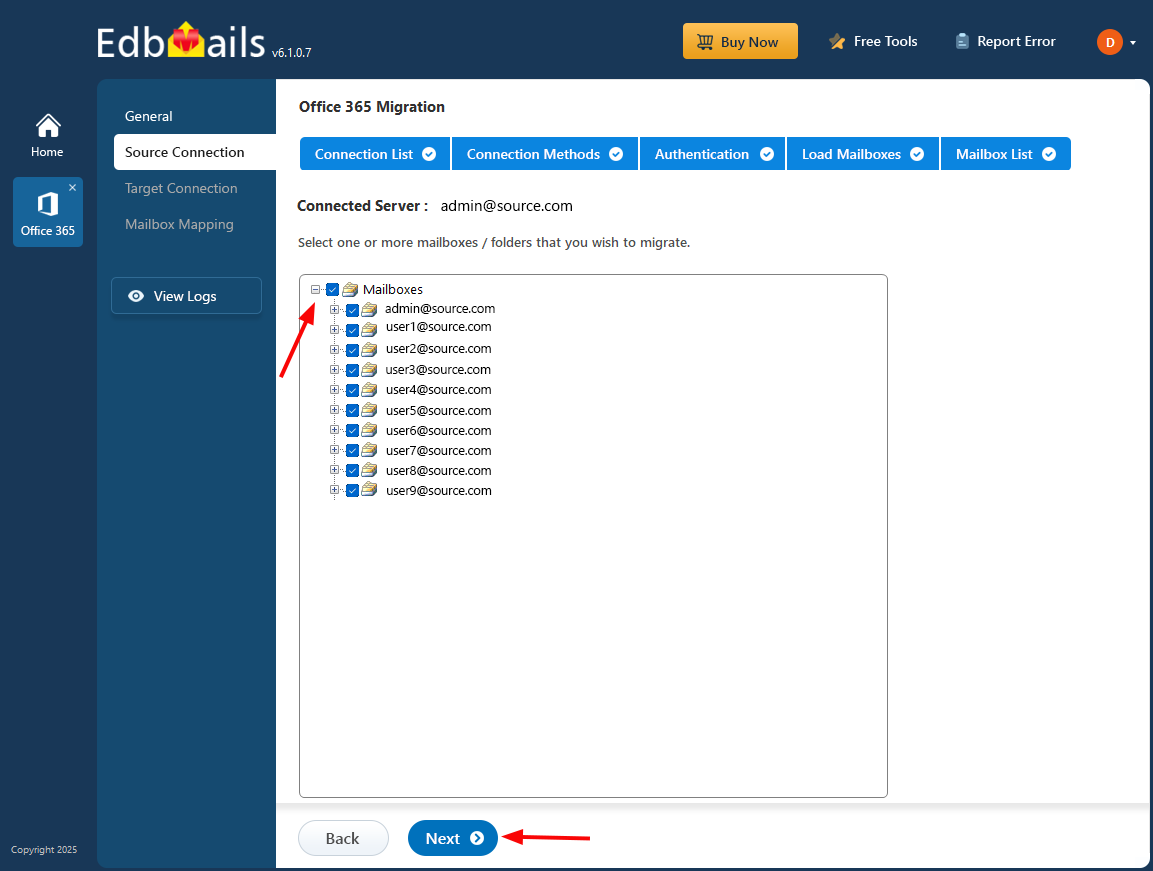
- Once the mailboxes are loaded, select the ones you wish to migrate and click ‘Next’ to continue.
Connect to Office 365 server using secure modern authentication
Step 4: Connect to target IceWarp server
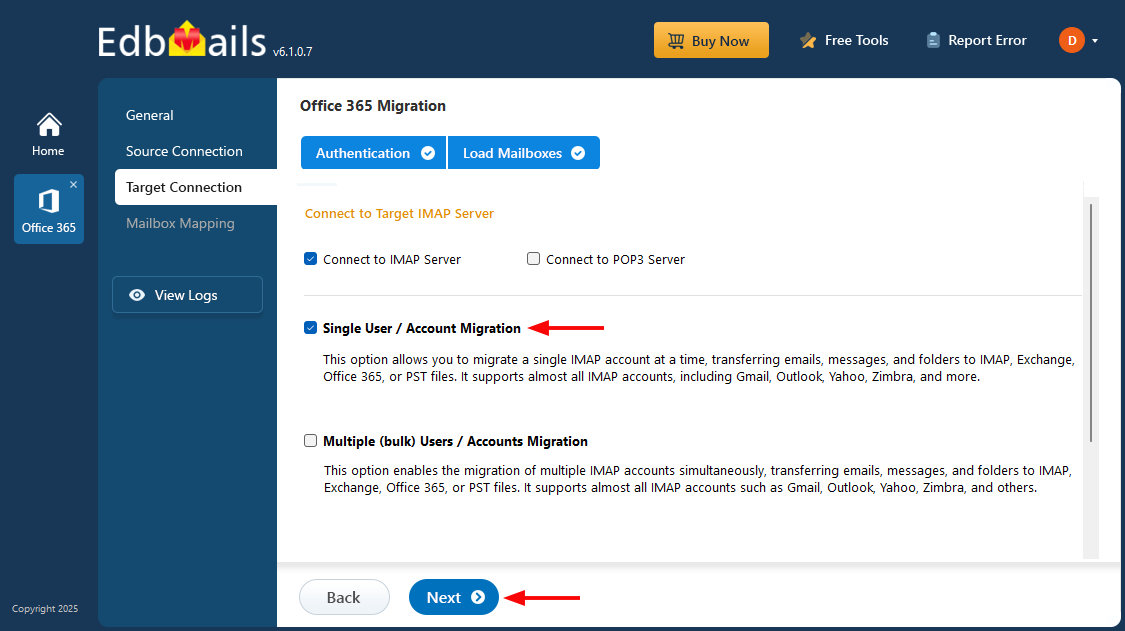
- Choose either ‘Connect to IMAP’ or ‘Connect to POP3’ based on your destination platform.
- If you're migrating a single mailbox, select ‘Single User / Account Migration’ and enter the target email address along with the IMAP server details.
- Click ‘Login’ to establish the connection, wait for the mailbox to load, then click ‘Next’ to proceed.
- To migrate multiple mailboxes, select ‘Multiple (Bulk) Users/Accounts Migration’ and click ‘Next’.
- Select the option ‘IMAP Migration CSV File’.
- A prompt will appear to download the sample .csv file. Select a destination folder on your system to save it.
- Open the downloaded CSV file and enter the necessary information such as email address (mailbox name), password, host, and port. Fields that are not relevant for email migration can be marked as ‘NA’. Once updated, save the file and close it.
- Click on the ‘Load Modified CSV File’ option and choose your updated CSV. Review the listed mailboxes, then continue by selecting ‘Next’.
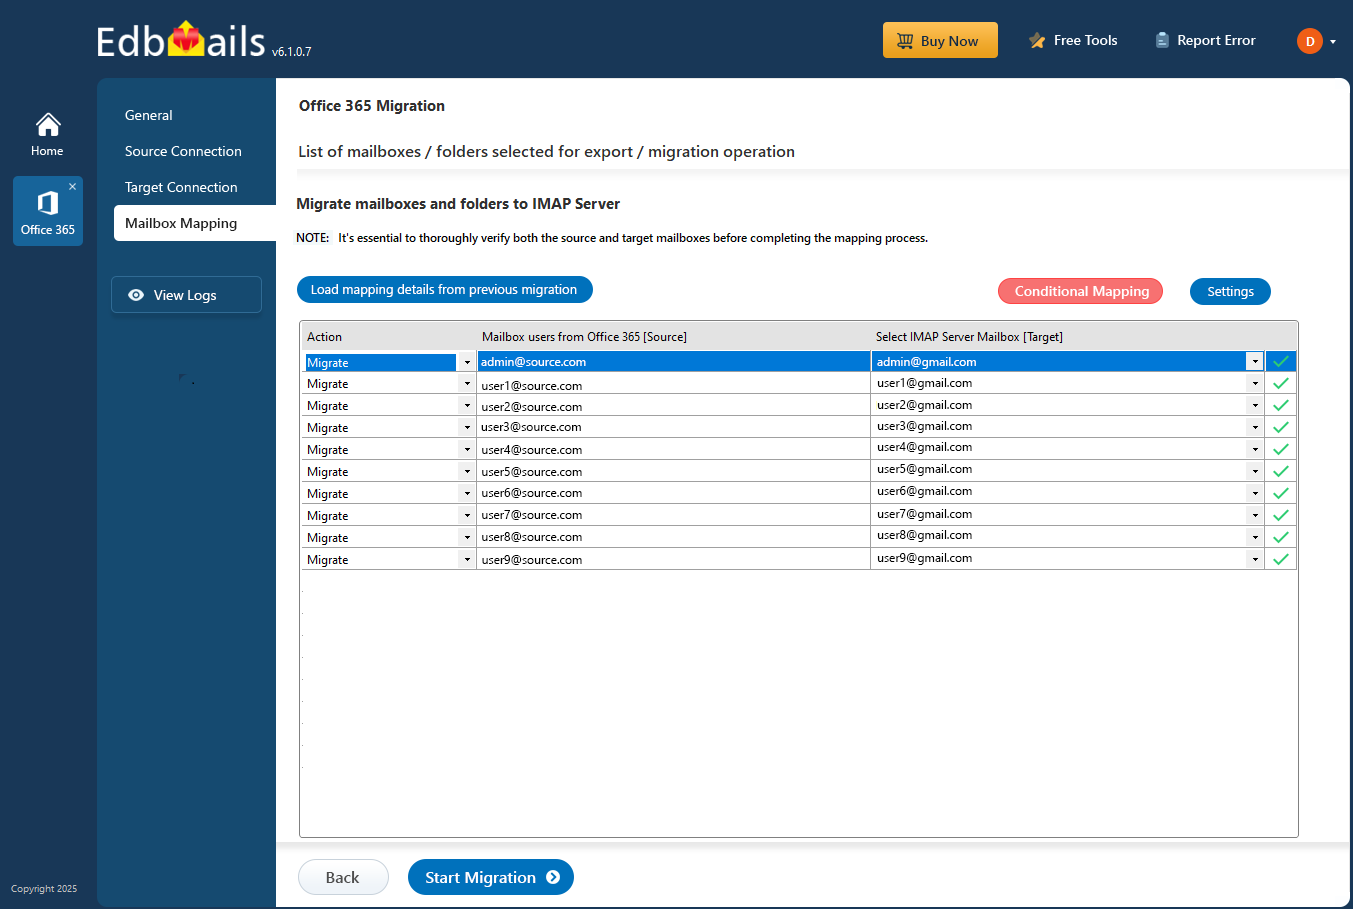
Step 5: Map Office 365 to IceWarp mailboxes
- Choose the mailbox mapping option that fits your needs.
- EdbMails offers automatic mailbox mapping between Office 365 and IceWarp accounts, but you also have the flexibility to perform manual mapping if preferred.
Step 6: Start Office 365 to IceWarp migration
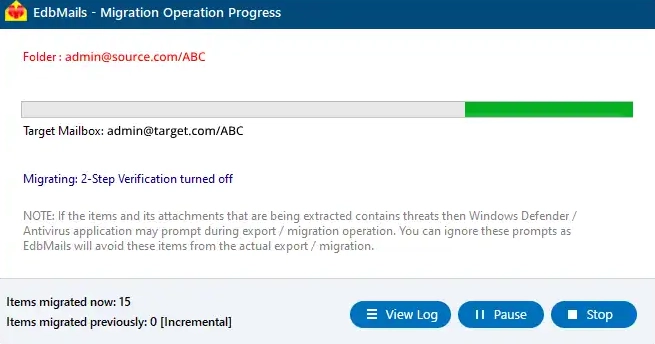
- Click on ‘Start Migration’ to initiate the mailbox transfer process.
- Once the migration is finished, select ‘View Log’ to review the migration report and verify the items on the destination server.
Office 365 to IceWarp: Post migration tasks
After migration, update your domain’s MX records to route all new emails to IceWarp.
Best practices for a successful Office 365 to IceWarp migration
- Begin with a full assessment of your Office 365 environment to identify mailboxes, shared folders, and data volume.
- Prepare the IceWarp server in advance by creating user accounts and enabling required services like IMAP.
- Ensure stable network connectivity and check for bandwidth limits or latency issues before migration.
- Use a secure and reliable tool like EdbMails to automate the Office 365 to IMAP migration with mailbox mapping and folder structure retention.
- Run a pilot migration to test mailbox performance, verify folder integrity, and fix configuration gaps.
- Monitor the live migration process using detailed logs from EdbMails and address any failed items or warnings.
- Reconfigure mail clients and verify access on web, desktop, and mobile platforms.
- Perform a final data integrity check to ensure all folders, emails, and attachments have migrated accurately.
- By filtering out heavy or irrelevant folders, you cut down the data volume and dramatically improve migration speed and efficiency.
Common Mistakes to Avoid During Office 365 to IceWarp Migration:
- Deleting source Office 365 mailboxes before verification: EdbMails recommends verifying migrated mailboxes thoroughly before removing source accounts to prevent accidental data loss.
- Using incorrect hostname, port field, or SSL settings: Incorrect server settings result in failed connections, EdbMails supports secure IMAP configuration.
- Skipping pilot / test migrations: EdbMails advises running a pilot migration to validate folder mapping, mailbox size, and performance before the full migration.


