


Create a New Outlook Profile for a Single User
An Outlook profile stores the account connections, data-file references, and settings that classic Outlook for Windows loads for a user. Creating a separate profile is a practical diagnostic step when one user experiences repeated sign-in prompts, startup failures, synchronization problems, or incorrect account configuration while other users are unaffected.
This guide applies to classic Outlook for Windows. The new Outlook for Windows manages accounts through its own Settings interface and does not use the classic Control Panel profile workflow described below. Creating a profile does not repair a service outage, incorrect DNS, or a server-side mailbox problem, so confirm the scope of the issue before replacing the user’s working configuration.
When should you create a new Outlook profile?
| Condition | Correct route | Why |
|---|---|---|
| Only one user has repeated prompts, startup errors, or account configuration problems | Create and test a separate classic Outlook profile | A clean profile helps determine whether the existing local profile is the cause. |
| Several users are affected at the same time | Check Microsoft 365 service health, network access, DNS, Autodiscover, identity, and policy changes first | A shared failure is unlikely to be resolved by rebuilding each local profile. |
| The user moved to another Microsoft 365 tenant or mailbox endpoint | Confirm licensing, identity, DNS, and Autodiscover, then create a profile if the old endpoint remains cached | The new profile must discover the intended target mailbox rather than mask an incomplete cutover. |
| The goal is to add another email account to the current Outlook setup | Add the account to the existing profile when separation is not required | A second profile is optional and changes how the user selects accounts at startup. |
| The user works in the new Outlook for Windows | Use Settings → Accounts → Your accounts → Add account | The new Outlook app does not use the classic Mail Control Panel profile workflow. |
Before creating the profile
- Confirm that the user can sign in to Outlook on the web. This separates a local Outlook problem from an account, licensing, or mailbox-access issue.
- Record any locally attached PST files, shared mailboxes, additional accounts, add-ins, and special configuration that may need to be added again.
- Keep the existing profile until the new profile has synchronized and passed validation. Creating a new profile does not require deleting the old one.
- Make sure the user knows the current credentials and can complete the organization’s multifactor authentication process.
- For a post-migration issue, confirm that the target mailbox, DNS, and Autodiscover configuration are ready before creating the profile.
Microsoft 365 and Exchange mailbox content normally resynchronizes into a new OST file. Locally stored PST content does not automatically move into the new profile; attach the required PST only after confirming that it is the correct file.
Three ways to create the profile
Choose one of the following methods. The Control Panel method is useful when Outlook will not open, while the profile picker is usually the quickest route on current classic Outlook builds.
Method 1: Create a profile through Control Panel
Use this method in classic Outlook for Windows when the Mail applet is available.
Step 1: Close Outlook. Check Task Manager if Outlook remains open in the background.
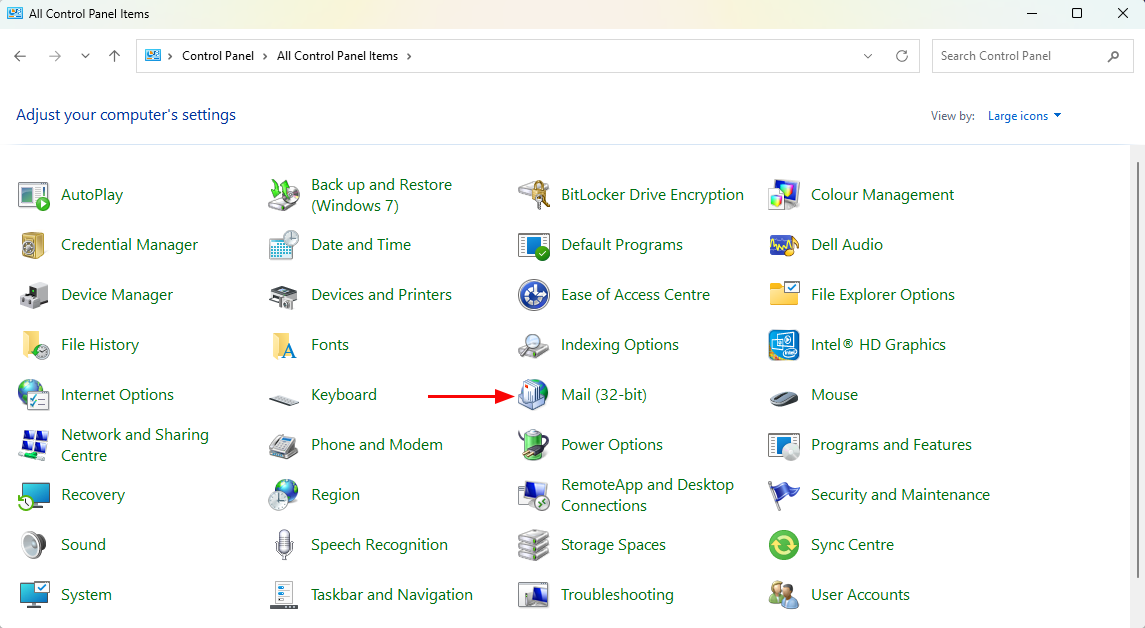
Step 2: Open Control Panel, search for Mail, and select Mail (Microsoft Outlook). The label may include “32-bit” even on a 64-bit version of Windows.
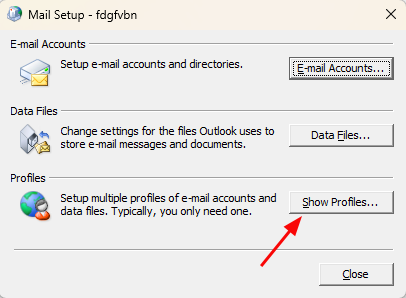
Step 3: In Mail Setup, select Show Profiles.
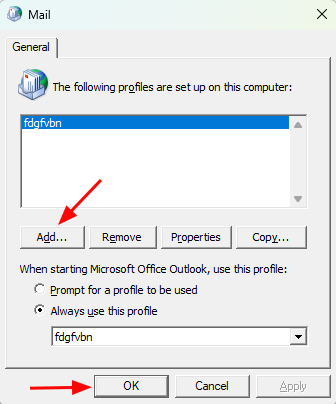
Step 4: Select Add.
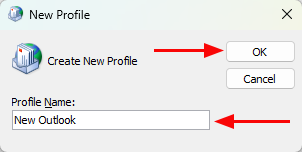
Step 5: Enter a descriptive profile name and select OK. The name identifies the local profile; it does not rename the mailbox.
Step 6: Enter the user’s email address and complete the account setup. Use the organization’s approved sign-in method and multifactor authentication when prompted. Manual server settings are normally relevant to POP or IMAP accounts; Microsoft 365 and Exchange accounts generally use automatic discovery.
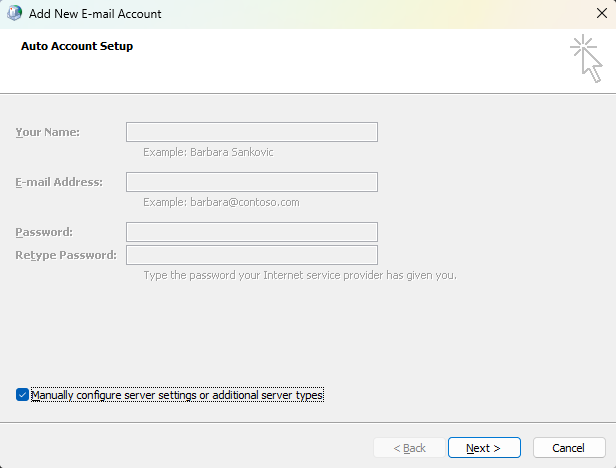
Step 7: Under When starting Microsoft Outlook, use this profile, choose either Prompt for a profile to be used or Always use this profile. If you select the second option, choose the new profile from the list.
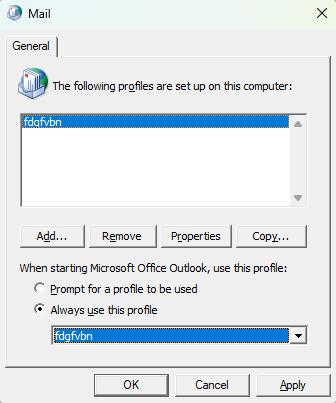
Step 8: Select Apply and OK, then start classic Outlook and allow the mailbox to synchronize.
Method 2: Open profile settings from classic Outlook
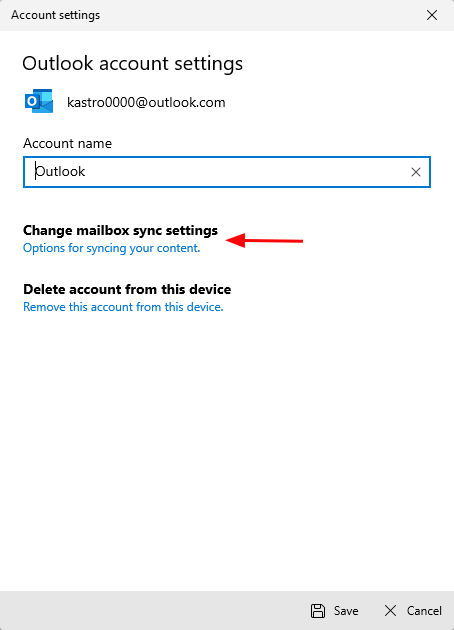
Windows account sync settings and Outlook profiles are not the same. The Change mailbox sync settings page shown below adjusts a Windows mail account; it does not create a classic Outlook profile.
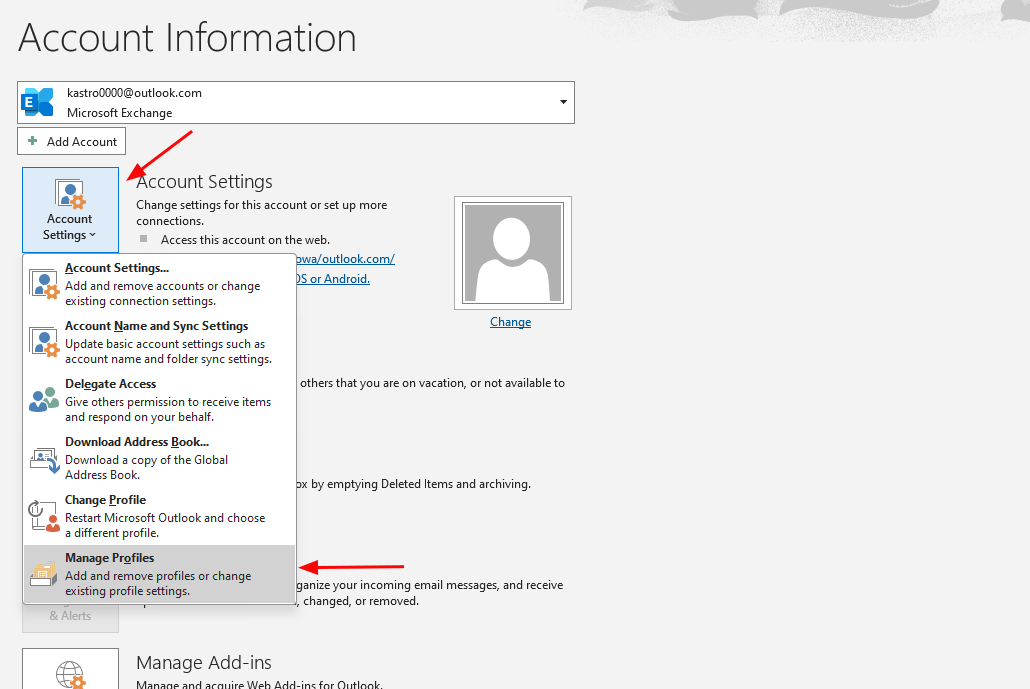
Step 1: In classic Outlook, select File → Account Settings → Manage Profiles. Depending on the Outlook build, Microsoft may label the command Change Profile; Outlook then restarts and opens the profile picker.
Step 2: If Mail Setup opens, select Show Profiles → Add. If the profile picker opens, expand Options and select New.
Step 3: Name the profile, add the user’s account, and choose whether Outlook should prompt for a profile or always open the new one.
Method 3: Use the profile picker or command line
Microsoft’s current profile-picker method is useful when you cannot reach the profile settings from an open Outlook session.
- Close Outlook, then hold Shift while starting classic Outlook.
- In the profile picker, expand Options and select New.
- Enter a profile name, add the user’s account, and complete authentication.
Alternatively, press Windows + R, enter outlook.exe /profiles, and press Enter. If Windows cannot find Outlook, run the command from the Office installation directory or use the Control Panel method.
Validate the new Outlook profile
- Confirm that Outlook opens with the intended profile and connects to the correct mailbox.
- Allow initial synchronization to progress, then test sending and receiving messages.
- Open the calendar, contacts, shared mailboxes, and any additional accounts required by the user.
- Check Search, Offline Address Book behavior, rules, signatures, delegates, and add-ins relevant to the user’s work.
- Verify that required local PST files are attached and readable.
- Retain the old profile until the user or administrator accepts the new configuration. Remove it later only when no local dependency remains.
If the new profile still connects to the wrong mailbox after a migration, investigate Autodiscover configuration after Office 365 migration instead of repeatedly creating profiles.
Frequently Asked Questions
Does this procedure apply to the new Outlook for Windows?
Does creating a new Outlook profile delete mailbox data?
What is the difference between adding an account and creating a profile?
Should I create a new profile after an Office 365 migration?
What should I check if the new profile has the same problem?