Backup Exchange server database
Microsoft Exchange Server is crucial for business communication worldwide, but like any critical system, it is susceptible to risks such as hardware failures, database corruption, virus attacks, or human error. When an Exchange server encounters issues, it can disrupt essential business operations, making it vital to have a reliable way to quickly restore the Exchange database.
Regularly backing up your Exchange server database (EDB) is essential for safeguarding your email data and ensuring that you can recover it in case of a disaster. With tools like EdbMails EDB to PST Converter and EdbMails Backup Live Exchange, you can effortlessly back up and migrate your Exchange database without the need for complex setups.
EdbMails EDB to PST Converter allows you to repair and recover corrupted EDB files, converting them into PST format for easy access and restoration. EdbMails Backup Live Exchange offers a secure and efficient way to create encrypted backups of your Exchange server mailboxes, ensuring that your data is safe and recoverable when needed.
In this article, we provide a simple, step-by-step guide to help you backup your Exchange server database and mailboxes. Whether you're setting up regular backups or need to restore data after an issue, these tools will help keep your Exchange server protected and operational.
How to backup an Exchange server database on Windows?
You can back up the Exchange database with the following methods
- With Windows Server backup (WSB)
- Export the EDB file to PST with EdbMails
- Backup mailboxes with EdbMails Exchange backup
Method 1: Backup EDB with Windows server backup
Before starting the backup with the Windows Server Backup (WSB), it’s important to note that the operation is performed at the volume level. This means that to carry out an application-level backup and restore, the entire volume must be backed up. Additionally, ensure the health of your Exchange database is checked beforehand to avoid potential corruption issues during the process.
Keep in mind that WSB does not support the automatic restoration of the backup copy to a Recovery Database (RDB). To restore, you must manually create the RDB, copy the backup database and log folders, and then proceed with the restore operation.
Learn more about the Windows Server backup and its features
The following steps describe how to perform backup with WSB
- Step 1: Start Windows Server Backup as an administrator
- Step 2: Select the required Backup option under Local Backup
You have two options to choose from, Backup Schedule and Backup Once
- Step 3: In the Select Backup Configuration page select Custom
To back up all the server data, select the Full Server option. If you only need to back up the database and its related files, the Custom option will be sufficient.
- Step 4: In the Select Items for Backup page, click Add Items
When selecting items for backup, make sure to choose the entire volume, not just the folder containing the files. For an application-level restore, it’s essential to back up the complete volume.
- Step 5: Click Advanced Settings to change the VSS settings and add Exclusions
In the Exclusions tab under Advanced Settings, add any files or folders you wish to exclude from the backup. Then, in the Volume Shadow Copy (VSS) tab, select the VSS Full Backup option.
- Step 6: Schedule the backup (optional)
If you have selected the Backup Schedule option in Step 2, you can specify the backup time for the job to run automatically.
- Step 7: Specify the backup Destination Type
In this step, you can choose the destination location to save the backup. The following three options are available.
- Backup to a hard disk that is dedicated for backups (recommended)
- Backup to a volume
- Backup to a shared network folder
- Step 8: Review the backup settings and start the backup
In the Confirmation page, review the selections and settings such as Backup Time, Files excluded and Advanced options. Finally click Backup to start the operation.
- See steps to use Windows Server backup to backup Exchange server
- See steps to use Windows Server backup to restore the Exchange backup
Note: If the EDB is corrupted or damaged, WSB may display the Exchange Database Consistency Check Failed error. In such cases, backup and restore operations cannot be performed. Additionally, WSB does not guarantee data integrity or support importing the EDB to Exchange Server or Office 365.
The limitation with the WSB is that if your Exchange database (EDB) is corrupted and damaged, then it is not possible to restore your data. It also does not guarantee data integrity or enable migration of the EDB to Exchange server and Office 365.
Method 2: Convert EDB to PST with EdbMails
Step 1: Download and install EdbMails Exchange recovery tool- Start by downloading and installing the EdbMails Exchange recovery tool on any computer that has access to both the source and destination environments. You can also run the recovery process on a system that doesn't have Exchange Server installed, as long as it's connected to the required systems.
- Open the application and click on 'Login' to access your account or, choose 'Start Your Free Trial' to begin exploring all the features available to you.
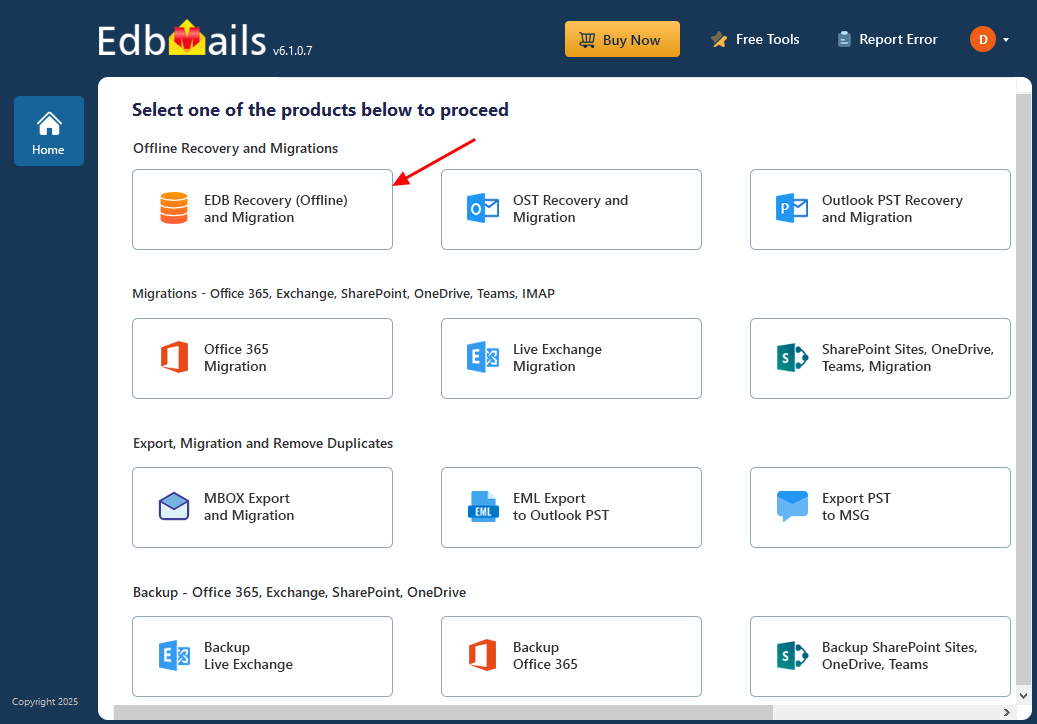
- Choose 'EDB Recovery (Offline) and Migration' from the product options to continue.
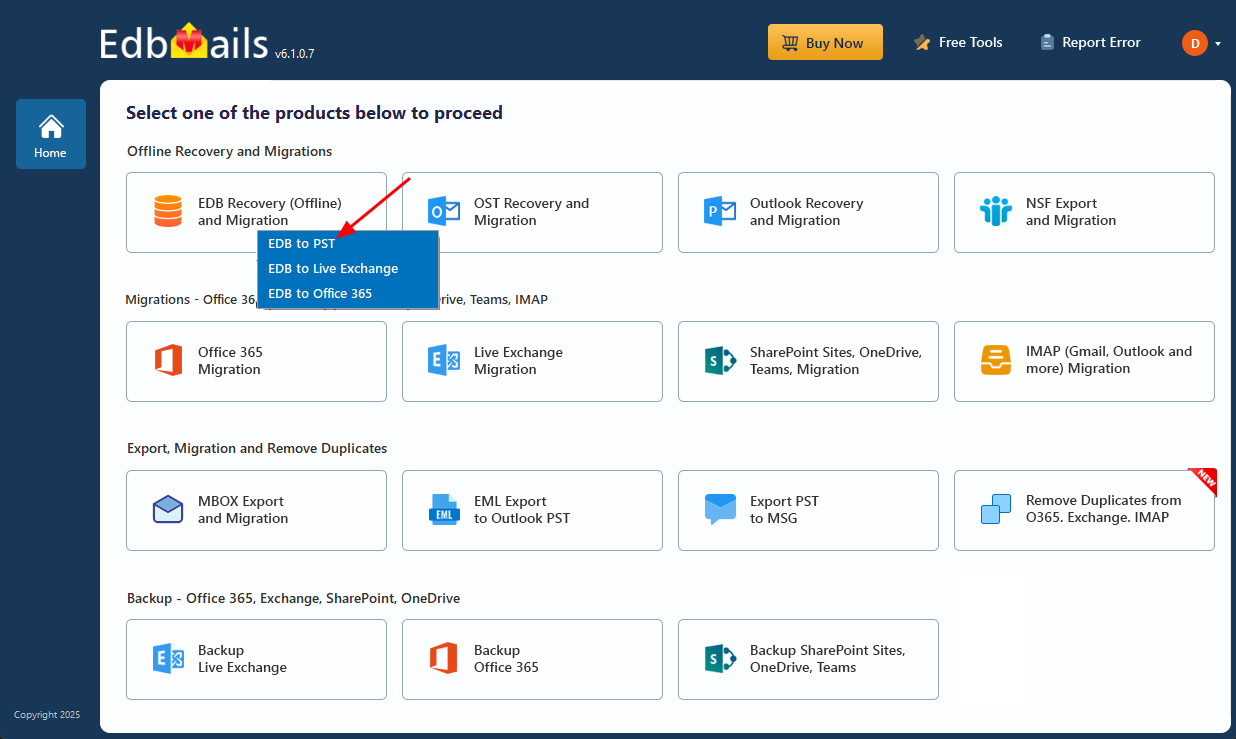
- Choose ‘EDB to PST’ as your recovery option.
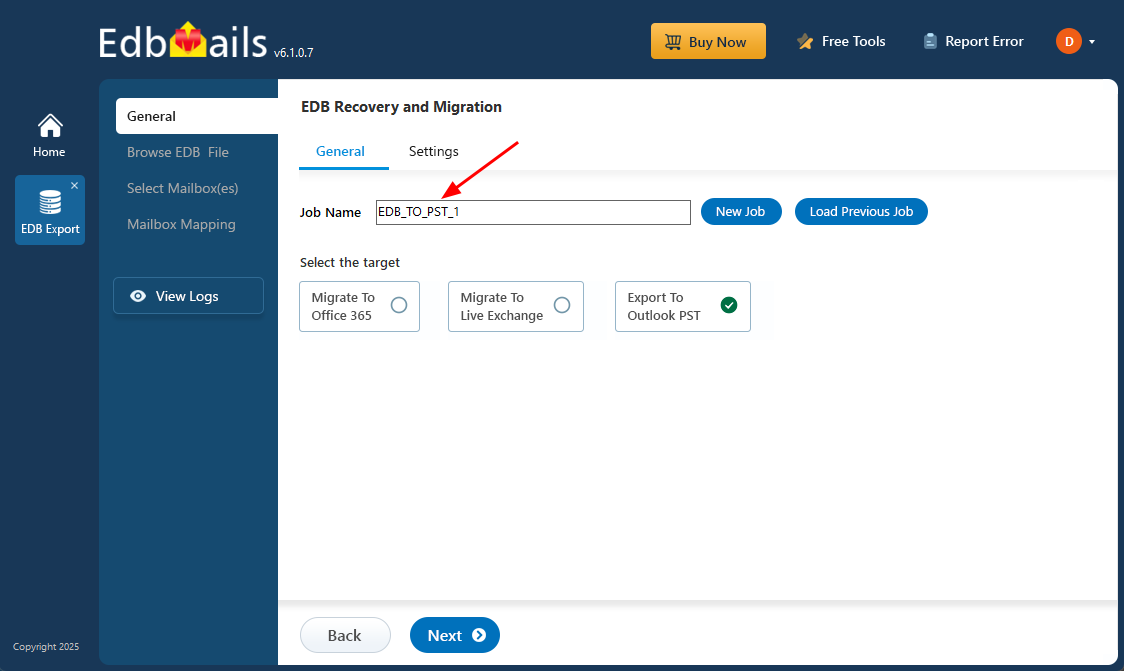
- You can either stick with the default job name or click on ‘New Job’ to give it a custom name that suits your preference.
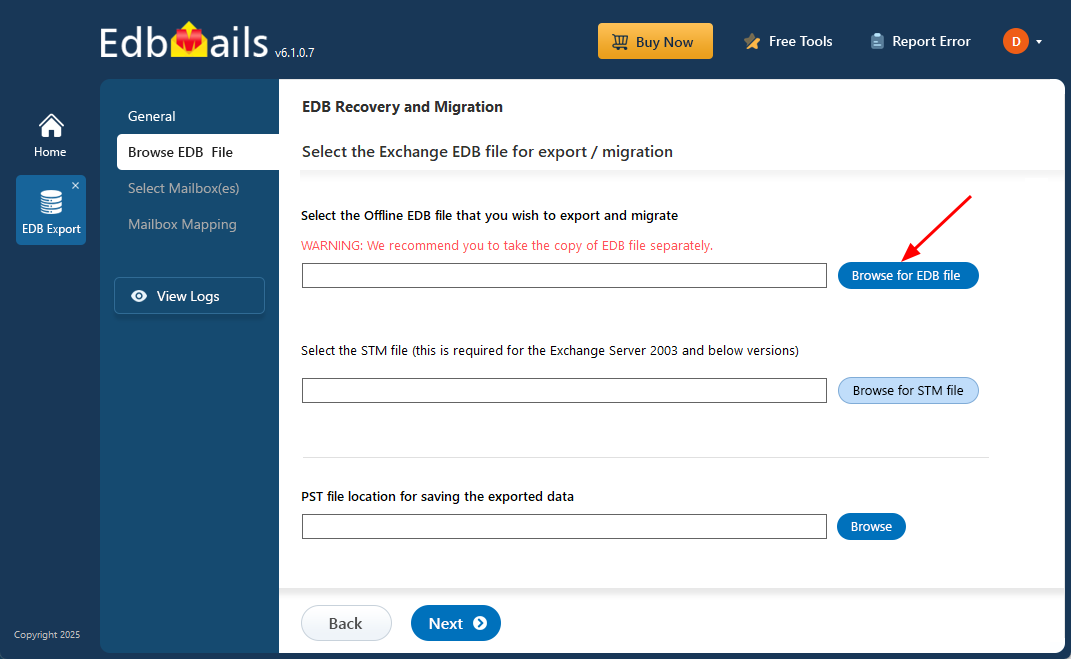
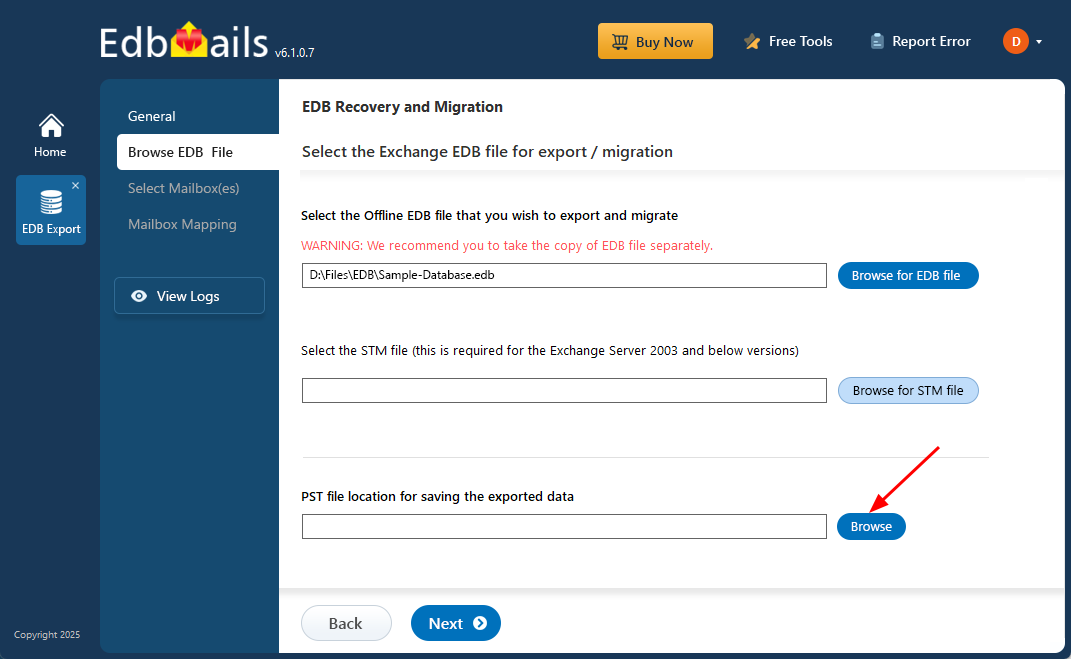
- Click ‘Browse for EDB file’
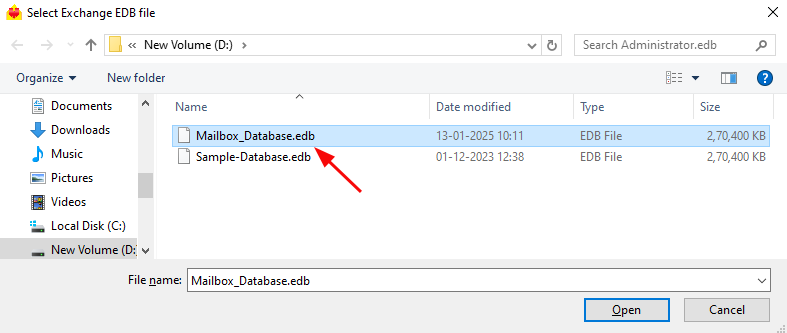
- Select the offline Exchange EDB file that you want to export. If the file is on a shared network, make sure you have the required read and write permissions for a smooth operation.
- Click ‘Browse’
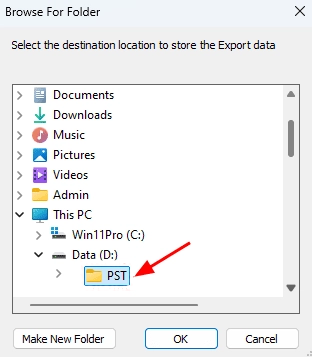
- Choose a destination to save your exported PST files and ensure there is enough disk space to complete the export process without issues and then click ‘Next’.
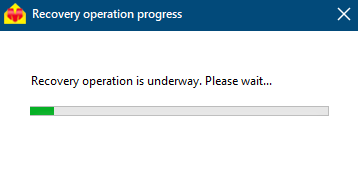
- EdbMails performs a thorough scan of the EDB file, restoring mailbox data even from corrupted or damaged files, ensuring that no data is lost during the recovery process.
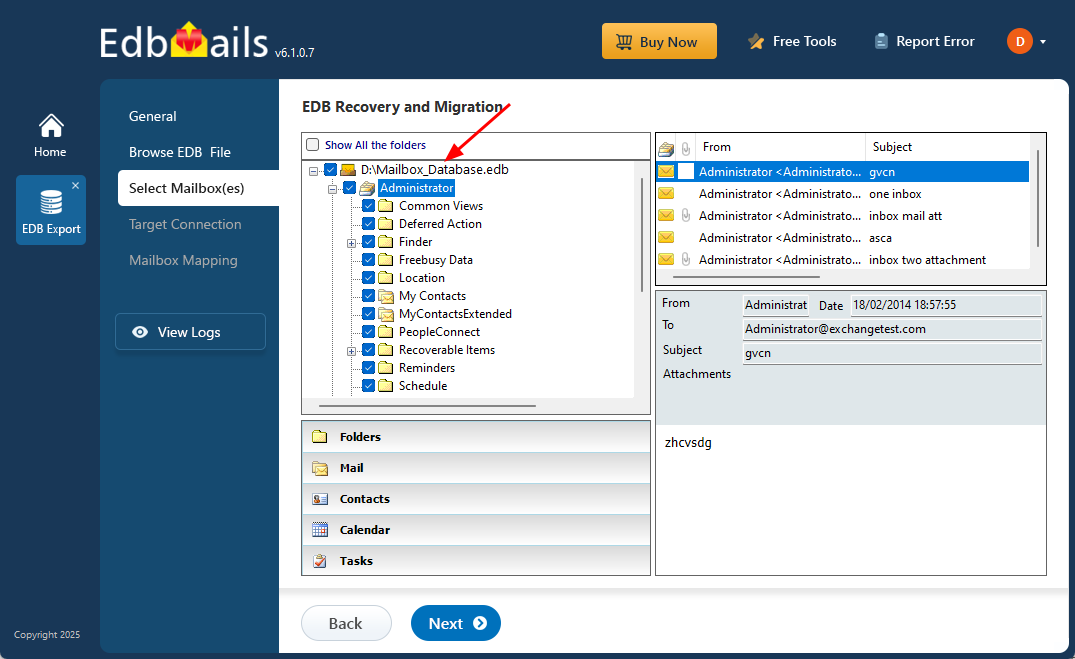
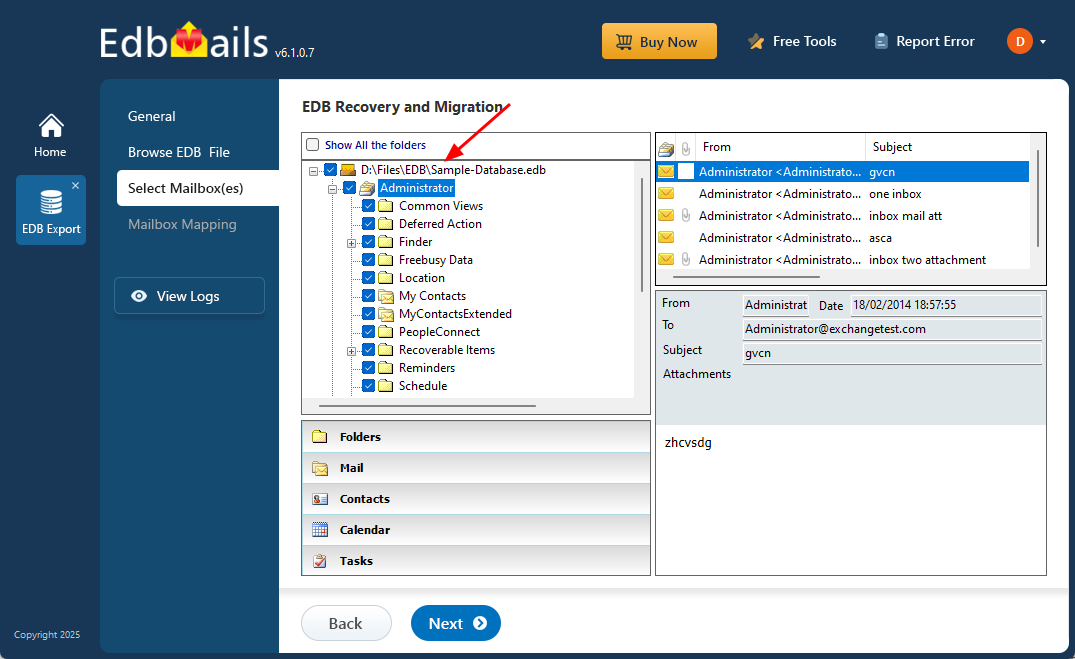
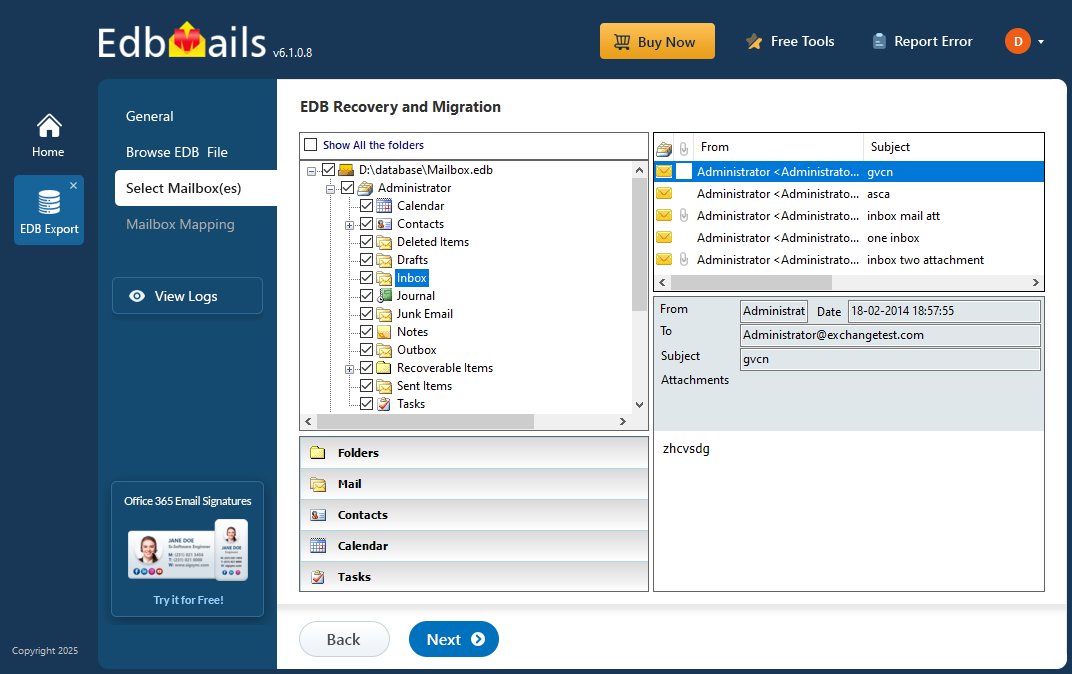
- Once the recovery is complete, expand the mailbox and click on any folder to preview its contents—such as emails, contacts, calendars, tasks, journals, and notes—in the right-hand pane. Then, select the mailboxes or folders you want to export and click ‘Next’ to proceed.
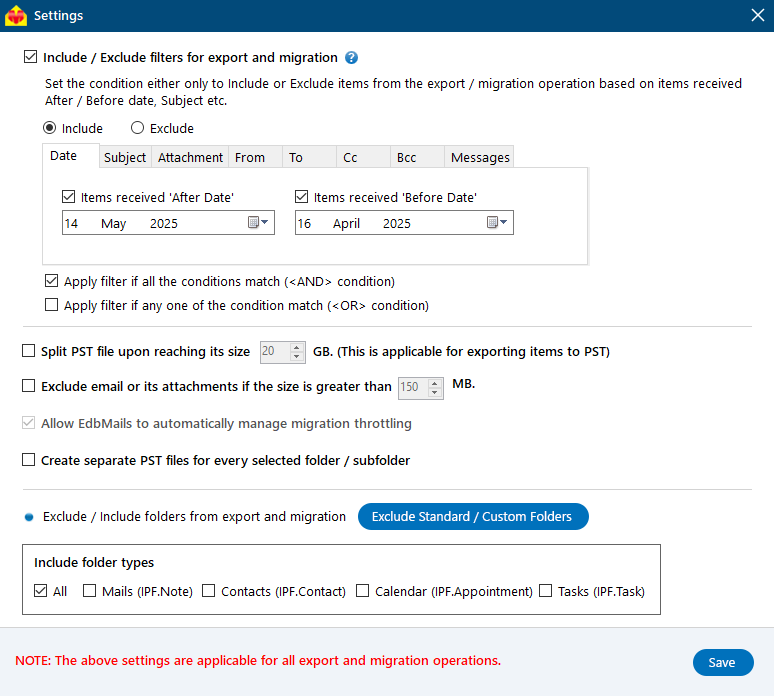
- You can use the advanced filter settings to export Exchange emails to PST based on criteria like date, subject, attachments, and more.
- The 'Exclude Standard / Custom folders' option lets you leave out specific folders like Inbox, Sent, Drafts, Junk, Conversation History, and any custom folders—from the export process.
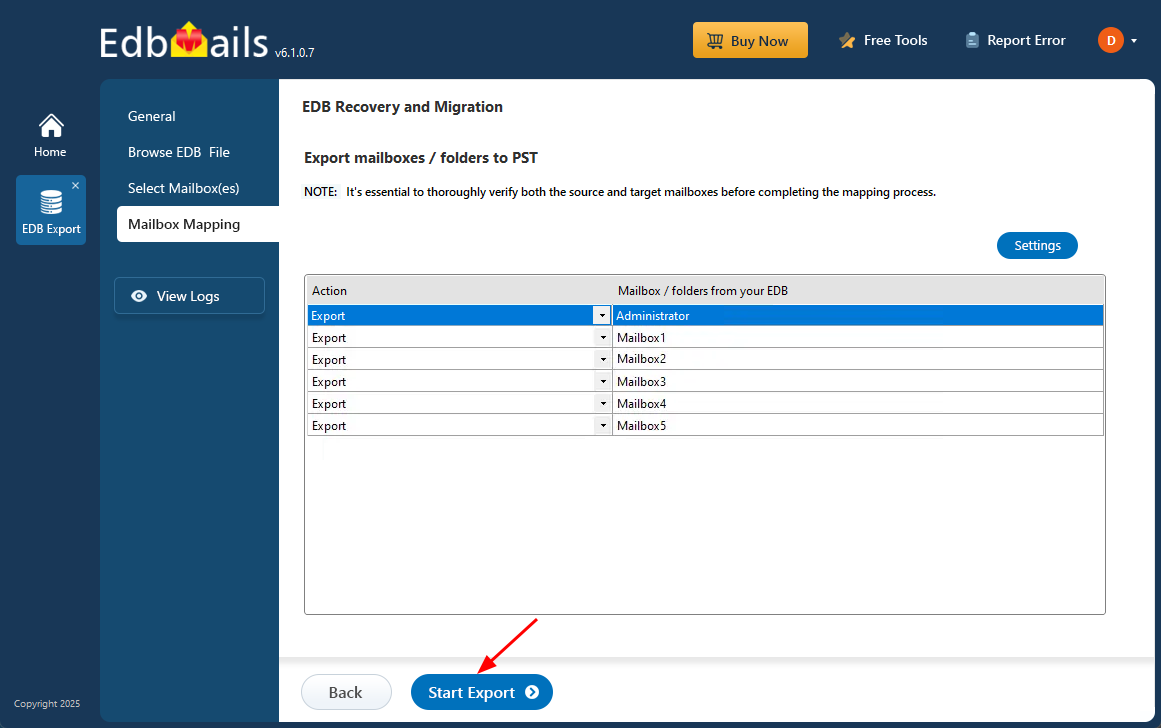
- Review the selected mailboxes and folders to ensure everything is correct. Confirm that the 'Action' is set to 'Export', then click ‘Start Export’ to begin the process.
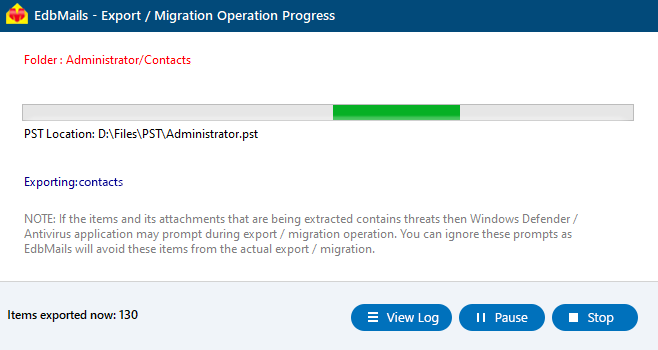
- During the export, EdbMails displays a real-time progress window with options to pause or resume. After the export is complete, click ‘View Log’ to access a detailed summary report.
Tip : To restore all your mailboxes and mail items, import the exported PST file into Outlook. You can copy the PST file to a secure location or replicate it on your network drive for backup.
- The EDB export process with EdbMails ensures no downtime, and the target PST backup is an exact replica of the source. You can recover the Exchange database without the need for log files and utilize the built-in filter settings to select specific folders, emails, and mail items for export, backup, and migration.
Method 3: Backup and restore mailboxes with EdbMails Exchange backup
EdbMails also offers a dedicated Exchange server backup tool that allows you to back up your mailboxes instantly, using highly secure AES-256 bit military-grade encryption. The following steps outline the entire process.
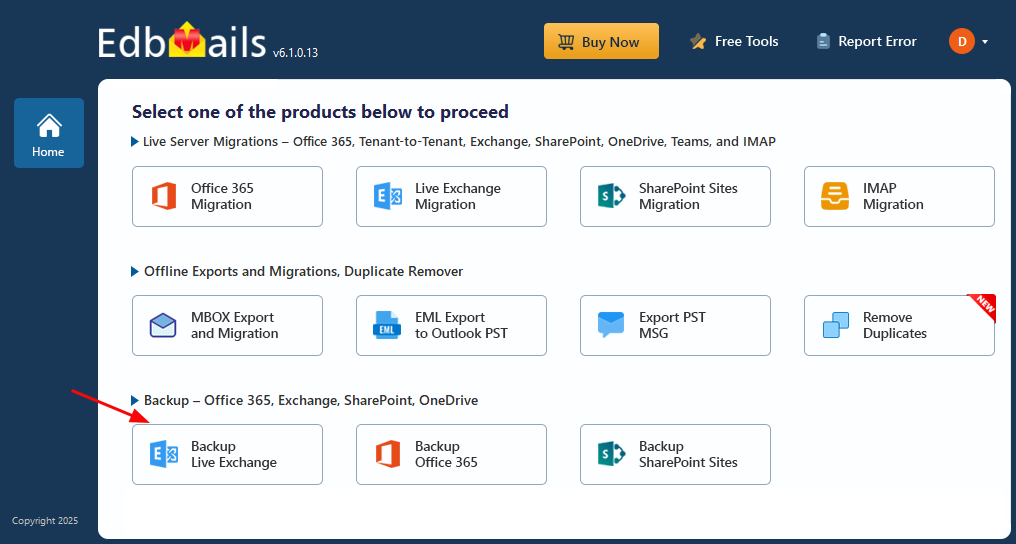
Step 1: Select Exchange Backup in the application- Select ‘Backup Live Exchange’ from the available product options.
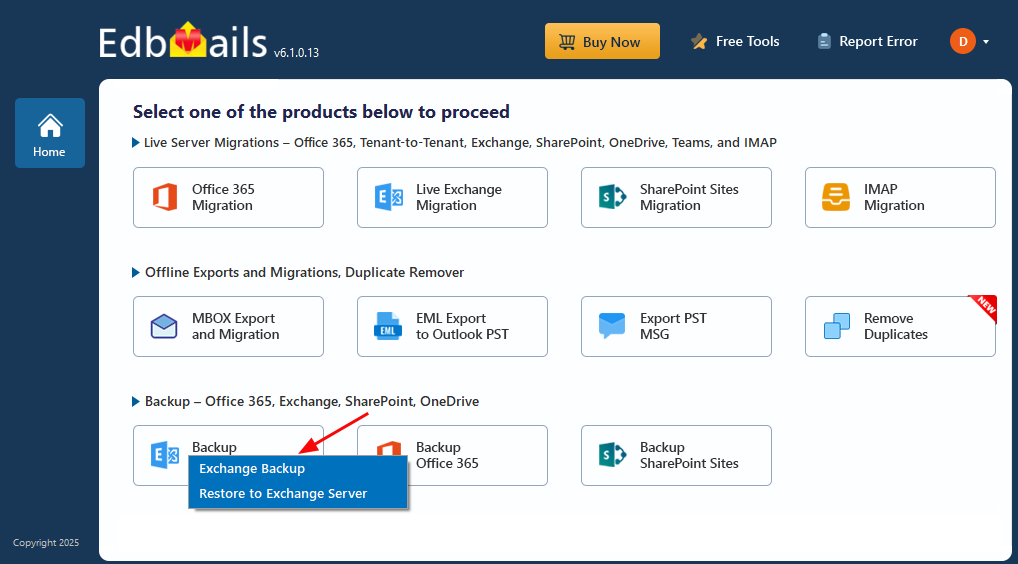
- Select the recovery technique as ‘Exchange Backup’.
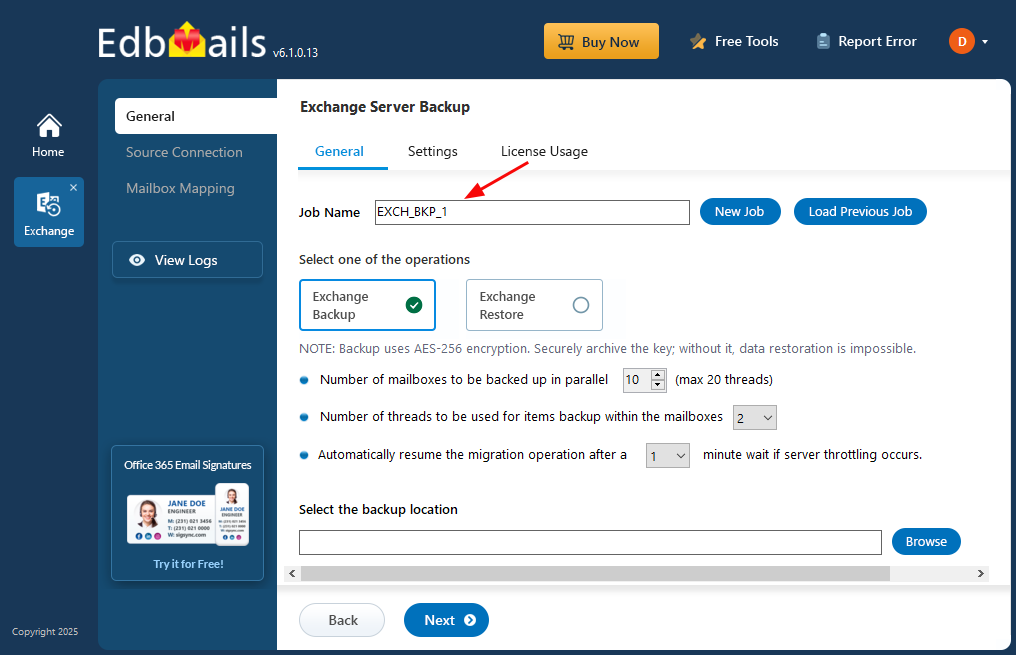
- You can either keep the default job name or create a custom one by selecting ‘New Job’, which will help you easily identify and manage your tasks later.
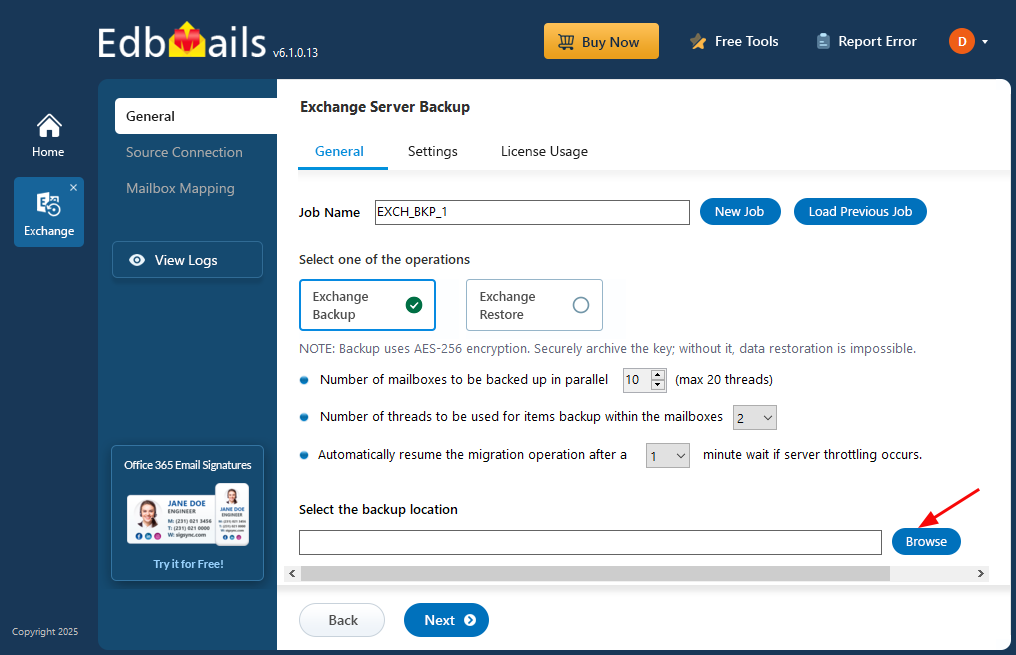
- Click ‘Browse’ to set a backup location.
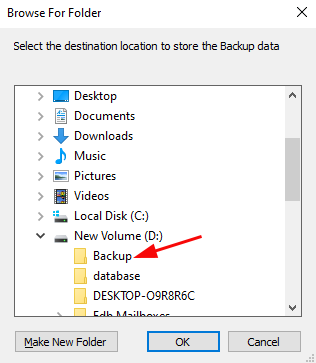
- Select a location to save the backup files and make sure there is sufficient disk space available on your computer. Then, click ‘Next’ to continue.
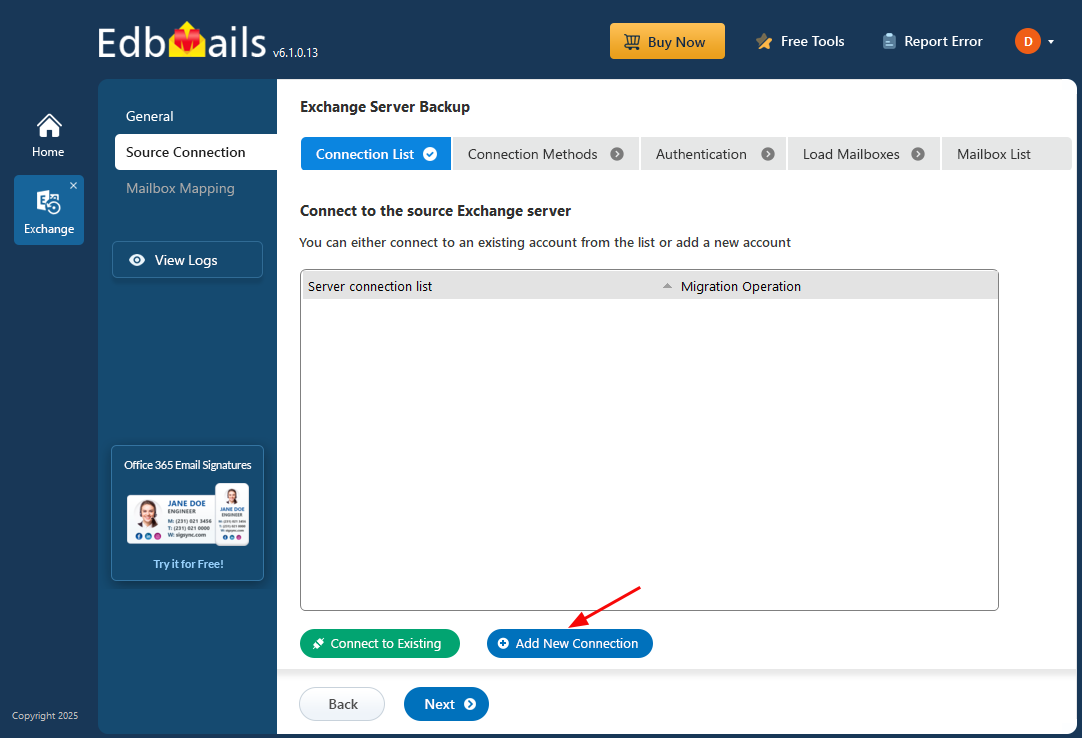
- Click the ‘Add New Connection’ button to set up a new connection to the source Exchange server. If a connection has already been configured, simply choose it from the list and click ‘Connect to Existing’ to continue.
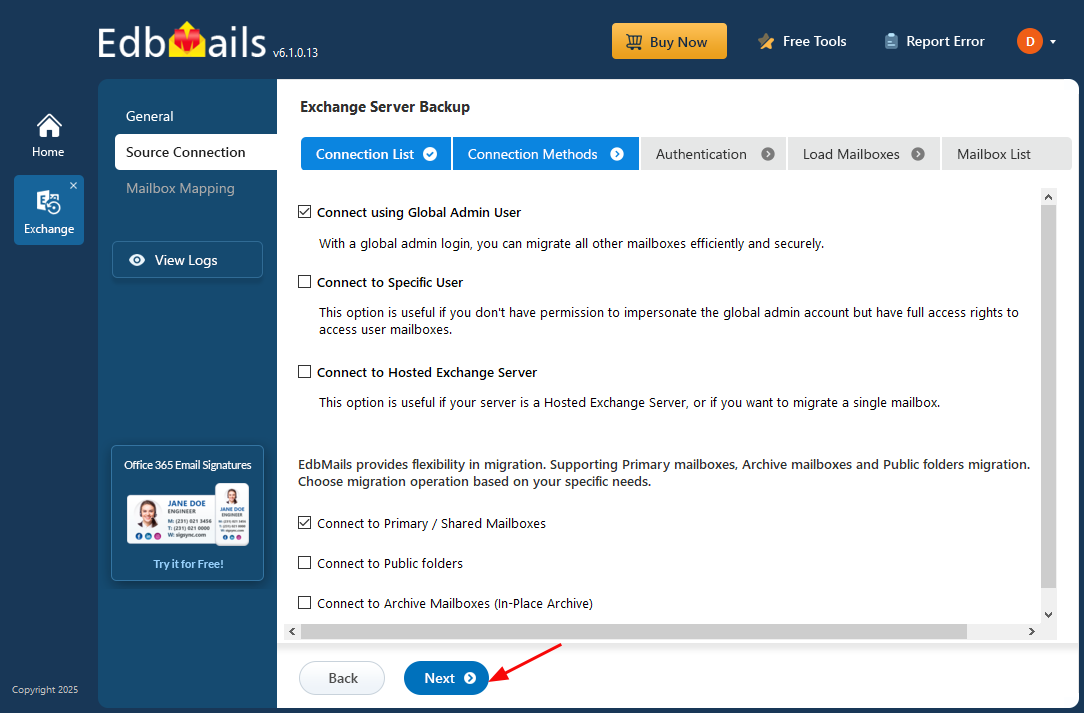
- Choose the appropriate connection options and click the ‘Next’ button.
Different options to connect to Exchange server in EdbMails
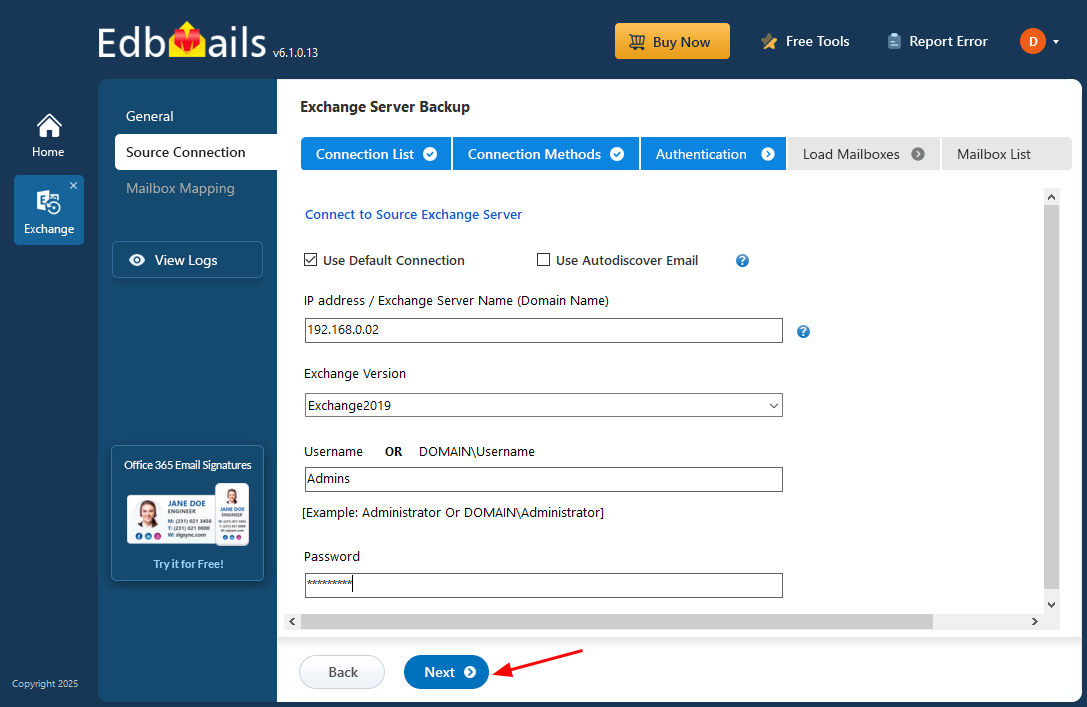
- Provide the necessary source Exchange server details and click the ‘Login’ button to proceed.
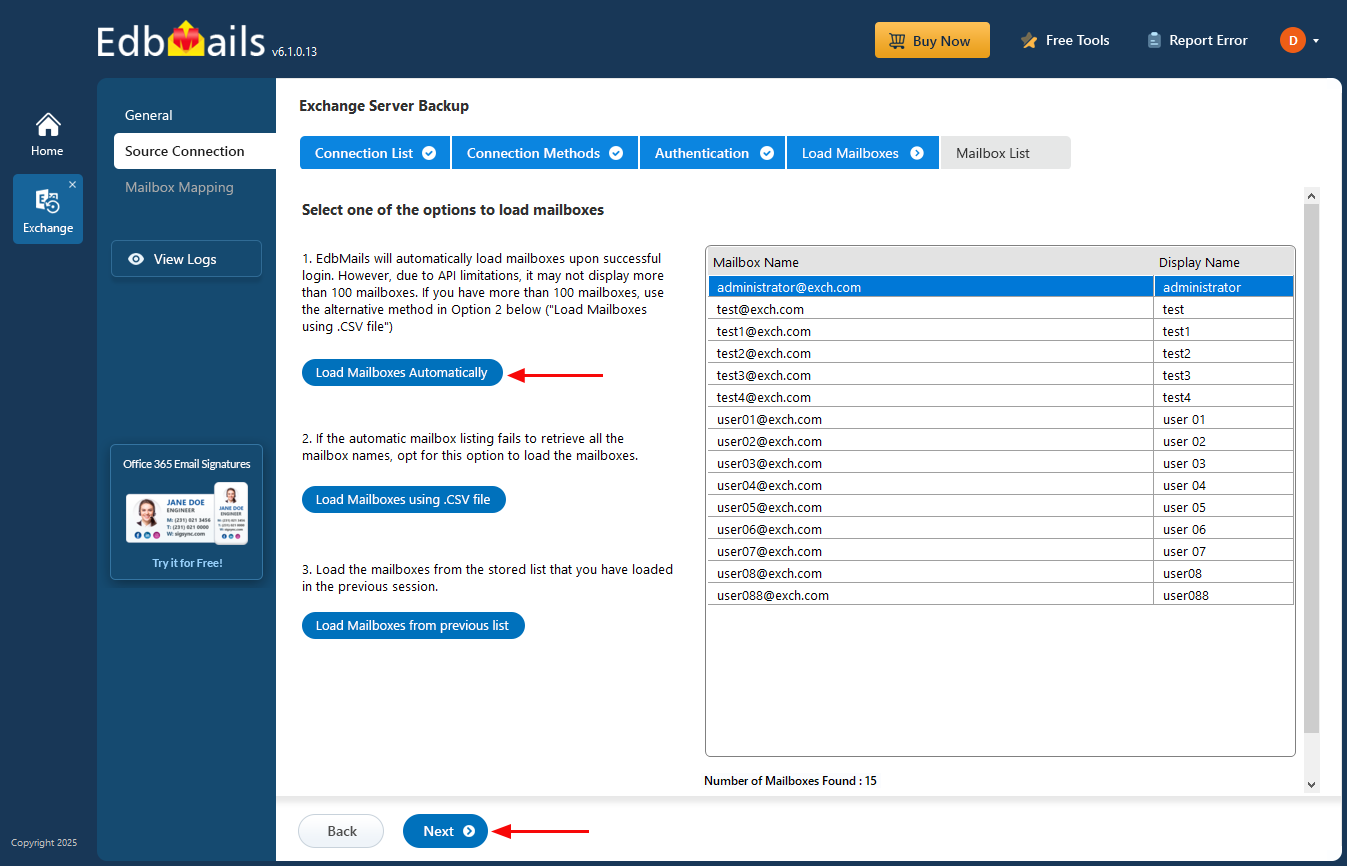
- EdbMails automatically loads up to 100 mailboxes from the source Exchange server, following Microsoft’s API limitations. To load more than 100 mailboxes, you can import a CSV file with the additional mailbox list. Choose the method that best fits your setup to load mailboxes into EdbMails and click ‘Next’.
- Select the items you want to backup and click the ‘Next’ button.
- EdbMails provides the facility for a Full Backup or Incremental backup and enables you to exclude mailbox folders such as Inbox, Drafts, Junk, Conversation History.
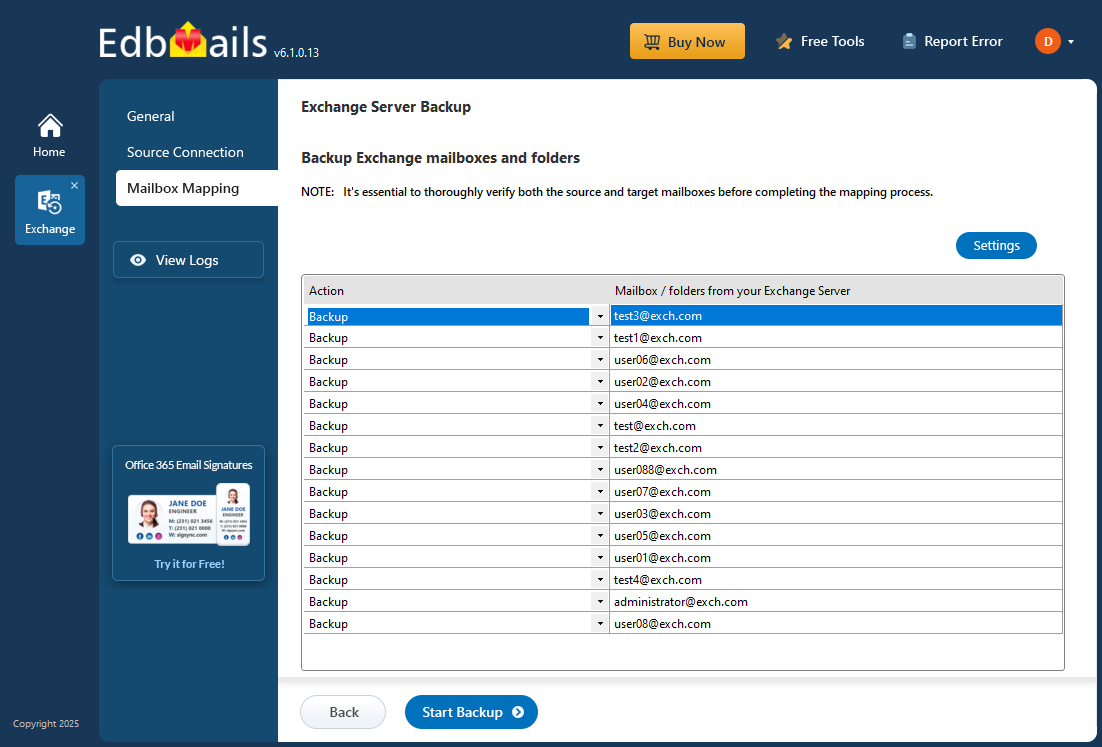
- Review the selected mailboxes and folders to ensure everything is correct. Verify that the 'Action' is set to 'Backup', then click ‘Start Backup’ to begin the process.
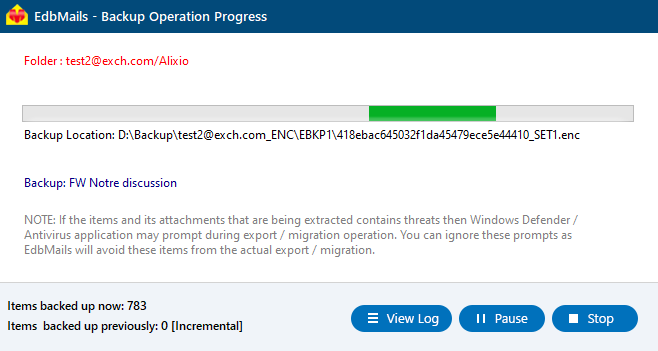
- During the backup, EdbMails displays a real-time progress window with options to pause or resume. After the backup is complete, click ‘View Log’ to access a detailed summary report.
- You can restore the backup file anytime by following the restore operation with EdbMails.
See steps to restore Exchange server backup with EdbMails
Benefits of Exchange mailbox backup with EdbMails
- All-in-one application for Exchange migration, Exchange backup and EDB Recovery.
- You can convert EDB to PST or backup Exchange server mailboxes as an AES-256 encrypted file.
- Facility for Exchange server backup and restore from a single user-friendly interface.
- You can use the Exchange server without downtime even when the backup is running.
- The graphical interface enables you to complete the backup without PowerShell scripts.
- Migrate EDB to Office 365 and Live Exchange server
- EdbMails is compatible with all Windows operating systems and Windows servers
Conclusion
In this article, we explored three methods for backing up Exchange server mailboxes and EDB files. The first method involves using the Windows Server Backup (WSB) utility, which backs up applications at the application level. However, WSB has a limitation: if the EDB file is severely corrupted or in a Dirty Shutdown state, the backup becomes ineffective, and you’ll need to repair the database before you can recover the mailboxes. EdbMails, on the other hand, is a robust Exchange recovery tool that can repair and export corrupted EDB files to PST format, as well as create a complete, highly secure, encrypted backup of Exchange server mailboxes.


