Export Exchange Public Folders to Outlook PST
Exporting Exchange Server Public Folders to PST is a vital requirement for organizations looking to safeguard, migrate, or archive shared mailbox data. Public folders often contain information such as emails, calendars, contacts, and tasks that support day-to-day collaboration. Saving this data in PST format helps meet compliance needs, supports long-term retention, and simplifies system migration. However, relying on traditional approaches like the Outlook Import/Export wizard can be time-consuming and unreliable, particularly when handling large public folder data sets or when the Exchange server is experiencing performance or accessibility issues.
EdbMails EDB to PST Converter is a comprehensive solution that simplifies the export of Exchange Public Folders. It allows users to recover data from healthy, offline, or corrupted EDB files without the need for an Exchange Server or Active Directory access. The software supports selective export, enabling you to choose specific folders or mailbox items as required. Compatible with all major Exchange Server versions from 2003 to 2019, EdbMails delivers a consistent experience across diverse setups while retaining the original folder structure, email attributes, and Unicode content throughout the conversion process.
The following step-by-step guide explains how to use EdbMails to export Exchange Server Public Folders to PST in a secure and efficient manner. It walks you through each stage of the process, including installing the software, selecting the EDB file, previewing Public Folder data, and selecting a location to save the PST files. Designed for both first-time users and experienced Exchange administrators, this guide ensures a clear and confident export experience.
How to export Public folder to PST in Exchange server 2019, 2016 and 2013?
Exchange server versions like 2019, 2016, 2013, and 2010 don’t offer a direct built-in option to export Public folders. A common solution is to configure your Exchange account in Outlook and use the Import/Export feature to save the Public folder data as a PST file.
Steps to export Exchange server 2019, 2016, 2013 and 2010 Public folder to PST
- Step 1: Check that MS Outlook 2019, 2016, 2013, or 2010 is installed on your computer.
- Step 2: From the Windows Control Panel, add and configure your Exchange account in Outlook.
- Step 3: Next, open Microsoft Outlook and click the ‘File’ tab located in the top left corner
- Step 4: Click ‘Import/Export’ under the ‘Open & Export’ menu to open the wizard.
- Step 5: Select the ‘Export to a File’ option and choose ‘Outlook Data File (.pst)’.
- Step 6: Select the folders and subfolders by expanding the Public Folders node.
- Step 7: If you want to export based on specific fields, click ‘Filters’.
- Step 8: Select a save location and start exporting the Public Folders to PST.
How to archive Public folders to a PST file in Outlook?
To archive or back up Public folders to a PST file, start by creating a new Outlook data file (.PST) in Outlook. Once it’s set up, you can manually copy the Public folder from your Exchange server account to the PST file. You can either drag and drop entire folders or select and move multiple messages at once.
- Step 1: Open Microsoft Outlook 2010 /2013 / 2016, or 2019 on your computer.
- Step 2: Add your Exchange server user account that has the Public folder.
- Step 3: Click on your account and expand ‘New Items’ at the top.
- Step 4: To create a new PST file, go to 'More Items' and then 'Outlook Data File...'
- Step 5: After this PST file has been listed in Outlook, create a new folder within it.
- Step 6: Copy the Public folder from your user account into the PST file.
- Step 7: You can also copy individual or all messages into the new folder in bulk.
We’ve outlined two manual methods for exporting Exchange Public folders to PST. However, these methods may not be ideal for large Public folders, as Outlook can often crash or freeze during the process. Additionally, exporting one folder at a time can be time-consuming. If your Exchange server is down or the database is corrupted, these methods won’t work. In such cases, using a third-party tool to repair the corrupted EDB file and then exporting the Public folder to PST is the only viable solution.
How to export a Public folder to PST from any Exchange server?
To export the Public folder database (pub1.edb) and Public folder data to PST from Exchange server 2013, 2016, and 2019, you can rely on the EdbMails Exchange database recovery tool. EdbMails simplifies the process of recovering Exchange mailboxes from offline or corrupted EDB files, without the need for an Exchange server or Active Directory. It also enables you to either convert the EDB to PST or directly migrate the data to Office 365 or a Live Exchange server.
Steps to export Exchange Public folders from EDB to PST using EdbMails
Step 1: Download and install EdbMails software
- Download and set up EdbMails on any Windows PC, even if Exchange Server isn’t available and start exporting your Exchange public data without delay.
- Launch the EdbMails tool from your system.
- Enter your registered email address and password, then select Login. If you haven’t signed up yet, click Start Your Free Trial to continue using the trial version.Note: The trial version supports mailbox export with a limit of 30 items per folder. To unlock full export functionality, a valid license is required.
Click here to purchase the license from the EdbMails website .
After that, restart the application. Log in using the same email credentials used during purchase to activate the license.
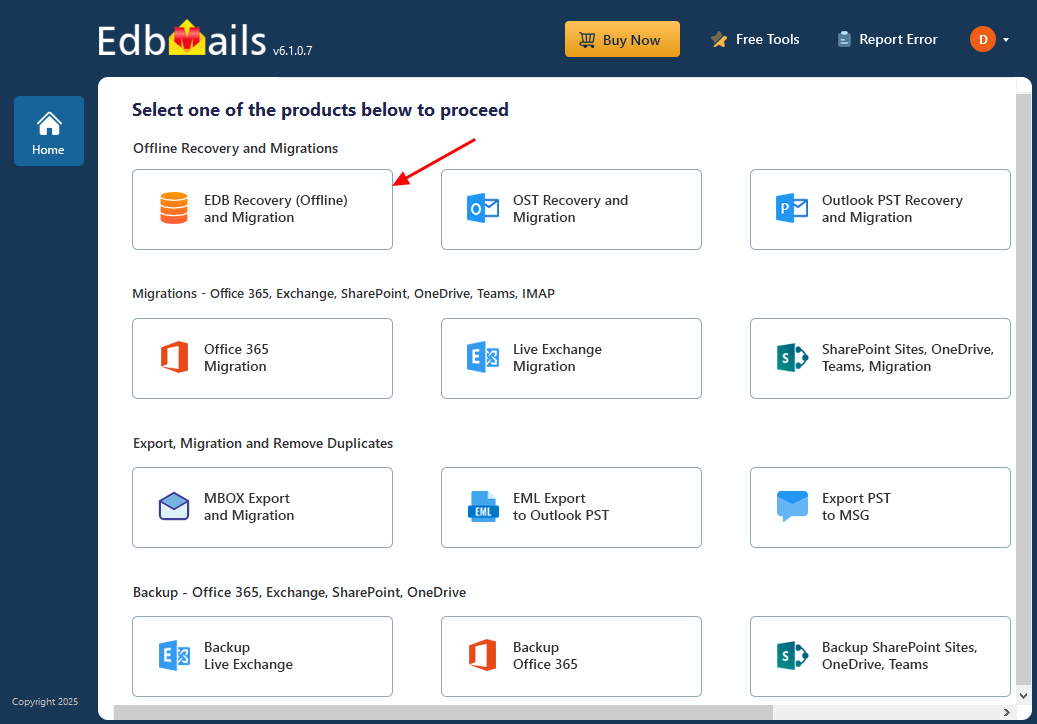
- Select ‘EDB Recovery (Offline) and Migration’ from the list of available products.
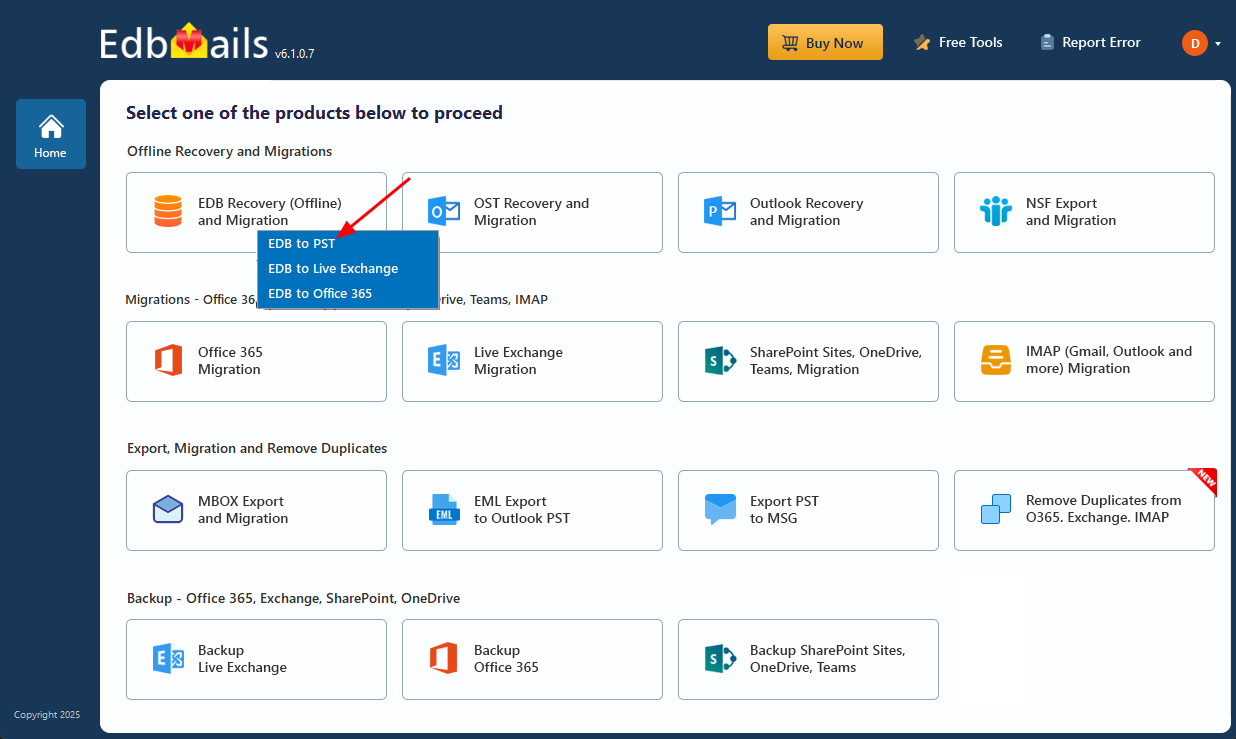
- Select ‘EDB to PST’ option.
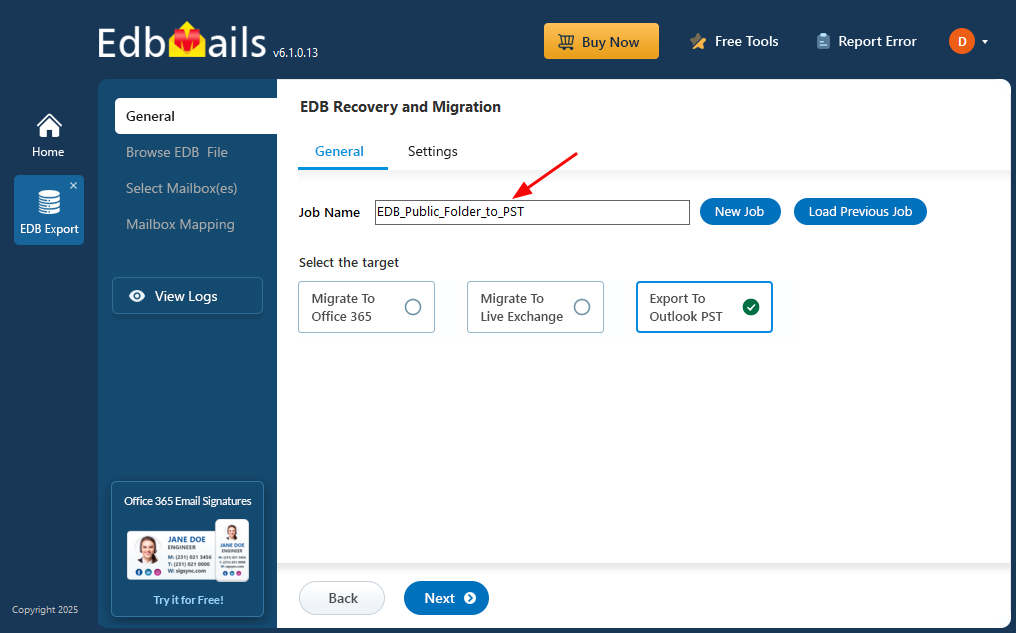
- Either retain the default job name or select New Job to rename it.
- Press Next to continue to the following step.
Step 2: Select the offline EDB file
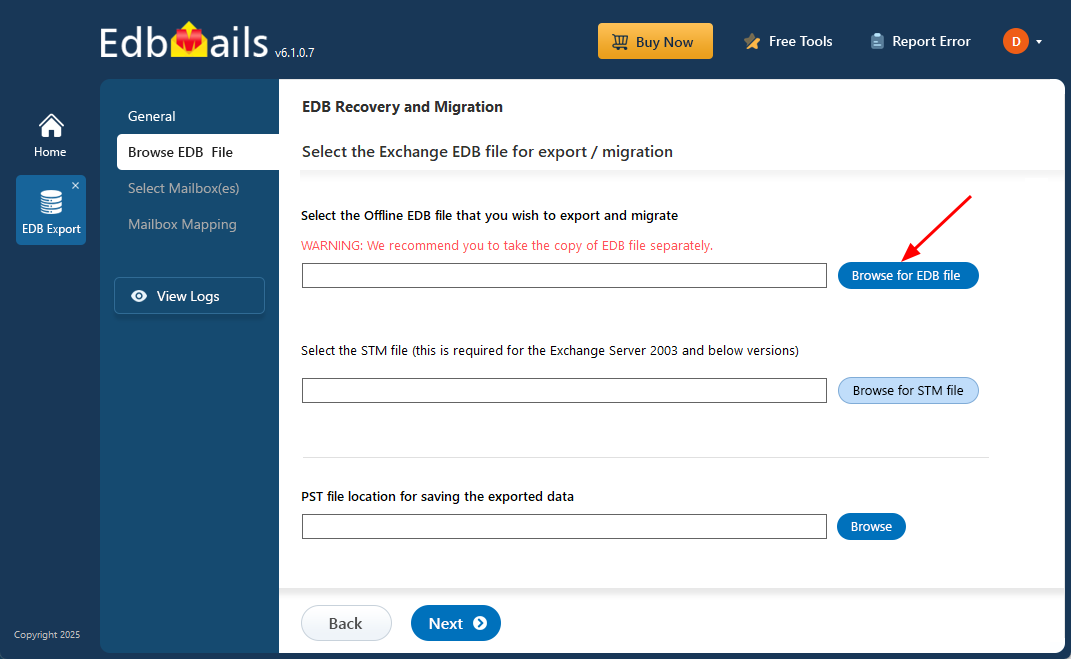
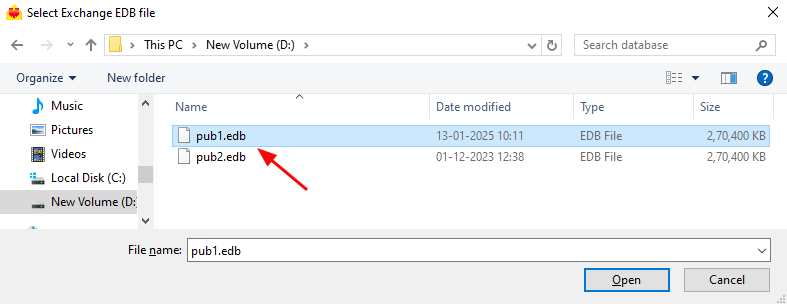
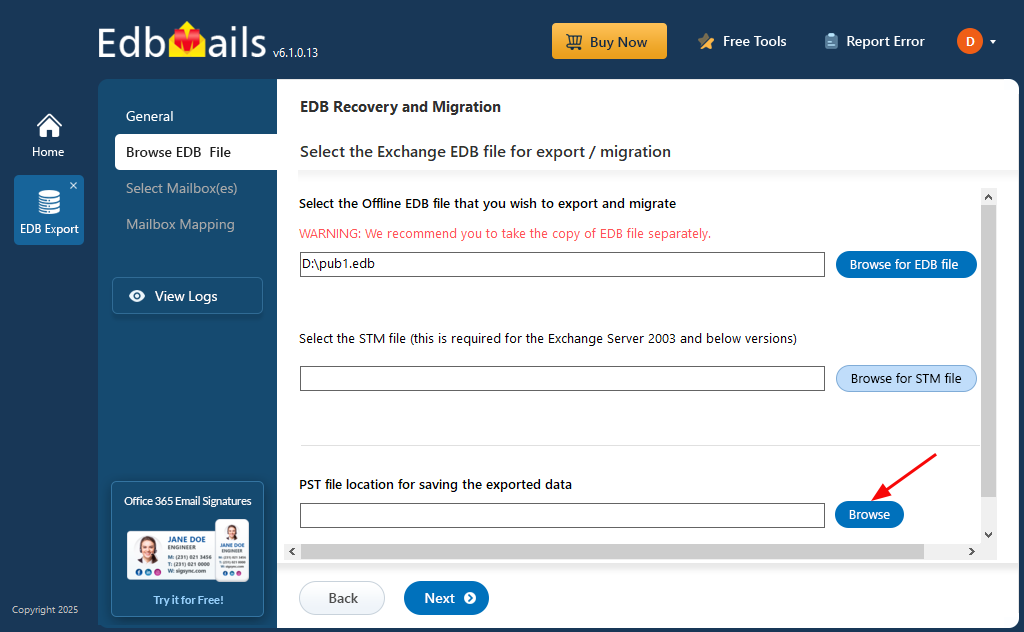
- Click ‘Browse for EDB file’.
- Browse and select the offline EDB file from your computer, then click Next to continue.
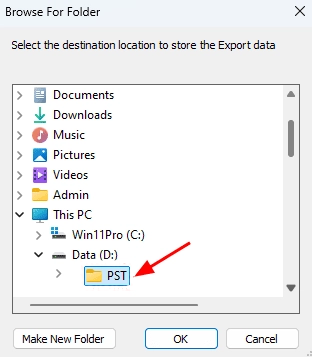
- Click ‘Browse’.
- Choose where to save the PST files and confirm that the selected drive has sufficient storage to handle the export.
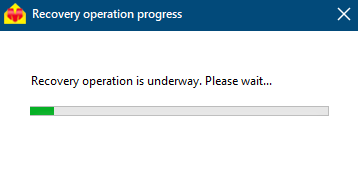
- EdbMails scans and fixes damaged EDB files from an Exchange server, ensuring data recovery and accessibility.
Step 3: Select the mailboxes to export EDB to PST
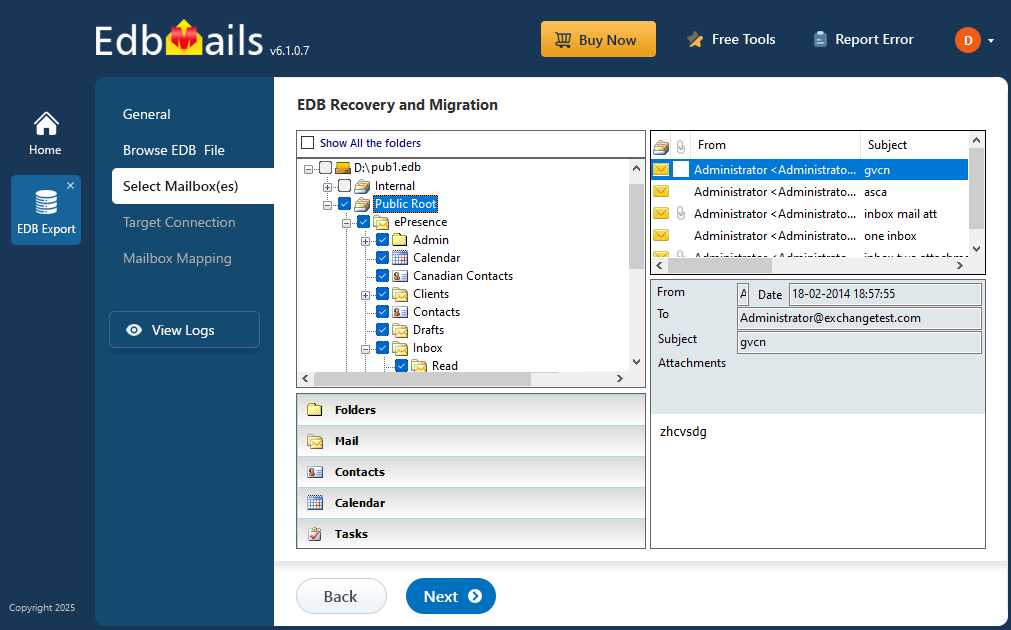
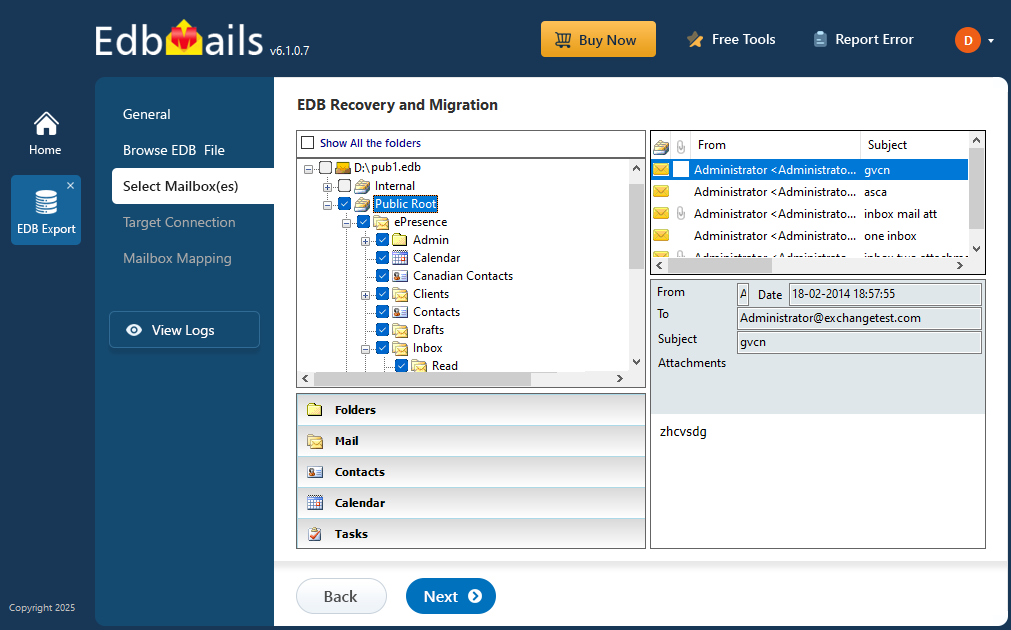
- After the recovery process is complete, you can preview all your mail items, such as emails, contacts, folders, notes, tasks, and calendars, directly in the application's preview pane.
- Select the desired EDB public folders for migration and click the 'Next' button to continue.
Step 4: Convert EDB to PST
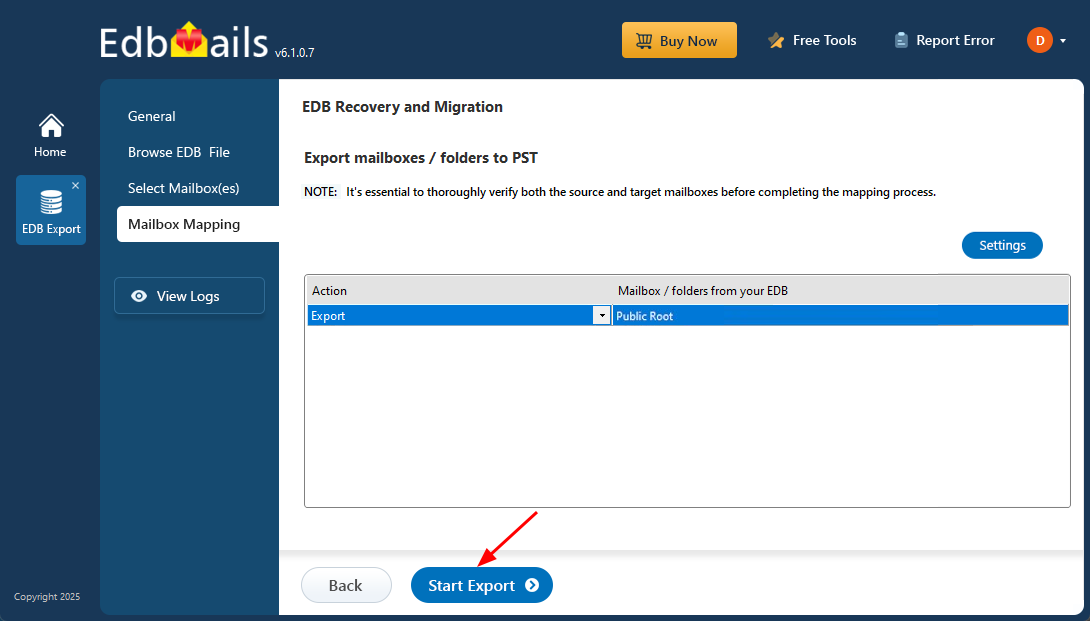
- Check the selected mailboxes and folders for export. Make sure the 'Action' is set to 'Export', then click the 'Start Export' button to initiate the process.
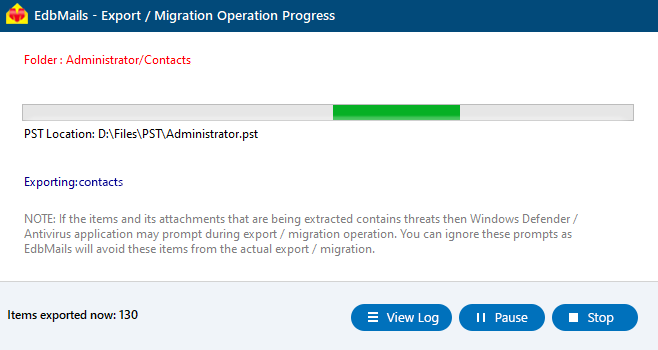
- EdbMails shows a progress window during the export process, allowing you to pause and resume the operation as needed.
- Click the ‘View Logs’ button to access a detailed summary of the export process.
Conclusion
Exporting Public folders from an EDB file to PST can be challenging, especially without the right tools or a clear step-by-step approach. While Exchange Server 2010 allows this through PowerShell, later versions such as 2013, 2016, and 2019 no longer provide a built-in option. The process becomes even more complicated if the database is corrupted or the server is unavailable, making manual methods ineffective.
EdbMails, a Microsoft-partnered EDB to PST converter, simplifies this task significantly. It enables you to recover data from damaged or offline EDB files and export Public folders directly to PST in just a few clicks. Beyond exporting, EdbMails also supports direct migration of Public folders from Exchange Server 2003 through 2019 to another Exchange server or Office 365, all without downtime or risk of data loss—making it a dependable and efficient solution for administrators.


