Exchange database is mandatory on UserMailbox
When the ‘Exchange database is mandatory on UserMailbox’ error appears, it prevents users from accessing their mailboxes, leading to significant disruptions in communication and day-to-day business operations. This issue typically arises when the Exchange server database is dismounted, corrupted, or otherwise inaccessible. If not addressed promptly, it can result in the loss of critical data such as emails, contacts, and calendar entries.
Restoring access begins with successfully mounting the Exchange database—but when the database is damaged, manual recovery methods often fall short and demand considerable technical expertise. This is where EdbMails EDB to PST Converter provides a reliable alternative. It enables you to recover mailbox data from dismounted or corrupted Exchange databases with ease. Whether you choose to migrate the restored data to a live Exchange server or export it to PST files, EdbMails ensures complete data recovery without compromising integrity.
In this step-by-step guide, we will walk you through how to resolve the "Exchange database is mandatory on UserMailbox" error using EdbMails. This simple process will help you restore access to user mailboxes quickly, with no downtime, ensuring your business operations resume without disruption.
What is the Exchange database mandatory error?
Exchange server 2019 and 2016 are the latest versions that offer improved features and enhanced security, prompting many businesses to migrate from older Exchange server systems. Upgrading from Exchange server 2013 to either Exchange server 2019 or 2016 allows companies to benefit from these advancements. However, during the upgrade process, you may come across various error messages that can complicate the migration.
The following error was generated when “$error.Clear();
if(($server -eq $null) -and ($RolelsDatacenter -ne $true))
{
Update-RmsSharedIdentity -ServerName $RoleNetBIOSName
}
was run :Microsoft.Exchange.Data.DataValidationException: Database is mandatory on UserMailbox
You might see the following warning message when you navigate to the Exchange admin center (EAC).
This error occurs when a user mailbox is not associated with a database or when the homeDB attribute in Active Directory is not configured properly. In Exchange server 2016 and later versions, every mailbox must be linked to a valid database. If the database is missing or not set correctly, this error message can appear. Another possible cause is corruption of the Exchange database (EDB) file, which prevents it from mounting to the Exchange server properly.
How to resolve the error Exchange server database is mandatory on UserMailbox?
You can resolve the error with the following three methods
- Set the HomeMDB attribute in the Active Directory Services Interface
- Move the mailbox to a Database Availability Group (DAG)
- Recover and convert the corrupted EDB to PST with EdbMails
Method 1: Set the HomeMDB attribute in the ADSI
- Step 1: Install AD DS on your computer
Install the Active Directory Domain Services (AD DS) on your Windows Server operating system where you have installed the Exchange server.
See steps to install Active Directory Domain Services- After you install the AD DS, click the 'Start menu' > 'Administrative Tools' > 'ADSI Edit'.
- Right click ADSI Edit from the left and select 'Connect to…'
- Step 2: Open the Connection Settings in ADSI Edit
The ADSI (Active Directory Services Interface) Editor allows you to view and modify objects within Microsoft Active Directory Domain Services (AD DS). To begin, select the ‘Default Naming Context’ in the Connection Settings window and click OK. This will allow you to access and manage the necessary objects in your Active Directory environment.
- Step 3: Go to the User Properties and check for the homeMDB value
- Expand the ADSI to see all the Organizational units (OU)
- Navigate to the user mailbox name which shows the error
- Right click on the user > click Properties > homeMDB
The value for the homeMDB attribute will be shown as
. The homeMDB value contains the mailbox database whose object is associated with the mailbox. - Step 4: Set the homeMDB value if it shows not set
Search for a user within the Organizational Unit (OU) whose mailbox is associated with a valid database and is not displaying the error. Right-click on this user and select 'Properties.' In the 'homeMDB' field, copy the value displayed, which should look like this: CN=DB02, CN=Databases, CN=Microsoft Exchange, CN=Services, CN=Configuration, DC=domain_name, DC=local
Go back to the user whose mailbox shows
and paste the value for the homeMDB attribute. See steps to set the homeMDB attribute in the String Attribute Editor and steps to fix the inconsistent state of the user mailbox.
- Step 5: Restart the Exchange server Information Store and check the usermailbox
Once the changes are made, it may take a few hours for them to take effect. To speed up the process, restart the Microsoft Information Store service. Open the Start menu, go to Services, locate Microsoft Information Store, right-click it, and select Restart. After the service has restarted, log in again and open the Exchange Admin Center. The "Exchange database is mandatory on UserMailbox" error should no longer appear for the user mailbox.
- Step 1: Install AD DS on your computer
Method 2: Move the mailbox to a Database Availability Group
If your Exchange server is set up with a Database Availability Group (DAG), you'll need to create a new database within the DAG and then move all mailboxes to this new database. Follow the steps below to complete this process:
- Step 1: Start the Exchange Management Shell (EMS)
Launch EMS on your Exchange server 2016 or 2019 server as an administrator
- Step 2: Create a new mailbox database on the DAG
Type the following command in the EMS to create a new mailbox database
New-MailboxDatabase -Name -Server -EDB_File_Path -Log_folder_path
Replace the EDB_File_Path and Log_folder_path with the respective folder path on your computer. - Step 3: Move the mailbox to the new database
Type the following command in the EMS to move the mailbox to the new database you just created.
New-MoveRequest -Identity 'johndoe@example.com' -TargetDatabase "DB01"
See steps to move mailbox to a new database
The methods mentioned above may not be effective when the EDB file of the Exchange server is heavily corrupted or damaged, leaving the database error unresolved. Additionally, moving the mailbox to another database often requires PowerShell scripts and technical expertise. In the next section, we'll outline the most efficient and safe approach to recover the Exchange server database using EdbMails.
- Step 1: Start the Exchange Management Shell (EMS)
Method 3: Recover and convert the corrupted EDB to PST with EdbMails
In this method, we will guide you through the process of converting a corrupted EDB file to PST using the EdbMails EDB to PST converter. As a Microsoft-partnered application, EdbMails simplifies the recovery process by allowing you to directly migrate mailboxes from the EDB to the Exchange server without the need for PowerShell cmdlets.
Step 1: Download and install EdbMails Exchange recovery tool- Download and install EdbMails on any Windows PC—no need for Exchange Server. The software works standalone, making data recovery fast and effortless.
- Launch the application and click ‘Login’. If you have not registered yet, click on ‘Start Your Free Trial’ to get started.
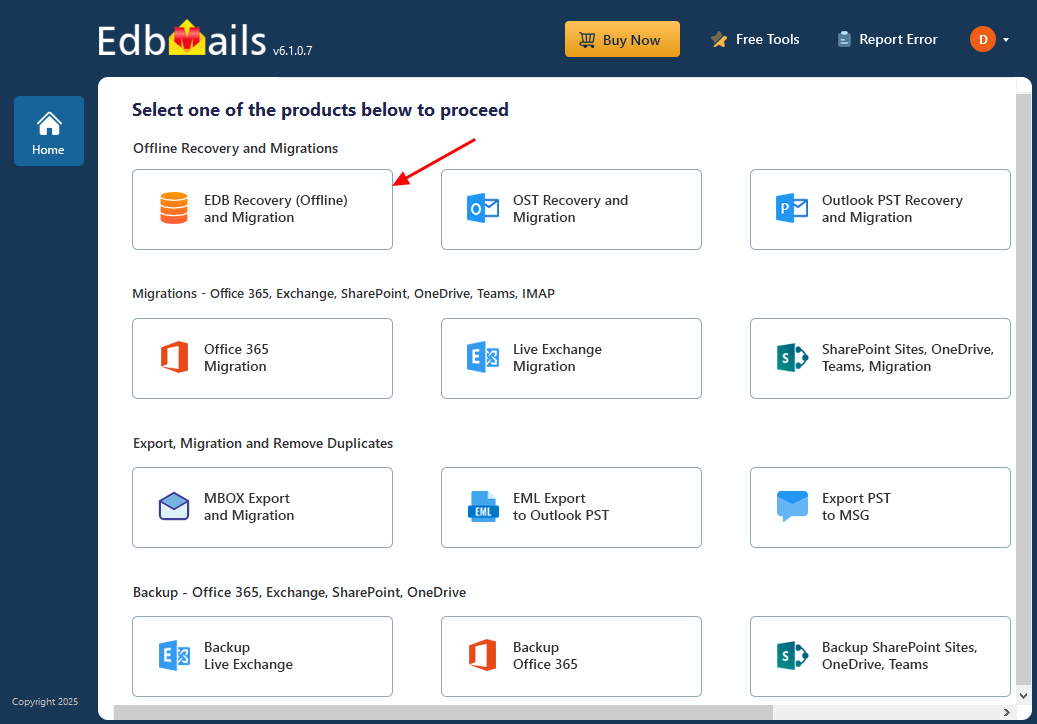
- Select the product as ‘EDB Recovery (Offline) and Migration’
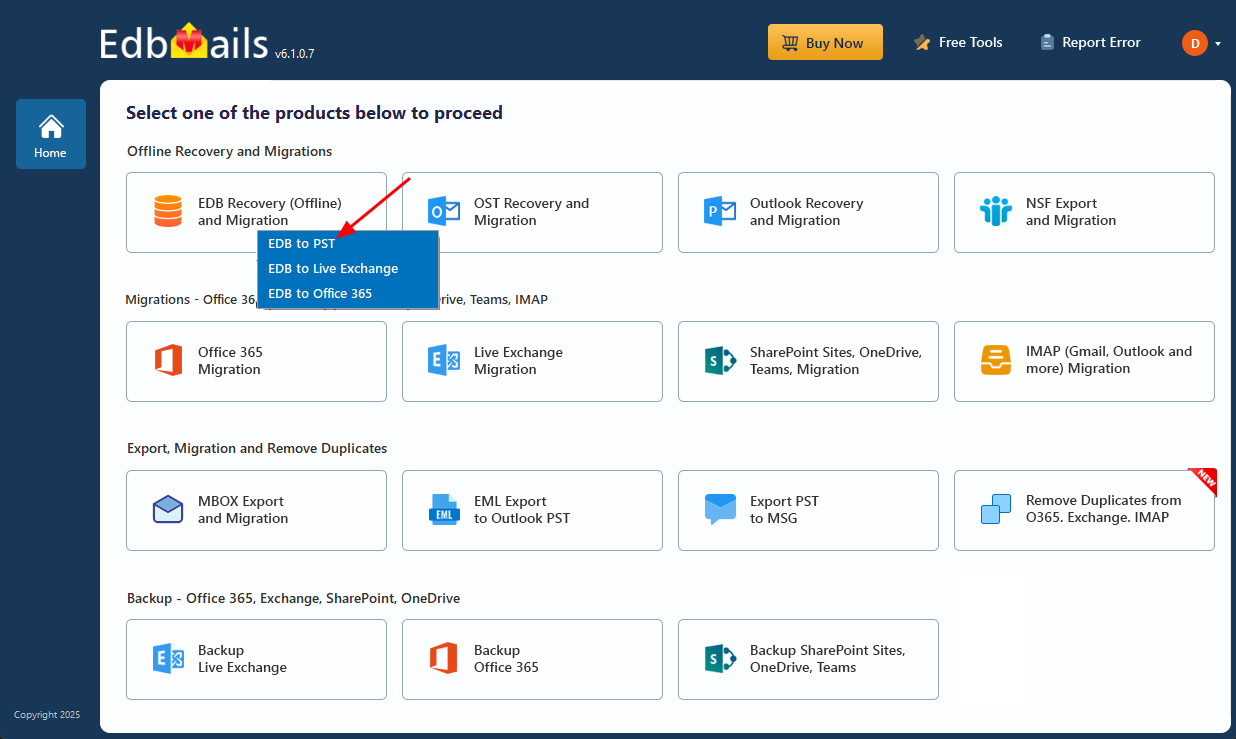
- Select ‘EDB to PST’
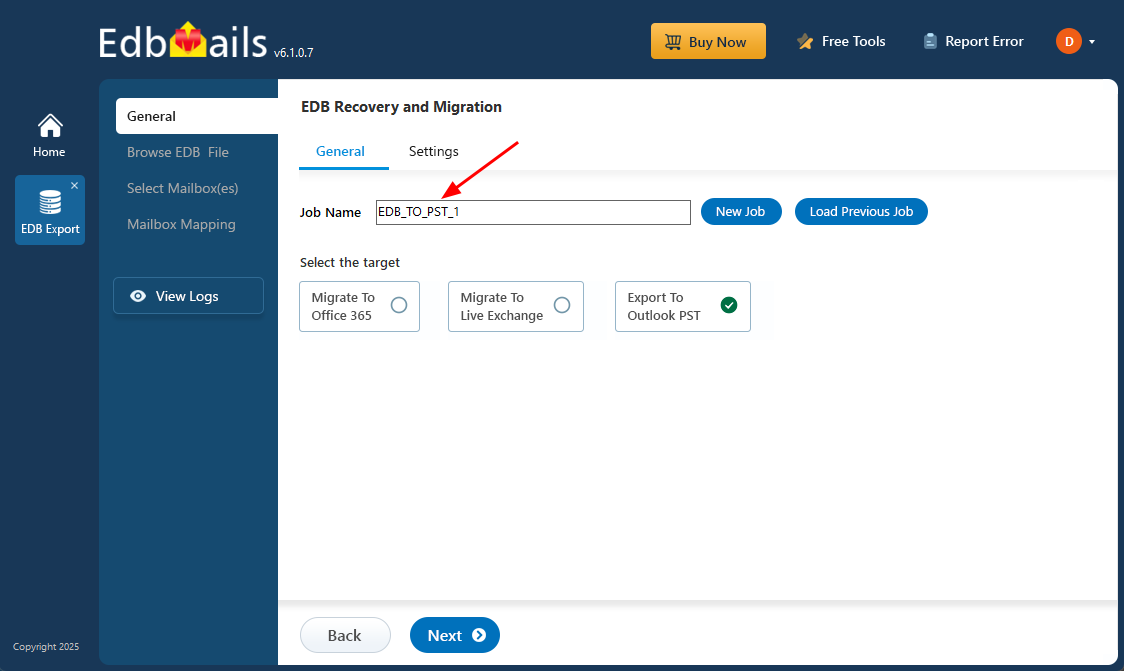
- Use the default job name or click ‘New Job’ to assign a new job name of your choice.
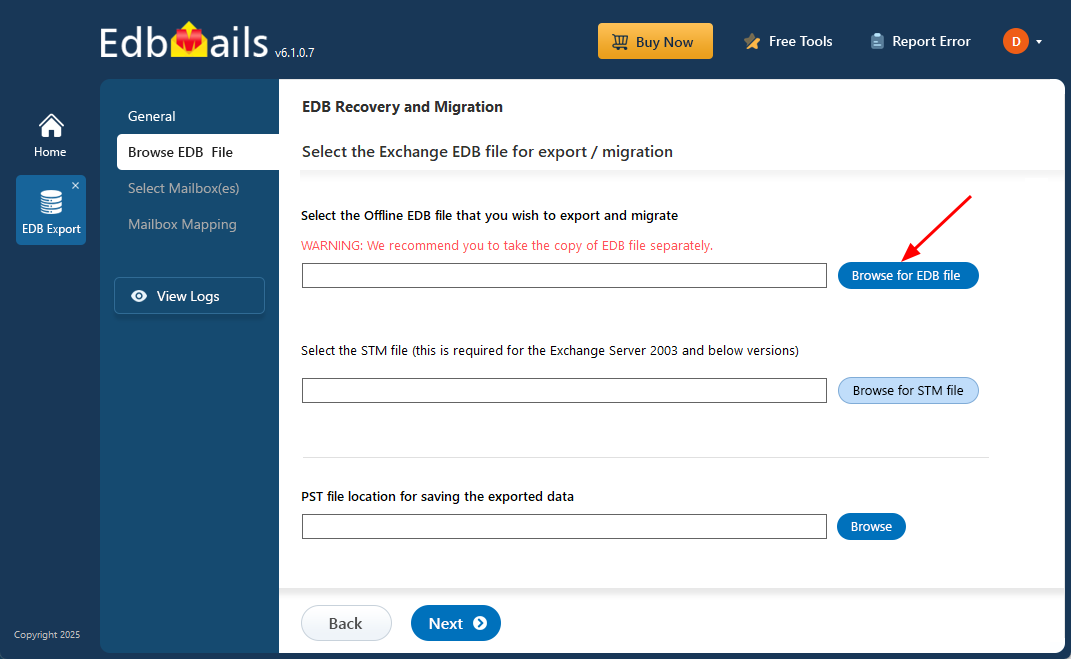
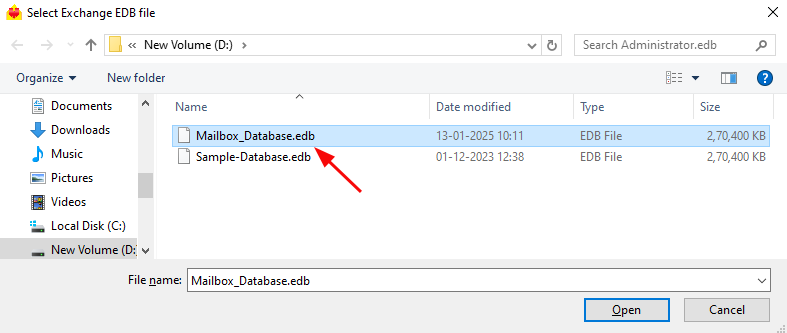
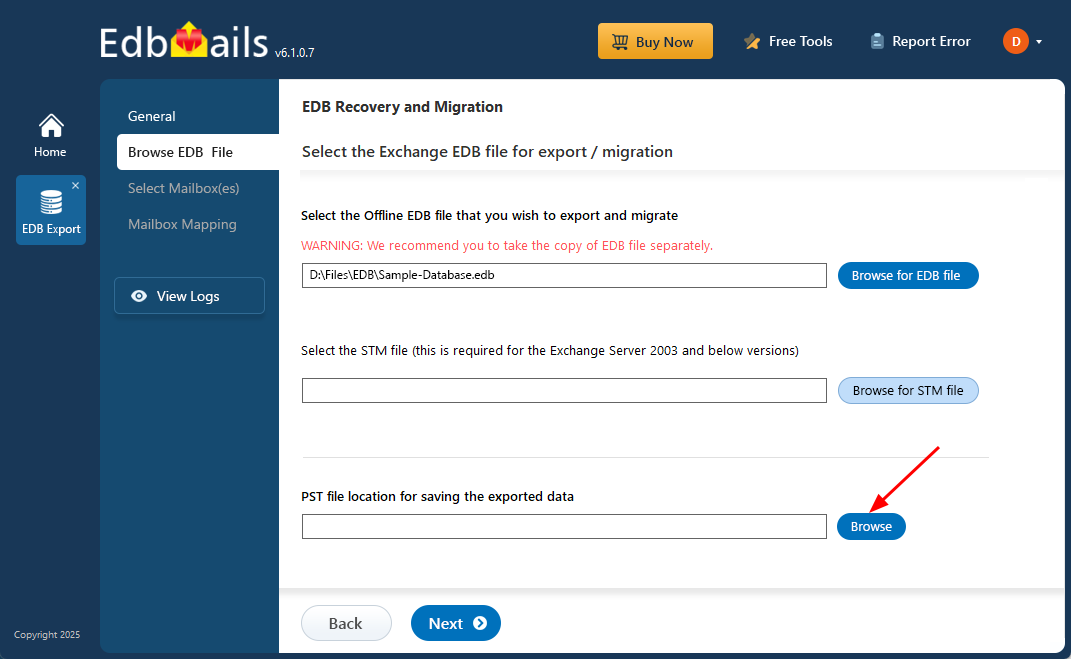
- Click ‘Browse for EDB file’
- Select the offline EDB file from your computer drive, then click the ‘Next’ button to continue. If the file is on a shared network, make sure you’ve got read and write permissions for a smooth experience.
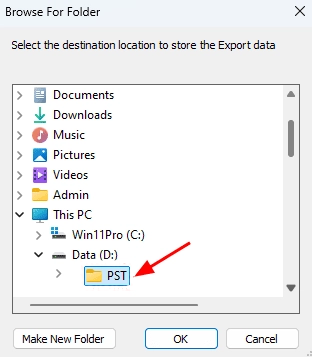
- Click ‘Browse’
- Select a location to save your exported PST files, and ensure there’s enough disk space for the export to complete.
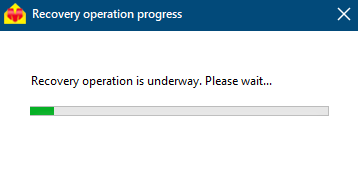
- EdbMails scans and repairs damaged EDB files from your Exchange server, ensuring complete data recovery and easy access.
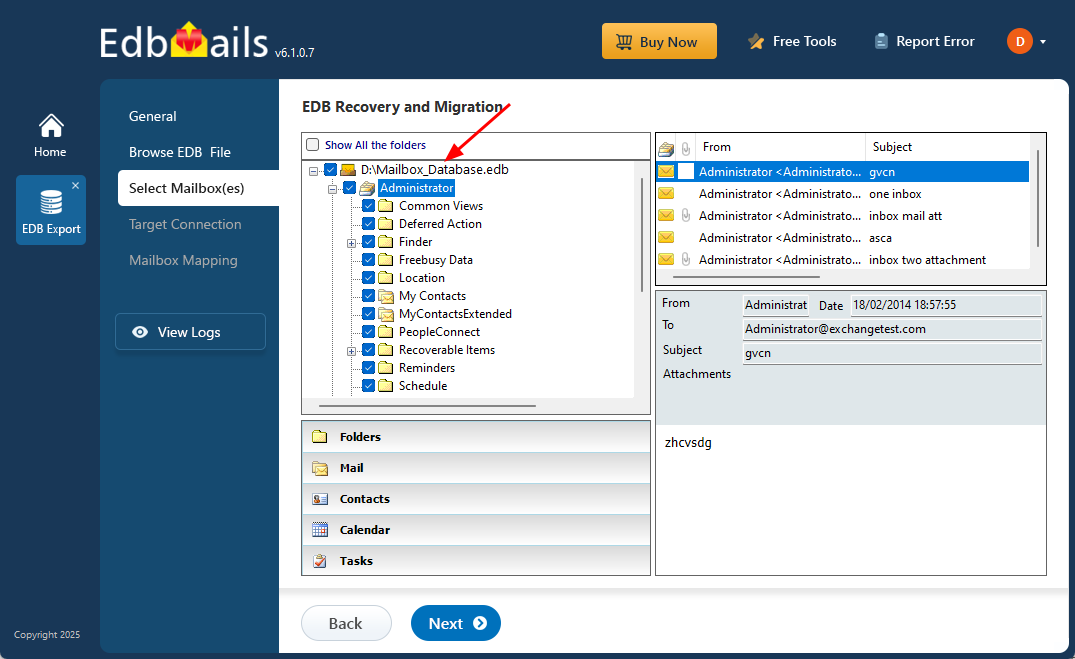
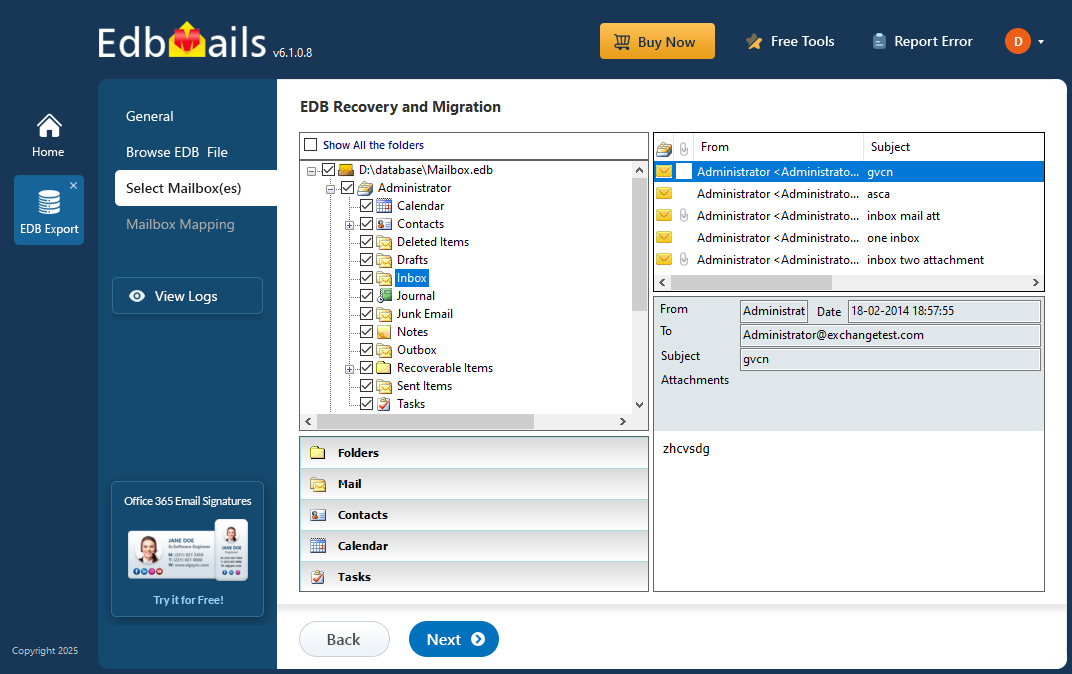
- Once recovery is finished, expand the mailbox and select any folder to see all its details like; emails, contacts, calendars, tasks, journals, and notes in the right side preview pane.
- Select the mailboxes or folders you want to export, then click ‘Next’ to proceed.
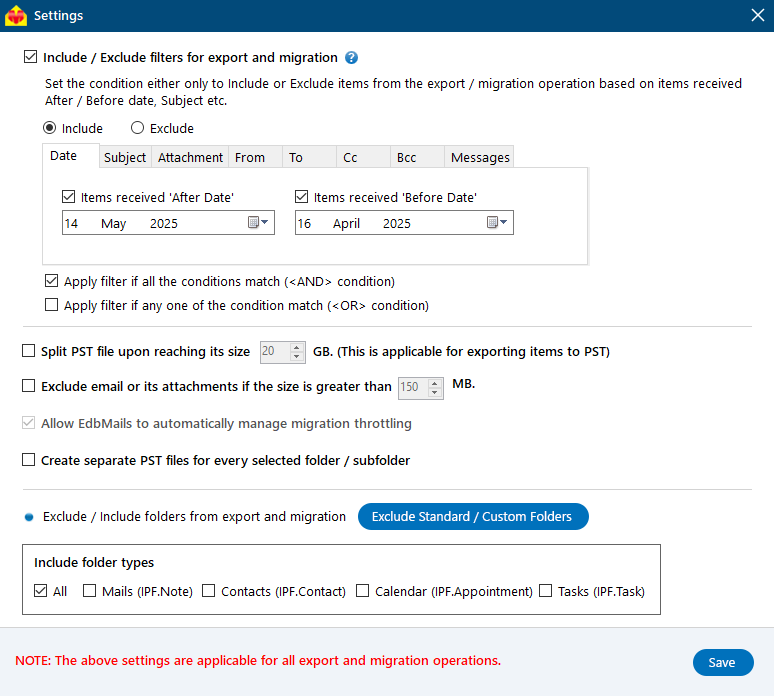
- You can apply the advanced filter settings to export the Exchange emails to PST by specific Date, Subject, Attachment and so on.
- EdbMails comes with other additional settings, like splitting a PST file during export and excluding emails that exceed a specified size limit.
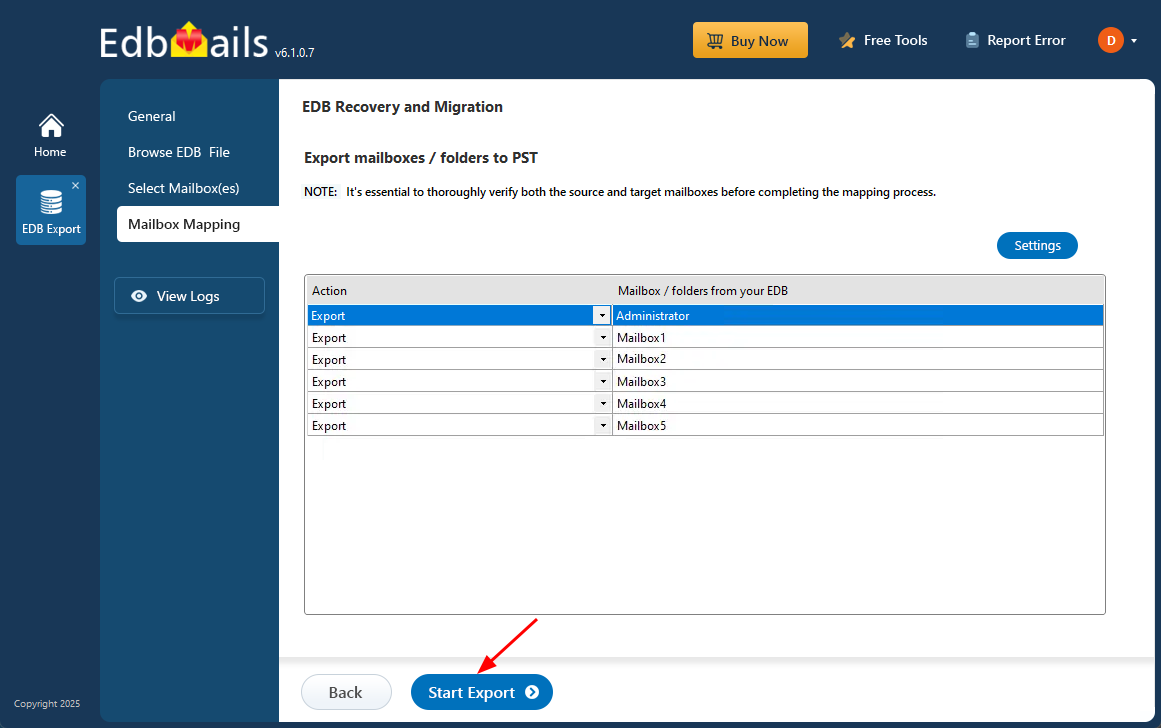
- Check your selected mailboxes and folders to confirm everything’s ready. Ensure the 'Action' is set to 'Export', then click ‘Start Export’ to begin the process.
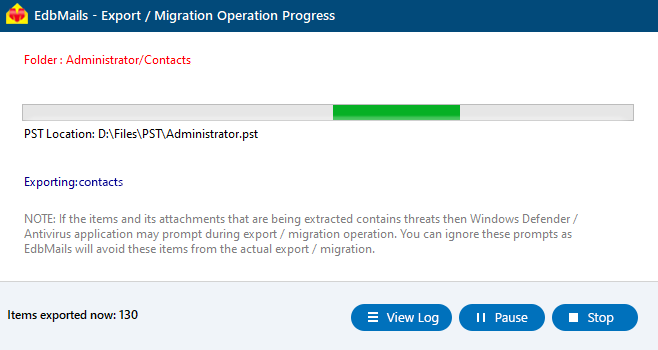
- While exporting, EdbMails displays a real-time progress window with options to pause or resume as needed. After completion, simply click ‘View Log’ to access a detailed summary report.
- To restore all your mailboxes and mail items from the corrupted EDB file, add the exported PST file in Outlook. If you have migrated the EDB to Office 365 or Exchange server, add the domain name and configure the MX records to point to the new server.
- The migration and export operation with EdbMails does not cause downtime or data loss. EdbMails can recover EDB without log files and also does not require an Exchange server for database recovery. It has advanced built-in filter settings for selecting specific folders, emails, and mail items for export and migration.
In Conclusion
The "Exchange database is mandatory" error occurs when the database associated with a user mailbox is either missing or corrupted. The first step in resolving this issue is to set the homeMDB attribute in Active Directory Services. If your Exchange server is part of a Database Availability Group (DAG), you'll need to create a new database and move the mailboxes to it using PowerShell scripts. However, if the EDB file is corrupted or inaccessible, the best option is to use an Exchange repair tool like EdbMails. This tool can help you export all mailboxes and folders from the EDB file to PST, or migrate them directly to a live Exchange server or Office 365 with just a few clicks.


