Restore an Exchange Server Database
Restoring an Exchange Server database (.EDB) is critical when it becomes offline or corrupted due to unexpected events such as server crashes, power failures, or storage issues. In many cases, remounting the database in Exchange is not feasible, particularly if the data is damaged or the original server environment is unavailable. Without a reliable restoration and recovery approach, organizations may lose access to essential mailbox data, including emails, calendars, contacts, and tasks, which can disrupt communication and affect overall business operations.
Restoring an Exchange database often requires extracting mailbox data from an EDB file, a task that can be challenging when relying solely on native Exchange tools. Built-in recovery methods usually involve advanced PowerShell commands and a deep understanding of Exchange server architecture. In addition, these approaches may fall short when dealing with heavily corrupted databases or unavailable backups. EdbMails EDB to Exchange Migration Tool simplifies the process by enabling direct recovery of mailbox data from damaged or offline EDB files and restoring it to a healthy Exchange server, minimizing manual effort and significantly reducing downtime.
This guide explains how to restore your Exchange database using EdbMails through a clear, step-by-step approach. Starting with choosing the source EDB file and ending with the secure transfer of mailbox data to the target Exchange Server, the process is simple and efficient. It is designed to help administrators restore functionality quickly while ensuring a smooth and reliable recovery.
What are the reasons for restoring an Exchange server database
Some of the reasons to restore the Exchange database are as follows:
- Restoring mailbox data from Exchange server crash
- Exchange server hardware failure
- The database EDB file is corrupted
- Recover mailbox data from an Exchange server crash
- Virus infection or malware attacks
- To recover Exchange server from Jet Engine Errors
- Restoring emails for compliance and legal requirements
- To upgrade or migrate from one Exchange server to another
- Missing or corrupted Exchange log files causing Dirty Shutdown
How to restore an Exchange server database from backup?
To restore the Exchange server database using the built-in Windows Server Backup, launch the Recovery Wizard, select Microsoft Exchange, and choose the location where you want the database to be restored. If the database is found to be corrupted or damaged, you can attempt recovery using Eseutil or opt for a more reliable method with the EdbMails Exchange Recovery Tool for safe and efficient restoration.
Steps to restore Exchange server database using Windows Server Backup
- Step 1: Launch 'Windows Server backup' and click 'Local Backup' from the left menu
- Step 2: Click 'Recover' under 'Action' and specify the location and date of the backup file
- Step 3: Select the 'Application' as Exchange and specify the recovery option
- Step 4: Choose whether you want to restore to the original or another location
- Step 5: Finally, go to the 'Confirmation' window and click 'Recover'
Once you know how to restore an Exchange server database, there are a few key things to keep in mind. If you're using a Windows Server backup, always make sure the Exchange server database backup is the most recent one. If it’s outdated, any data added after the backup will be lost. When using Microsoft’s Eseutil tool, a soft recovery can often fix the database and return it to a Clean Shutdown state. But if the database is still in a Dirty Shutdown state and heavily corrupted, you might need to perform a hard repair, which can lead to permanent data loss. To avoid this risk, it’s better to use a trusted third-party tool like EdbMails Exchange Recovery. It can recover even severely damaged databases without losing any mailbox data.
How to restore a database in Exchange server 2019, 2016, 2013, 2010, 2007 and 2003?
To restore a database in any version of Exchange server from 2019 to 2003, you can use the EdbMails Exchange Repair Toolkit. This tool allows you to repair corrupted or offline EDB files, convert them to PST, and even import EDB files to live Exchange server . It also offers flexibility by letting you select specific mailbox items and export them to formats like MHT, HTML, or EML. The steps below will guide you through the recovery and conversion process using the application.
Step 1: Download and install EdbMails Exchange recovery tool
- Get started with ease, just download and install EdbMails on any Windows computer. No need for an Exchange server to be installed! The application is easy to use and lets you begin the recovery process right away in just a few clicks.
- Start by launching the EdbMails software on your computer.
- Enter your email ID and password, then click ‘Login’. If you’re a new user, choose ‘Start Your Free Trial’ to continue.
Note: The Free Trial edition lets you migrate mailbox data, but limits the export to 30 items per folder. To export all mailbox items without restrictions, you’ll need to purchase a license from the EdbMails website.
Click here to purchase the license from the EdbMails website.
After completing the purchase, restart the application and sign in again using the same login credentials to activate your license.
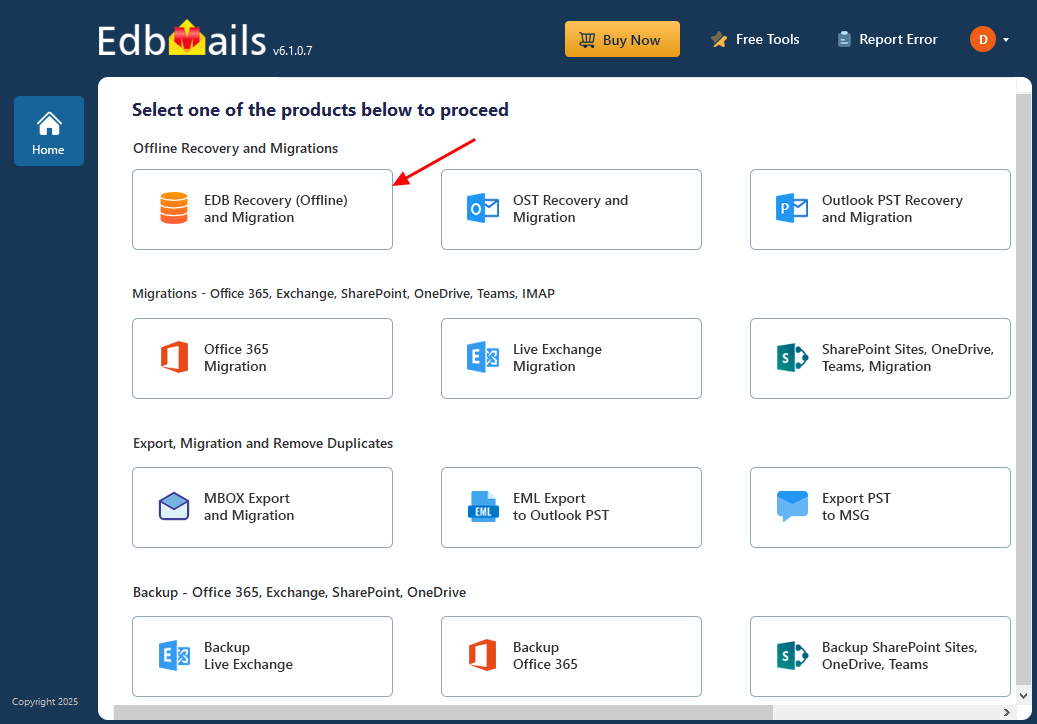
- From the product list select ‘EDB Recovery (Offline) and Migration’.
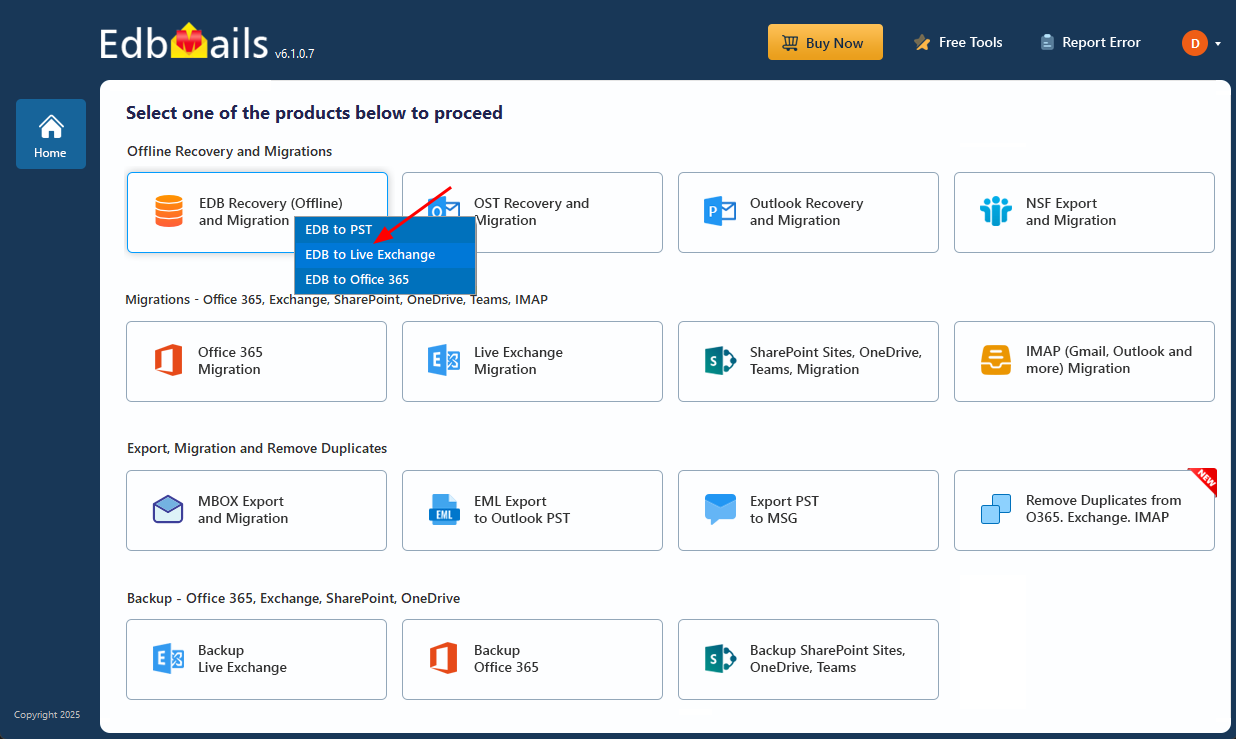
- Select ‘EDB to Live Exchange’
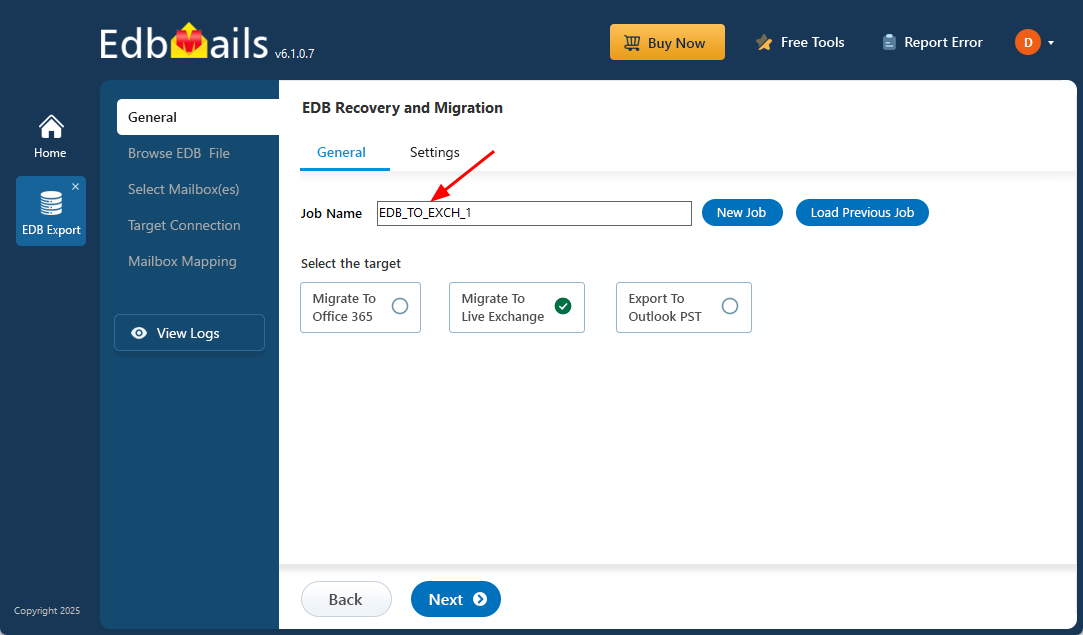
- You may use the default job name or choose the ‘New Job’ option to assign a different name.
- After that, click ‘Next’ to proceed to the following step.
Step 2: Select the offline EDB file
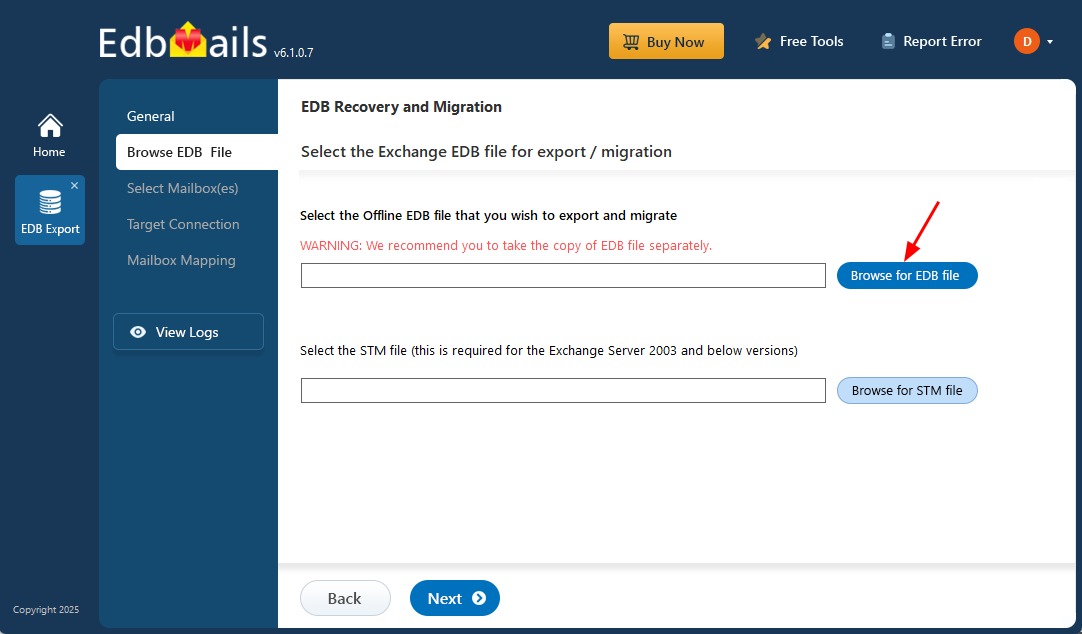
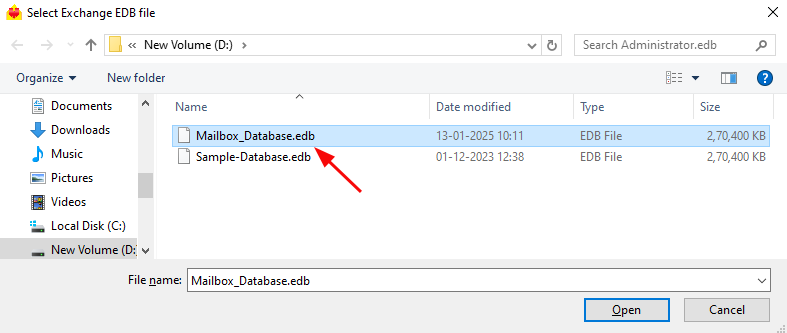
- Click on the ‘Browse for EDB file’ button.
- Select the Offline Exchange server database file that you want to restore to another Exchange server, then click ‘Next’.
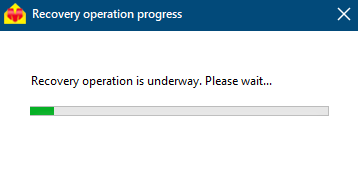
- EdbMails examines the offline EDB file to restore mailbox data from corrupted databases. The scanning time varies based on the database size and condition, so it’s important to wait until the process is complete.
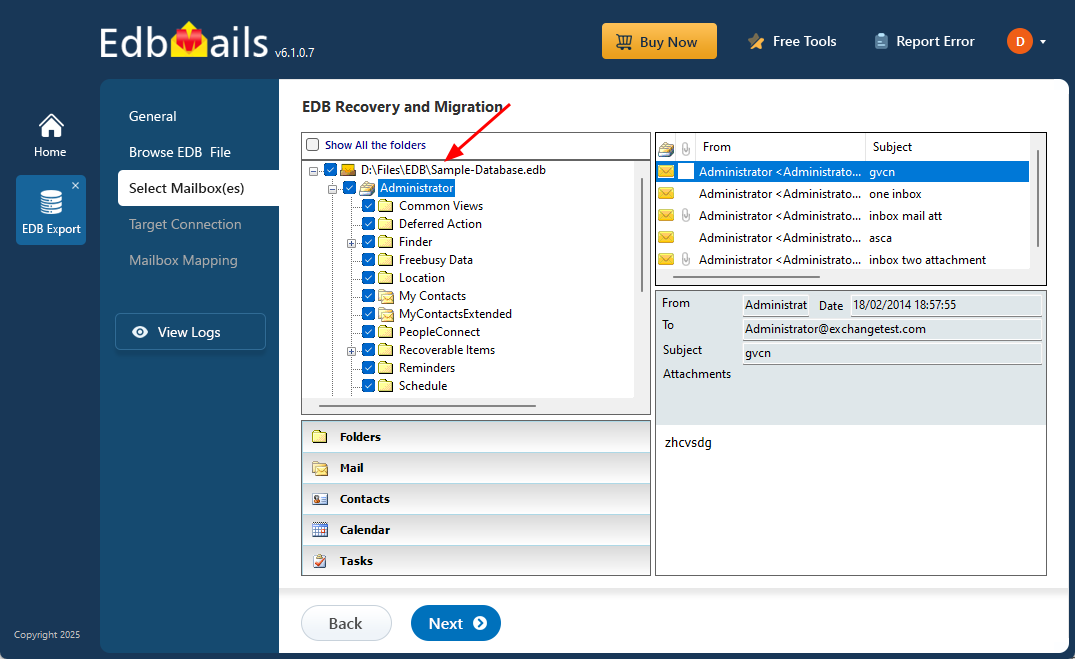
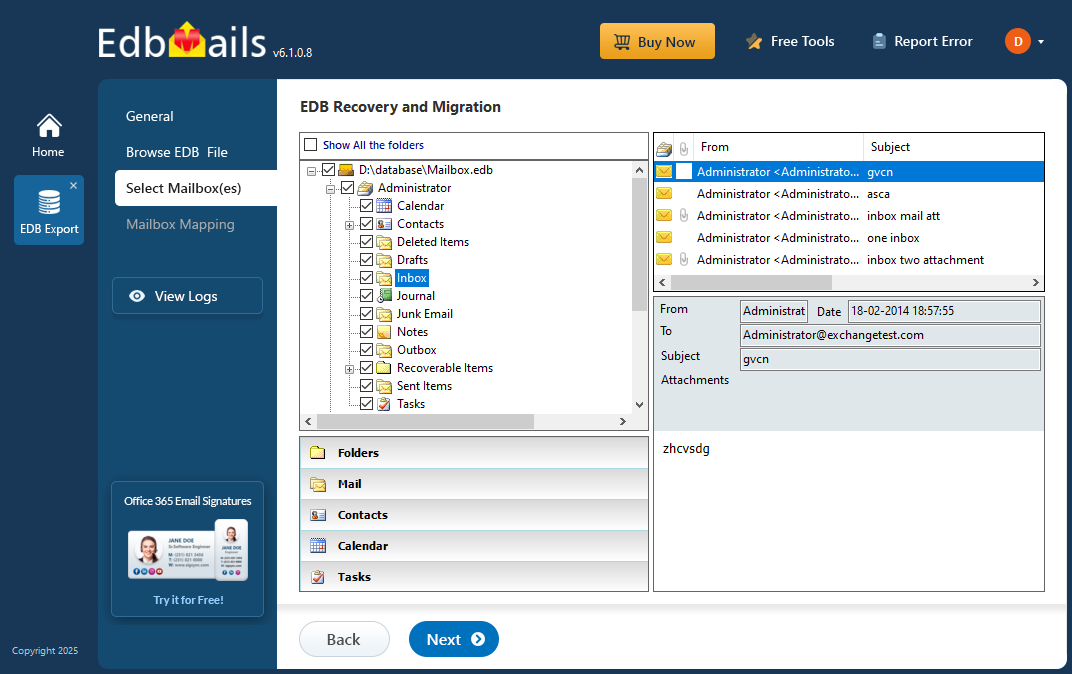
- EdbMails can fully recover the Exchange database (EDB) without log files. You can preview specific mail items such as calendars, notes, tasks, journals from the application’s preview pane.
- Select all the mailboxes you want to restore to another Exchange server and click on ‘Next’ to continue.
Step 3: Connect to the target Exchange server to begin restoration operation
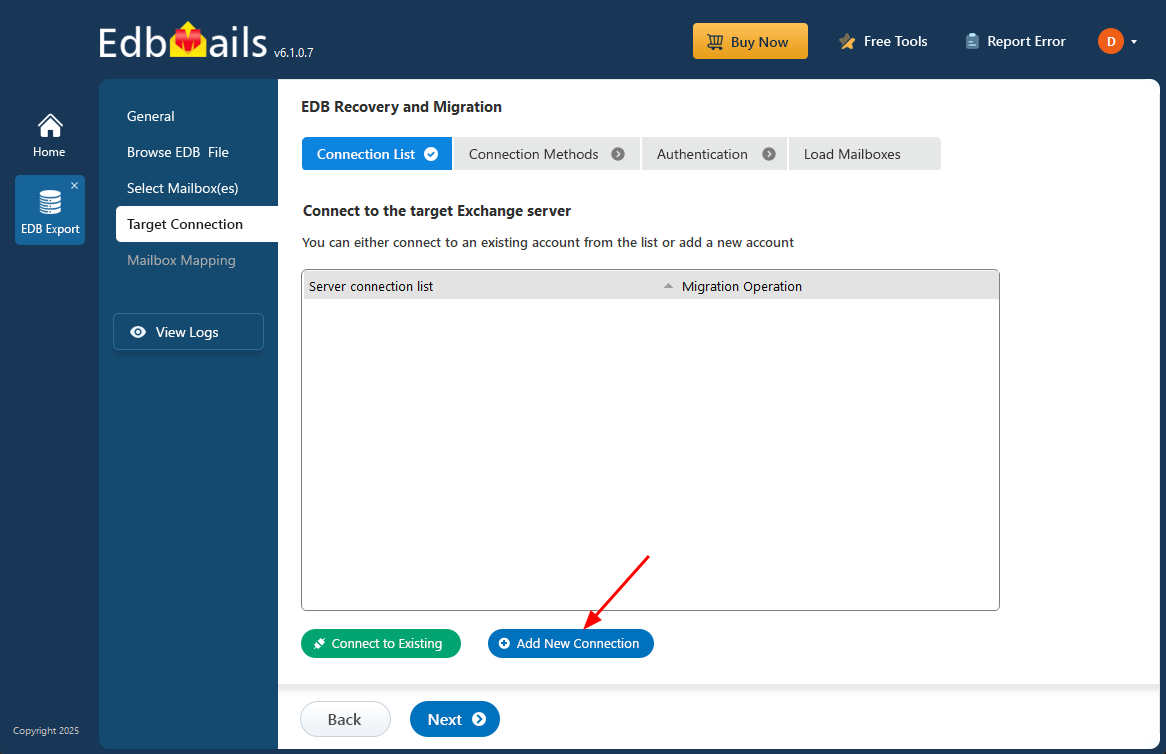
- To connect to a new target Exchange server, click the ‘Add New Connection’ button. If you prefer to use an existing connection, simply select it from the list and click ‘Connect to Existing’ to continue.
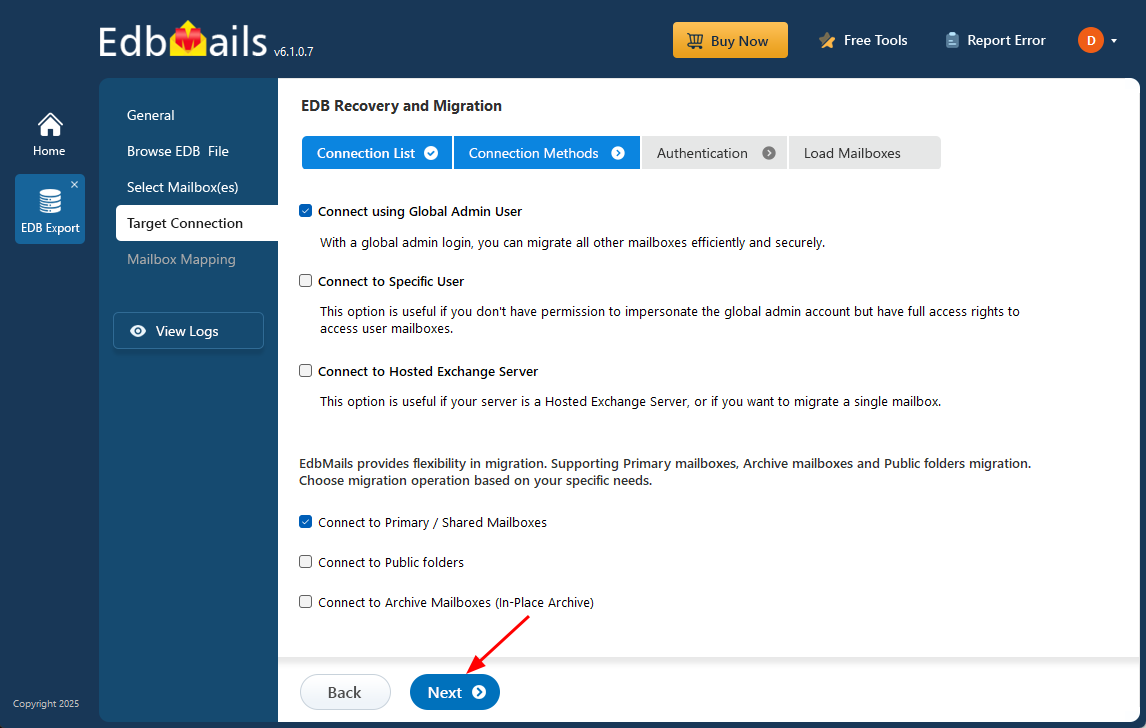
- Select the required connection options and click the ‘Next’ button.
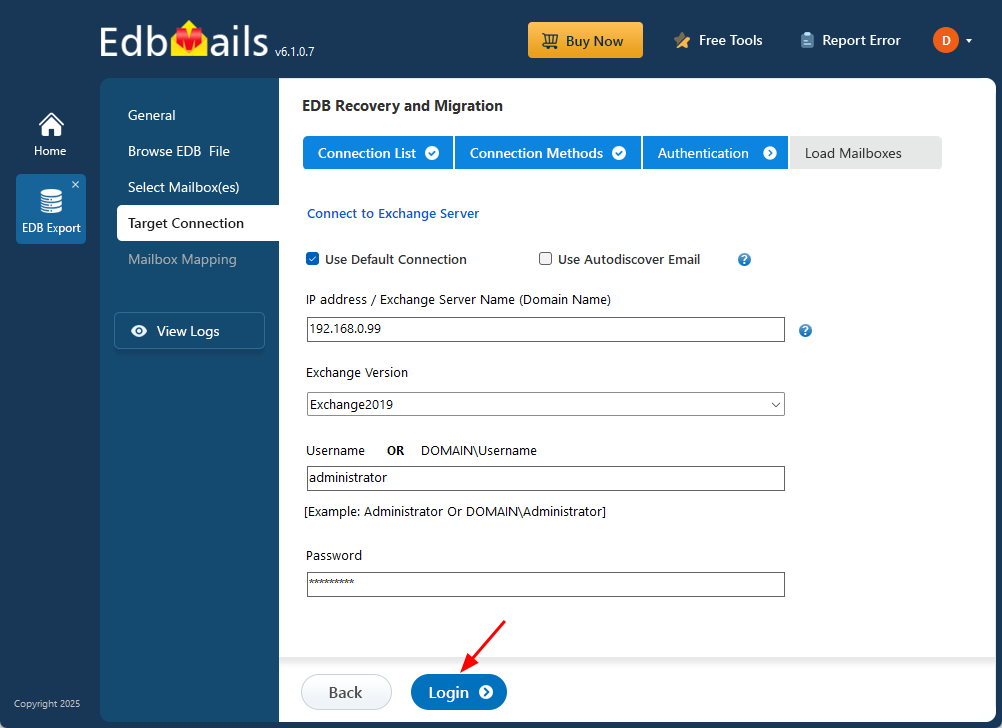
- Enter the required login details to connect to the target Exchange server mailboxes, then click ‘Login’ to proceed.
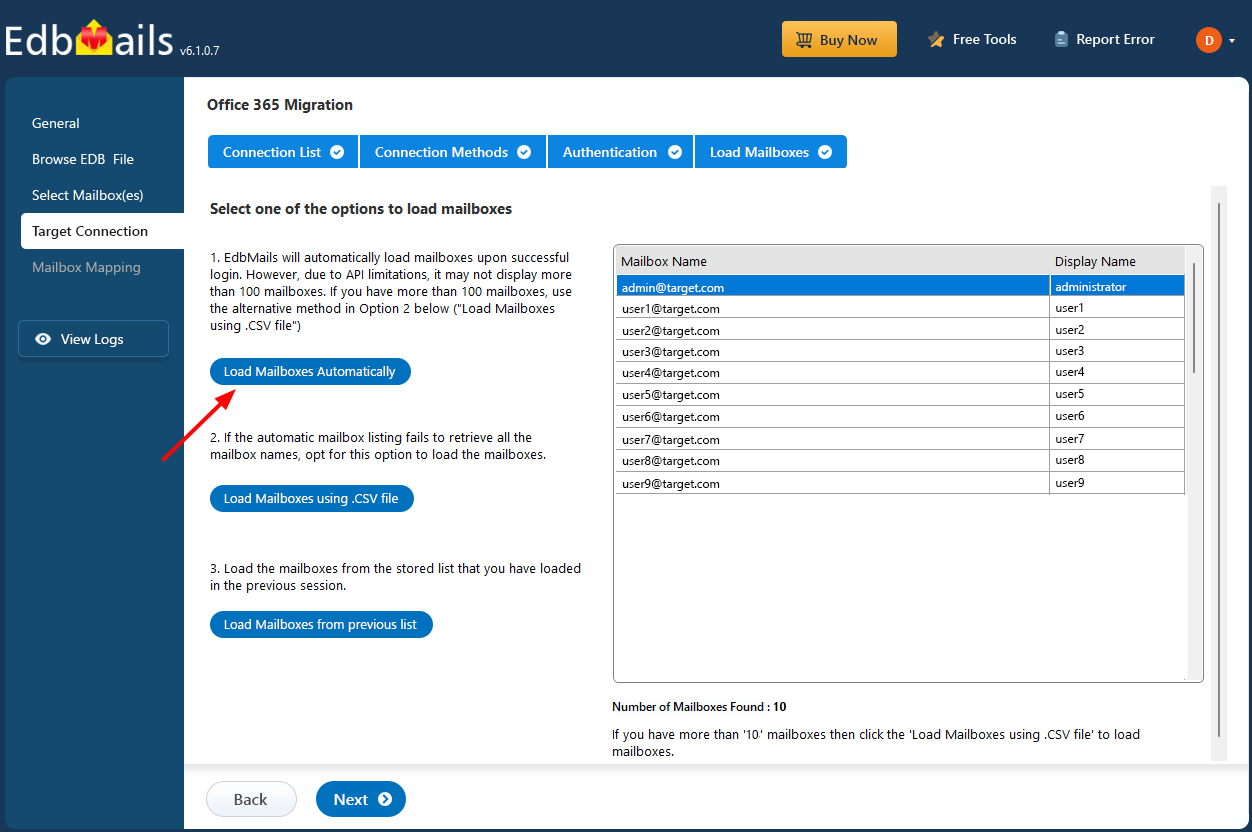
- EdbMails can automatically display up to 100 mailboxes from the target Exchange Server, which is the maximum allowed by Microsoft’s API. If your organization has more than 100 mailboxes, you can easily load the rest by importing a CSV file with the mailbox list. Just select the method that works best for you to continue loading the mailboxes.
Step 4: Map source and target mailboxes
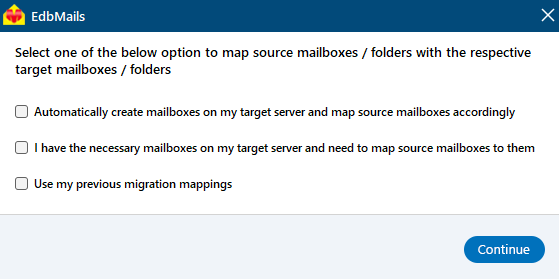
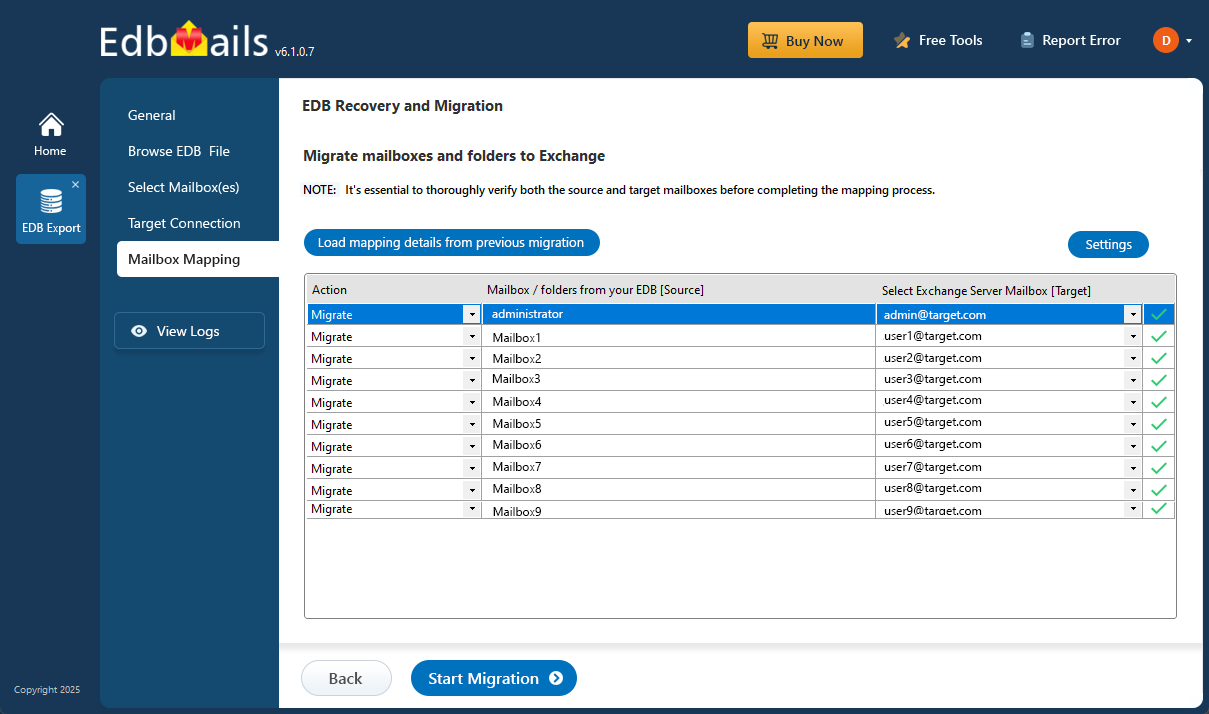
- Select the appropriate option to map the source mailboxes to the target mailboxes.
- EdbMails simplifies migration by automatically aligning mailboxes and folders between the source and destination servers, reducing time and effort. For greater precision, users can also manually assign specific source mailboxes to corresponding target mailboxes, ensuring accurate data transfer.
Step 5: Start EDB to Live Exchange Server migration
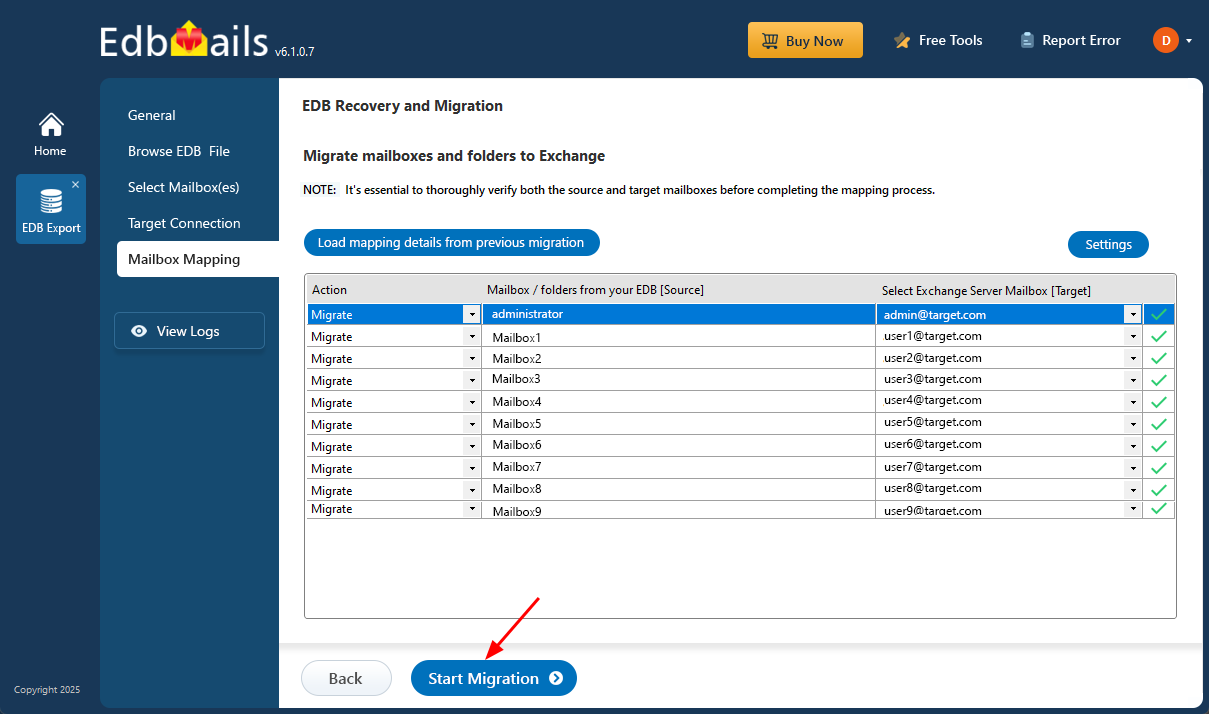
- Once the mailbox mapping is complete, click ‘Start Migration’ to initiate the restoration from the EDB file to the Exchange Server.
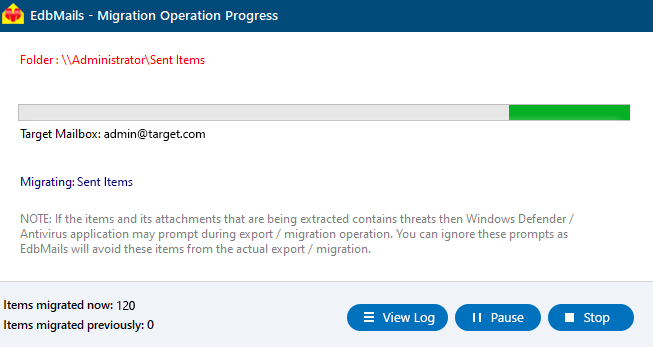
- You can pause and resume the migration and view the detailed summary in the View Log. Finally, log in to the target Exchange server check for the restored mailboxes, folders and items.
Concluding Words
Restoring an Exchange server database becomes essential when faced with corruption, accidental deletion, or data loss. Although Windows Server Backup can assist in some scenarios, manual recovery can be time-consuming and unreliable—particularly if backup files are missing or the server is severely damaged. EdbMails, a trusted Microsoft-partnered solution, offers a secure and efficient way to recover EDB files from all major Microsoft Exchange Server versions, including 2019, 2016, 2013, 2010, 2007, and 2003. The tool allows you to restore data directly to another Exchange server, export mailboxes to PST, or migrate EDB files to Office 365. With its simple, step-by-step process, even users without technical expertise can quickly and safely recover mailbox data, making EdbMails a reliable choice for smooth and fast Exchange database restoration.


