Move Exchange mailbox to another database
Moving mailboxes between databases is a routine yet critical task for Exchange server administrators. Whether it's to balance server load, free up space, or reassign mailboxes due to organizational changes, this operation helps maintain smooth performance across Exchange environments. It’s relevant across versions including Exchange server 2019, 2016, 2013, and 2010.
Although Exchange server provides native options like the Admin Center (EAC) and PowerShell scripts, these methods can become complex—especially when dealing with large mailbox sizes, database corruption, or time-sensitive transfers. EdbMails EDB to Live Exchange Migrator offers a more streamlined approach. It enables direct migration from offline EDB files or live Exchange servers to another mailbox database. With its intuitive interface, automatic mailbox mapping, and support for granular migration, EdbMails minimizes errors and eliminates the need for manual intervention.
This step-by-step guide walks you through the complete mailbox move process using EdbMails—from selecting the source file to connecting with the target server and completing the migration. Whether you're planning a local move or recovering data from a dismounted database, EdbMails ensures a smooth and efficient mailbox transfer.
Learn more about the types of mailbox moves in an Exchange server
How to move an Exchange server mailbox to another database?
Method 1: Move mailboxes from the Exchange admin center (EAC)
Note: The method to move mailboxes from the EAC is applicable to Exchange servers 2019, 2016 and 2013.
- Step 1: Login to the EAC and go to the 'recipients > migration' tab.
- Step 2: Click on the + sign and select 'Move to a different database'.
- Step 3: Select the users you want to move and click 'Next'.
- Step 4: In the move configuration page select the target database.
- Step 5: In the start batch page, configure the settings and click 'new'.
See the detailed steps to create a local move request from the EAC
Method 2: Move Exchange server Mailboxes to another database with PowerShell
- Step 1: Open the Exchange management shell (EMS) as administrator.
- Step 2: Get the name of the mailbox database that contains the user mailbox.
Run the Get-Mailbox cmdlet and the command prompt shows the database name where the user mailbox is located.
Get-Mailbox johndoe | Format-List Database
- Step 3: Create a local mailbox move request
The New-MoveRequest PowerShell cmdlet creates a local mailbox move request
New-MoveRequest -Identity johndoe -TargetDatabase "DB01" –BadItemLimit 10
- TargetDatabase – ‘DB01’ is the name of a target database you want to move the mailbox to.
- BadItemLimit – It is the limit of the number of damaged items in the mailbox that are skipped during the database move.
To move all the mailboxes from one database to another at once, run the following cmdlet:
Get-Mailbox -Database DB02 -ResultSize Unlimited | New-MoveRequest -TargetDatabase DB01
See steps to create a local move from the EMS for individual and multiple mailboxes
If you want to move multiple mailboxes in a batch, run the following cmdlet:
Get-Mailbox -Database "DB02" | New-MoveRequest -BatchName "DB02 to DB01" -TargetDatabase "DB01" -Priority High -BadItemLimit 51 -AcceptLargeDataLoss
See steps to create a local move request in EMS from a CSV file
To migrate Public folder mailbox to a different database, run the following cmdlet:
New-MoveRequest -Identity "PF_Sigcorp" -TargetDatabase DB01
Here, PF_Sigcorp is the public folder mailbox and DB01 is the target database
- Step 4: Check the status of the mailbox move request
Run the following cmdlet to get the mailbox migration status
Get-MoveRequestStatistics -Identity johndoe
Limitations of the PowerShell method:
- Moving mailboxes and Public folders to a different Exchange server database may lead to temporary downtime during the transfer process
- This method requires advanced technical skills and a thorough understanding of PowerShell cmdlets to execute successfully.
- This approach isn't user-friendly, and incorrect command usage can lead to potential data loss.
- Mailbox moves can't be performed if the source Exchange database is corrupted or inaccessible.
Method 3: Move Exchange Mailboxes to another database with EdbMails
EdbMails is an intuitive Exchange migration tool with a graphical interface that simplifies moving mailboxes from EDB files to a Live Exchange server. As a Microsoft partner, it supports recovery of corrupted or damaged EDB files and enables direct migration to both on-premises Exchange server and Microsoft 365. The software allows you to migrate not just primary mailboxes, but also Archive mailboxes, Shared mailboxes, and Public folders to Exchange server without needing PowerShell scripts or complex configurations. It’s compatible with Exchange Server versions 2007 through 2019 and runs smoothly on all major Windows and Windows Server editions. In the following steps, we’ll walk you through how to move an Exchange server mailbox to a different database using EdbMails.
Step 1: Download and install EdbMails Exchange recovery tool- Download and set up EdbMails on any Windows computer, even one without Exchange Server installed.
- Open the application and click ‘Login’ using your registered email ID and password. If you haven't registered yet, just click ‘Start Your Free Trial’ to activate your trial and discover all the features available.
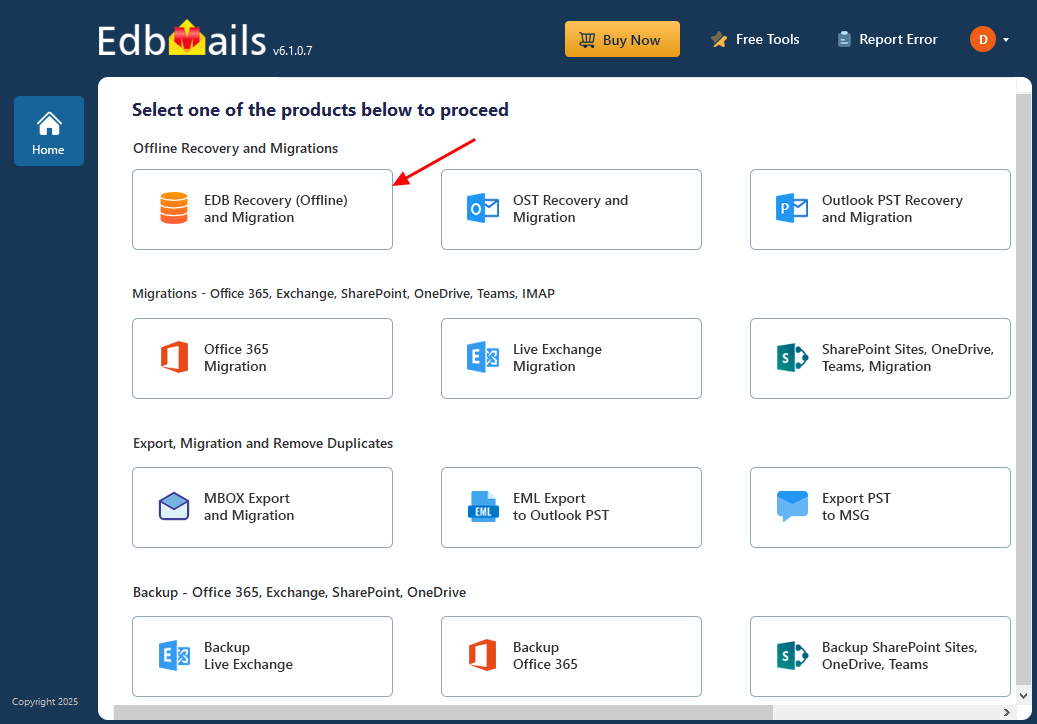
- Select ‘EDB Recovery (Offline) and Migration’ from the list of available products to proceed.
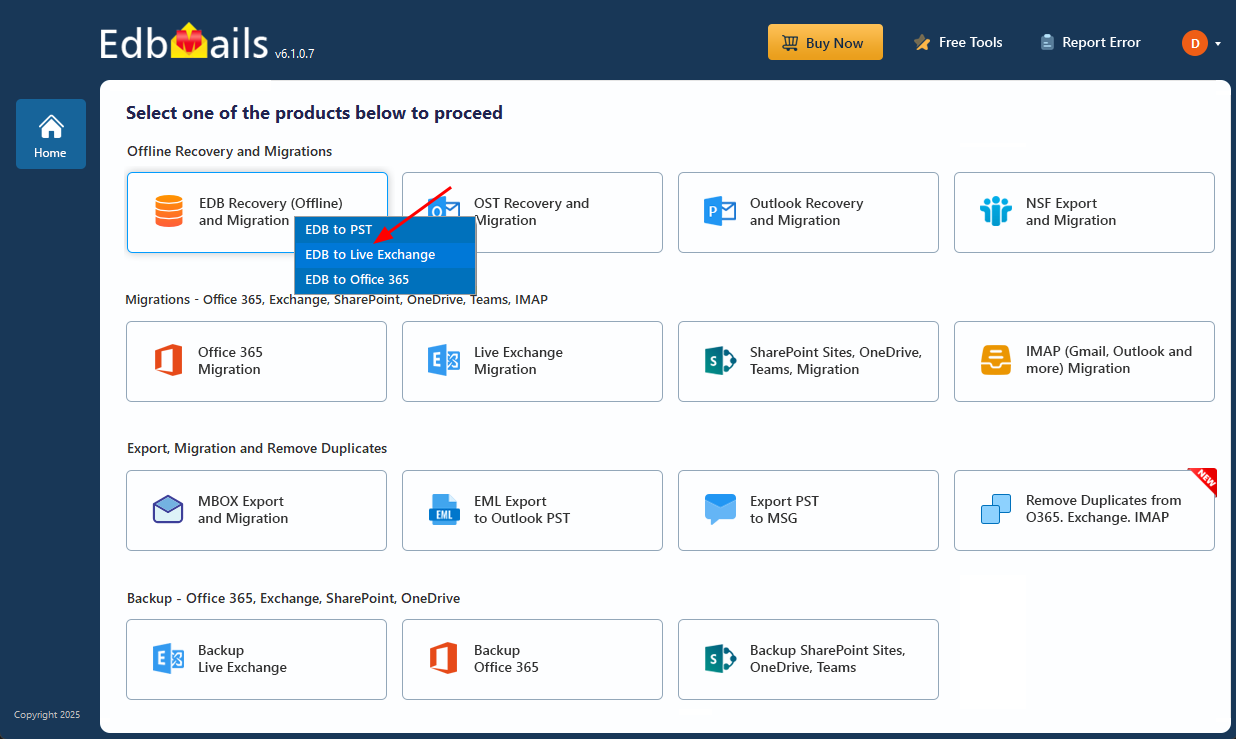
- Select the recovery method as 'EDB to Live Exchange'
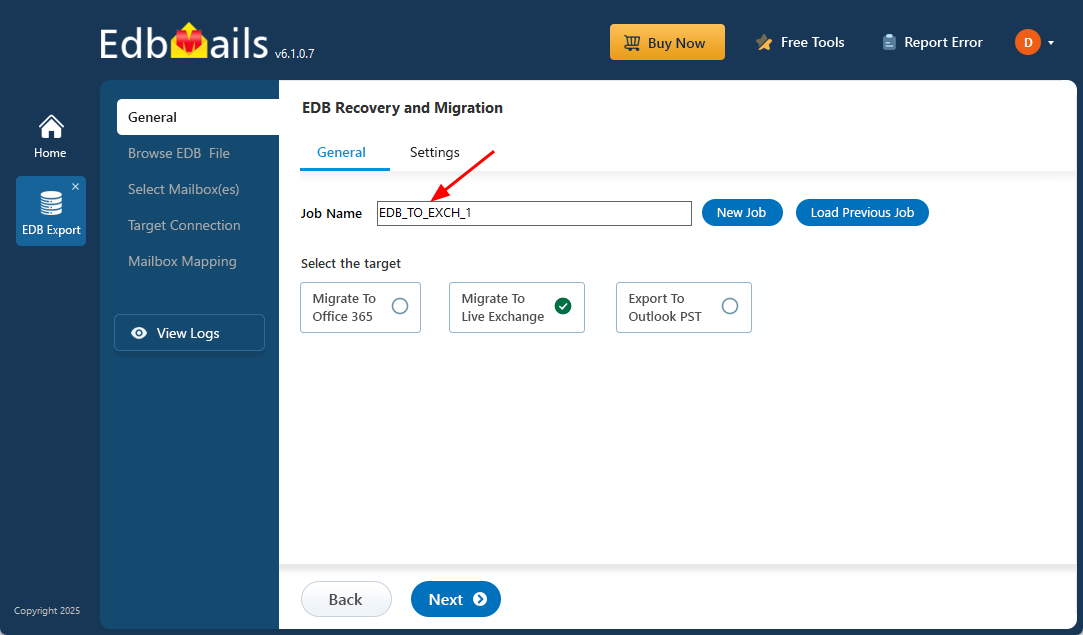
- You can choose to keep the default job name or create a custom one by selecting ‘New Job’, making it easier to identify and manage your tasks later.
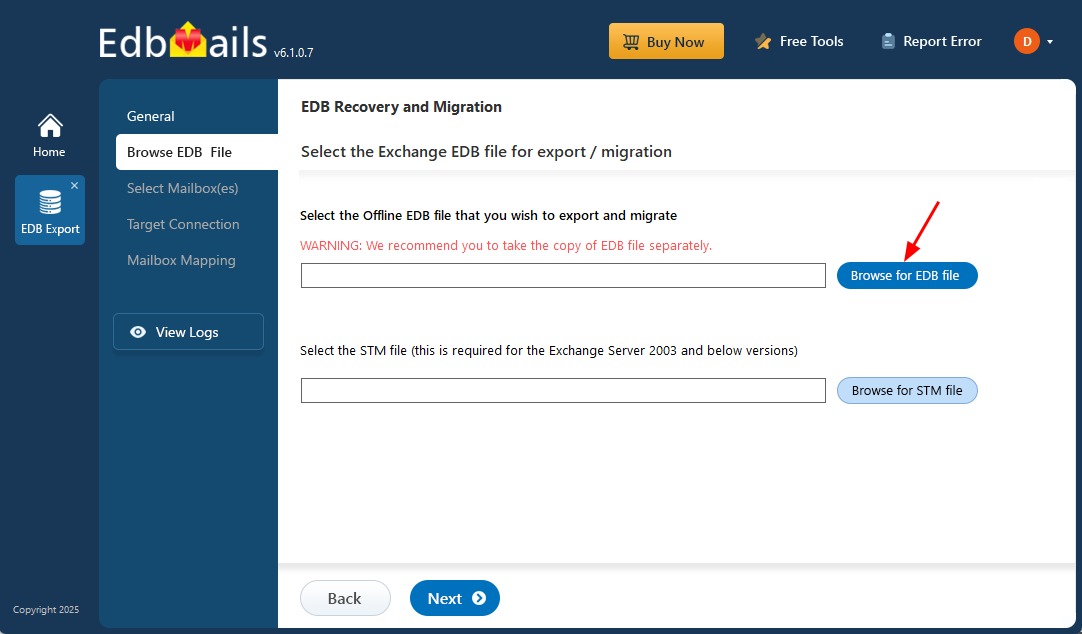
- Click the ‘Browse for EDB file’ button
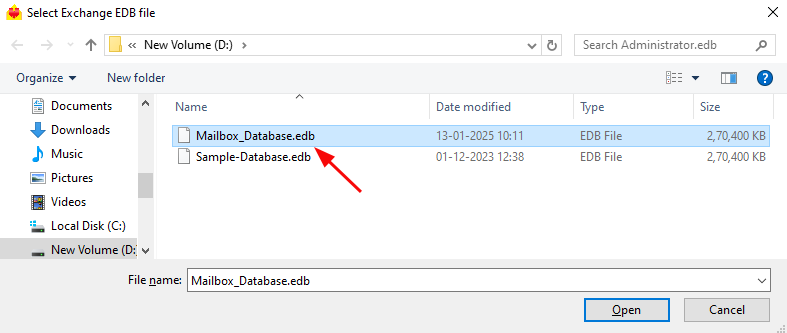
- Select the offline EDB file which contains the mailboxes you want to move.
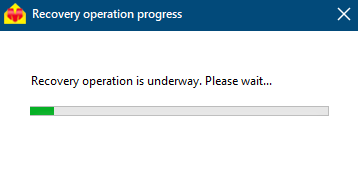
- EdbMails performs a detailed scan of the EDB file, recovering mailbox data even from corrupted or damaged files, ensuring that no data is lost during the recovery process.
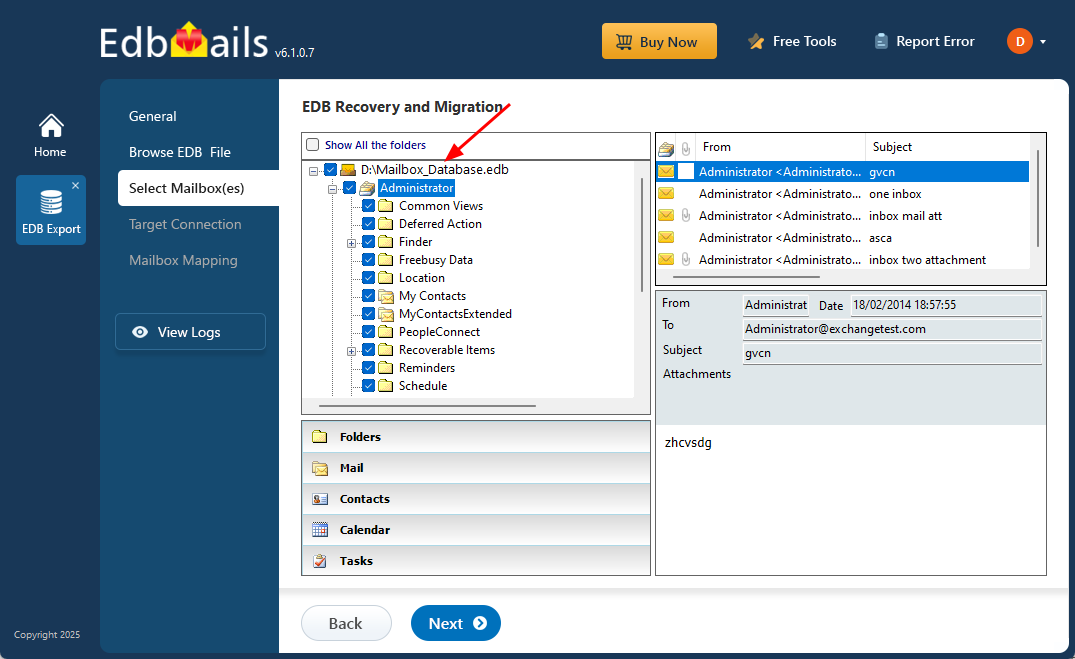
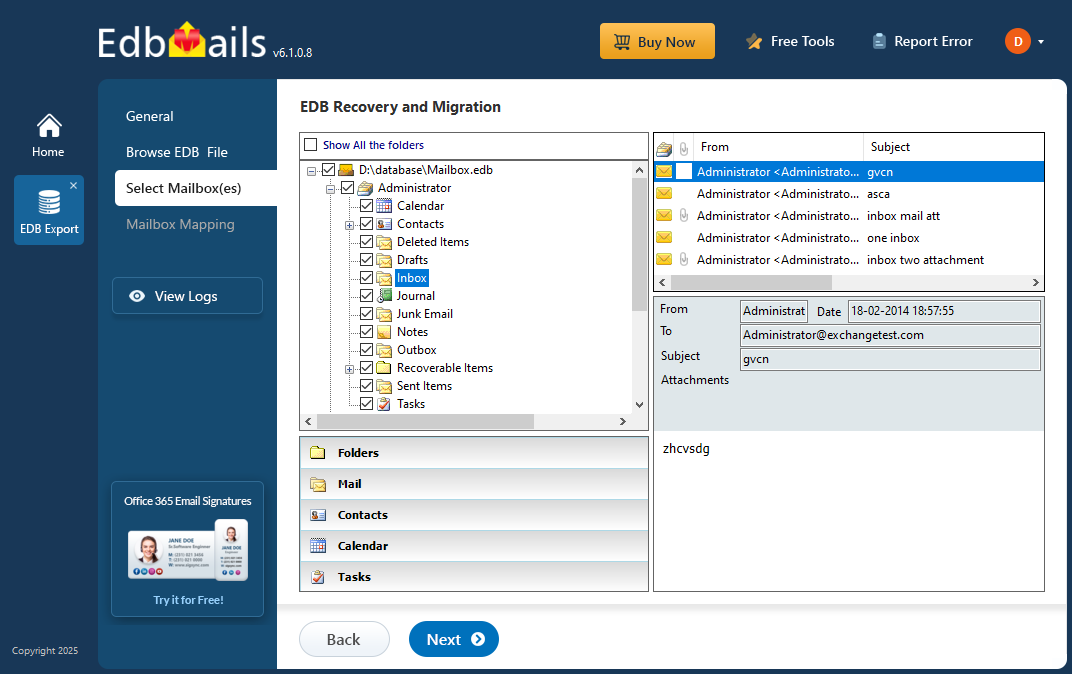
- Once the recovery process is finished, expand the mailbox and click on any folder to preview its contents like; emails, contacts, calendars, tasks, journals, and notes—on the right-hand pane.
- Choose the specific mailboxes or folders you want to export, then click ‘Next’ to proceed with the export.
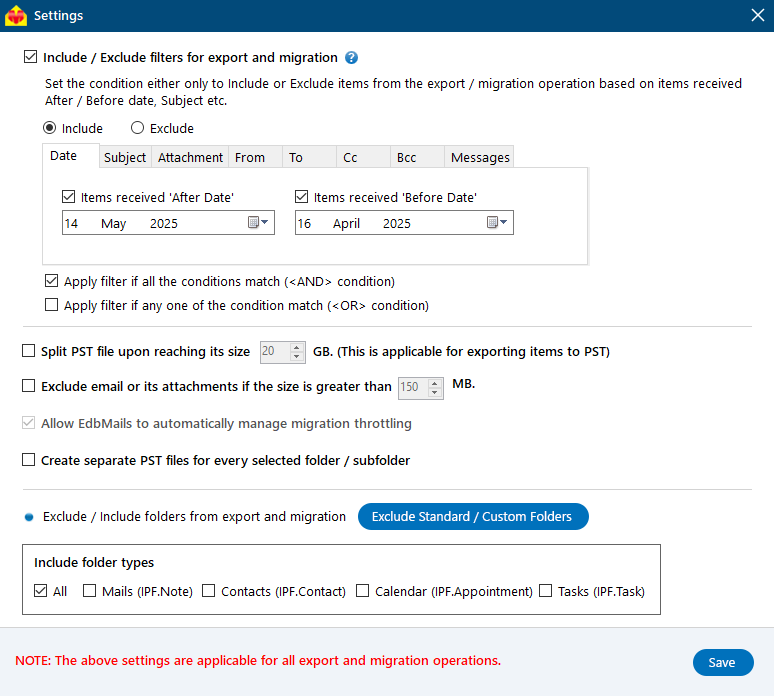
- EdbMails allows you to apply the filters to customize your migration process. For instance, you can apply date filters to migrate the items within a certain date range.
- EdbMails offers additional export settings, such as splitting a PST file into smaller parts and excluding emails that exceed a specified size limit, providing more control over the migration process.
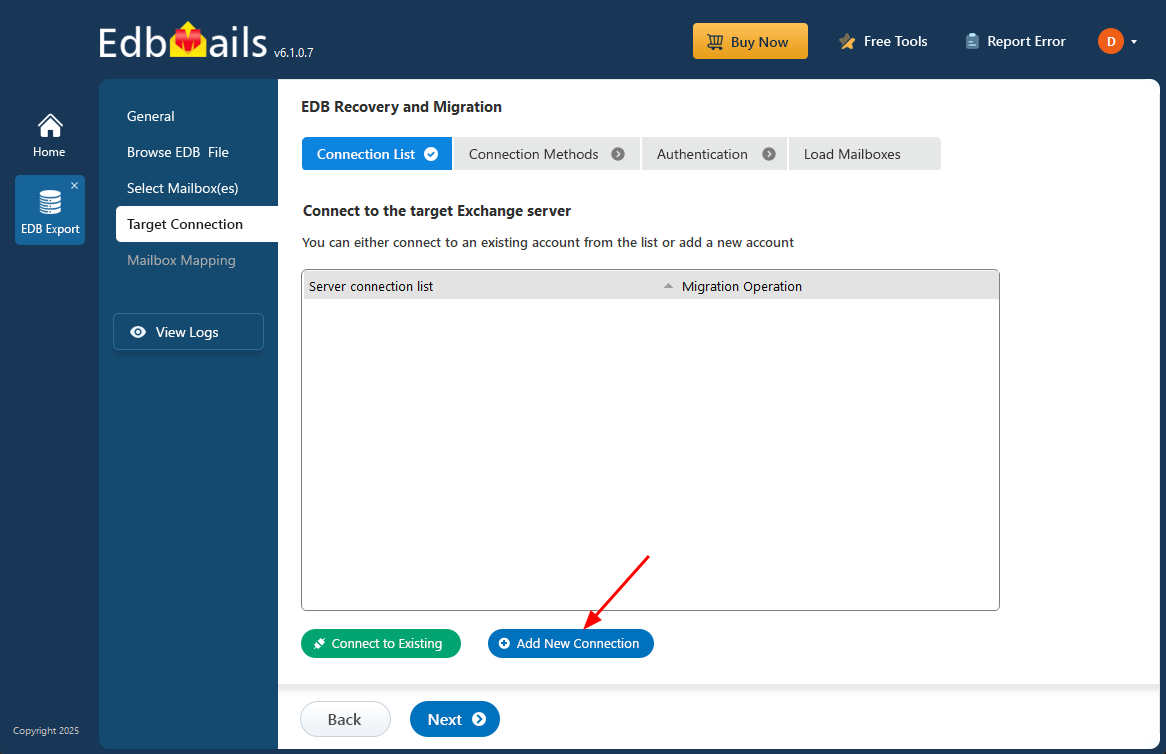
- Click on the ‘Add New Connection’ button to create a new connection to the target Exchange server. If you’ve already set up a connection before, simply select it from the list and click ‘Connect to Existing’ to continue.
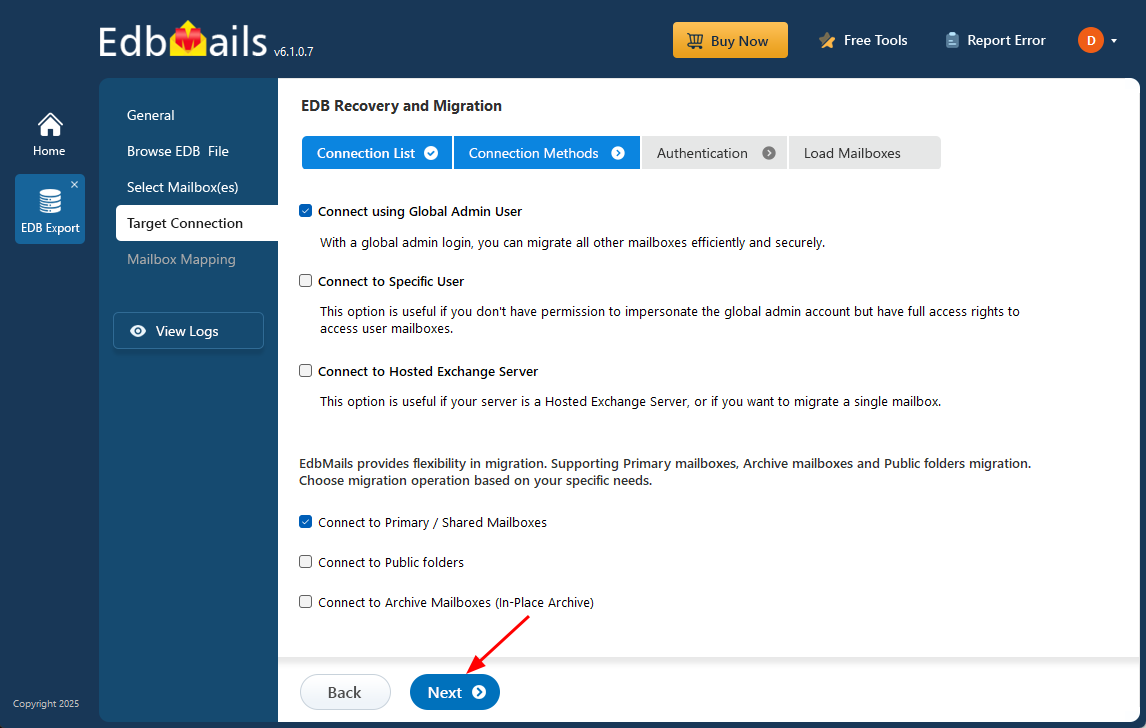
- Choose the appropriate connection options and click the ‘Next’ button.
Different options to connect to Exchange server in EdbMails
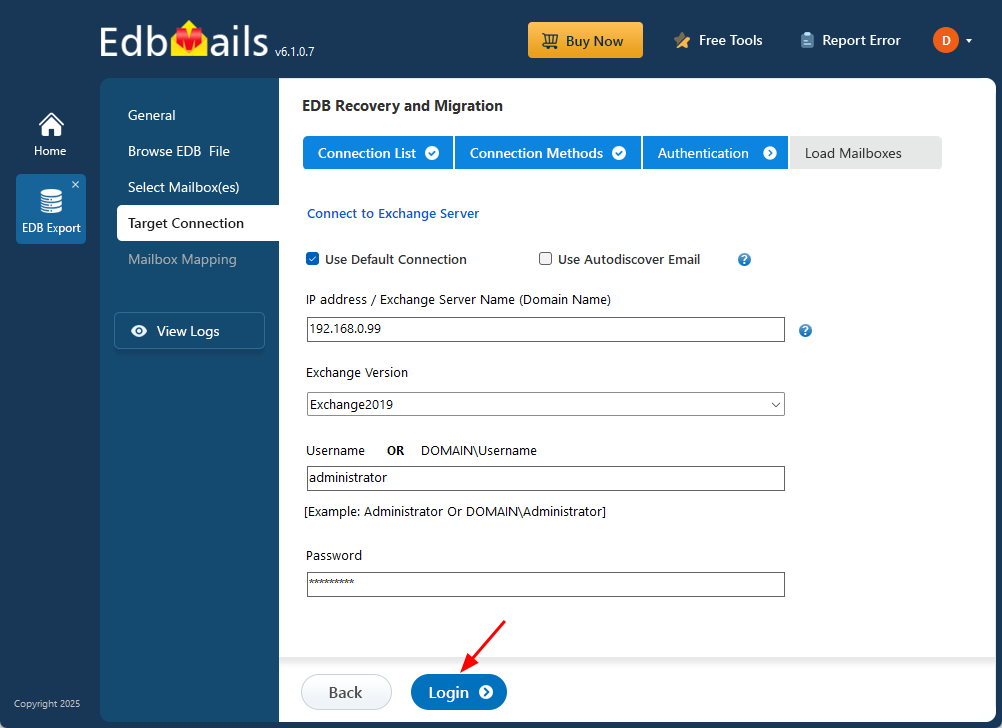
- Provide the necessary target Exchange server details and click the ‘Login’ button to proceed.
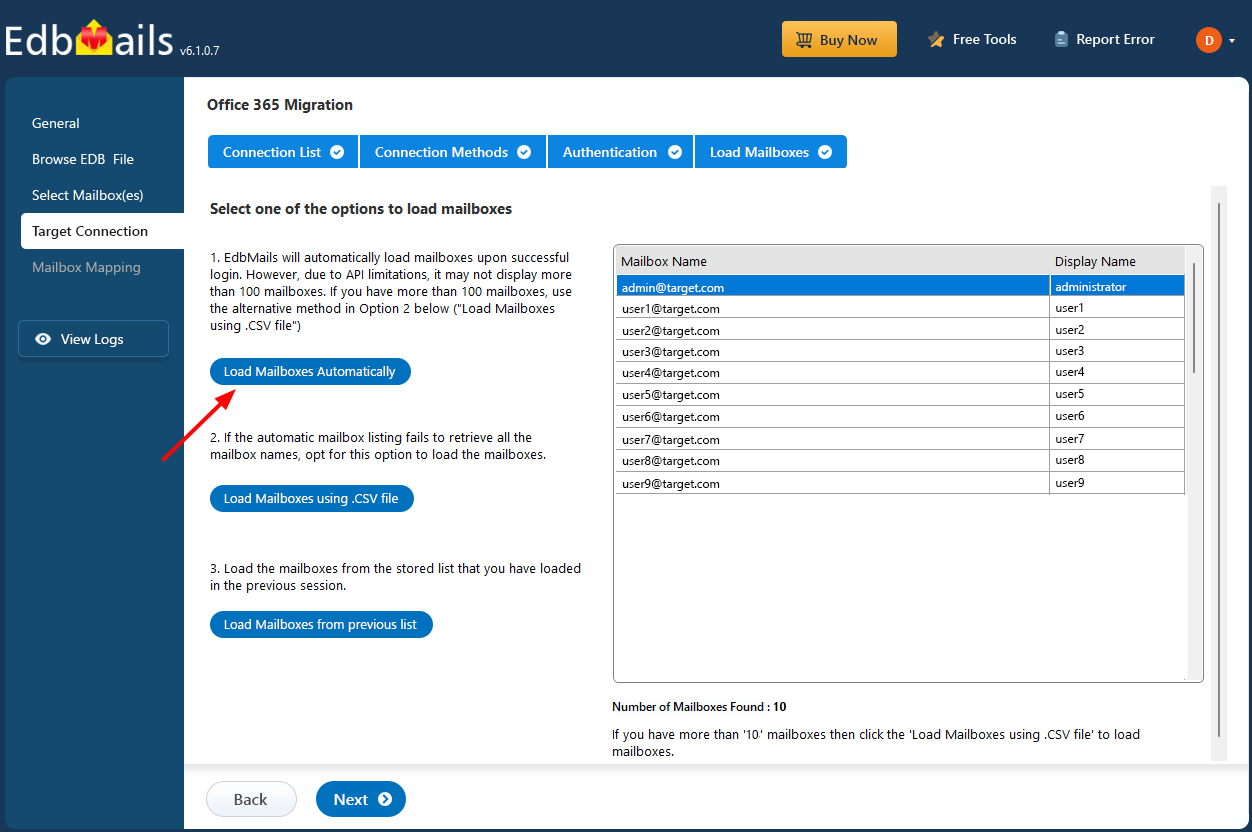
- By default, EdbMails loads up to 100 mailboxes directly from the target Exchange server, in accordance with Microsoft’s API limit. If you need to load more than 100 mailboxes, you can do so by importing a CSV file containing a list of additional mailboxes. Select your preferred method to load the mailboxes into EdbMails.
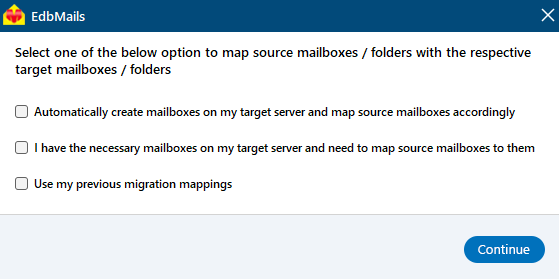
- Select the appropriate mailbox mapping option based on your needs.
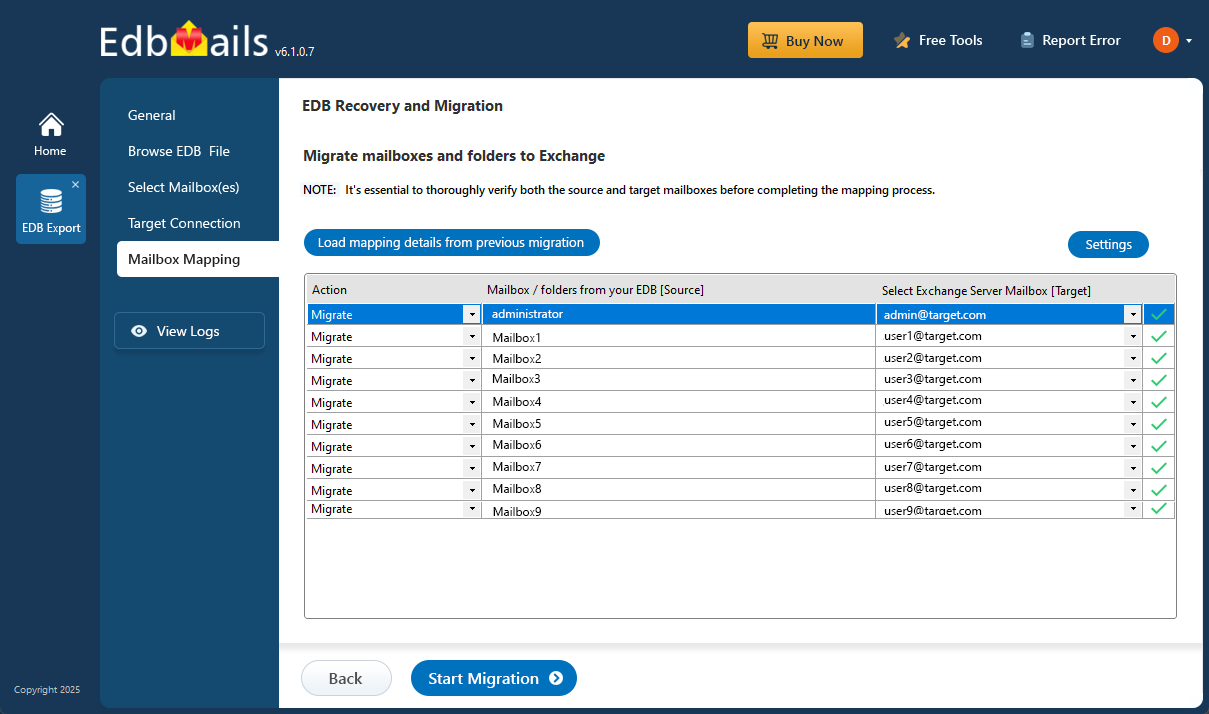
- EdbMails gives you the option to automatically create mailboxes on the target Exchange server, especially when the application is installed directly on that server. EdbMails also performs automatic mailbox mapping by matching the display names from the source and target servers. If needed, you can manually map mailboxes and folders to suit your specific migration preferences.
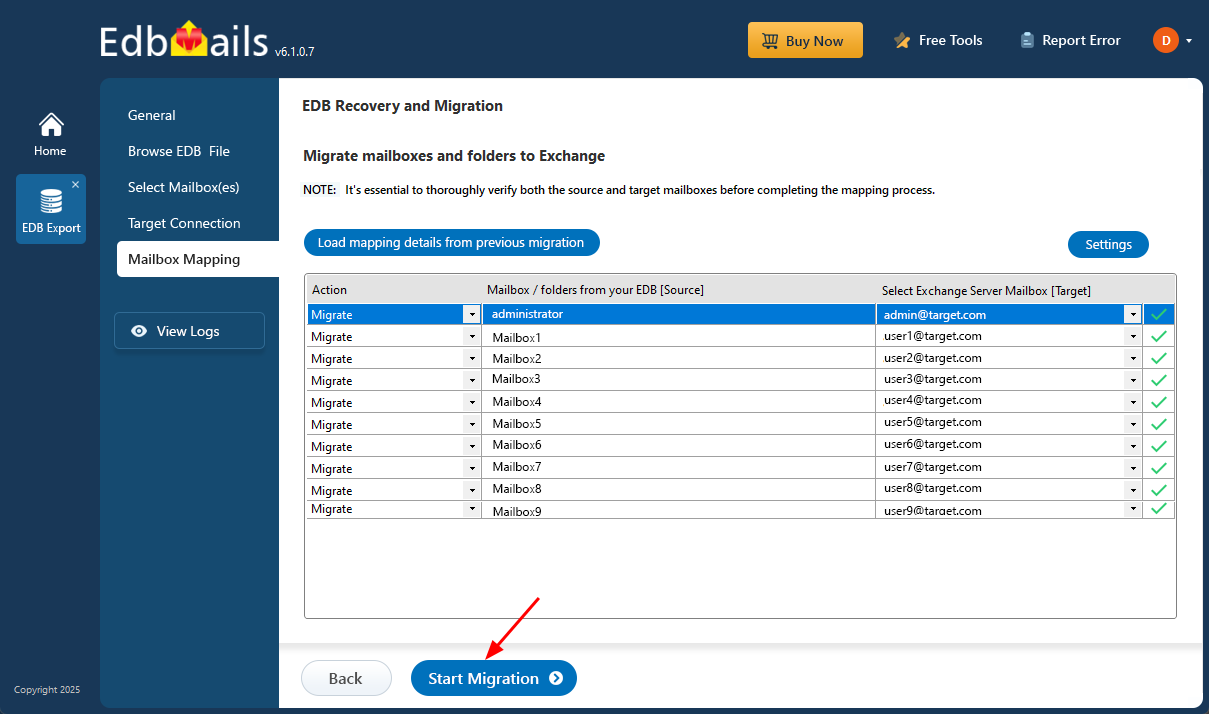
- Once the mailbox mapping is finished, click the ‘Start Migration’ button to begin the process of importing mailbox data from the EDB file into the Exchange server.
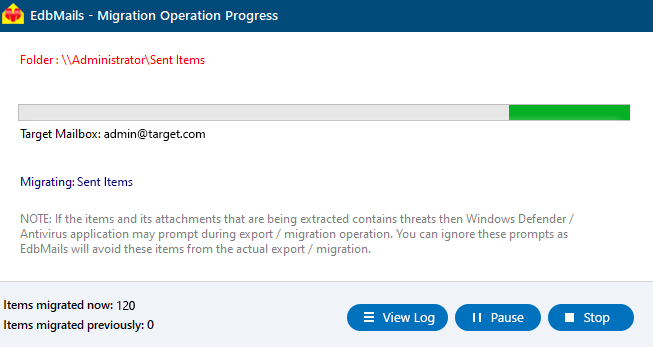
- You can monitor the migration progress in real-time using the progress bar. Once the migration is complete, a confirmation message will be displayed.
- Click the ‘View Logs’ button to open the migration log and check the number of emails, folders, and mailbox items that were successfully migrated.
Benefits of EdbMails Exchange server mailbox migration
- Directly import mailboxes from EDB to Office 365 and Exchange server.
- EdbMails also supports mailbox move from Exchange to Exchange server.
- You do not require PowerShell scripts or technical knowledge to perform the move.
- You can recover the Exchange server from Jet Engine errors and restore your mailbox data.
- Safely move all the mailboxes to another Exchange server without data loss.
- The application can recover virus infected, damaged and corrupted EDB files.
- EdbMails EDB to PST converter can help you export all your Exchange server emails to PST.
- EdbMails enables you to open an EDB file and preview mailbox items from before you perform the migration.
- You can migrate Public folder, Archive mailbox and Shared mailboxes.
Concluding Words
We discussed three primary methods for moving Exchange mailboxes between databases in Exchange server 2019, 2016, 2013, and 2010. These include using the Exchange Admin Center (EAC), PowerShell scripts, and the EdbMails Exchange migration tool. The EAC and PowerShell approaches are commonly used but come with limitations. They only work if the source Exchange database is healthy and accessible. Additionally, PowerShell requires technical know-how, and a single error in command execution can lead to issues or data loss, making these options less user-friendly for many administrators. EdbMails, on the other hand, simplifies the entire process. It can migrate mailboxes even from older or legacy servers, and supports cross-domain, cross-forest migration, and public folder migrations.


