Resolve the mount error in Exchange Server
Exchange Server databases (EDB files) store critical mailbox data including emails, attachments, calendars, and folders. When a database unexpectedly dismounts, it disrupts email flow and user access—resulting in major communication issues across an organization. This can occur due to service interruptions, missing log files, storage problems, or corruption in the EDB file itself. If you're seeing mount errors like “Unable to mount the database (hr=0x80004005, ec=1108)”, immediate action is required to avoid data loss and restore functionality.
In many cases, Exchange administrators attempt to remount the database using the Exchange Admin Center (EAC) or PowerShell cmdlets. However, if the issue stems from a corrupted EDB file or missing transaction logs, these native methods often fall short. This is where third-party solutions like EdbMails EDB to PST Converter and EDB to Exchange Migrator become essential. These tools can extract mailboxes from inaccessible EDB files and either convert them to Outlook PST format or migrate the data directly to a live Exchange server—offering a reliable path to recovery when traditional methods fail.
This guide provides a comprehensive, step-by-step approach to identifying and resolving Exchange database mount errors. Whether the problem is related to services, storage, file corruption, or overgrown database size, you’ll learn how to diagnose the root cause and apply the appropriate fix. With EdbMails, even severely damaged databases can be recovered, ensuring your organization’s mailbox data remains accessible and secure.
How to resolve the error ‘Unable to Mount Database (hr=0x80004005, ec=1108)’?
The following methods can help you fix the error in Exchange server 2019, 2016, 2013 and 2019.
Method 1: Restart the Exchange Server services
The first step in resolving a mount error is to verify that all essential Exchange Server services are running properly. One of the most critical services is Microsoft Exchange Information Store, which is responsible for managing mailbox and public folder databases. If this service is stopped—whether due to conflicts with third-party applications or interference from antivirus software—mailboxes become inaccessible, and dependent services may also fail to launch. Follow the steps below to restart these services and restore normal functionality.
- Press 'Window Key + R' and type 'services.msc'
- Find the service named Microsoft Exchange Information Store and Microsoft Exchange Mailbox Replication. Right click on the item and select 'Start'. If the service has been disabled or stopped, click 'Restart'
Method 2: Perform a soft repair and mount the database
After you restart the Exchange server services, perform a soft repair on the database with the cmdlet eseutil/r. For this recovery operation, you must manually copy the missing transaction log files and the EDB file into the folder and run the eseutil recovery command.
For Soft Recovery operation, run the cmdlet: eseutil/r
If the soft recovery is successful, it displays the database State as 'Clean Shutdown'. Mount the Exchange database on the server with the following steps.
From the Exchange admin center (EAC):
- In the EAC, go to 'servers' and click 'databases'.
- Select the repaired Exchange database.
- Click on 'More Options' and select 'Mount' to remount the database.
By using PowerShell cmdlets:
To remount the database status with the PowerShell, run the Mount-Database cmdlet on the Exchange Management Shell (EMS) as a system administrator.
Mount-Database -Identity
If the database fails to mount even after performing this operation and continues to display the error message 'Unable to mount database hr=0x80004005, ec=1108', then it is most likely corrupted.
Method 3: Check the Exchange database for corruption
You can check for Exchange database corruption with Eseutil (Extensible Storage Engine utility), a Microsoft built-in tool to repair the EDB.
Run the following cmdlet on the PowerShell as administrator
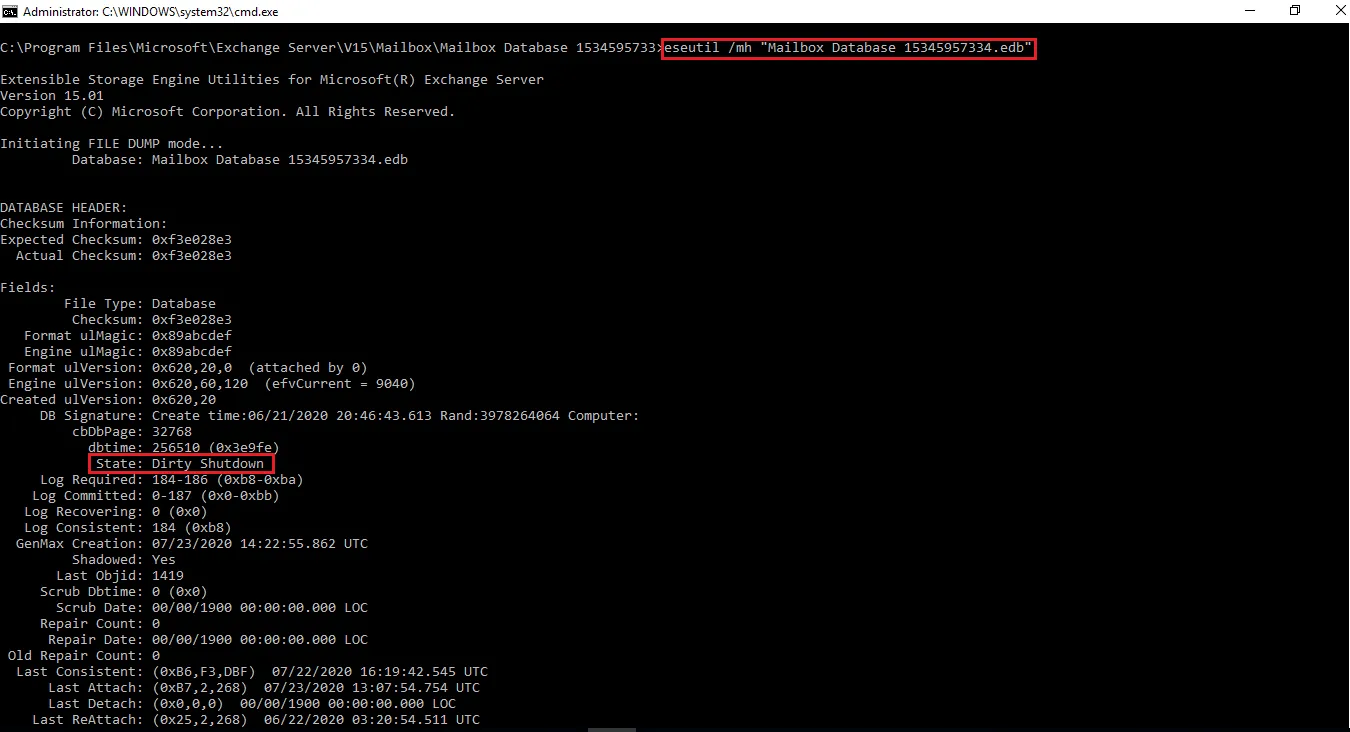
'C:\Program Files\Microsoft\Exchange Server\V15\Mailbox\Mailbox Database 1534595733>eseutil/mh “Mailbox Database 153459573354.edb”
If the mount operation fails or if it is corrupted, the database State will be 'Dirty Shutdown' as shown. Before you perform the repair operation, ensure you have sufficient hard disk space as described in the following method.
Method 4: Increase the storage capacity of the hard drive
Check the storage space on the hard drive where the Exchange server is installed.
- Right click on the Drive > Click 'Properties'
- Check the Free Space of the Volume
If you're running out of space, consider upgrading your hard drive to a bigger capacity or moving the database to a different drive or location.
Method 5: Repair the Exchange database with Eseutil
If the database error 'Unable to mount database hr=0x80004005, ec=1108' persists, you must perform a complete repair with Eseutil. The cmdlet eseutil/p performs a Hard recovery and tries to restore the EDB file from corruption.
Run the following cmdlet for the Hard Recovery operation: eseutil/p
'C:\Program Files\Microsoft\Exchange Server\V15\Mailbox\Mailbox Database 1534595733>eseutil/d “Mailbox Database 153459573354.edb”
See steps to repair Exchange database with Eseutil
Check the database status again with the cmdlet eseutil/mh and mount the database with Mount-Database if no errors are found.
Limitation with the Hard recovery: Remember that the hard recovery operation with eseutil does not guarantee complete data recovery. It may also result in data loss if eseutil is unable to recover the data. In this scenario, you must use a third-party Exchange recovery tool as described in the following method.
Method 6: Repair the Exchange database with EdbMails
Step 1: Download and install EdbMails EDB to PST converter tool
- Download and install EdbMails on any computer that has access to both the source and target environments. There's no need to install it directly on the Exchange server, you can safely run the recovery process from any non-Exchange system connected to the network.
- Open the EdbMails application and click ‘Login’ to access your account. If you haven't registered yet and want to explore the full range of features before purchasing, choose ‘Start Your Free Trial’.
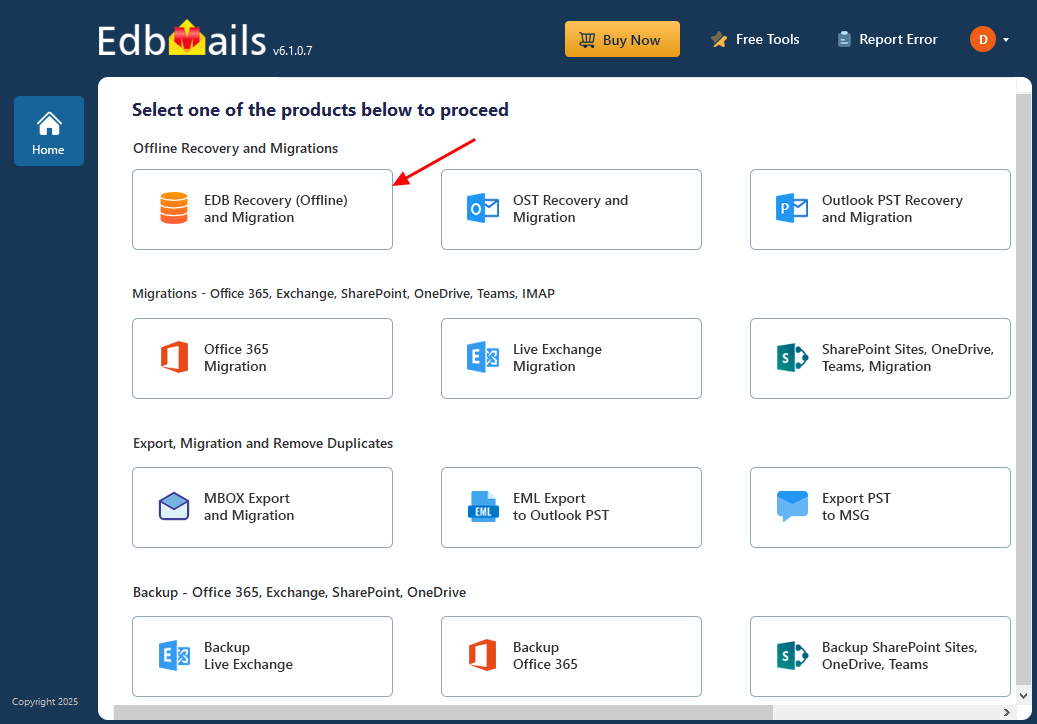
- Select 'EDB Recovery (Offline) and Migration'.
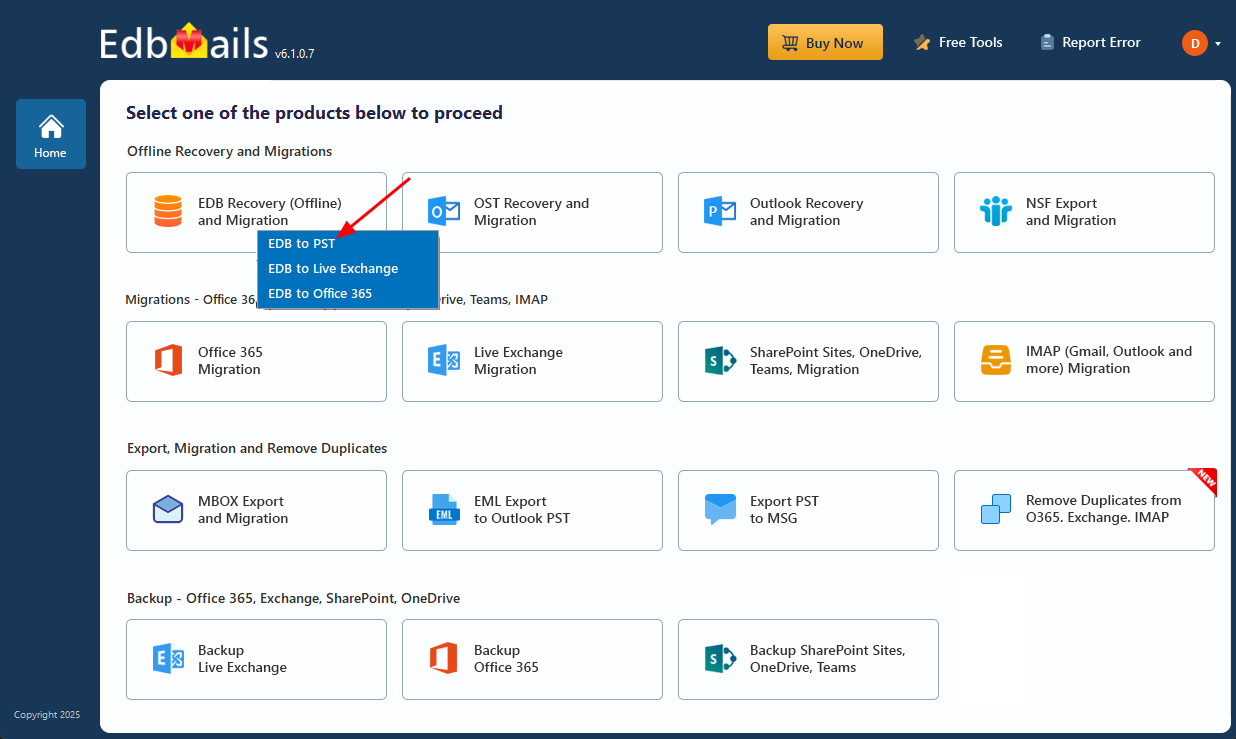
- Choose ‘EDB to PST’ as a recovery technique.
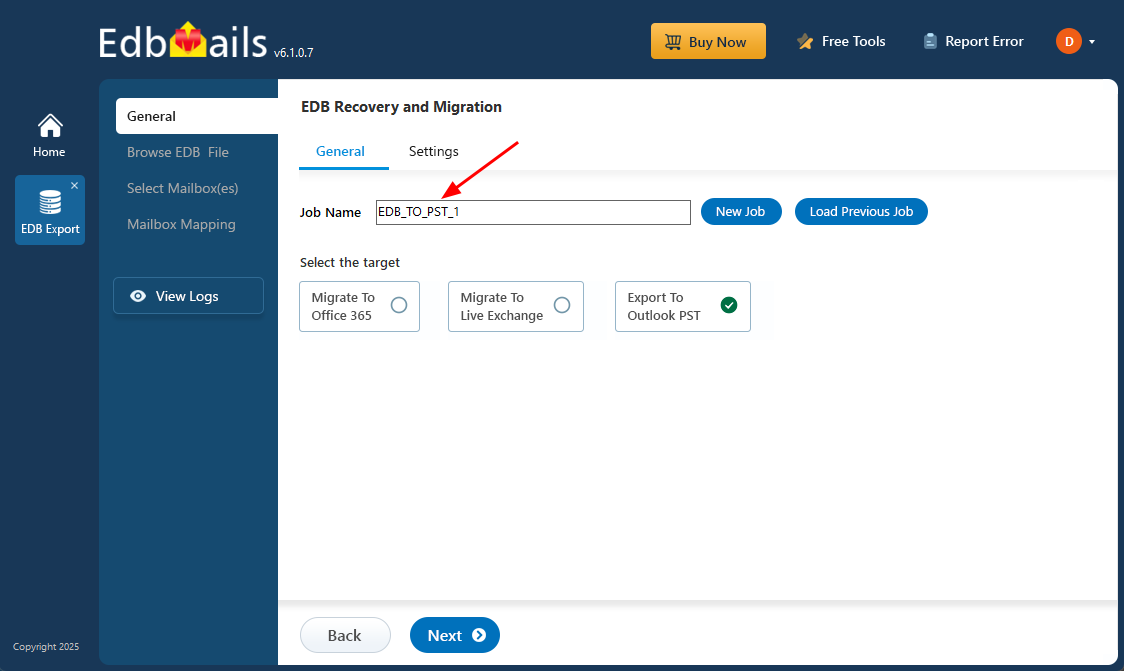
- You can proceed with the default job name or click ‘New Job’ to create a custom name that helps you better identify and manage the task later.
Step 2: Select the EDB file that fails to mount on the Exchange server
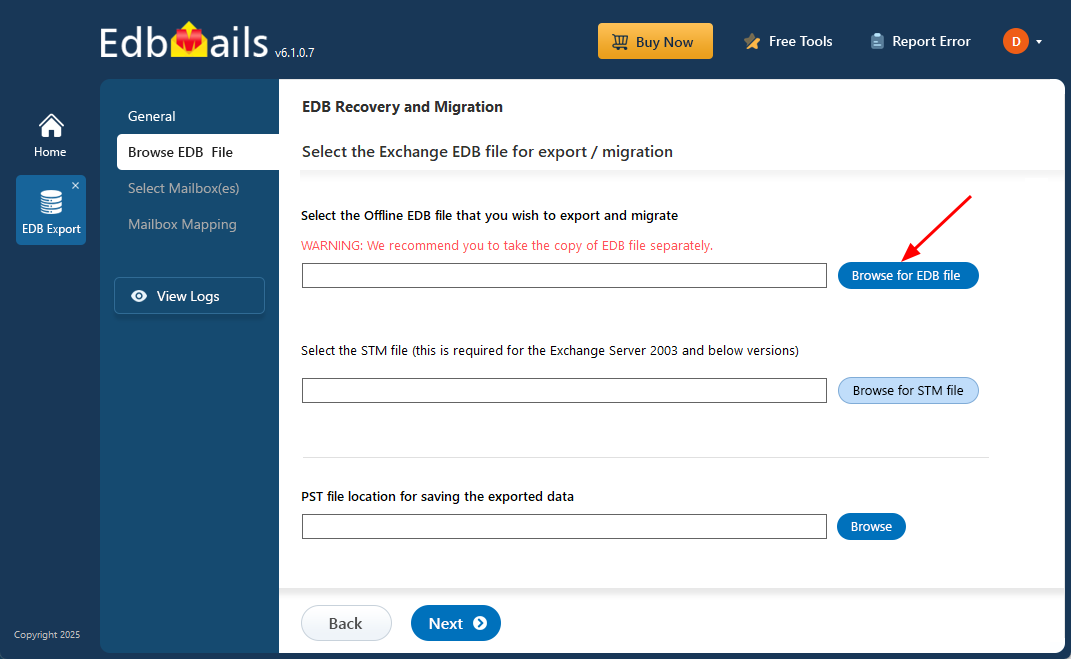
- Click ‘Browse for EDB file’
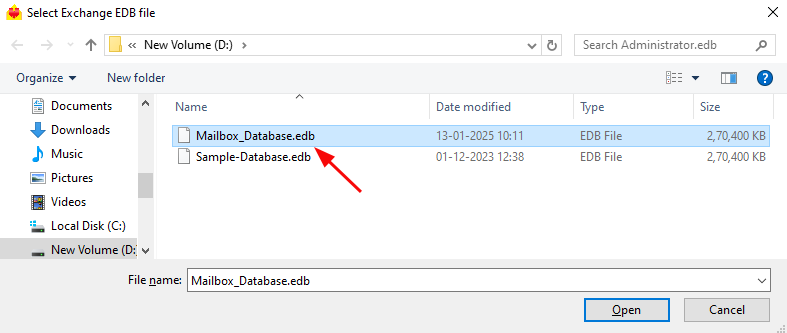
- Select the dismounted Exchange database file that you want to convert. If the file is on a shared network, make sure you have the required read and write permissions for a smooth operation.
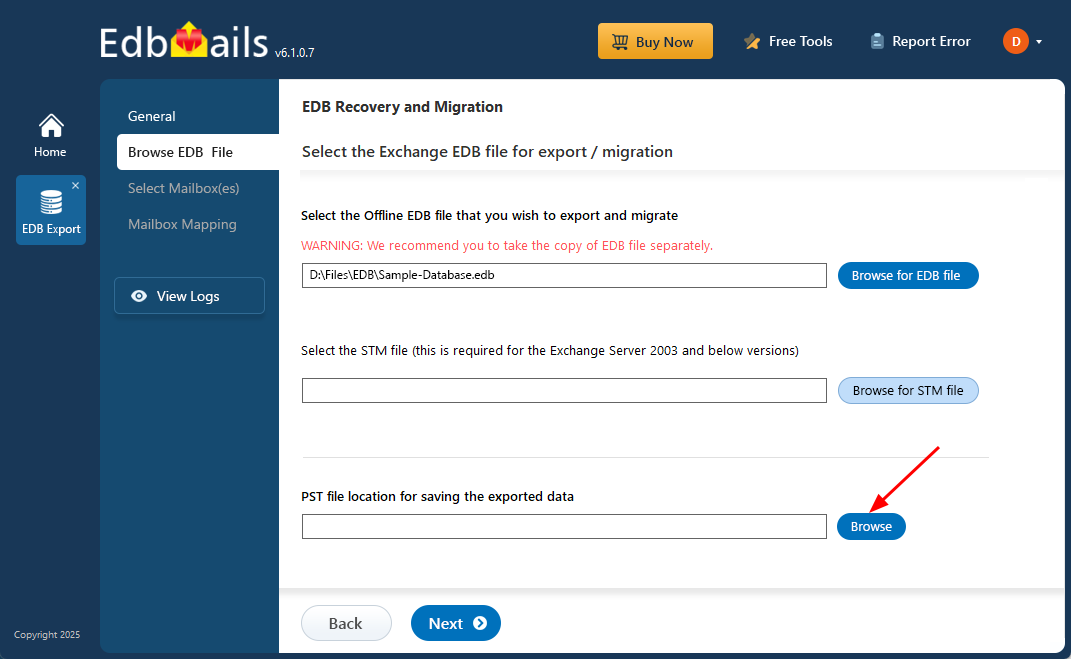
- Click ‘Browse’.
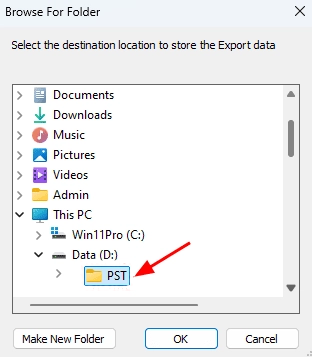
- Select a destination folder to save the exported PST files. Make sure there is enough disk space available, then click ‘Next’ to continue.
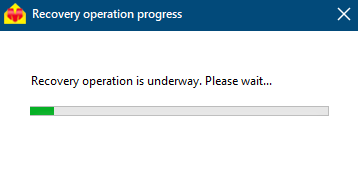
- EdbMails performs a deep scan of the EDB file and can retrieve mailbox data even from severely corrupted or damaged databases, ensuring a complete and reliable recovery without data loss.
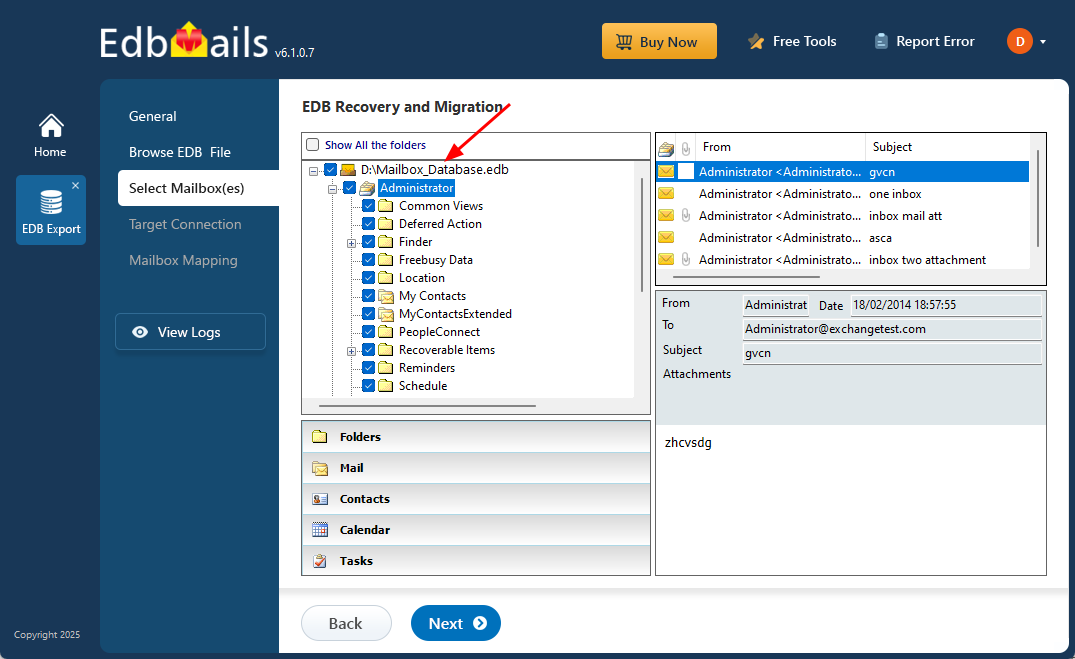
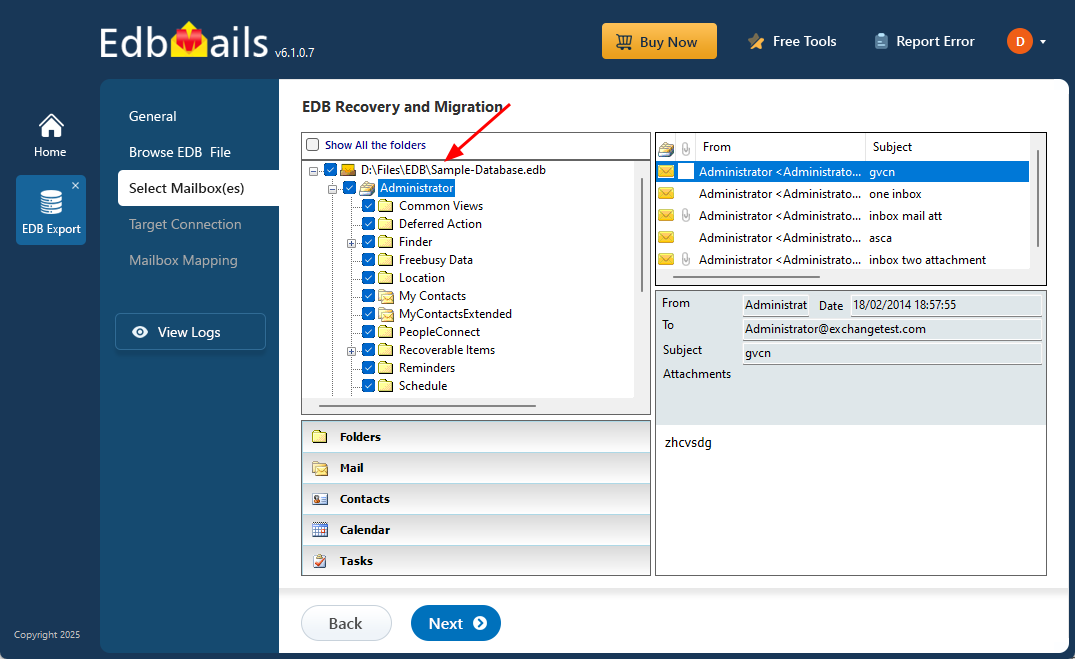
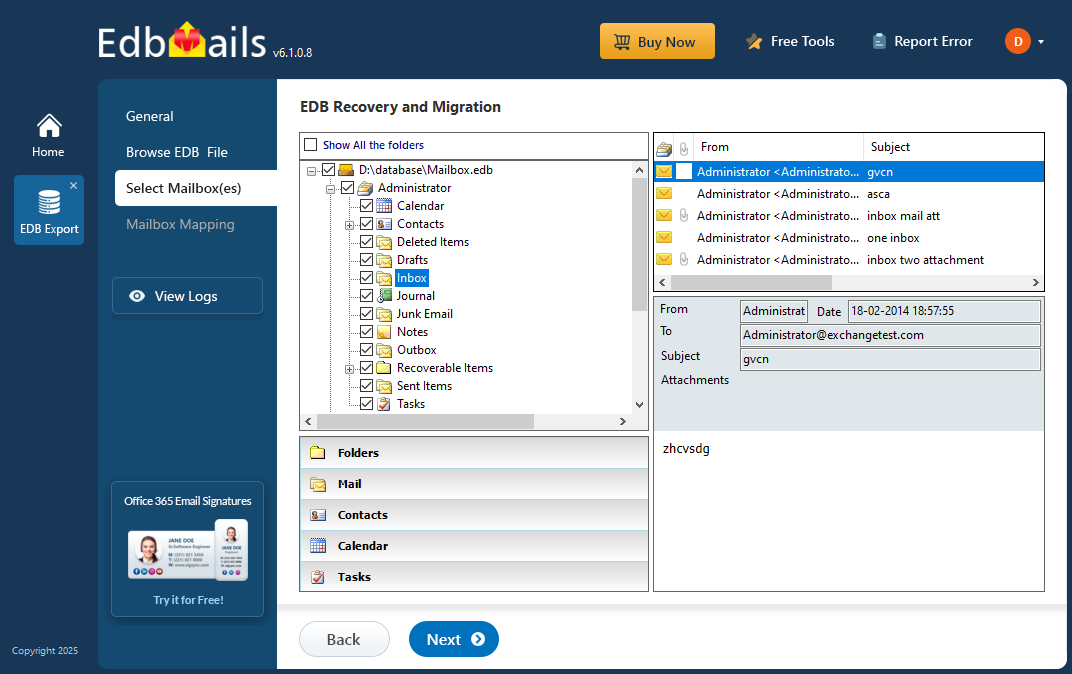
- Once the recovery is complete, expand the mailbox tree and click on any folder—such as emails, contacts, calendars, tasks, journals, or notes—to preview its contents in the right-hand panel. After reviewing the data, choose the mailboxes or specific folders you want to export, then click ‘Next’ to proceed.
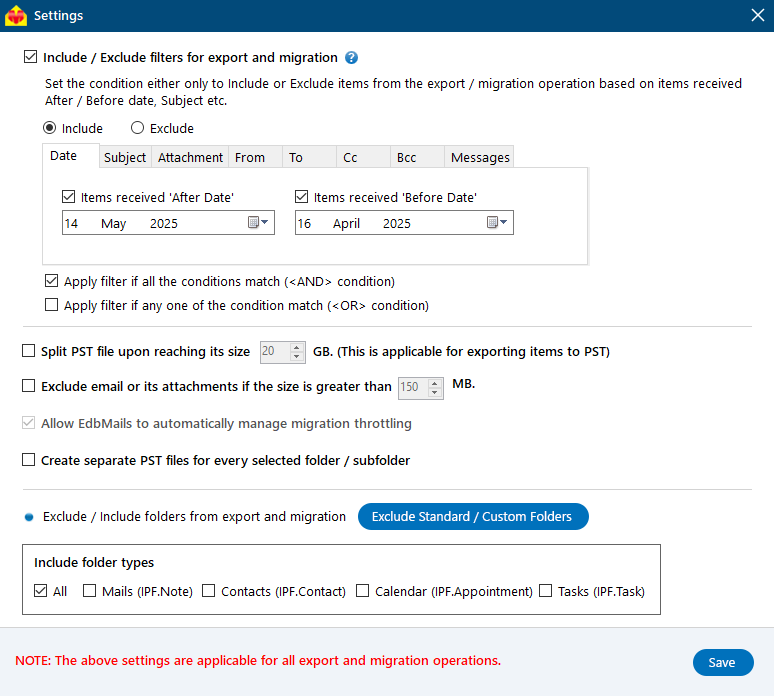
- You can use the advanced filter settings to export Exchange emails to PST based on criteria like date, subject, attachments, and so on.
- The 'Exclude Standard / Custom folders' option lets you leave out specific folders like Inbox, Sent, Drafts, Junk, Conversation History, and any custom folders—from the export process.
- EdbMails comes with other additional settings for the export such as splitting a PST file and excluding emails whose size is greater than a specified limit.
Step 3: Convert EDB to PST
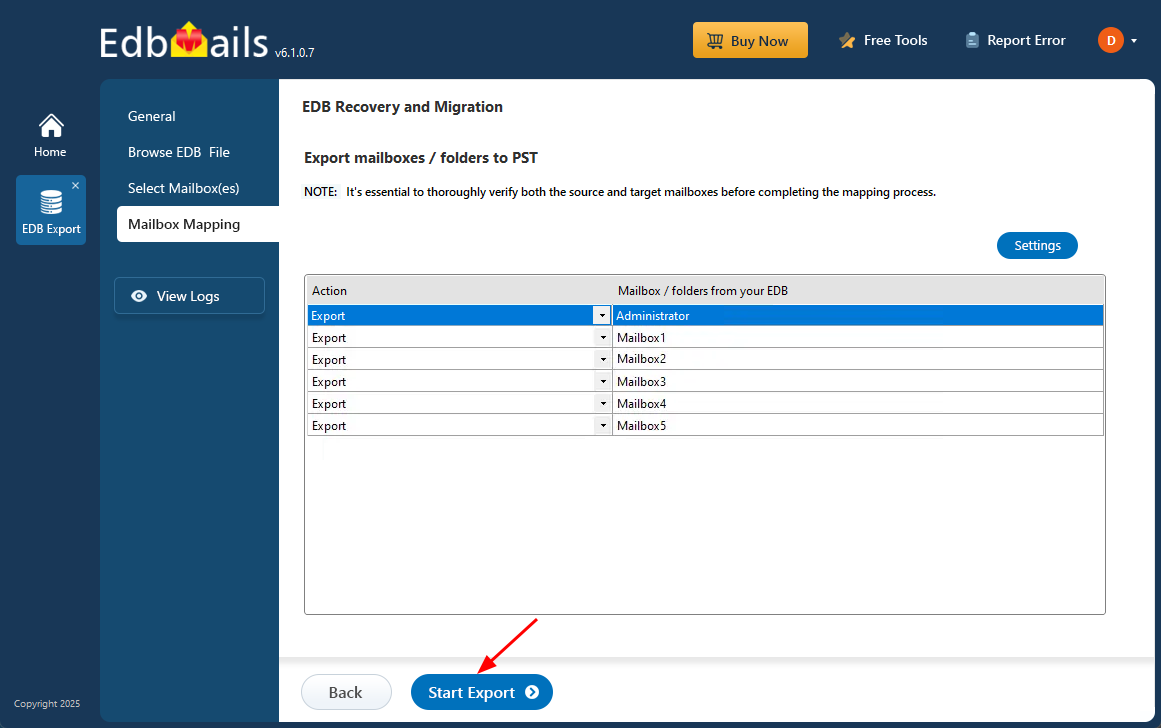
- Double-check the selected mailboxes and folders to make sure everything is correct. Ensure the ‘Action’ is set to ‘Export’, then click ‘Start Export’ to begin the process.
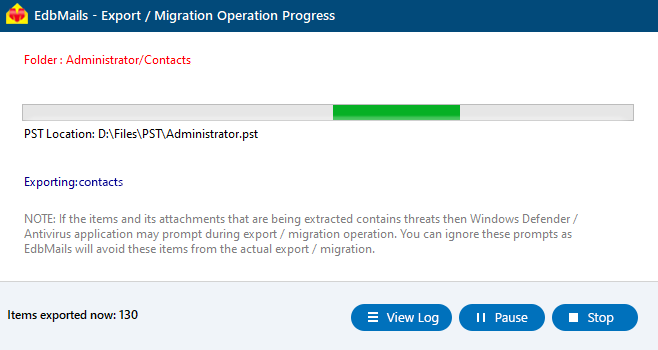
- EdbMails displays a real-time progress window during the export, with options to pause or resume the operation as needed. After the export completes, click ‘View Log’ to access a detailed summary report of the export activity.
- To restore all your mailboxes and mail items, add the exported PST file in Outlook and synchronize them with the Live Exchange server mailboxes.
Method 7: Migrate the EDB file to another Exchange server
EdbMails allows you to recover mailbox data from an EDB file and directly migrate it to a Live Exchange server with just a few clicks. The process is streamlined, requiring no downtime or complex PowerShell commands. Follow the steps below to perform a smooth and efficient mailbox migration.
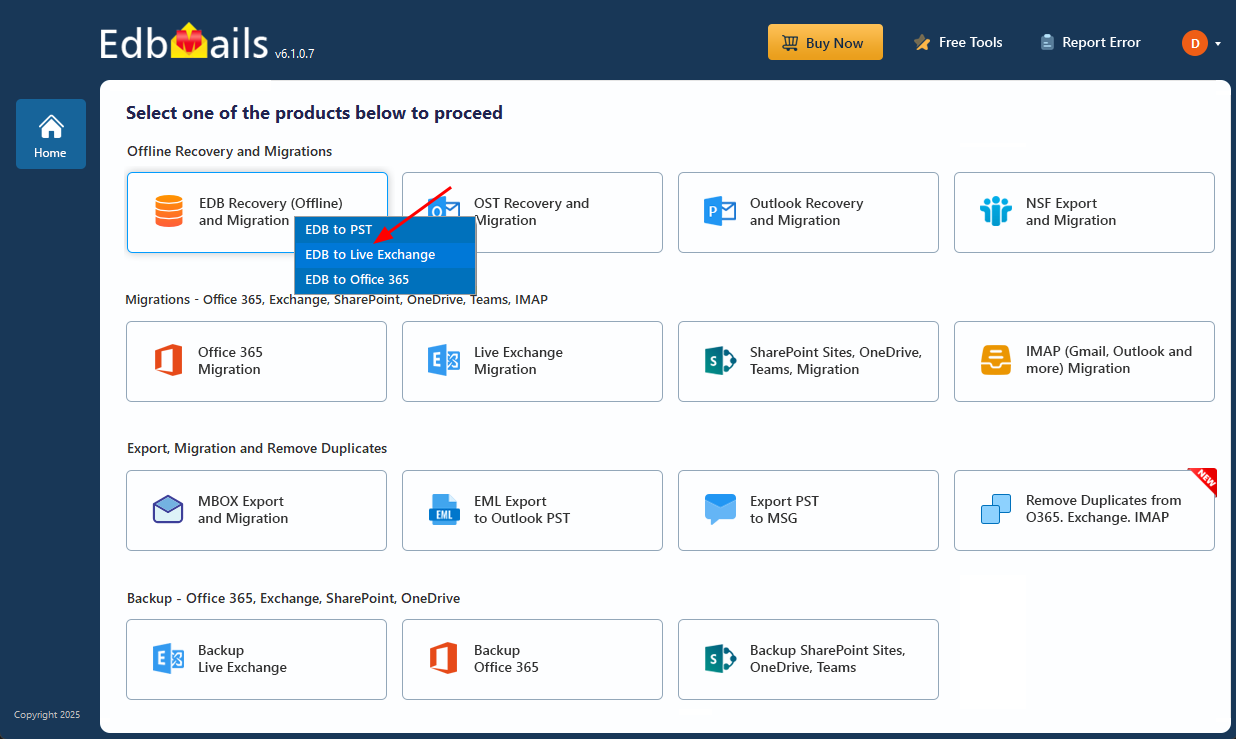
- Select ‘EDB Recovery (Offline) and Migration’ from the list of available products to proceed.
- Select 'EDB to Live Exchange'
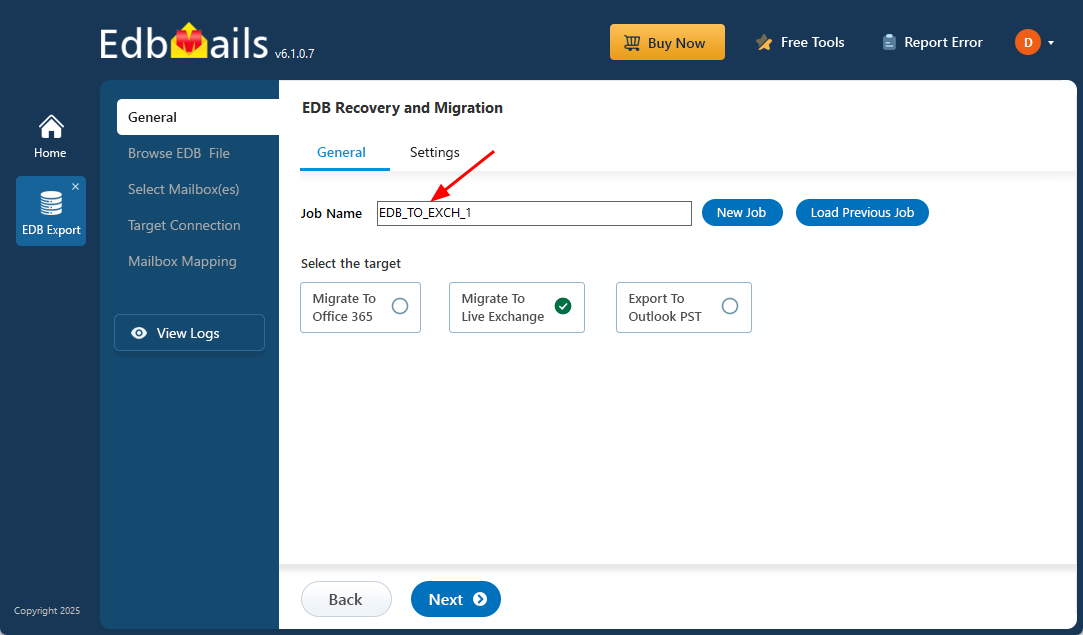
- You can either use the default job name or select ‘New Job’ to create a custom name. This makes it easier to identify and manage your tasks as you move forward.
Step 2: Select the Exchange database which contains the user mailboxes
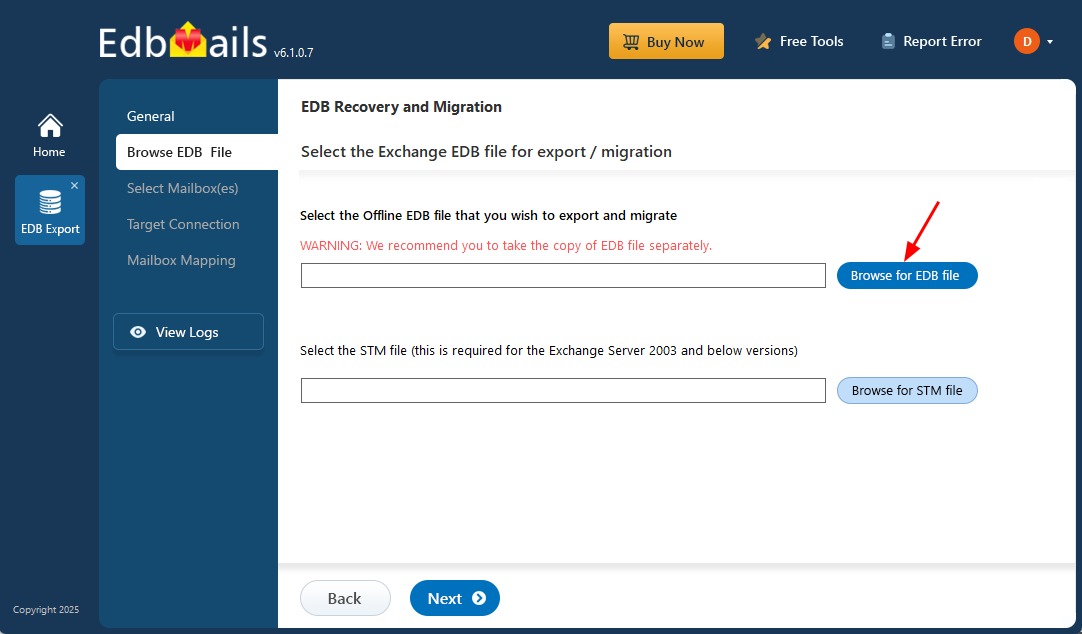
- Click the ‘Browse for EDB file’ button.
- Select the offline EDB file which contains the mailboxes you want to move.
- EdbMails performs a detailed scan of the EDB file, recovering mailbox data even from corrupted or damaged files, ensuring that no data is lost during the recovery process.
- Once the recovery process is finished, expand the mailbox and click on any folder to preview its contents like; emails, contacts, calendars, tasks, journals, and notes—on the right-hand pane.
- Choose the specific mailboxes or folders you want to export, then click ‘Next’ to proceed with the export.
Step 3: Connect to target Exchange server
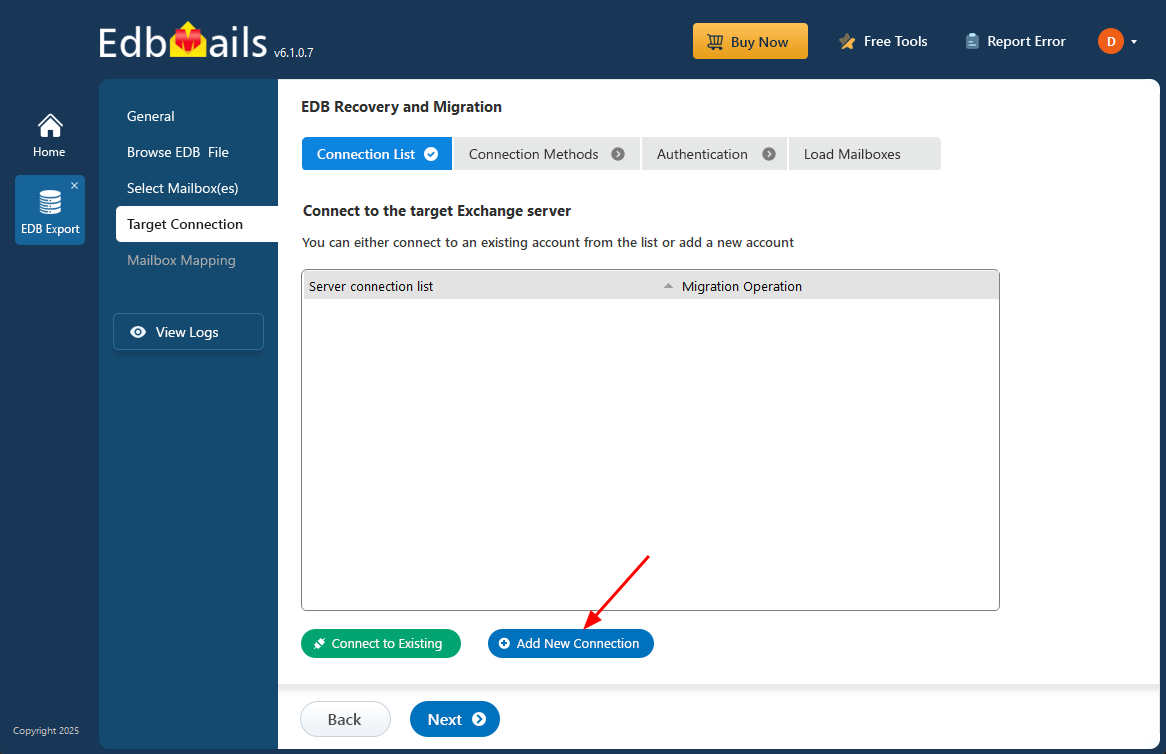
- Click on the ‘Add New Connection’ button to establish a new connection to your target Exchange server. If you've previously set up a connection, just select it from the list and click ‘Connect to Existing’ to proceed.
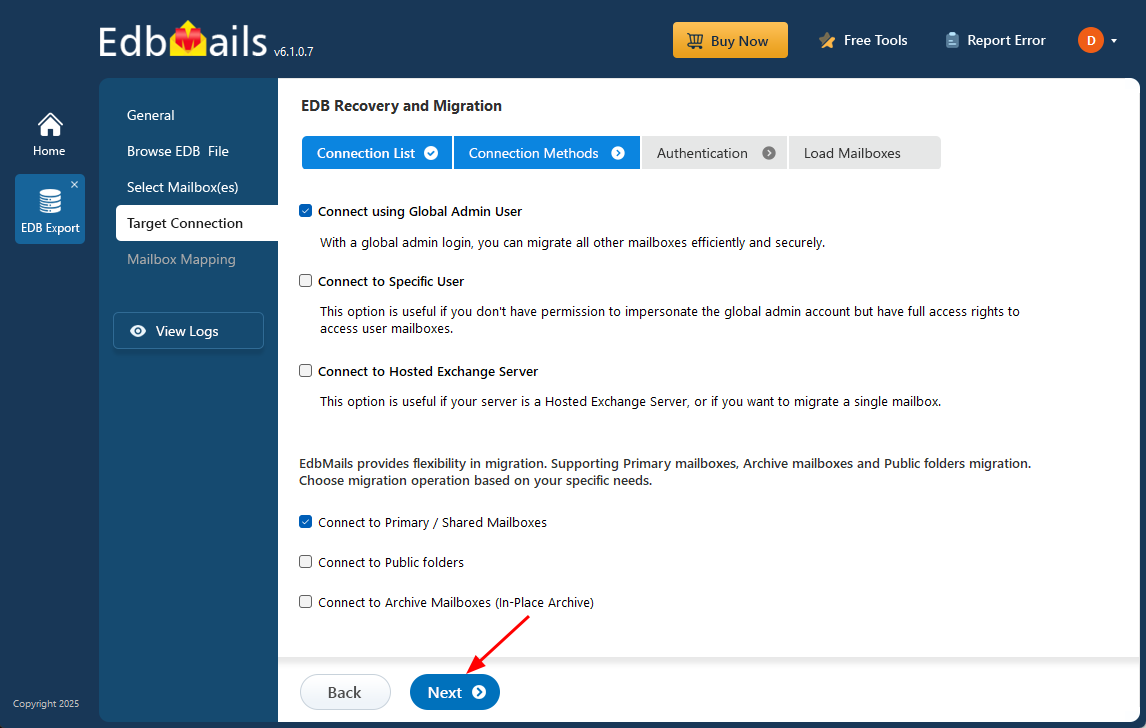
- Choose the appropriate connection options and click the ‘Next’ button.
Different options to connect to Exchange server in EdbMails
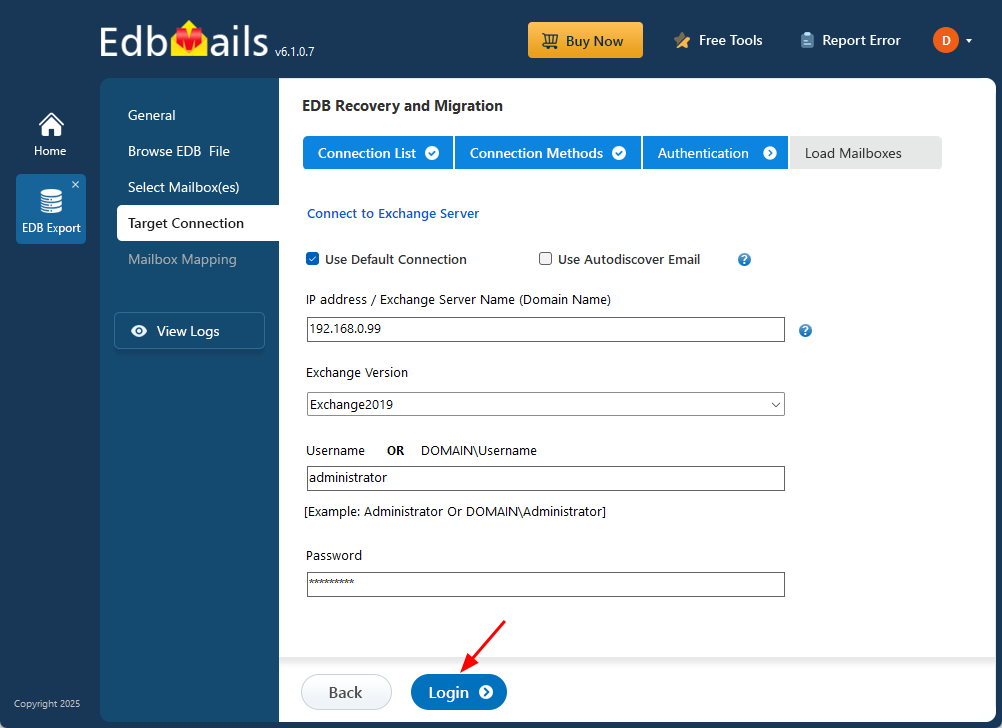
- Provide the required details for the target Exchange server and click the ‘Login’ button to continue.
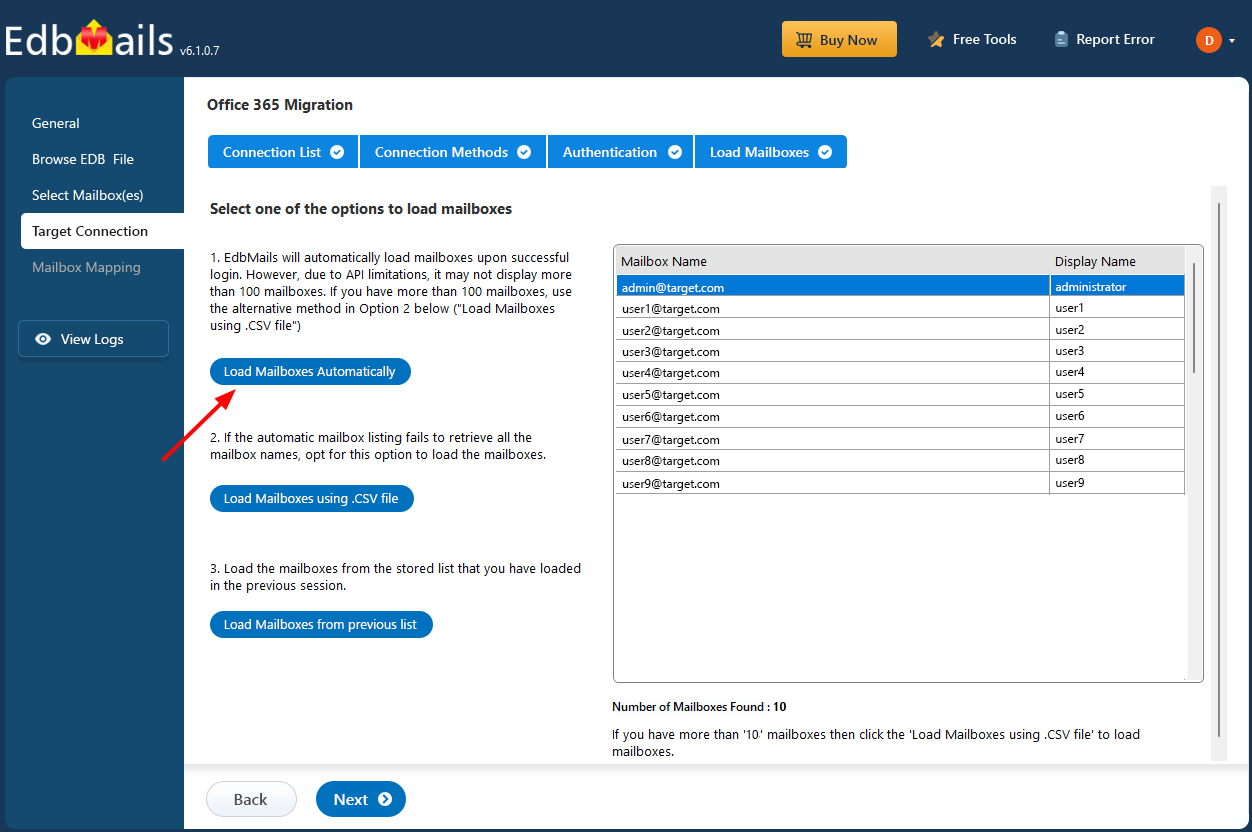
- EdbMails automatically loads up to 100 mailboxes from the target Exchange server, in line with Microsoft’s API limits. If you need to load more than 100, you can import a CSV file containing the additional mailboxes. Choose the method that best fits your needs to load the mailboxes into EdbMails.
Step 4: Map source and target mailboxes
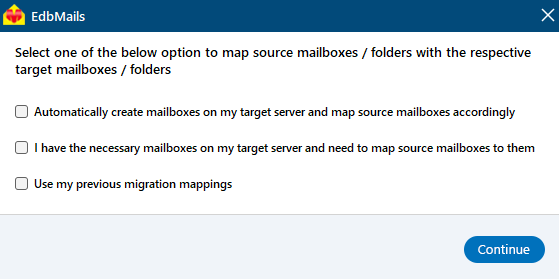
- Select the appropriate mailbox mapping option based on your needs.
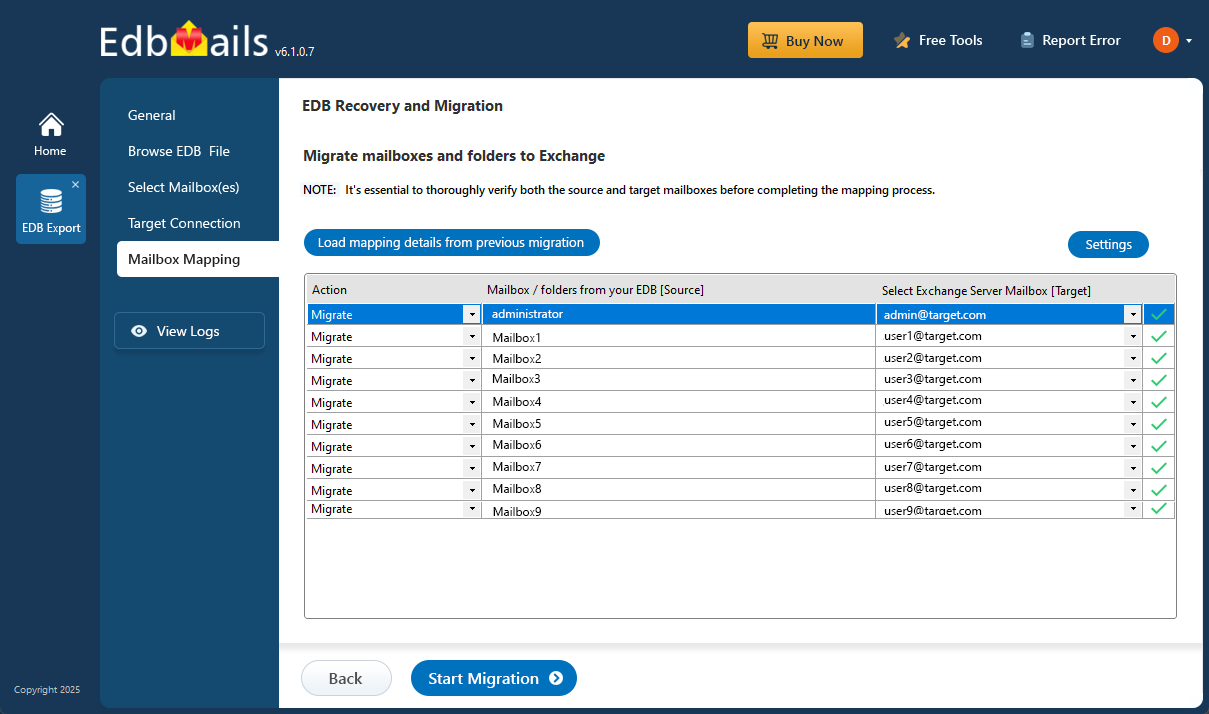
- EdbMails allows you to automatically create mailboxes on the target Exchange server, particularly when the application is installed directly on that server. The tool also maps mailboxes automatically by matching the display names from both the source and target servers. If necessary, you can manually adjust the mailbox and folder mappings to fit your migration needs.
Step 5: Start EDB to live Exchange migration
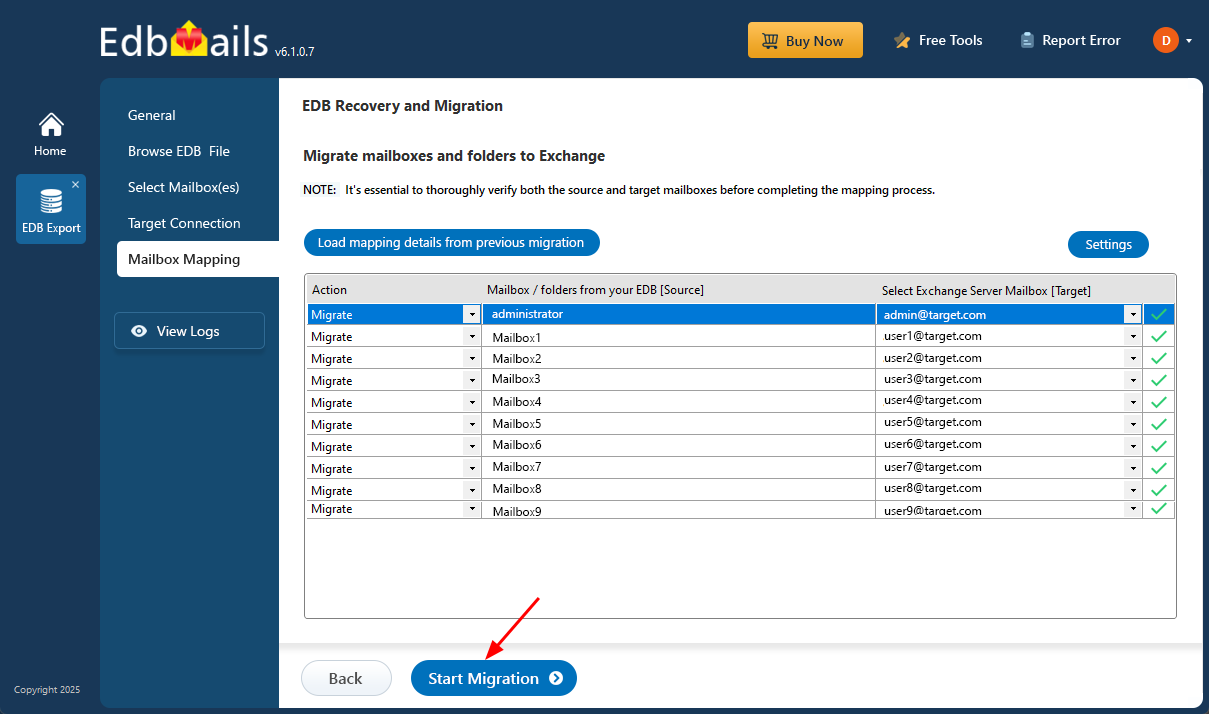
- After completing the mailbox mapping, click ‘Start Migration’ to begin importing mailbox data from the EDB file into the target Exchange server.
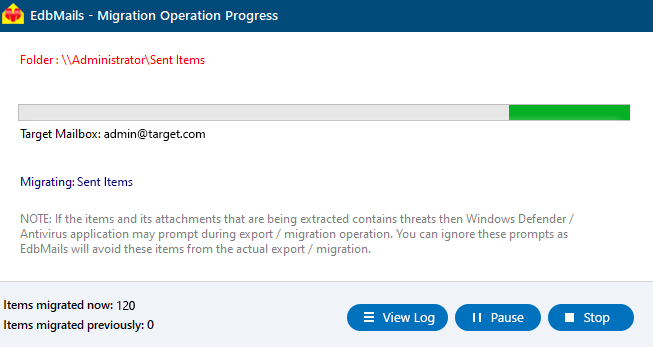
- You can monitor the migration progress in real-time using the progress bar. Once the migration is complete, a confirmation message will be displayed.
- Click the ‘View Logs’ button to access the migration log and review the details, including the number of emails, folders, and mailbox items successfully migrated from a dismounted database file.
In Summary:
We’ve outlined several approaches to fix the Exchange server database mounting error hr=0x80004005, ec=1108, which typically points to issues like database corruption or suspended Exchange server Information Store services. A good starting point is to use Eseutil to check the database state and attempt a soft recovery. If this fails, a hard repair or freeing up additional storage space may be necessary. However, Eseutil comes with limitations—it doesn't ensure full recovery and may lead to irreversible data loss. To avoid these risks, EdbMails Exchange Recovery offers a reliable alternative. It can fully repair and restore corrupted EDB files, allowing you to safely export mail data to PST. In addition, it supports direct migration to Office 365 or another Exchange server without needing complex PowerShell scripts or advanced technical skills.

