Reduce Exchange server database file size
Microsoft Exchange Server plays a central role in business communication by efficiently managing emails, calendars, and user mailboxes. Over time, however, the Exchange database (EDB file) can expand significantly as mailbox data accumulates. Without proper management, this unchecked growth can lead to degraded server performance, prolonged backup processes, and, in severe cases, database dismounts or corruption—particularly in Standard Exchange editions where database size limits are enforced.
An oversized EDB file can lead to slow search operations, indexing issues, and errors like “Content Index failed” or “Indexing suspended.” Managing inactive or outdated mailbox data also becomes increasingly difficult without proper maintenance. This is where EdbMails EDB to PST Converter comes into play. It enables you to extract and archive mailboxes into PST files, helping to clear out unwanted data, free up database space, and maintain a healthy Exchange environment without risking data loss.

In this step-by-step guide, we’ll show you how to efficiently reduce the size of your Exchange database by identifying and exporting unnecessary mailboxes with the help of EdbMails. By following these steps, you can stay within the recommended database limits, boost server performance, and ensure smoother, more reliable Exchange operations.
Exchange server management best practices
The following are some of the best practices that you must follow for maintaining the Exchange server and database in good condition.
- Understand the Exchange server storage configuration
- Run the Exchange server Best Practices Analyzer scan
- Plan for high availability and site resilience of Exchange server
How to reduce the Exchange database file size?
You can reduce the EDB file size in Exchange 2019, 2016, 2013 and 2010 with the following methods:
- By defragmenting the Exchange database
- By deleting mailbox data that you no longer require
- Moving the database manually to another location
- By taking a backup of Exchange server mailboxes
Method 1: Defragment the Exchange database
Before diving into the specifics of defragmentation, it’s important to understand the concept of whitespace within the Exchange database. When mailboxes or mailbox items are deleted, the database creates free space known as whitespace, which can be reused to store new data. However, this space does not automatically reduce the physical size of the database file. To reclaim this whitespace and effectively minimize the database size, periodic defragmentation is required.
- Remember to dismount the database before performing the defragmentation.
- Ensure that the drive on which the Exchange server is installed has sufficient space for defragmentation.
- Take a copy of the database before you start the defrag operation with eseutil.
Eseutil is a built-in utility in Exchange Server provided by Microsoft to check for database corruption and perform defragmentation. However, it’s important to note that the database must be unmounted before running the tool, which temporarily makes mailboxes unavailable until the defragmentation process is finished. The operation can be carried out through the following steps.
- Run the Exchange Management Shell as administrator
- Get the amount of white space available in the Exchange database
Get-MailboxDatabase
-status| Name, DatabaseSize, AvailableNewMailboxSpace -Auto - Dismount the Exchange database with the following cmdlet
Dismount-Database < database name >
- Defragment the database with the eseutil
Eseutil /d < DBName>
- Mount the database again after the defragmentation is complete
Mount-Database < DBName >
- Check the new space available in the database after defragmentation
Get-MailboxDatabase
-status| Name, DatabaseSize, AvailableNewMailboxSpace -Auto
One of the main limitations of Eseutil is that it cannot recover an EDB file if it is severely corrupted, and using the tool effectively requires a good understanding of PowerShell commands.
Method 2: Delete the unwanted data from the mailboxes
Removing unwanted data from Exchange mailboxes—like junk emails, old contacts, large attachments, and unused files—helps create free space in the database, known as whitespace. While this frees up room for new data, it doesn't actually shrink the size of the EDB file. Still, regularly cleaning up mailbox data is a good habit that helps keep the database from growing too large over time.
Method 3: Move the database from the Exchange admin center
You can also manually move the user mailboxes to a different database from the Exchange admin center (EAC) or with PowerShell cmdlets.
- Step 1: Login to the EAC and go to the ‘recipients’>‘migration’ tab
- Step 2: Click on the + sign and select 'Move to a different database'
- Step 3: Select the users you want to move and click 'Next'
- Step 4: In the move configuration page select the target database.
- Step 5: In the start batch page, configure the settings and click 'new'
See the detailed steps to create a local move request from the EAC
Method 4: Backup and migrate Exchange server mailboxes
Step 1: Download and install EdbMails Exchange recovery tool
- Download and install EdbMails on any Windows computer of your choice. The export process doesn’t require an Exchange Server, you can run the application on a non-Exchange server as well.

- Open the application and click ‘Login’ to access your account, or select ‘Start Your Free Trial’ to explore all the available features.

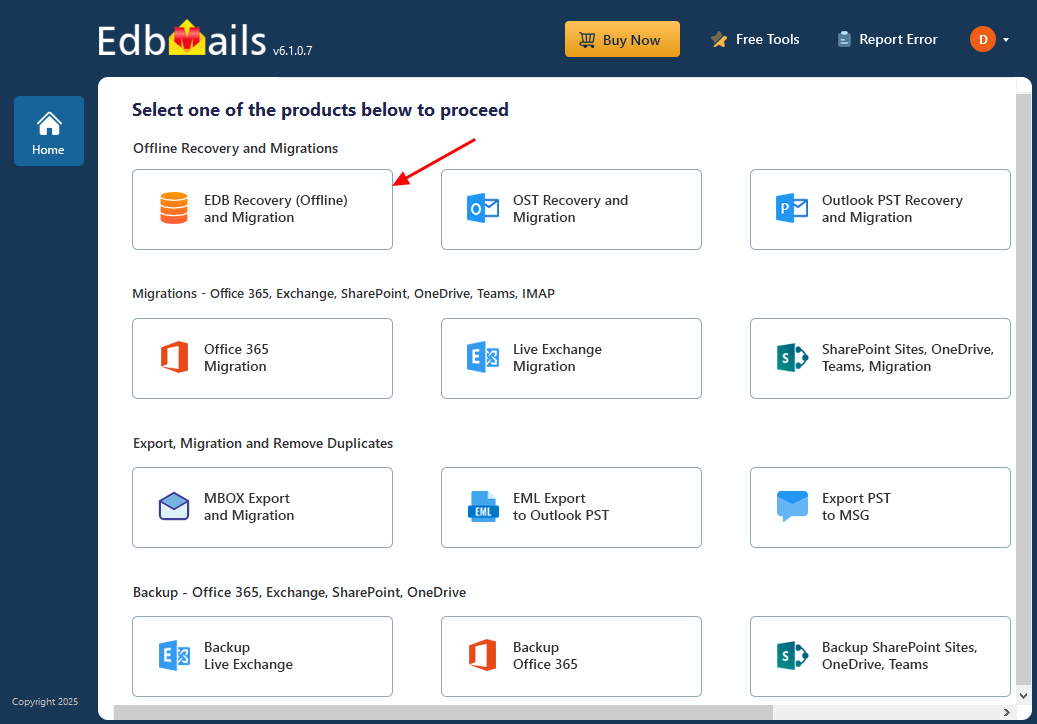
- Select 'EDB Recovery (Offline) and Migration'
- Choose the recovery technique as ‘EDB to PST’.

- You can use the default job name or click ‘New Job’ to create a custom name based on your preference.

- Download and install EdbMails on any Windows computer of your choice. The export process doesn’t require an Exchange Server, you can run the application on a non-Exchange server as well.
Step 2: Select the Exchange database file that you want to backup
- Click ‘Browse for EDB file’.

- Select the offline Exchange EDB file that you want to convert. If the file is on a shared network, make sure you have the required read and write permissions for a smooth operation.

- Click ‘Browse’.

- Select a destination folder to save the exported PST files. Make sure there is enough disk space available, then click ‘Next’ to continue.

- EdbMails thoroughly scans the EDB file and can recover mailbox data even from corrupted or damaged files, ensuring complete data recovery without loss.

- After the recovery is complete, expand the mailbox and click on any folder to preview its contents—like emails, contacts, calendars, tasks, journals, and notes—in the right-hand panel. Once you've reviewed the data, select the mailboxes or specific folders you want to export, then click ‘Next’ to continue.

- You can use the advanced filter settings to export Exchange emails to PST based on criteria like date, subject, attachments, and so on.
- The 'Exclude Standard / Custom folders' option lets you leave out specific folders like Inbox, Sent, Drafts, Junk, Conversation History, and any custom folders—from the export process.
- EdbMails comes with other additional settings for the export such as splitting a PST file and excluding emails whose size is greater than a specified limit.

- Click ‘Browse for EDB file’.
Step 3: Convert EDB to PST
- Review the selected mailboxes and folders to ensure everything is accurate. Verify that the 'Action' is set to 'Export', then click ‘Start Export’ to begin the process.
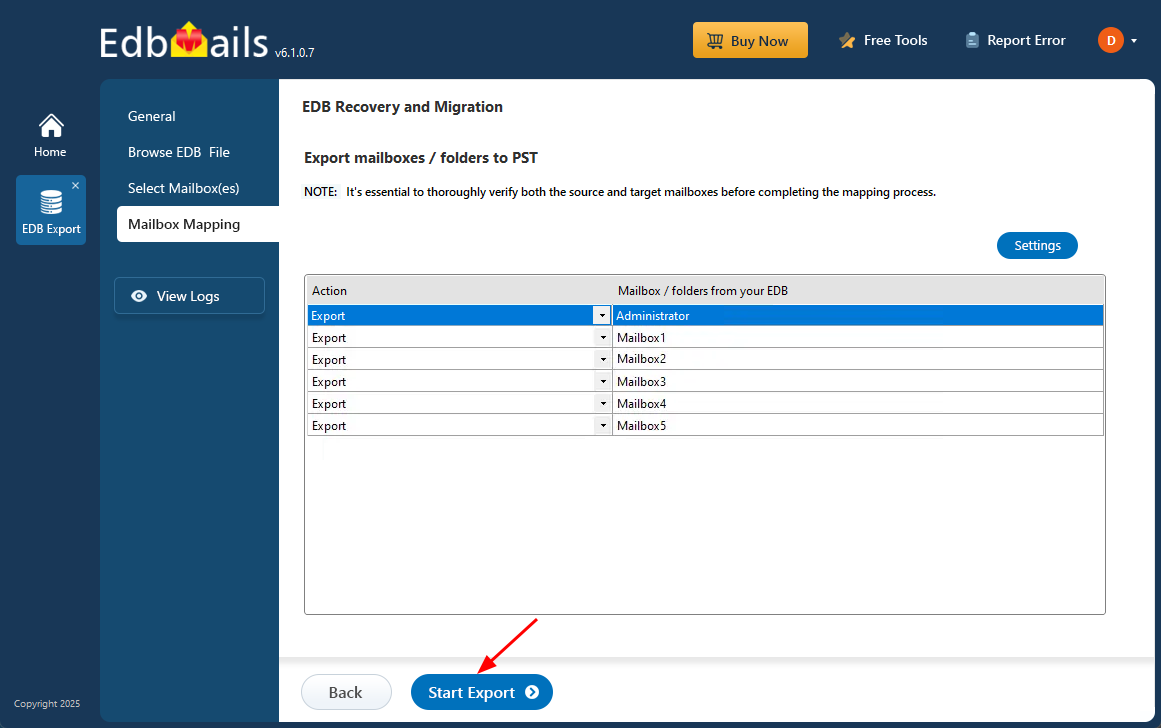
- During the export process, EdbMails shows a real-time progress window, allowing you to pause or resume as needed. Once the export is finished, click ‘View Log’ to see a detailed summary report.

Tip: To restore all your mailboxes and items from the EDB file, simply add the exported PST file to Outlook. For added security, you can copy the PST file to a safe location or back it up on your network drive.
The EDB export process with EdbMails ensures zero downtime, and the resulting PST backup is an exact replica of the source. It also features advanced built-in filters, allowing you to select specific folders, emails, and mail items for export, backup, or migration.
Follow these steps if you want to perform an Exchange-to-Exchange server migration and reclaim mailbox storage space on the source server. The method outlined below describes how to back up Exchange mailboxes.
Reclaim space by performing Exchange mailbox backup
Step 1: Select Exchange Backup in the application
- Select ‘Backup Live Exchange’ from the available product options.

- Select the recovery technique as ‘Exchange Backup’.

- You can either use the default job name or create a custom one by selecting ‘New Job’, making it easier to identify and manage your tasks later.

- Click ‘Browse’ to set a backup location.

- Choose a location to save the backup files and ensure there is enough available disk space on your computer. Then, click ‘Next’ to proceed.

Step 2: Connect to the source Exchange server
- Click the ‘Add New Connection’ button to set up a connection to the source Exchange server. If a connection has already been configured, select it from the list and click ‘Connect to Existing’ to proceed.

- Choose the appropriate connection options and click the ‘Next’ button.
Different options to connect to Exchange server in EdbMails

- Enter the required source Exchange server details and click ‘Login’ to continue.

- EdbMails automatically loads up to 100 mailboxes from the source Exchange server, in accordance with Microsoft’s API limitations. To load more than 100 mailboxes, you can import a CSV file containing the additional mailbox list. Select the method that suits your setup and click ‘Next’ to proceed.

- Select the items you want to backup and click the ‘Next’ button.
- EdbMails offers the option for either a Full Backup or Incremental Backup and allows you to exclude specific mailbox folders, such as Inbox, Drafts, Junk, and Conversation History.

Step 3: Backup Exchange server database
- Review the selected mailboxes and folders to ensure everything is accurate. Confirm that the ‘Action’ is set to ‘Backup’, then click ‘Start Backup’ to begin the process.

- During the backup, EdbMails shows a real-time progress window, with options to pause or resume as needed. Once the backup is finished, click ‘View Log’ to view a detailed summary report.
- You can restore the backup file anytime by following the restore operation with EdbMails.
See steps to restore Exchange server backup with EdbMails.

- Select ‘Backup Live Exchange’ from the available product options.
- Review the selected mailboxes and folders to ensure everything is accurate. Verify that the 'Action' is set to 'Export', then click ‘Start Export’ to begin the process.
Conclusion:
When an Exchange EDB file becomes too large, it increases the risk of corruption and negatively impacts server performance. In this article, we’ve covered four effective methods to reduce the size of the Exchange database. Deleting mailboxes creates free space within the database, known as whitespace, but to actually reclaim that space and reduce the file size, you need to defragment the database. Manual defragmentation typically involves PowerShell scripts and may not work if the database is already corrupted. EdbMails offers a reliable alternative. It’s an all-in-one Exchange recovery and migration tool that helps reduce database size by recovering mailboxes from EDB files and exporting them to PST. Additionally, it supports secure mailbox migration to another Exchange server and allows you to take encrypted backups for safe storage and recovery.

