Import an Exchange Database File (.EDB) into Live Exchange Server
Importing an EDB file into an Exchange Server is commonly required during disaster recovery, server migration, or when accessing archived mailbox data. However, relying on manual methods such as PowerShell commands or built-in Exchange utilities can be complicated and time-intensive. The process also carries risks, particularly when the database is offline, damaged, or lacks the required transaction log files.

EdbMails EDB to Exchange Migrator provides a dependable solution for importing mailboxes directly from offline EDB files into Exchange Server versions 2010, 2013, 2016, and 2019. The tool operates without requiring access to the original Exchange environment, Active Directory, or transaction log files. It enables secure mailbox recovery from EDB files while maintaining the original folder layout, message hierarchy, and metadata. Designed with an intuitive interface and guided workflow, EdbMails ensures a smooth, accurate, and hassle-free EDB to Exchange migration process.
Before starting the process, make sure you can access the target Exchange environment where the mailboxes will be imported. Confirm that user mailboxes are already created on the destination server and that you have administrative credentials with the necessary permissions to perform the migration. The step-by-step instructions below guide you through the entire procedure for importing an EDB file into your Exchange server using EdbMails, ensuring a smooth and controlled migration process.
How to move Exchange database from one server to another
To move an EDB file from Exchange to another server, first check the database state with Eseutil and backup the database file with Windows Server backup utility. Finally, restore the backup to a new Exchange server.
The Eseutil command line utility is installed when you install the Exchange server and it can check the database file for errors, consistency, missing log files, and so on. To run eseutil, first unmount the database with the Dismount database cmdlet. Next, navigate to the Eseutil's location, launch the tool, and proceed with the following steps.
Steps to move Exchange database to another server
- Step 1: Check the Exchange database (.EDB) state with the cmdlet eseutil/mh
- Step 2: If it displays Dirty Shutdown, run eseutil/r and eseutil/p to repair the database.
- Step 3: Use Windows Server backup (WSB) to take a complete backup of the Exchange data.
- Step 4: Restore the backed up EDB from the WSB to a different server.
- Step 5: Setup your new Exchange server and decommission the old one
The Exchange server backup method has the limitation of not being able to backup individual EDB files or log files and instead requires backing up the entire volume or drive.
How to move an Exchange 2010 database to another drive?
To move an Exchange 2010 database to another drive, launch the Exchange management console (EMS) and navigate to the Database management tab, then select Move Database path.
Steps to move Exchange 2010 database to another drive
- Step 1: Launch and open the Exchange management console.
- Step 2: Navigate to 'Mailbox' under 'Organization Configuration' in the left menu.
- Step 3: Select the database to change path and select ‘Move Database path’
- Step 4: Change the location of the default path and click ‘Move’ to start the operation.
This procedure transfers the database file to a different folder or drive. If you want to move an Exchange mailbox to another database or to another Exchange 2010 server, however, you must use the Database portability method. The database portability method has a limitation in that you cannot move an EDB from an older version of Exchange to the most recent version, such as 2016 or 2019.
How to move Exchange 2013 and 2016 mailboxes to another server from EAC?
To change the default location of a database in Exchange 2013 and 2016, use the Exchange Management Shell cmdlet MoveDatabasePath. To move mailboxes from Exchange 2013 to another server, use the option ‘Move mailbox to another database’ from the classic Exchange admin center (EAC). Let's go over the procedure step by step.
Steps to move Exchange 2013/2016 mailboxes to another server
- Step 1: Run the cmdlet C:\>Move-DatabasePath “Database_name” -EdbFilePath “new_path”.
- Step 2: Check if the database EDB file is moved to the new location.
- Step 3: Navigate to the EAC to move complete mailboxes to another server.
- Step 4: Click (+) under migration and then select 'Move to a different database'.
- Step 5: Select all of the user mailboxes to be moved and then create a migration batch.
- Step 6: Enter a name for the batch and select the target database name.
- Step 7: Click 'New' to initiate the request and view the operation's status in the EAC.
There are two main approaches to consider. If you're simply relocating the database, you can use the MoveDatabasePath cmdlet. This temporarily unmounts the database and moves it to a new path. On the other hand, if you want to avoid dismounting mailboxes or any downtime, you can move them through the Exchange Admin Center (EAC) directly.
However, both methods rely heavily on PowerShell scripts, which can be risky without technical expertise and may lead to data loss. Additionally, if the EDB file is damaged or corrupted, these native methods cannot repair or access the data. In such cases, a more reliable solution is to use EdbMails Exchange Recovery. It can repair corrupted EDB files and import the recovered data directly into any version of Exchange server.
How to import an EDB file into Exchange 2019, 2016, 2013 and 2010 using EdbMails?
EdbMails lets you migrate mailboxes and email data from an EDB file directly to Exchange servers or Microsoft 365. You can also export the data to PST files or save selected emails in formats like HTML, EML, or MHT, depending on your needs for backup or access.
Step 1 : Download and launch EdbMails EDB Recovery software application
- Download and install EdbMails on any Windows-based computer, even if the system doesn’t have Exchange Server installed.

- Launch the EdbMail application and log in using your registered email address and password. If you don’t have an account, click ‘Start Your Free Trial’ to begin using EdbMails instantly without registration.Note: The Free Trial allows you to export mailbox data with a limit of 30 items per folder. To remove this restriction and export all items, a valid license is required.
Click here to purchase the license from the EdbMails website
After completing the purchase, restart the application and log in using the same email credentials to activate your license successfully.

- Select ‘EDB Recovery (Offline) and Migration’ from the product list

- Select 'EDB to Live Exchange'

- Either retain the default job name or use ‘New Job’ to define a unique name, ensuring easy identification in the future.
- Then, click ‘Next’ to continue

- Download and install EdbMails on any Windows-based computer, even if the system doesn’t have Exchange Server installed.
Step 2: Select offline Exchange EDB file
- Click ‘Browse for EDB file’ button

- Browse to the location of the offline EDB file on your local drive, select it, and then click ‘Next’ to proceed.

- EdbMails thoroughly analyzes the offline EDB file to retrieve mailbox data, even when the database is corrupted. The duration of the recovery process varies based on the file size and condition of the database, so allow the scan to complete fully for accurate results
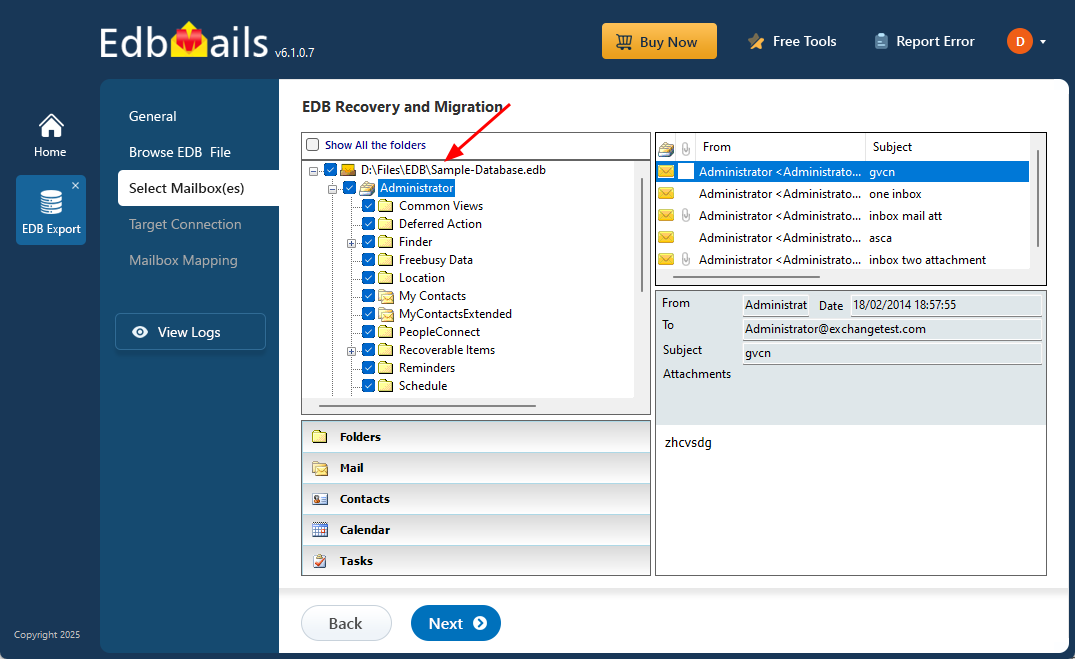
- Once the recovery process finishes, expand the mailbox and select any folder to display all mailbox items such as emails, contacts, calendars, tasks, journals, and notes in the preview pane on the right.
- Choose the specific mailboxes or folders you want to export, and then click ‘Next’ to proceed.
- Click ‘Browse for EDB file’ button
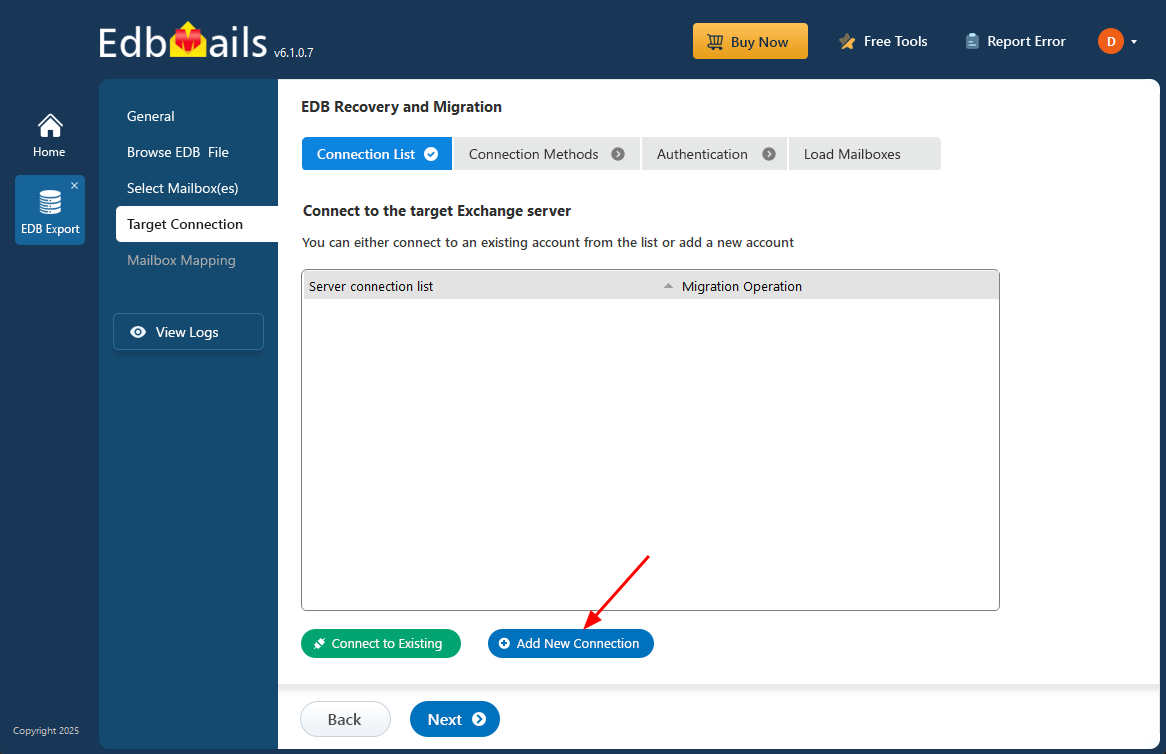
Step 3: Connect to target Exchange server
- To connect to the target Exchange server, click ‘Add New Connection’ to configure a new setup. If you’ve previously created a connection, simply choose it from the list and click ‘Connect to Existing’ to continue.
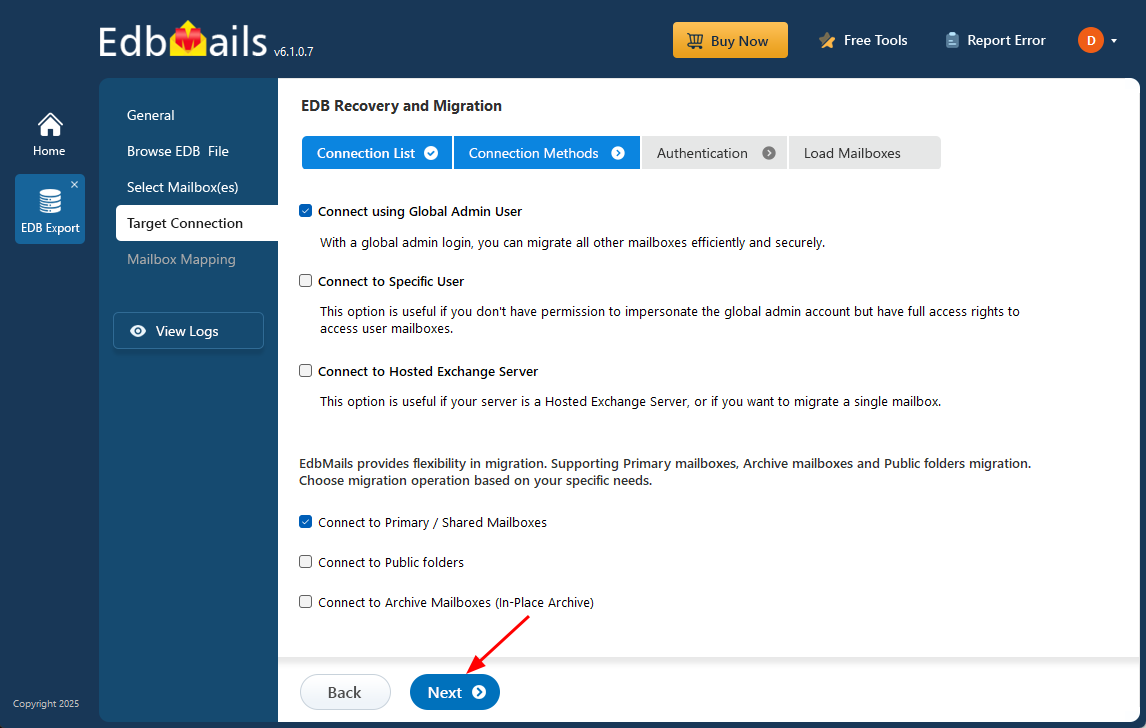
- Select the required connection options and click the ‘Next’ button.
Different options to connect to Exchange server in EdbMails
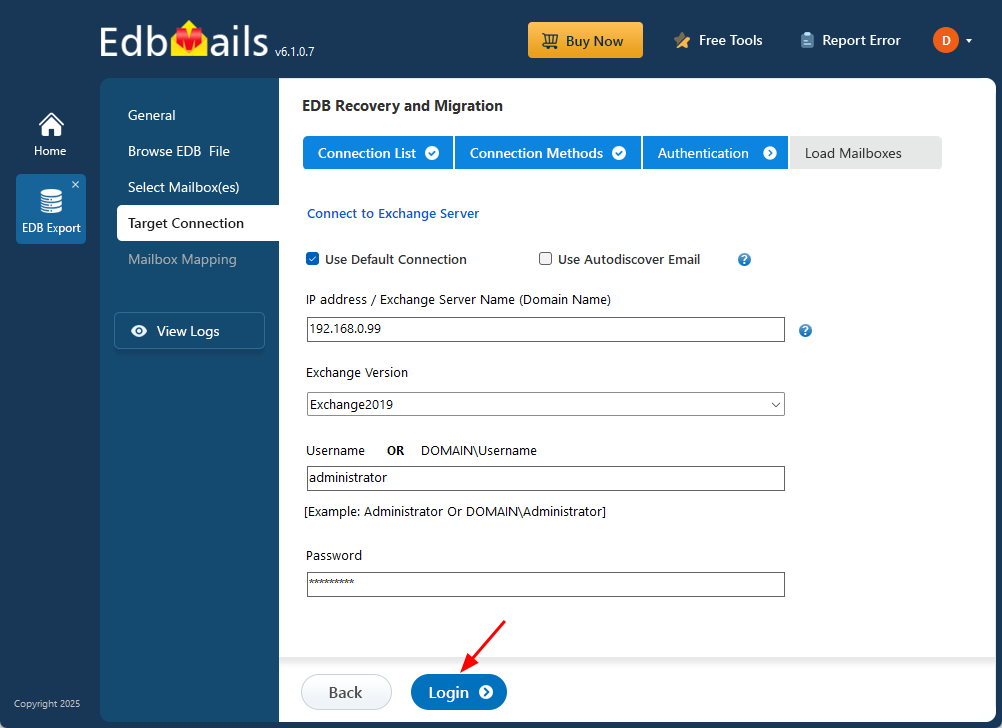
- Enter the target Exchange server details to complete the connection setup, then click the ‘Login’ button to continue.
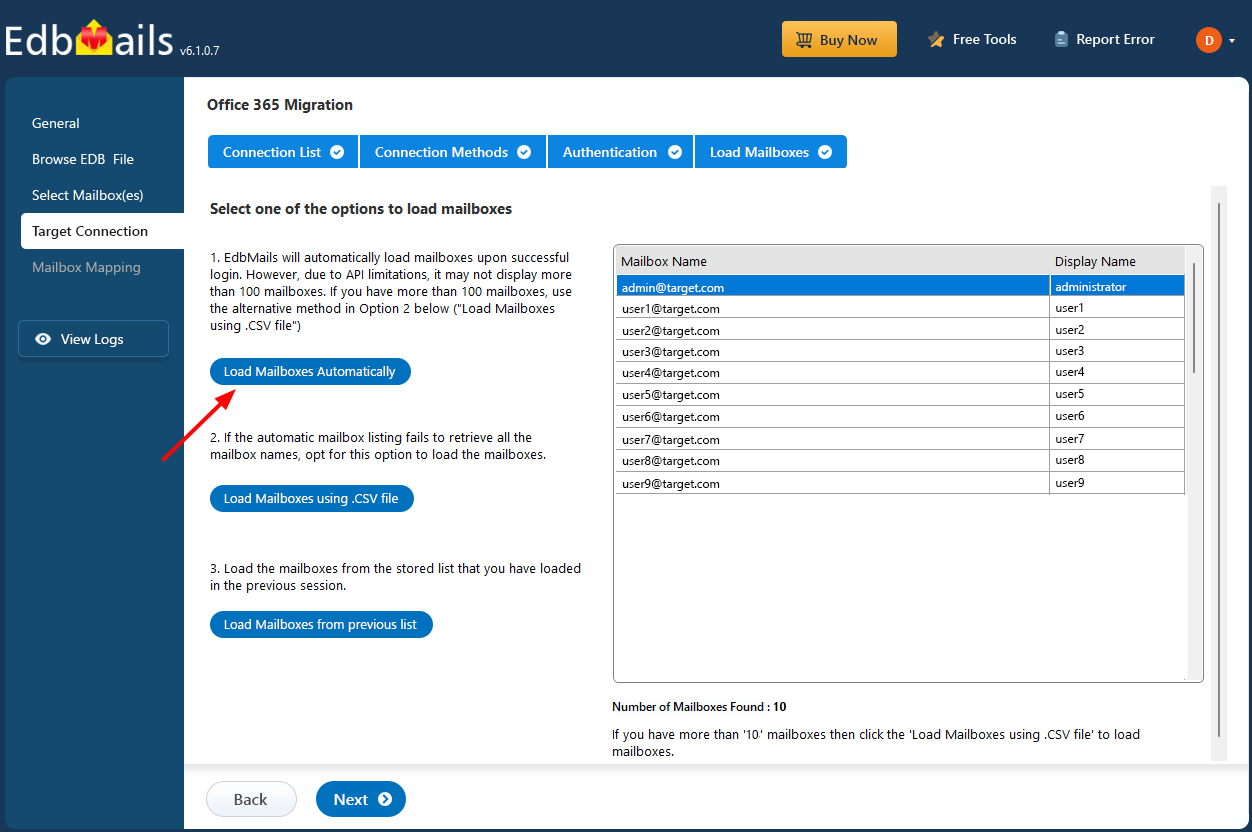
- EdbMails automatically loads up to 100 mailboxes from the target Exchange server, which is the maximum limit allowed by Microsoft’s API. If your organization has more than 100 mailboxes, you can load additional ones by importing a list using the CSV file method. Simply choose your preferred method to proceed with loading the mailboxes.
- To connect to the target Exchange server, click ‘Add New Connection’ to configure a new setup. If you’ve previously created a connection, simply choose it from the list and click ‘Connect to Existing’ to continue.
Step 4: Map source and target mailboxes
- Choose the required mailbox mapping option

- You can choose to let EdbMails automatically create mailboxes on the target Exchange server when the application is installed directly on that server. EdbMails also performs automatic mailbox mapping by matching the display names from the source and target servers. If needed, you can manually map mailboxes and folders to suit your specific migration preferences.

- Choose the required mailbox mapping option
Step 5: Start EDB to live Exchange migration
- Once the mailbox mapping is complete, click the ‘Start Migration’ button to begin importing mailbox data from the EDB file into the Exchange server.

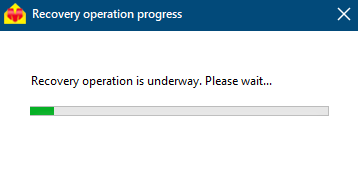
- You can monitor the migration in real-time using the progress bar. After the process finishes, EdbMails will display a confirmation message indicating that the migration was successfully completed.
- EdbMails also allows you to pause and resume the migration process as needed.

- Click on the ‘View Logs’ button to open the migration report and check the number of emails, folders, and mailbox items that were migrated.
- Once the mailbox mapping is complete, click the ‘Start Migration’ button to begin importing mailbox data from the EDB file into the Exchange server.
Key Features of EdbMails EDB to Exchange Migration Software
- Fully compatible with all major Windows Server and client operating systems.
- Built-in Free EDB file viewer to preview mailbox contents before migration.
- Granular recovery and migration – select and migrate specific mailboxes, folders, or individual items.
- Flexible filters to include or exclude specific folders, message types, or date ranges.
- Preserves original folder hierarchy and email formatting throughout the migration.
- Supports recovery and migration from corrupted, dismounted, or offline EDB files to a live Exchange server.
- Facilitates secure backup of your Exchange Server database for disaster recovery.
- Intuitive, GUI-based interface that eliminates the need for PowerShell commands or complex scripts.
- Recovers EDB files affected by Jet Engine errors and enables seamless direct mailbox migration.
Concluding Words
There are several situations where you might need to move an Exchange database and its mailboxes to a different server, whether due to migration, upgrades, or server issues. Doing this manually can be complex, time-intensive, and may lead to downtime or limited control over what gets moved. EdbMails makes this process simple. It lets you import EDB files directly into Exchange 2010, 2013, 2016, or 2019, no log files or Active Directory needed. Even if your EDB file is offline, orphaned, or corrupted, EdbMails can recover and migrate it seamlessly, allowing you to begin working with your new Exchange server right away.

