Import OST File to Office 365
Migrating OST files to Office 365 becomes necessary when users switch to Microsoft 365, face issues with an old Outlook profile, or need to access mailbox data from a different system. Since OST files are tied to a specific profile and can’t be opened directly in Outlook, transferring the data requires a dedicated solution.
EdbMails OST to Office 365 migrator offers a reliable and straightforward method to move your mailbox contents—including emails, contacts, calendars, and attachments—directly to Office 365. It eliminates the need for manual workarounds or complex configurations.
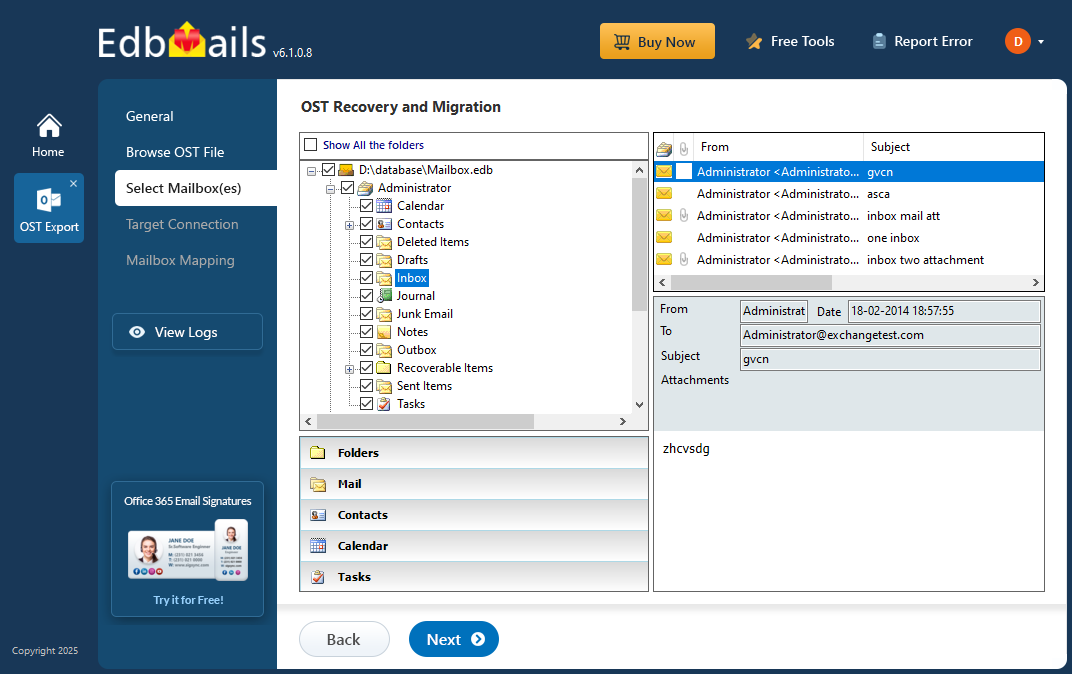
The tool also supports a step-by-step approach where you can select the OST file, connect to your Office 365 account, and choose specific items or folders to migrate. This flexibility makes it easy to perform targeted migrations based on your needs.
Why import OST to Office 365?
There are various scenarios where you may need to import your emails from OST to Office 365. Some of the common scenarios are as follows:
- Switching to Office 365: Many organizations are moving from on-premises Exchange servers to cloud-based Office 365 for improved productivity, security, and reliability. In such cases, users need to migrate their data including OST files to Office 365.
- Switching to a different computer: When you switch to a new computer or device, you may lose access to their locally stored OST files. Migrating these files to Office 365 ensures that you can access their emails and other data from any device with an internet connection.
- Recovering data after a system crash: In the event of a system crash, users may lose access to their local OST files. Migrating these files to Office 365 ensures that you can continue using your data without any loss.
- Complexity of the Microsoft migration tools: Microsoft in-built migration tool for Office 365 is complex, consumes time involving a lot of research and scripting.
- Switching from Exchange server to Office 365: Migrating to Office 365 is an ideal opportunity to resolve storage limitations, compliance challenges, support concerns, and eDiscovery issues commonly associated with OST files in Exchange environments. In addition, Microsoft no longer offers support or technical assistance for legacy Exchange and Windows servers, making it even more important to move forward. Upgrading your mailbox to Office 365 ensures better accessibility, security, and long-term reliability.
- Accessing emails on the cloud: Migrating your emails from OST to Office 365 helps you avoid the hassle of managing on-premise Exchange servers, including routine maintenance, security risks, and system updates. With Office 365, you can access your mailbox seamlessly across multiple devices using Outlook and mobile applications.
Steps to import OST to Office 365 with EdbMails
Step 1: Download and install EdbMails software
- Download and install the EdbMails application on your computer.
- Enter your email address and password, then click ‘Login’ or ‘Start Your Free Trial’ to continue.
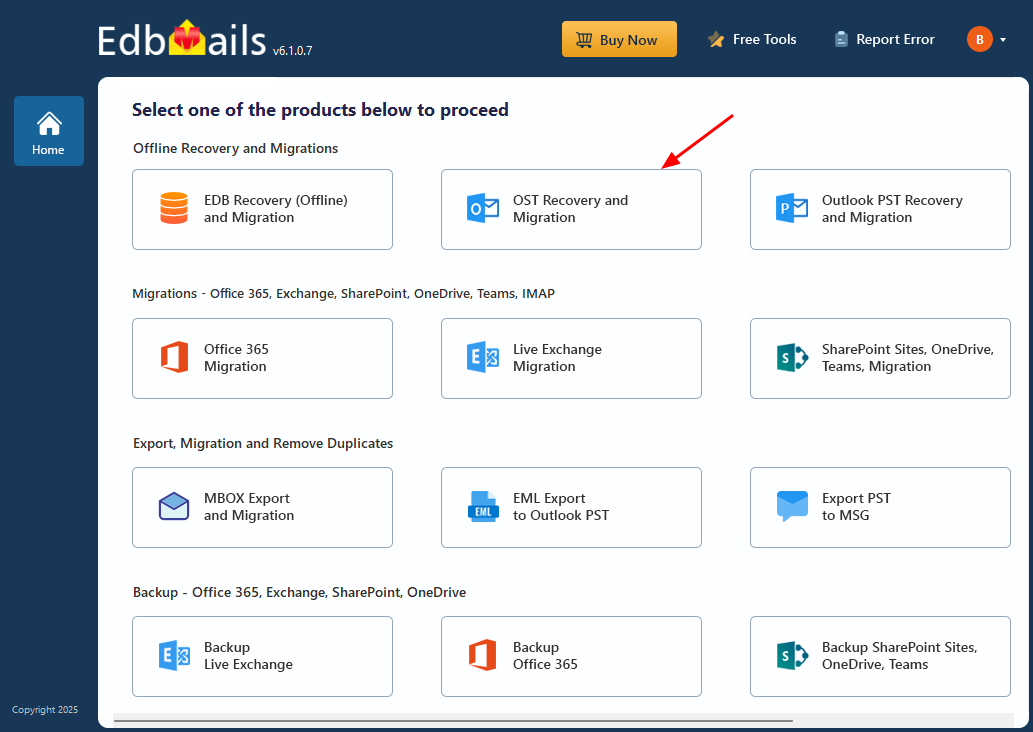
- Select ‘OST Recovery and Migration’.
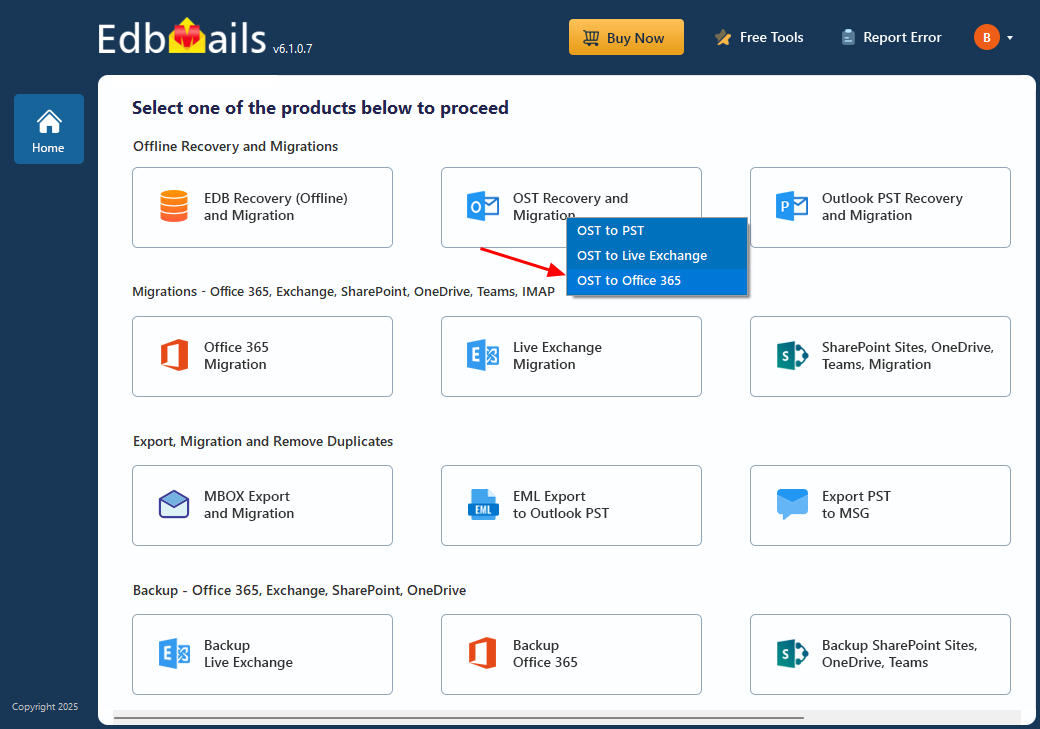
- Select ‘OST to Office 365’.
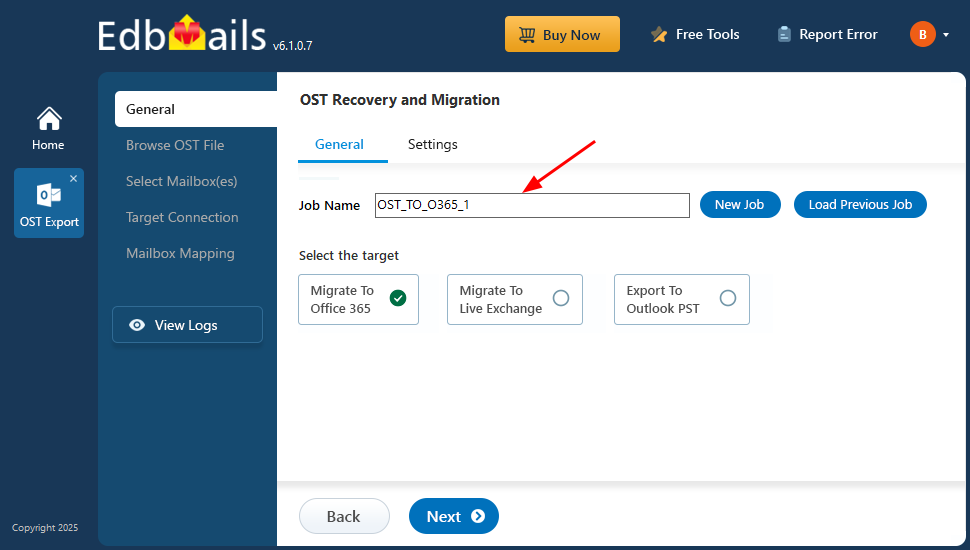
- You can keep the default job name or click the ‘New Job’ button to enter a custom job name.
Step 2: Browse and select the OST file that you want to upload
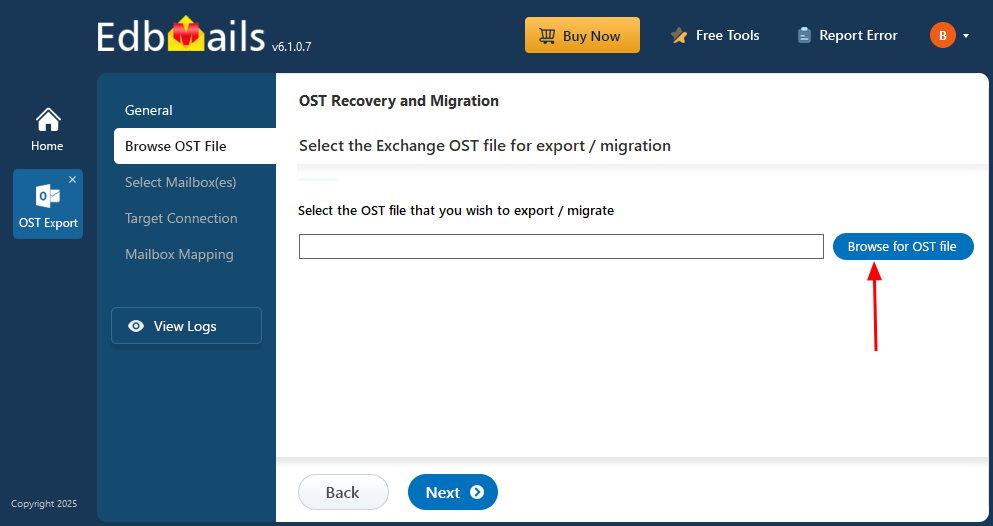
- Click ‘Browse for OST file'.
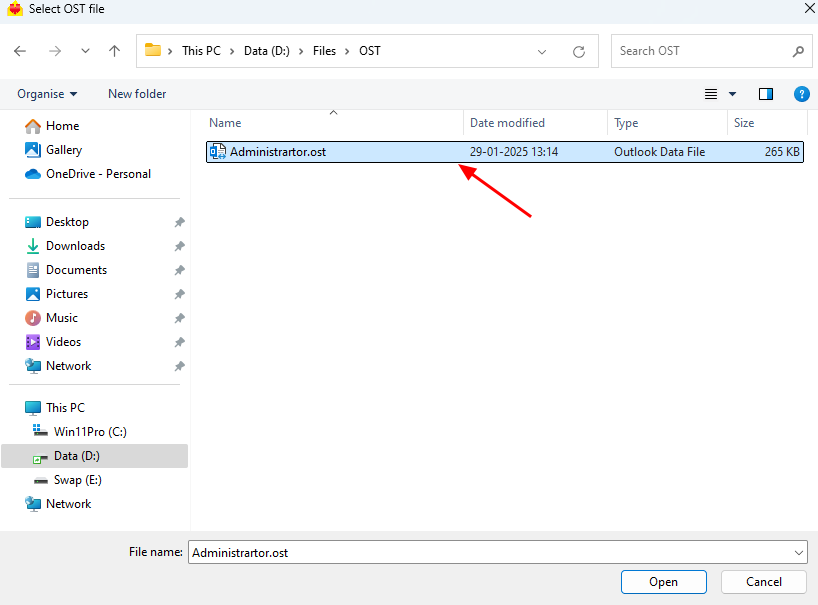
- Select the offline OST file from your computer, then click ‘Next’ to proceed. If needed, you can also access an OST file shared over a network, as long as it has read and write permissions enabled.
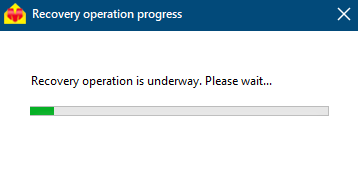
- EdbMails scans your OST file and recovers data in case of corruption.
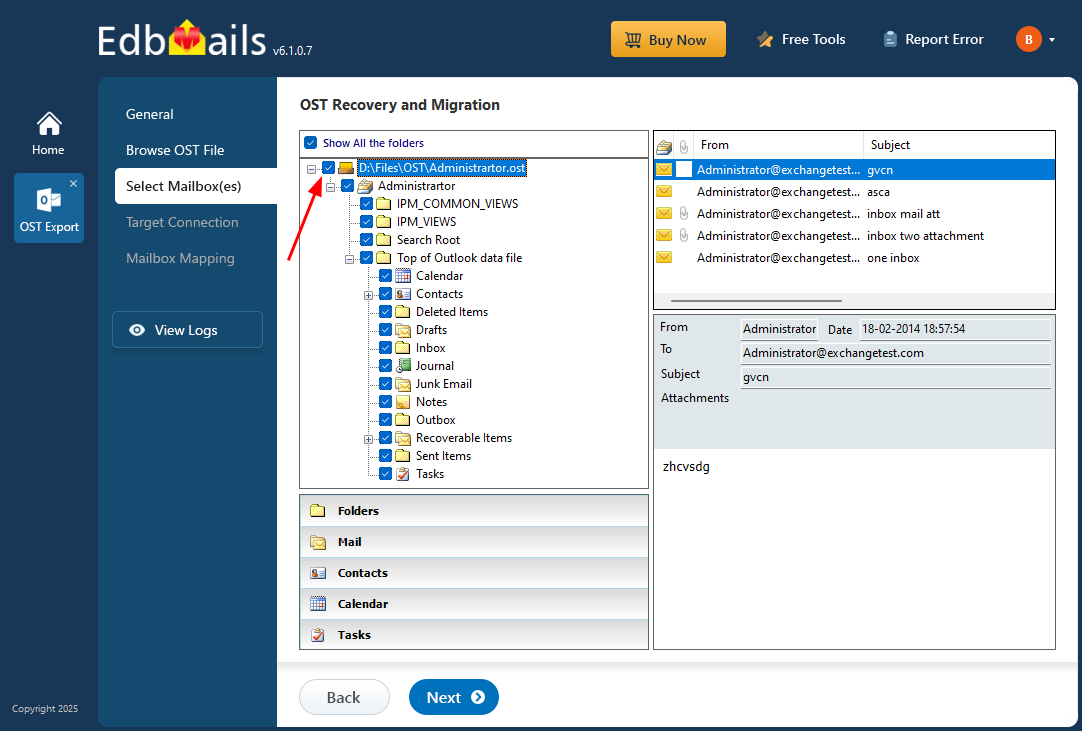
- Once the recovery is complete, the full folder structure will appear in the left pane. You can expand the mailbox and its folders to explore the contents. The preview section allows you to view emails, contacts, notes, tasks, and calendar entries directly within the application. There's no need to have Outlook installed to open and browse the OST file.
Step 3: Preview and select the mailbox
- Select emails, calendars, mailboxes or folders and click the ‘Next’ button.
Step 4: Connect to target Office 365 server
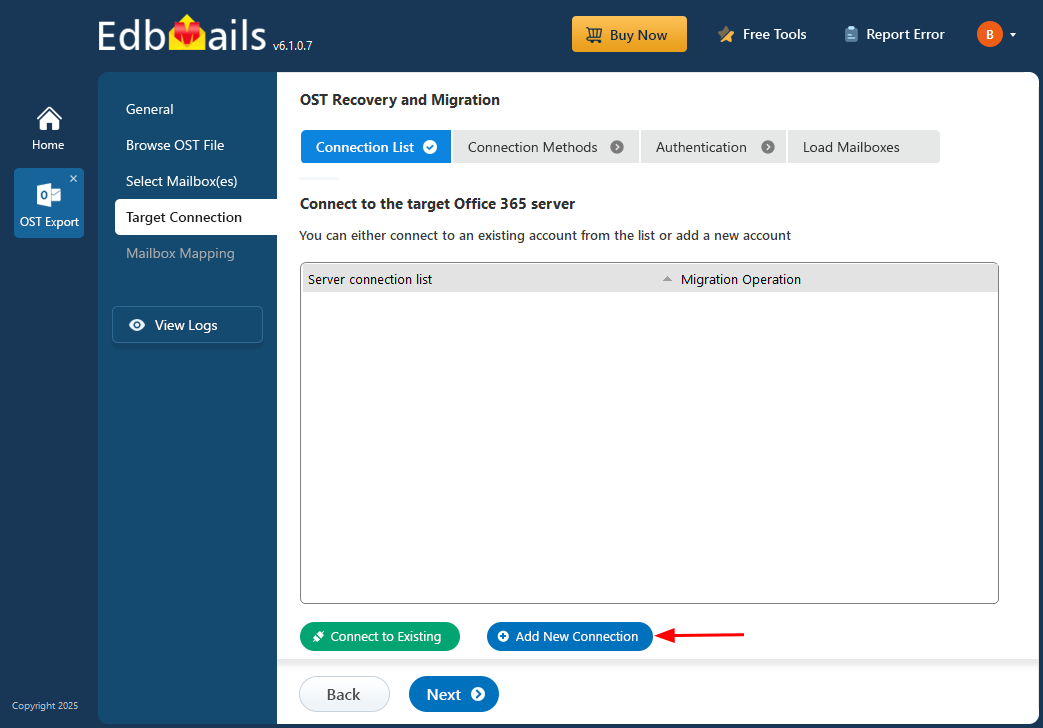
- Click the ‘Add New Connection’ button to set up a new connection to your target Office 365 server. If you’ve connected before, simply select the existing connection from the list and click ‘Connect to Existing’ to continue.
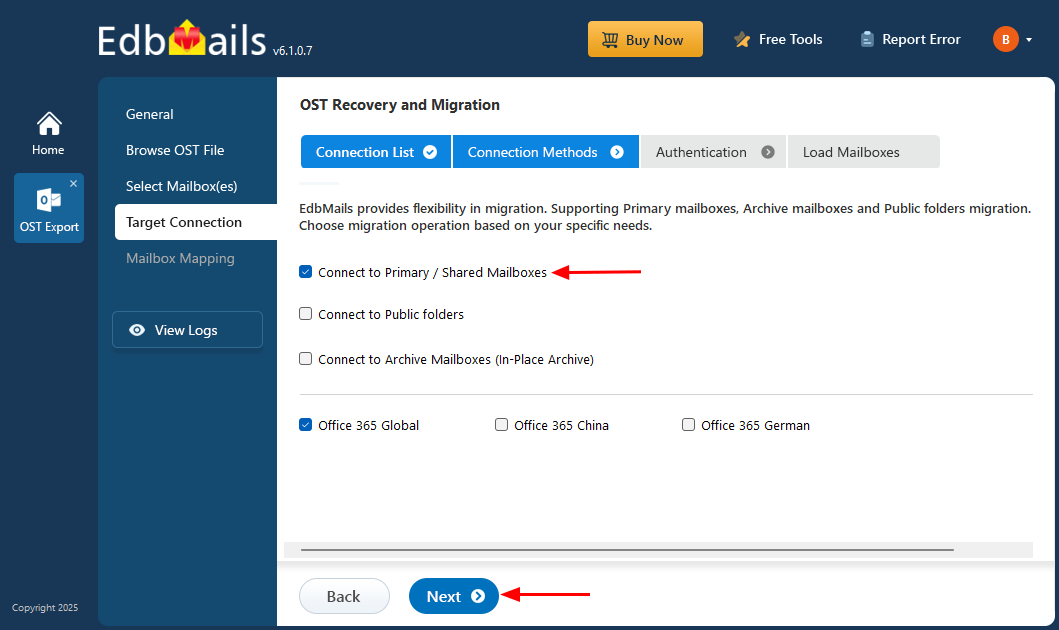
- Select the required connection options and click the ‘Next’ button.
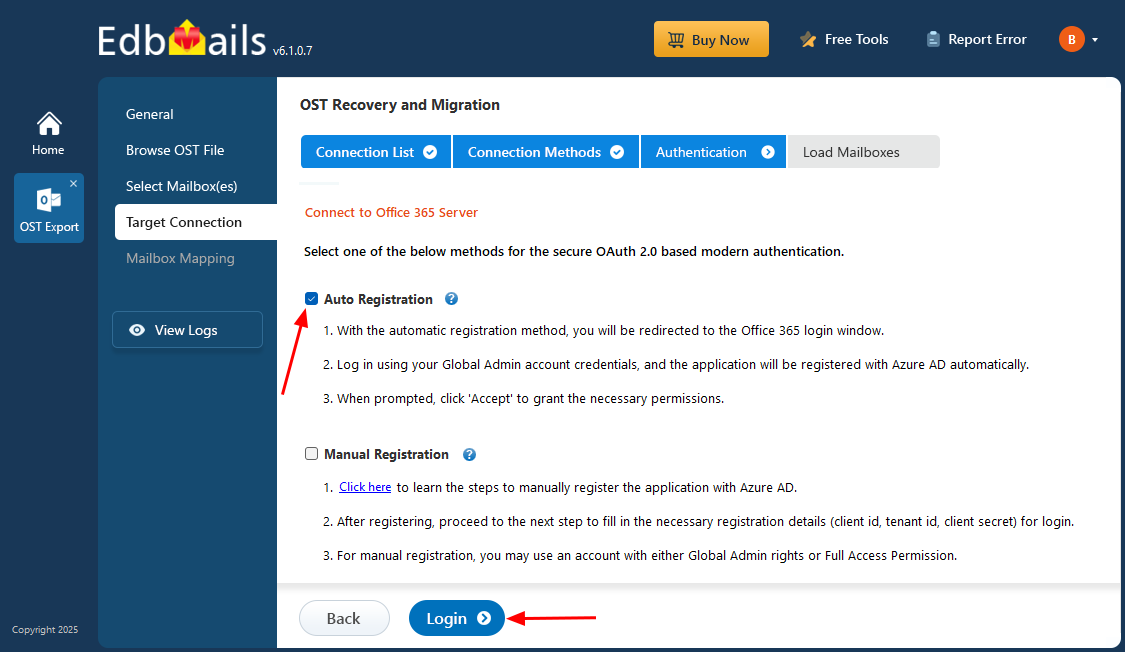
- Select one of the authentication methods and click the ‘Login’ button to continue.
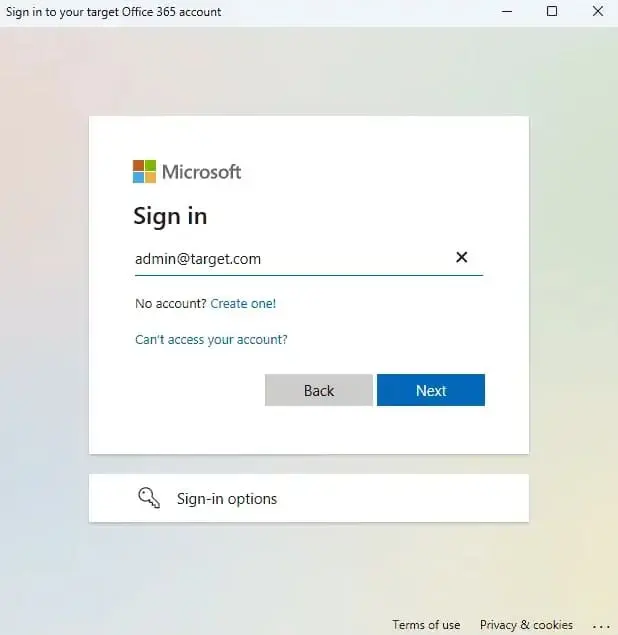
- Authenticate on Microsoft sign-in page.
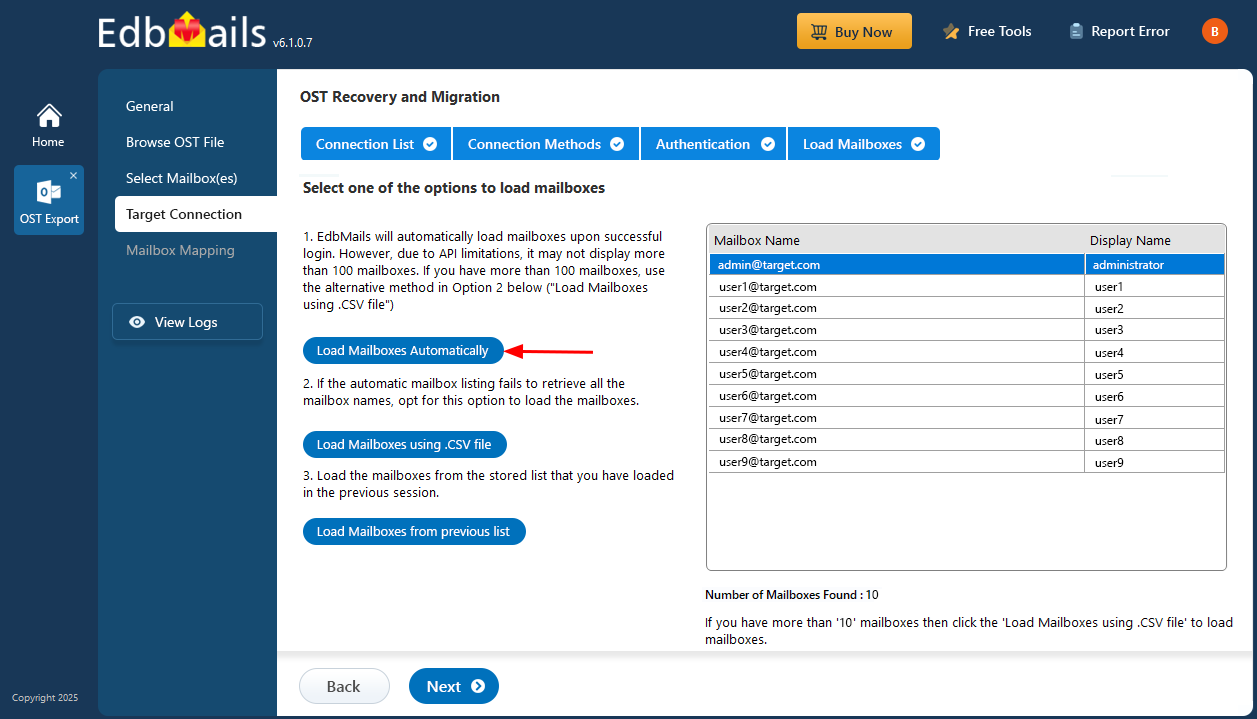
- Choose one of the available methods to load the mailboxes. Alternatively, you can import the mailbox list using a CSV file for bulk selection.
Step 5: Map source and target mailboxes
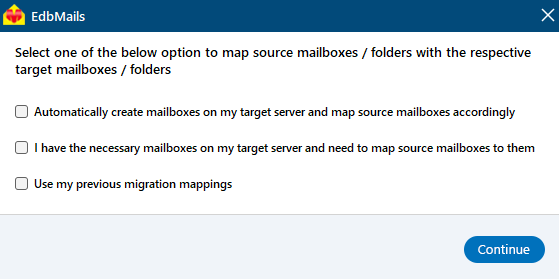
- Choose the required mailbox mapping option.
- EdbMails automatically creates the required mailboxes on your target Office 365 server and assigns the appropriate licenses, streamlining the migration process.
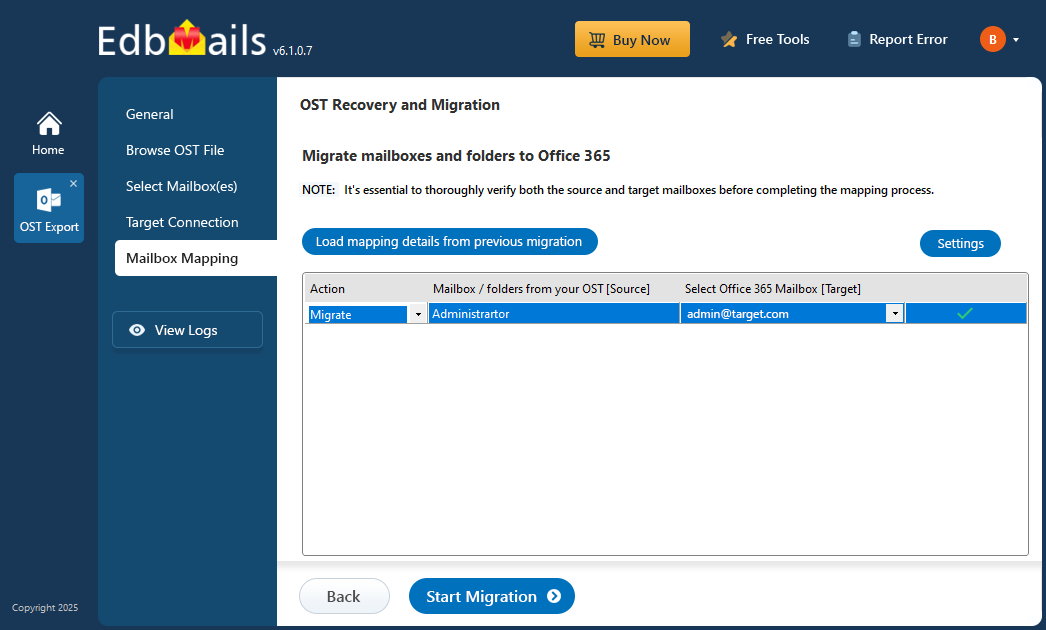
- EdbMails automatically maps mailboxes and folders between the source and target servers by default. If needed, you can manually map source mailboxes to specific target mailboxes for more control over the migration
Step 6: Start importing all your mailbox data from OST to Office 365
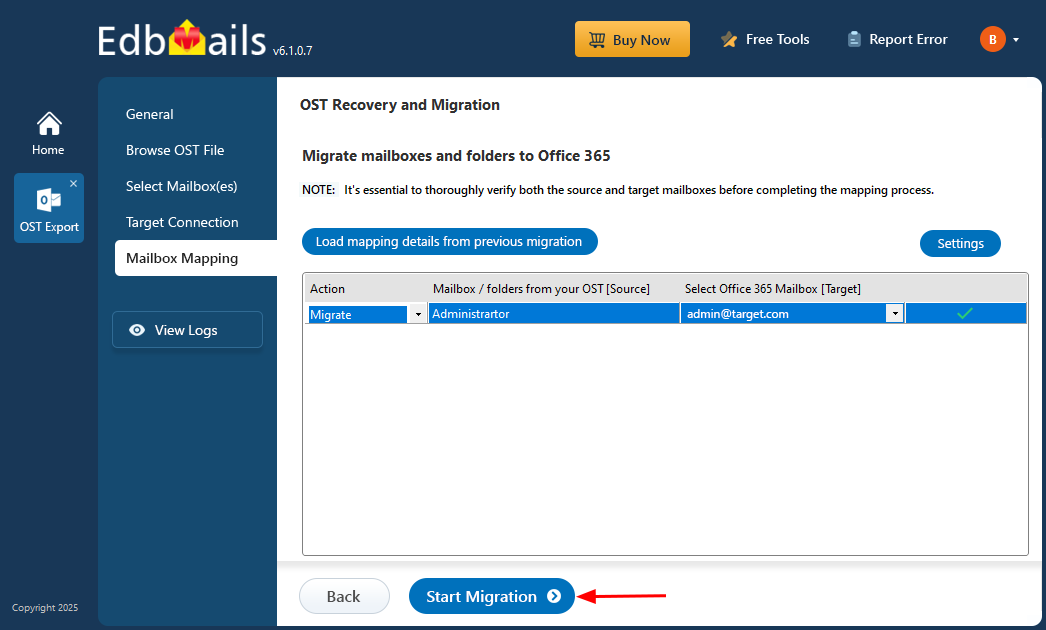
- Click the 'Start Migration’ button to initiate the migration process.
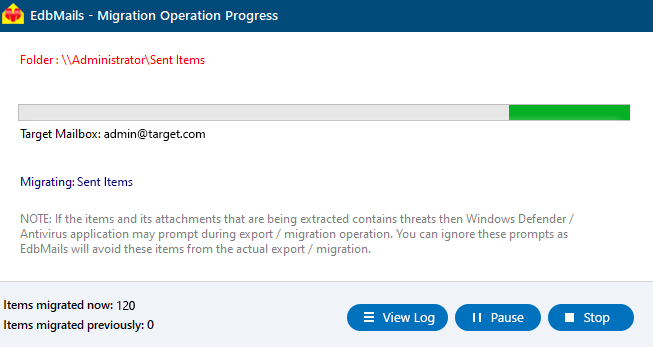
- The migration is currently in progress and can be tracked using the progress bar. You can pause or resume the process at any time. Once the migration is complete, EdbMails will show a confirmation message to indicate successful completion.


