Export email, calendars, contacts and more from OST files
When using Outlook, your emails, calendars, and contacts are stored in an OST (Offline Storage Table) file, allowing you to access your data even when you're not connected to the Exchange server. However, there are times when exporting this data to a more portable PST (Personal Storage Table) file is necessary.
Such instances arise when switching to a new system, changing Outlook profiles, or simply backing up important information. In some cases, OST files may become inaccessible due to corruption, server issues, or problems with the Exchange server. This makes it difficult to retrieve or export the data.
EdbMails OST to PST Converter makes this process simple by enabling you to export your Outlook data to PST format without needing the original Exchange server or Outlook profile. This tool is perfect for recovering data from orphaned or damaged OST files. The following guide provides a step-by-step process to help you easily export your mailbox items, ensuring safe and organized data migration or backup.
How to extract calendars and contacts from OST files?
- Method 1: Export calendars and contacts from Outlook
You can export emails, calendars and contacts from Outlook with the following steps.
From Outlook 2021, 2019, 2016 and 2013:Repeat the steps for exporting and importing contacts and other mail items from the OST file. See how to download Outlook emails to the hard drive.
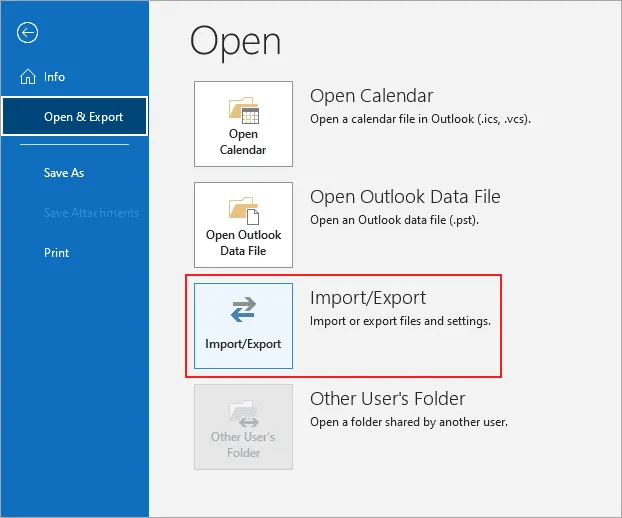
- Step 1: Launch Outlook and open the Import/Export Wizard
- Open Outlook and go to the ‘File’ tab
- Click ‘Open & Export’ > ‘Import/Export’
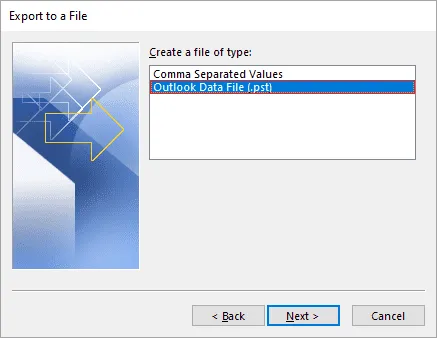
- Step 2: Select Export to a file and choose Outlook data file
- In the Import and Export Wizard, select ‘Export to a File’
- Select ‘Outlook Data File (.pst)’ and click ‘Next’
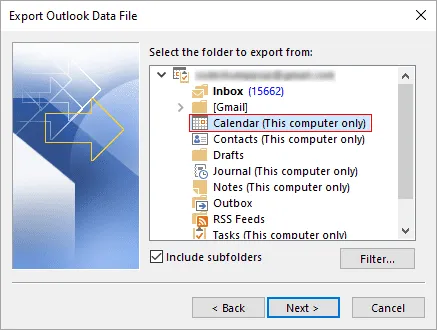
- Step 3: Select the calendars and contacts to export
- Select the ‘Calendar’ from the list of mail items and folders and select the option to include subfolders.
- Click ‘Browse’ and select the location to export the PST file.
- You can also password-protect the output file before continuing with the export.
- Step 4: Start the export and import the PST file into Outlook
- Finally start the export operation of the calendars from the OST file to PST
- To import the exported items into Outlook, launch Outlook again and go to the Import/Export wizard.
- Select ‘Import from another program or file’ and follow the steps to import all your contacts into Outlook.
From Outlook 2010 and 2007:
- Step 1: Go to the Import/Export wizard in Outlook
- Step 2: Click Export to a file and choose Personal Folder file (.pst)
- Step 3: Select the Calendars and include the subfolders
- Step 4: Select the location to save the PST file and start the export
Limitation: Exporting calendars and contacts directly from Outlook may fail if the OST file is corrupted, orphaned, inaccessible, or if the Exchange server is unavailable. In these situations, you will need to convert the OST file to PST format in order to successfully extract and recover your calendars, contacts, and other mailbox data.
- Step 1: Launch Outlook and open the Import/Export Wizard
- Method 2: Export calendars and contacts with OST to PST Converter
EdbMails OST to PST Converter provides an all-in-one solution to export data from OST files to PST files, including emails, contacts, calendars, tasks, notes, journals, and appointments. It ensures that the original folder structure from the OST file is fully preserved in the PST file, keeping your data well-organized. After conversion, you can easily access your emails, contacts, and calendar events in Microsoft Outlook, just as they were in the OST file. Additionally, EdbMails offers advanced filtering options, allowing you to selectively back up specific contacts or calendar entries with ease.
Step 1: Download and install EdbMails converter tool for OST
- Download and install the EdbMails application on any Windows-based computer.
- Log in with your registered email ID and password, or else click on 'Start Your Free Trial' to begin.
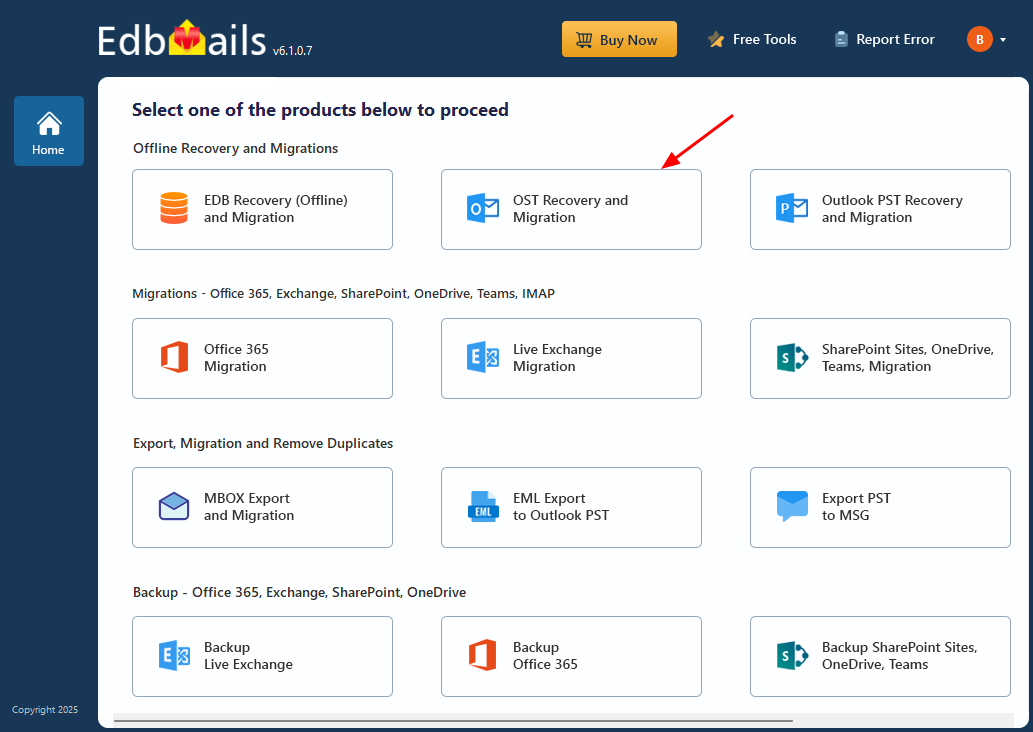
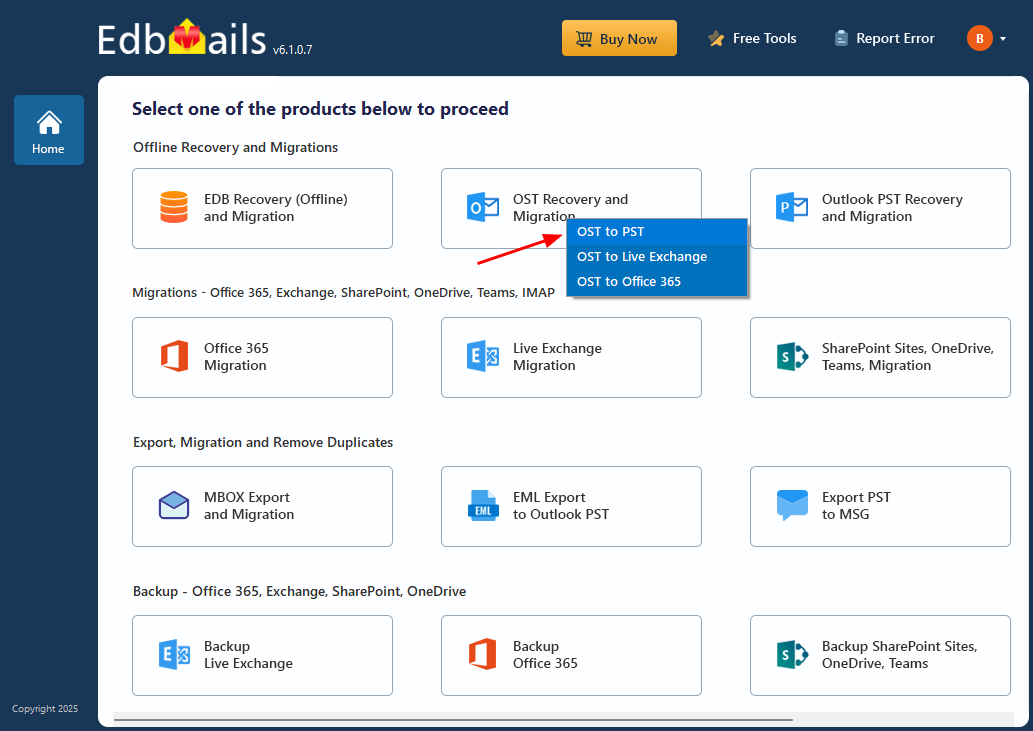
- Select ‘OST Recovery and Migration’.
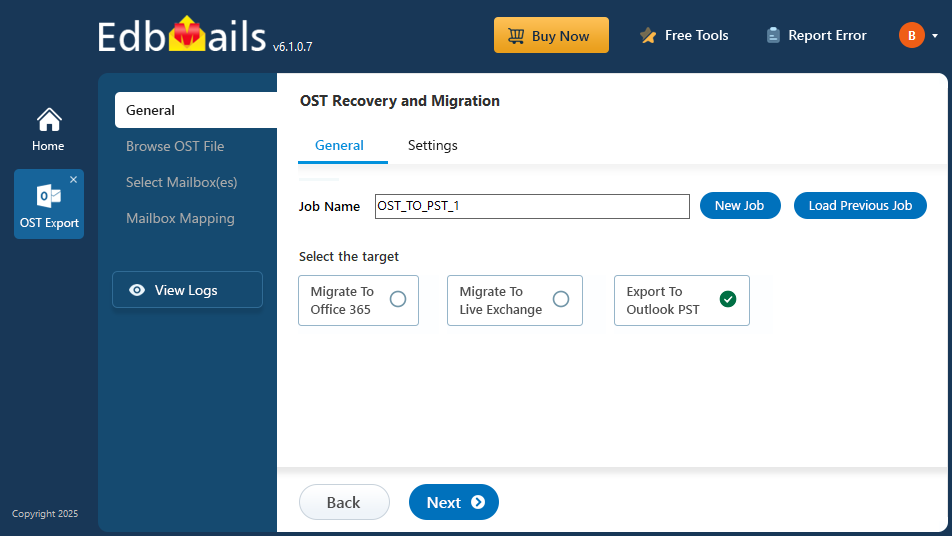
- Select export operation as ‘OST to PST’.
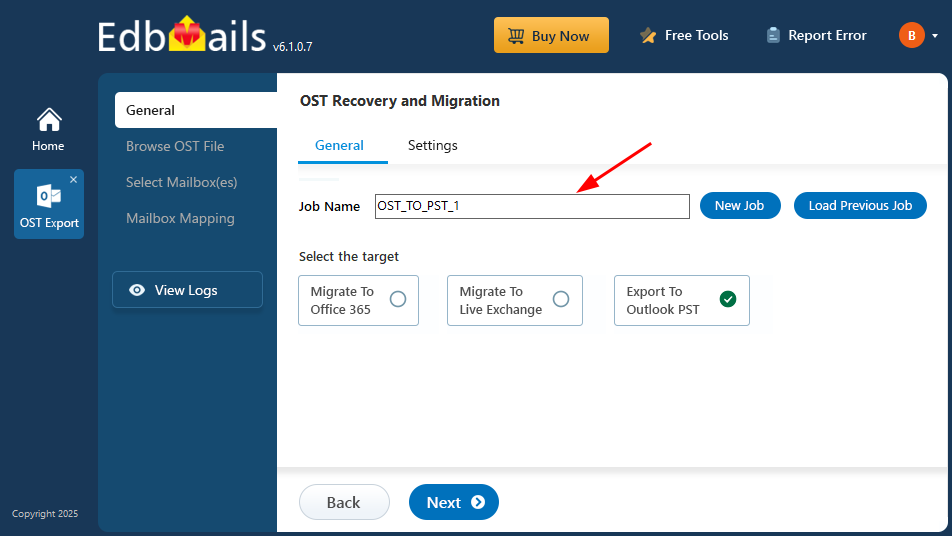
- You can use the default job name or enter a custom one for easier identification. After that, click ‘Next’ to continue.
Step 2: Select the OST file containing the emails and mailbox items
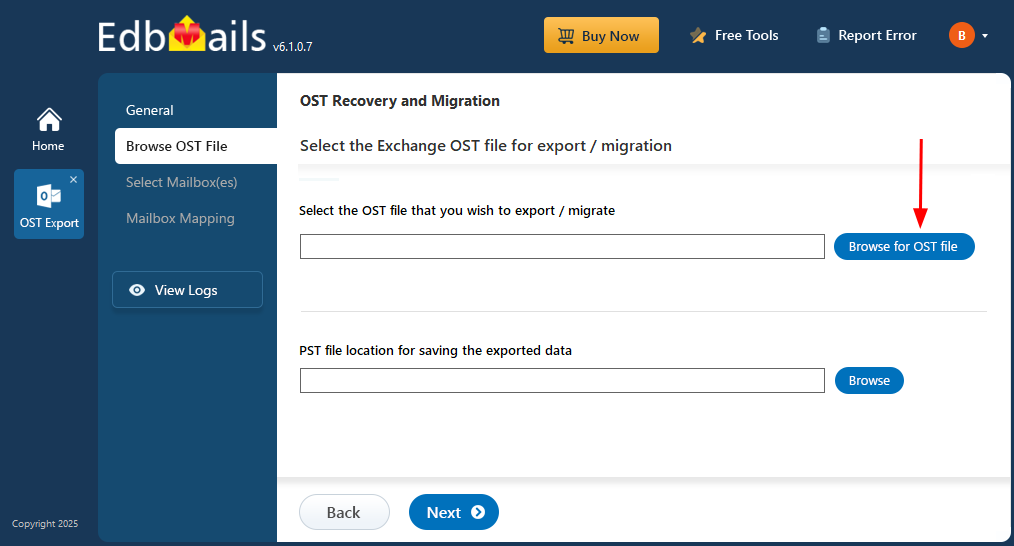
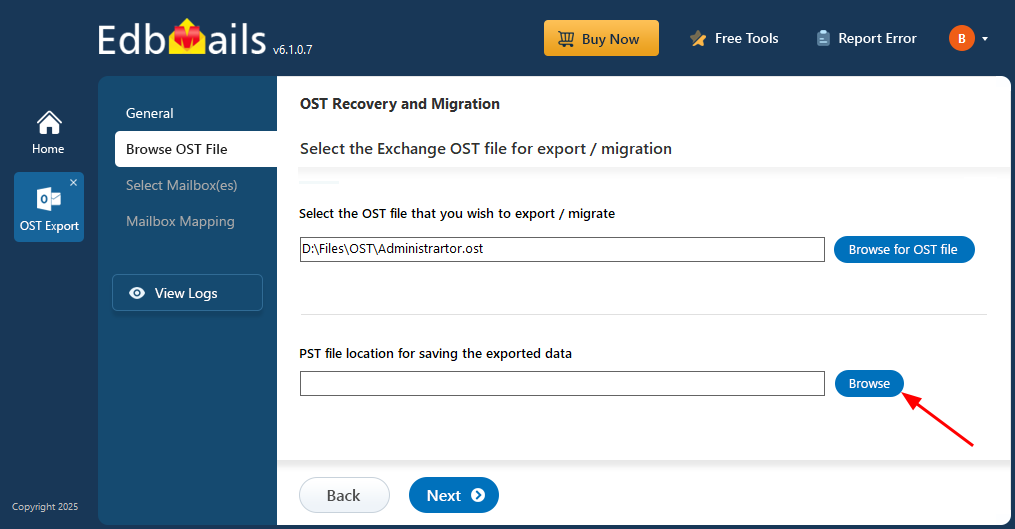
- Click ‘Browse for OST file'.
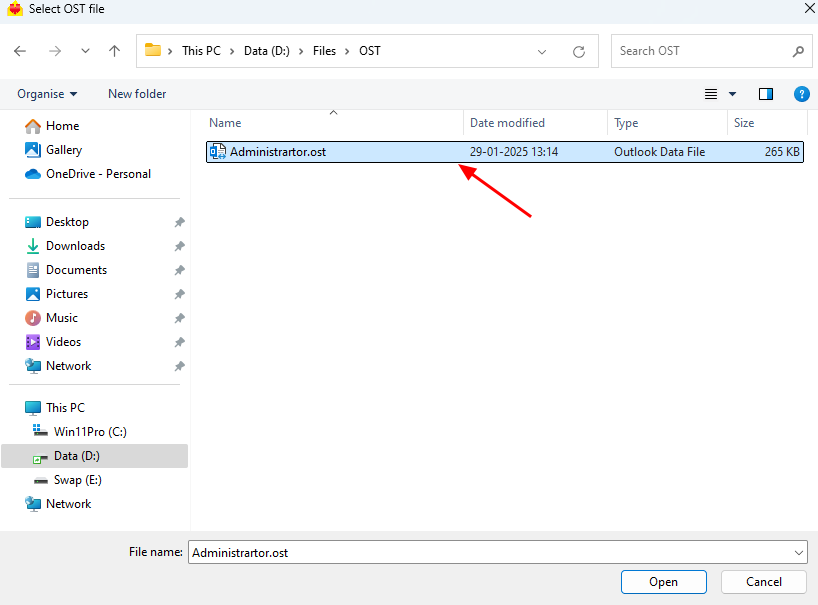
- Browse and select the OST file from your computer to view its contents, then click ‘Next’ to continue. If the file is located on a network drive, make sure it has read and write permissions enabled.
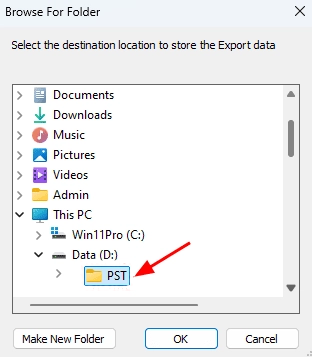
- Click ‘Browse’.
- Choose the destination folder where you want to save the exported PST files, and make sure the drive has sufficient free space to complete the export process.
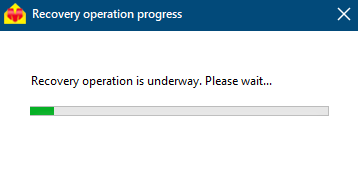
- EdbMails scans your OST file and recovers data in case of corruption.
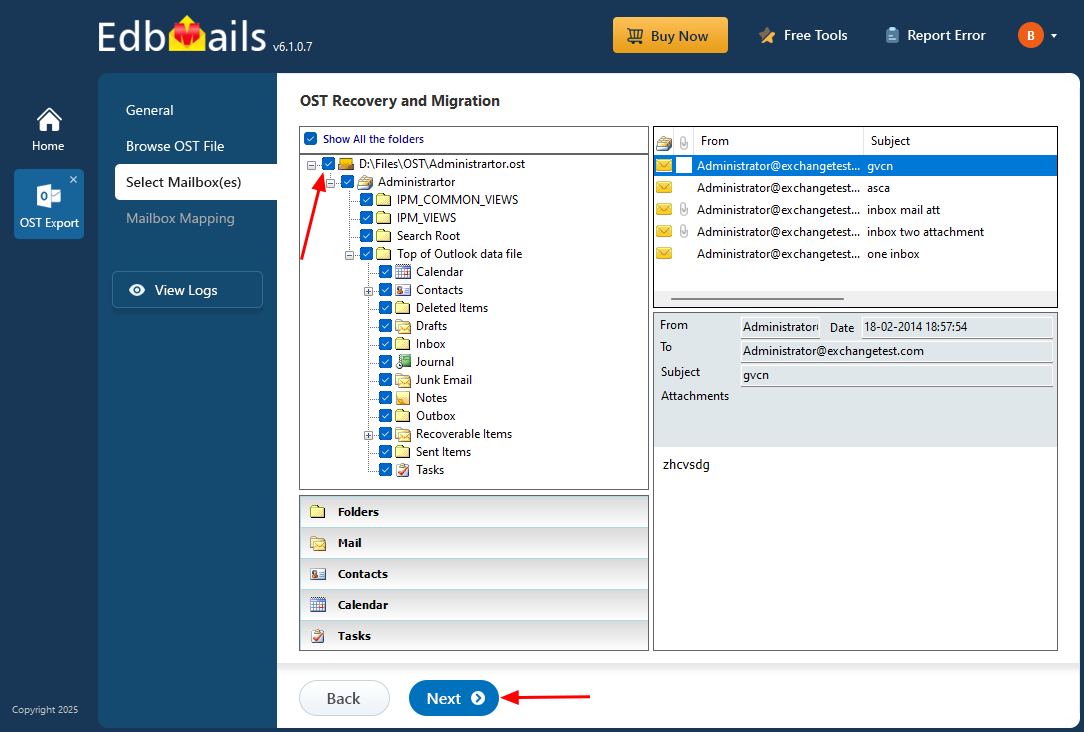
- Once the recovery process is finished, the complete folder structure will be displayed in the left pane. You can expand the mailbox to explore the folders and preview their contents. EdbMails' built-in viewer enables you to directly open and view emails, contacts, notes, tasks, and calendar items without the need for Outlook.
Step 3: Preview and select the mailbox
- Select the desired mailboxes or folders, then click the ‘Next’ button to proceed.
Step 4: Export the mail items from Outlook OST to PST
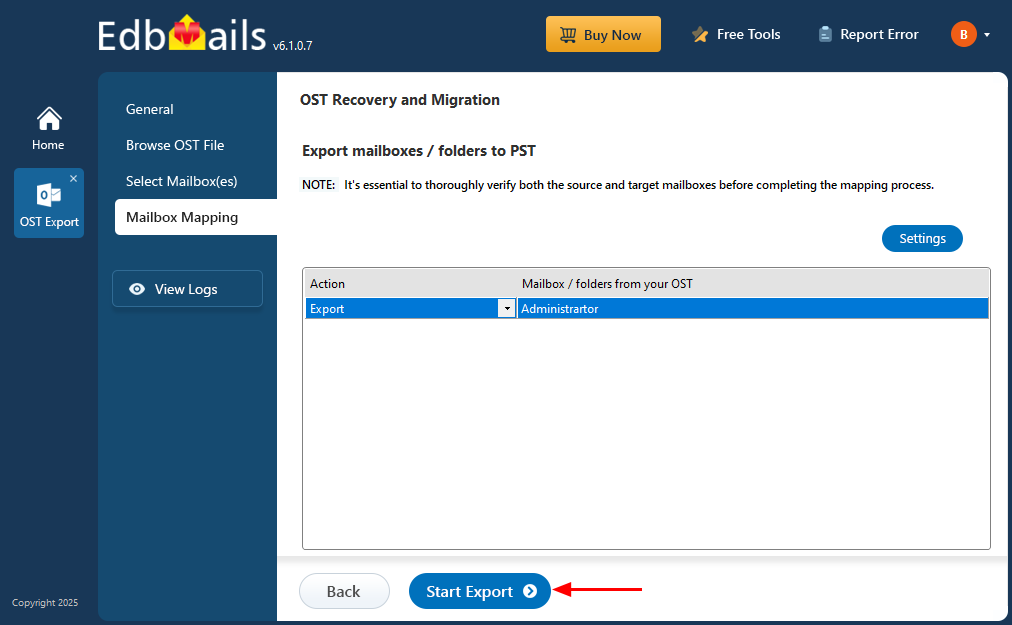
- Review the selected mailboxes and folders for the export operation. Ensure that the ‘Action’ is set to ‘Export’, then click the ‘Start Export’ button to begin.
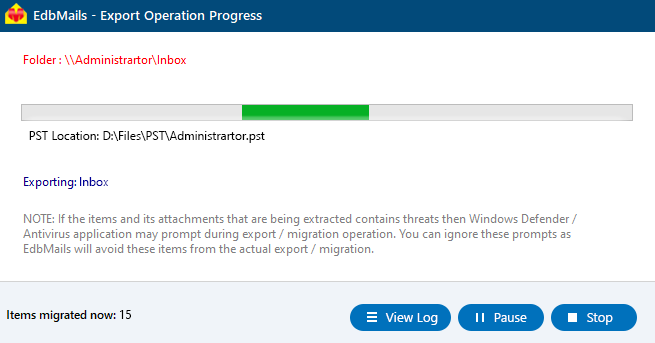
- The export operation has started, and you can track its progress using the progress bar. Once completed, EdbMails will display a confirmation message indicating that the export is finished.

