


How to Import an OST File into Microsoft Outlook
OST (Offline Storage Table) files store mailbox data locally when Outlook operates in Cached Exchange Mode, enabling users to access their emails even without an internet connection. However, OST files are linked to a specific Outlook profile and system, which makes them difficult to open or reuse directly, particularly after system failures, file corruption, or when migrating to a new computer. In such cases, converting the OST file into a more flexible and widely supported PST format offers the most practical way to regain access to mailbox data. Since Outlook can't open an OST file directly, the EdbMails OST to PST Converter handles the conversion to PST first.
This is where EdbMails OST to PST Converter proves useful. It provides a dependable solution for retrieving and extracting mailbox data from inaccessible or orphaned OST files, making it easy to import the recovered data back into Outlook without risking data loss. In the following steps, you’ll learn how to convert and import your OST file, so you can restore access to your emails, contacts, calendars, and other Outlook items quickly and securely.
Common Reasons to Import OST Files into Outlook
There can be several reasons why you may need to import mail items from an OST file into Microsoft Outlook. Here are some of the common ones:
- Migration to a New Computer: When you switch to a new computer or reinstall your operating system, you may need to import the OST file into Microsoft Outlook to access your mailbox data.
- Exchange Server Crash: If the Exchange server crashes, Outlook might not be able to sync your mail items. To fix this issue and access your mailbox data, you may need to load the OST file manually.
- Recovery of Deleted Items: If you accidentally delete an email or other mailbox items from your Microsoft Outlook profile, you may be able to recover them by importing an old OST file. See how to restore deleted items from an OST file.
- Corruption of Mailbox: Sometimes, your mailbox data in Microsoft Outlook can get corrupted due to hardware problems, software glitches, or a virus infection. When this happens, Outlook might show an error like ‘Outlook data file cannot be accessed’. In such situations, importing the OST file can help you recover and access your mailbox data.
- Switching to a Different Email Client: If you want to switch to a different email client other than Microsoft Outlook, you can convert the OST file to PST format and then import it into the new email client. Learn how to save emails from Outlook 365 to a hard drive.
How to Find the OST File Location on Your Computer?
Before you can import an OST file into Microsoft Outlook, you need to locate the file on your computer. In this section, we guide you on how to find the OST file location on your computer.
- Step 1: Launch the Control Panel and open the Mail Applet
- Click ‘Start’ on the Windows desktop and type ‘Control Panel’ in the search bar.
- In the Control Panel, select the ‘Mail’ applet and click ‘Data Files’
- Step 2: Locate the OST File on your computer
- In the Data Files dialog box, you will see a list of all the data files associated with your Microsoft Outlook profile.
- Look for the OST file associated with your email account and click ‘Open File Location’
- You can find the OST file in the folder that opens.
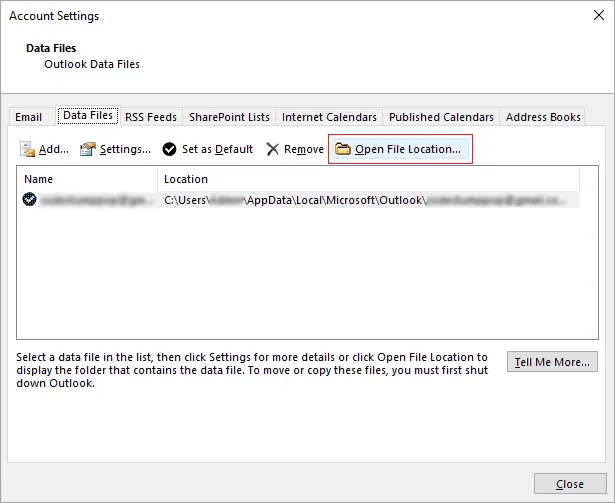
Alternatively, you can navigate to the OST file location by following the path
C:\Users%username%\AppData\Local\Microsoft\Outlook
where ‘%username%’ is the name of the user account on your computer.
Why Can't You Directly Import an OST File Into Outlook?
An OST file enables you to work offline and access your mailbox data even when you are not connected to the Exchange server. However, you cannot directly open an OST file in Microsoft Outlook. Here are the reasons why:
- Synchronization with Exchange Server: The purpose of an OST file is to enable you to work offline and synchronize your mailbox data with the Exchange server when you connect to it. Therefore, the data in an OST file is not meant to be directly accessed, because it needs to be synchronized with the Exchange server to ensure that all your emails and mailbox items are up to date.
- Security and Protection: OST files are encrypted and protected by your Microsoft Exchange profile with a MAPIEntryID GUID key. Directly importing an OST file into Outlook can compromise the security and integrity of your mailbox data.
- File compatibility issue: OST files are not compatible with Microsoft Outlook, which means that you cannot directly open them in the email client. If you try to open them in Outlook, you may notice the following error message ‘The program you have selected cannot be associated with this file type. Please choose another program’. OST files are meant to be used by the Exchange server and are stored in a different file format than PST files.
Therefore, to access the data in an OST file, you can make use of the methods described in the following section.
There Are Two Different Ways to Restore OST Data to Outlook
Outlook does not provide a normal Open or Import command for attaching an arbitrary OST file. Choose the route according to whether the original mailbox is still available.
| Condition | Correct route | Why |
|---|---|---|
| The Exchange or Microsoft 365 mailbox still exists | Add the account to Outlook and allow Outlook to create and synchronize a new OST. | The server mailbox remains the authoritative source. |
| The old OST may contain unsynchronized local items | Preserve the old file before rebuilding; recover required local data separately. | Recreating an OST downloads server data but does not restore items that exist only in the old local file. |
| The OST is orphaned, copied from another computer or tied to a deleted profile | Convert recoverable OST data to PST, then open or import the PST in Outlook. | PST is the portable Outlook data-file format intended for independent access. |
| The destination is Microsoft 365 or Exchange | Use direct OST migration when appropriate instead of creating an intermediate PST. | This can reduce handling when the final destination is a live mailbox. |
Workflow: Convert OST, Validate PST and Add It to Outlook
- Make a copy of the source OST and keep the original unchanged.
- Use EdbMails OST to PST Converter to scan the file and preview the required folders.
- Export a representative sample during the free evaluation and review the export report.
- Open the resulting PST in Outlook and check Inbox, Sent Items, Contacts, Calendar and attachments.
- After validation, complete the full export and either keep the PST open as a separate data file or import selected folders into the destination mailbox.
Open a PST or Import Its Contents?
| Action | Best for | Result |
|---|---|---|
| Open Outlook Data File | Reviewing or keeping recovered content separate | The PST appears as an additional data file in Outlook. |
| Import from another program or file | Copying recovered items into an existing mailbox or Outlook folder structure | Selected PST content is copied into the chosen destination. |
Classic Outlook and New Outlook
Menus and PST capabilities differ between Classic Outlook and New Outlook and can change with Microsoft updates. Use the current Microsoft interface for the Outlook version installed on the computer. Do not treat direct attachment of an arbitrary OST file as a supported import method.
Post-Import Verification
- Compare expected and exported folder names.
- Open a sample of messages with different dates and attachment types.
- Verify contacts and calendar entries separately.
- Review skipped or failed items in the EdbMails export log.
- Confirm that the correct Outlook profile and destination folders were used.
For the full conversion procedure, see How to Convert OST to PST.
How to Import OST Files into Outlook?
To import OST files into Outlook, first convert OST to PST before importing the PST into Outlook. You can convert the OST file to PST using the Outlook Import/Export wizard or a third-party OST to PST converter software like EdbMails.
- Method 1: Use the Outlook Import/Export Wizard
Here are the steps to convert an OST file to PST format in Microsoft Outlook with the Import/Export Wizard:
- Step 1: Open the Import/Export wizard in Outlook
- Open Microsoft Outlook and click on the ‘File’ tab in the top left corner of the screen.
- Click on the ‘Open & Export’ option and select ‘Import/Export’ from the dropdown menu.
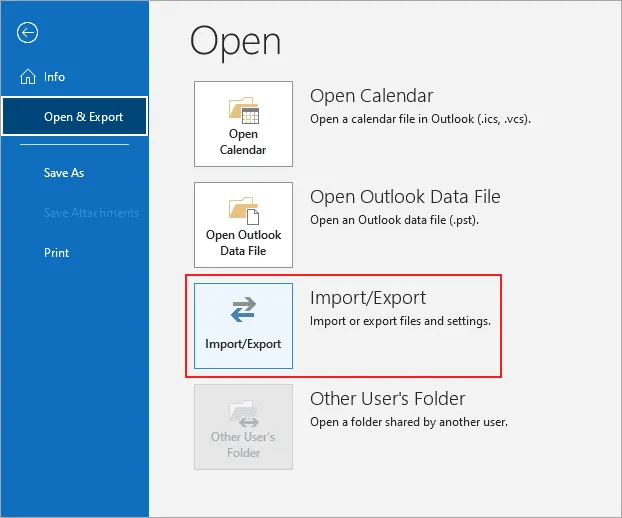
- Step 2: Select export type as Outlook PST
- In the Import/Export wizard, select ‘Export to a file’ and click ‘Next’.
- Choose ‘Outlook Data File (.pst)’ as the file type to export and click ‘Next’
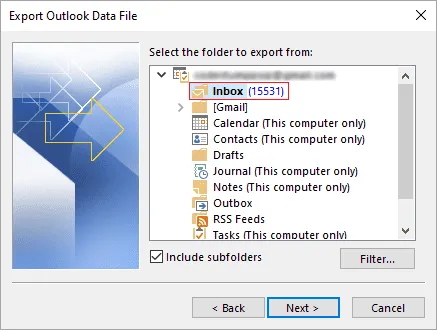
- Select the folder or account that you want to export from and click on the ‘Next’ button.
- Choose a location to save the new PST file and give it a name.
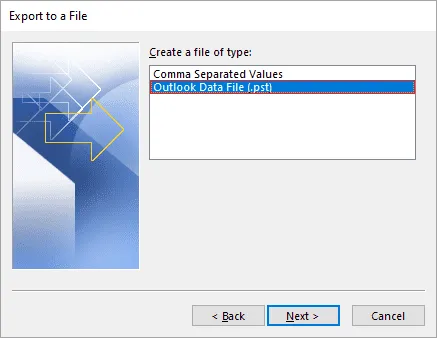
- Step 3: Select the mailbox items to export
- Choose the option ‘Include subfolders’ to export all items in the folder or account.
- If you only want to export specific items, select ‘Filter’ and choose the desired criteria.
- Click ‘Next’ to proceed.
- Step 4: Export the OST file contents to PST
- If you want to password-protect the exported PST file, enter a password and click ‘OK’.
- Click ‘Finish’ to start the export process.
- Wait for the process to complete and click ‘OK’ when the export is finished.
- Step 5: Import the PST file into Outlook
- Open Microsoft Outlook and click on the ‘File’ tab in the top left corner of the screen.
- Click on the ‘Open & Export’ option and select ‘Import/Export’ from the dropdown menu.
- Choose ‘Import from another program or file’ and click ‘Next’
- Select ‘Outlook Data File (.pst)’ as the file type to import and click ‘Next’.
- Browse to the location where you saved the new PST file and select it.
- Choose the option ‘Replace duplicates with items imported’ to avoid importing duplicate items.
- Select the folder or account where you want to import the data and click ‘Finish’
By following these steps, you can convert an OST file to PST format and import the PST file into the email client for easy access to your mailbox data.
While using the Import/Export wizard to convert OST to PST is a relatively straightforward method, there are a few limitations to keep in mind:
- Data loss: The Import/Export wizard may not be able to export all data from an OST file, resulting in data loss during the conversion process.
- Size limitations: The size of the OST file can affect the conversion process. If the OST file is too large, the Import/Export wizard may not be able to complete the conversion, or it may take a very long time.
- Corrupted OST file: If the Outlook data file OST cannot be opened, or if it is corrupted, the Import/Export wizard may not be able to convert the file to PST format successfully.
- Importing OST into Office 365: The Import/Export wizard does not offer any facility to directly import emails and mailbox items from OST to Office 365.
- Password-protected OST files: If the OST file is password-protected, you will need to enter the password during the conversion process. If you do not have the password, you will not be able to convert the file using the Import/Export wizard.
- Step 1: Open the Import/Export wizard in Outlook
- Method 2: Use Outlook's AutoArchive Feature
The second method to open mailbox contents from Outlook is to archive the OST file to PST by using the Auto Archive Settings in Outlook. This feature can help free up space in your mailbox while also ensuring that important emails are stored safely in an archived file.
Here are the steps to archive emails from OST to PST using the Auto Archive settings in Microsoft Outlook:
- Step 1: Open Auto Archive Settings in Outlook
- Open Microsoft Outlook and click on the ‘File’ tab in the top left corner of the screen.
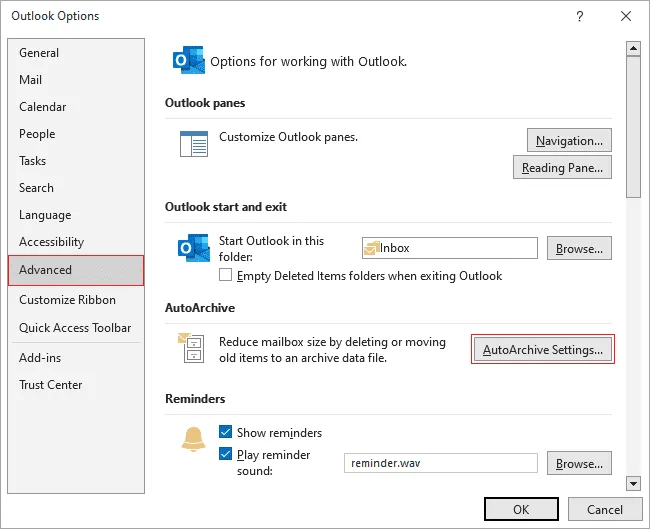
- Click ‘Options’> ‘Advanced’ > ‘AutoArchive Settings’
- Step 2: Set up Auto Archive options
- Check the ‘Run AutoArchive every’ box and set a time frame for how often you want to run the Auto Archive process.
- Choose the folder or folders you want to archive. You can choose to archive all folders.
- Choose the Default folder settings for archiving and set a time frame for how old the items should be before they are archived.
- Choose the location where you want to save the archived PST file
- Click ‘OK’ to save the Auto Archive settings.
- Step 3: Customize the Auto Archive settings for folders
- To specify different archive settings for any folder, right-click on the folder in Outlook, choose ‘Properties’ and then go to the ‘AutoArchive’ tab
- Step 4: Run the Auto Archive process
- Wait for the specified time frame for the Auto Archive process to run automatically.
- Alternatively, you can click ‘File’> ‘Tools’ > ‘Clean Up Old Items’ to archive items manually.
- Check the location where you saved the archived PST file to confirm that the items have been successfully archived.
Note: If the OST file is corrupted or orphaned, you will not be able to export or archive emails to PST format from Outlook. For corrupt OST file repair, you must use EdbMails to open and repair the OST file.
- Step 1: Open Auto Archive Settings in Outlook
- Method 3: Import OST into Outlook 2019, 2016, 2013 and 2010
EdbMails is a reliable and powerful tool for importing OST files into Outlook. It has many advantages over the other manual methods and is a good option if you can't open the OST file or want to directly upload the OST file into Office 365 and Live Exchange server. EdbMails is Outlook-compatible and enables you to repair and open OST files without Outlook.
Here are the steps to import your OST file into Outlook using EdbMails:
Step 1: Download and install EdbMails OST converter tool
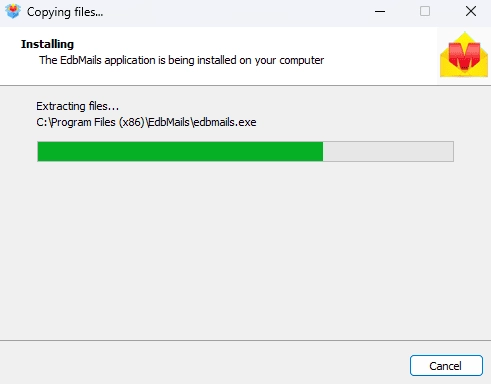
- Download and set up the EdbMails application on any Windows PC.
- Open the EdbMails software on your computer.
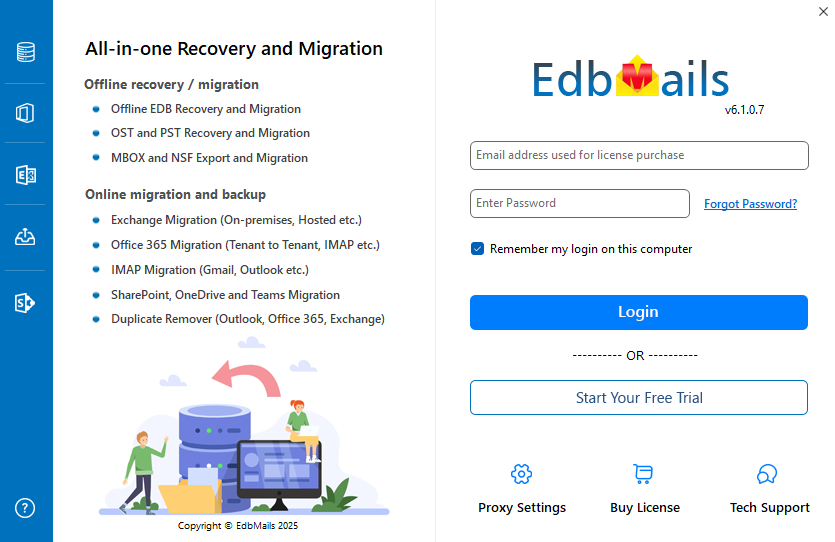
- Enter your registered email ID and password, then click ‘Login’. If you don't have an account, select ‘Start Your Free Trial’ to access the trial version.Note: The trial version allows you to test the application features and export up to 30 mailbox items from each folder. To remove these limitations and unlock full access, you must purchase a valid license from the EdbMails website.
Click here to purchase the license from the EdbMails website.
After completing the purchase, restart the EdbMails application and sign in again using the same credentials to activate your license.
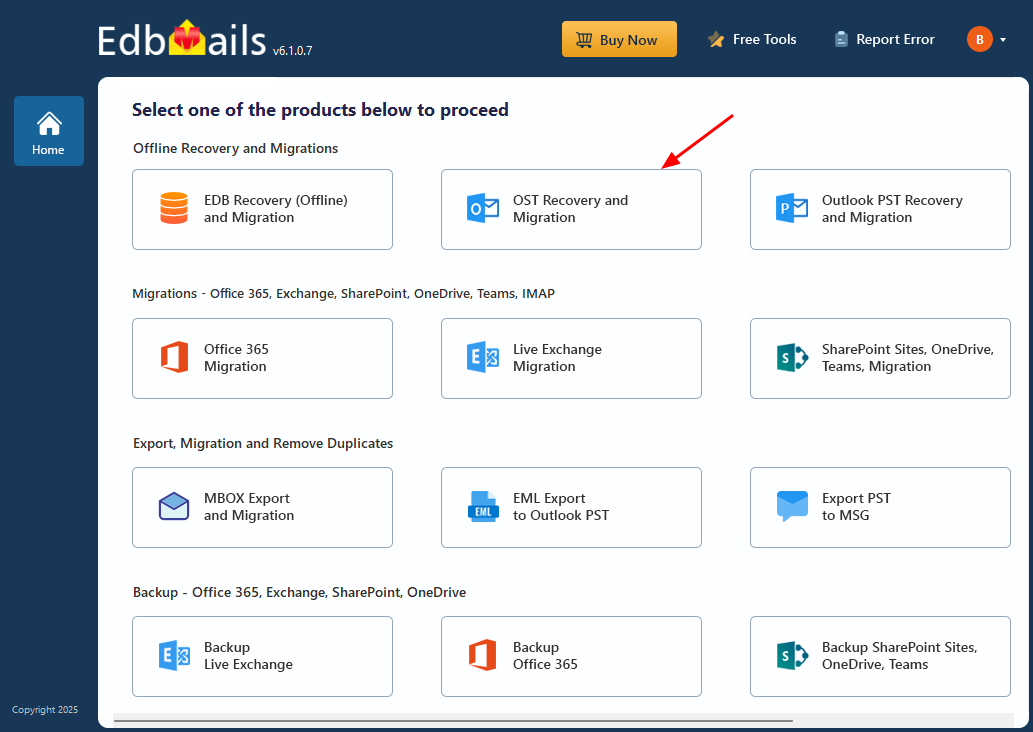
- Select ‘Outlook OST Recovery and Migration’.
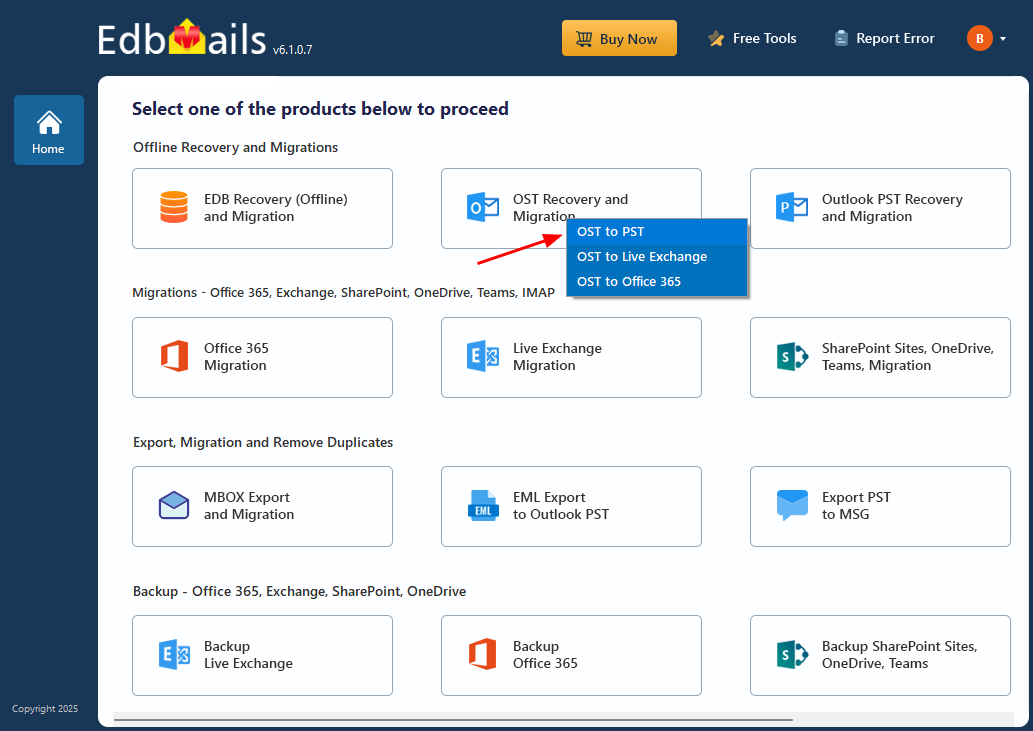
- Select ‘OST to PST’.
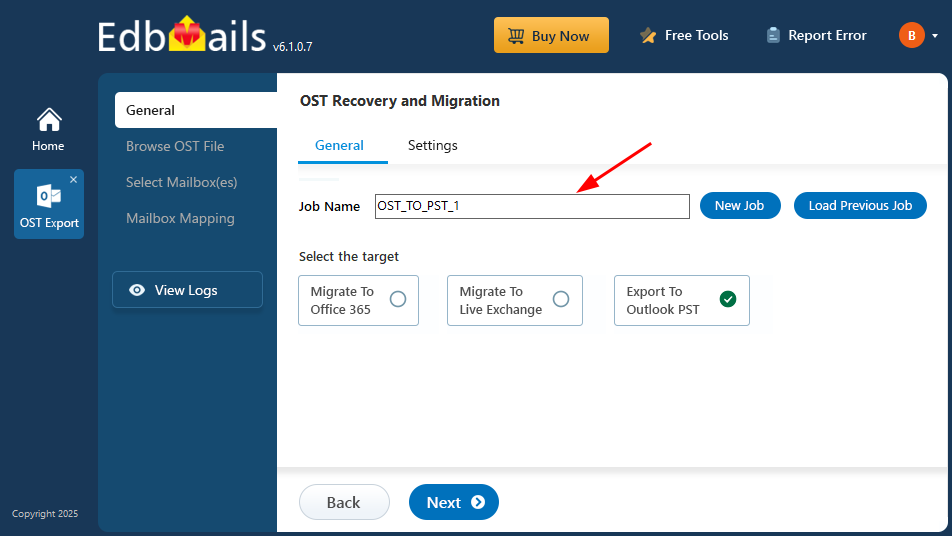
- You have the option to assign a custom job name by selecting the ‘New Job’ button, or you can continue using the default job name.
- Then, click ‘Next’ to continue.
- Download and set up the EdbMails application on any Windows PC.
Step 2: Select the Outlook OST file
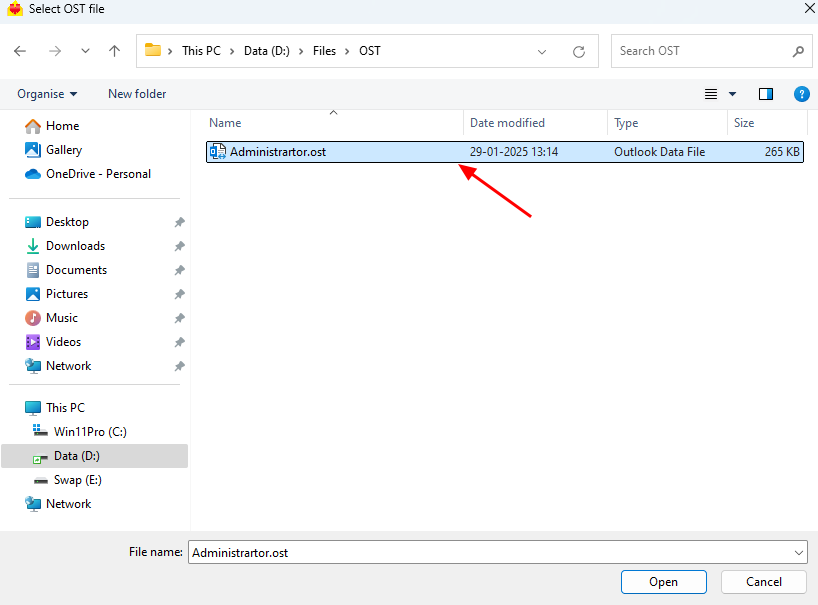
- Click ‘Browse for OST file'.
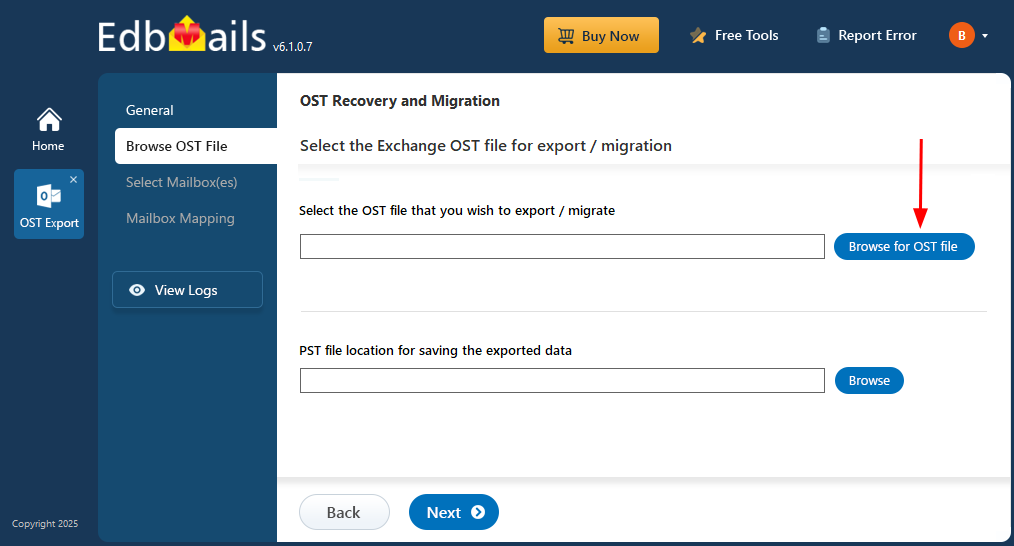
- Select the offline OST file from your local drive and click ‘Next’ to proceed. If the OST file is located on a network drive, ensure it’s properly shared with both read and write permissions enabled for smooth access.
- Click ‘Browse’.
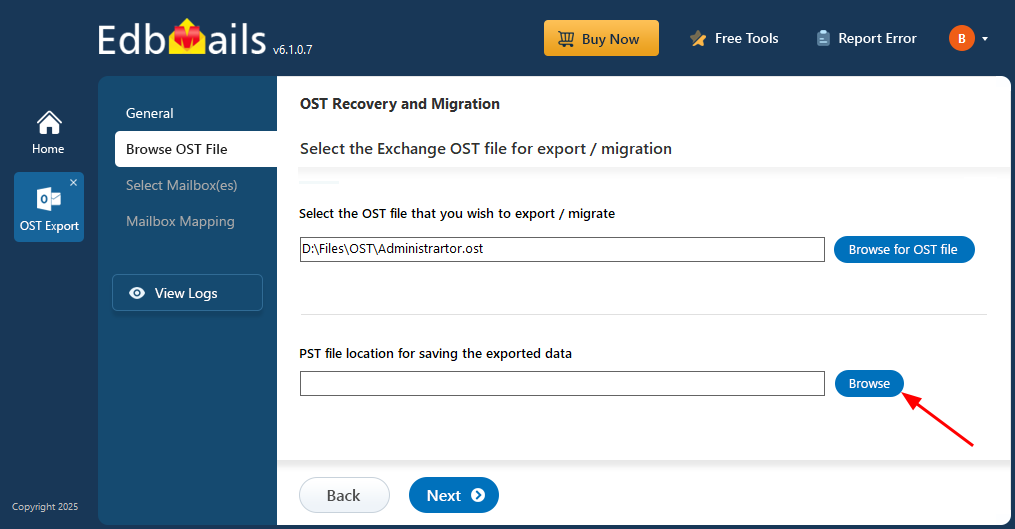
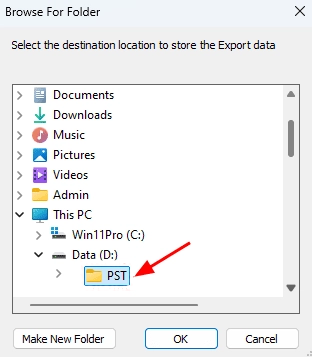
- Choose a location where you want to save the exported PST file. Ensure you have enough free disk space for storage.
- Click ‘Browse for OST file'.
Step 3: Preview and select the mailbox
- EdbMails performs a detailed scan of offline OST files to recover mailbox data, even from corrupted or damaged files. The tool evaluates the file structure to extract emails and other mailbox items.
- EdbMails displays mailbox data detected in the OST, including supported emails, folders, contacts, calendars, notes, tasks and appointments that are present and readable. You can preview specific items before export.
- The 'Exclude Standard / Custom folders' option lets you leave out specific folders like Inbox, Sent, Drafts, Junk, Conversation History, and any custom folders—from the export process.
- Select the required mailboxes/folders and click the ‘Next’ button.
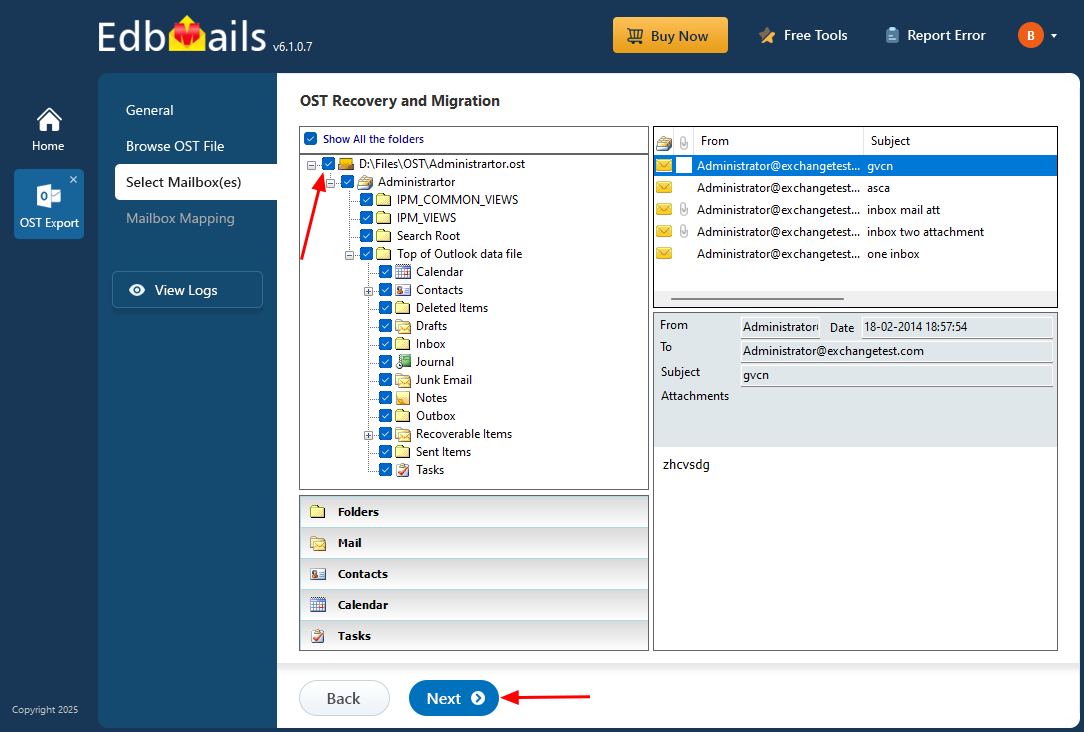
- EdbMails performs a detailed scan of offline OST files to recover mailbox data, even from corrupted or damaged files. The tool evaluates the file structure to extract emails and other mailbox items.
Step 4: Convert the OST file to PST
- For the conversion, ensure that you have Outlook installed on your computer.
- Verify the mailboxes and folders selected for export operation.
- Make sure the ‘Action’ is set to 'Export', then click the 'Start Export' button.
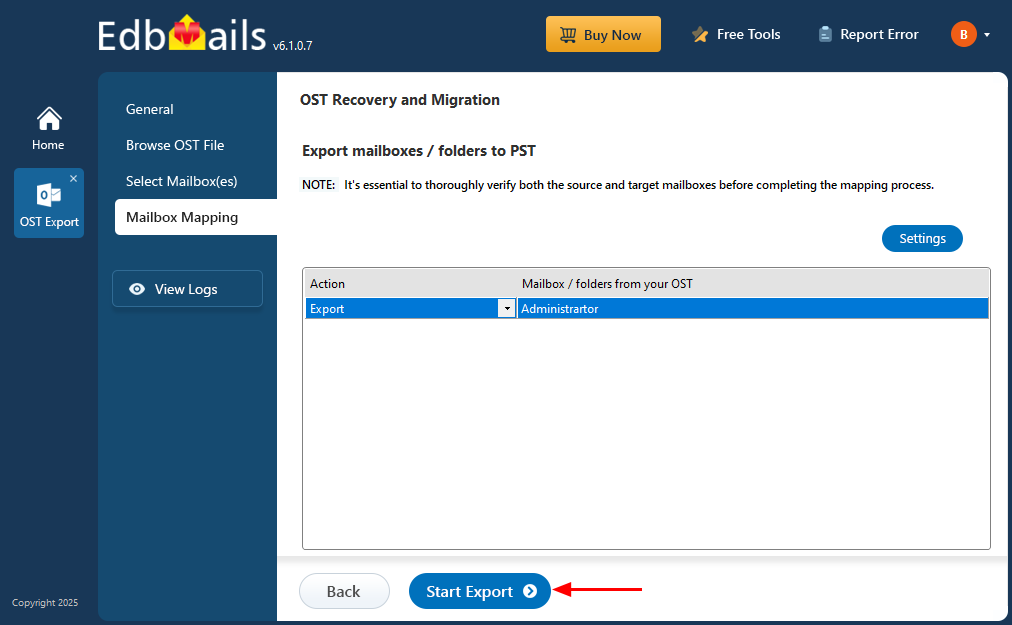
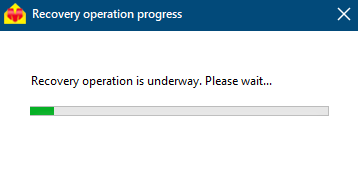
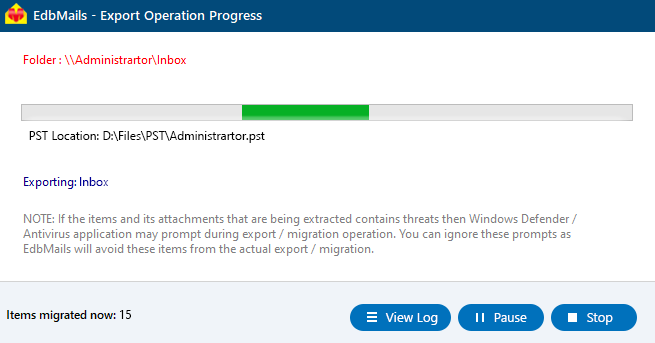
- EdbMails starts converting your OST file to PST format, and you can monitor the progress of the conversion in the software's user interface.
Step 5: Import the PST file into Microsoft Outlook
- Launch Microsoft Outlook and click on the ‘File’ tab in the top left corner of the screen.
- Click on ‘Open & Export’ and select ‘Import/Export’ from the dropdown menu.
- Choose ‘Import from another program or file’ and follow the steps to import the PST file.
- Click on ‘Finish’ to complete the import process.
Advantages of EdbMails over the other methods:
- Easy to use: EdbMails has a user-friendly interface that makes it easy for even non-technical users to perform OST to PST conversion. Additionally, you can convert mail items from OST to HTML, EML, and MHT formats.
- Speed: EdbMails is built to handle large OST files with speed and efficiency, allowing you to convert them to PST without unnecessary delays.
- Data Integrity: EdbMails preserves supported folder hierarchy and mailbox properties from data that is present and readable in the source OST during conversion. It can also scan corrupted OST files and recover mailbox items that remain recoverable.
- Flexibility: With EdbMails, you have the flexibility to choose which data you want to export from the OST file, such as specific folders, date ranges, or exclude folders that you don't need.
- Advanced features: EdbMails supports applicable encrypted OST files, lets you preview mailbox data detected in the OST before conversion, and provides the option to save the converted PST file to a supported network location.