


PST to Office 365 Migration Step-by-Step Guide
This guide explains how to migrate Outlook PST files to Microsoft 365 with the EdbMails PST to Office 365 Migration Tool. The workflow covers target preparation, PST selection and preview, Microsoft 365 sign-in, mailbox mapping, filtering, migration, and post-migration verification.
Use this procedure when moving legacy Outlook archives, user PST backups, or selected PST mailbox data into Microsoft 365. EdbMails can migrate directly from PST to Microsoft 365 without requiring Outlook for the direct migration path. Migration results still depend on the data present in the source PST, target mailbox configuration, Microsoft 365 service limits, throttling, and the permissions available to the connected account.
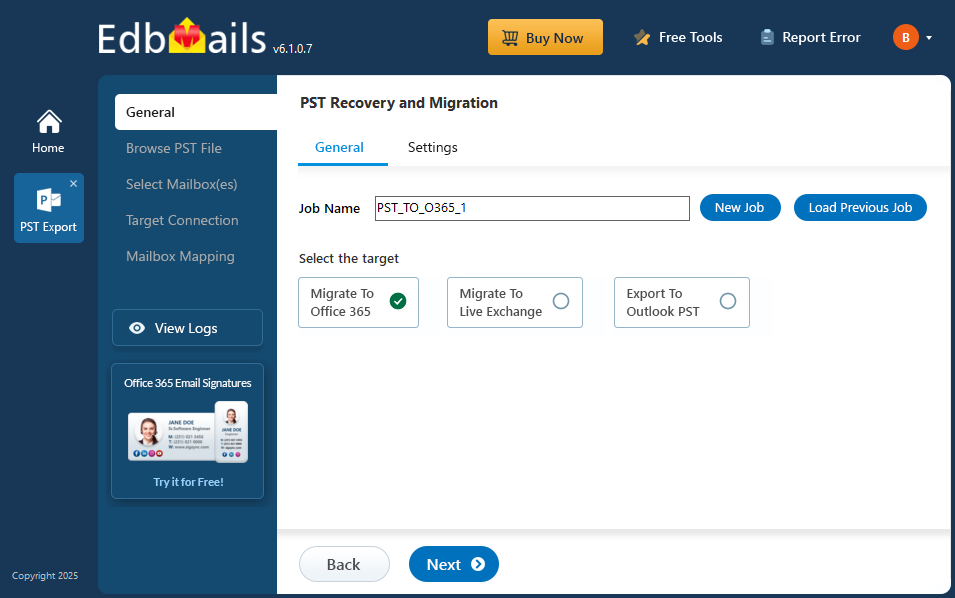
The following sections cover pre-migration planning, Microsoft 365 prerequisites, the complete PST migration procedure, verification, troubleshooting, and post-migration tasks.
PST to Office 365 migration planning checklist
- Inventory the PST sources.
Identify the PST files to migrate, their approximate sizes, the users or departments they belong to, and whether any files are damaged or duplicated.
- Define the target destination.
Decide whether each PST should map to a primary mailbox, shared mailbox, Online Archive, or prepared Public Folder location in Microsoft 365.
- Confirm target accounts and licenses.
Create the required users and mailboxes before migration, unless you plan to use EdbMails' supported automatic mailbox-creation workflow.
- Plan filters and exclusions.
Decide whether the project needs all PST data or only selected date ranges, folders, senders, recipients, subjects, or attachments.
- Keep the source PST files until validation is complete.
Do not delete or archive the only copy of a PST immediately after migration. Retain the source until migration logs and target mailbox data have been verified.
Prerequisites to import PST to Office 365
Before importing PST data, prepare the target Microsoft 365 tenant and confirm that the required destination mailboxes are ready.
- Review available network capacity and Microsoft 365 migration performance considerations. See Microsoft 365 network and migration planning and migration performance factors and best practices.
- Prepare the target Microsoft 365 tenant and required administrative access. See the Microsoft 365 tenant roadmap.
- Make sure each destination user that requires an Exchange Online mailbox has an appropriate Microsoft 365 license. Compare Microsoft 365 business plans and Microsoft 365 enterprise plans.
- Create the required users and destination mailboxes and assign suitable Microsoft 365 licenses.
- If selected PST folders will be mapped to Microsoft 365 Public Folders, create and configure the required Public Folder hierarchy and permissions on the target before migration.
- If PST data will be migrated to an Online Archive mailbox, enable the archive for the target user before mapping. See steps to enable Online Archive in Microsoft 365.
- If this PST import is part of a broader mail-system cutover, add and verify the required custom domain in Microsoft 365 and plan the DNS changes separately. Importing PST data by itself does not require changing your MX record.
- Review Exchange Online message-size limits before migration. Microsoft documents a 150 MB migration/general message-size ceiling for supported scenarios, while tenant, mailbox, client, and other service limits can be lower depending on configuration.
Steps to migrate PST to Office 365
Step 1: Download EdbMails PST to Office 365 migration tool
- Download and install the EdbMails application on your computer.
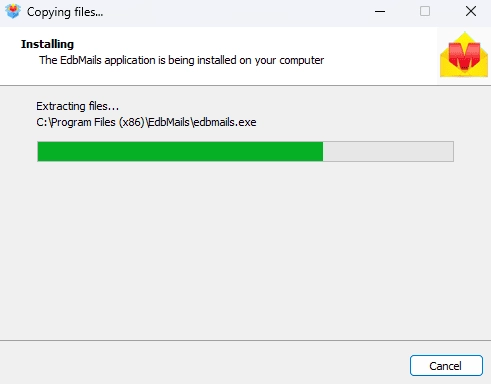
- See the EdbMails PST system requirements for PST to Office 365 migration.
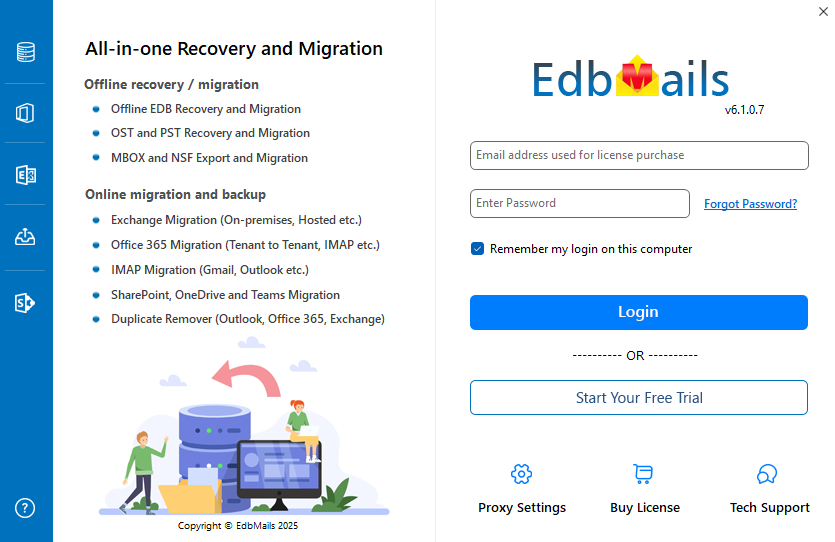
- Launch the EdbMails application.
- Enter the email address & password and click ‘Login’ or ‘Start Your Free Trial’.
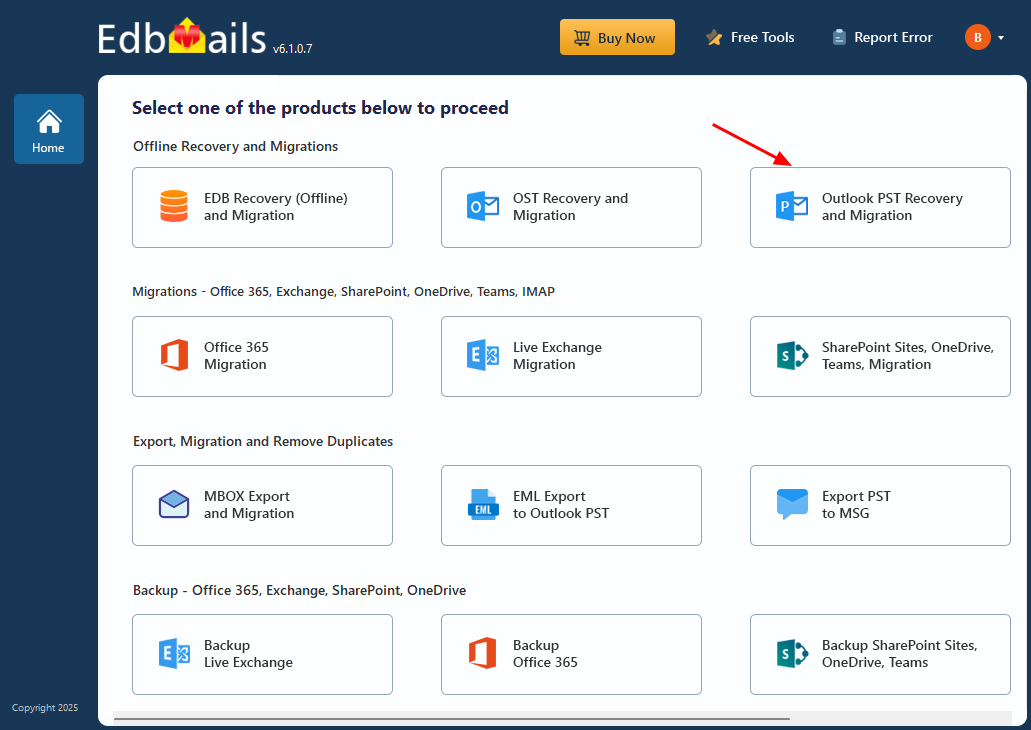
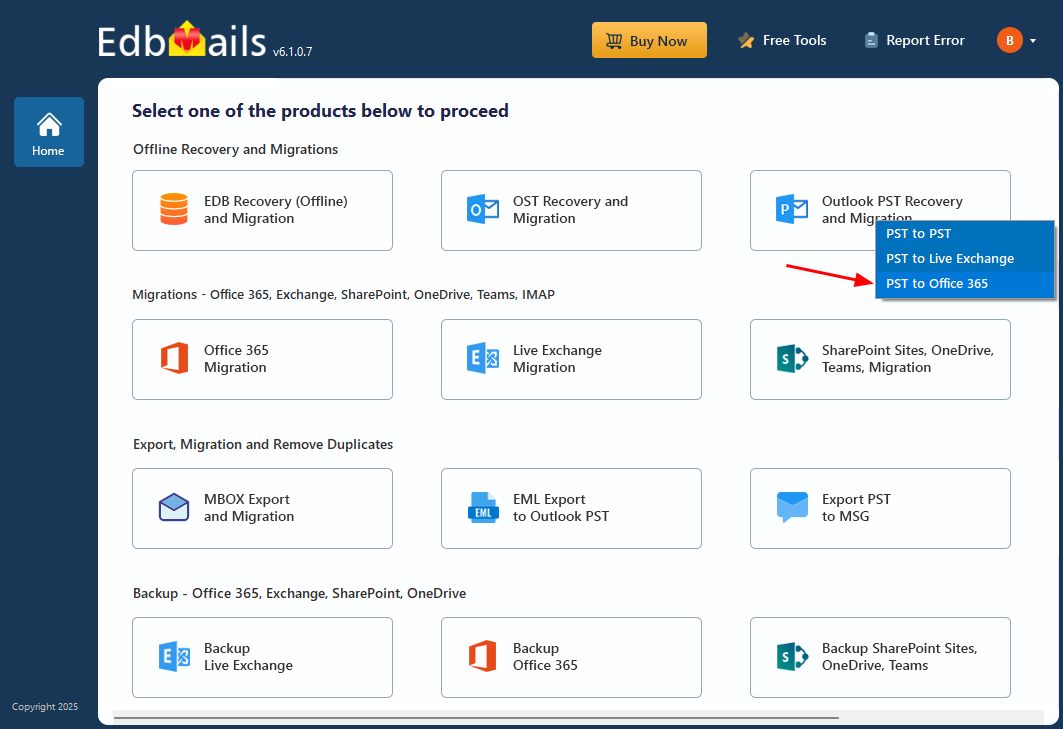
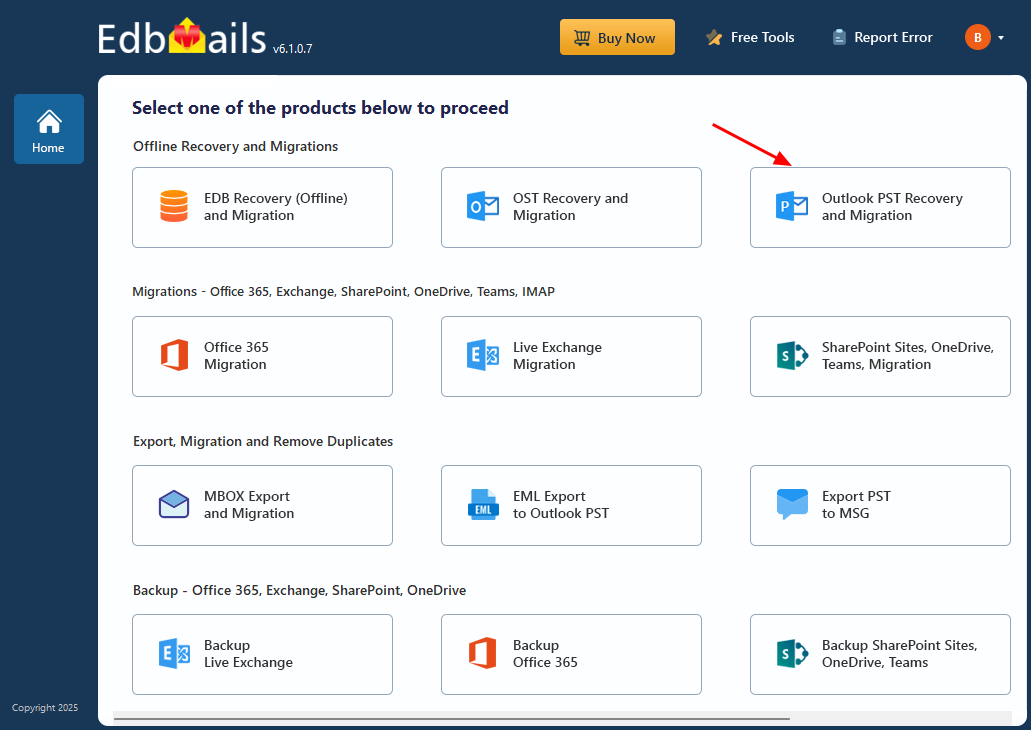
- Select ‘Outlook PST Recovery and Migration'
- Select ‘PST to Office 365’.
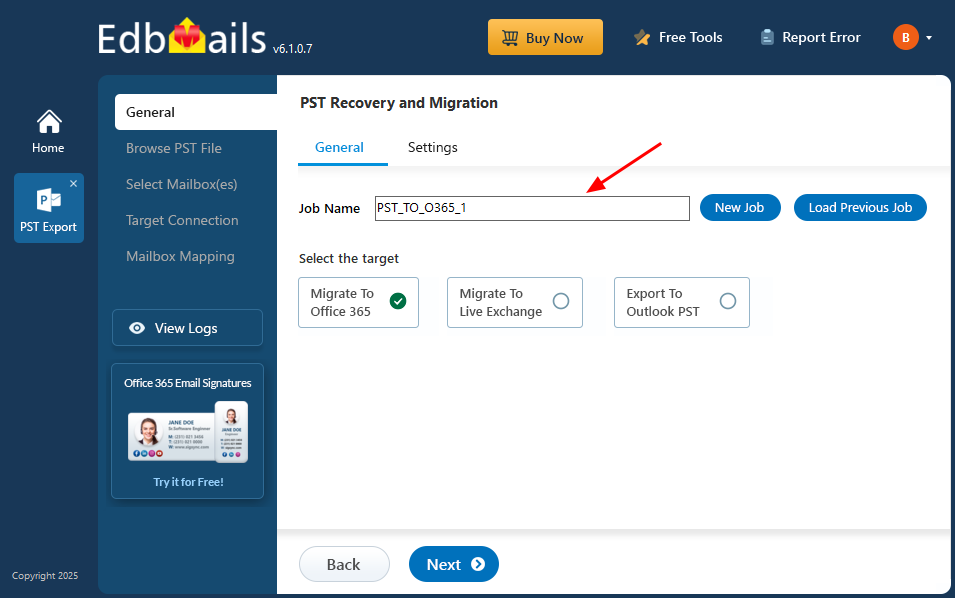
- You can either keep the default job name or click the ‘New Job’ button to change the job name.
- Download and install the EdbMails application on your computer.
Step 2: Select the offline PST file
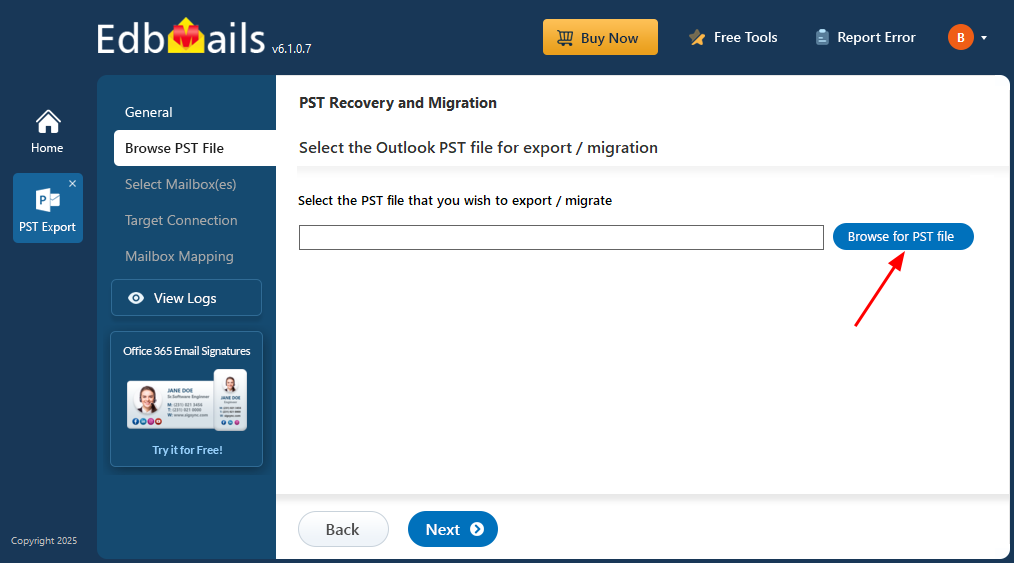
- Click ‘Browse for PST file’.
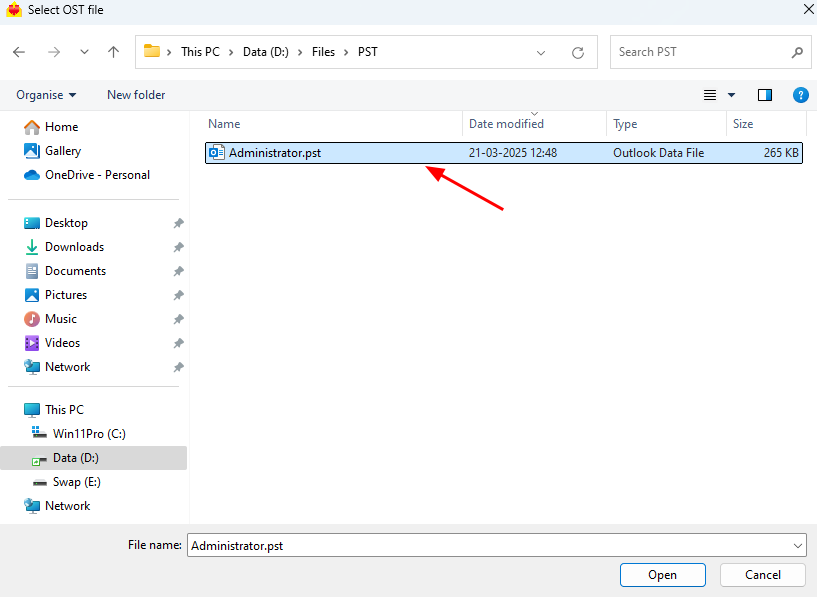
- Select the offline PST file from your computer drive, then click the ‘Next’ button to continue. You can also use an accessible PST from a network location, provided the computer running EdbMails has reliable access to the source file.
- Click ‘Browse for PST file’.
Step 3: Preview and select the mailbox
- EdbMails scans the PST and builds a preview of mailbox data it can read. If the PST is damaged, recovery depends on the data that remains present and readable in the source file.
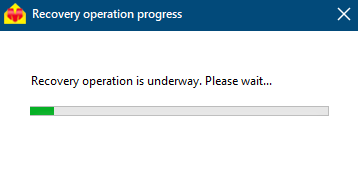
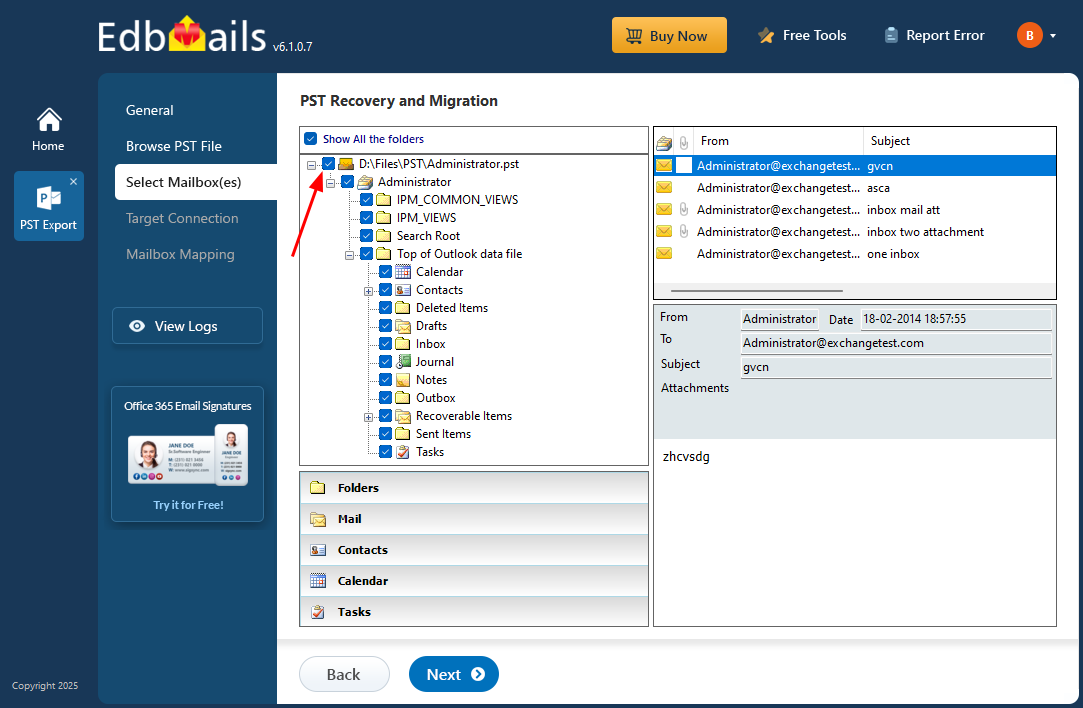
- After scanning, the available folder structure appears in the left pane. Expand folders to preview supported emails, attachments, contacts, calendars, tasks, notes, journals, and other mailbox items before migration.
- Select the required mailboxes / folders and click the ‘Next’ button.
- EdbMails provides filtering options to narrow the migration scope. For example, use date filters to migrate only items within a required date range.
- EdbMails scans the PST and builds a preview of mailbox data it can read. If the PST is damaged, recovery depends on the data that remains present and readable in the source file.
Step 4: Connect to the target Microsoft 365 tenant
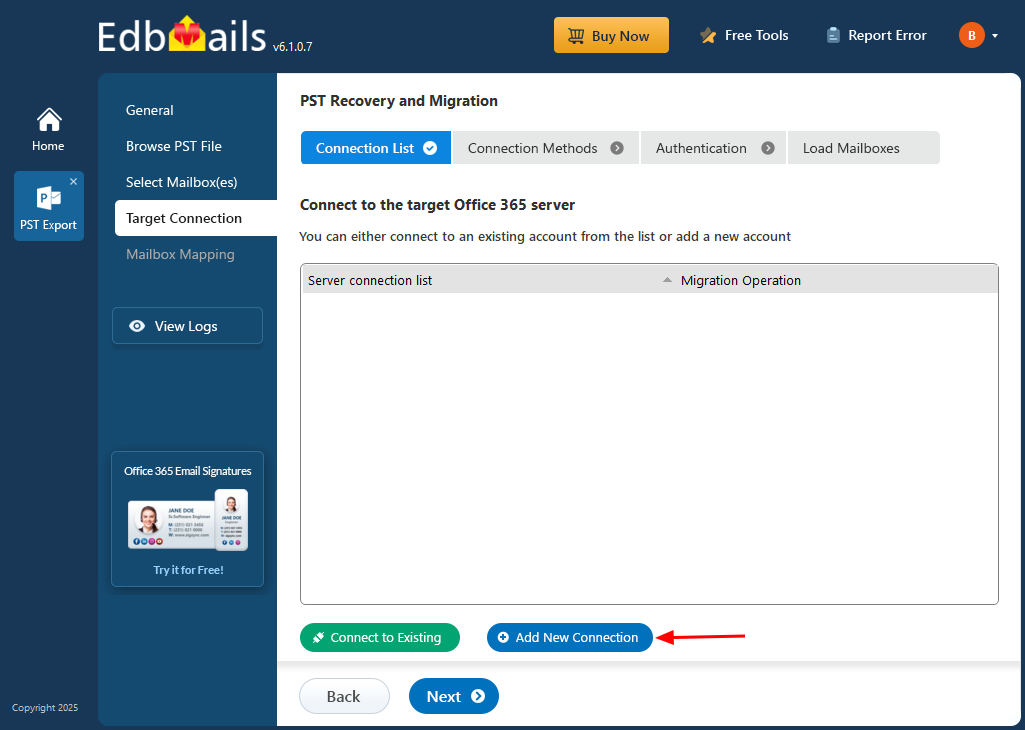
- Click the ‘Add New’ button to create a connection to the target Microsoft 365 tenant. To reuse a previous connection, select it from the connection list and click ‘Connect’.
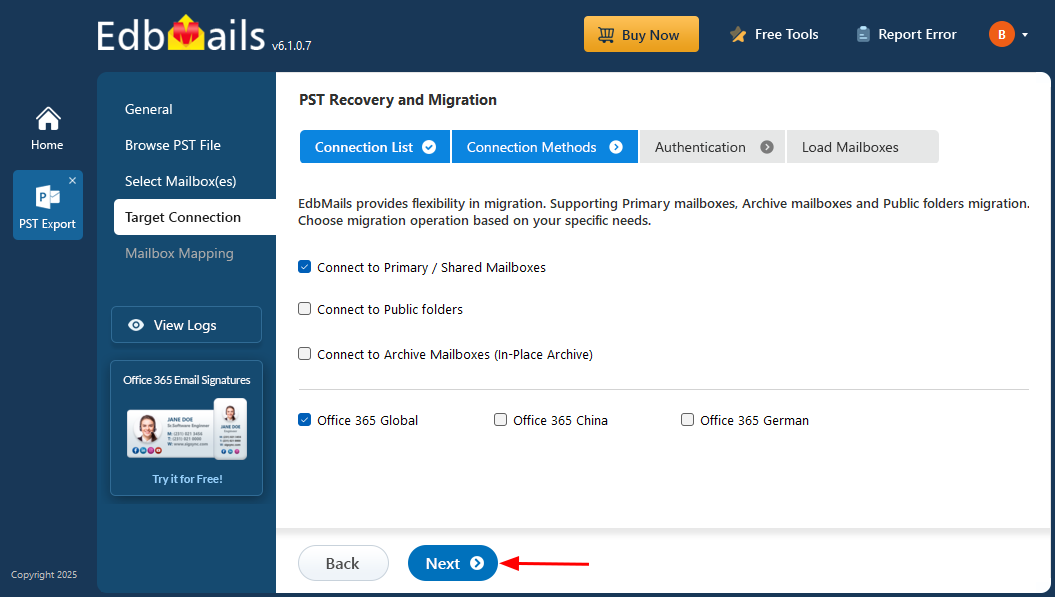
- Select the required connection options and click the ‘Next’ button.
- Select one of the available authentication methods and click ‘Login’ to continue.
Connect to Microsoft 365 using modern authentication
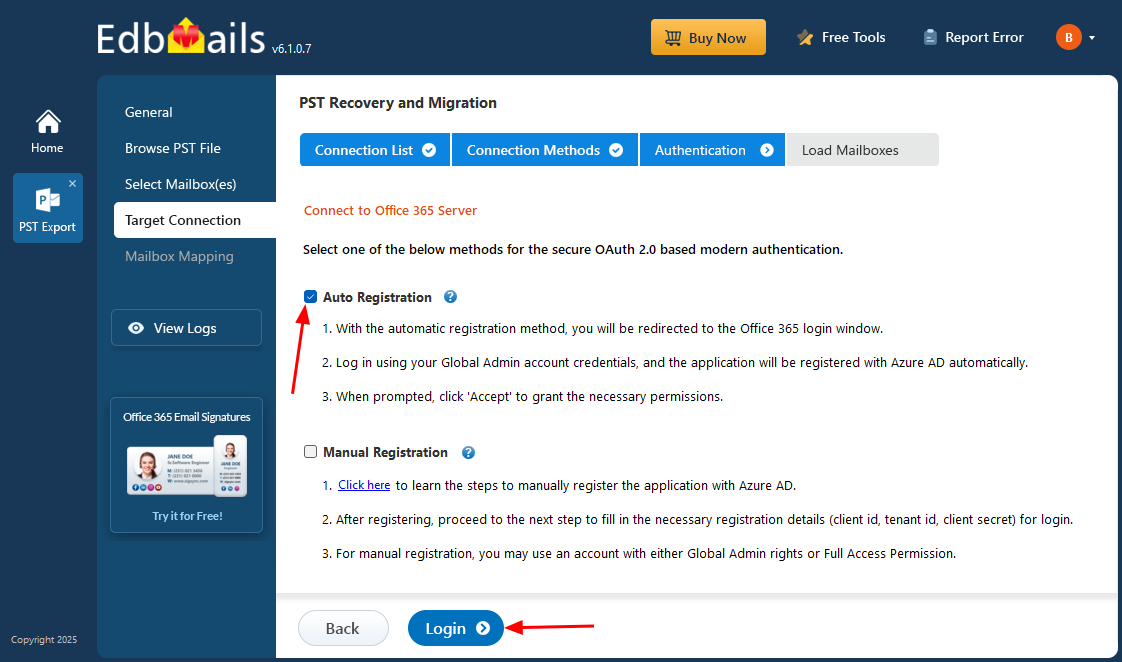
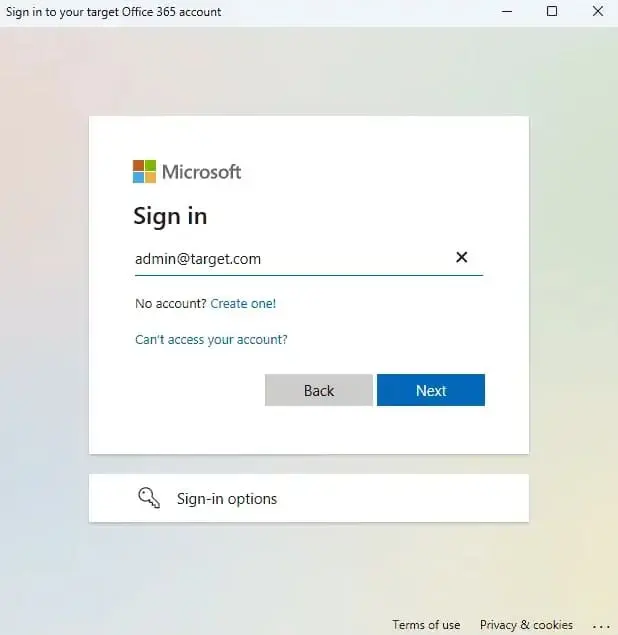
- Complete authentication on the Microsoft sign-in page.
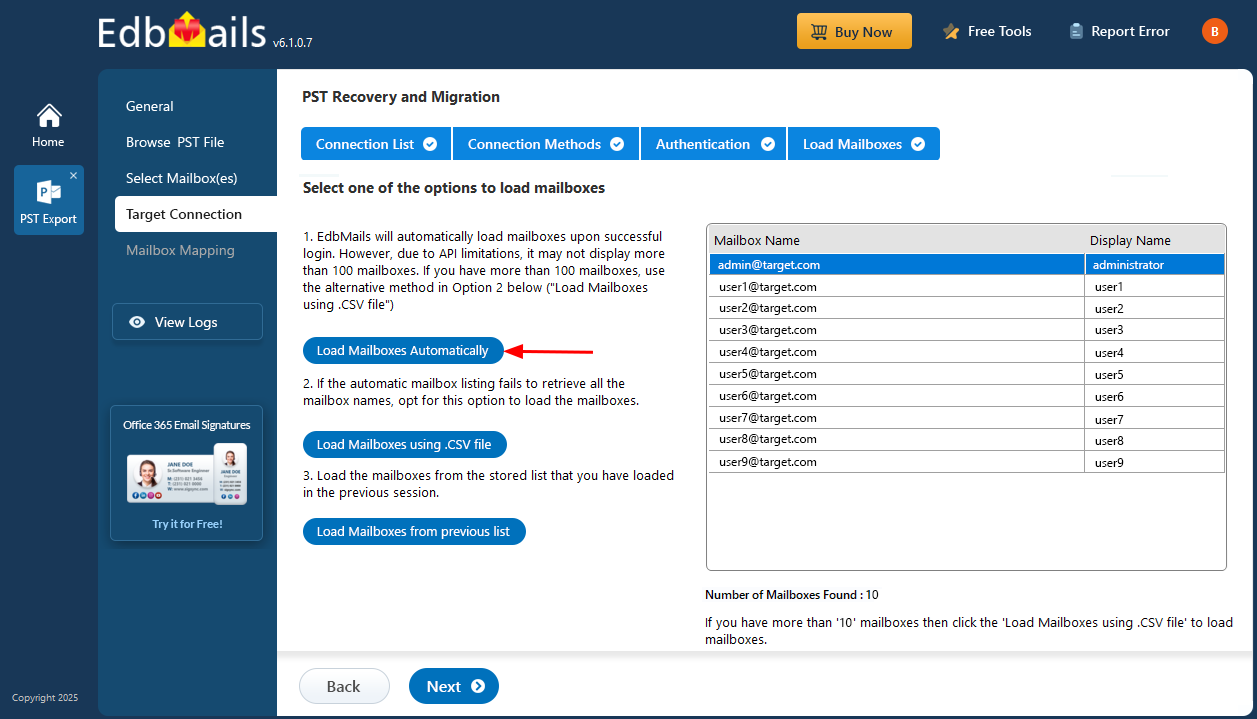
- Select one of the methods to load the mailboxes. You can also load the mailboxes using a CSV file.
- Click the ‘Add New’ button to create a connection to the target Microsoft 365 tenant. To reuse a previous connection, select it from the connection list and click ‘Connect’.
Step 5: Map source and target mailboxes
- Choose the required mailbox mapping option
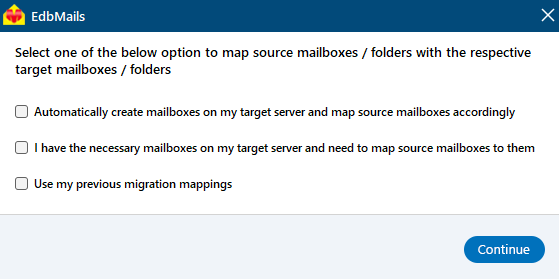
- If you choose the supported automatic mailbox-creation workflow and the connected account has the required permissions, EdbMails can create target Microsoft 365 users/mailboxes and assign available licenses.
Learn more about automatic mailbox creation and licensing.
- EdbMails can automatically map source and target mailboxes when identifiers match. Review every mapping and manually change the target where required before starting migration.
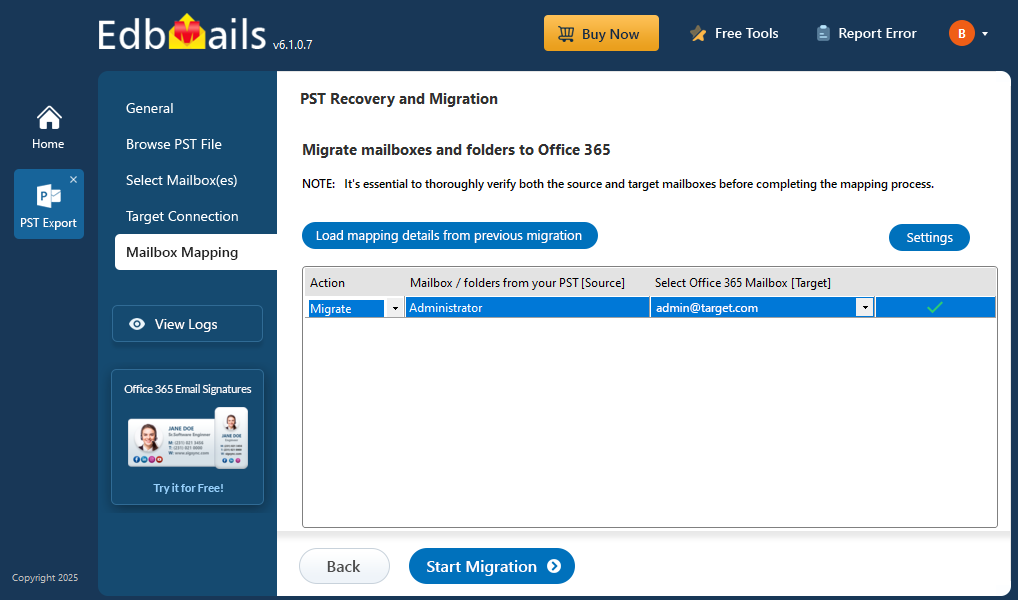
- Choose the required mailbox mapping option
Step 6: Start PST to Office 365 migration
- Click ‘Settings’ to apply the required migration filters. For example, use a date range to migrate only items received within a specific period and exclude data that is outside the migration scope.
- Click the 'Start Migration’ button to initiate the migration process.
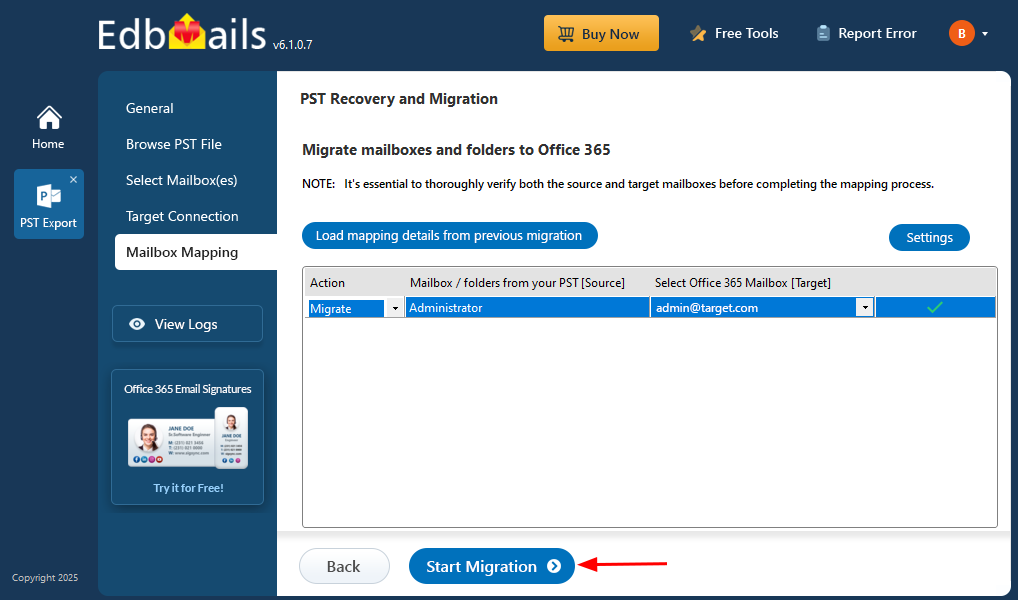
- Monitor the migration in the progress view. You can pause or resume the operation using the supported controls. Microsoft 365 throttling or transient service conditions can affect throughput, so large migrations can require additional time or retries.
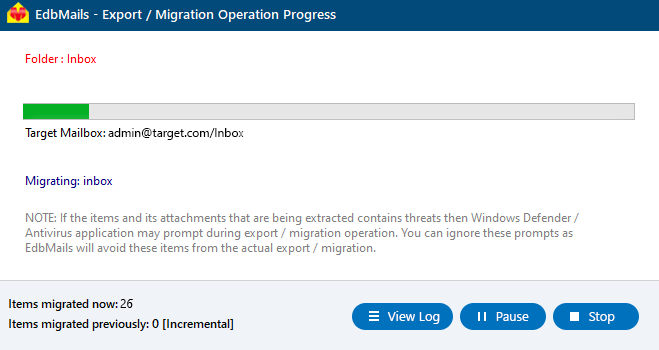
- Review the migrated folders and item counts in the EdbMails migration log report.
- Sign in to the target Microsoft 365 mailbox and verify representative messages, attachments, contacts, calendars, folders, and other important data.
PST to Office 365 post-migration tasks
- Step 1: Verify the migrated mailbox data
Review the EdbMails migration log and validate important folders, messages, attachments, contacts, calendars, and item counts in Microsoft 365. Keep the source PST until the migration output has been verified.
- Step 2: Update DNS only when this is part of a broader mail-flow cutover
A PST import alone does not require changing MX or Autodiscover records. If the PST migration is part of moving your organization's active mail service to Microsoft 365, perform the required Microsoft 365 DNS changes as part of that separate cutover plan.
- Step 3: Reconfigure Outlook only if required
Importing PST data does not automatically require a new Outlook profile. If this task is part of a tenant/domain transition or Outlook cannot connect to the intended Microsoft 365 mailbox, recreate or reconfigure the Outlook profile as appropriate.
- Step 1: Verify the migrated mailbox data
PST to Office 365 migration troubleshooting
For troubleshooting, visit Knowledge Base articles.
For more questions, refer to the PST to Office 365 Migration FAQs or contact the EdbMails support team.
Benefits of EdbMails for PST to Office 365 migration
- Migrate PST mailbox data directly to Microsoft 365 without a separate Azure Storage staging step.
- Preview and selectively migrate supported emails, attachments, contacts, calendars, tasks, notes, journals, folders, and other mailbox data.
- Use filters and source-to-target mailbox mapping to control what is migrated and where it is placed.
- Use incremental migration tracking for supported re-runs from the same source/computer to the same target.
- Review detailed migration logs and verify the target mailbox after migration.
- Use Microsoft 365 modern authentication and TLS-protected connections for the target sign-in and migration workflow.
PST to Office 365 migration frequently asked questions
Do I need Outlook installed to migrate PST to Office 365?
No. EdbMails can read and preview the PST source and migrate supported mailbox data directly to Microsoft 365 without requiring Outlook for the direct migration path.
Can I migrate multiple PST files to Microsoft 365?
Yes. Add the PST sources, select the required data, connect to Microsoft 365, map each source to the correct target mailbox, and start the migration. For bulk procedures, see the multiple PST to Office 365 guide.
Can I import PST data to a shared mailbox or Online Archive?
Yes, when the destination is already configured and the connected account has the required access. Enable Online Archive mailboxes before mapping PST data to them.
Does PST import require changing MX records?
No. Importing historical PST data does not by itself require an MX-record change. DNS changes are only relevant when the PST project is part of a broader mail-flow or domain cutover to Microsoft 365.
Can Microsoft 365 throttling slow the migration?
Yes. Microsoft 365 applies service throttling to protect availability. Migration speed therefore varies with tenant conditions, bandwidth, PST size, Microsoft service health, and other limits. Large projects can require additional time, retries, or staged runs.
Can I migrate only selected folders or dates from a PST?
Yes. Preview the PST and select only the required folders or items. Use available filter settings such as date, sender, recipient, subject, or attachment criteria to narrow the migration scope.
What happens if I run the PST migration again?
For supported re-runs from the same source/computer to the same target, EdbMails uses incremental migration tracking to avoid reprocessing items already recorded as migrated. Review the migration log after each run.
How do I verify that PST data was migrated successfully?
Review the EdbMails migration log for folder and item status, then sign in to the target Microsoft 365 mailbox and verify representative messages, attachments, contacts, calendars, folders, and other important data.
Additional resources
- Modern authentication in Office 365
- Manual registration of EdbMails in Azure AD
- Videos - Outlook PST to Office 365 migration
- PST to Office 365 Migration FAQs
- EdbMails PST to Office 365 Migration Tool
- Import multiple PST files to Office 365
- PST to Office 365 migration features
- Outlook PST Recovery and Repair Tool