PST to Exchange Migration Step by Step Guide
Migrating PST files to an Exchange Server is an essential step for businesses aiming to improve email management, enhance data security, and facilitate better collaboration. Over time, PST files can accumulate and become challenging to manage, leading to potential data loss, security vulnerabilities, and slower performance. By moving these files to the Exchange server, organizations can centralize their email data, making it easier to manage, back up, and secure. This transition also reduces the risk of corruption or accidental loss of important emails, making Exchange a more reliable platform for enterprise communication.
EdbMails PST to Exchange Migrator simplifies this migration process and offers added benefits, such as the ability to recover and migrate data from corrupt, damaged, and password-protected PST files. The tool supports PST files from all versions of Outlook, including 2003, 2007, 2010, 2013, 2016, and the latest versions. It is compatible with all Exchange Server versions, including 2007, 2010, 2013, 2016, and 2019. With zero data loss and automatic mailbox mapping, EdbMails ensures that your migration is quick, accurate, and secure.

This step-by-step guide will help you import your PST files into the Exchange server with ease, ensuring a smooth migration without any server downtime. With EdbMails, businesses of all sizes can confidently migrate their PST files to Exchange server, ensuring a more organized and secure email environment.
Prerequisites to migrate PST to Exchange server
Create mailboxes on the Exchange server
- Before migration, it's important to ensure that mailboxes are created on the target server. You can choose the option to allow EdbMails to automatically create mailboxes on the target server. However, if you prefer to create mailboxes manually, refer to the link below.
- If you want to migrate to the Exchange Public folder, refer to the link below to create a public folder on Exchange server and assign the required permissions to the admin user.
Steps to create Public folder in Exchange server and assign admin permissions.
Configure the throttling and message-size limits
- For a successful PST to Exchange migration, it is important to address throttling policies. Migration activities, being resource-intensive and Microsoft may impose throttling to maintain server performance and stability. Configuring throttling settings ensures smooth and uninterrupted data transfer during the migration process.
Steps to set up custom EWS throttling policies on Exchange server
- To successfully migrate larger emails and attachments without encountering delivery errors, timeouts, or performance issues, set the message size limit to the maximum value (150MB).
Steps to set up change message size limits on Exchange server
Steps import PST to Exchange server
Step 1: Download and Install the EdbMails application
- Download and install the EdbMails application on the computer having Windows operating system.

See a detailed list of EdbMails system requirements to import PST to Exchange server.
- Launch the EdbMails application.
- Enter the email address & password and click ‘Login’ or ‘Start Your Free Trial’.

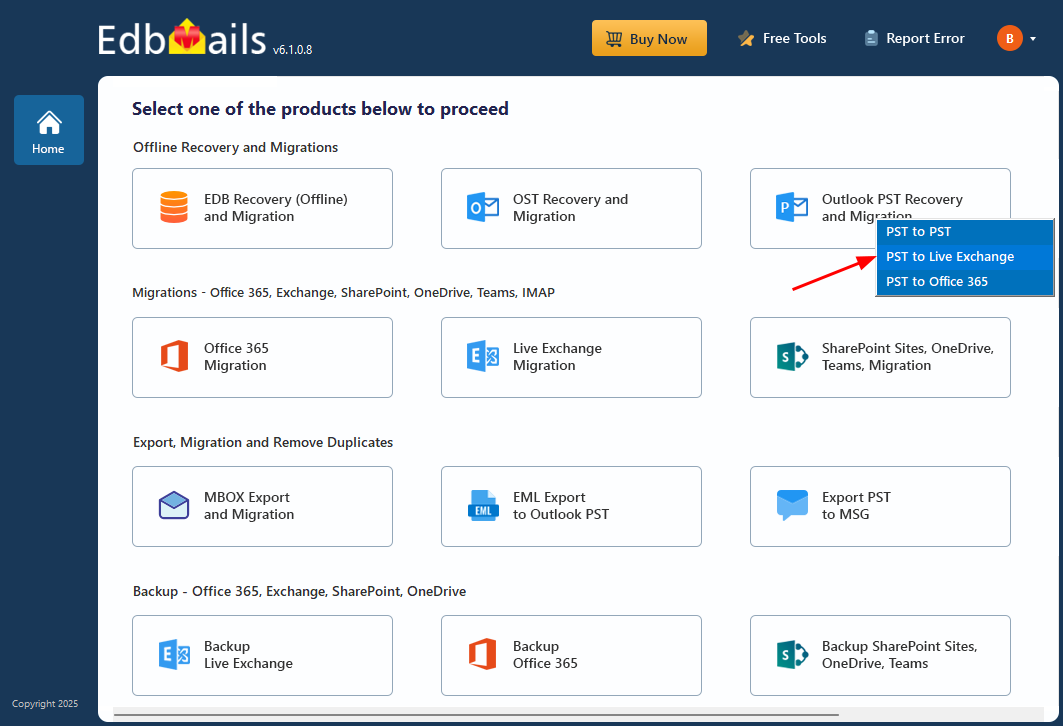
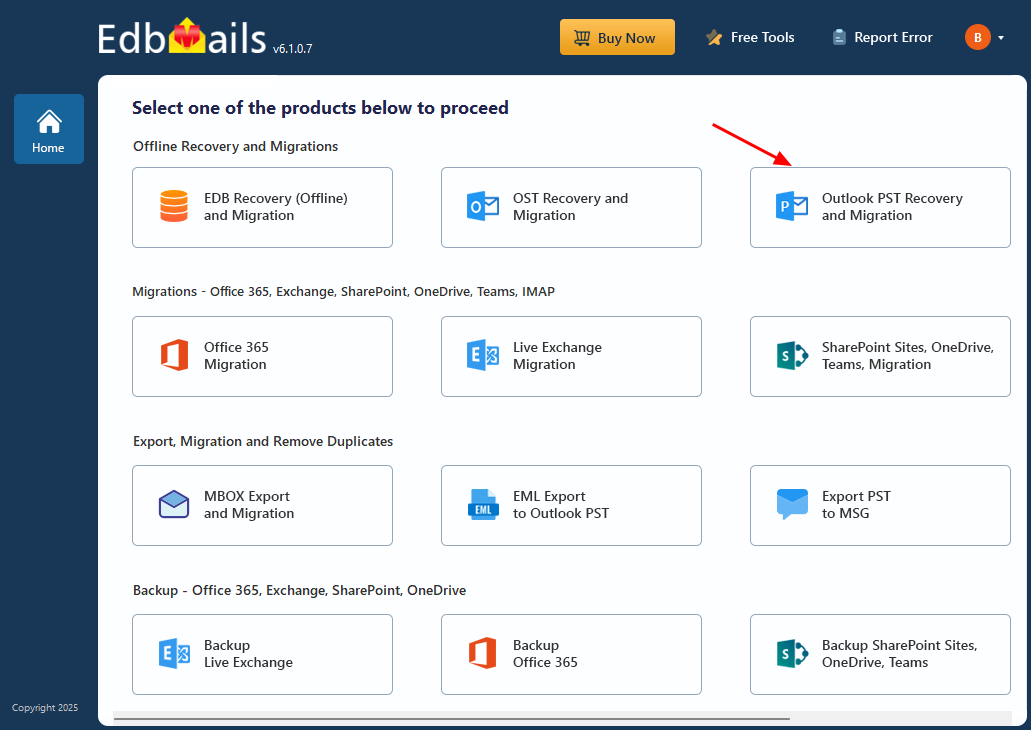
- Select ‘Outlook PST Recovery and Migration'

- Select ‘PST to Live Exchange’.
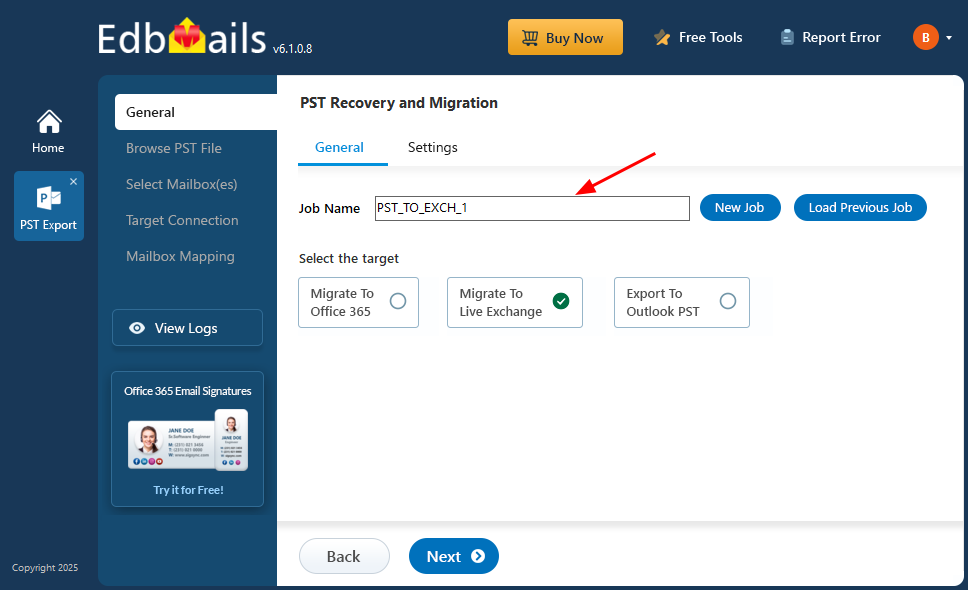
- You can either keep the default job name or click the ‘New Job’ button to change the job name.
- Download and install the EdbMails application on the computer having Windows operating system.
Step 2: Select the offline PST file
- Click ‘Browse for PST file’.
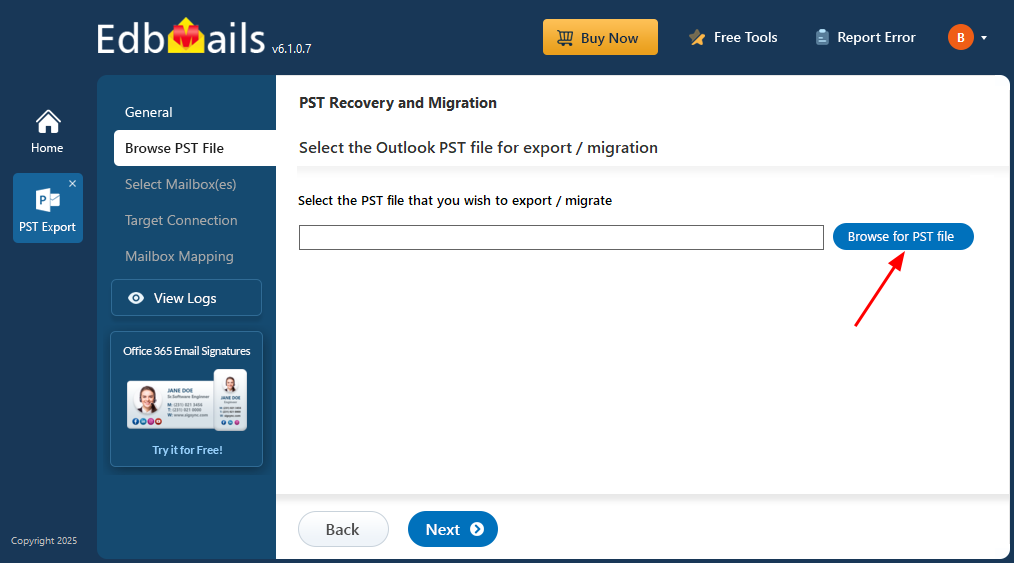
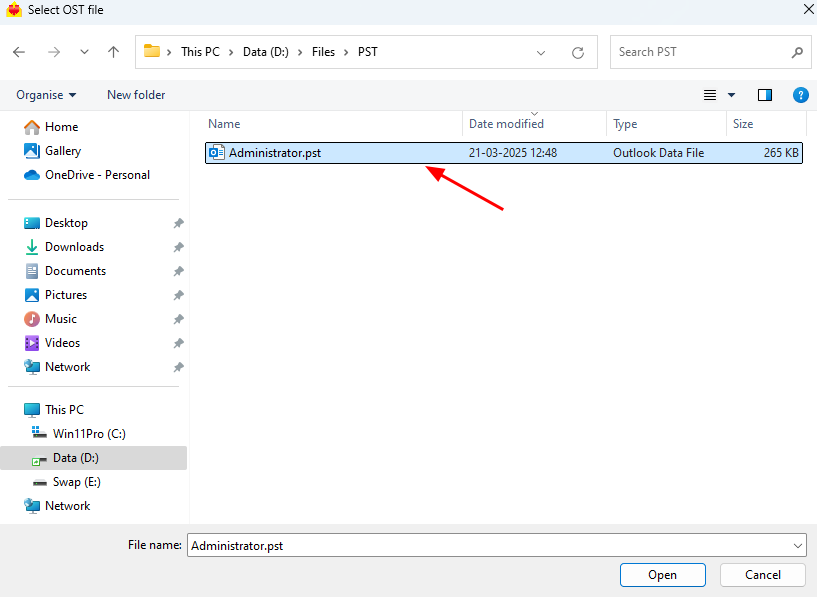
- Select the offline PST file from your local drive, or from a shared network location with read and write permissions enabled. Once selected, click ‘Next’ to proceed.
- EdbMails automatically scans your PST file and recovers data even if the file is corrupted.
- Once the recovery is complete, the full folder structure appears in the left pane. You can expand the folders to preview the recovered content. The built-in preview feature allows you to directly view emails, contacts, calendars, tasks, notes, and other mailbox items.
- Click ‘Browse for PST file’.
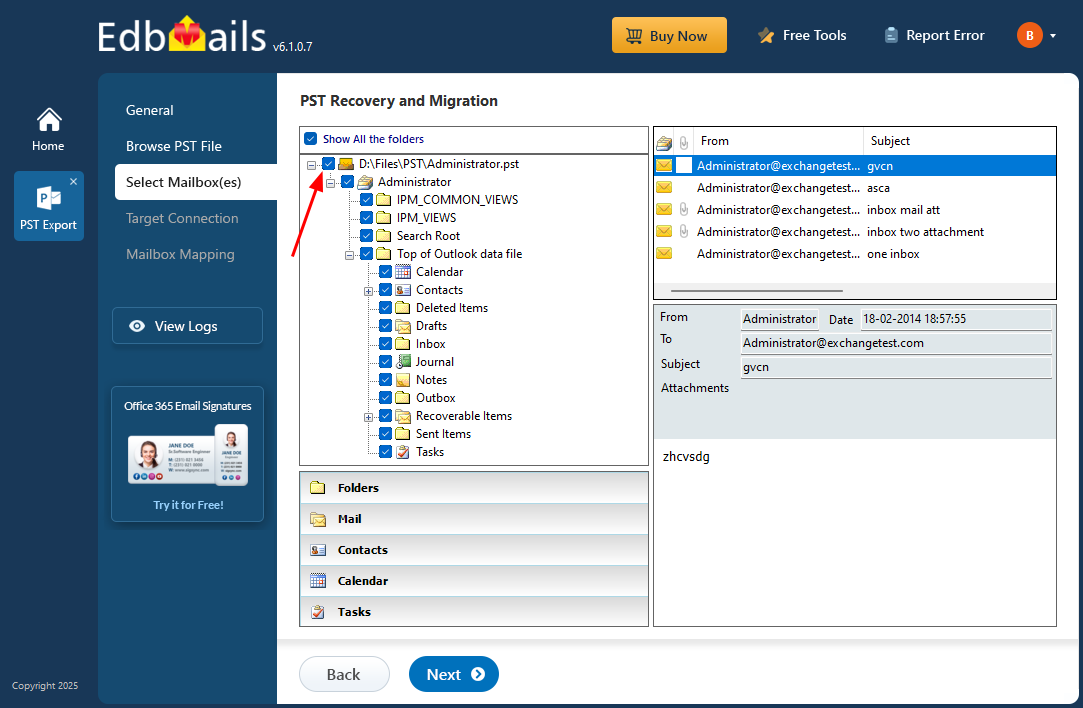
Step 3: Select mailbox /folders for migration
- Choose the mailbox or folders you wish to migrate, then click the ‘Next’ button to proceed with the process.
- Choose the mailbox or folders you wish to migrate, then click the ‘Next’ button to proceed with the process.
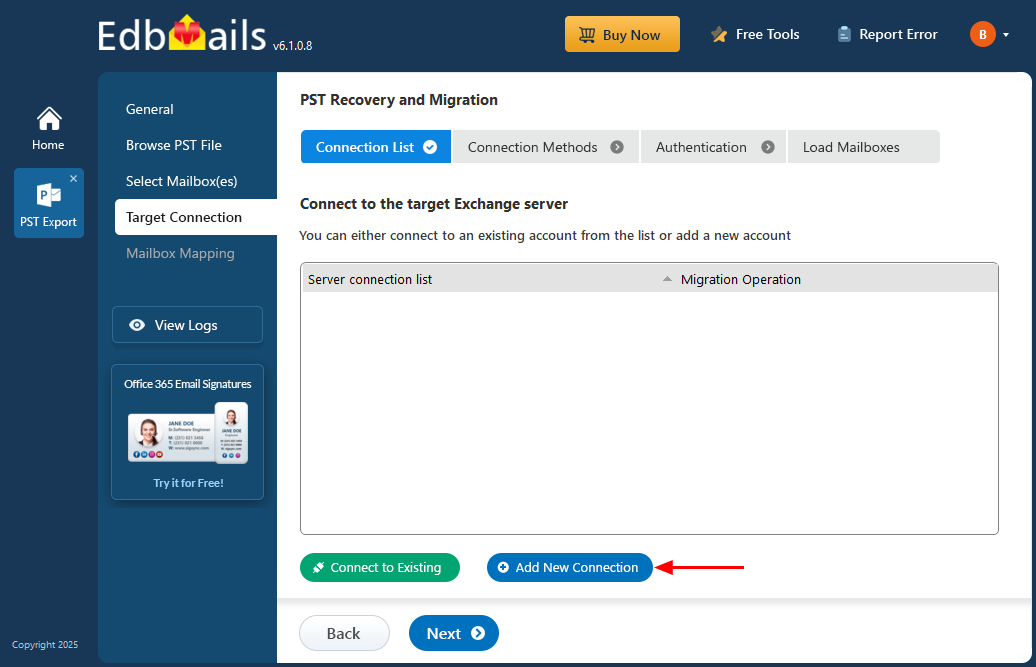
Step 4: Connect to target Exchange server
- Click on the ‘Add New Connection’ button to set up a connection to the target Exchange server. If you want to use a previously established connection, simply select it from the list and click ‘Connect to Existing’ to continue.
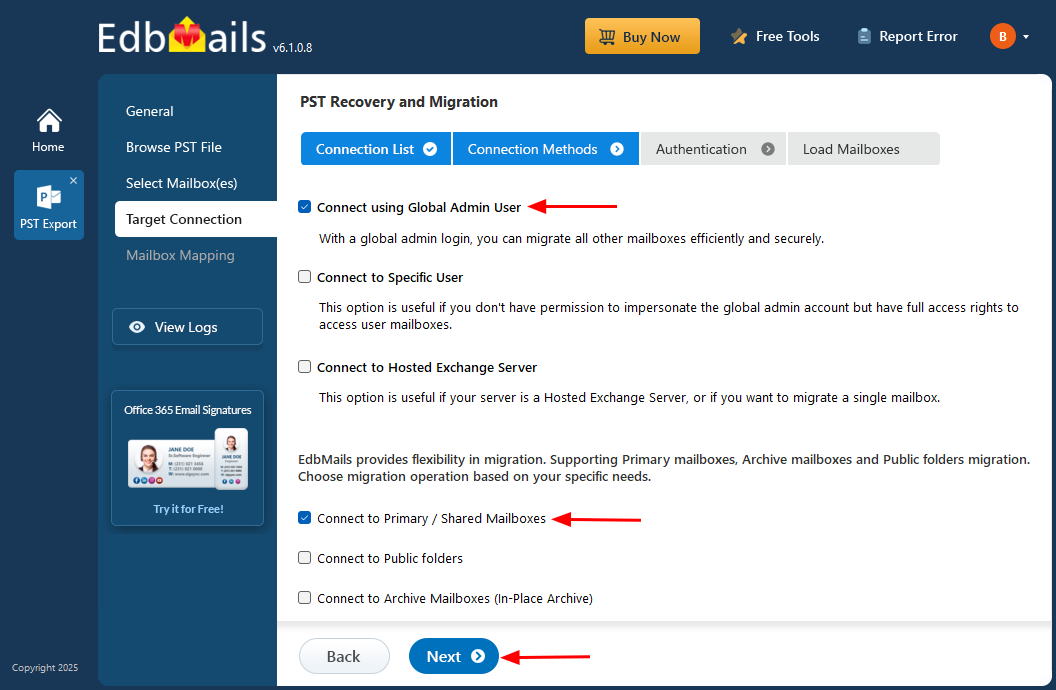
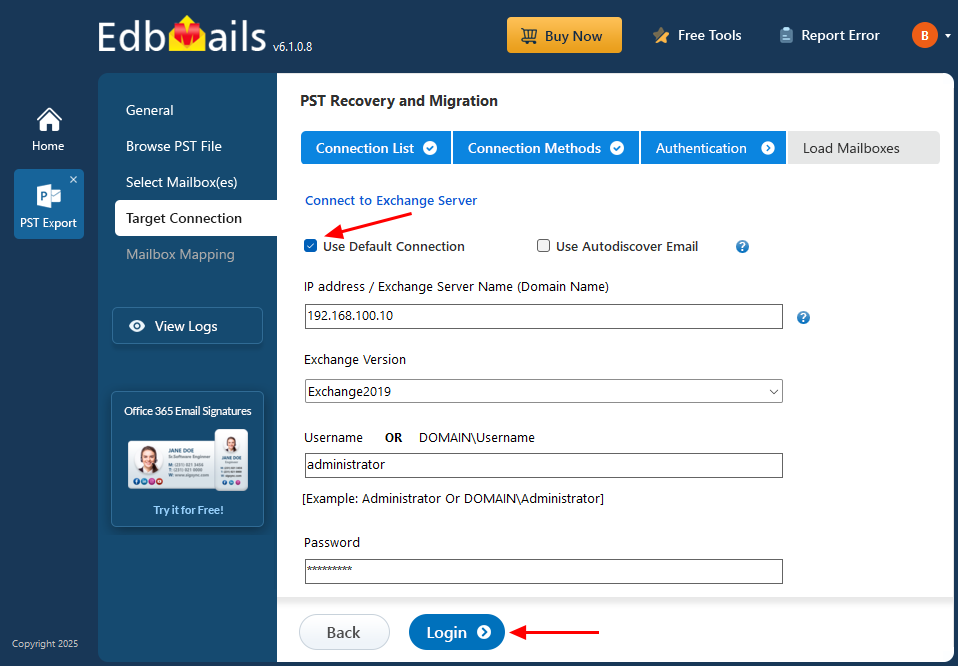
- Choose the appropriate options to connect to your target Exchange server. If you opt to connect using a global admin account, make sure that impersonation rights are set.
Different options to connect to Exchange server in EdbMails
- Click the ‘Next’ button.
- Enter the target Exchange server details and click the ‘Login’ button.
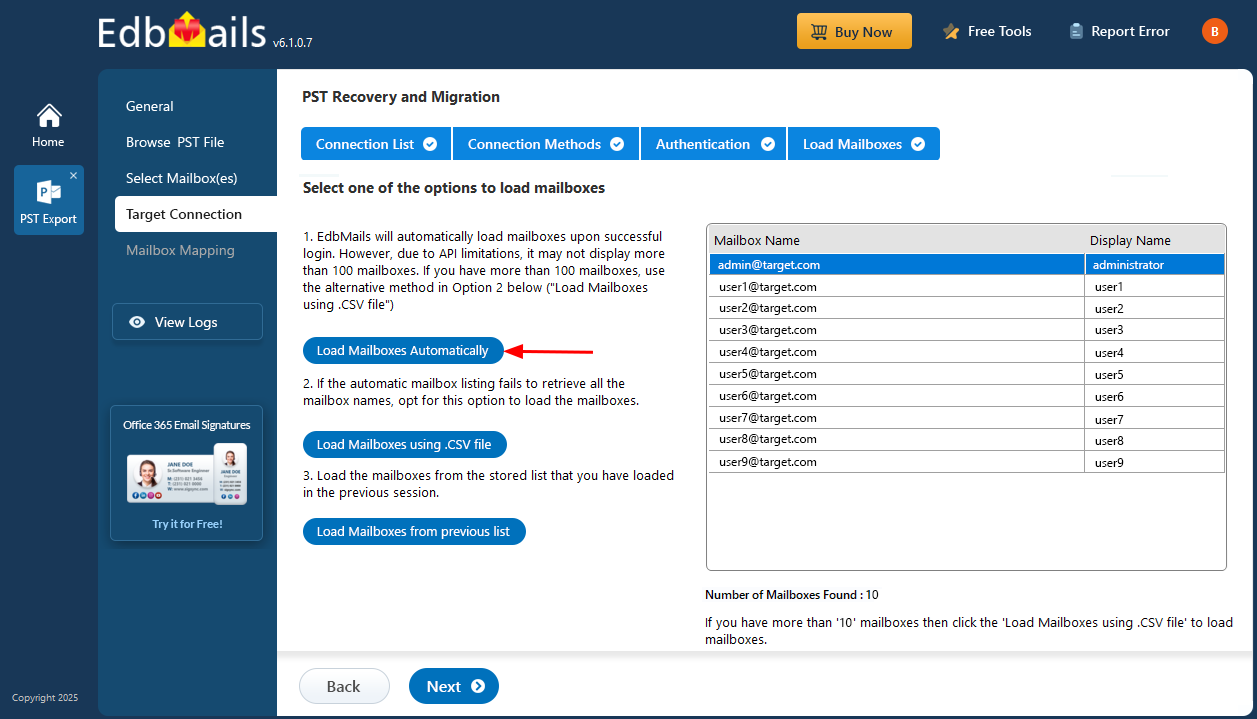
- EdbMails automatically loads mailboxes from the Exchange server. However, due to Microsoft API limitations, only 100 mailboxes can be displayed. If there are more than 100 mailboxes, you can load them using the CSV file method.
- Click on the ‘Add New Connection’ button to set up a connection to the target Exchange server. If you want to use a previously established connection, simply select it from the list and click ‘Connect to Existing’ to continue.
Step 5: Map mailbox from PST to Exchange server
- Select the required mailbox mapping option.
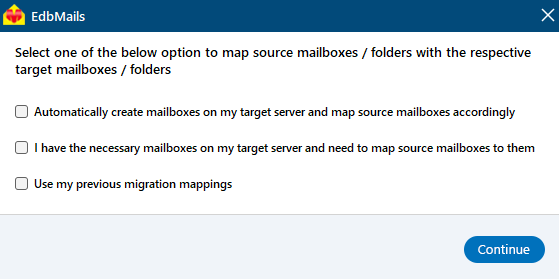
- If EdbMails is installed on your Exchange server, you have the option to automatically create mailboxes on the target Exchange server.
See How to automatically create mailboxes on target Exchange server?
Once the mailboxes are created on the target server, EdbMails automatically maps the mailboxes and folders between the source and target servers. For greater flexibility, you can also manually map source folders and subfolders to specific target locations as needed.
- Select the required mailbox mapping option.
Step 6. Migrate from Outlook PST to Live Exchange server
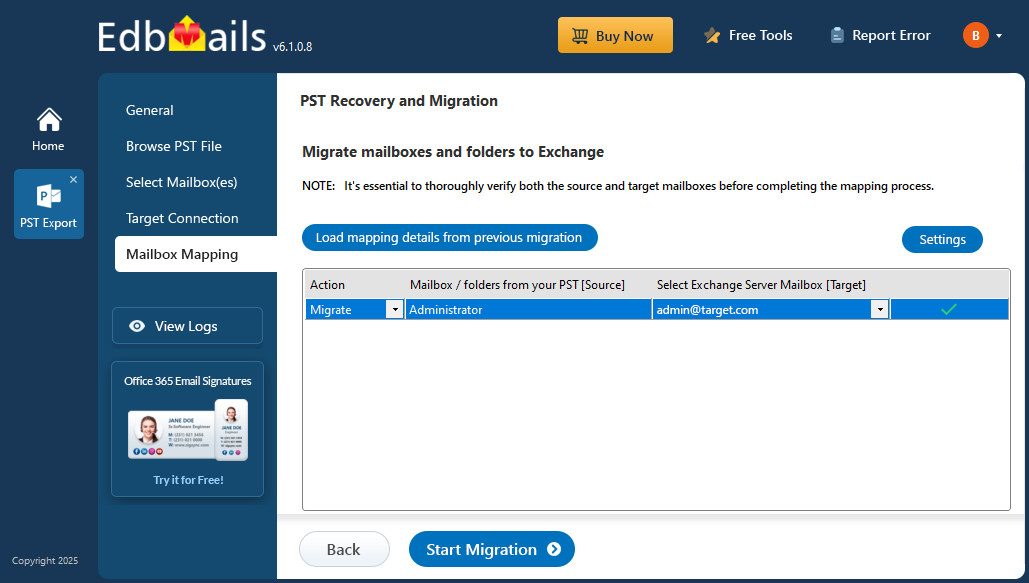
- Verify the mailbox mapping.
- Click the ‘Settings’ button to customize your migration process. For example, the date filter lets you migrate only the items received after, before, or within a specific date range. Similarly, you can apply filters based on subject, sender, recipient, or read and unread status of the messages.
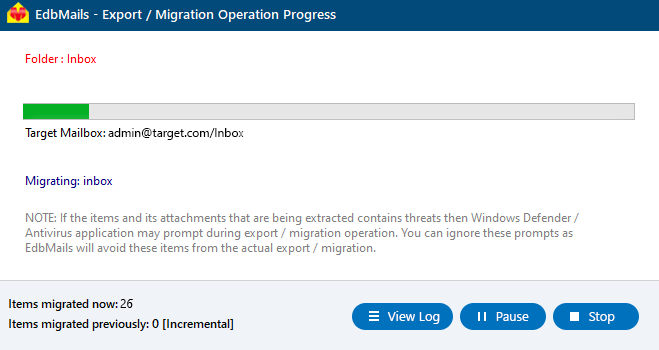
- Click ‘Start Migration’ to begin the migration process.

- The migration process has now started. Once it’s complete, a confirmation message will appear. Click the ‘View Logs’ button to access the detailed migration report, which displays the complete migration status along with the number of items migrated in each folder.
Benefits of EdbMails to to import PST to Exchange server
Direct migration capability
EdbMails allows you to migrate PST files directly to a live Exchange server, removing the need for any extra steps. This simplifies the entire process, helping businesses complete the migration faster without server downtime, all while keeping the data safe and intact.Support for all Exchange server versions
EdbMails is compatible with various Exchange server versions including 2019, 2016, 2013, 2010, and 2007. This flexibility allows organizations to migrate PST files regardless of their current or target Exchange environment. It ensures seamless integration across diverse infrastructures.Automatic mapping of mailboxes
EdbMails automatically maps source mailboxes and folders to their corresponding target locations on the Exchange server. This feature saves time and reduces manual effort. Users can also customize mappings for specific organizational needs.Detailed reporting
EdbMails offers comprehensive and transparent reporting, including migration status and folder-wise item counts—making it easier to monitor and verify the entire process. These reports are valuable for auditing, troubleshooting, and maintaining full control over the migration from start to finish.Import PST files of any size
EdbMails handles PST files of any size efficiently. Whether dealing with small individual files or large enterprise-level data, the tool ensures consistent performance. This capability makes it ideal for businesses with extensive email archives.

