
Google Workspace (G Suite) to Exchange Migration
Organizations often migrate from Google Workspace (G Suite) to Exchange Server to gain greater control over their email infrastructure, strengthen security policies, and improve collaboration within enterprise environments. While Google Workspace is a fully cloud-based platform, Exchange Server offers the flexibility to manage email systems on-premises or in hybrid environments, allowing administrators better governance and control over organizational data .
EdbMails G Suite Migration Tool provides a secure, automated, and efficient solution for transferring mailboxes from Google Workspace to Exchange Server. The application enables organizations to migrate emails, attachments, folders, and other mailbox data seamlessly while preserving folder structures and metadata, ensuring data consistency throughout the migration process.

Additionally, the application supports migration to multiple Exchange Server versions, including Exchange Server 2019, 2016, 2013, 2010, and 2007. This wide compatibility allows organizations to migrate their Google Workspace mailboxes to different Exchange environments with minimal downtime while maintaining complete data integrity.
EdbMails also includes a range of advanced features designed to simplify large-scale migrations. These include selective mailbox migration, incremental migration to avoid duplicates, automatic mailbox mapping, and detailed migration reports. The application ensures secure data transfer while maintaining folder hierarchy, email properties, and attachments, making it suitable for organizations of all sizes that require a reliable and streamlined migration process.
Prerequisites for G Suite to Exchange Migration
Before starting the migration using EdbMails, ensure the following requirements are completed to guarantee a smooth and secure transfer.
On the Source G Suite Side
- An active Google Workspace admin account with Super Administrator privileges.
- API access is enabled in the Google Workspace Admin console.
- Service account with domain-wide delegation configured for secure mailbox access.
Steps to Configure a Google Workspace (G Suite) Admin Account
On the Target Exchange Server Side
Step 1: Verify Your System Meets Exchange Server Requirements
Before starting your migration, ensure your system meets the requirements for the version of Microsoft Exchange Server you plan to install. Check the official documentation for the necessary network settings, hardware specifications, and supported operating systems.
- Exchange 2013 Server Setup
- Network and Directory Requirements for Exchange 2016
- Network and Directory Requirements for Exchange 2019
- Hardware Requirements for Exchange 2016
- Hardware Requirements for Exchange 2019
- Supported Operating Systems for Exchange 2016
- Supported Operating Systems for Exchange 2019
Use these links to prepare your target Exchange environment and ensure a smooth installation.
Step 2: Prepare Your Target Server
Before installing Microsoft Exchange Server, complete the required prerequisites for Active Directory, Mailbox servers, and Edge Transport servers.
- Exchange 2019 Prerequisites for Active Directory (AD)
- Windows Server Prerequisites for Exchange 2019
- Exchange 2016 Prerequisites for Active Directory (AD)
- Windows Server Prerequisites for Exchange 2016
Ensure these prerequisites are completed to set up a stable and supported Exchange environment.
Step 3: Set Up Exchange Server for Migration
Follow these steps to install and prepare your Microsoft Exchange Server for migration:
- Prepare Active Directory (AD) and Domains
- Extend the Active Directory schema if required.
- Prepare the AD forest and domains for the target Exchange version.
- If you have multiple domains, you need to additionally prepare the Active Directory domains.
- Install Exchange Server
- Verify that system requirements and prerequisites are met.
- Install Exchange 2016 or Exchange 2019 using the setup wizard.
- Prepare a Clean Target Environment
- Create and configure a Send connector for sending mail outside your organization.
- Configure receive connectors if needed (default connectors are created automatically).
- Add accepted domains to allow email from other domains.
- Update the default email address policy to include new domains for all recipients.
- Configure internal and external URLs on Client Access (frontend) services for internal and internet access.
- Configure SSL certificates from a trusted certificate authority for services like Outlook Anywhere and Exchange ActiveSync.
- Verify the Exchange server installation using Get-ExchangeServer in Exchange Management Shell (EMS).
- Create Mailboxes and Public Folders
- Mailboxes are automatically created by EdbMails. To create them manually, follow the Exchange server instructions.
- For Public folder migration from Office 365, create Public folders in the target Exchange server as required
- Set Impersonation Rights
- Set impersonation rights to the global admin account if it will be used for migration.
- Ensure the admin account has a valid, non-hidden mailbox and appropriate management roles.
- Adjust Throttling and Message-Size Limits
- Modify EWS throttling settings if Microsoft throttles the migration.
- Modify EWS throttling settings if large messages cause migration to stall.
By following these steps, your Exchange server will be ready for a smooth and successful migration.
Step-by-Step Migration Process: G Suite to Exchange Migration
Follow these steps to securely migrate your mailboxes from Google Workspace (G Suite) to Exchange using EdbMails:
Step 1: Download the EdbMails Application
- Download and install the EdbMails application on your computer.
See EdbMails system requirements for G Suite migration.

- Enter your registered email address and password, then click ‘Login’. If you have not created an account yet, choose ‘Start Your Free Trial’ to continue using the trial version.

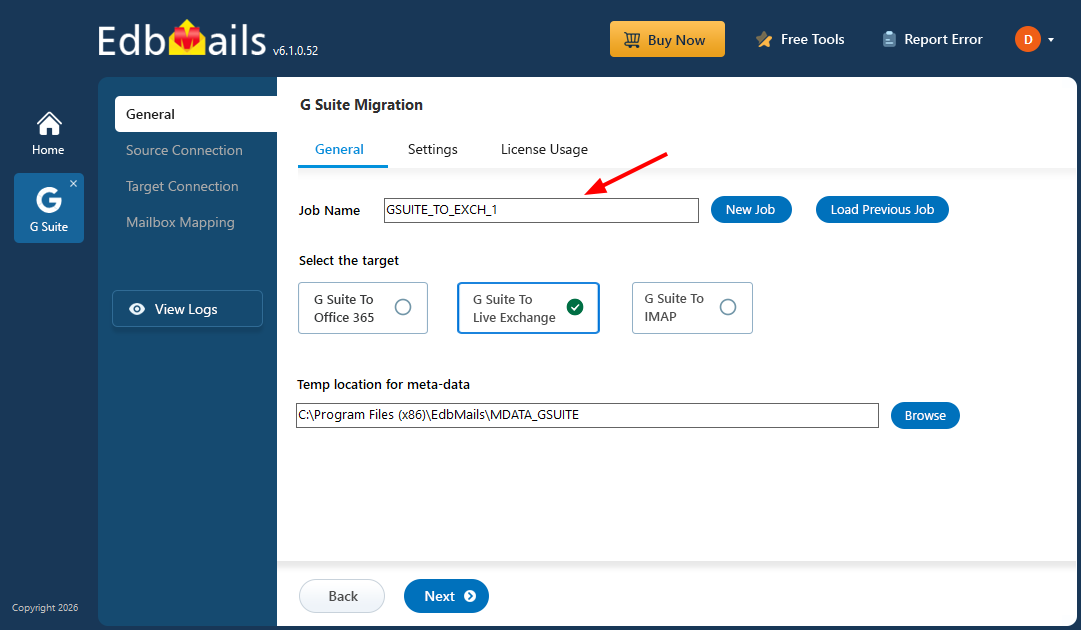
- Select the option ‘G Suite Migration’.

- Select ‘G Suite to Exchange Server Migration’.
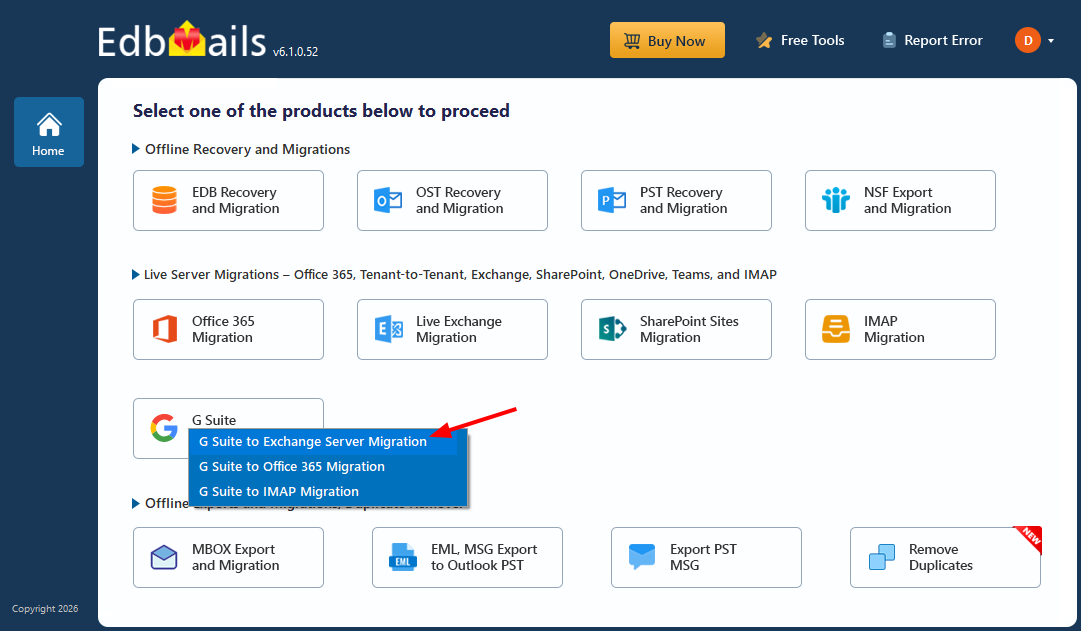
- You can proceed with the default job name, or click ‘New Job’ to create and assign a custom name of your choice.
- Download and install the EdbMails application on your computer.
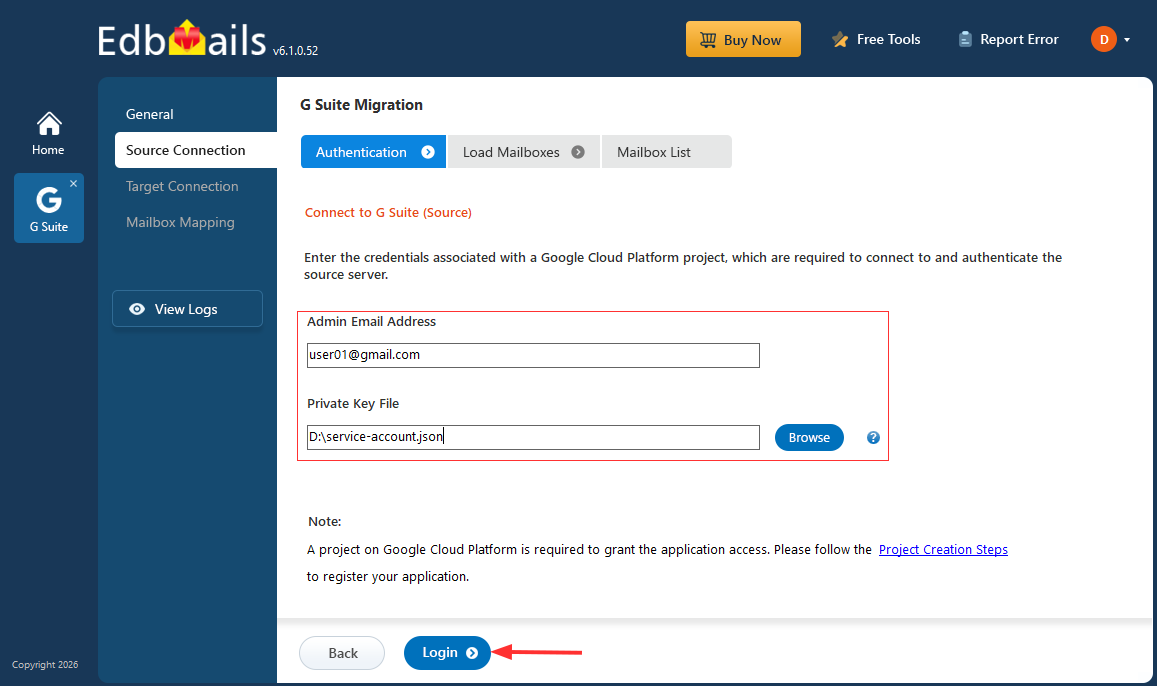
Step 2: Connect to Source G Suite Server
- Enter the admin email address, click ‘Browse’ to select the JSON file you downloaded from the Google Cloud Console, and then click 'Login'.
Steps to Create a Google Cloud Project and Download the JSON File
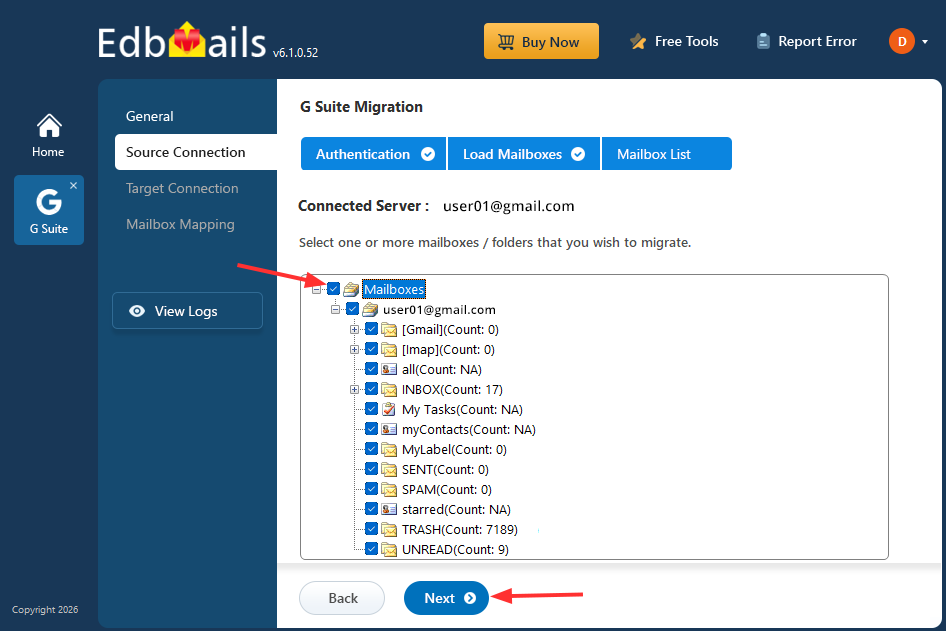
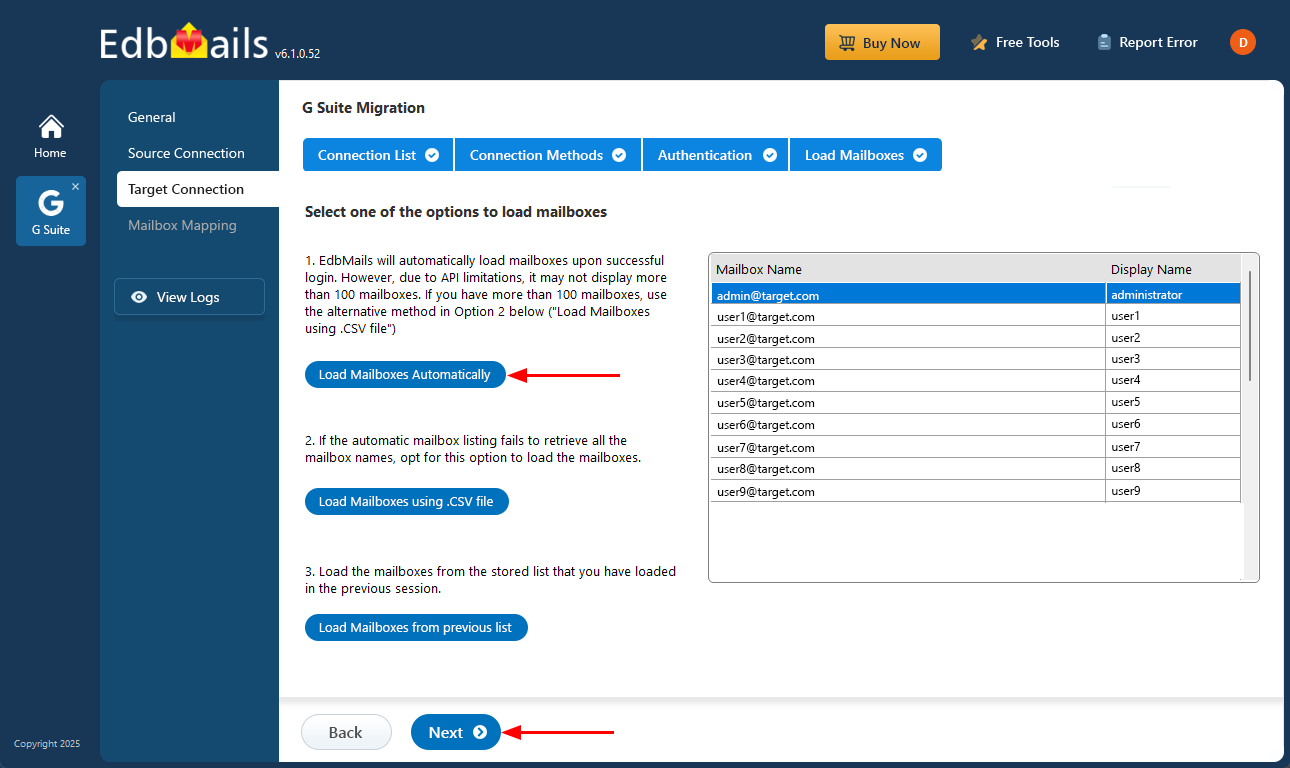
- Select one of the methods to load the mailboxes, then click ‘Next’.
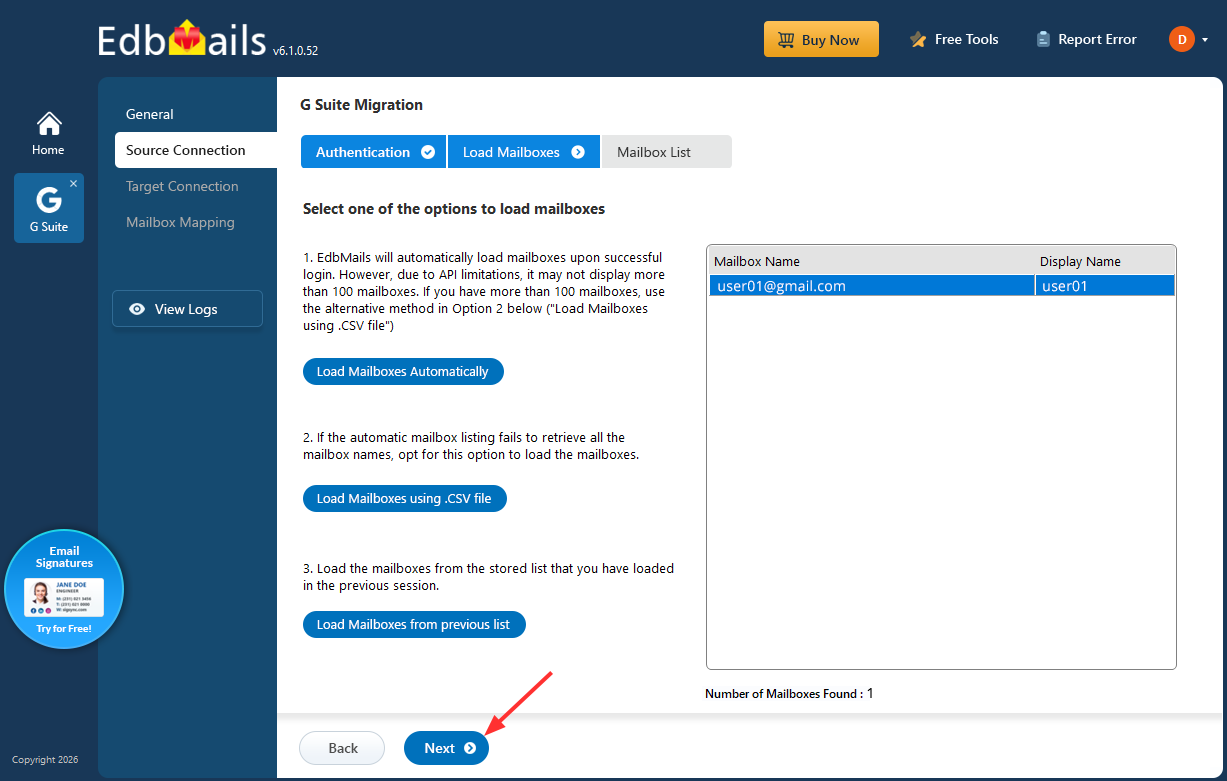
- Select the mailboxes you want to migrate, then click ‘Next’ to continue.
- Enter the admin email address, click ‘Browse’ to select the JSON file you downloaded from the Google Cloud Console, and then click 'Login'.
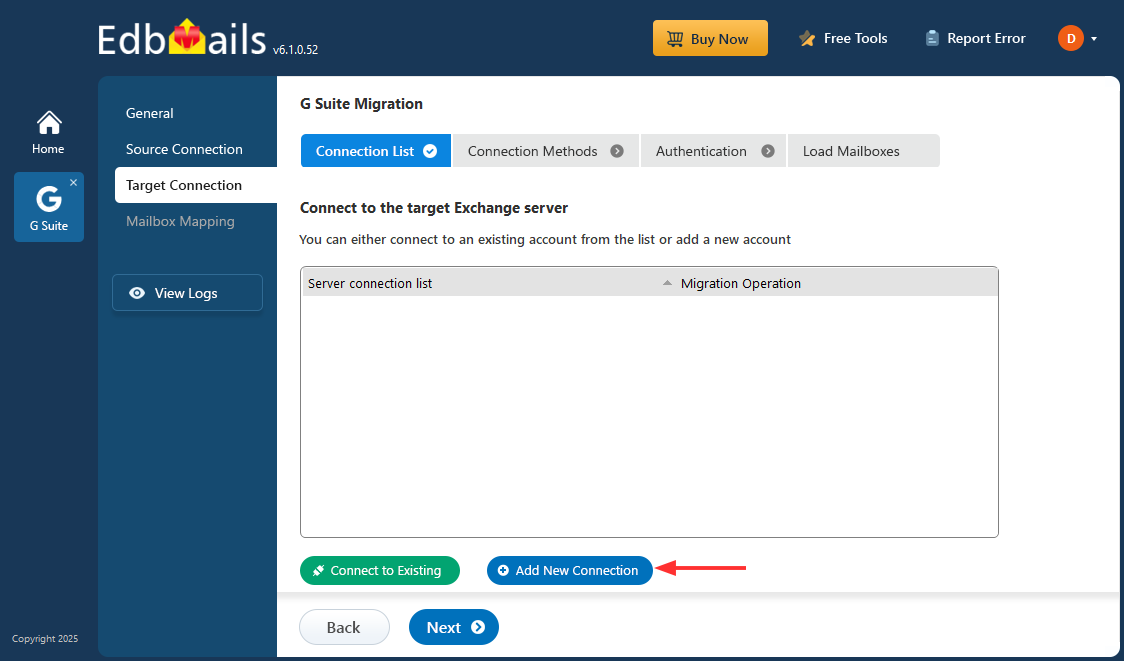
Step 3: Connect to the target Exchange server
- Click the ‘Add New Connection’ button to establish a new connection to the target Exchange server. To use a previous connection, select it from the connection list and click the ‘Connect to Existing’ button to proceed.
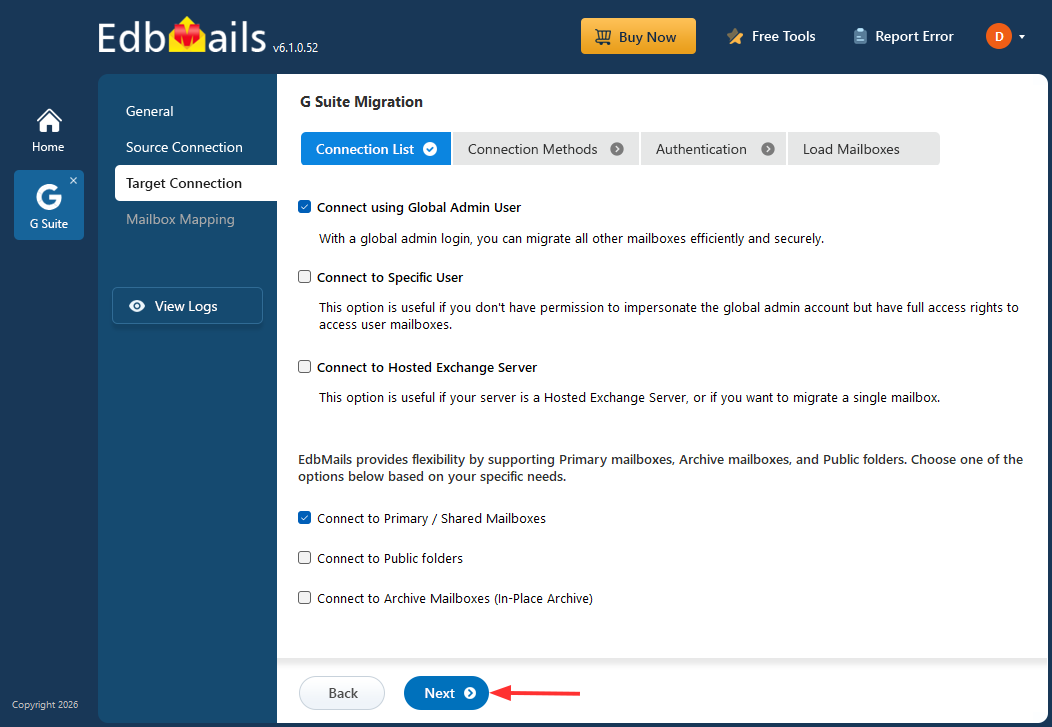
- Choose the required options to connect to your target Exchange server and click the ‘Next’ button.
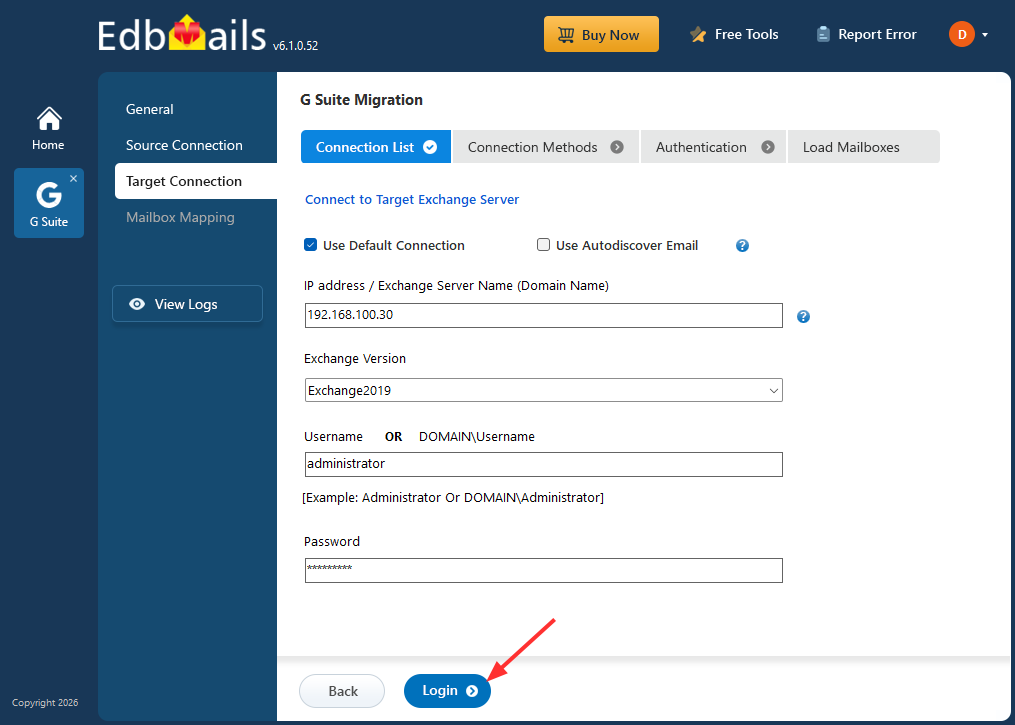
- Enter the target Exchange server details and click the ‘Login’ button.
- Select one of the methods to load the mailboxes. Then click ‘Next’.
- Click the ‘Add New Connection’ button to establish a new connection to the target Exchange server. To use a previous connection, select it from the connection list and click the ‘Connect to Existing’ button to proceed.
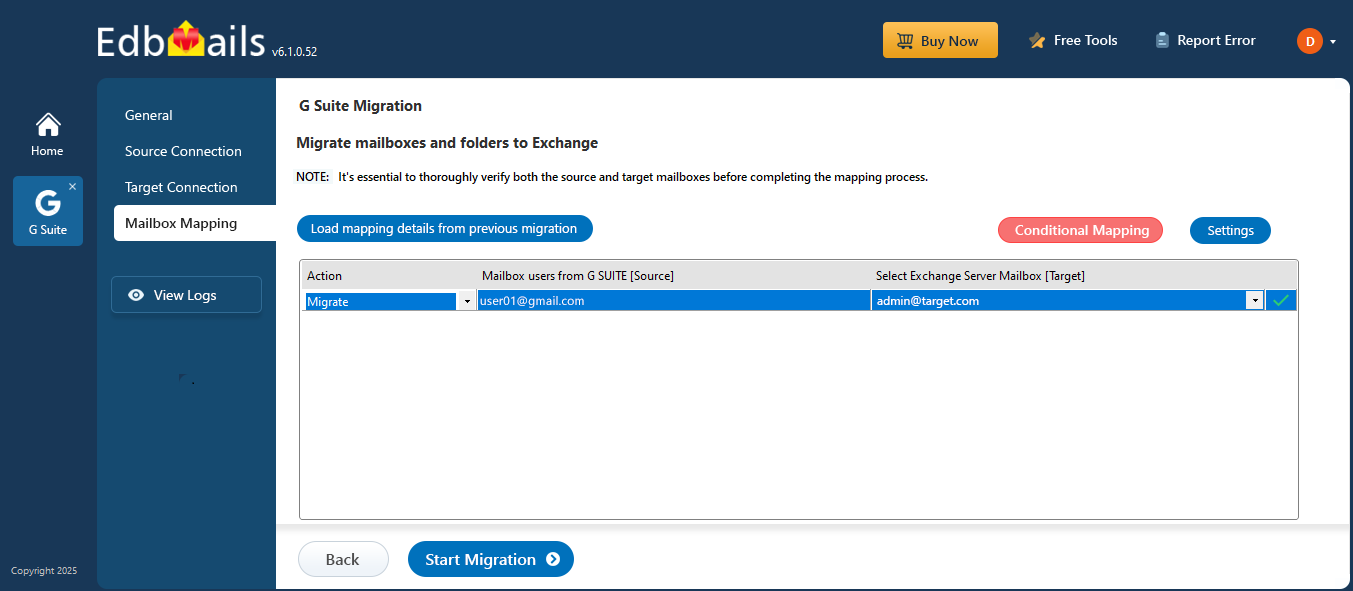
Step 4: Map Source and Target Mailboxes
- Choose the required mailbox mapping option, then click ‘Continue’.
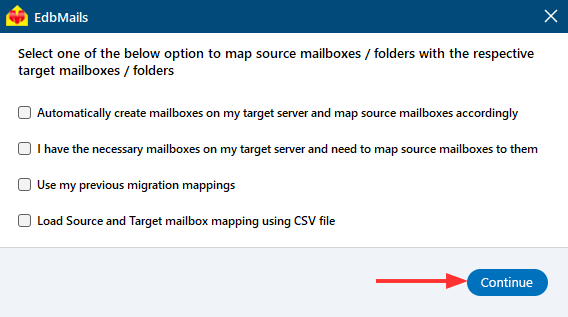
- If you have installed EdbMails on your target Exchange server, you can allow EdbMails to automatically create mailboxes on the target Exchange server.
Click here to know more about automatic mailbox creation.
- EdbMails automatically maps mailboxes between the source and the target Exchange servers. This feature is especially useful when migrating a large number of mailboxes, as it reduces manual effort and saves time during the overall migration process.
- Choose the required mailbox mapping option, then click ‘Continue’.
Step 5: Start G Suite to Exchange Migration
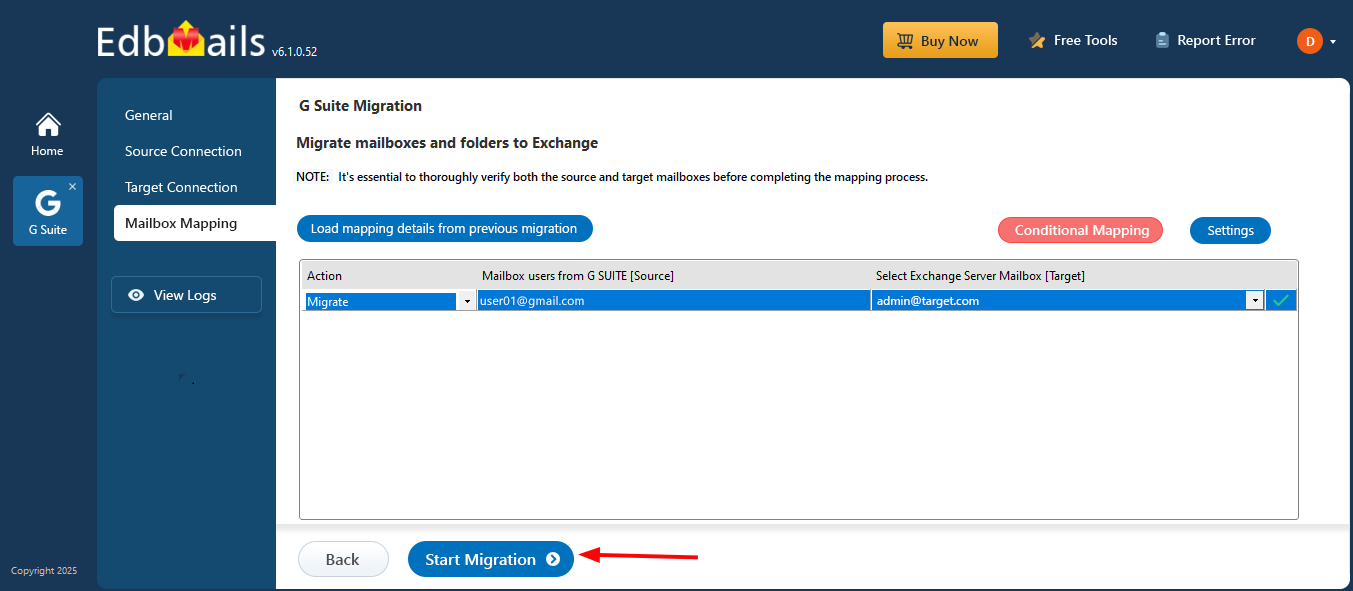
- Click the 'Start Migration’ button to initiate the migration process.
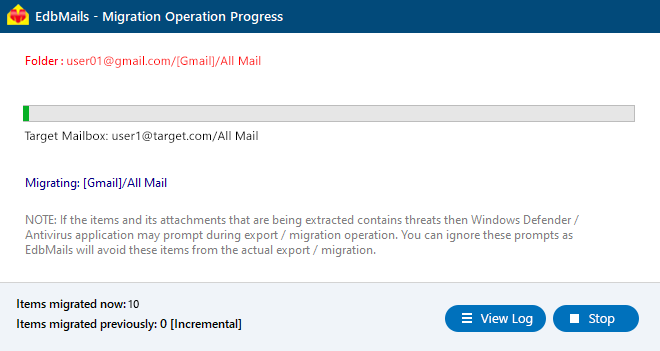
- Track the migration progress using the progress bar. Once the migration is complete, EdbMails prompts you to review the migration status. Click the ‘View Logs’ button to access the migration report. Also, log in to your target Exchange server and verify the items
- Click the 'Start Migration’ button to initiate the migration process.
G Suite to Exchange Post-Migration Tasks
After completing the migration from Google Workspace (G Suite) to Microsoft Exchange using EdbMails, perform the following tasks to finalize the migration and ensure a smooth transition for users:
1. Update DNS Records (MX Records)
- Change the MX records of your domain to point to the new Exchange server.
- Configure the Autodiscover record to allow Outlook clients to automatically connect to the migrated mailboxes.
- This ensures all incoming emails are delivered to the new Exchange server.
2. Create New Outlook Profiles
- Remove any previous instances of the migrated email accounts in Outlook to avoid conflicts
- Configure and recreate Outlook profiles for each user in your domain to connect to the new Exchange mailboxes.
Benefits of Using EdbMails for G Suite to Exchange Migration
- Complete Mailbox Migration: Transfer emails, attachments, contacts, and calendar items from G Suite to Exchange while preserving the original folder hierarchy and metadata.
- Secure API-Based Access: Uses Service Account with domain-wide delegation to access G Suite securely without requiring individual user passwords.
- Bulk Mailbox Migration: Transfers only newly added or modified items in subsequent migration runs, preventing duplicate data and enabling staged migration.
- Bulk Mailbox Migration: Supports migrating multiple G Suite mailboxes in a single project, saving time for large organizations.
- Incremental Migration: Only newly arrived or modified items are migrated in subsequent runs, preventing duplication and allowing staged migrations.
- Selective Data Migration: Apply filters by date range, folder, or email type to migrate only the required items, optimizing bandwidth and reducing migration time.
- Flexible Exchange Support: Supports both Exchange On-Premises and Hybrid Exchange environments, ensuring seamless compatibility.
- Real-Time Migration Monitoring: Track migration progress with live status updates and detailed reports for better visibility and control.
- Minimal Downtime: Users can continue working in G Suite during migration, ensuring uninterrupted business operations.
- User-Friendly Interface: Intuitive step-by-step interface makes it easy for administrators to configure and execute migrations without technical complexity.

