Microsoft Teams Backup guide
Microsoft Teams has become essential for collaboration in modern workplaces, bringing together messaging, meetings, file sharing, and team channels into one unified platform. As organizations rely more on Teams for daily communication and collaboration, the volume of important data grows. Yet, default retention policies may fall short when it comes to ensuring long-term data protection and meeting business continuity, compliance, or recovery requirements.
EdbMails Microsoft Teams Backup provides a reliable solution to safeguard your Teams data, including chats, shared files, meetings, and channels. With features like automated scheduling, selective backups, and easy restoration, EdbMails ensures that your data is always protected and easily recoverable.

In this guide, you'll learn how to use EdbMails to back up your Microsoft Teams environment effectively, ensuring that your essential collaboration data remains secure and accessible whenever you need it.
Prerequisites to backup Microsoft Teams
- Ensure your computer or external drive has sufficient free storage space to store the Microsoft teams backup data.
- Grant admin access to each Team site. You can choose to let EdbMails automatically grant admin access through the SharePoint login window. However, if you prefer to grant admin access manually, refer to the link below
Steps to add Global admin as a member of each Team site on the source server
- A stable internet connection is required throughout the backup process.
- The Office 365 tenant should be active and accessible.
Step by Step Guide for Microsoft Teams Backup
Step 1: Download and install EdbMails Microsoft teams backup software
- Download and install the EdbMails application on any computer with Windows OS.

- Enter your email address and password to log in. If you don’t have an account, click ‘Start Your Free Trial’ to explore the features.

- Select ‘Backup SharePoint Sites’.

- Select ‘SharePoint OneDrive Backup’ as backup option.

- You can either use the default job name or click ‘New Job’ to assign a custom job name for better tracking and management.
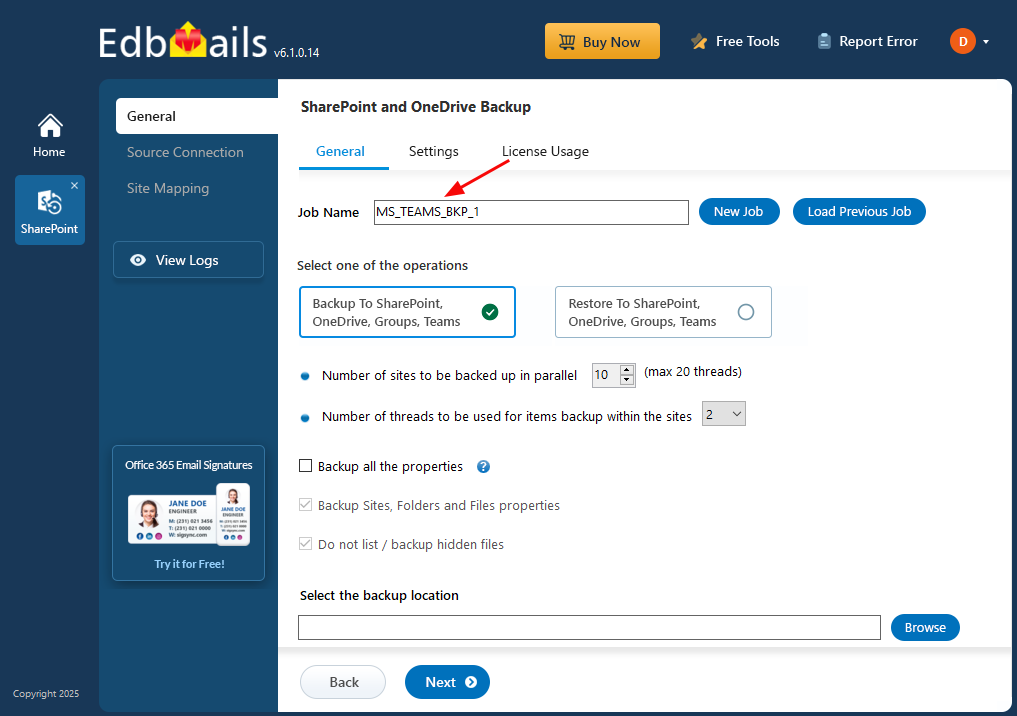
- Click ‘Browse’ to set a location to store backup file.

- Select the location to store the backup data.

- Click the ‘Next’ button to continue.

- Download and install the EdbMails application on any computer with Windows OS.
Step 2: Connect to SharePoint Online and OneDrive Source server
- Enter the source SharePoint server url, admin center url, Office 365 Global admin account email address and password.
- Then, click the ‘Grant Required Permissions’ button.

- Click the option ‘Grant permissions to selected OneDrive sites’.
- Choose either ‘All Sites (Members)’ or ‘Only selected Sites (Members)’ based on your preference.
- Click on ‘Click Here To Grant Admin Access Automatically’.

- A new window will pop up in your taskbar – it's a PowerShell screen that will guide you to log in with your Global Admin credentials on the familiar Microsoft sign-in page.
Note: Keep an eye on the taskbar as, you might be asked to log in several times during this process.

- Select the sites from the list to manage their permissions, then click 'Continue'.

- When you see the PowerShell icon pop up in your taskbar, click it. This will open the Microsoft sign-in page where you can log in with your Global Admin account and start the migration.
- After signing in, you’ll see the progress of admin access being granted to the selected OneDrive sites.

- After the permissions are successfully applied to your selected sites, a confirmation message will appear.

- To manually set up admin access, please refer the information available at the link below.
Steps to Grant admin access to all OneDrive for business site collections on the source server
- Select the method for the secure OAuth 2.0 based modern authentication and click on ‘Login’.

- Enter the password to login to your Global admin account.

- After logging in, select your preferred method to load SharePoint sites. EdbMails automatically lists up to 100 sites due to Microsoft API limitations. To include more, use the ‘Load Sites using .CSV file’ option, which allows you to import all sites without restriction.

- Select the sites or folders you want to backup and click 'Next'.
- When you click on sub-folders, EdbMails will retrieve the folders automatically.

Step 3: Site Mapping
- Review the selected folders and confirm that the ‘Action’ is set to ‘Backup’. Once verified, click ‘Start Backup’ to initiate the process.

- The backup has started, and you can monitor its progress through the progress bar. Once completed, EdbMails will display a confirmation message. Click ‘View Logs’ to access the detailed backup report.

- Review the selected folders and confirm that the ‘Action’ is set to ‘Backup’. Once verified, click ‘Start Backup’ to initiate the process.
Additional Resources:

