Guide to Restoring Office 365 Groups
Office 365 Groups are essential for team collaboration, providing a centralized platform for emails, calendars, shared files, and conversations. However, there may be times when crucial data is lost, whether due to user errors, system failures, or other unforeseen circumstances. In these cases, restoring Office 365 Groups data becomes vital to ensure that your team can continue working without disruption.
EdbMails Office 365 Groups Restore Tool offers an efficient and secure solution to restore emails, calendar events, files, and group conversations. It empowers you to recover data at both granular and group levels, giving you the flexibility to restore specific items or entire groups with ease. EdbMails’ intuitive interface makes it simple to restore Office 365 Groups data, ensuring minimal downtime and maximum reliability.
This step-by-step guide will walk you through the process of using EdbMails to restore your Office 365 Groups, from selecting the data to initiating the restore. By following these instructions, you can ensure your team’s critical collaboration data is quickly and easily recovered when needed.
Prerequisites to restore Office 365 Groups data
- Get the SharePoint target server URL, Admin center url, Office 365 Admin account, Password.
- Set up the necessary SharePoint sites on the target server. EdbMails can create them automatically to streamline the process, or you can choose to create them manually by following the detailed instructions in the link below.
- Ensure that each SharePoint site on the target server has admin access. EdbMails can automatically assign this access through the SharePoint login window. Alternatively, if you prefer to set it up manually, you can follow the instructions provided in the link below.
Steps to add Global admin as a member of each SharePoint site on the target server.
- Ensure to enable the option to create sites / subsites on your target SharePoint server.
Step by Step Guide for Office 365 Groups Restore
Step 1: Download and install EdbMails Application
- Download and install the EdbMails application on your computer.
- Log in using your registered email address and password, or click 'Start Your Free Trial' to explore the features without setting up an account.
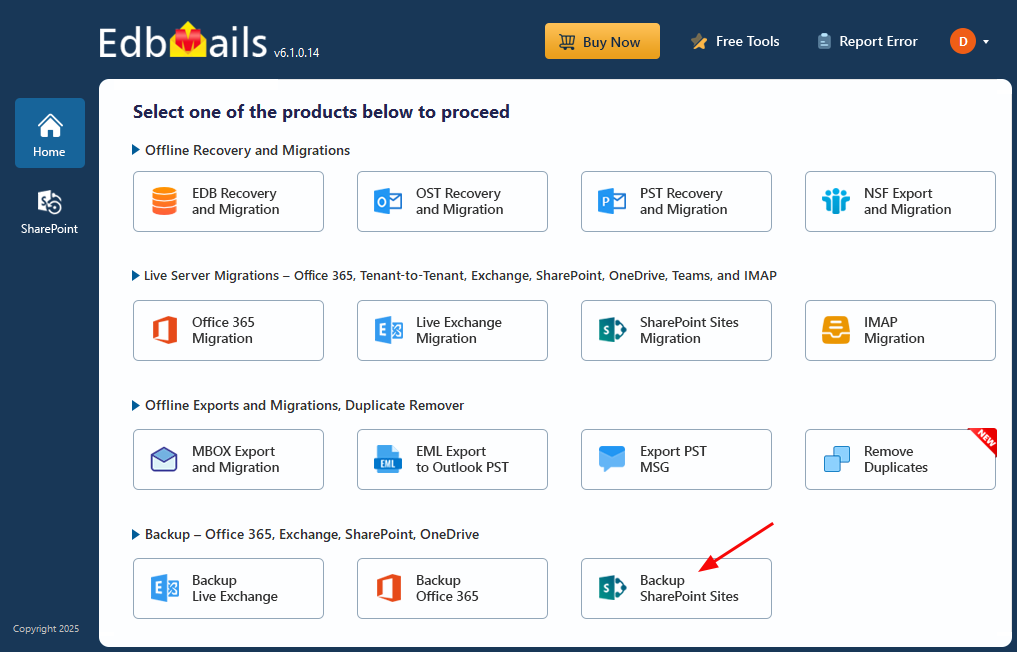
- From the list of the product, select ‘Backup SharePoint Sites’.
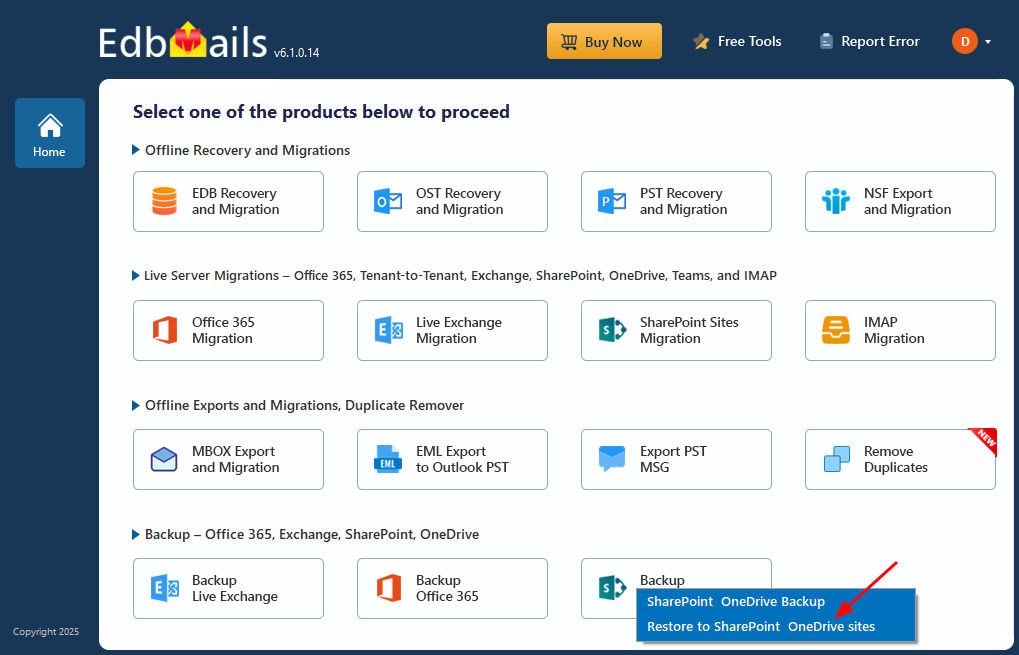
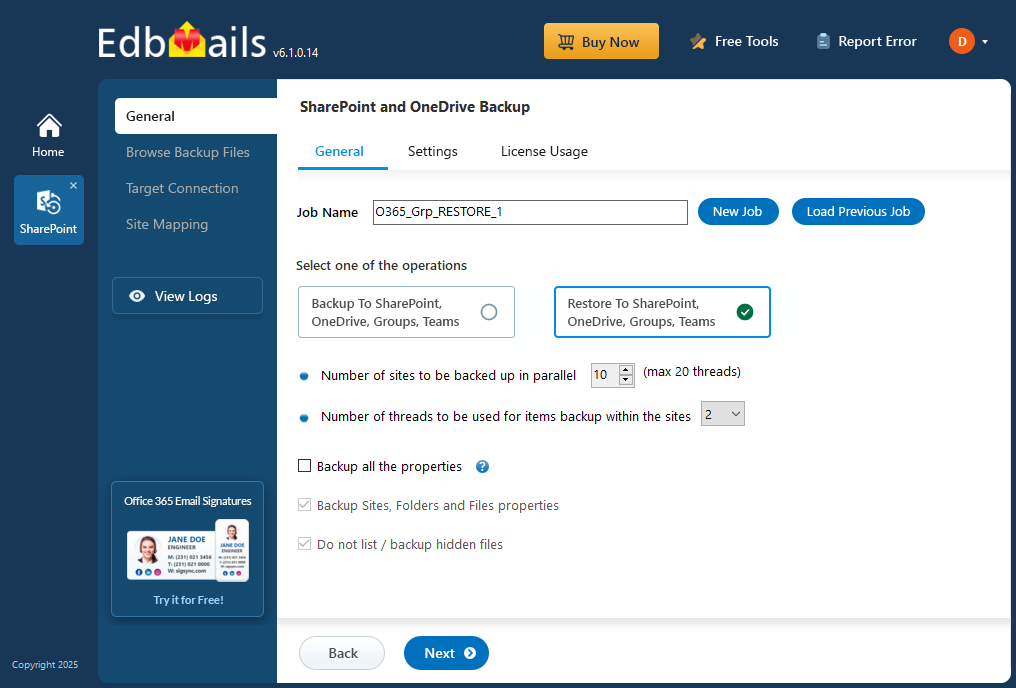
- Select ‘Restore to SharePoint OneDrive Sites’ as the restore option.
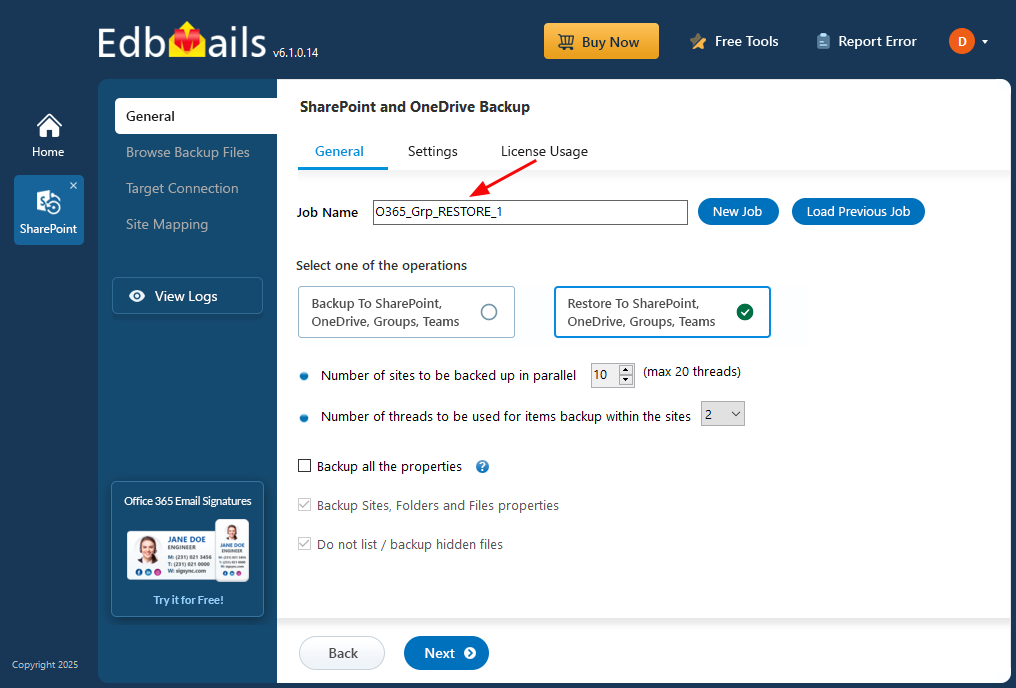
- You can use the default job name or choose ‘New Job’ to set a custom name for better identification. Once done, click ‘Next’ to proceed.
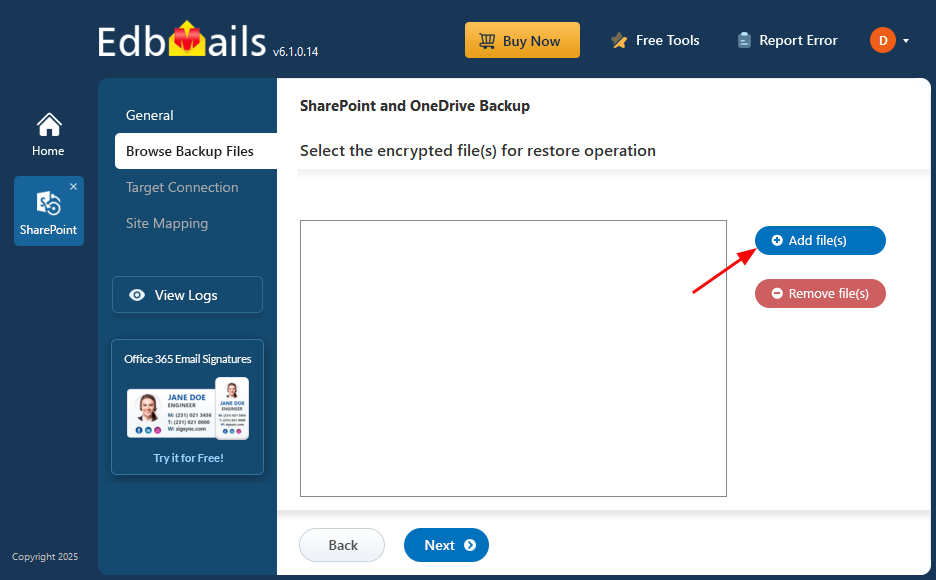
- Click on ‘Add file(s)’.
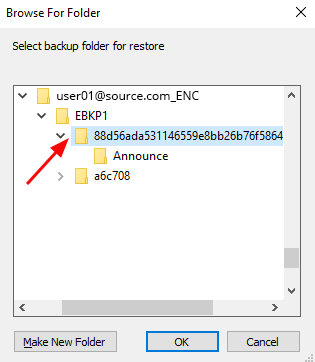
- Select the encrypted files for restoration and click on ‘Next’.
Step 2: Connect to Target SharePoint Online and OneDrive
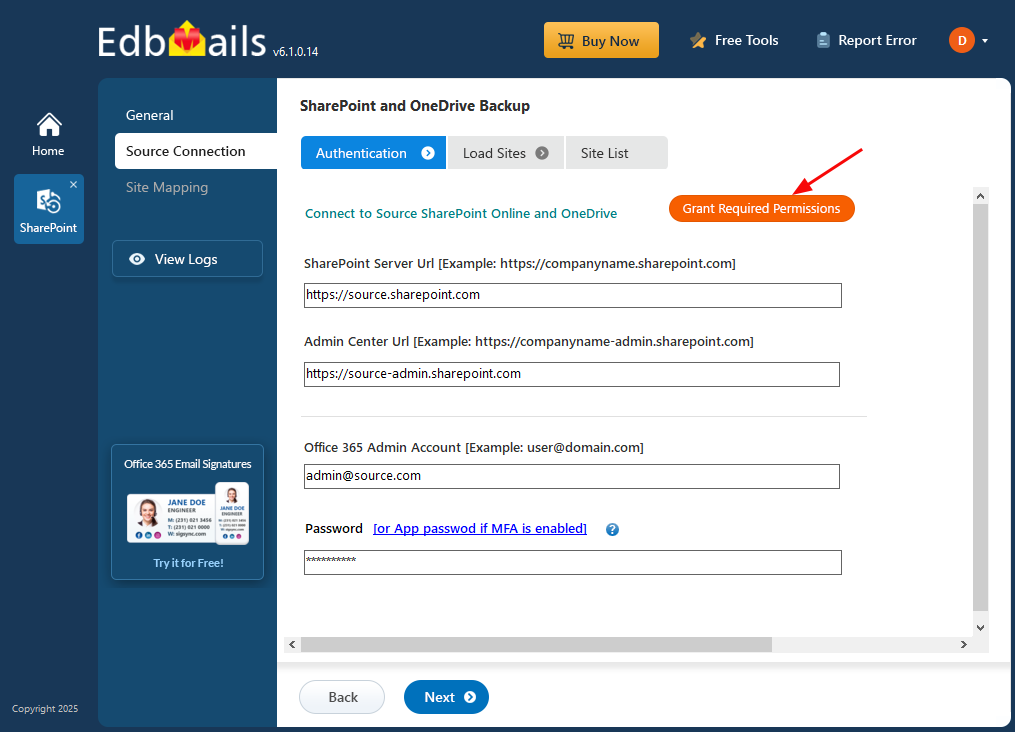
- Enter the target SharePoint server url, admin center url, Office 365 Global admin account email address and password.
- Then, click the ‘Grant Required Permissions’ button.
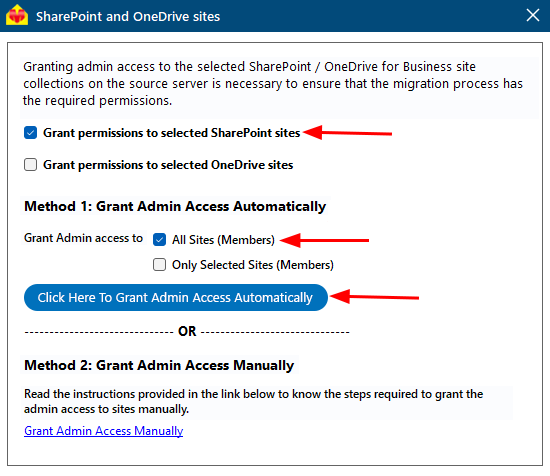
- Click the option ‘Grant permissions to selected SharePoint sites’.
- Choose either ‘All Sites (Members)’ or ‘Only selected Sites (Members)’ based on your preference.
- Click on ‘Click Here To Grant Admin Access Automatically’.
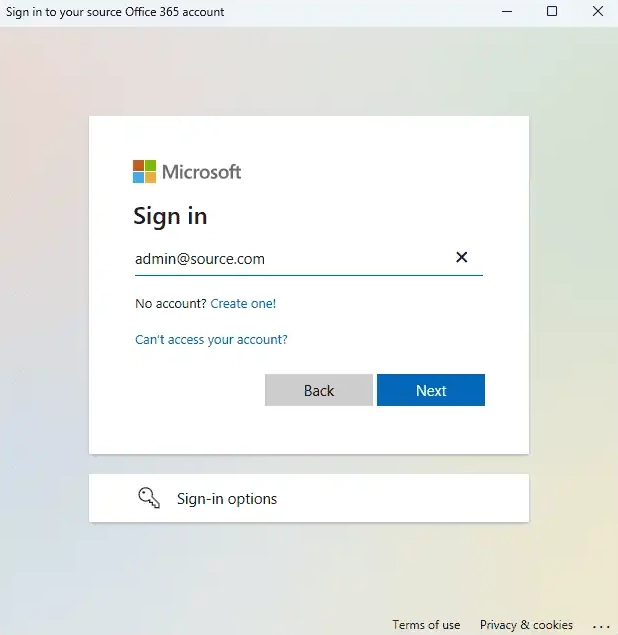
- A new window will pop up in your taskbar – it's a PowerShell screen that will guide you to log in with your Global Admin credentials on the familiar Microsoft sign-in page.
Note: Keep an eye on the taskbar, as you might be prompted to authenticate multiple times during the process.
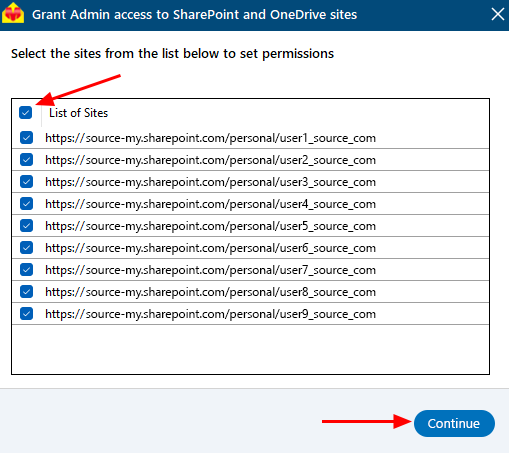
- Choose the specific sites from the list where you want to manage permissions, and then click 'Continue' to move forward.
- When the PowerShell window appears in the taskbar, click on it to sign in using a Global Admin account through the Microsoft Sign-In page. This will initiate the migration process.
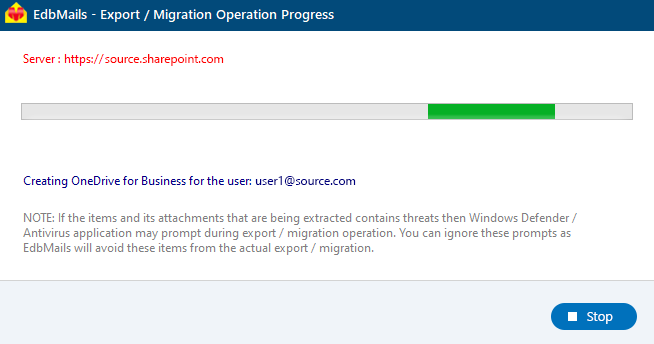
- After signing in, you’ll see the progress of admin access being granted to the selected OneDrive sites.
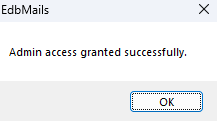
- Once the permissions have been successfully set on the sites you chose, you'll see a message confirming it's done.
- If you want to manually grant the admin access, refer to the link below:
Steps to Grant admin access to all OneDrive for business site collections on the source server
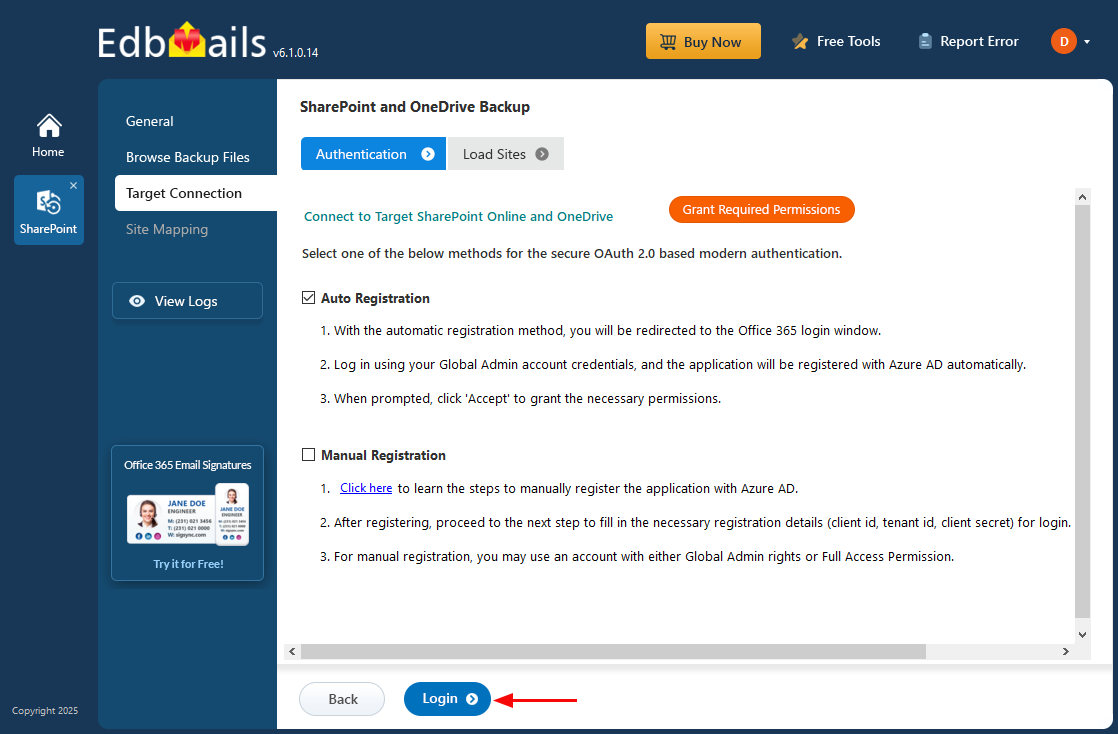
- Select the method for the secure OAuth 2.0 based modern authentication and click on ‘Login’.
- Enter the password to login to your Global admin account.
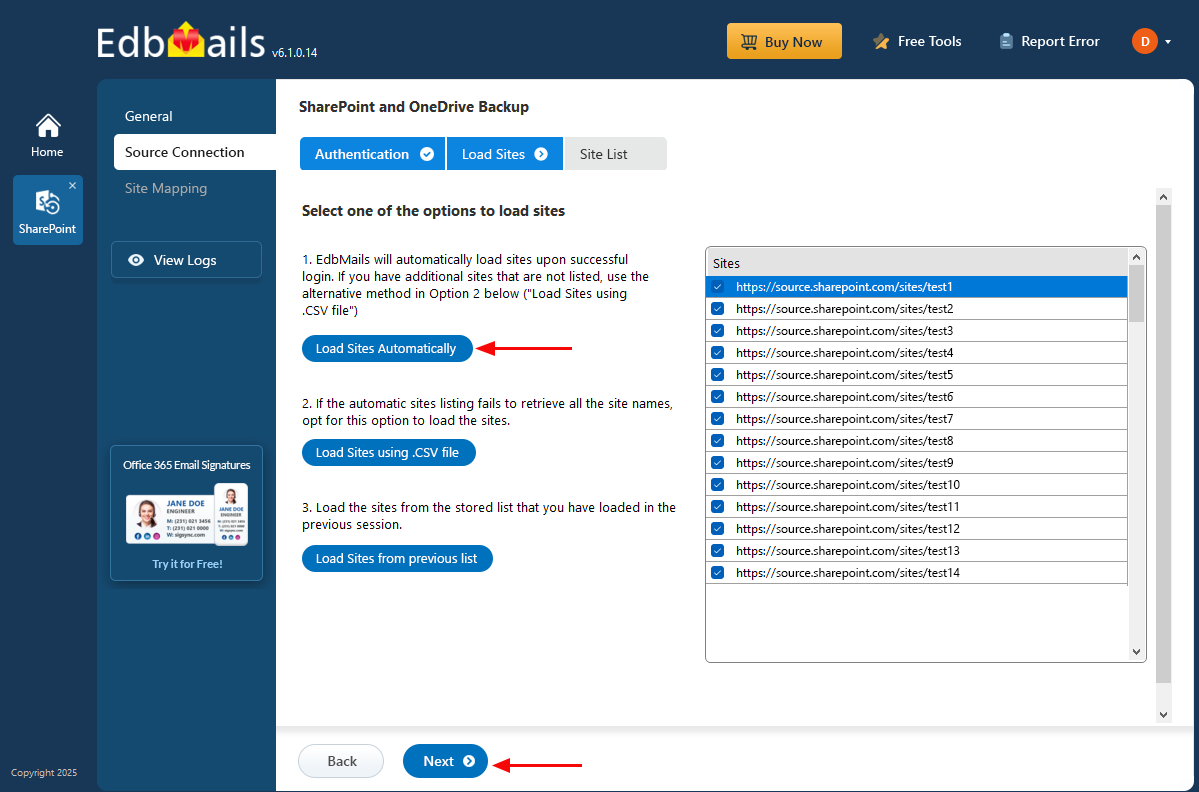
- Once you're logged in, you can let EdbMails automatically load your SharePoint sites—up to 100, as limited by Microsoft’s API. To include more sites beyond this limit, use the ‘Load Sites using .CSV file’ option for a complete list.
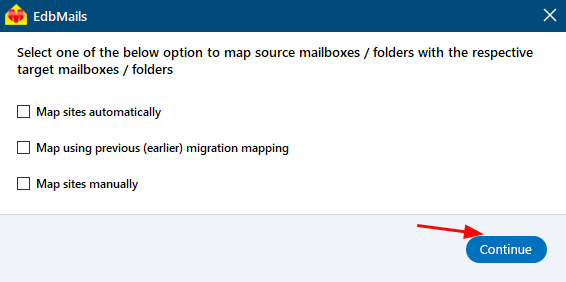
- Select one of the methods to map mailboxes or folders and click ‘Continue’.
Step 3: Site Mapping
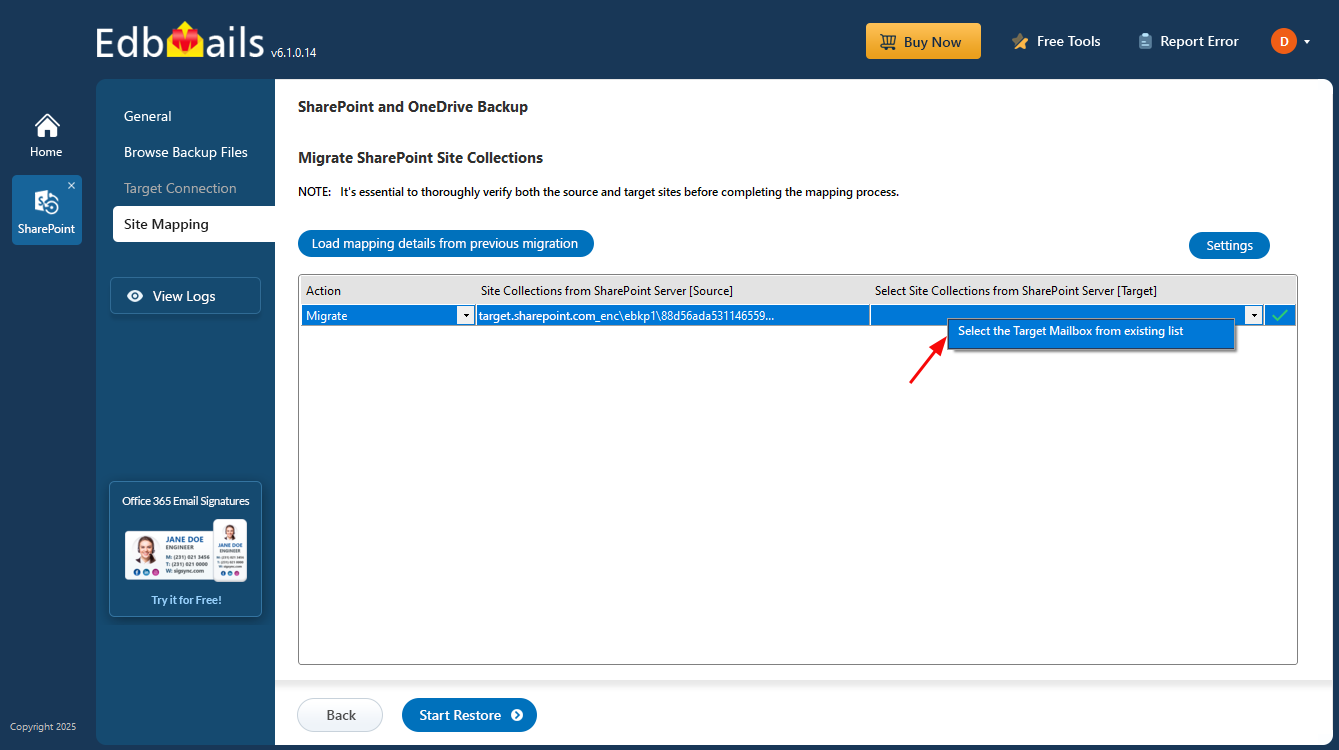
- Click on the target site collection cell and select the desired target mailbox.
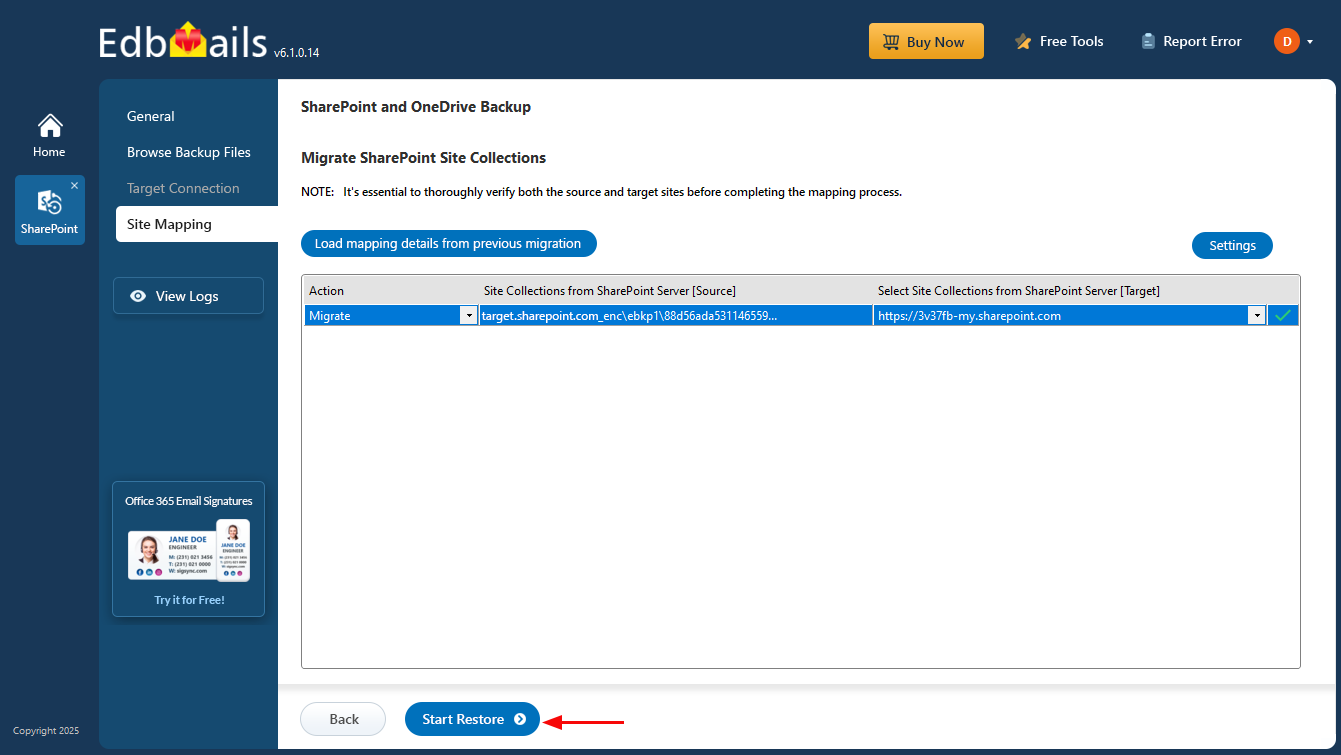
- Click the ‘Start Restore’ to initiate the restore process.
- Once the restore is complete, EdbMails will display a confirmation message. Click ‘View Logs’ to review the restore report. To verify the results, sign in to the target mailbox and check the restored items.


