OneDrive Restore Guide
When files are lost or deleted from OneDrive, having a reliable solution is crucial for quick and secure recovery. Data loss can happen for various reasons, such as accidental deletion, corruption, or syncing issues. Without the right tool, retrieving important files can be a complex task, especially if backup or previous versions aren't accessible.
EdbMails OneDrive Restore tool is designed to address this challenge. It enables the recovery of lost files, folders, or entire accounts from OneDrive, restoring your data to its original state and minimizing the risk of further issues.

With cloud storage becoming essential for both personal and business use, it's increasingly important to have a dependable tool to restore OneDrive data. EdbMails ensures continuity by allowing recovery from both personal and business accounts, helping you avoid disruptions.
To get started, we’ve provided a step-by-step guide that will walk you through the process of restoring your OneDrive data with EdbMails, ensuring a smooth and efficient recovery.
Prerequisites to restore OneDrive data
- Get the SharePoint target server URL, Admin center url, Office 365 Admin account, Password.
- Create the OneDrive sites on the target server. You can let EdbMails set them up automatically, or if you prefer, you can follow the step-by-step instructions in the link below to set them up manually.
Click here to view the steps for creating OneDrive sites on the target server. For detailed instructions, refer to the ‘Commands to Create OneDrive Sites on the Target Server’ section.
- Grant the admin account access to each user's OneDrive on the target server. You can have EdbMails manage this automatically, or if you prefer, follow the manual steps provided in the link below.
Steps to Grant admin access to all OneDrive for business site collections on the target server
Step-by-step guide to restore OneDrive data using the EdbMails
Step 1: Download and install EdbMails Application
- Download and install the EdbMails application on your computer

- Log in with your registered email address and password, or select the 'Start Your Free Trial' to get started.

- Select ‘Backup SharePoint Sites’.

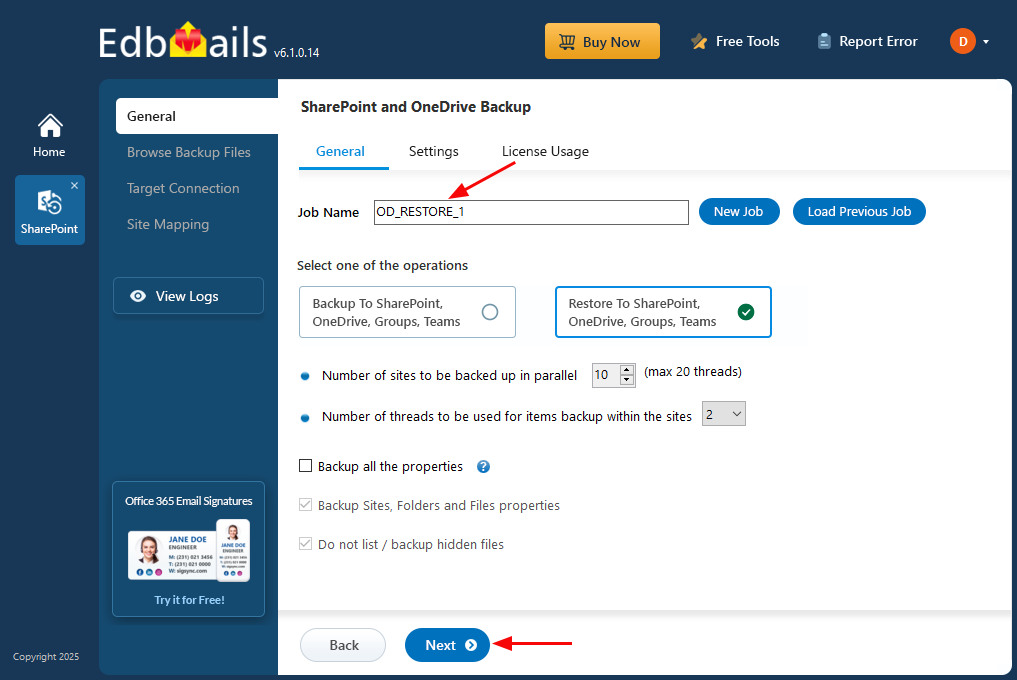
- Select the option ‘Restore to SharePoint OneDrive Sites’.

- You can either use the default job name or click the ‘New Job’ button to create a custom job name for your task, then click ‘Next’ to continue.
- Click on ‘Add file(s)’

- Select the encrypted files for restoration and click on ‘Next’.

- Download and install the EdbMails application on your computer
Step 2: Connect to Target SharePoint Online and OneDrive
- Enter the target SharePoint server url, admin center url, Office 365 Global admin account email address and password.
- Then, click the ‘Grant Required Permissions’ button.

- Click the option ‘Grant permissions to selected OneDrive sites’.
- Choose either ‘All Sites (Members)’ or ‘Only selected Sites (Members)’ based on your preference.
- Click on ‘Click Here To Grant Admin Access Automatically’.

- A PowerShell window will appear in the taskbar, click on it to sign in using your Global Admin account through the Microsoft authentication page.
Note:Keep an eye on the taskbar, as you might be prompted to authenticate multiple times during the process.

- From the list, select the specific sites where you want to set permissions, then click ‘Continue’ to proceed.

- When the PowerShell window appears in the taskbar, click it to open the Microsoft Sign-In page. Sign in with a Global Admin account to begin the migration process.
- After signing in, you’ll see the progress of admin access being granted to the selected OneDrive sites.

- After permissions are successfully granted to the selected sites, a confirmation message will be displayed.

- If you want to manually grant the admin access, refer to the link below:
Steps to Grant admin access to all OneDrive for business site collections on the source server
- Select the secure OAuth 2.0-based modern authentication method, then click on ‘Login’to proceed.

- Enter the password to login to your Global admin account.

- Select the required sites to set the permissions from the list, then click ‘Continue’.

- Select one of the methods to map sites or folders and click ‘Continue’.

Step 3: Site Mapping
- Click on the target site collection cell and select the desired target sites.

- Click the ‘Start Restore’ to initiate the restore process.

- When the restore is complete, EdbMails will show a confirmation message. Click ‘View Logs’ to see the restore operation report. To make sure everything is in place, sign in to the target sites and check the restored items.

- Click on the target site collection cell and select the desired target sites.
Additional Resources:

