Migrate MBOX to Exchange migration step by step guide
MBOX is a widely used email storage format supported by clients like Thunderbird, Google Takeout, and Apple Mail. However, as businesses grow, migrating to Microsoft Exchange becomes vital for enhanced security, centralized management, and seamless integration with services like Outlook and Office 365. Unlike MBOX files that store data locally, Exchange offers centralized email storage and, when properly configured, access to mailboxes across devices through Outlook on the Web or mobile clients.

Microsoft Exchange provides advanced capabilities such as data loss prevention, email retention policies, and built-in threat protection, making it a trusted platform for handling sensitive business communications. Migrating to Exchange not only improves productivity but also ensures compliance and security across the organization’s email infrastructure.
EdbMails MBOX to Exchange migration tool offers a simple, direct, and reliable solution for moving MBOX data to both on-premises and hosted Exchange environments. The tool preserves all email properties, attachments, and folder structures, ensuring a smooth transition without data loss. Users can selectively migrate specific emails using advanced filters like date range, sender, or subject. With its intuitive interface and robust security standards, EdbMails makes the migration process easy for both technical and non-technical users.
Prerequisites to migrate MBOX to live Exchange server
- Create mailboxes on the Exchange server
Before migrating, it's essential to ensure that mailboxes are properly created on the target server. You have the option to allow EdbMails to automatically create mailboxes on the target server. Alternatively, if you prefer to manually create mailboxes, simply follow the detailed instructions in the link below.
See how to create mailboxes in Exchange server
If you want to migrate to the Exchange Public folder, refer to the link below to create a public folder on Exchange server and assign the required permissions to the admin user.
Steps to create Public folder in Exchange server and assign permission to the admin user
- Configure the throttling and message-size limits
To ensure a successful MBOX to Exchange migration, it's crucial to consider throttling policies. Since migration activities can be resource-intensive, Microsoft may impose throttling to maintain server performance and stability. By properly configuring throttling settings, you can ensure a smooth and uninterrupted data transfer throughout the migration process.
Steps to set up custom EWS throttling policies on Exchange server
To successfully migrate larger emails and attachments without encountering delivery errors, timeouts, or performance issues, set the message size limit to the maximum value (150MB).
Steps to set up change message size limits on Exchange server
- Create mailboxes on the Exchange server
Steps to migrate MBOX to live Exchange server using EdbMails
Step 1: Download and Install the EdbMails application
- Download and install EdbMails MBOX to Live Exchange server tool on your computer running on Windows OS.

- Sign in with your registered email address and password, or select the 'Start Your Free Trial'.

- Download and install EdbMails MBOX to Live Exchange server tool on your computer running on Windows OS.
Step 2: Select MBOX Export and Migration
- Choose ‘MBOX Export and Migration’ from the list of products

- Select ‘MBOX to Live Exchange’

- You can keep the default job name or click ‘New Job’ to change the job name

- Choose ‘MBOX Export and Migration’ from the list of products
Step 3: Add MBOX files
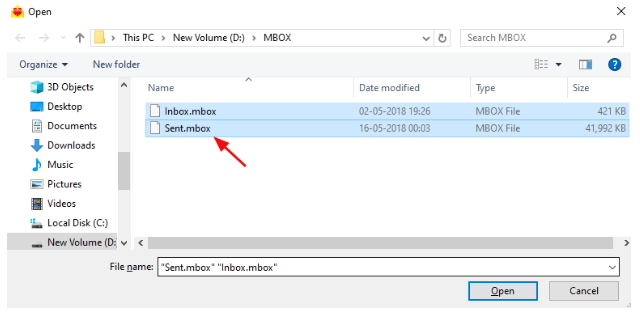
- Click ‘Add file(s)’ button
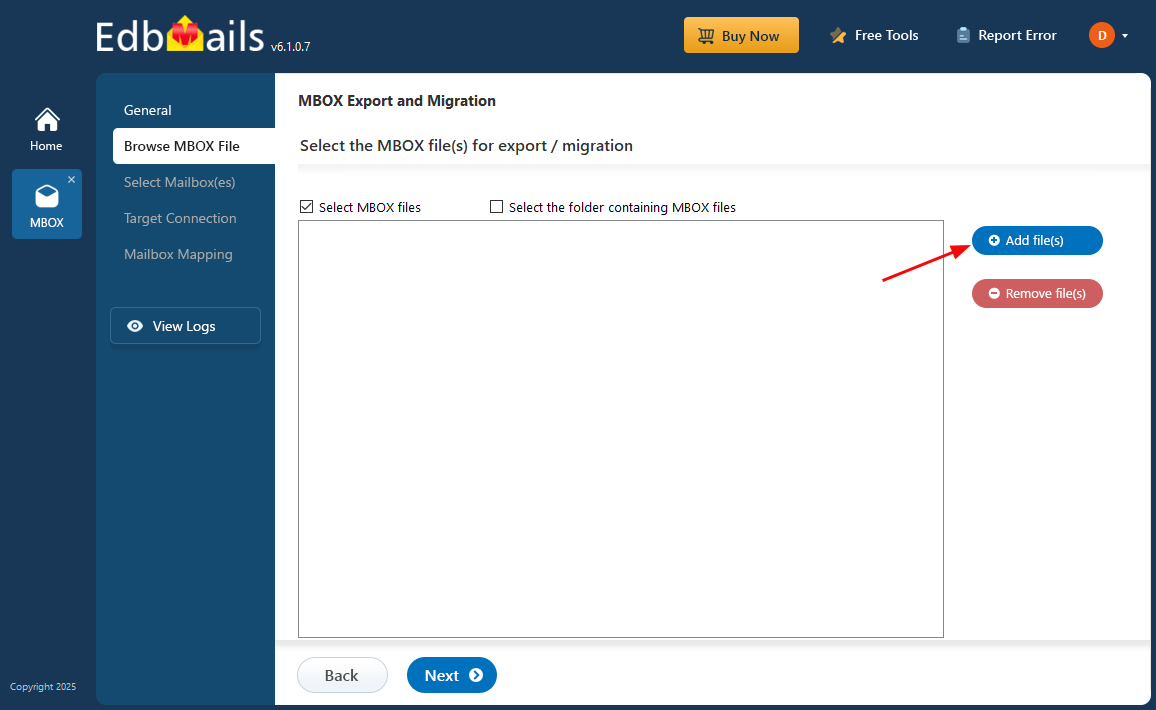
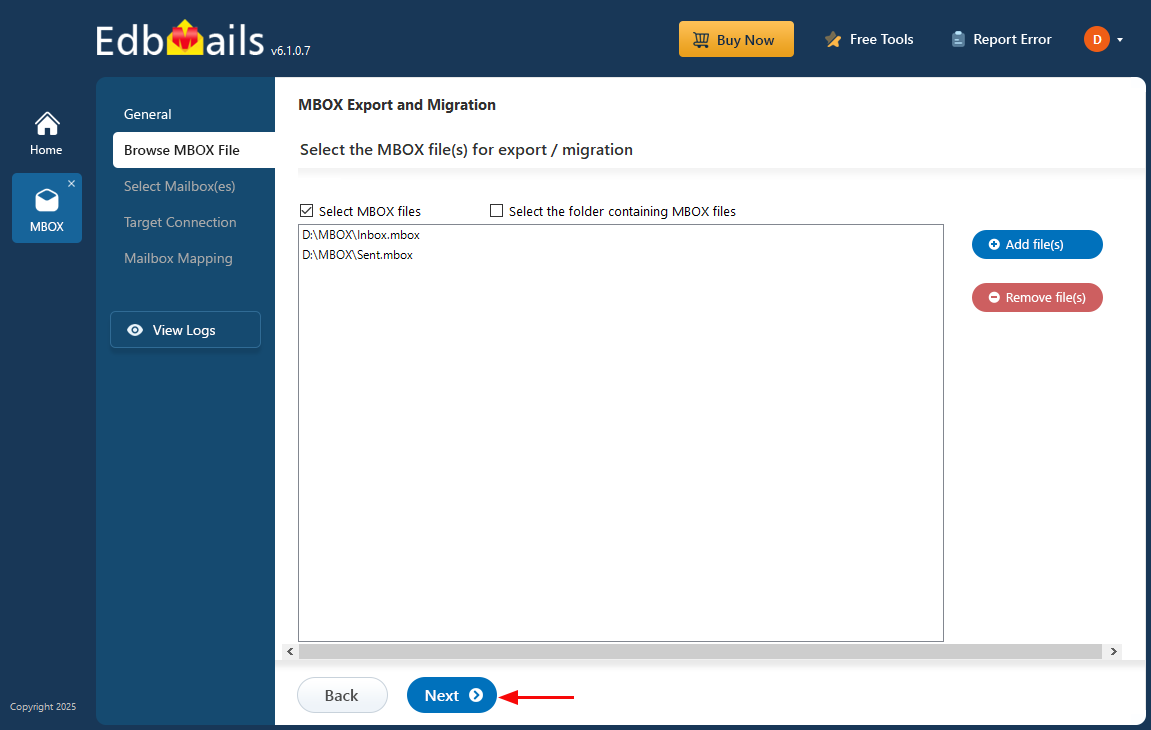
- Select the MBOX file(s). You can also access offline MBOX files from a shared network location, provided that read and write permissions are assigned.
- Click ‘Next’ to continue
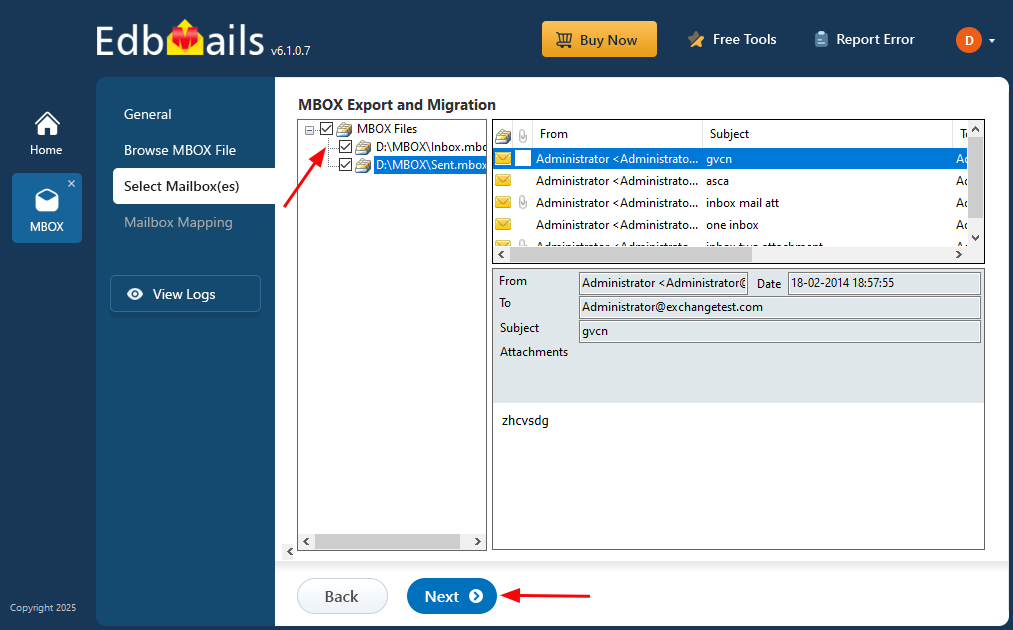
- Choose the mbox files you want to migrate and click 'Next' to continue.
- Click ‘Add file(s)’ button
Step 4: Connect to target exchange server
- Click the 'Add New Connection' button to connect to the target exchange server. To use an existing connection, select it from the list and click 'Connect to Existing' to proceed.

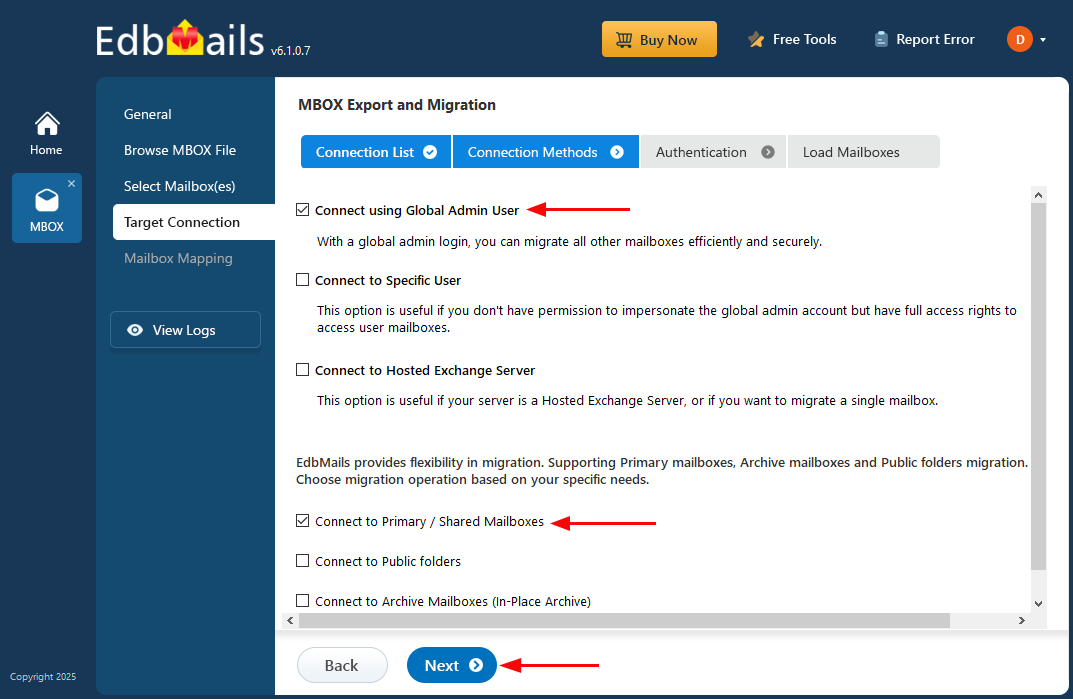
Select the required connection methods and click the ‘Next’ button.
- Various methods to connect to the Exchange server in EdbMails
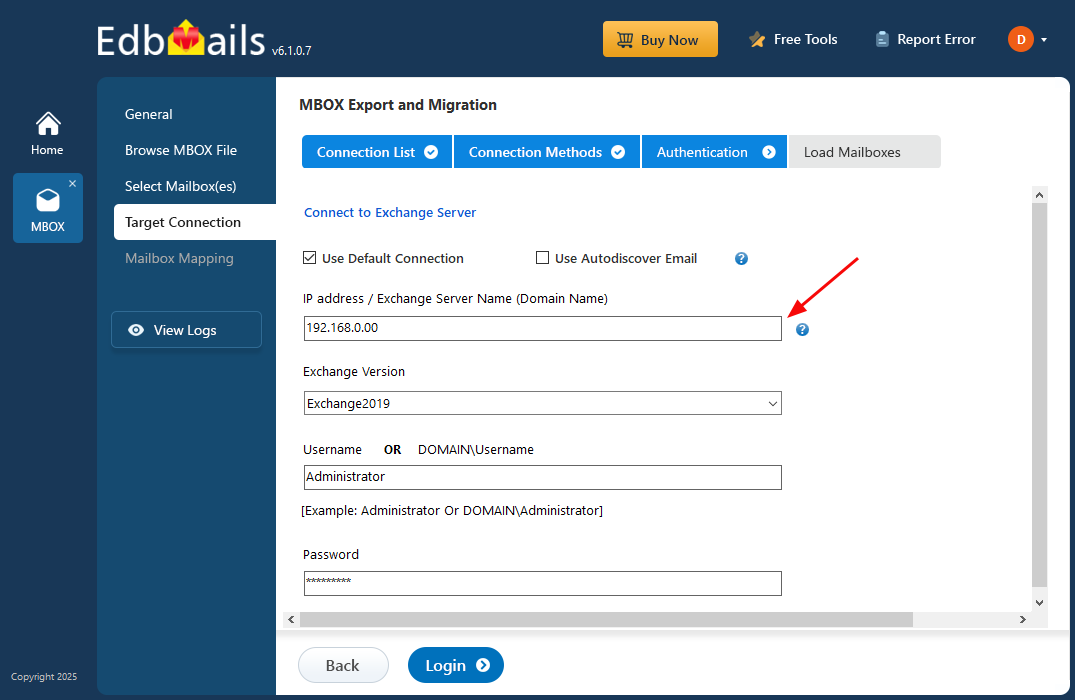
- Enter the details of the target Exchange server and click the ‘Login’ button.
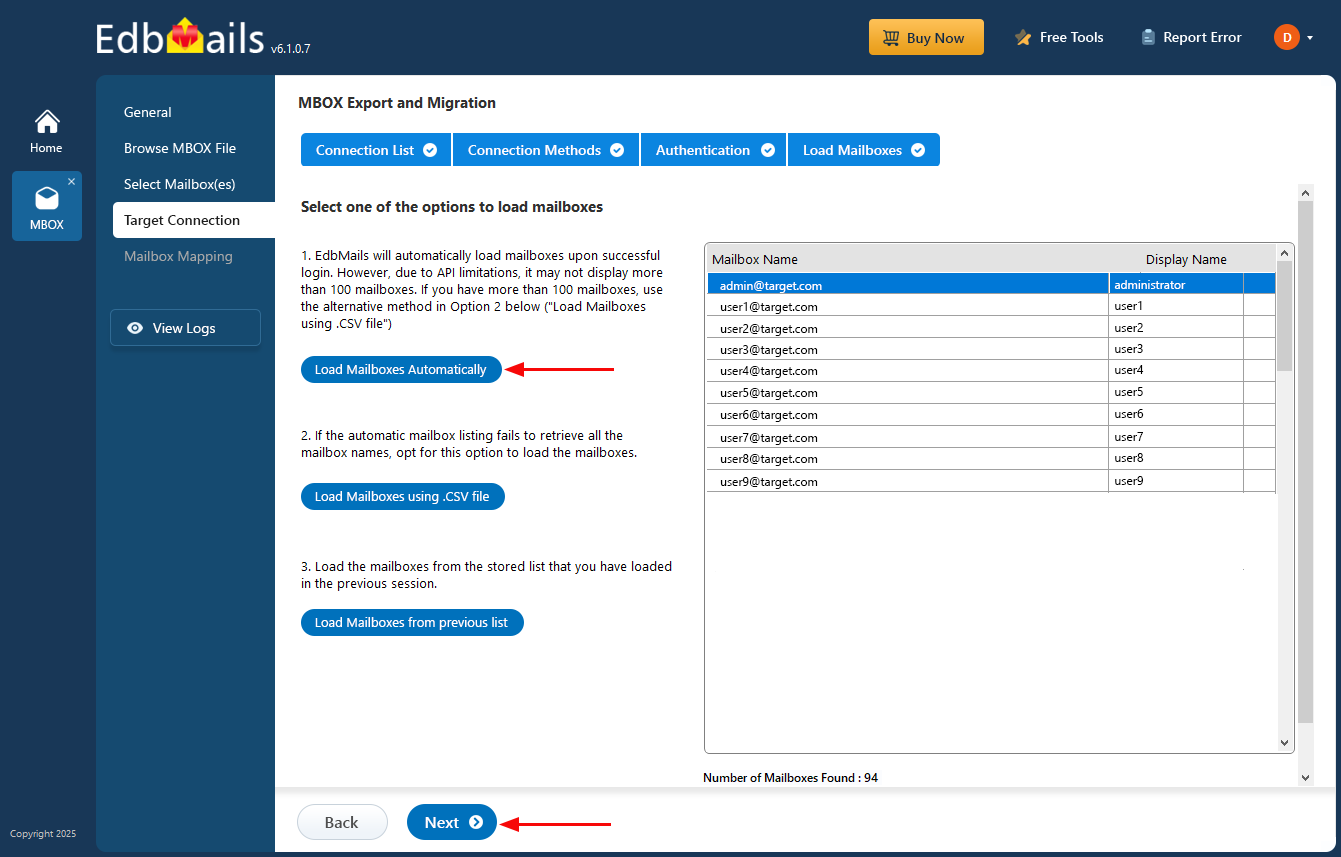
- Select one of the available methods to load the mailboxes for migration and click on ‘Next’
- Click the 'Add New Connection' button to connect to the target exchange server. To use an existing connection, select it from the list and click 'Connect to Existing' to proceed.
Step 5: MBOX to Exchange server mailboxes mapping
- Choose the required mapping option
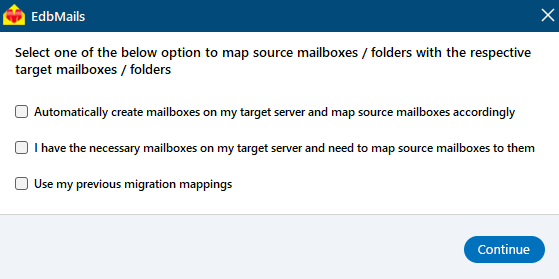
- If EdbMails is installed on your target Exchange server, you can let the software automatically create the required mailboxes.
Discover more about the automated mailbox creation process.
- EdbMails automatically maps mailboxes between the source and the target server servers. You can also manually map mailboxes.
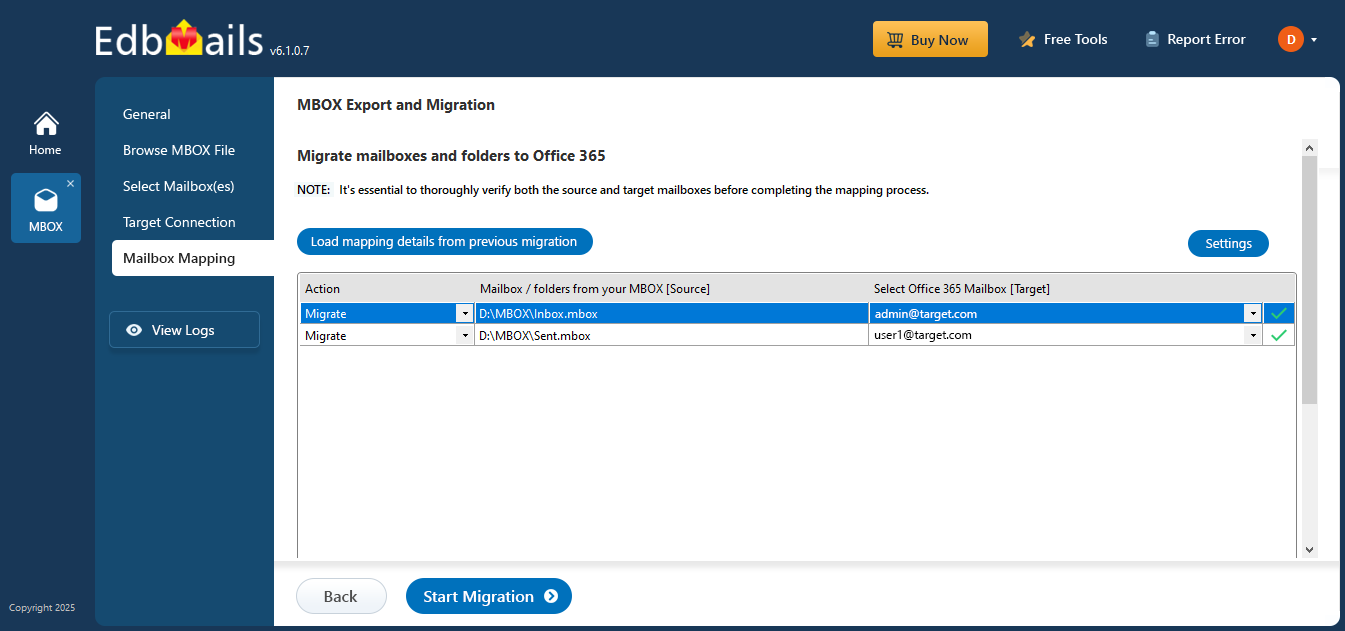
- Choose the required mapping option
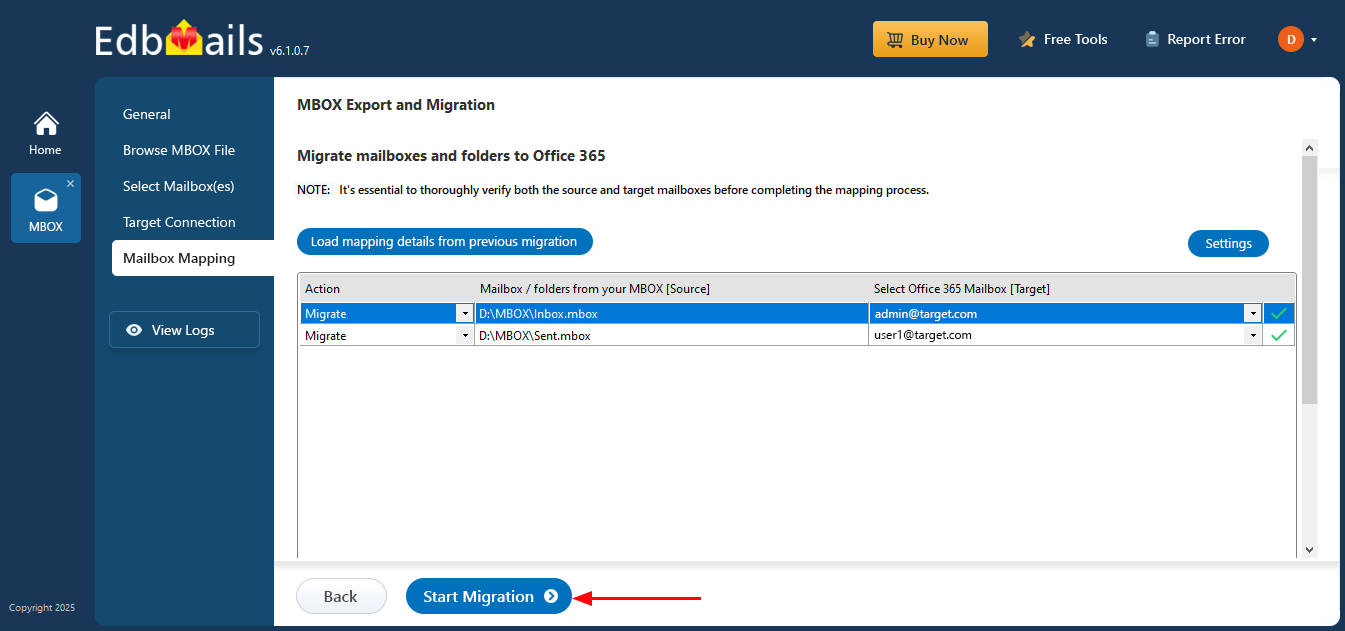
Step 6: MBOX to Live Exchange server migration:
- Check the selected files and ensure the 'Action' is set to 'Migrate'. Next, click 'Start Migration' to begin the migration process.
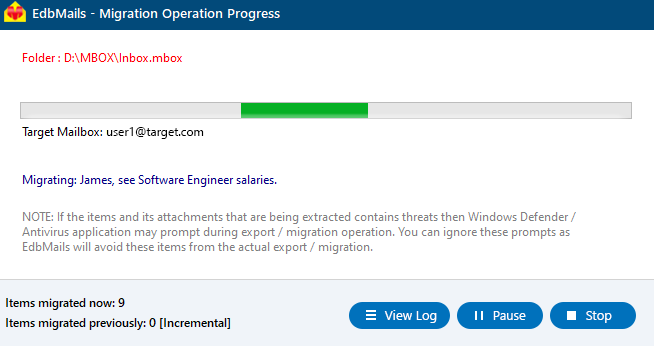
- That’s it! You can track the migration progress in real time and pause or resume it whenever needed. After the migration is complete, a message will appear to review the migration status. Click the ‘View Logs’ button to see the detailed migration report.
- Check the selected files and ensure the 'Action' is set to 'Migrate'. Next, click 'Start Migration' to begin the migration process.
Benefits of using EdbMails to convert MBOX to Live Exchange Server
- Seamless migration of MBOX files to live Exchange Server without data loss.
- Direct migration from MBOX to Exchange, avoiding intermediate steps.
- Preserves emails, attachments, and folder structures during migration.
- Fast and efficient process, without server downtime.
- Supports various MBOX file types from different email clients such as Thunderbird, Entourage, Pocomail, Mulberry, Spicebird, Sylpheed, Apple Mail, and Mozilla Mail and many more.
- User-friendly interface to quickly migrate MBOX files to Exchange server
- Handles large MBOX files without issues.
- Allows selective migration of specific emails or folders.
- Optimized to minimize impact on the Exchange Server.
- Ensures data safety throughout the migration process.

