Remove Duplicate Emails in Outlook
Microsoft Outlook is one of the most widely used email clients, trusted by individuals and organizations for managing emails, contacts, calendars, tasks, and more. However, as Outlook data grows over time, users often face a frustrating issue with duplicate emails, contacts, and calendar items. These duplicate items not only clutter your mailbox but also slow down Outlook’s performance, increase PST/OST file size, and make it harder to locate important messages.
Outlook duplicates may arise for several reasons: improper synchronization with Exchange/IMAP servers, accidental imports from PST/OST/EML files, incorrect rules or filter configurations, or technical issues during backups and migrations. Whatever the cause, removing duplicates manually is tedious and error-prone. This is where the EdbMails Outlook Duplicate Remover Tool comes in handy. It provides a fast, secure, and accurate way to scan Outlook mailboxes, identify duplicates based on customizable criteria, and eliminate them without data loss.
In this guide, we’ll explore everything you need to know about removing duplicate emails in Outlook, including causes, challenges, step-by-step removal, planning, prerequisites, and post-cleanup best practices.
Common Causes of Duplicate Emails in Outlook
EdbMails Outlook Duplicate Remover Tool
Planning to remove duplicate emails in Outlook
Prerequisites Before Removing Outlook Duplicates
Steps to remove duplicate Emails in Outlook using EdbMails
Step 1: Download and Install the EdbMails application
- Download and install the EdbMails application on your computer running on Windows OS.
- Log in using your registered email address and password or choose the 'Start Your Free Trial'.
Step 2: Select Duplicate Remover product
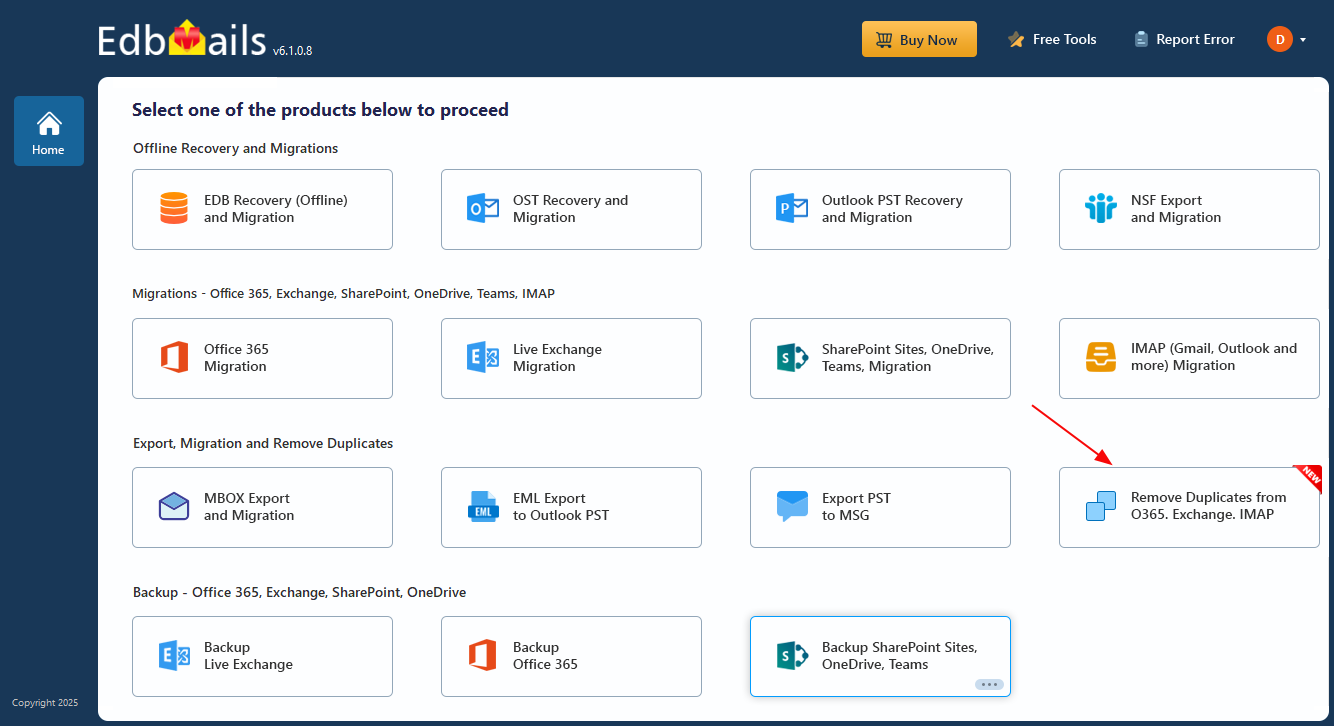
- From the dashboard, choose ‘Remove Duplicates from O365. Exchange. IMAP’.
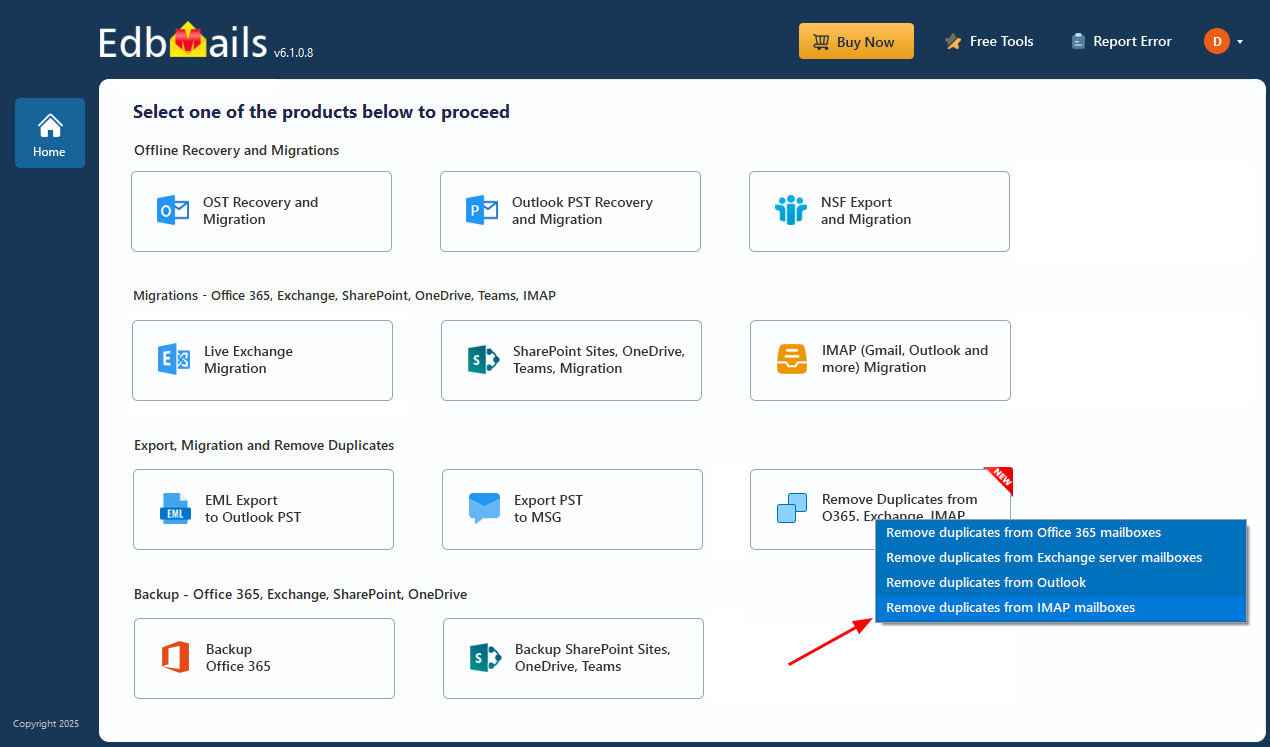
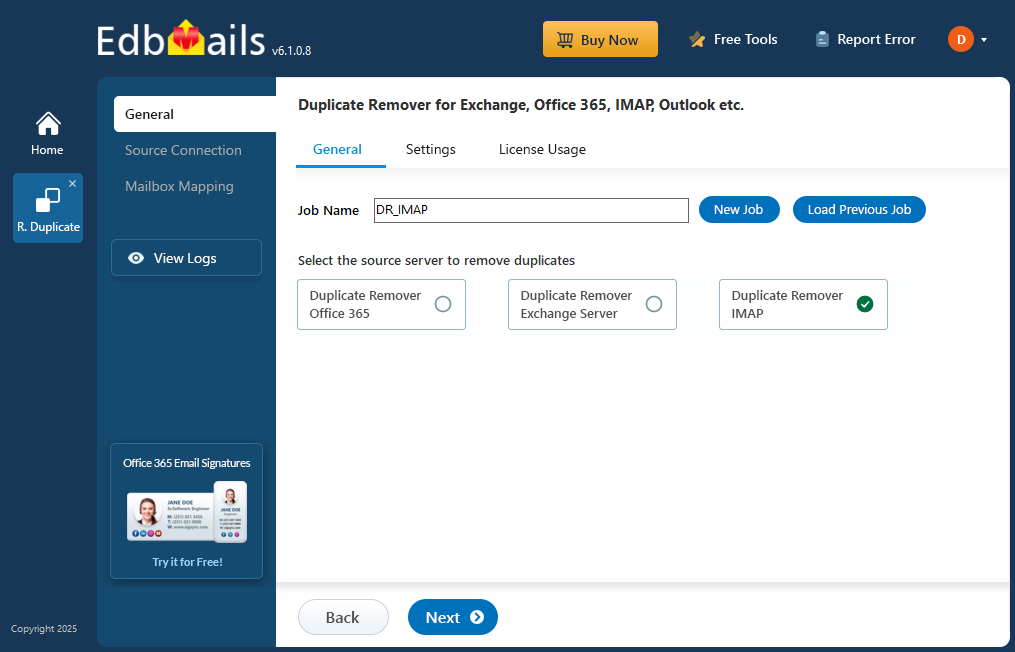
- Choose the option ‘Remove Duplicates from IMAP Mailboxes’ to proceed.
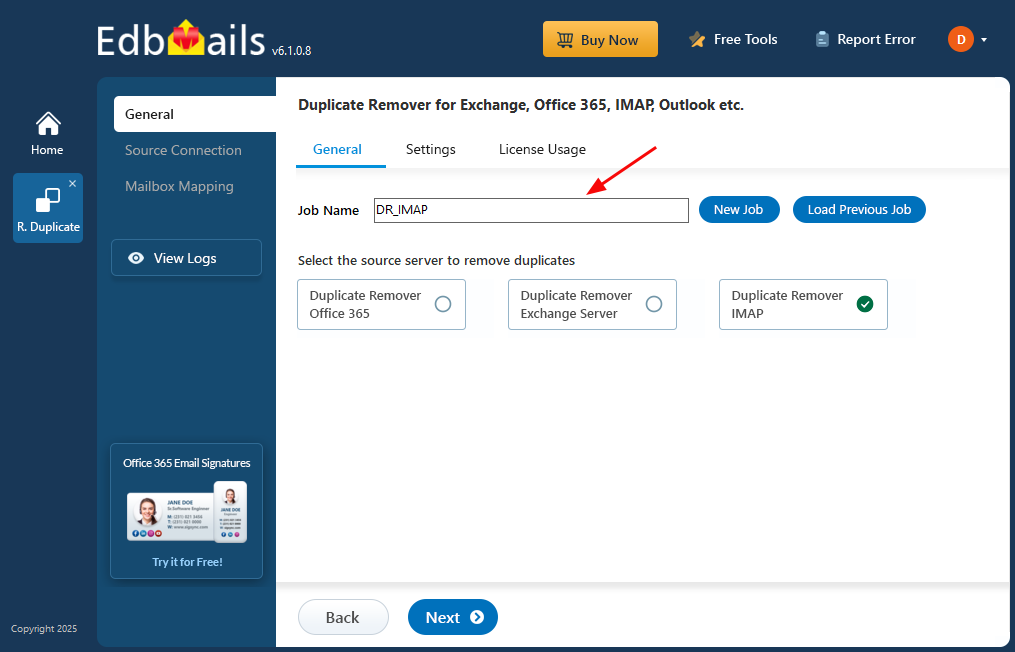
- You can proceed with the default job name or click ‘New Job’ to change.
- EdbMails performs duplicate removal simultaneously on multiple mailboxes, leveraging parallel processing for faster results
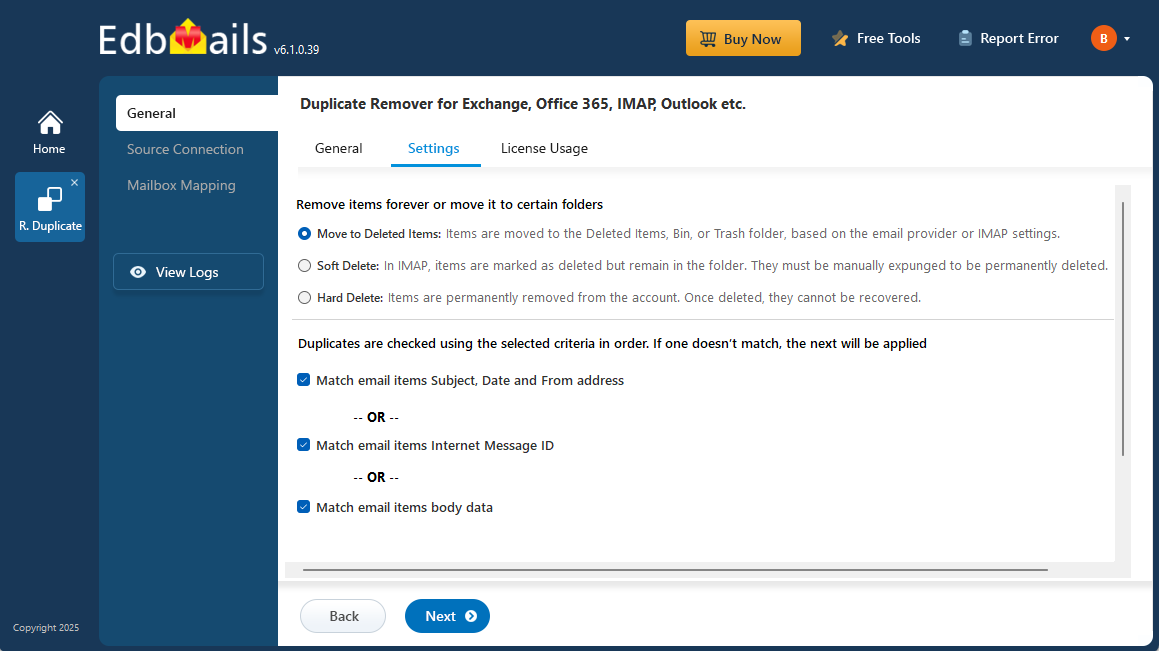
- On the Settings page, choose how duplicates should be handled - move them to Deleted Items, mark as Soft Delete, or permanently Hard Delete.
You can also set matching criteria such as Subject, Date, From address, Body content, or Internet Message ID to detect duplicates accurately.After configuring the options, click “Next” to proceed with the duplicate removal process.
Step 3: Connect Your Outlook IMAP Account
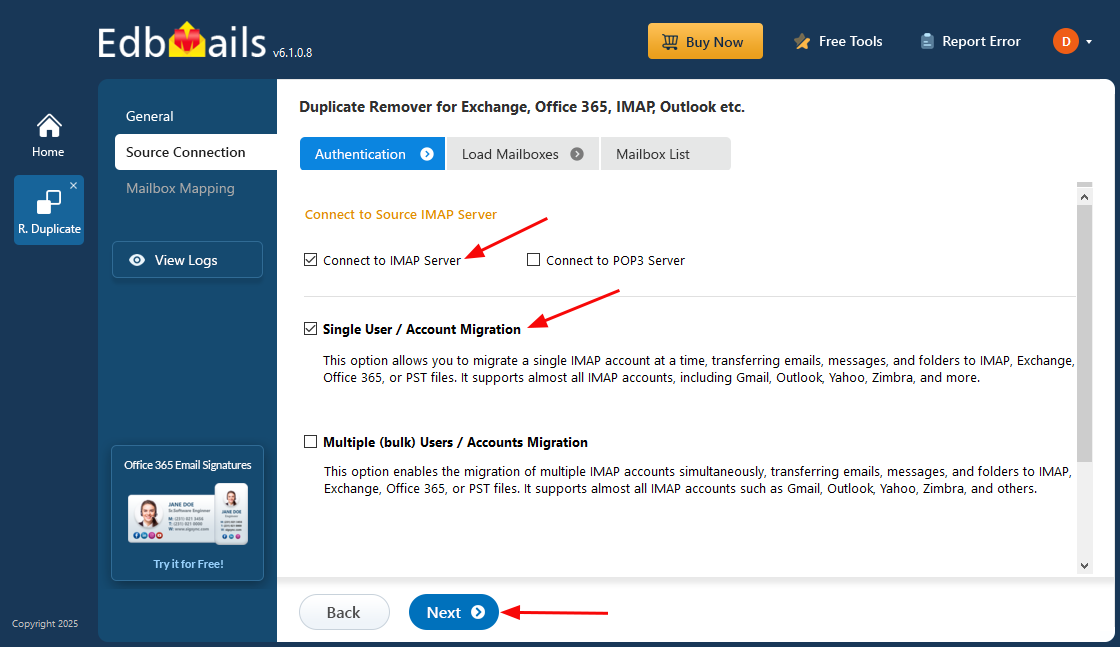
- To remove duplicates from a single user, select ‘Single User / Account Migration’.
- Choose the desired protocol (IMAP or POP3) and click ‘Next’ to continue.
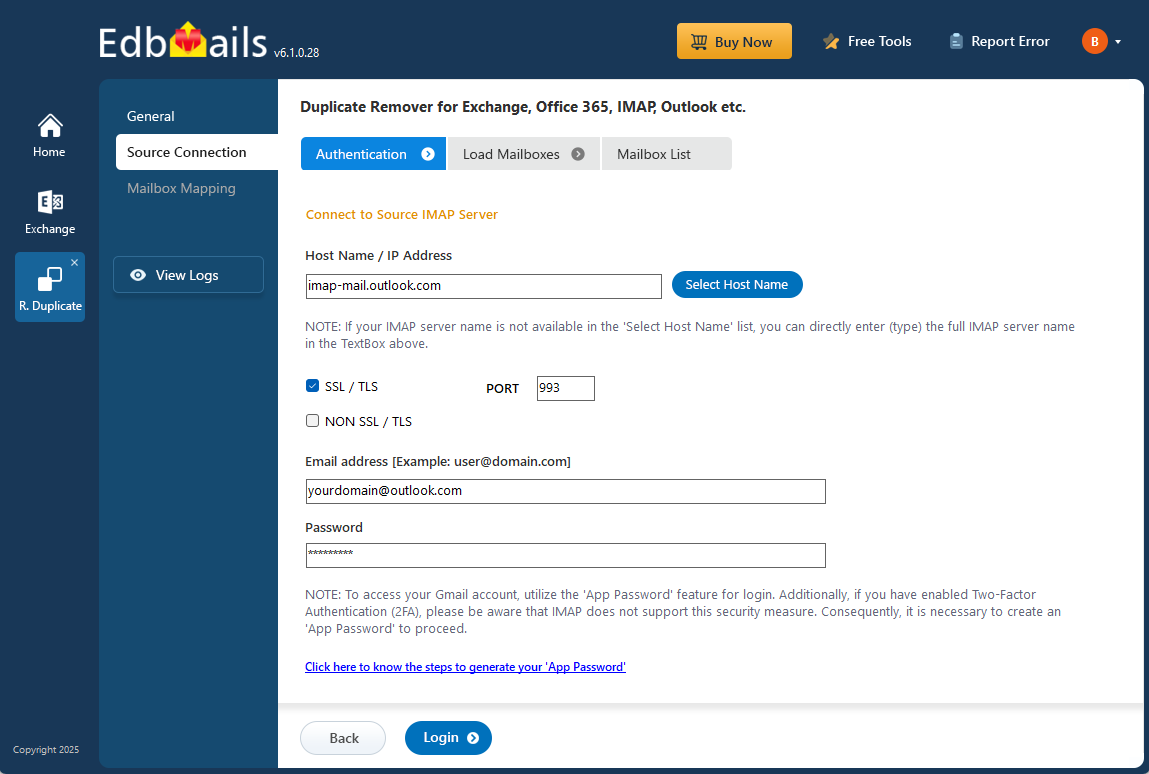
- Select the IMAP hostname (imap-mail.outlook.com) in the list. Next, enter the email address and password of your Outlook, and click ‘Login’.
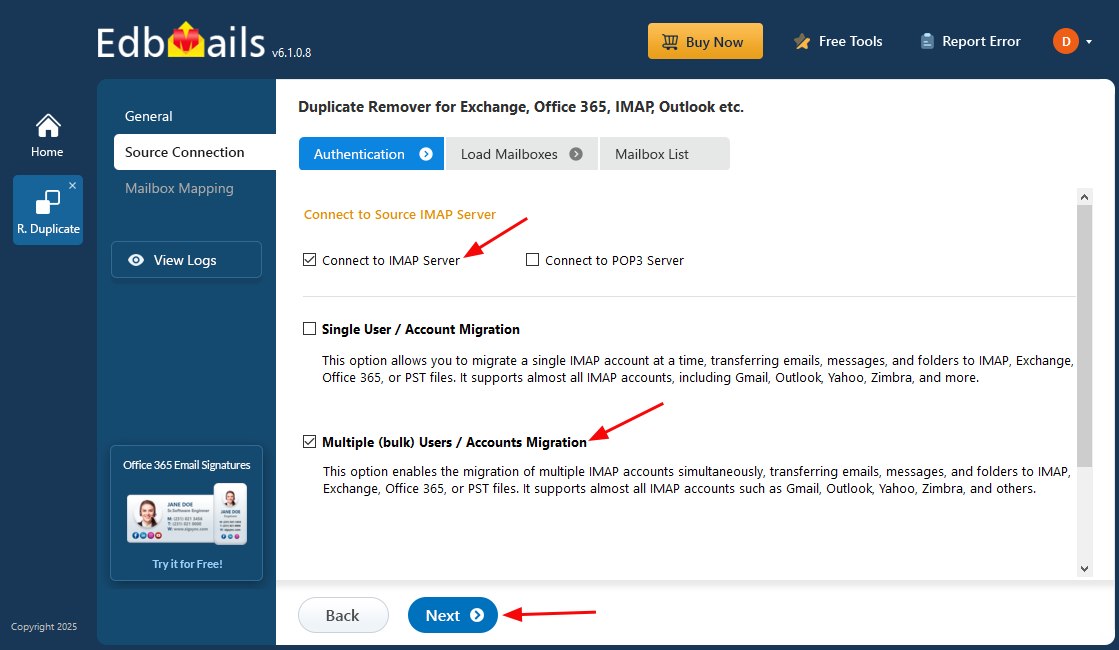
- To connect to multiple Outlook mailboxes, choose the ‘Multiple (Bulk) Users / Accounts Migration’ option and click ‘Next’ to continue.
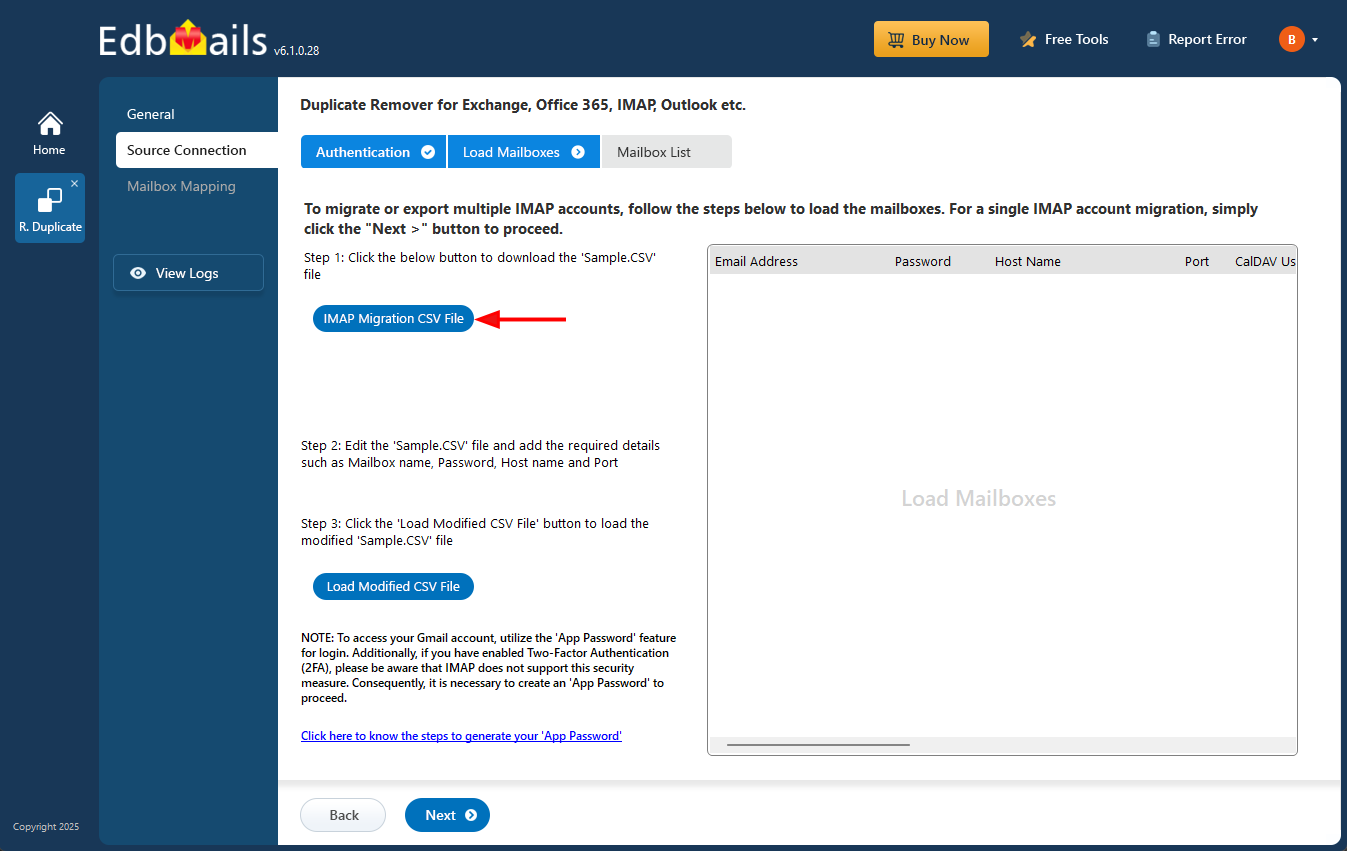
- Click ‘Download Sample CSV File’.
- Choose the location to save the CSV file.
- Open the CSV file and update it with the required details such as Source Mailbox Name, Password, Host, and Port Number.
- Save the changes and close the CSV file.
- Click on the ‘Browse CSV File’ button.
- Select the modified CSv file and click ‘Next’.
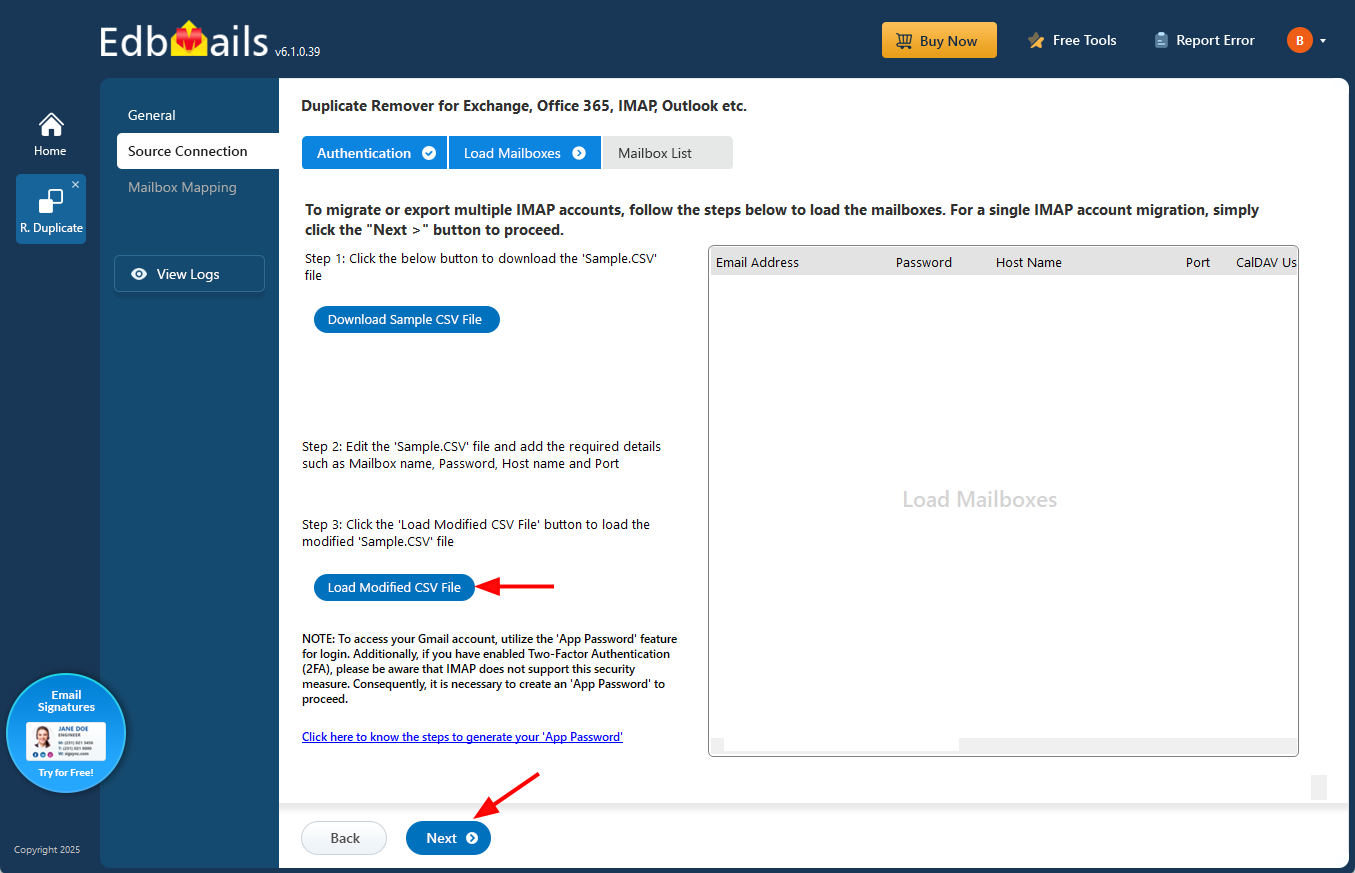
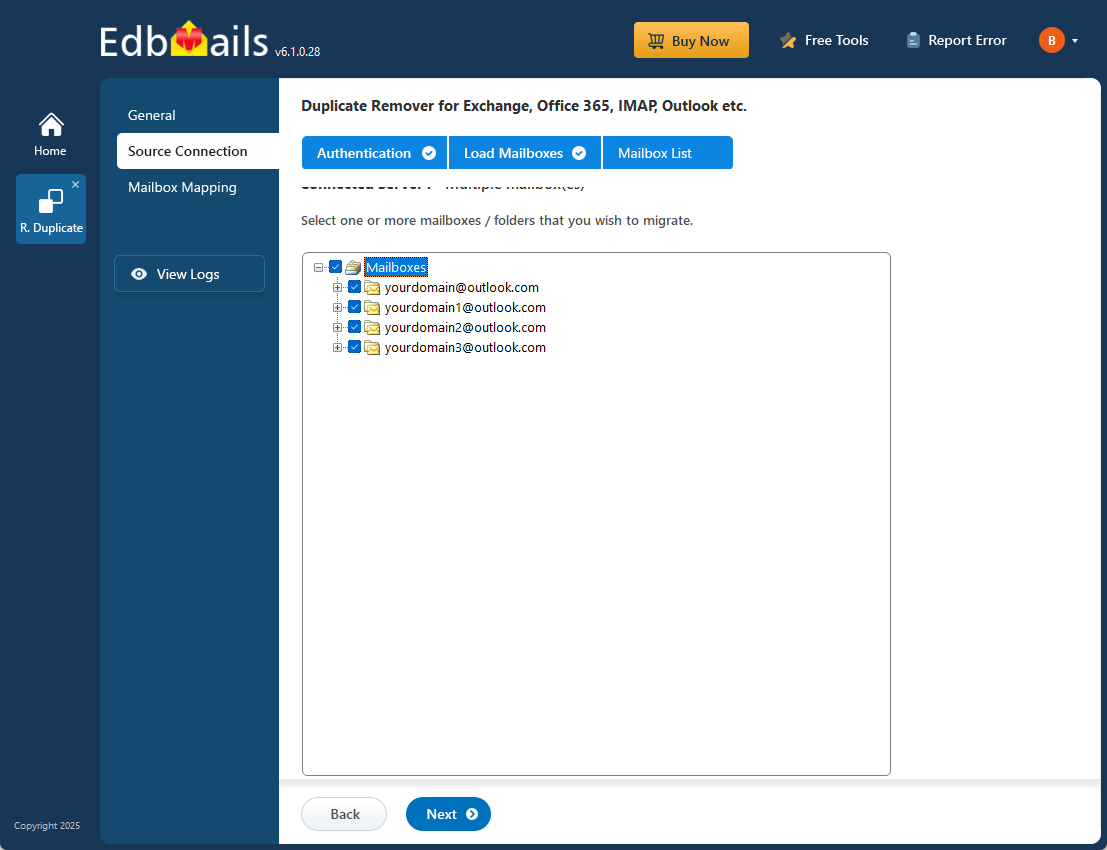
- Choose the mailboxes or folders you want to include in the duplicate removal process, and then click ‘Next’ to continue.
Step 4: Verify Mailboxes
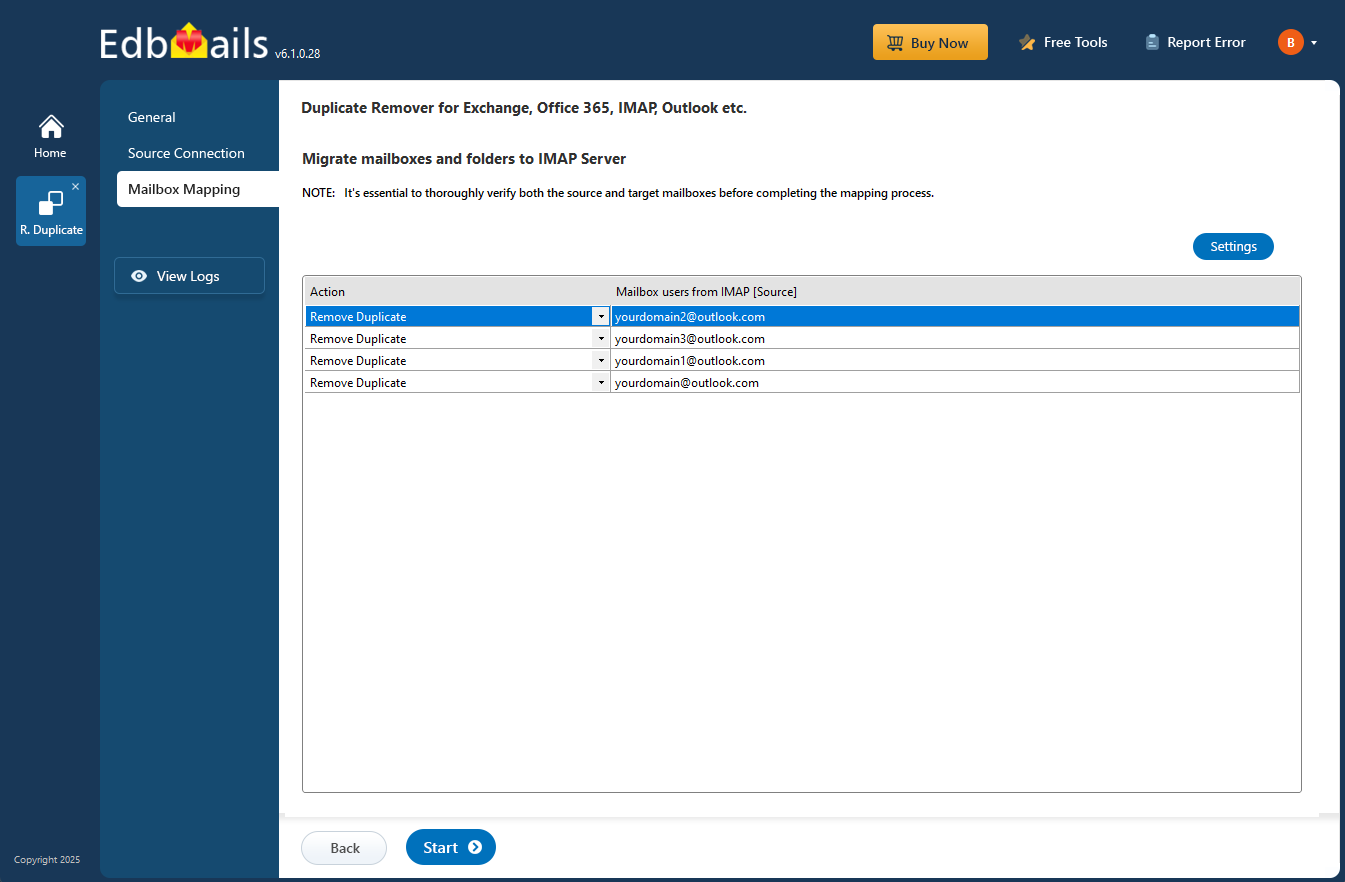
- Review the list of selected mailboxes and confirm that the Action is set to ‘Remove Duplicate’.
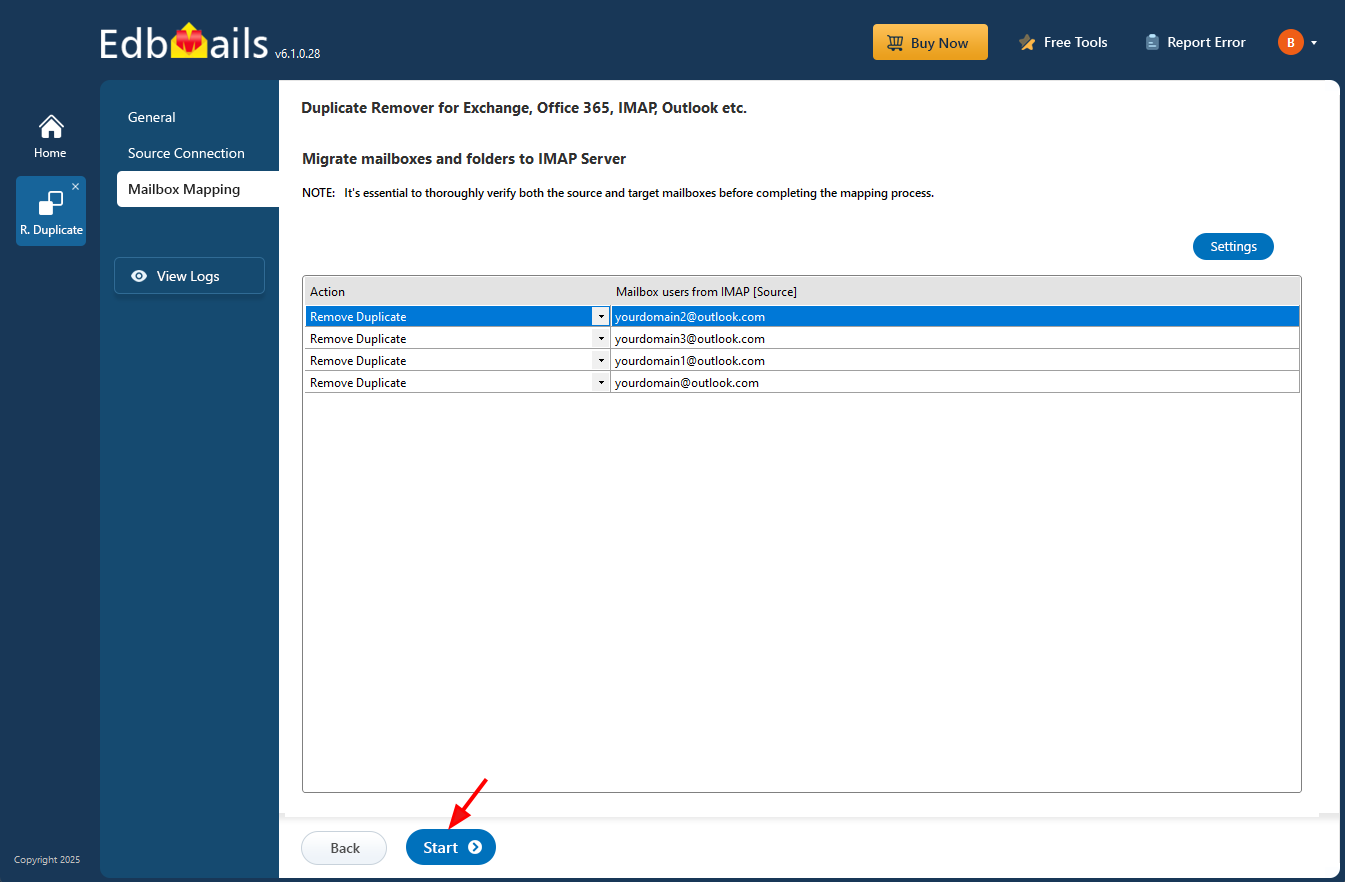
- Click on the ‘Start’ button to initiate the duplicate removal operation.
Step 5: Monitor and Confirm Removal of Duplicate Emails
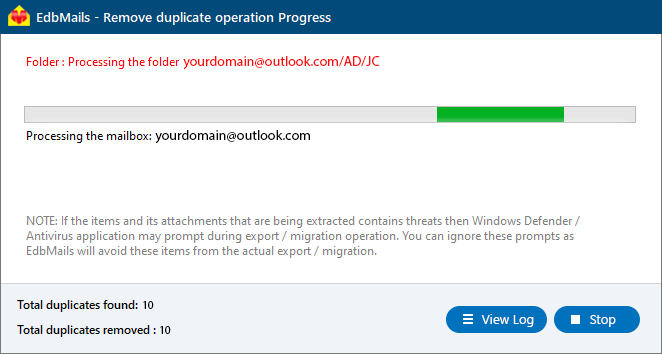
- A progress bar will display the status of the duplicate removal process. Once completed, a confirmation message appears.
- Click ‘View Log’ to see a detailed report of how many duplicate emails were removed.
- Finally, sign in to your Outlook account and verify the items
Post-Duplicate Removal Process
Preventing Future Duplicates in Outlook


